
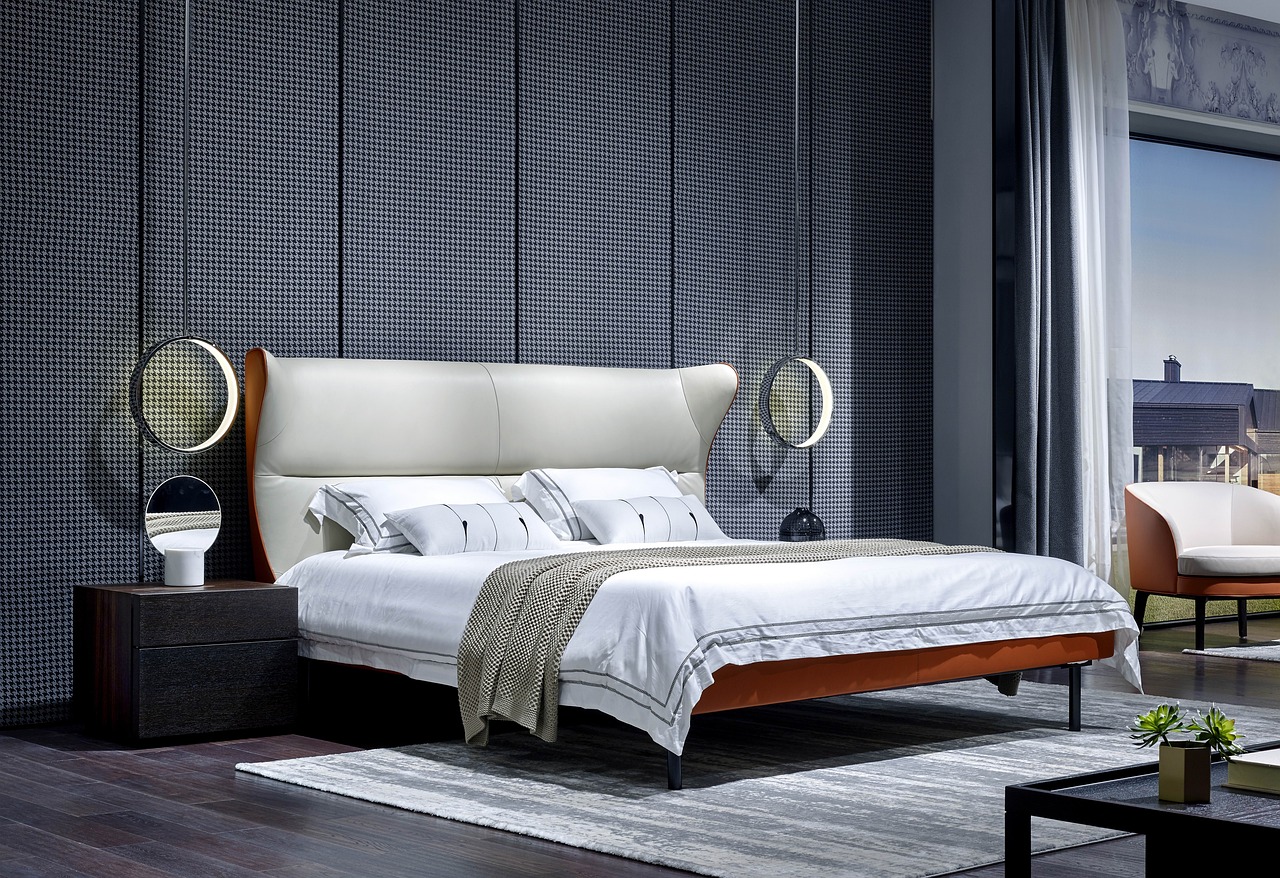
Elevated Wooden Pet Beds: A DIY Guide
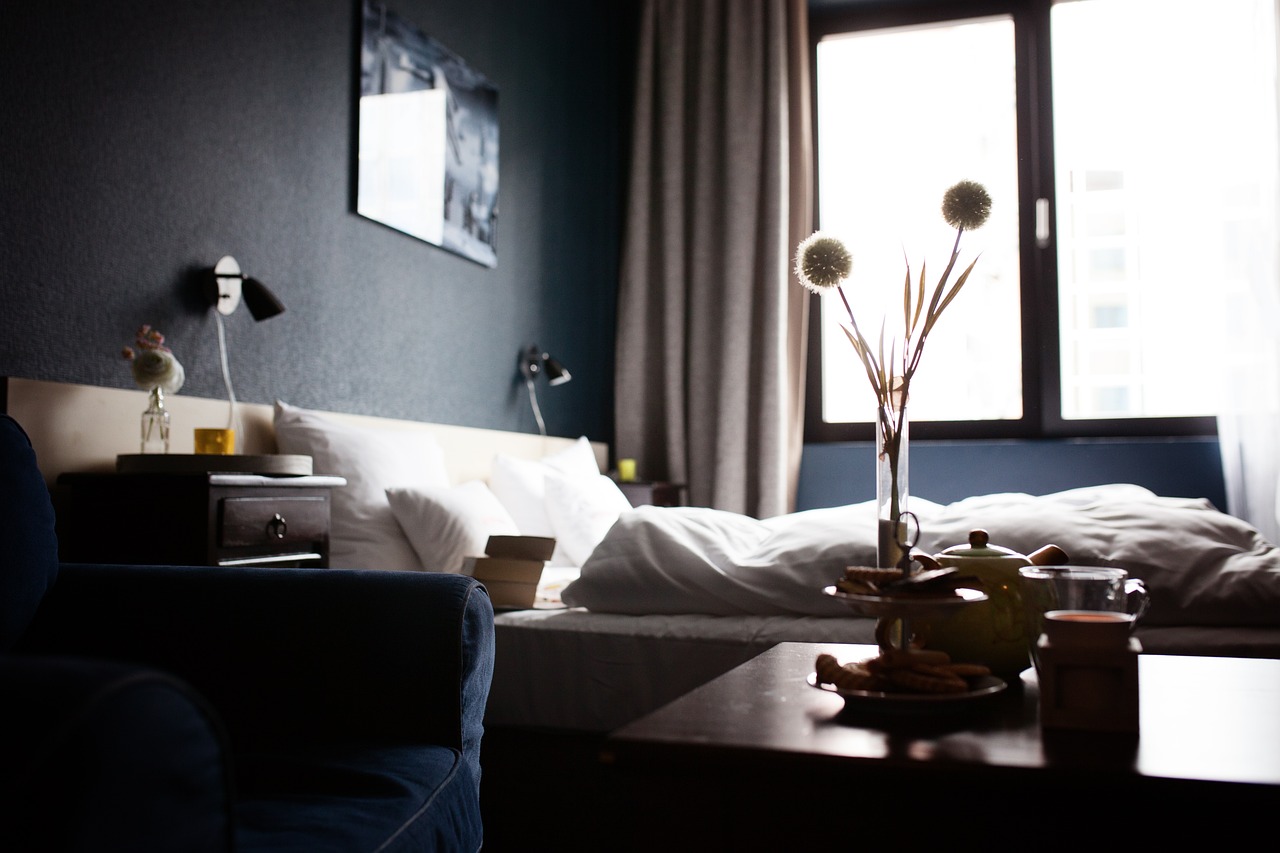
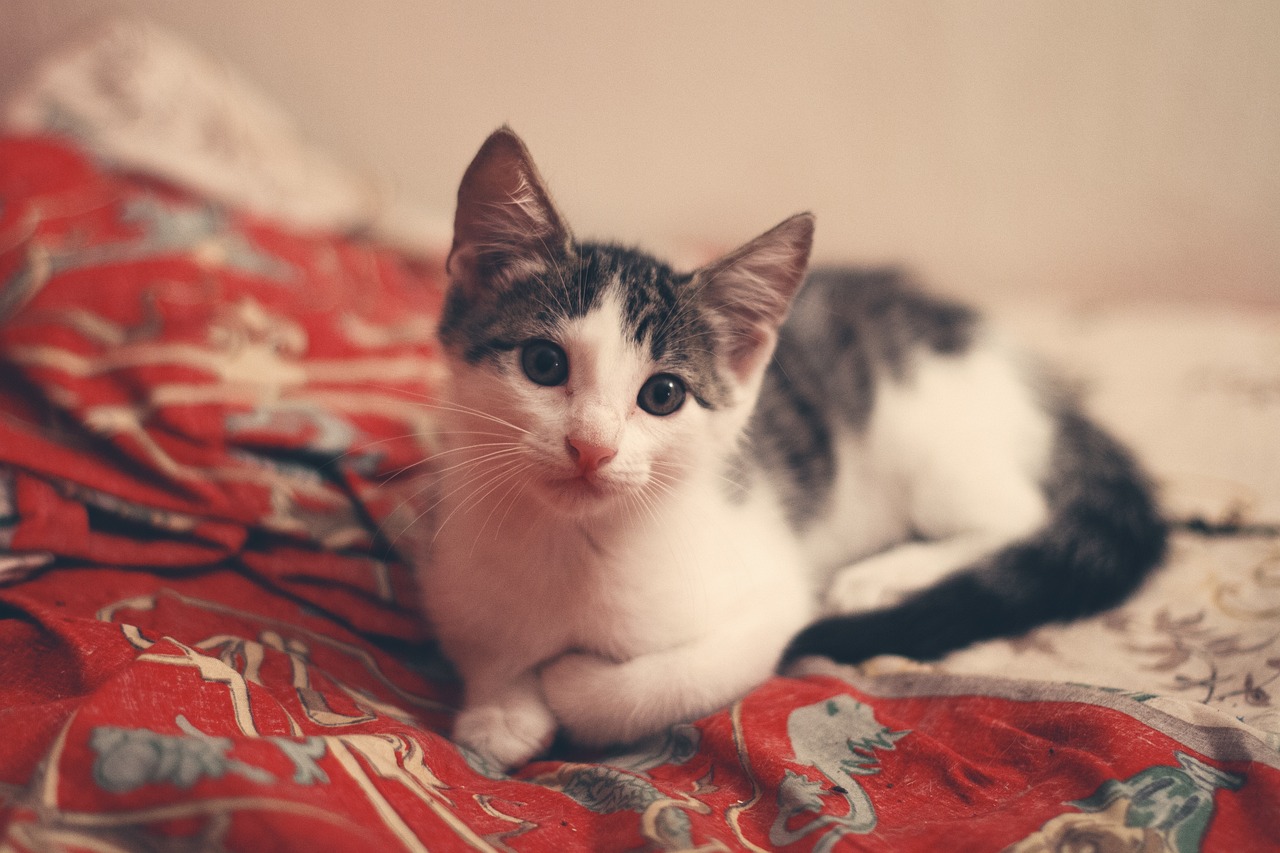
Are you looking for a way to pamper your furry friend while adding a touch of style to your home? Elevated wooden pet beds are an excellent solution! Not only do they provide a cozy spot for your pet to relax, but they also offer a unique design element that can enhance your home decor. In this DIY guide, we’ll walk you through the process of creating your very own elevated wooden pet bed, ensuring that your pet enjoys comfort and style in equal measure.
Imagine your beloved dog or cat lounging on a beautifully crafted wooden bed, elevated off the cold floor, enjoying the fresh air circulating around them. This guide will provide you with step-by-step instructions, tips on materials, and design ideas, making it easy for anyone to embark on this rewarding project. Plus, it’s a fantastic way to express your creativity and showcase your woodworking skills!
So, are you ready to dive into the world of DIY elevated wooden pet beds? Let’s explore the benefits, materials, design ideas, and everything you need to know to create a stunning and functional piece that both you and your pet will adore.
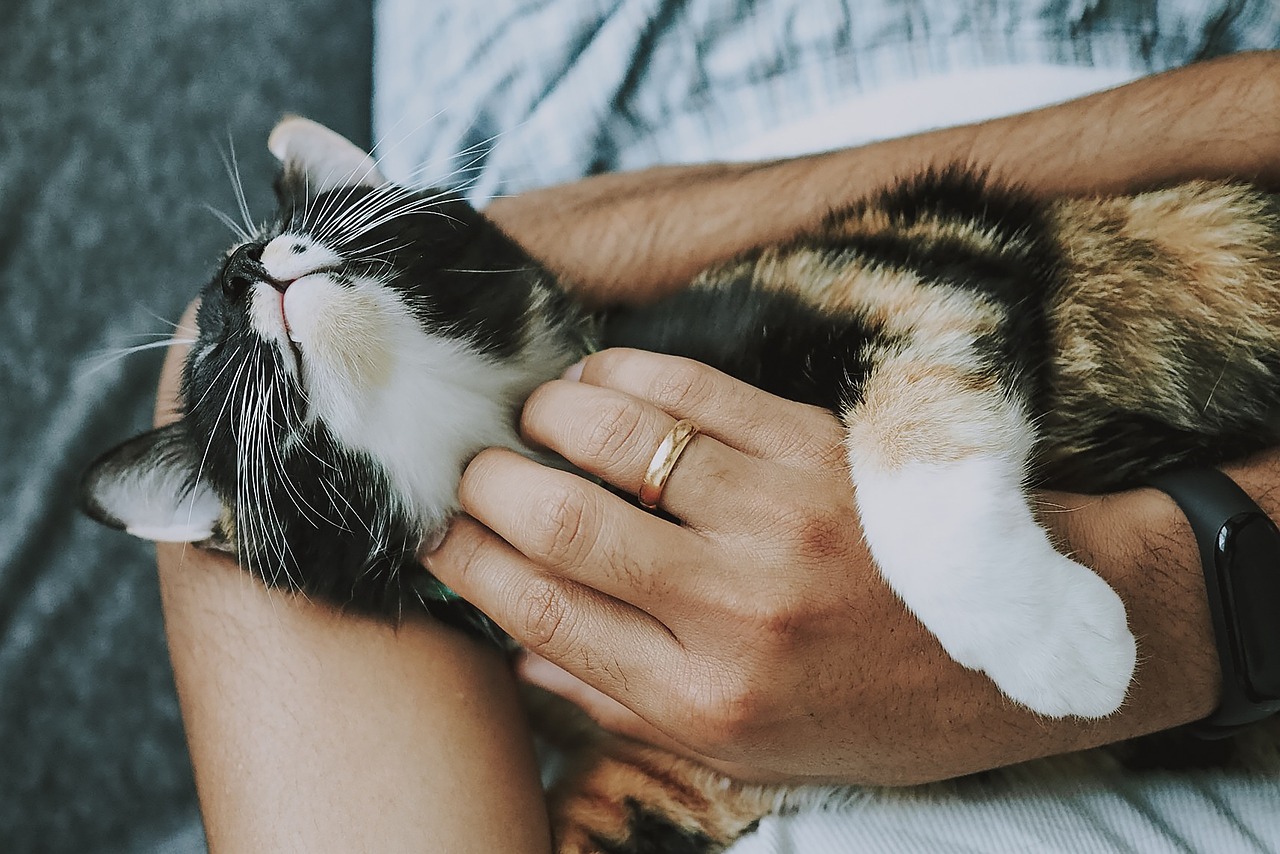
Elevated pet beds are not just a trend; they come with a plethora of benefits that can significantly improve your pet's quality of life. First and foremost, these beds allow for improved airflow, which helps to keep your pet cool during warmer months. By lifting your pet off the ground, you’re also reducing joint pressure, making it easier for older pets or those with arthritis to get comfortable. Additionally, elevated beds protect your furry friends from cold, damp surfaces, ensuring they stay warm and cozy, especially during chilly nights.
Consider this: Just like we prefer a comfortable bed that supports our bodies, our pets deserve the same. An elevated wooden pet bed can be a game-changer, contributing to better sleep and overall health. Plus, they can be easily cleaned, allowing you to maintain a hygienic sleeping environment for your pet.
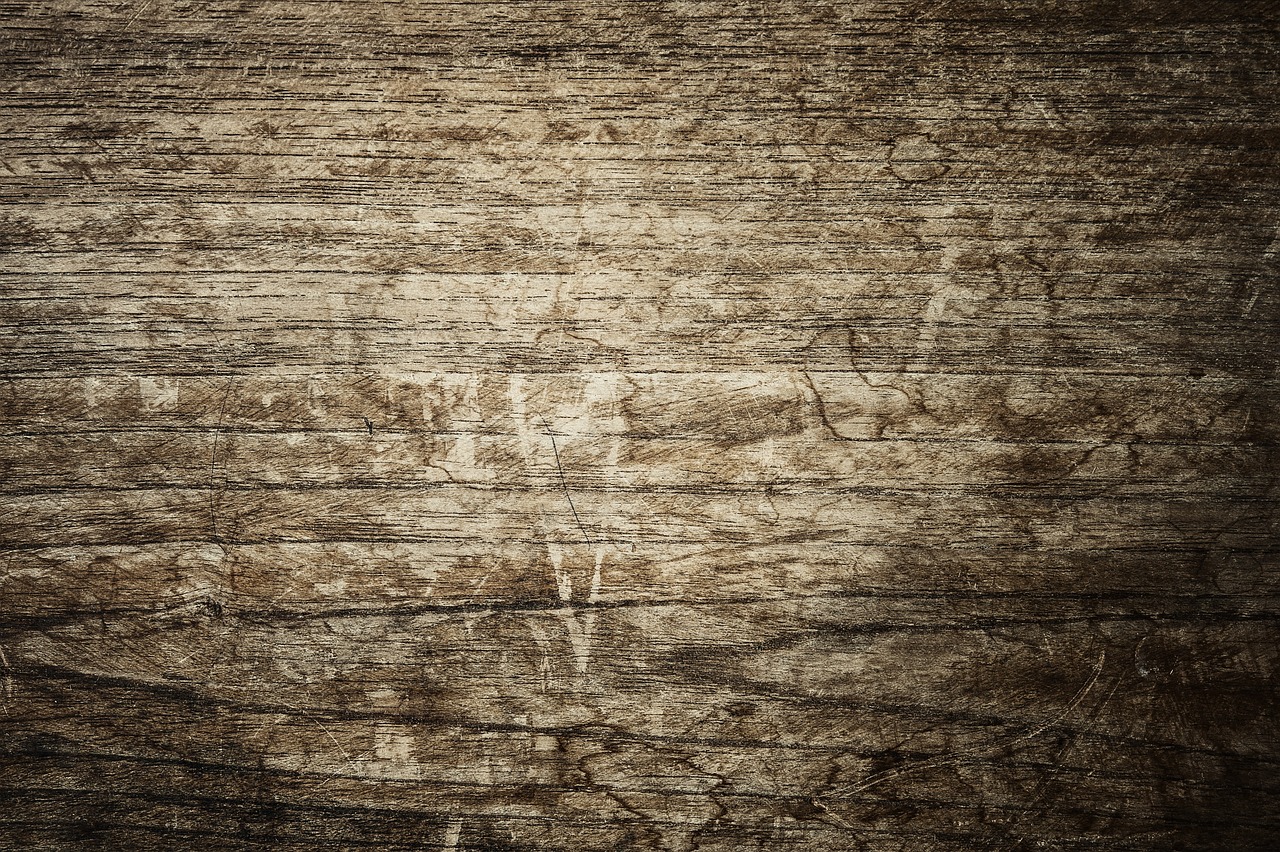
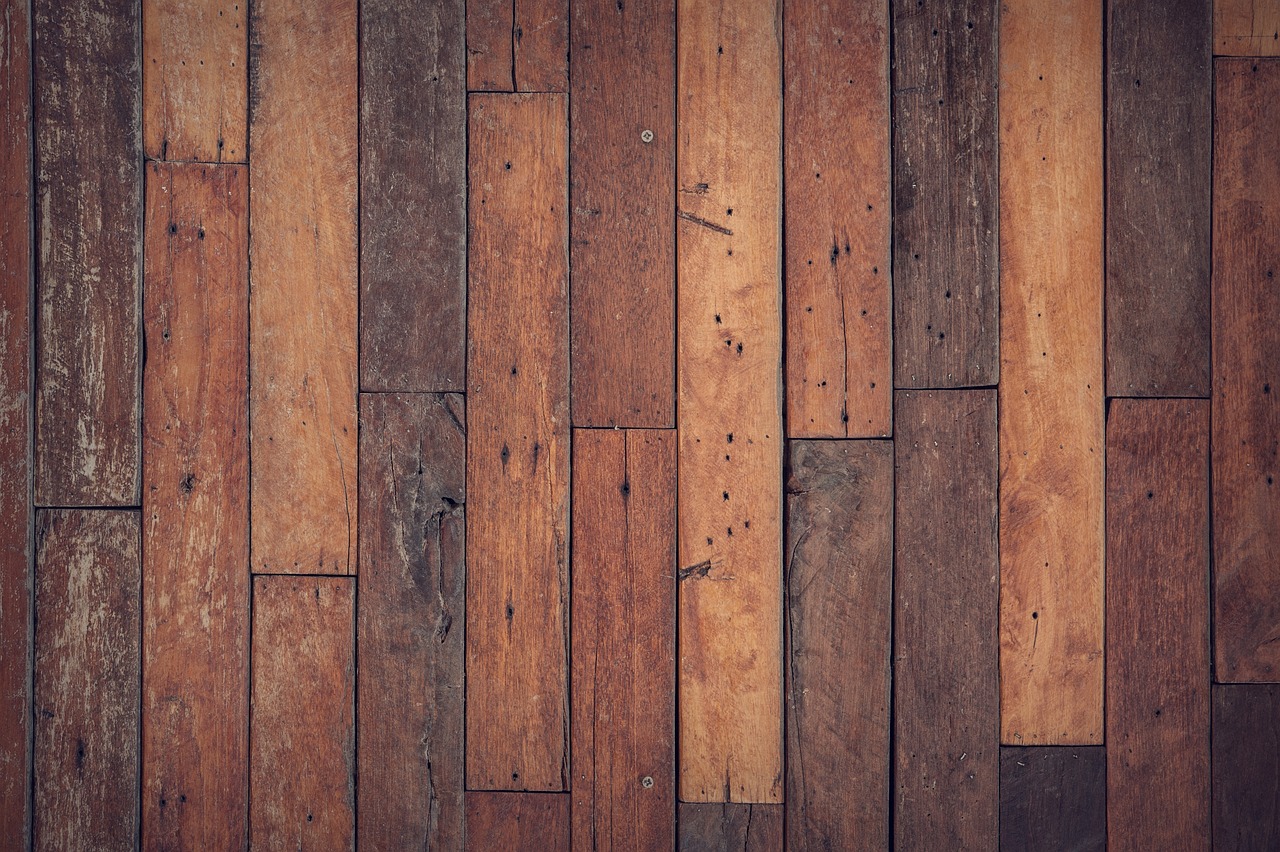
When it comes to building your elevated pet bed, selecting the right materials is crucial for both durability and safety. You’ll want to choose quality wood that can withstand your pet’s weight and activity level. Popular choices include cedar, known for its natural resistance to pests and moisture; pine, which is lightweight and easy to work with; and plywood, which offers a budget-friendly option with decent strength.
Each type of wood has its own set of advantages and disadvantages. For example:
| Wood Type | Pros | Cons |
|---|---|---|
| Cedar | Natural pest resistance, aromatic | More expensive |
| Pine | Lightweight, easy to work with | Less durable, may warp over time |
| Plywood | Cost-effective, strong | Can splinter if not finished properly |
Once you’ve selected your wood, it’s time to think about finishing. A good finish will enhance the bed's appearance while protecting the wood from scratches and moisture. Look for pet-safe stains and paints that are free from harmful chemicals. You might also consider using a weather-resistant sealant if the bed will be placed outdoors.
Comfort is key when it comes to your pet’s sleeping area. The padding you choose can make all the difference. Options like memory foam or orthopedic pads provide excellent support for your pet’s joints, while removable covers make cleaning a breeze. Think about your pet’s specific needs when selecting the right padding to ensure they have a cozy and restful place to sleep.
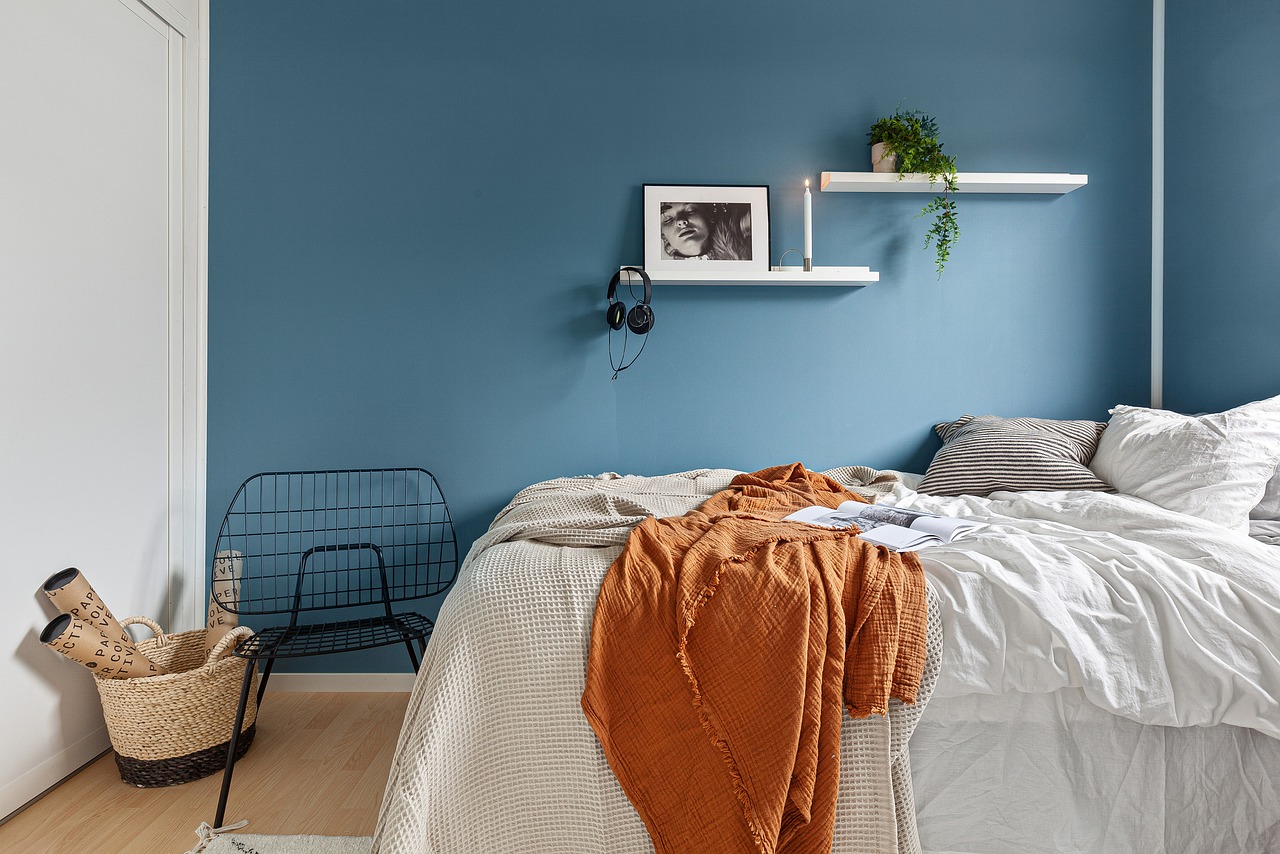
Now that you’ve got the basics down, let’s get creative! Your elevated pet bed can be as unique as your pet. Whether you prefer a minimalist look or a rustic design, there’s a style to suit every home. Consider incorporating colors that match your decor or shapes that complement your furniture. The possibilities are endless!
Before you dive into your DIY project, gather the necessary tools. Basic hand tools like saws, hammers, and screwdrivers are essential for building, while power tools such as drills and sanders can make the process faster and more efficient.
Familiarize yourself with the basic hand tools you'll need. Each tool plays a vital role in the construction process, ensuring precision and safety during assembly. Having the right tools at your disposal can make all the difference!
Power tools can significantly speed up the building process. Using tools like drills, sanders, and nail guns can help you achieve a professional-quality elevated pet bed in no time!
Follow our detailed step-by-step instructions to build your elevated wooden pet bed. Each stage is broken down to ensure clarity and ease of understanding, making the project accessible for all skill levels. From measuring and cutting wood to assembling the frame, we’ve got you covered!
Accurate measurements and cuts are crucial for a successful build. This section provides tips on measuring wood correctly and using cutting tools safely to achieve precise dimensions.
Learn how to assemble the frame of your elevated pet bed securely. This step focuses on joining techniques and ensuring stability for a long-lasting structure that can withstand your pet's weight.
Once your bed is built, it’s time for the finishing touches! Personalize your elevated pet bed with paint colors, decorative elements, or even your pet’s name. This is your chance to make the bed uniquely yours while enhancing its functionality.
Incorporate decorative elements like stencils, carvings, or fabric accents to give your pet bed a unique flair. This section offers creative ideas to express your style while keeping it pet-friendly.
Proper maintenance ensures your elevated pet bed lasts for years. Learn essential care tips, including cleaning methods and periodic checks, to keep your pet's bed in excellent condition.
Q: How high should I elevate the pet bed?
A: The height can vary based on your pet's size, but typically, 6 to 12 inches off the ground is ideal for small to medium pets.
Q: Can I use treated wood for outdoor beds?
A: Yes, but ensure that the treatment is safe for pets and consider using a sealant to protect the wood further.
Q: How often should I clean the pet bed?
A: Regular cleaning is recommended, ideally once a week, to maintain hygiene and comfort for your pet.
Benefits of Elevated Pet Beds
Elevated pet beds are not just a trendy addition to your home decor; they come with a plethora of benefits that can significantly enhance your pet's quality of life. Imagine your furry friend lounging comfortably, away from the cold, hard ground—sounds delightful, right? This elevated design promotes better airflow, ensuring your pet stays cool during those hot summer months. The elevation also helps in reducing joint pressure, which is especially crucial for older pets or those with arthritis. By providing a soft, raised surface, you’re essentially giving your pet a cozy retreat that supports their health and comfort.
Moreover, these beds act as a protective barrier against cold surfaces. When the temperatures drop, having a bed that keeps your pet off the chilly ground can make a world of difference. It’s like giving your pet their very own warm, snuggly cloud to rest on! Additionally, elevated beds are often easier to clean, as they keep your pet off the floor, reducing the amount of fur and dirt that accumulates in your living space.
But wait, there’s more! Here’s a quick rundown of some of the standout benefits of elevated pet beds:
- Improved Airflow: The design allows air to circulate beneath the bed, helping to regulate your pet's body temperature.
- Joint Support: Elevated beds reduce pressure on joints, making them ideal for aging pets or those with joint issues.
- Protection from Cold Surfaces: Keeping your pet off the ground helps maintain their body heat during colder months.
- Easy to Clean: With less contact with the floor, these beds are generally easier to maintain and keep clean.
- Stylish Design: They come in various styles and colors, allowing you to choose one that complements your home decor.
In summary, investing in an elevated wooden pet bed is not just a practical choice; it's a thoughtful way to ensure your pet’s comfort and health. They offer a sanctuary where your furry companion can relax, sleep, and rejuvenate, all while adding a touch of elegance to your living space.

Choosing the Right Materials
When it comes to crafting an elevated wooden pet bed, selecting the right materials is paramount. Not only do the materials influence the bed's durability, but they also play a crucial role in ensuring your furry friend's comfort and safety. Think of it as building a cozy little castle for your pet—every choice matters! So, let’s dive into the essential components you need to consider.
First and foremost, the type of wood you choose will significantly impact the longevity of the bed. You want something that can withstand your pet's playful antics while still looking great in your home. Here are some popular wood options:
- Cedar: Known for its natural resistance to insects and decay, cedar is a fantastic choice for outdoor use. Its aromatic properties also keep pests at bay, making it a win-win for both you and your pet.
- Pine: An affordable and readily available option, pine is lightweight and easy to work with. However, it may require more maintenance over time, especially if exposed to the elements.
- Plywood: This versatile material is sturdy and can be used for various parts of the bed. It’s also budget-friendly and can be easily painted or stained to match your decor.
Next, let’s talk about finishes. The right finish not only enhances the aesthetics of your pet bed but also protects the wood from wear and tear. You’ll want to look for non-toxic stains and sealants that are safe for pets. Here are a few options:
| Finish Type | Benefits | Safety |
|---|---|---|
| Water-Based Stains | Quick drying, easy cleanup | Low VOC, pet-safe |
| Natural Oil Finishes | Enhances wood grain, eco-friendly | Safe for pets when cured |
| Polyurethane Sealants | Durable, moisture-resistant | Choose water-based for safety |
Finally, let’s not forget about padding. The comfort of your pet is non-negotiable! Consider materials like memory foam, which conforms to your pet's body, providing excellent support. Orthopedic pads are another great option, especially for older pets that may need extra cushioning for their joints. And don’t overlook removable covers—these make cleaning a breeze!
In summary, choosing the right materials for your elevated wooden pet bed involves a careful balance of durability, safety, and comfort. By investing time in selecting quality wood, appropriate finishes, and cozy padding, you’re not just building a bed; you’re creating a sanctuary for your beloved pet.
Wood Types for Durability
When it comes to crafting an elevated wooden pet bed, the choice of wood can make a world of difference. Not only does the right wood enhance the aesthetic appeal of your pet bed, but it also ensures durability and longevity. Let's dive into some popular wood types that are commonly used for this purpose, and explore their unique characteristics, pros, and cons.
Cedar is a top contender when it comes to building pet furniture. Known for its natural resistance to moisture and pests, cedar not only looks beautiful but also stands the test of time. Its aromatic properties can even help keep bugs away, making it a fantastic option for outdoor beds. However, while cedar is robust, it can be a bit on the pricier side, so it's essential to weigh your budget against its benefits.
Pine, on the other hand, is a more affordable alternative that still offers decent durability. It's lightweight and easy to work with, making it a popular choice for DIY projects. However, pine is softer than cedar, which means it may be more susceptible to scratches and dents over time. If you decide to go with pine, consider using a protective finish to enhance its durability and protect it from wear and tear.
Another option is plywood, which is often overlooked but can be quite effective. Plywood is made from layers of wood veneer, which are glued together to create a strong, stable material. It's less prone to warping compared to solid wood options, making it a reliable choice for constructing a sturdy pet bed. However, the aesthetics might not be as appealing as solid wood, so you might want to consider painting or staining it to match your decor.
Here’s a quick comparison table to summarize the characteristics of these wood types:
| Wood Type | Durability | Cost | Best For |
|---|---|---|---|
| Cedar | High | High | Outdoor use, pest resistance |
| Pine | Medium | Low | Indoor use, budget-friendly |
| Plywood | Medium to High | Medium | Sturdy construction, versatile |
In conclusion, selecting the right wood type for your elevated pet bed is crucial for ensuring its durability and functionality. Consider your pet's needs, your budget, and the aesthetic you want to achieve. Whether you choose cedar for its beauty and resilience, pine for its affordability, or plywood for its strength, each option has its unique advantages. Happy building!
Q1: How do I know which wood type is best for my pet bed?
A1: It depends on your budget, where you plan to place the bed (indoor or outdoor), and your pet's habits. Cedar is great for outdoor use, while pine is budget-friendly for indoor beds.
Q2: Can I use treated wood for my pet bed?
A2: It's best to avoid treated wood, as the chemicals used in the treatment process can be harmful to pets. Stick with untreated, natural wood options.
Q3: How can I protect my wooden pet bed from moisture?
A3: Applying a weather-resistant sealant or finish can help protect the wood from moisture, especially if the bed will be used outdoors.
Finishing Options
When it comes to creating an elevated wooden pet bed, the finishing touches are just as important as the construction itself. Not only do they enhance the overall look of the bed, but they also provide essential protection to the wood, ensuring that it remains durable and safe for your furry friend. Choosing the right finish can make all the difference, so let’s explore some options that are both stylish and practical.
First and foremost, you have to consider stains. Staining your pet bed can bring out the natural beauty of the wood while adding a layer of protection against moisture and wear. There are many types of stains available, ranging from transparent to opaque, allowing you to achieve the desired aesthetic. For example, a dark walnut stain can give your pet bed a rich, sophisticated look, while a lighter finish can create a more rustic, airy feel. Just make sure to choose stains that are low in VOCs (Volatile Organic Compounds) to keep your pet safe.
Next up, we have paints. Painting your pet bed can be a fun way to express your creativity and match the bed to your home decor. Whether you opt for a bold color to make a statement or a soft pastel to blend in, the possibilities are endless. However, it’s crucial to select paints that are non-toxic and pet-safe, ensuring that your furry friend won’t be exposed to harmful chemicals. Additionally, using a paint with a satin or semi-gloss finish can provide extra durability and ease of cleaning.
Lastly, consider using a sealant to protect your pet bed from the elements, especially if it will be used outdoors. Sealants create a waterproof barrier that can prevent damage from rain, snow, and even pet accidents. Look for sealants that are specifically designed for wood and are safe for pets. Applying a clear sealant over your stain or paint not only adds an extra layer of protection but also enhances the color and finish of the wood.
Here’s a quick comparison of the finishing options:
| Finishing Type | Benefits | Considerations |
|---|---|---|
| Stain | Enhances natural wood beauty, moisture protection | Choose low-VOC options |
| Paint | Creative expression, color matching | Use non-toxic, pet-safe paints |
| Sealant | Waterproof barrier, protects against wear | Ensure pet-safe sealants |
By carefully selecting the right finishing options, you not only create a beautiful elevated wooden pet bed but also ensure that it remains a safe and comfortable space for your beloved pet. The finishing touches can truly transform your DIY project into a stunning piece of furniture that complements your home while providing a cozy retreat for your furry companion.
Q: What type of finish is best for outdoor pet beds?
A: For outdoor pet beds, it's best to use a waterproof sealant to protect against moisture and weather elements. Look for sealants that are specifically labeled as safe for pets.
Q: Can I use regular paint on my pet bed?
A: You should avoid using regular paint that contains harmful chemicals. Instead, opt for non-toxic, pet-safe paints that are designed for furniture.
Q: How often should I reapply the finish?
A: It depends on the wear and tear. Generally, it's a good idea to check the finish every 6-12 months and reapply as needed to maintain protection and appearance.
Padding and Comfort
When it comes to creating an elevated wooden pet bed, one of the most critical aspects to consider is the padding. After all, your furry friend deserves a cozy spot to rest their head after a long day of play! Choosing the right padding can significantly enhance your pet's comfort and overall sleeping experience. Think of it as choosing the perfect mattress for yourself; just as you wouldn’t settle for anything less than comfortable, your pet shouldn’t either.
There are several types of padding materials available, each with its unique benefits. For instance, memory foam is a popular choice because it conforms to your pet's body, providing excellent support and alleviating joint pressure. This is especially beneficial for older pets or those with arthritis. On the other hand, orthopedic pads are designed to offer additional support and are often recommended by veterinarians for pets that need extra care.
Another option is to use removable covers for your padding. These covers not only add an extra layer of comfort but also make cleaning a breeze. Imagine how easy it would be to simply unzip and toss the cover in the wash instead of trying to scrub down a whole bed! Additionally, you can choose fabrics that are both soft and durable, ensuring that your pet's bed remains comfortable for years to come.
When selecting padding, consider factors such as your pet's size, age, and any specific health concerns. For example, larger breeds may require thicker padding to support their weight, while smaller or older pets might benefit from softer options. Ultimately, the goal is to create a sleeping surface that feels like a warm hug for your pet, making them feel safe and secure.
To help you make an informed decision, here's a quick comparison table of popular padding options:
| Padding Type | Benefits | Best For |
|---|---|---|
| Memory Foam | Conforms to body shape, relieves pressure | Older pets, pets with joint issues |
| Orthopedic Pads | Extra support, recommended by vets | Pets needing special care |
| Removable Covers | Easy to clean, customizable | All pets |
In conclusion, investing in the right padding for your elevated wooden pet bed is a crucial step in ensuring your pet’s comfort. By selecting the appropriate materials and considering your pet's specific needs, you can create a cozy sanctuary that they will love. So, why not give your furry friend the gift of comfort? After all, a happy pet means a happy home!
- What type of padding is best for a large dog? Memory foam or orthopedic pads are ideal as they provide the necessary support for larger breeds.
- Can I wash the padding? If you choose removable covers, they can be easily washed. Always check the care instructions for specific materials.
- How thick should the padding be? A thickness of 2 to 4 inches is generally sufficient, depending on your pet's size and weight.

Design Ideas for Elevated Beds
When it comes to designing an elevated wooden pet bed, the possibilities are as vast as your imagination! The beauty of these beds lies not only in their functionality but also in their ability to seamlessly blend into your home decor. Whether you're aiming for a minimalist look or a more rustic vibe, there’s a style that will suit your taste and your pet’s needs.
For a modern touch, consider a sleek, low-profile design with clean lines. This style can be enhanced with neutral colors like whites, grays, or blacks, allowing it to fit perfectly into any contemporary space. You can even add a pop of color with a vibrant cushion or blanket. On the other hand, if you prefer a more traditional look, a wooden bed with a classic finish, such as a rich walnut or cherry, can evoke a warm, inviting atmosphere. Pair it with a soft, patterned fabric for the bedding to add a touch of charm.
Another exciting idea is to create a themed bed that reflects your personality or interests. For example, if you love the beach, you could paint the bed in soft blues and whites, using driftwood accents. If you’re a fan of nature, consider incorporating elements like carved leaves or floral stencils. This not only personalizes your pet's space but also makes it a conversation piece in your home.
In addition to aesthetics, think about functionality. Adding storage drawers underneath the bed can be a great way to keep your pet’s toys and accessories organized. This is especially useful in smaller living spaces where every inch counts. You can also consider adjustable legs, allowing you to change the height of the bed as your pet grows or ages. This adaptability can significantly enhance your pet's comfort over time.
Don’t forget about the importance of comfort! The bed should not only look good but also provide a cozy retreat for your furry friend. Consider using a combination of materials for the bedding, such as memory foam for support and soft fabric for warmth. You can even create a removable cover that matches the bed's design, making it easy to clean and maintain.
Ultimately, the key to a successful elevated wooden pet bed design is to find a balance between style and practicality. Think about your pet's needs and how the bed will fit into your home. With a little creativity and effort, you can create a stunning piece that both you and your pet will love!
- What type of wood is best for an elevated pet bed?
Cedar and pine are popular choices due to their durability and natural resistance to pests. Plywood is also a good option for a budget-friendly build. - How do I ensure my elevated pet bed is safe?
Make sure to sand down all edges and corners to prevent splinters. Use non-toxic finishes and ensure the bed is stable and sturdy. - Can I customize the size of the pet bed?
Absolutely! Measure your pet and adjust the dimensions accordingly to ensure a perfect fit.
Tools Needed for Construction
Before diving into your DIY elevated wooden pet bed project, it's essential to gather all the necessary tools. Having the right tools on hand can make the construction process smoother and more enjoyable. Imagine trying to bake a cake without the right utensils; it just won't turn out the same! In the same way, the tools you choose can significantly impact the quality of your pet bed. Here’s a breakdown of the basic hand tools and power tools you’ll need.
First, let's talk about basic hand tools. These are the backbone of any DIY project and include:
- Saws: A handsaw or circular saw will help you cut the wood to the desired dimensions.
- Hammer: Essential for driving in nails and ensuring your frame is secure.
- Screwdrivers: Both flathead and Phillips screwdrivers are necessary for assembling various components.
- Measuring Tape: Accurate measurements are crucial, so don’t forget this handy tool!
- Square: To ensure your corners are right angles, making for a sturdy frame.
These tools are fundamental and can be found in most households. However, if you want to speed up the process and achieve professional results, consider investing in some power tools. Here are a few that can make your life easier:
- Drill: Perfect for making pilot holes and driving screws quickly and efficiently.
- Sander: A power sander will save you time and effort when smoothing out the edges of your wood.
- Nail Gun: This tool can significantly speed up the assembly process by quickly driving nails into the wood.
When using power tools, always prioritize safety. Wear protective eyewear and follow the manufacturer's guidelines to prevent accidents. The right tools will not only make the construction process more efficient but also enhance the overall quality of your elevated pet bed. So, gather your tools, and let’s get building!
Q: What if I don't have all the tools listed?
A: You can often rent tools from hardware stores or borrow from friends. Alternatively, consider purchasing a basic set of hand tools that will be useful for many future projects.
Q: How long will it take to build an elevated pet bed?
A: The time will vary based on your skill level and the complexity of your design, but most people can complete the project in a weekend.
Q: Can I customize the size of the pet bed?
A: Absolutely! Just ensure you measure your pet and adjust the dimensions accordingly for a perfect fit.
Q: What type of wood is best for outdoor use?
A: Cedar and redwood are excellent choices for outdoor pet beds due to their natural resistance to moisture and insects.
Basic Hand Tools
When embarking on the journey of creating an elevated wooden pet bed, having the right tools at your disposal is essential for a smooth and successful project. Basic hand tools are not only crucial for the initial construction but also for ensuring that every cut and joint is precise and secure. Imagine trying to bake a cake without a mixing bowl—it's simply not going to yield the best results! Similarly, the right tools make all the difference in your DIY project.
First on the list is the trusty saw. Whether you opt for a hand saw or a more modern circular saw, this tool will be your best friend when it comes to cutting wood to the desired dimensions. It's important to choose the right type of saw for the job; for instance, a miter saw is excellent for making angled cuts, while a jigsaw is perfect for more intricate shapes.
Next, you'll need a hammer. This classic tool is vital for driving nails into the wood, ensuring that your elevated pet bed is sturdy enough to withstand your furry friend's antics. A claw hammer is particularly useful, as it allows you to easily remove nails if adjustments are needed. Just remember to strike with precision—nobody wants a crooked nail ruining their masterpiece!
Another essential tool is the screwdriver. Depending on the type of screws you choose—flathead or Phillips—you'll need the corresponding screwdriver to secure joints and reinforce the frame. A power screwdriver can speed up the process significantly, but having a manual one on hand can be beneficial for those tight spots where a power tool might not fit.
In addition to these primary tools, consider incorporating a measuring tape for accuracy. After all, "measure twice, cut once" is a golden rule in woodworking. It’s easy to get caught up in the excitement of building, but taking the time to measure accurately can save you from frustrating mistakes later on. A square is also helpful for ensuring your angles are right, giving your project that professional finish.
Lastly, don't overlook the importance of safety gear. While hand tools may seem straightforward, accidents can happen. Always wear protective eyewear and gloves to keep yourself safe while working. Remember, a small precaution can prevent a big mishap!
In summary, the basic hand tools you need for constructing an elevated wooden pet bed include:
- Saw (hand saw or circular saw)
- Hammer (preferably a claw hammer)
- Screwdriver (manual or power)
- Measuring tape
- Square for precise angles
- Safety gear (gloves and protective eyewear)
With these tools in hand, you're well-equipped to tackle your DIY elevated wooden pet bed project. So, roll up your sleeves and get ready to create a cozy haven for your furry companion!
1. What type of wood is best for an elevated pet bed?
Cedar, pine, and plywood are popular choices. Cedar is naturally resistant to moisture and pests, while pine is affordable and easy to work with. Plywood offers strength and stability.
2. How do I ensure the elevated bed is sturdy enough for my pet?
Make sure to use quality materials and secure all joints properly. Reinforcing the frame with additional supports can also enhance stability.
3. Can I customize the design of the pet bed?
Absolutely! Feel free to add personal touches like paint, fabric accents, or decorative elements to match your home décor.
4. How do I maintain the pet bed?
Regularly clean the bed and check for any wear and tear. Reapply protective finishes as needed to keep the wood in good condition.

Power Tools for Efficiency
This guide provides step-by-step instructions on creating elevated wooden pet beds, offering comfort for your pets while enhancing your home decor. Explore materials, designs, and tips for a successful DIY project.
Elevated pet beds provide numerous advantages, including improved airflow, reduced joint pressure, and protection from cold surfaces. Discover how these benefits contribute to your pet's overall health and comfort.
Selecting quality materials is crucial for durability and safety. Learn about the best types of wood, finishes, and padding options that ensure a sturdy and comfortable elevated pet bed.
Different wood types offer varying levels of durability and aesthetics. Explore popular choices like cedar, pine, and plywood, and understand their pros and cons in terms of longevity and maintenance.
Finishing your pet bed enhances its appearance and protects the wood. Discover suitable stains, paints, and sealants that are safe for pets and weather-resistant for outdoor use.
Choosing the right padding is essential for your pet's comfort. Investigate various materials such as memory foam, orthopedic pads, and removable covers to ensure a cozy sleeping surface.
Get inspired by creative design ideas that suit any home decor style. From minimalist to rustic, explore various shapes, colors, and styles to match your aesthetic preferences.
Before starting your DIY project, gather the necessary tools. This section outlines essential tools for building, cutting, and finishing your elevated wooden pet bed effectively.
Familiarize yourself with basic hand tools like saws, hammers, and screwdrivers. Each tool plays a vital role in the construction process, ensuring precision and safety during assembly.
When it comes to building an elevated wooden pet bed, power tools can be your best friends. They not only speed up the construction process but also help achieve a level of precision that manual tools might struggle to deliver. Imagine trying to cut through thick wood with a hand saw—it’s exhausting! With power tools, you can glide through your project with ease. Drills, sanders, and nail guns are among the most useful tools you can invest in for this DIY endeavor.
Using a drill allows you to create clean holes for screws, ensuring a sturdy frame. It’s like having a magic wand that transforms raw materials into a solid structure. Meanwhile, a sander helps smooth out rough edges, giving your pet bed that professional finish. You wouldn't want your furry friend to get snagged on splinters, right?
Lastly, a nail gun can be a game changer, drastically reducing the time it takes to assemble the frame. Instead of hammering each nail in by hand, you can simply press the trigger and watch as your bed comes together in a matter of minutes. Just remember to use these tools safely and follow all manufacturer guidelines to avoid any accidents.
For your reference, here's a quick overview of the essential power tools:
| Tool | Purpose |
|---|---|
| Drill | Creating holes for screws and assembly |
| Sander | Smoothing surfaces and edges |
| Nail Gun | Quickly fastening pieces together |
Follow our detailed step-by-step instructions to build your elevated wooden pet bed. Each stage is broken down to ensure clarity and ease of understanding, making the project accessible for all skill levels.
Accurate measurements and cuts are crucial for a successful build. This section provides tips on measuring wood correctly and using cutting tools safely to achieve precise dimensions.
Learn how to assemble the frame of your elevated pet bed securely. This step focuses on joining techniques and ensuring stability for a long-lasting structure that can withstand your pet's weight.
Add the final touches to your elevated pet bed with personalization options. From paint colors to decorative elements, discover how to make your pet bed uniquely yours while enhancing its functionality.
Incorporate decorative elements like stencils, carvings, or fabric accents to give your pet bed a unique flair. This section offers creative ideas to express your style while keeping it pet-friendly.
Proper maintenance ensures your elevated pet bed lasts for years. Learn essential care tips, including cleaning methods and periodic checks, to keep your pet's bed in excellent condition.
Q: How do I clean the elevated pet bed?
A: Regularly vacuum the bed to remove hair and debris. For deeper cleaning, use a damp cloth with mild soap and water, ensuring it dries completely before letting your pet use it again.
Q: Can I use treated wood for the pet bed?
A: It's best to avoid treated wood as it may contain chemicals harmful to pets. Opt for untreated wood or wood specifically labeled as pet-safe.
Q: What size should I make the bed?
A: Measure your pet while they are lying down to determine the appropriate length and width. Always add a few extra inches for comfort.

Step-by-Step Construction Process
Building an elevated wooden pet bed may seem daunting at first, but with a clear plan and some patience, you can create a cozy haven for your furry friend. This section breaks down the construction process into manageable steps, ensuring that even beginners can follow along with ease. So, roll up your sleeves and let’s get started!
The first step in your construction journey is measuring and cutting the wood. Accurate measurements are crucial for a successful build, as they ensure that all pieces fit together seamlessly. Begin by gathering your materials and tools. You’ll need a measuring tape, a square, and a saw—either hand or power, depending on your preference. Measure twice and cut once; this old adage is especially true in woodworking. When you cut your wood, make sure to wear safety goggles to protect your eyes. Here’s a quick reference table for the dimensions you might need:
| Part | Dimensions (inches) |
|---|---|
| Base Frame | 48 x 30 |
| Legs | 12 |
| Support Slats | 46 x 2 |
| Top Platform | 48 x 30 |
Once you’ve cut your wood, it’s time to assemble the frame. Start by laying out the base frame on a flat surface. Use your square to ensure that the corners are at right angles. Secure the corners using wood screws or brackets for added stability. Don’t rush this part; a sturdy frame is essential for a long-lasting bed. After the base is complete, attach the legs at each corner. Make sure they are evenly spaced and securely fastened. This will provide the necessary elevation for your pet’s comfort while also allowing for airflow underneath.
Next, you’ll want to add the support slats. These are essential for providing a solid foundation for the top platform where your pet will sleep. Space the slats evenly across the frame, leaving about 3-4 inches between each slat. This spacing allows for adequate support while also ensuring your pet’s comfort. Secure the slats with screws, ensuring that they are flush with the top of the frame.
Now comes the exciting part—attaching the top platform. This is where your pet will rest, so it’s important to make it as comfortable as possible. Lay the top platform on the frame, making sure it’s centered. Secure it with screws, ensuring that it’s tightly fastened to prevent any wobbling. You might want to sand the edges of the platform to avoid any splinters that could harm your pet.
Finally, it’s time to add the finishing touches. You can choose to stain or paint your elevated pet bed to match your home decor. Remember to use pet-safe finishes to ensure your furry friend’s safety. Once the finish is dry, consider adding a cozy mattress or padding on top for extra comfort. Materials like memory foam or orthopedic pads are great choices here, as they provide support while being soft and inviting.
As you can see, building an elevated wooden pet bed is a straightforward process that can be completed in just a few hours. With some basic tools and a bit of creativity, you can craft a beautiful and functional piece that your pet will love. And the best part? You can customize it to fit your home’s style and your pet’s needs!
- How do I ensure my elevated pet bed is sturdy? Make sure to use quality materials and secure all joints with screws or brackets. Proper measurements and cuts also contribute to stability.
- Can I use treated wood for the pet bed? It's best to avoid treated wood as it may contain chemicals that are harmful to pets. Use untreated wood and seal it with pet-safe finishes.
- What type of padding is best for my pet? Memory foam or orthopedic pads are excellent choices for providing comfort and support for your pet’s joints.
- How often should I clean the pet bed? Regular cleaning is essential. Aim to clean it at least once a week, and check for any signs of wear or damage.
Measuring and Cutting Wood
When embarking on your DIY journey to create an elevated wooden pet bed, one of the most critical steps is measuring and cutting the wood accurately. Think of this stage as the foundation of a house; if the measurements are off, the entire structure could become unstable. To start, gather your materials and tools, including a measuring tape, a square, and a saw. The measuring tape will help you determine the lengths of each piece of wood, while the square ensures that your cuts are straight and angles are right.
Begin by planning your design. Sketch out your pet bed dimensions based on your pet’s size and the space available in your home. For example, if you have a medium-sized dog, a bed measuring around 30 inches by 24 inches might be ideal. Once you have your design, carefully measure each piece of wood according to your plan. Always double-check your measurements before cutting; it’s better to take a little extra time now than to waste materials later due to mistakes.
When you’re ready to cut, mark your measurements on the wood using a pencil. Use a straight edge or a square to draw a line where you’ll cut. This will guide you and help ensure a clean edge. As you cut, maintain a steady hand and follow the line closely. If you’re using a power saw, ensure that you’re wearing appropriate safety gear, such as goggles and gloves, to protect yourself from flying debris.
Here’s a quick breakdown of the common cuts you might need for your elevated pet bed:
| Cut Type | Description |
|---|---|
| Length Cuts | These are cuts made to determine the length of the bed frame. |
| Cross Cuts | These cuts are made across the width of the wood, typically for the side panels. |
| Notches | Sometimes you may need to cut notches in the wood to allow for joints or to fit pieces together. |
After cutting, take a moment to smooth the edges with sandpaper. This not only prevents splinters but also gives your pet bed a polished look. Remember, a well-measured and cut piece of wood can make all the difference in the stability and aesthetics of your elevated pet bed. So take your time, and don’t rush through this process!
- What tools do I need for measuring and cutting wood? You will need a measuring tape, a square, a pencil, and a saw (hand saw or power saw).
- How do I ensure my cuts are straight? Use a square to mark your lines and follow them closely while cutting. A straight edge can also help guide your saw.
- What safety precautions should I take? Always wear goggles and gloves when using power tools to protect yourself from debris and sharp edges.
- Can I use reclaimed wood for my pet bed? Yes, reclaimed wood can be a great option as long as it is safe and free from harmful chemicals or sharp edges.

Assembling the Frame
Assembling the frame of your elevated wooden pet bed is one of the most critical steps in the entire DIY process. This is where your vision starts to take shape, and it's essential to ensure that everything fits together perfectly. A well-constructed frame not only provides stability and support but also ensures the safety of your furry friend. So, let’s roll up our sleeves and get to work!
First, gather all your pre-cut pieces of wood. You should have four legs, a base, and side supports. It’s important to double-check that all pieces are cut to the correct dimensions. Remember, even a slight miscalculation can lead to an unstable bed. Lay out the pieces on a flat surface to visualize how they will come together. This step is like solving a puzzle; you want to see how everything fits before you start assembling.
Next, start by attaching the legs to the base. Use wood screws to secure each leg firmly. When screwing, make sure you’re using the right size screws; too long, and they might poke through the other side, while too short won’t hold the weight. A good rule of thumb is to use screws that are at least 1.5 times the thickness of the wood you’re working with. For example, if your base is 1 inch thick, go for screws that are at least 1.5 inches long.
After securing the legs, it’s time to add the side supports. These are crucial for providing additional stability to the frame. Position them at the midpoint of each leg, creating a rectangle that will support the sleeping area of your pet. Here’s where you can use a clamp to hold everything in place while you screw it down. This will make your life a lot easier and ensure that the frame remains square. If you find it challenging to keep everything aligned, consider using a carpenter's square to check your angles.
Now, let’s talk about joining techniques. You have a few options here:
- Butt Joint: This is the simplest method where two pieces of wood are joined end to end. It’s effective but may require additional support.
- Pocket Hole Joint: This involves drilling angled holes into one piece of wood and attaching it to another. It provides a clean look and strong hold.
- Mortise and Tenon Joint: A more advanced technique that involves creating a slot (mortise) in one piece and a corresponding projection (tenon) on the other. This is incredibly strong but requires more skill.
Once everything is securely fastened, give the frame a gentle shake. If it feels sturdy and doesn’t wobble, congratulations! You’ve successfully assembled the frame. However, if there’s any movement, double-check your screws and joints. Remember, safety first—your pet deserves a solid bed that can withstand their playful antics.
Finally, it's essential to sand down any rough edges or surfaces. This not only enhances the overall appearance but also ensures your pet won’t get splinters while lounging on their new bed. Use a fine-grit sandpaper for a smooth finish, and don’t forget to clean up any dust before moving on to the next steps of your project.
Assembling the frame can be a rewarding experience, and as you see it come together, you’ll feel a sense of accomplishment. Just remember to take your time and enjoy the process. Your pet will thank you for the effort you’ve put into creating a cozy and safe resting place!
Q: How long does it take to assemble the frame?
A: The assembly process can take anywhere from 1 to 3 hours, depending on your skill level and the complexity of your design.
Q: What if I make a mistake while assembling?
A: Mistakes happen! If you find that something doesn’t fit, don’t panic. You can always unscrew and adjust the pieces as needed. Just be sure to take your time and measure twice!
Q: Can I customize the size of the bed?
A: Absolutely! You can adjust the dimensions based on your pet's size. Just make sure to maintain proper proportions for stability.
Finishing Touches and Personalization
Once you've constructed your elevated wooden pet bed, it's time to add those finishing touches that transform a simple structure into a cozy sanctuary for your furry friend. Personalization is key here; it’s not just about functionality, but also about making a statement that reflects your style and your pet's personality. Think of it as the cherry on top of a delicious sundae—essential for that perfect finish!
To start, consider the color scheme you want to implement. A fresh coat of paint or a stain can really breathe new life into your pet bed. If you’re going for a rustic look, a natural wood stain can enhance the grain of the wood, giving it a warm, inviting feel. For a more modern vibe, opt for bright, bold colors that pop against your home decor. Just ensure that any paint or stain you choose is non-toxic and safe for pets, as they tend to sniff and chew on everything!
Next, think about adding decorative elements. This is where you can really let your creativity shine! You might consider stenciling your pet’s name on the side of the bed or adding fun patterns to the surface. For a more intricate touch, you could even try your hand at wood carving. If you're not quite the artist, fabric accents like throw pillows or blankets can also add a pop of color and comfort. Just make sure these additions are washable, as pets can be a little messy!
Another aspect of personalization is choosing the right bedding. A cozy, plush mattress can make a world of difference in your pet's comfort. You might want to look into orthopedic pads or memory foam options, which not only provide support but also come in various colors and patterns. Additionally, removable covers that you can easily wash are a great idea to keep the bed fresh and clean.
Lastly, don’t forget about the maintenance of your elevated pet bed. Regular upkeep will ensure it remains a beautiful and functional part of your home. A simple wipe-down with a damp cloth can keep the wood looking great, while periodic checks for any wear and tear will help you catch issues before they become serious. By taking these steps, you can ensure that your personalized pet bed will be a cherished spot for your furry friend for years to come.
- What type of paint is safe for pets? Look for paints labeled as non-toxic and free from harmful chemicals. Water-based paints are usually a safe choice.
- How often should I clean the elevated pet bed? It's advisable to clean the bed at least once a week to keep it hygienic and comfortable for your pet.
- Can I use outdoor paint for indoor beds? While outdoor paints are designed to withstand elements, they may contain chemicals that are not pet-friendly. Stick to indoor-safe options.
- How can I ensure the bed is sturdy enough for my pet? Use quality materials and follow precise measurements during construction. Reinforce joints with screws and brackets for added stability.
Adding Decorative Elements
When it comes to creating an elevated wooden pet bed, the fun doesn't stop at just construction; it's time to let your creativity shine! Adding decorative elements can transform a simple pet bed into a stunning piece of furniture that complements your home’s decor. Think of it as dressing up your pet’s space, making it not only comfortable but also visually appealing. So, how can you achieve that perfect blend of style and functionality?
One popular way to personalize your elevated pet bed is through stenciling. You can use stencils to paint your pet's name or even fun designs that reflect their personality. Imagine a cozy bed with “Buddy’s Retreat” elegantly painted on the side! This not only makes the bed unique but also adds a touch of charm to your living space.
Another idea is to incorporate fabric accents. You can add cushions or pillows that match your interior color scheme. Choose fabrics that are pet-friendly and easy to clean, such as canvas or outdoor fabric, which can withstand the wear and tear of pet life. These decorative touches not only enhance comfort but also create a cohesive look in your home.
Moreover, consider adding carvings or woodburning designs to the wood itself. This technique allows you to create intricate patterns or even simple shapes that can elevate the overall aesthetic of the bed. If you're feeling adventurous, you could carve out paw prints or whimsical designs that resonate with your pet's playful nature.
Lastly, don’t forget about the color palette. A fresh coat of paint can do wonders! Opt for colors that complement your existing decor. If you have a modern home, sleek whites or grays could work wonders. For a more rustic feel, consider earthy tones like browns or greens. The choice of color can dramatically change the vibe of the pet bed, making it a true part of your home.
In summary, adding decorative elements to your elevated wooden pet bed is all about expressing your style while ensuring your pet’s comfort. Whether it’s through stenciling, fabric accents, carvings, or paint, the possibilities are endless. So unleash your creativity and make that pet bed a centerpiece in your home!
- What materials are best for decorative elements? It's advisable to use pet-safe paints and fabrics that are durable and easy to clean.
- Can I change the decorative elements later? Absolutely! You can update the design as your style changes or as your pet grows.
- Are there any specific tools needed for adding decorative elements? Basic tools like brushes for painting, stencils, and carving tools are often sufficient.
Maintenance Tips for Longevity
Maintaining your elevated wooden pet bed is essential not just for aesthetics but also for ensuring the safety and comfort of your furry friend. Think of it as giving your pet a cozy home that deserves a little love and care. Regular maintenance can significantly extend the life of the bed, making it a worthwhile investment for both you and your pet.
First and foremost, cleaning is a vital part of maintenance. Dust and pet hair can accumulate over time, leading to an unhygienic sleeping environment. Use a soft brush or a vacuum cleaner with a brush attachment to remove hair and debris. For deeper cleaning, a damp cloth with mild soap can be used to wipe down the wooden surfaces. Just be sure not to soak the wood, as excess moisture can lead to warping or damage.
Another critical aspect is to keep an eye on the padding. If you're using removable covers, wash them regularly according to the manufacturer's instructions. This not only keeps the bed fresh but also helps in preventing odors. If your padding is starting to flatten or show signs of wear, consider replacing it to maintain the comfort level your pet deserves. After all, a happy pet is a healthy pet!
Don't forget about the wood finish. Depending on the type of finish you used, it may need periodic reapplication. A good quality sealant can protect the wood from moisture and scratches. If you notice any peeling or chipping, it's time to sand down the affected areas and apply a fresh coat. This not only protects the bed but also keeps it looking new and appealing in your home.
Lastly, regular checks for structural integrity are crucial. Inspect the frame for any wobbly parts or loose screws. Tightening screws and reinforcing joints can prevent accidents and ensure your pet's safety while using the bed. If you notice any cracks or damage, address those immediately to avoid further deterioration.
In summary, maintaining your elevated wooden pet bed involves:
- Regular cleaning to remove dust and pet hair
- Washing removable covers frequently
- Reapplying wood finish as needed
- Inspecting the frame for structural integrity
By following these simple maintenance tips, you can ensure that your elevated pet bed remains a comfortable and stylish haven for your beloved pet for many years to come.
Q: How often should I clean the elevated pet bed?
A: It's best to clean the bed weekly to prevent the buildup of dust and pet hair. For deeper cleaning, consider doing it monthly.
Q: Can I use any type of wood for the pet bed?
A: While you can use various types of wood, it's advisable to choose durable and pet-safe options like cedar or pine for longevity.
Q: What should I do if my pet bed starts to smell?
A: If your pet bed has an odor, check the padding and covers. Washing removable covers and replacing old padding can help eliminate smells.
Q: How can I make my wooden pet bed more comfortable?
A: You can enhance comfort by adding quality padding such as memory foam or orthopedic pads, and using removable covers for easy cleaning.
Q: Is it safe to use paint on the pet bed?
A: Yes, but ensure you use non-toxic, pet-safe paints or stains to avoid any harmful effects on your pet.
Frequently Asked Questions
- What are the benefits of an elevated wooden pet bed?
Elevated wooden pet beds offer a range of benefits for your furry friends. They improve airflow, which keeps your pet cool during warmer months. Additionally, they reduce joint pressure, making them ideal for older pets or those with arthritis. Plus, they protect your pets from cold or damp surfaces, ensuring a more comfortable sleep.
- What materials should I use for building an elevated pet bed?
When it comes to materials, choosing the right type of wood is crucial for durability and safety. Popular choices include cedar for its natural resistance to insects, pine for its affordability, and plywood for its versatility. Additionally, consider using pet-safe finishes and comfortable padding options like memory foam or orthopedic pads to enhance your pet's sleeping experience.
- How do I ensure the elevated pet bed is sturdy enough?
To create a sturdy elevated pet bed, focus on accurate measurements and secure assembly techniques. Use strong joinery methods, such as screws or dowels, to connect the frame. Additionally, ensure that the bed is designed to support your pet's weight comfortably. Testing the bed with your pet before regular use can help confirm its stability.
- Can I customize my elevated pet bed?
Absolutely! Customization is one of the best parts of a DIY project. You can personalize your elevated pet bed with different paint colors, decorative elements like stencils or carvings, and even choose specific fabrics for padding. This way, you can match the bed to your home decor while making it uniquely yours.
- What tools do I need for this DIY project?
For building an elevated wooden pet bed, you'll need basic hand tools such as saws, hammers, and screwdrivers. Power tools like drills and sanders can also significantly speed up the process. Having the right tools ensures that your construction is precise and safe, making the entire project more enjoyable.
- How can I maintain the elevated pet bed for longevity?
To keep your elevated pet bed in great shape, regular maintenance is key. Clean it periodically to remove dirt and pet hair, and check for any signs of wear or damage. Applying a fresh coat of sealant or paint every couple of years can help protect the wood and keep it looking new. These simple steps can extend the life of your pet's bed significantly.


