A Comprehensive Guide to Creating Your First Quilt
Welcome to the wonderful world of quilting! If you’ve ever looked at a beautiful quilt and thought, “I’d love to create something like that,” you’re in the right place. This article provides a detailed overview of the essential steps, materials, and techniques needed to successfully create your first quilt, along with tips for beginners to enhance their quilting experience. Quilting is not just a hobby; it’s a journey filled with creativity, relaxation, and a sense of accomplishment. So, grab your fabric, and let’s get started!
Before diving into quilting, it's crucial to grasp the fundamental concepts. Think of this as laying the groundwork for a beautiful home. You wouldn’t build a house without a solid foundation, right? Understanding the different types of quilts, essential terminology, and the basic tools required is key to embarking on your quilting journey. From patchwork quilts to whole cloth quilts, there’s a style for everyone. Familiarizing yourself with terms like “batting,” “binding,” and “piecing” will make your quilting experience smoother and more enjoyable.
Choosing the right fabrics is vital for your quilt's success. The fabric you select will not only affect the look of your quilt but also its feel and durability. Think of fabrics as the colors on an artist’s palette—each one can bring a unique vibe to your creation. In this section, we’ll discuss the types of fabric you can use, how to coordinate colors, and tips for achieving a stunning finished product.
Different fabric types serve various purposes in quilting. Here’s a quick overview:
| Fabric Type | Characteristics | Best Uses |
|---|---|---|
| Cotton | Soft, durable, and easy to work with | Most quilting projects |
| Flannel | Warm and cozy, with a soft texture | Lap quilts and winter projects |
| Specialty Fabrics | Includes silk, velvet, and more | Decorative quilts and specific effects |
Cotton is the most commonly used fabric for quilts due to its versatility and ease of handling. Flannel adds a cozy touch, perfect for those chilly nights, while specialty fabrics can elevate your quilt into a work of art.
Fabric weight can significantly affect the drape and durability of your quilt. Lighter fabrics are great for delicate quilts, while heavier fabrics offer robustness and warmth. Choose based on your project’s needs—think about whether you want a light, airy quilt or a heavy, warm one. Understanding this concept will help you make informed choices that align with your vision.
Color selection and pattern coordination are essential for aesthetic appeal. A quilt is like a visual story, and the colors and patterns you choose will set the mood. Here are some tips:
- Use a color wheel to find complementary colors.
- Start with a focal fabric and build around it.
- Mix patterns carefully—too many can clash!
Creating harmonious color schemes is about balance and contrast. Don’t be afraid to experiment; after all, quilting is about expressing your unique style!
Having the right tools is essential for efficient quilting. Imagine trying to cook without the proper kitchen tools—it would be a mess! Here’s a list of must-have equipment:
- Rotary cutter
- Cutting mat
- Quilting ruler
- Sewing machine
- Thread and needles
These tools will streamline your quilting process and help you achieve professional results.
Learning fundamental quilting techniques will help you execute your project with confidence. Just like learning to ride a bike, it may seem daunting at first, but with practice, you’ll be cruising in no time! We’ll cover essential skills like cutting, piecing, and quilting, providing step-by-step instructions for beginners.
Accurate cutting is crucial for a well-constructed quilt. Using a rotary cutter and a cutting mat will help ensure precision in your fabric pieces. Measure twice, cut once—this old adage holds true in quilting! Taking your time during this step will save you headaches later on.
Piecing involves sewing together the fabric pieces to create the quilt top. Think of it as assembling a puzzle; each piece must fit just right. We’ll provide guidance on different piecing techniques, including the importance of accurate seams, which are the backbone of your quilt’s structure.
Finishing touches can elevate your quilt from good to great. This section discusses layering, quilting, and binding techniques that will help you complete your project beautifully. A well-finished quilt is like the cherry on top of a sundae—essential for that perfect completion!
Layering is a critical step in quilt finishing. Properly layering your quilt top, batting, and backing will ensure a smooth finish. Think of it as building a sandwich; each layer plays a crucial role in the overall taste!
Binding gives your quilt a polished edge. We’ll explore various binding techniques and provide tips for achieving neat, professional-looking edges on your quilt. A well-bound quilt is like a beautifully wrapped gift—it’s all in the details!
Q: How long does it take to make a quilt?
A: The time it takes to make a quilt varies based on the complexity of the design and your skill level. A simple quilt can take a few days, while more intricate designs may take weeks or even months.
Q: Do I need a sewing machine to quilt?
A: While you can hand-sew a quilt, a sewing machine makes the process faster and more efficient. It’s highly recommended for beginners.
Q: Can I use fabric from old clothes?
A: Absolutely! Repurposing fabric from old clothes is a great way to create a unique quilt with personal history.
Now that you have a comprehensive understanding of the steps, materials, and techniques needed to create your first quilt, you’re ready to embark on this exciting journey. Remember, quilting is not just about the finished product; it’s about enjoying the process and expressing your creativity. Happy quilting!
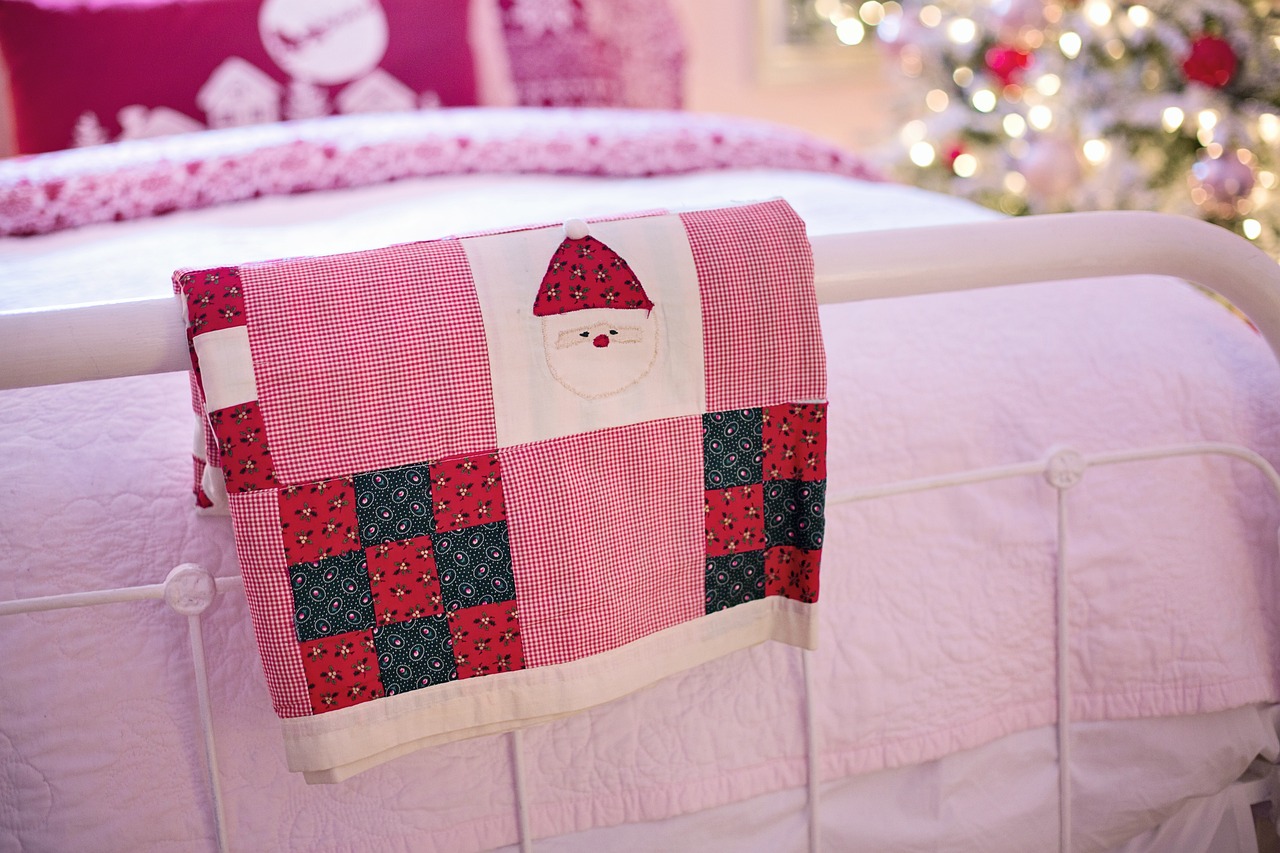
Understanding Quilting Basics
Before diving into the world of quilting, it's essential to grasp the fundamental concepts that will serve as the building blocks for your creative journey. Quilting is more than just sewing fabric together; it's an art form that combines creativity with craftsmanship. Understanding the different types of quilts, essential terminology, and the basic tools required will set you up for success. So, let's unravel the basics!
First off, quilts can be categorized into various types, each with its unique characteristics and purposes. For instance, you have bed quilts, designed for warmth and comfort, and wall hangings, which serve as decorative pieces. There are also baby quilts, table runners, and lap quilts, each catering to specific needs and occasions. Knowing these distinctions can help you choose the right project for your skill level and interests.
Now, let’s talk about some essential quilting terminology that every beginner should know. Terms like batting, binding, and piecing are frequently used in quilting discussions. Batting is the insulating layer placed between the quilt top and backing, while binding refers to the fabric that finishes the edges of your quilt. Piecing is the process of sewing fabric pieces together to create the quilt top. Familiarizing yourself with these terms will make your quilting experience much smoother.
In addition to terminology, having the right tools is crucial to your quilting success. Some of the essential tools include:
- Rotary Cutter: This tool allows for precise cutting of fabric.
- Cutting Mat: Protects your surfaces and provides a grid for accurate measurements.
- Quilting Ruler: A must-have for measuring and cutting fabric accurately.
- Sewing Machine: While hand sewing is an option, a sewing machine can save you time and effort.
Investing in quality tools can significantly enhance your quilting experience, making it more enjoyable and efficient. Just like a chef needs the right knives to create a masterpiece, a quilter needs the right tools to bring their vision to life.
Finally, don't forget that quilting is a journey of learning and creativity. As you embark on this adventure, remember that practice makes perfect. The more you quilt, the more comfortable you will become with the techniques and tools. So, gather your materials, keep an open mind, and let your creativity flow!
Selecting the Right Fabrics
When it comes to quilting, the fabric you choose can make or break your project. Think of it like building a house; without a strong foundation, everything else will crumble. In quilting, your fabric is that foundation. Selecting the right fabrics involves understanding different fabric types, patterns, and color coordination to create a stunning quilt that not only looks good but also feels good. So, let’s dive deeper into how to choose the perfect fabrics for your quilting adventure!
First off, let's talk about fabric types. The most popular choice among quilters is cotton, and for good reason! Cotton is durable, easy to work with, and comes in a myriad of colors and prints. It’s like the Swiss Army knife of fabrics—versatile and reliable. Flannel is another excellent option, especially if you’re aiming for a cozy, warm quilt. It’s soft and snuggly, making it perfect for chilly nights. Specialty fabrics, such as batiks or silks, can add a unique flair to your quilt but may require a bit more skill to work with. So, choose wisely based on your project’s needs and your skill level!
Next up is fabric weight. This is a crucial element that can impact the drape and durability of your quilt. For instance, lightweight fabrics may be perfect for delicate designs, but they might not hold up as well in a heavily used quilt. On the other hand, heavier fabrics can provide more structure but may be cumbersome to work with. As a general rule of thumb, a medium-weight cotton is a safe bet for most quilting projects. It strikes a balance between ease of use and durability, making it an ideal choice for beginners.
Now, let’s get to the fun part: choosing colors and patterns. Coordinating colors is like painting a masterpiece; it requires a keen eye and a bit of creativity. A good starting point is to select a color palette that resonates with you. You might want to consider using a color wheel to find complementary colors or go for a monochromatic scheme for a sleek look. Patterns can also play a significant role in your quilt’s overall aesthetic. Here are a few tips to help you choose:
- Mix and match: Combining different patterns can create visual interest, but be cautious not to overwhelm the eye. Aim for a balance.
- Scale matters: Use a mix of large and small patterns to add depth to your quilt. Just like in a good movie, variety keeps things exciting!
- Test swatches: Before committing to a fabric, grab some swatches and see how they work together. It’s like a dress rehearsal for your quilt!
Lastly, remember that quilting is a personal journey. Your fabric choices should reflect your style and personality. Don’t be afraid to experiment and let your creativity shine through! Whether you’re drawn to bright, bold colors or soft, muted tones, the right fabric will help you tell your unique story through quilting.
Q: Can I use any fabric for quilting?
A: While you can technically use any fabric, it’s best to stick with cotton or quilting-specific fabrics for the best results. These materials are designed to withstand the quilting process and provide durability.
Q: How do I know if my fabric is suitable for quilting?
A: Check the fabric weight and weave. Medium-weight cotton is generally ideal. Avoid stretchy or slippery fabrics, as they can be challenging to work with.
Q: What if I can’t find the perfect fabric?
A: Don’t stress! You can always dye or paint your fabric to achieve the desired look. Additionally, consider mixing different fabrics and patterns to create a unique quilt that’s all your own.
Fabric Types and Their Uses
When it comes to quilting, understanding the different fabric types is essential for achieving the desired look and feel of your quilt. Each fabric type has its unique characteristics that make it suitable for various quilting projects. Let's dive into some of the most popular fabric types used in quilting and their specific uses.
Cotton is the most widely used fabric in quilting. Its natural fibers make it breathable and easy to work with, which is why it's a favorite among quilters. Cotton fabrics come in a vast array of colors and prints, allowing you to express your creativity. They also hold their shape well, making them perfect for piecing and quilting. Whether you're making a cozy lap quilt or a vibrant wall hanging, cotton is your go-to choice.
Flannel is another popular fabric type, especially for those looking to create warm and snuggly quilts. Flannel is softer and thicker than cotton, making it ideal for winter quilts or baby blankets. One thing to keep in mind is that flannel can stretch more than cotton, so it's essential to use a rotary cutter and mat for precise cutting. If you're aiming for a quilt that wraps you in warmth, consider incorporating flannel into your design.
For those wanting to add a touch of elegance, specialty fabrics like silk, satin, or even batik can be used. These fabrics can elevate the aesthetic of your quilt, but they often require more care and skill to work with. For instance, silk can be slippery and may fray easily, so it's crucial to use a fine needle and a slower sewing speed. Specialty fabrics can be perfect for quilted wall art or special occasion quilts that are meant to impress.
To help you understand the different fabric types, here's a quick overview:
| Fabric Type | Characteristics | Best Uses |
|---|---|---|
| Cotton | Breathable, easy to sew, holds shape | Lap quilts, wall hangings, everyday quilts |
| Flannel | Soft, thicker, warm | Winter quilts, baby blankets |
| Specialty Fabrics | Elegant, varied textures, requires care | Wall art, special occasion quilts |
Choosing the right fabric type is just as important as selecting the right colors and patterns. Remember that the fabric you choose will affect not only the appearance of your quilt but also its functionality and comfort. So, take your time to explore the various fabric types available to you, and don't hesitate to mix and match them to create something truly unique.
- What is the best fabric for beginners? Cotton is generally recommended for beginners due to its ease of use and availability.
- Can I mix different fabric types in one quilt? Yes, mixing fabric types can create interesting textures and looks, but be mindful of their different properties.
- Is flannel suitable for summer quilts? Flannel is typically warmer, so it may not be the best choice for summer quilts. Lightweight cotton is preferable.

Understanding Fabric Weight
When it comes to quilting, the weight of the fabric is one of those behind-the-scenes heroes that can make or break your project. Think of fabric weight as the backbone of your quilt—it supports everything else you create. But what does fabric weight really mean? In simple terms, fabric weight refers to how heavy or light a fabric is, typically measured in grams per square meter (GSM) or ounces per square yard. Understanding this concept is crucial because it impacts not only the drape of your quilt but also its durability and warmth.
For instance, if you're aiming for a cozy quilt perfect for snuggling on chilly nights, you might want to opt for a heavier fabric, such as flannel or a medium-weight cotton. On the other hand, if your design calls for a more delicate touch, perhaps for a summer quilt, lighter fabrics like voile or lawn could be your best bet. Each fabric type comes with its own unique characteristics, and knowing how to choose the appropriate weight can elevate your quilting game.
Here’s a quick overview of different fabric weights and their typical uses in quilting:
| Fabric Type | Weight | Best Uses |
|---|---|---|
| Cotton | Light to Medium (3-6 oz) | General quilting, patchwork |
| Flannel | Medium to Heavy (5-8 oz) | Warm quilts, baby blankets |
| Batiks | Medium (4-6 oz) | Art quilts, vibrant designs |
| Voile | Light (2-3 oz) | Delicate quilts, summer throws |
As you can see, the weight of the fabric plays a significant role in determining its suitability for various quilting projects. But it doesn’t stop there! The weight also affects how the quilt layers interact with each other. For example, a quilt made with heavy fabric might require a thicker batting to maintain its shape and warmth, whereas a quilt with lighter fabric could benefit from a thinner batting to keep it airy and light.
So, how do you choose the right fabric weight for your quilt? Start by considering the purpose of your quilt. Are you making a bedspread to keep warm during winter, or a lightweight throw for summer picnics? Additionally, think about the other fabrics you plan to use in your design. Mixing weights can create visual interest, but be cautious—too much disparity in weight can lead to challenges in construction and may affect the final look of your quilt.
In conclusion, understanding fabric weight is essential for any quilter looking to create a stunning and functional quilt. By selecting the appropriate weight for your project, you can ensure that your quilt not only looks great but also serves its intended purpose. So the next time you’re browsing for fabrics, remember: weight matters!
Choosing Colors and Patterns
When it comes to quilting, choosing the right colors and patterns can make or break your project. Think of it as setting the mood for a party; the right colors can create a welcoming atmosphere, while mismatched tones can leave your guests feeling uneasy. So, how do you pick the perfect palette for your quilt? First, consider the theme or purpose of your quilt. Are you making it for a baby shower, a wedding gift, or perhaps a cozy throw for your couch? Each occasion can inspire different color choices and patterns.
One effective method for selecting colors is to use the color wheel. This handy tool can help you understand color relationships, such as complementary, analogous, and triadic colors. For instance, if you want a vibrant, energetic vibe, consider using complementary colors—those that sit opposite each other on the wheel, like blue and orange. Alternatively, if you’re aiming for a more serene and harmonious look, try analogous colors that sit next to each other, like blue, blue-green, and green.
Patterns are equally important in quilting. They can add depth and interest to your project. When choosing patterns, think about how they will interact with each other. You might want to combine a bold print with a more subdued one to create balance. A good rule of thumb is to limit yourself to three different patterns in one quilt to avoid overwhelming the eye. For example, you could pair a floral print with a solid color and a geometric pattern. This way, each fabric has its moment to shine without competing for attention.
Additionally, consider the scale of your patterns. Large prints can dominate a quilt, while smaller prints tend to blend in. Mixing scales can create a dynamic look. For instance, a large floral print can be paired with smaller polka dots or stripes to create visual interest. Don’t be afraid to experiment—sometimes, the most unexpected combinations can yield stunning results!
Here’s a quick reference table to help you think about your color and pattern choices:
| Color Scheme | Description | Best Used For |
|---|---|---|
| Monochromatic | Variations of a single color | Elegant, cohesive designs |
| Complementary | Colors opposite each other on the color wheel | Vibrant, high-energy projects |
| Analogous | Colors next to each other on the color wheel | Calm, harmonious designs |
| Triadic | Three colors evenly spaced on the color wheel | Balanced, colorful quilts |
Finally, don't forget to take inspiration from nature, art, or even your favorite clothing. Sometimes, the best ideas come when you least expect them. As you embark on this colorful journey, remember that quilting is a personal expression. Trust your instincts, and let your creativity flow!
- What if I don't know where to start with colors? Start by choosing a favorite fabric and pull colors from that. Use the color wheel for guidance!
- Can I mix patterns? Absolutely! Just keep in mind to balance bold and subtle patterns for harmony.
- How many colors should I use in my quilt? It's best to limit your palette to 3-5 colors to maintain cohesion.
Tools and Equipment Needed
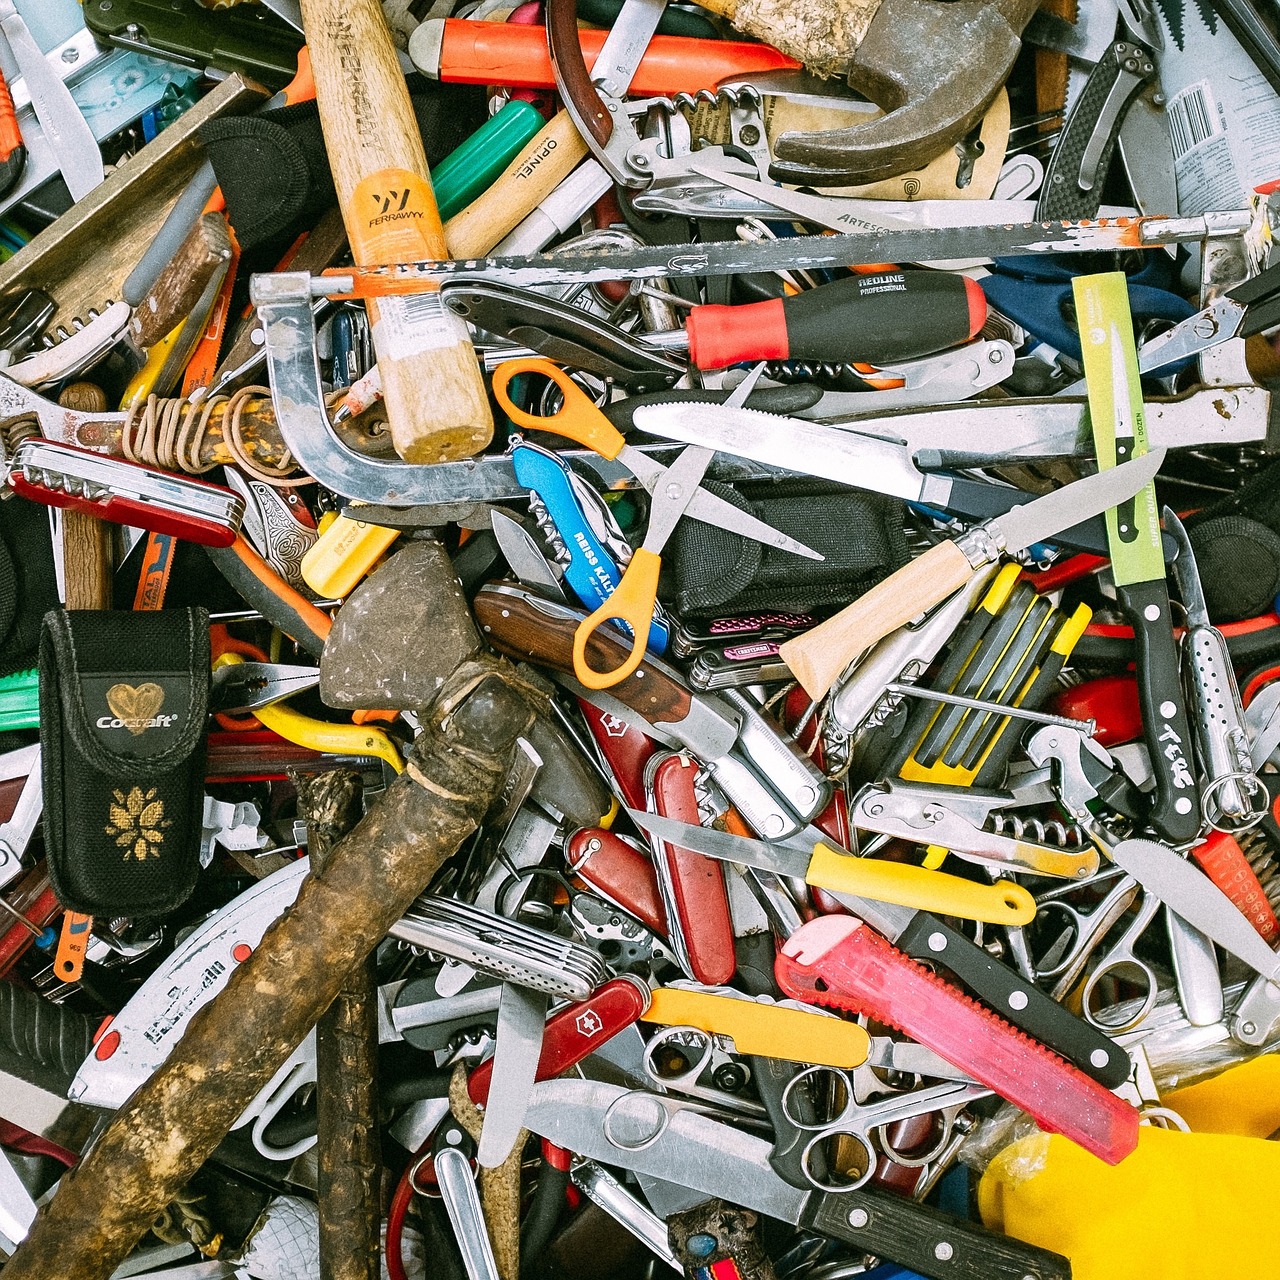
When embarking on your quilting journey, having the right tools and equipment is essential for ensuring a smooth and enjoyable experience. Imagine trying to bake a cake without a mixing bowl or a whisk; similarly, without the proper quilting tools, you might find yourself frustrated and overwhelmed. So, let's dive into the must-have items that will make your quilting process not only easier but also more enjoyable.
First and foremost, a good quality sewing machine is the heart of your quilting setup. While some may opt for hand sewing, a sewing machine can significantly speed up the piecing process, allowing you to focus on your creativity rather than the mechanics of sewing. Look for a machine that offers a variety of stitch options and has a sturdy build to handle multiple layers of fabric.
Next up is the rotary cutter, which is a game-changer for cutting fabric accurately. Unlike traditional scissors, a rotary cutter allows you to slice through multiple layers of fabric with ease, ensuring that your pieces are uniform in size. Pair this with a self-healing cutting mat to protect your surfaces and keep your blade sharp. The combination of these two tools will make cutting fabric feel like a breeze.
You'll also need a quilt ruler, which is crucial for measuring and cutting your fabric accurately. These rulers often come with grid lines that help you line up your fabric pieces perfectly. Don't forget to invest in a seam ripper as well; it's a small but mighty tool that will save you from making irreversible mistakes. We all have those moments when we sew two pieces together incorrectly, and a seam ripper will be your best friend in those situations!
In addition to these tools, consider having a pressing station set up with an iron and an ironing board. Pressing your seams as you go will give your quilt a professional finish and help you avoid any puckering or misalignment. A good iron with steam capability can make a world of difference in how your fabric lays flat.
Finally, don't overlook the importance of storage solutions for your fabric and tools. Keeping your workspace organized will not only make your quilting process smoother but will also inspire you to create. Consider using clear bins or a dedicated sewing cabinet to keep everything in its place.
To summarize, here's a quick table of the essential tools and their purposes:
| Tool | Purpose |
|---|---|
| Sewing Machine | For quick and efficient piecing of quilt tops. |
| Rotary Cutter | For cutting multiple layers of fabric with precision. |
| Cutting Mat | Protects surfaces and keeps rotary blades sharp. |
| Quilt Ruler | Ensures accurate measurements and cuts. |
| Seam Ripper | Helps fix mistakes easily. |
| Iron and Ironing Board | Press seams for a professional finish. |
| Storage Solutions | Keeps your workspace organized and inspires creativity. |
By gathering these tools and equipment, you'll be well on your way to creating beautiful quilts that you can cherish for years to come. Remember, the right tools not only enhance your quilting experience but also boost your confidence as you embark on this creative adventure!
Basic Quilting Techniques
Learning fundamental quilting techniques is like mastering the alphabet before writing a novel; it sets the stage for your creativity to flourish. Whether you’re a complete newbie or someone who’s dabbled in sewing, understanding the basics will help you execute your quilting project with confidence. There are a few essential skills that every quilter should have under their belt, including cutting, piecing, and quilting. Let’s dive into each of these techniques to ensure you’re well-prepared for your quilting journey!
Accurate cutting is crucial for a well-constructed quilt. Imagine trying to fit together pieces of a puzzle that are all the wrong size; it just doesn’t work! To avoid this frustration, invest in a good rotary cutter and cutting mat. These tools will not only save you time but also provide the precision you need. Here are some methods to ensure your fabric is cut accurately:
- Use a rotary cutter: This tool allows for clean, straight cuts and is essential for cutting multiple layers of fabric at once.
- Measure twice, cut once: Always double-check your measurements before making any cuts. This mantra is a quilter’s best friend!
- Keep your blades sharp: Dull blades can lead to frayed edges and inaccurate cuts, so make sure to replace them regularly.
By mastering the art of cutting, you lay a strong foundation for the rest of your quilting project. Remember, precision at this stage will save you headaches later on!
Once you’ve cut your fabric pieces, it’s time to piece them together to create the quilt top. This step is where your design starts to come to life! You’ll want to focus on achieving accurate seams to ensure that everything lines up perfectly. A common technique is the ¼ inch seam allowance, which is standard in quilting. Here’s how to piece your quilt top effectively:
- Align your fabric pieces: Make sure the edges are perfectly aligned before sewing.
- Sew with consistent pressure: Maintain even pressure on the fabric as you sew to avoid puckering.
- Press your seams: Once you’ve sewn your pieces together, press the seams flat. This helps to set the stitches and gives your quilt top a professional finish.
As you piece together your quilt top, don’t be afraid to experiment with different layouts and designs. Quilting is an art form, and your creativity is what makes it special!
After piecing your quilt top, it’s time to give it that polished look. Finishing touches can elevate your quilt from good to great. This includes layering, quilting, and binding techniques that will help you complete your project beautifully. Layering is a critical step in quilt finishing, as it ensures that your quilt will be warm and functional.
Layering is more than just stacking fabric; it’s about creating a sandwich of quilt top, batting, and backing. Start by laying your backing fabric right side down, followed by the batting, and finally, the quilt top right side up. Smooth out any wrinkles to ensure a smooth finish. This layering technique not only provides warmth but also gives your quilt a professional look.
Binding gives your quilt a polished edge, much like the frame around a beautiful painting. There are various binding techniques you can use, but the most common is the double-fold binding. To achieve neat, professional-looking edges:
- Cut your binding strips: Typically, these should be 2.5 inches wide. The length will depend on the perimeter of your quilt.
- Attach the binding: Start sewing the binding to the front of the quilt and fold it over to the back, securing it with hand stitches or by sewing it down from the front.
- Finish with a mitered corner: This technique gives your quilt a clean, finished look at the corners.
By mastering these basic quilting techniques, you’ll not only gain the skills needed to create beautiful quilts but also the confidence to explore more advanced techniques in the future. Quilting is an art that continues to grow with practice, so don’t be afraid to make mistakes along the way!
Q: What is the best fabric for beginners?
A: Cotton is the best choice for beginners due to its ease of handling and availability in a wide variety of prints and colors.
Q: How do I choose a quilting pattern?
A: Start with simple patterns like squares or rectangles. As you gain confidence, you can explore more complex designs.
Q: Can I quilt without a sewing machine?
A: Yes, hand quilting is a traditional method that can be very rewarding, though it requires more time and patience.
Cutting Fabric Accurately
Accurate cutting is the backbone of a well-constructed quilt. Imagine trying to fit together pieces of a jigsaw puzzle where the pieces are all jagged and uneven; it simply doesn't work! The same principle applies to quilting. If your fabric pieces are cut inaccurately, it can lead to mismatched seams and an overall sloppy appearance. So, how do you ensure that your fabric cutting is precise? Let’s dive into some essential techniques and tools that will help you achieve that perfect cut.
First off, investing in the right tools is essential. A rotary cutter is a game-changer when it comes to cutting fabric. Unlike scissors, a rotary cutter allows you to slice through multiple layers of fabric with ease, giving you clean, straight edges. Pair it with a self-healing cutting mat to protect your work surface and prolong the life of your blades. Additionally, using a quilter's ruler can help you measure and cut your fabric accurately. Look for one with clear markings that make it easy to line up your fabric.
Now, let’s talk about the actual cutting process. Before you begin, it’s vital to press your fabric to remove any wrinkles. Wrinkles can distort your measurements, leading to inaccurate cuts. Once your fabric is smooth, lay it flat on your cutting mat. Use your quilter's ruler to measure the desired width of your strips or squares, and make sure to align the ruler's edge with the fabric grain for the best results. Remember, cutting along the grain will help your quilt pieces retain their shape better.
When you’re ready to cut, use a steady hand and apply even pressure with your rotary cutter. It’s advisable to cut away from your body to ensure safety. If you’re cutting multiple layers, make sure they are all aligned perfectly; otherwise, you might end up with uneven pieces. For larger pieces, consider using a fabric weight to keep everything in place while you cut. This will prevent any shifting that could lead to inaccuracies.
Lastly, let’s not forget about the importance of a cutting guide. Here’s a simple table to help you remember the various cutting methods and their ideal uses:
| Cutting Method | Best For |
|---|---|
| Rotary Cutting | Long straight cuts, multiple layers |
| Scissors | Small, intricate cuts |
| Template Cutting | Shapes and curves |
By mastering these cutting techniques, you’ll set a solid foundation for your quilting project. Remember, the more time you spend on cutting accurately, the less time you’ll need to spend on correcting mistakes later. So take a deep breath, gather your tools, and get ready to cut your fabric with confidence!
- What is the best fabric to use for beginners? Cotton is highly recommended due to its ease of handling and availability.
- How do I know if my rotary cutter blade needs replacing? If you notice frayed edges or have to apply extra pressure to cut through fabric, it’s time for a new blade.
- Can I use regular scissors instead of a rotary cutter? While you can, rotary cutters provide cleaner cuts and are more efficient for quilting.
Piecing Your Quilt Top
Piecing your quilt top is where the magic truly begins! It’s that exhilarating moment when all your carefully chosen fabrics come together to create a beautiful design. Think of it as assembling a puzzle, where each piece plays a crucial role in the overall picture. The process can be both exciting and challenging, especially for beginners. But don't worry, with a bit of practice and patience, you'll soon find your groove.
First things first, let’s talk about the sewing techniques you’ll need. The most common method involves using a sewing machine, which can save you a lot of time compared to hand sewing. However, if you prefer a more traditional approach, hand piecing can be just as rewarding. Each method has its own charm, and it ultimately depends on your personal preference. Regardless of the technique you choose, the key is to achieve accurate seams.
When piecing, you’ll want to pay close attention to the 1/4-inch seam allowance. This is the standard measurement in quilting and is crucial for ensuring that your pieces fit together perfectly. A handy tip is to use a quilting foot on your sewing machine, which often has a guide to help you maintain that seam allowance consistently. If you’re hand sewing, use a ruler to measure and mark your fabric before cutting. This way, you can avoid any miscalculations!
As you start piecing, it’s essential to press your seams open or to one side after sewing. This helps to eliminate bulk and makes it easier to match your seams when you join additional pieces. A good iron is your best friend in this stage! When pressing, be gentle to avoid distorting your fabric. Remember, the goal is to have a flat, even surface for the next steps.
Another important aspect of piecing your quilt top is arranging your fabric pieces. Take your time to play around with the layout before you start sewing. You might find that certain colors or patterns work better together than you initially thought. Don’t hesitate to step back and look at your work from a distance. Sometimes, a fresh perspective can spark new ideas!
Once you’re satisfied with your arrangement, it’s time to start sewing the pieces together. Begin with smaller sections, like rows or blocks, and then gradually join them to form the entire quilt top. This method not only makes the process more manageable but also allows you to easily fix any mistakes before they become bigger issues. If you encounter any challenges, remember that every quilter has faced similar hurdles. Embrace the learning curve!
After you’ve pieced together your quilt top, take a moment to admire your handiwork. You’ve just created something unique and beautiful! However, before moving on to the next steps, it’s a good idea to double-check your work. Lay the quilt top flat on a large surface and check for any uneven edges or misaligned seams. If you find any discrepancies, now is the time to fix them. Trust me, it will save you a lot of headaches later on!
In summary, piecing your quilt top is an exciting and rewarding experience. By following these steps and practicing your techniques, you’ll be well on your way to creating a stunning quilt that you can be proud of. So grab your fabrics, fire up that sewing machine, and let your creativity flow!
- What is the best fabric for quilting? Cotton is widely regarded as the best fabric for quilting due to its durability and ease of handling.
- Do I need a special sewing machine for quilting? While a standard sewing machine can work, a machine with a walking foot and a larger throat space can make quilting easier.
- How do I prevent my seams from coming apart? Always use a consistent seam allowance and backstitch at the beginning and end of your seams for extra security.
- Can I use different fabric types in the same quilt? Yes, but ensure that the fabrics have similar weights and characteristics to avoid issues with the quilt's drape and durability.
Finishing Your Quilt
Once you've pieced together your quilt top, the excitement builds as you approach the final stages of your quilting journey. Finishing your quilt is not just about putting the last stitches in; it’s about transforming your hard work into a beautiful, functional piece of art. Think of it as the icing on a cake—without it, your quilt might not look as appealing or complete. In this section, we’ll explore the essential steps to ensure your quilt not only looks fantastic but also stands the test of time.
The first step in finishing your quilt is layering. This involves placing your quilt top, batting, and backing together in a way that prepares them for quilting. The batting acts as the cushion, giving your quilt warmth and loft, while the backing provides a sturdy foundation. To layer your quilt effectively, start by spreading out the backing fabric on a flat surface, right side down. Next, place the batting on top of the backing, smoothing out any wrinkles. Finally, lay your quilt top right side up on the batting. Make sure everything is aligned and flat. This process is crucial because any bumps or misalignments can lead to a lumpy quilt.
After layering, it’s time for the actual quilting. This step involves sewing through all three layers to hold them together. You can choose from various quilting styles, such as straight-line quilting, free-motion quilting, or even hand quilting, depending on your skill level and desired look. Each method offers a unique texture and appearance to your quilt. If you're a beginner, straight-line quilting is often the easiest way to start. It involves sewing straight lines across your quilt, which can be done with a sewing machine. However, if you’re feeling adventurous, free-motion quilting allows for more creativity as you can stitch any design you like!
Once the quilting is complete, the final touch is binding. Binding not only finishes the edges of your quilt but also adds a decorative element. You can choose to make your binding from the same fabric as your quilt or use a contrasting fabric for a pop of color. To bind your quilt, cut strips of fabric, typically 2.5 inches wide. Join these strips together to create a long continuous strip, which you will then attach to the edges of your quilt. Fold the binding over the edge, pin it in place, and sew it down. This step requires patience, but the satisfaction of seeing your quilt finished will make it all worthwhile.
To help visualize the process, here’s a quick overview of the finishing steps:
| Step | Description |
|---|---|
| Layering | Align quilt top, batting, and backing smoothly. |
| Quilting | Sew through all layers using your chosen technique. |
| Binding | Attach fabric strips around the edges for a polished finish. |
In conclusion, finishing your quilt is a rewarding process that requires attention to detail and a bit of creativity. Each step, from layering to binding, contributes to the overall beauty and functionality of the quilt. As you complete your quilt, take a moment to appreciate the journey you’ve taken from selecting fabrics to the final stitches. Remember, this quilt is not just a project; it’s a labor of love that you can cherish for years to come!
- How do I choose the right batting for my quilt? Consider the warmth and loft you desire. Cotton batting is great for a soft feel, while polyester provides more loft and is easier to care for.
- Can I machine quilt my quilt? Absolutely! Machine quilting is a popular option and can save you time while providing a professional finish.
- What is the best way to care for my finished quilt? It's best to wash your quilt gently in cold water and tumble dry on low heat. Always check the care instructions for the fabrics you used.
Layering Your Quilt
Layering your quilt is one of the most crucial steps in the quilting process, and it can make all the difference in how your finished project turns out. Think of it like building a delicious sandwich; each layer adds flavor and texture, contributing to the overall experience. In quilting, the three main layers are the quilt top, batting, and backing. Understanding how to properly layer these components ensures that your quilt not only looks beautiful but also feels cozy and holds up over time.
To begin, you'll want to lay out your quilt top, which is the decorative side that showcases your hard work and creativity. Make sure it’s flat and free of any wrinkles. Next comes the batting, which is the layer that gives your quilt its warmth and thickness. Batting comes in various materials such as cotton, polyester, or blends, each offering different qualities in terms of weight and warmth. Finally, the backing fabric is the layer that provides the quilt with a finished look and additional durability. This piece should be larger than the quilt top to allow for any shifting that may occur during the quilting process.
Here’s a simple guide to layering your quilt:
- Step 1: Find a clean, flat surface to work on, such as a large table or the floor.
- Step 2: Lay your backing fabric down first, right side facing down. Smooth out any wrinkles.
- Step 3: Place the batting on top of the backing, ensuring it’s centered and flat.
- Step 4: Finally, position your quilt top right side up on top of the batting.
Once everything is layered, it's essential to secure the layers together to prevent shifting while you quilt. You can use safety pins, basting spray, or even large stitches to hold the layers in place. Many quilters prefer to use safety pins as they are easy to remove and allow for adjustments. Just remember to space them out evenly, about every 6-8 inches, to keep everything snug.
After securing your layers, you’re ready to start quilting! This is where your creativity can shine through, as you can choose to hand quilt, machine quilt, or even tie the quilt. Each method has its own unique charm and can enhance the overall look of your quilt. So, take a deep breath, and get ready to transform your layered masterpiece into a finished quilt that you can cherish for years to come!
Q: What type of batting should I use for my quilt?
A: The type of batting depends on your personal preference and the intended use of the quilt. Cotton batting is breathable and great for warmer climates, while polyester batting provides more loft and is often more affordable.
Q: How do I prevent my layers from shifting while quilting?
A: To prevent shifting, make sure to securely baste your layers together using safety pins or basting spray. Additionally, quilting in sections can help manage the layers more effectively.
Q: Can I layer my quilt without a backing fabric?
A: While technically possible, a backing fabric is essential for a finished quilt. It adds durability and gives your quilt a polished look.

Binding Techniques
Binding your quilt is like putting on the finishing touches of a gorgeous outfit; it’s what makes everything come together and look polished. Think of binding as the frame for a beautiful painting—it enhances the overall appearance and gives it that professional touch. There are several techniques to consider when binding your quilt, each with its own unique flair and style. The choice of binding can dramatically affect the look and feel of your finished quilt, so let’s explore some popular methods that will help you achieve that perfect finish.
One of the most common techniques is the straight grain binding. This method involves cutting your binding strips along the straight grain of the fabric, which provides a firm structure and helps prevent stretching. It’s an excellent choice for beginners because it’s straightforward and requires minimal skill. To create straight grain binding, cut strips that are typically 2.5 inches wide, and join them together to form a long continuous strip. This binding is then sewn to the edge of your quilt, creating a clean and neat finish.
Another popular method is bias binding. Unlike straight grain binding, bias binding is cut on the diagonal of the fabric, allowing it to stretch and curve around corners more easily. This technique is particularly useful for quilts with rounded edges or intricate designs. To make bias binding, you’ll want to cut your fabric into strips that are also 2.5 inches wide, but remember to cut them at a 45-degree angle to the fabric’s selvage. This will give your binding the flexibility it needs to hug those curves perfectly.
When you’re ready to attach your binding, you have a couple of options. You can choose to sew it to the front of the quilt and then fold it over to the back, hand-stitching it down for a more traditional look. Alternatively, you might prefer to sew the binding to the back first, then bring it around to the front and topstitch it in place. This method is often quicker and can provide a more modern finish. Regardless of the technique you choose, always remember to press your binding before attaching it; this simple step will help you achieve crisp edges and a professional appearance.
As you embark on your binding journey, keep in mind that the color and fabric choice for your binding can also make a significant impact. A contrasting binding can create a striking frame for your quilt, while a fabric that closely matches your quilt top will provide a more subtle finish. Experimenting with different colors and patterns can add an extra layer of creativity to your project. Don’t be afraid to let your personality shine through in your binding choices!
To summarize the key binding techniques, here’s a quick reference table:
| Binding Technique | Description | Best For |
|---|---|---|
| Straight Grain Binding | Cut along the straight grain for a firm structure. | Beginners and straight edges. |
| Bias Binding | Cut on the diagonal for flexibility around curves. | Quilts with rounded edges or intricate designs. |
In conclusion, mastering binding techniques is an essential skill that can elevate your quilting projects. Take your time to practice and experiment with different methods, and soon enough, you’ll find the perfect technique that suits your style. Remember, the binding is the cherry on top of your quilting masterpiece, so make it count!
- What is the best fabric for binding? Cotton fabric is often recommended for binding due to its durability and ease of handling.
- How wide should binding strips be? A common width for binding strips is 2.5 inches, but you can adjust this based on personal preference.
- Can I use pre-made binding? Absolutely! Pre-made binding can save time and is available in various colors and patterns.
Frequently Asked Questions
- What is the best fabric for beginners to use when quilting?
For beginners, 100% cotton is often recommended. It's easy to work with, comes in a variety of colors and patterns, and holds up well over time. Cotton fabric is also forgiving when it comes to sewing, making it a great choice for those just starting out.
- How do I choose the right colors for my quilt?
Choosing colors can be a fun yet challenging task! Start by selecting a color palette that resonates with you. You can use a color wheel to find complementary colors or even look at fabric collections that catch your eye. Remember, it's all about what makes you happy!
- What tools do I need to start quilting?
Essential tools for quilting include a rotary cutter, a cutting mat, quilting rulers, and a sewing machine. Additionally, having pins, fabric scissors, and an iron will make your quilting journey much smoother. Think of these tools as your quilting best friends!
- How do I cut fabric accurately?
Accurate cutting is crucial for a well-constructed quilt. Use a rotary cutter alongside a ruler and cutting mat for the best results. Make sure to measure twice and cut once to avoid mistakes. It's like following a recipe—precision is key!
- What is the layering process in quilting?
Layering involves placing your quilt top, batting, and backing together in a specific order. Start with the backing fabric face down, then add the batting, and finally place the quilt top face up. This ensures a smooth finish and helps to keep everything in place while you quilt.
- How do I bind my quilt?
Binding your quilt is the final touch that gives it a polished look. You can use pre-made binding or make your own from fabric strips. Fold the binding over the raw edges of the quilt and sew it down, either by hand or machine. It’s like putting a frame around your masterpiece!
- Can I quilt without a sewing machine?
Absolutely! While a sewing machine can speed up the process, many quilters enjoy the meditative quality of hand sewing. If you choose to hand quilt, be prepared for a slower pace, but the results can be incredibly rewarding!
- What are some common mistakes to avoid when starting quilting?
Some common pitfalls include not pre-washing fabrics, cutting inaccurately, and not taking the time to pin pieces together. Remember, quilting is a journey, and mistakes are part of learning. Embrace them, and don't be afraid to ask for help!


