Creating the Perfect Ceramic Vase: Essential Tips
Creating a ceramic vase is not just about shaping clay; it's an art form that blends creativity, technique, and a touch of personal flair. Whether you’re a seasoned potter or a curious beginner, understanding the essentials of vase making can transform your creations from ordinary to extraordinary. Imagine crafting a piece that not only serves as a functional item but also as a stunning centerpiece in your home. In this article, we will dive into the nitty-gritty of crafting the perfect ceramic vase, covering everything from choosing the right clay to glazing techniques and firing methods. Let’s get our hands dirty and explore the world of pottery!
Selecting the appropriate clay is crucial for achieving durability and aesthetic appeal in your ceramic vase. Different clay types offer unique properties that affect the final product's texture and finish. For instance, earthenware is perfect for vibrant colors but is less durable than stoneware, which is known for its strength and versatility. Here’s a quick comparison:
| Type of Clay | Characteristics | Best For |
|---|---|---|
| Earthenware | Porous, vibrant colors | Decorative pieces |
| Stoneware | Durable, non-porous | Functional items |
| Porcelain | Translucent, delicate | Fine art pieces |
Choosing the right clay can significantly influence the outcome of your vase, so take the time to experiment and find the one that resonates with your vision!
Having the right tools is vital for successful pottery making. Picture yourself in your studio, surrounded by your favorite tools, each one designed to help you bring your creative ideas to life. Essential tools for shaping, trimming, and glazing your ceramic vase include:
- Potter's Wheel: For those who love the symmetry of wheel-thrown vases.
- Trimming Tools: Essential for refining the shape and removing excess clay.
- Glazing Brushes: Perfect for applying glazes evenly.
- Ribs: For smoothing and shaping the surface of your vase.
With these tools in hand, you’ll be well-equipped to tackle any pottery project!
Hand-building is a fundamental pottery technique that allows for creativity and personalization. It’s like sculpting with your hands, where you can express your unique style without the constraints of a wheel. This part explores various hand-building methods, such as pinch pots and coil building, to create unique vase shapes.
Pinch pots are simple yet versatile, perfect for beginners. The process of forming a vase using pinch techniques is straightforward: start with a ball of clay, then pinch and shape it into your desired form. This method encourages creativity and experimentation, allowing you to create everything from small decorative pots to larger, more intricate vases. Imagine sculpting a piece that reflects your personality with every pinch!
Coil building offers a way to create larger, more intricate vases. This technique involves rolling out long coils of clay and stacking them to form the walls of your vase. It’s like building a clay tower, where each coil adds height and character. Here are some tips for achieving structural integrity:
- Ensure each coil is well blended into the previous one to avoid cracks.
- Use a rib to smooth the joints for a seamless finish.
- Experiment with different coil sizes for varied textures.
With coil building, the sky’s the limit—let your imagination run wild!
Wheel throwing is a popular method for creating symmetrical vases. If you’ve ever watched a potter at work, you know how mesmerizing it can be! This section introduces the basics of wheel throwing, including centering clay and shaping the vase. First, you’ll need to center your clay on the wheel, which can be a bit tricky but is essential for achieving that perfect shape. Once centered, you can pull the clay upwards and outwards, creating a beautiful vase that’s not only functional but also a work of art.
Glazing adds color and texture to your ceramic vase, transforming it from a simple clay form into a vibrant masterpiece. This section covers various glazing techniques, including dipping, brushing, and spraying, to achieve different finishes and effects. Each method has its own charm and can dramatically change the appearance of your piece. For instance, dipping your vase in glaze can create a uniform finish, while brushing allows for more control and detail.
Understanding the difference between under glazes and over glazes is essential for achieving desired results. Under glazes are applied before the final glaze and can provide a base color or design, while over glazes are applied on top and create a glossy finish. Each type influences your vase's final appearance significantly, so choose wisely based on the effect you want to achieve!
Firing is a critical step in pottery making. It’s like the final exam for your vase! This section discusses different firing methods, including bisque and glaze firing, and their impact on the durability and finish of your ceramic vase. Bisque firing hardens the clay, making it less fragile, while glaze firing melts the glaze to create that beautiful, glossy finish we all admire. Understanding these methods will help you produce stunning, long-lasting pieces.
Here are some common questions that beginners often have when starting their pottery journey:
- What type of clay should I use for beginners? Earthenware is a great choice due to its workability and vibrant colors.
- Can I use regular paint for decorating my vase? No, it’s best to use ceramic glazes specifically designed for pottery.
- How long does it take to fire pottery? Firing can take several hours to a full day, depending on the method and kiln used.
Embarking on the journey of creating ceramic vases is both exciting and rewarding. With these tips and techniques, you're well on your way to crafting beautiful pieces that reflect your artistic vision. So grab your clay, and let’s get started!
Choosing the Right Clay
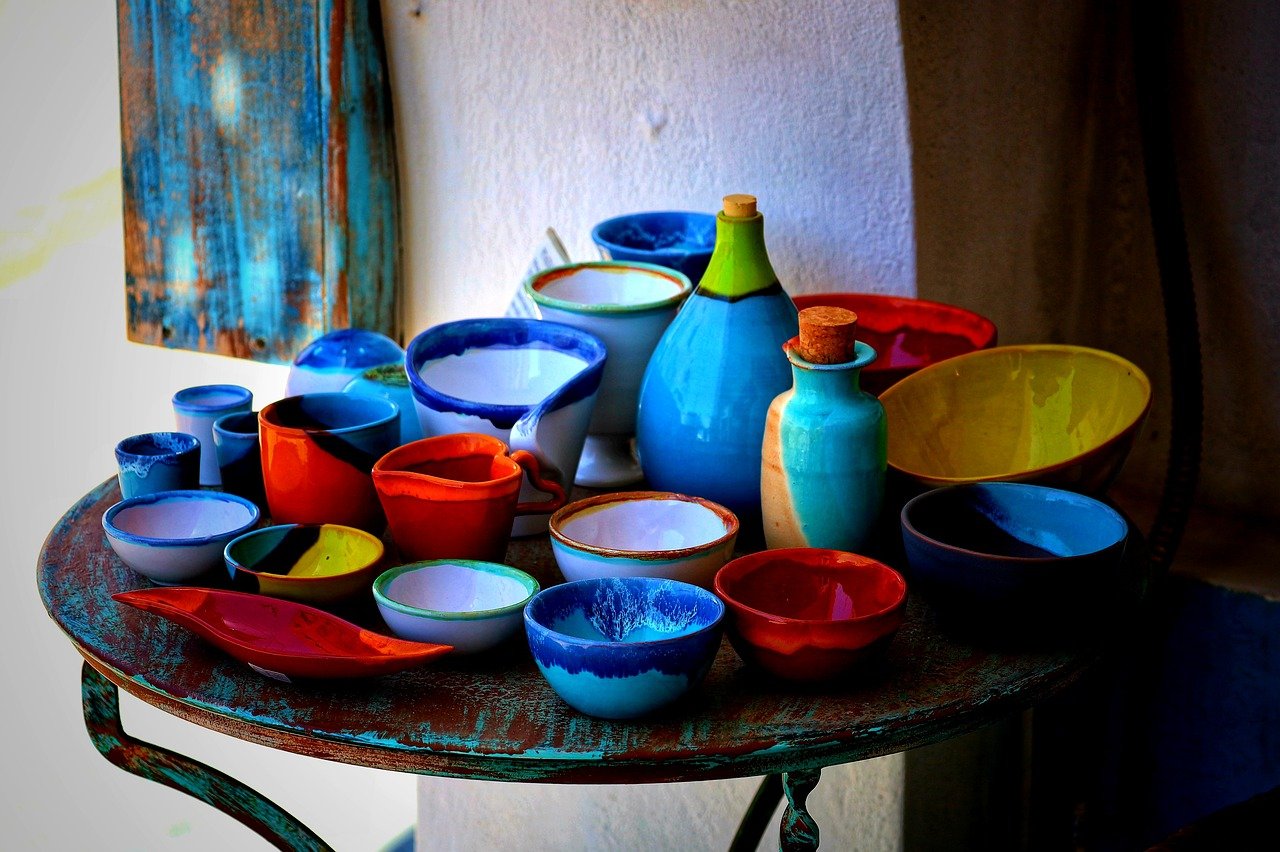
When it comes to crafting the perfect ceramic vase, one of the most critical decisions you'll make is choosing the right type of clay. The clay you select not only influences the durability of your vase but also affects its aesthetic appeal. Different clay types possess unique properties that can significantly impact the texture, color, and finish of your final product. So, how do you navigate this crucial choice? Let's break it down.
First off, you should understand that there are several types of clay available, each with its own set of characteristics. For instance, earthenware is a popular choice for beginners. It's relatively easy to work with and fires at a low temperature, making it accessible for home potters. However, it's also more porous and less durable than other clay types, which might limit its use for functional pieces that require strength.
On the other hand, stoneware is a fantastic option for those looking for durability and versatility. It fires at a higher temperature than earthenware and is less porous, making it suitable for both functional and decorative pieces. If you're aiming for a professional finish, stoneware might just be your best friend. Additionally, porcelain is known for its beautiful, translucent quality and smooth texture. It's ideal for intricate designs and fine details, but it can be challenging to work with due to its sensitivity to moisture and temperature changes.
To help you make an informed decision, here’s a quick comparison of these clay types:
| Type of Clay | Firing Temperature | Porosity | Best For |
|---|---|---|---|
| Earthenware | Low (1830°F - 2100°F) | High | Beginners, decorative pieces |
| Stoneware | Medium to High (2100°F - 2400°F) | Low | Functional and decorative pieces |
| Porcelain | High (2200°F - 2500°F) | Very Low | Intricate designs, fine art |
In addition to the type of clay, consider the texture and color you want your vase to have. Some clays come pre-mixed with colorants, while others are more neutral and can be enhanced with glazes later on. Think about your design vision and how the clay will complement it. Remember, the right clay can serve as a canvas for your creativity, enhancing the overall beauty of your piece.
Lastly, don't forget to experiment! Each type of clay offers different properties that can lead to unique results. If you're feeling adventurous, mix different clays to create something truly one-of-a-kind. The world of pottery is all about exploration and expression, so embrace the journey of finding the perfect clay for your ceramic vase.
Essential Tools for Pottery
When it comes to pottery, having the right tools can make all the difference between a frustrating experience and a joyful creation. Think of your pottery tools as your trusty sidekicks, each with a unique role to play in the adventure of crafting beautiful ceramic vases. Whether you're a seasoned potter or just starting out, understanding what tools are essential will help you navigate the world of ceramics with confidence.
First and foremost, you'll need a good set of pottery tools. This includes a variety of shaping and trimming tools that allow you to manipulate the clay with precision. For instance, a wire cutter is essential for slicing through blocks of clay or cutting your vase from the wheel. A rib tool, often made from wood or plastic, helps smooth the surface of your vase and refine its shape. Additionally, a set of loop tools is invaluable for trimming and carving, allowing you to add intricate details and designs.
Another crucial aspect of pottery is the wheel. A pottery wheel is where the magic happens, helping you create symmetrical shapes with ease. If you're new to wheel throwing, consider investing in a beginner-friendly model that allows for smooth operation. Don't forget to have a bat (a flat disk that sits on the wheel) to easily lift your vase off once it's shaped, preventing any damage to your creation.
As you progress, you might want to explore other tools that enhance your creativity. For instance, stamps and texture tools can add unique patterns to your vases, turning them into one-of-a-kind pieces. A spray bottle filled with water is also handy for keeping your clay moist while you work, as dry clay can become difficult to manage.
Let’s not forget about the importance of glazing tools. If you're looking to add color and texture to your vase, a set of glazing brushes and dipping tongs will be essential. These tools allow you to apply glazes evenly, ensuring a smooth finish that enhances the beauty of your creation. And if you're feeling adventurous, consider a sprayer for a more artistic application of glaze, giving your vase a unique flair.
To wrap it all up, here’s a quick reference table for your essential pottery tools:
| Tool | Purpose |
|---|---|
| Wire Cutter | Cuts clay and separates pieces from the wheel. |
| Rib Tool | Shapes and smooths the surface of the clay. |
| Loop Tool | Trims and carves intricate designs into the clay. |
| Pottery Wheel | Creates symmetrical shapes and forms. |
| Glazing Brushes | Applies glaze evenly to the surface of the vase. |
| Dipping Tongs | Helps dip pieces into glaze without mess. |
In summary, having the right tools is crucial for any potter looking to create stunning ceramic vases. Each tool plays a significant role in shaping, trimming, and glazing, ultimately impacting the final appearance and durability of your work. So, equip yourself with these essentials, and let your creativity flow!
Q: What is the most important tool for a beginner potter?
A: While all tools are important, a good pottery wheel and a wire cutter are often considered essential for beginners to start shaping their pieces effectively.
Q: Can I use regular household tools for pottery?
A: Some household tools can be adapted for pottery use, but investing in specific pottery tools will provide better results and enhance your creative process.
Q: How do I maintain my pottery tools?
A: Clean your tools after each use to prevent clay buildup. Store them in a dry place to avoid rusting and damage.
Hand-Building Techniques
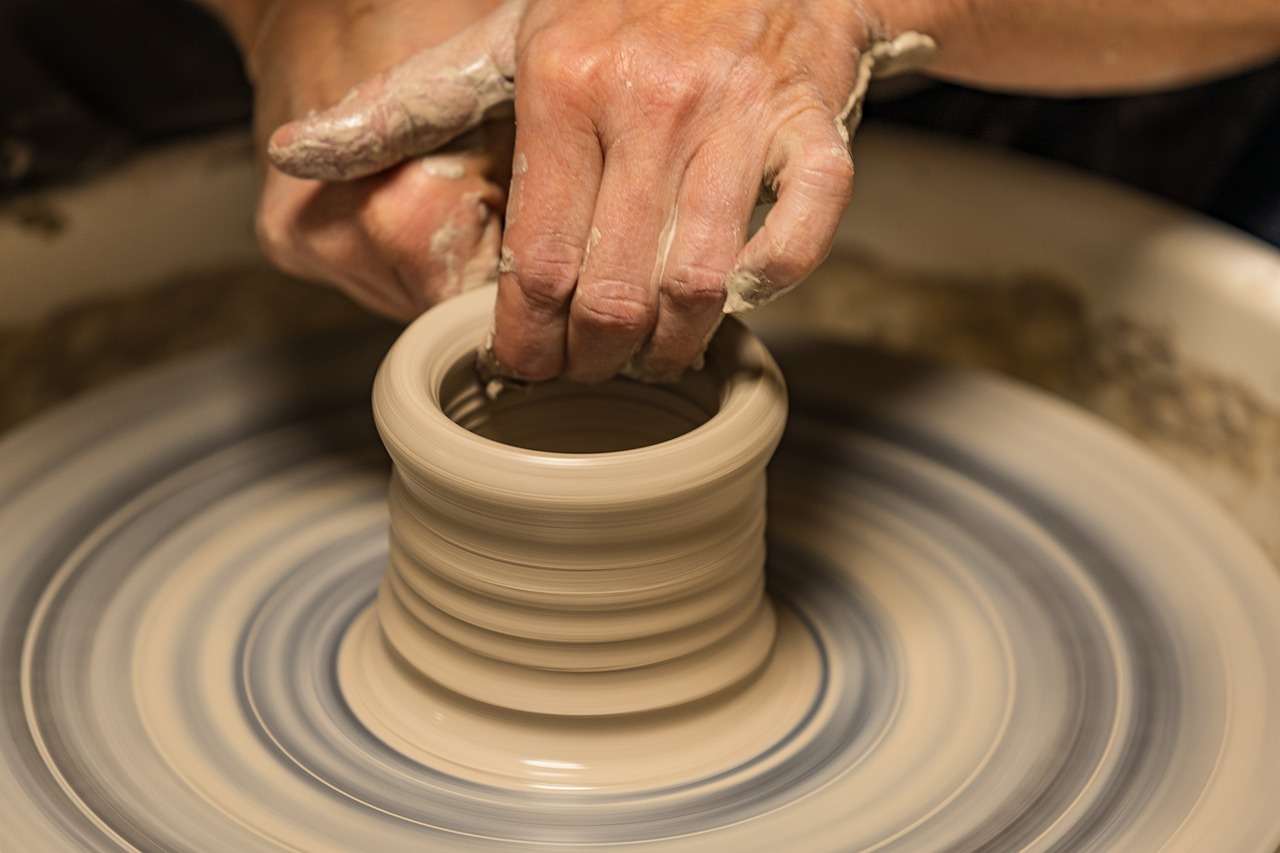
Hand-building is not just a method; it's an artistic journey that allows you to express your creativity in ways that machines simply can't replicate. Imagine molding clay with your own hands, feeling its texture, and shaping it into something beautiful. This technique provides a unique opportunity to create personalized and one-of-a-kind vases that reflect your individual style. Whether you're a beginner or a seasoned potter, hand-building techniques, such as pinch pots and coil building, can help you craft stunning pieces that stand out.
One of the most appealing aspects of hand-building is its versatility. You can create various shapes and sizes, from simple to intricate designs. The beauty of hand-building lies in its accessibility; you don't need a pottery wheel or expensive equipment to start. Just a handful of clay and your imagination are all you need to begin this exciting journey. As you explore these techniques, you'll find that each method offers its own set of challenges and rewards, encouraging you to push your creative boundaries.
Let’s delve into two popular hand-building techniques that can elevate your ceramic vase-making skills:
Pinch pots are the perfect starting point for anyone new to pottery. The technique is straightforward yet allows for a great deal of creativity. To create a pinch pot, you simply take a ball of clay and use your thumb to press into the center, gradually pinching the walls to form a bowl-like shape. This method not only helps in understanding the properties of clay but also invites experimentation. You can create various styles by altering the height, width, and texture of your pinch pot. Don't be afraid to add decorative elements, such as carved patterns or applied embellishments, to make your vase truly unique!
If you’re looking to create larger, more intricate vases, coil building is the way to go. This technique involves rolling out long, snake-like strands of clay and stacking them to form the walls of your vase. The beauty of coil building lies in its ability to create depth and texture. As you layer the coils, you can manipulate the shape, creating curves and angles that can be quite striking. Just remember to score and slip the coils to ensure a strong bond between them, preventing any cracks or separations during the drying or firing process.
Both pinch pots and coil building techniques not only enhance your pottery skills but also enable you to explore your personal style. As you practice, you'll find that each piece you create tells a story, reflecting your journey as a potter. So grab some clay, let your hands guide you, and watch as your unique ceramic vases come to life!
Q: Can I use any type of clay for hand-building?
A: While you can use various types of clay, it's best to choose one that is specifically designed for hand-building. Stoneware and earthenware are popular choices due to their workability and durability.
Q: How do I prevent my pinch pots from cracking?
A: To avoid cracking, make sure to keep your clay moist while working. Additionally, allow your pots to dry slowly and evenly by covering them with plastic or cloth until they reach leather-hard consistency.
Q: Is coil building suitable for beginners?
A: Absolutely! Coil building is a forgiving technique that allows beginners to experiment with shapes and designs without the pressure of achieving perfect symmetry.
Pinch Pots
Pinch pots are one of the most accessible and enjoyable techniques for beginners venturing into the world of pottery. This method not only allows for creativity but also encourages experimentation with shapes and sizes. The beauty of pinch pots lies in their simplicity; all you need is a ball of clay and your hands. Imagine molding the clay as if you were shaping a soft dough, gently pinching and pulling until you achieve the desired form. This tactile experience can be incredibly satisfying and therapeutic.
To start your journey with pinch pots, you’ll want to follow a few simple steps. Begin by taking a small lump of clay, about the size of a fist. Roll it into a smooth ball, ensuring there are no cracks or air bubbles. Next, use your thumb to press down into the center of the ball, creating a small indentation. This is where the magic begins! As you pinch the walls of the pot with your fingers, rotate the clay in your other hand to maintain an even thickness. The goal is to keep the walls about 1/4 inch thick to prevent cracking during drying and firing.
As you work, don’t be afraid to let your imagination run wild. You can create various shapes and sizes, from small decorative pots to larger vases. If you want to add a personal touch, consider incorporating textures or patterns into the surface of your pinch pot. You can use tools like stamps, leaves, or even your own fingers to create unique designs. This is where your personality shines through your work, making each piece truly one-of-a-kind.
Once you’ve shaped your pinch pot to your liking, it’s essential to let it dry slowly and evenly. Cover it with a plastic bag or damp cloth to prevent it from drying too quickly, which can lead to cracks. After a few hours, check on your creation; it should be leather-hard, which means it’s firm but still workable. At this stage, you can refine the shape, smooth out any rough areas, or even add additional elements like handles or decorative features.
After your pinch pot has dried completely, it’s time for the firing process. This is where your pot transforms from fragile clay into a durable ceramic piece. The first firing, known as bisque firing, prepares your pot for glazing. Once bisque fired, you can apply your choice of glazes, enhancing the color and finish of your pinch pot. Remember, the glazing process can be just as creative as the shaping, allowing you to experiment with different colors and techniques.
In summary, pinch pots are not just a beginner's project; they are a gateway to the broader world of pottery. With minimal tools and materials, you can create stunning pieces that reflect your style and creativity. So grab some clay, unleash your imagination, and start pinching your way to beautiful pottery!
- What type of clay is best for pinch pots? Generally, earthenware clay is a great choice for beginners, as it is easy to work with and forgiving.
- Can I add decorations to my pinch pot? Absolutely! You can use various tools or natural materials to create textures and designs.
- How long does it take for a pinch pot to dry? Drying times can vary, but typically it takes 24-48 hours for a pinch pot to dry completely before firing.
- Do I need a kiln to fire my pinch pots? Yes, a kiln is necessary for firing pottery to achieve a durable finish. You can also check for local pottery studios that offer kiln services.
Coil Building
Coil building is a fantastic pottery technique that opens the door to endless creativity and innovation. Imagine crafting your own unique vases, each with its own personality and flair! This method involves rolling out long, snake-like pieces of clay, known as coils, and stacking them to build the desired shape. It’s like creating a layered cake, where each coil adds height and character to your masterpiece. The beauty of coil building lies in its versatility; you can create anything from simple, rustic pots to intricate, elegant vases that showcase your artistic vision.
To get started with coil building, you’ll need to gather some essential materials and tools. First and foremost, you’ll want to have a good quality clay that can hold its shape as you work. Additionally, tools such as a rib, a needle tool, and a sponge will be incredibly helpful for smoothing and refining your vase. The process is straightforward, yet it allows for a significant amount of personal expression. You can choose to make your coils uniform or vary their thickness for a more organic look. As you stack each coil, remember to score and slip the edges where they meet to ensure a strong bond; this is crucial for the structural integrity of your vase.
One of the most exciting aspects of coil building is the opportunity to experiment with different textures and patterns. You can imprint designs into the coils before stacking them, or even incorporate other materials like leaves or fabric to create unique impressions. This technique is not just about building a vessel; it’s about telling a story through your work. Think about the emotions you want to evoke with your vase. Do you want it to feel earthy and grounded, or perhaps whimsical and airy? The choice is yours!
As you progress in your coil building journey, you may want to explore various styles and techniques. For instance, you can try adding decorative elements such as handles or spouts, or experiment with asymmetrical designs to challenge conventional forms. Each vase you create can be a reflection of your growth as an artist, showcasing your evolving skills and creativity.
In conclusion, coil building is not just a pottery technique; it's a form of self-expression that invites you to explore your artistic boundaries. Whether you're a beginner or an experienced potter, this method offers a wonderful way to create stunning, one-of-a-kind vases that are sure to impress. So grab your clay and tools, and let your imagination run wild!
- What type of clay is best for coil building? Generally, earthenware or stoneware clay is recommended for coil building, as they provide good workability and strength.
- Can I use coil building for other types of pottery? Absolutely! Coil building can be used for various forms, including bowls, sculptures, and even larger installations.
- How do I prevent my coils from drying out too quickly? Keep your coils covered with a damp cloth or plastic wrap while you work to maintain moisture and prevent cracking.
- What is the best way to smooth the seams between coils? Use a damp sponge or your fingers to gently blend the seams, ensuring a seamless finish.
Wheel Throwing Basics
Wheel throwing is an exhilarating technique that transforms a lump of clay into a beautifully symmetrical vase, almost like magic! If you've ever watched a potter at work, you know how mesmerizing it can be to see the clay spin and morph under skilled hands. But don't worry if you’re a beginner; everyone starts somewhere! The key to mastering wheel throwing lies in understanding the basics and practicing them diligently.
First, let’s talk about centering the clay. This is arguably the most crucial step in wheel throwing. When you place your clay on the wheel, it’s essential to get it centered perfectly. If the clay is off-center, your vase will end up lopsided, which can be frustrating. To center the clay, you’ll need to apply pressure with your hands while the wheel spins. It’s like finding the sweet spot on a seesaw—once you find it, everything else becomes easier!
Once your clay is centered, the next step is to open it up. This involves creating a hollow space in the center of the clay mass. Think of it as creating a well; you want to dig downwards while keeping the sides intact. This process requires a gentle touch and a bit of finesse, but with practice, you’ll get the hang of it. After you’ve opened the clay, it’s time to start pulling up the walls of your vase. This is where the magic happens! You’ll use your fingers and a bit of water to shape the clay, gradually pulling it upwards to create the desired height and form. It’s essential to keep your hands steady and maintain an even pressure to ensure uniformity.
As you shape your vase, remember to frequently check the thickness of the walls. A good rule of thumb is to aim for about a quarter-inch thickness. If the walls are too thick, they may crack during firing; too thin, and they could collapse. You can use tools like rib tools to smooth out the surface and refine the shape. This is also where you can start adding your personal touch, whether it’s a flare at the top or a curve in the body of the vase.
After you’ve achieved the desired shape, you’ll need to trim your vase. Trimming is an art in itself, allowing you to refine your piece and add a finished look. This step is done on the wheel after the vase has reached a leather-hard state, meaning it’s firm but still damp. Trimming helps remove excess clay and refine the foot of the vase, giving it a polished appearance.
Lastly, let’s not forget about the importance of practice. Wheel throwing can be challenging, but with each session, you’ll improve. Don’t be afraid to experiment with different shapes and sizes. Each piece you create is a stepping stone towards mastering this beautiful craft. So, grab your clay, get behind that wheel, and let your creativity flow!
- What type of clay is best for wheel throwing? Generally, stoneware clay is recommended for beginners due to its durability and versatility.
- How long does it take to learn wheel throwing? The time varies for everyone, but consistent practice can lead to noticeable improvements within a few weeks.
- Can I use a regular pottery wheel at home? Yes! There are many affordable options available for home use, but make sure to choose one that fits your needs and space.
Glazing Techniques
Glazing is where the magic happens in pottery! It’s not just about adding color; it’s about transforming your ceramic vase into a stunning piece of art that can captivate anyone who lays eyes on it. The right glaze can enhance the texture, highlight the form, and even evoke emotions. So, let’s dive into the world of glazing techniques and discover how you can elevate your ceramic creations.
First off, it’s essential to understand that there are various glazing techniques available, each offering unique results. Some of the most popular methods include dipping, brushing, and spraying. Each technique has its benefits and can be chosen based on the desired finish you wish to achieve. For instance, dipping is great for uniform coverage, while brushing allows for detailed application. Spraying can create lovely, soft gradients and textures that are hard to achieve by other means.
When you’re ready to glaze your vase, consider the following aspects:
- Color Selection: Choose colors that complement your vase's shape and design. Bright colors can make a statement, while soft pastels can provide a more subtle elegance.
- Texture: Different glazes can produce various textures, from smooth and glossy to rough and matte. Experimenting with these can add depth to your work.
- Layering: Don’t be afraid to layer glazes! This can create unique effects and depth, making your vase stand out even more.
Now, let’s talk about the difference between under glazes and over glazes. Understanding this distinction is crucial for achieving the results you want. Under glazes are typically applied before the first firing and can be used to create intricate designs or patterns. They are more stable and can be painted on with a brush or applied with a sponge. On the other hand, over glazes are applied after the first firing and often require a second firing to set. They tend to be more vibrant and glossy, providing a stunning finish that can make your vase pop!
Additionally, the firing process plays a significant role in the final appearance of your glaze. The temperature and atmosphere inside the kiln can dramatically affect how your glaze reacts. For example, a reduction firing can create rich, deep colors, while an oxidation firing results in brighter hues. Understanding these firing methods is essential for mastering your glazing techniques.
In conclusion, glazing is an art form in itself. By experimenting with different techniques and understanding the materials at your disposal, you can create breathtaking ceramic vases that are not only functional but also serve as beautiful art pieces. Remember, the key to great glazing is practice and experimentation, so don’t hesitate to try new things and see what works best for your style!
Here are some common questions about glazing techniques that might help you on your pottery journey:
| Question | Answer |
|---|---|
| What is the best way to apply glaze? | It depends on the effect you want! Dipping is great for even coverage, while brushing allows for more detail. |
| Can I mix different glazes? | Yes, mixing glazes can lead to unique results, but always test on a small piece first! |
| How do firing temperatures affect glaze? | Higher temperatures can deepen colors, while lower temperatures may produce lighter hues. Always refer to your glaze's specifications. |
Under Glazes vs. Over Glazes
When it comes to adding that perfect touch of color and texture to your ceramic vase, understanding the difference between under glazes and over glazes is essential. These two glazing techniques not only influence the final appearance of your piece but also affect the overall durability and finish. So, let’s dive into the nitty-gritty of these two methods, shall we?
Under glazes are applied to the greenware or bisque-fired clay before the final glaze is added. They are like the foundation of a house; they set the stage for everything that comes after. Under glazes come in a variety of colors and can be used to create detailed designs and patterns. One of the best things about under glazes is that they can be layered, allowing artists to experiment with different colors and effects. However, it’s important to note that under glazes can sometimes appear muted after firing, so it's crucial to choose colors that will still shine through the final glaze.
On the other hand, over glazes are applied on top of a glaze layer. Think of them as the icing on the cake; they add a glossy finish and vibrant colors that pop. Over glazes can provide a range of effects, from shiny to matte, and can also be used to create intricate designs. However, they require a second firing, which can be a bit more time-consuming. Additionally, over glazes can be more sensitive to temperature changes during firing, making it essential to understand the firing schedule to achieve the desired effects.
To help clarify the differences, here’s a quick comparison:
| Feature | Under Glazes | Over Glazes |
|---|---|---|
| Application | Applied before the final glaze | Applied on top of the glaze |
| Color Intensity | Can appear muted | Generally vibrant and glossy |
| Firing | Typically fired once | Requires a second firing |
| Design Flexibility | Great for detailed designs | Best for adding finishing touches |
In conclusion, both under glazes and over glazes have their unique advantages and can be used creatively in your ceramic vase projects. The choice between the two often depends on the desired outcome and the specific techniques you plan to employ. So, whether you want to lay down a beautiful base with under glazes or add a stunning finish with over glazes, understanding these techniques will undoubtedly elevate your pottery game!
- What is the main difference between under glazes and over glazes?
Under glazes are applied before the final glaze and can appear muted, while over glazes are applied on top of the glaze for a vibrant finish. - Can I use both under glazes and over glazes on the same piece?
Absolutely! Many artists use both techniques to achieve depth and detail in their work. - Do I need to fire my piece twice if I use over glazes?
Yes, over glazes require a second firing to set the colors and finish.

Firing Methods
Firing is not just a step in pottery making; it’s the transformative process that turns your soft, malleable clay into a sturdy, permanent piece of art. Understanding the different firing methods is essential for any potter who wants to create beautiful ceramic vases that stand the test of time. There are two primary firing stages you need to be familiar with: bisque firing and glaze firing. Each stage has its own unique purpose and impact on the final product.
Bisque firing is the first firing that your pottery undergoes. This process typically occurs at a lower temperature, usually around 1,830°F (1,000°C). The purpose of bisque firing is to remove any moisture from the clay and to harden it, making it more durable and easier to handle for further processes, like glazing. After bisque firing, the clay is porous, allowing it to absorb glazes effectively. This stage is crucial because it sets the foundation for the aesthetic qualities of your vase. Without this initial firing, your piece would be too fragile to glaze and would likely break during the glazing process.
Next comes glaze firing, which happens after your vase has been bisque fired and glazed. This firing occurs at a higher temperature, typically between 1,830°F (1,000°C) and 2,380°F (1,300°C), depending on the type of glaze used. This stage is where the magic happens! The heat causes the glaze to melt and form a beautiful, glass-like surface that enhances the colors and textures of your vase. It’s fascinating to watch how the glazes react under heat, often resulting in unexpected and stunning finishes.
To give you a clearer picture, here’s a quick comparison of both firing methods:
| Firing Method | Temperature Range | Purpose |
|---|---|---|
| Bisque Firing | 1,830°F (1,000°C) | Hardens clay, removes moisture, prepares for glazing |
| Glaze Firing | 1,830°F (1,000°C) - 2,380°F (1,300°C) | Melt glaze, enhance colors and textures, finalize piece |
Moreover, the choice of firing method can significantly affect the durability and finish of your ceramic vase. For instance, if you opt for a lower bisque firing temperature, you might find that the final piece is more fragile. Conversely, a higher glaze firing temperature can lead to a more robust and vibrant finish. It’s all about experimenting and finding the perfect balance that works for your artistic vision.
As you embark on your pottery journey, don’t shy away from exploring different firing techniques. Each method has its own charm and can lead to exciting discoveries in your work. So, whether you’re crafting a simple pinch pot or an elaborate coil-built vase, remember that the firing process is where your artistic expression truly comes alive!
- What is the difference between bisque firing and glaze firing?
Bisque firing hardens the clay and prepares it for glazing, while glaze firing melts the glaze to create a glassy finish. - Can I skip bisque firing?
Skipping bisque firing is not recommended as it can lead to issues during glazing and make your piece more fragile. - What temperature should I fire my vase at?
The temperature depends on the type of clay and glaze used, but generally, bisque firing is around 1,830°F and glaze firing can go up to 2,380°F.
Frequently Asked Questions
- What type of clay should I use for my ceramic vase?
Choosing the right clay depends on the look and durability you want for your vase. For beginners, earthenware is a great choice because it's easy to work with and forgiving. If you're looking for something more durable, consider stoneware, which can withstand higher temperatures and is less porous. Porcelain is another option, known for its smooth finish and translucency, but it can be trickier to handle.
- What essential tools do I need for pottery?
Having the right tools can make a world of difference in your pottery experience. At a minimum, you should have a pottery wheel (if you're wheel throwing), a set of loop tools for trimming, a rib for smoothing, and some sponges for wetting the clay. Don’t forget about a good knife for cutting and shaping, as well as a rolling pin if you’re hand-building!
- What are pinch pots and how do I make one?
Pinch pots are the perfect starting point for beginners! To make one, simply take a ball of clay and press your thumb into the center, then pinch the walls to shape it into a small vase. It’s all about feeling the clay and experimenting with different shapes. Don’t worry about perfection; the beauty of pinch pots lies in their uniqueness!
- How do I achieve a symmetrical shape when wheel throwing?
Centering the clay on the wheel is key to achieving symmetry. Start by throwing a small amount of water on the wheel and placing your clay in the center. As you start the wheel, apply pressure with your hands to center it. Once centered, gradually shape the clay while maintaining even pressure. Remember, practice makes perfect!
- What are the differences between under glazes and over glazes?
Under glazes are applied before the first firing and can create vibrant colors that show through a clear glaze. They’re great for detailed designs. Over glazes, on the other hand, are used after the initial firing and can create a shiny finish, adding depth and texture to your vase. Understanding these differences will help you achieve the look you want!
- What firing methods should I know about?
There are two primary firing methods you should be aware of: bisque firing and glaze firing. Bisque firing is the first firing that hardens your clay, making it easier to handle for glazing. Glaze firing follows, where your vase is fired again to set the glaze. Each method plays a crucial role in the final durability and appearance of your vase.


