How to Take Care of Indoor Ferns
Welcome to the lush world of indoor ferns! These stunning plants can transform your living space into a vibrant oasis, breathing life and color into every corner. But, like any beautiful thing, they require a bit of care and attention to truly thrive. In this guide, we’ll explore the essential tips and guidelines for successfully maintaining indoor ferns, ensuring they not only survive but flourish in your home environment. Whether you’re a seasoned plant parent or just starting your green journey, you’ll discover the best practices for watering, lighting, humidity, and overall care that will make your ferns the envy of all your friends.
Selecting the appropriate fern species for indoor growth is crucial. With so many varieties available, it can be overwhelming to choose the right one. Some popular options include the Boston fern, Maidenhair fern, and the Bird's Nest fern. Each of these species has distinctive features and care requirements. For instance, the Boston fern loves a bit of humidity and indirect light, while the Maidenhair fern prefers a slightly drier environment. Understanding these differences is key to ensuring your plant flourishes in its new home. So, do your research, and choose a fern that fits your lifestyle and environment!
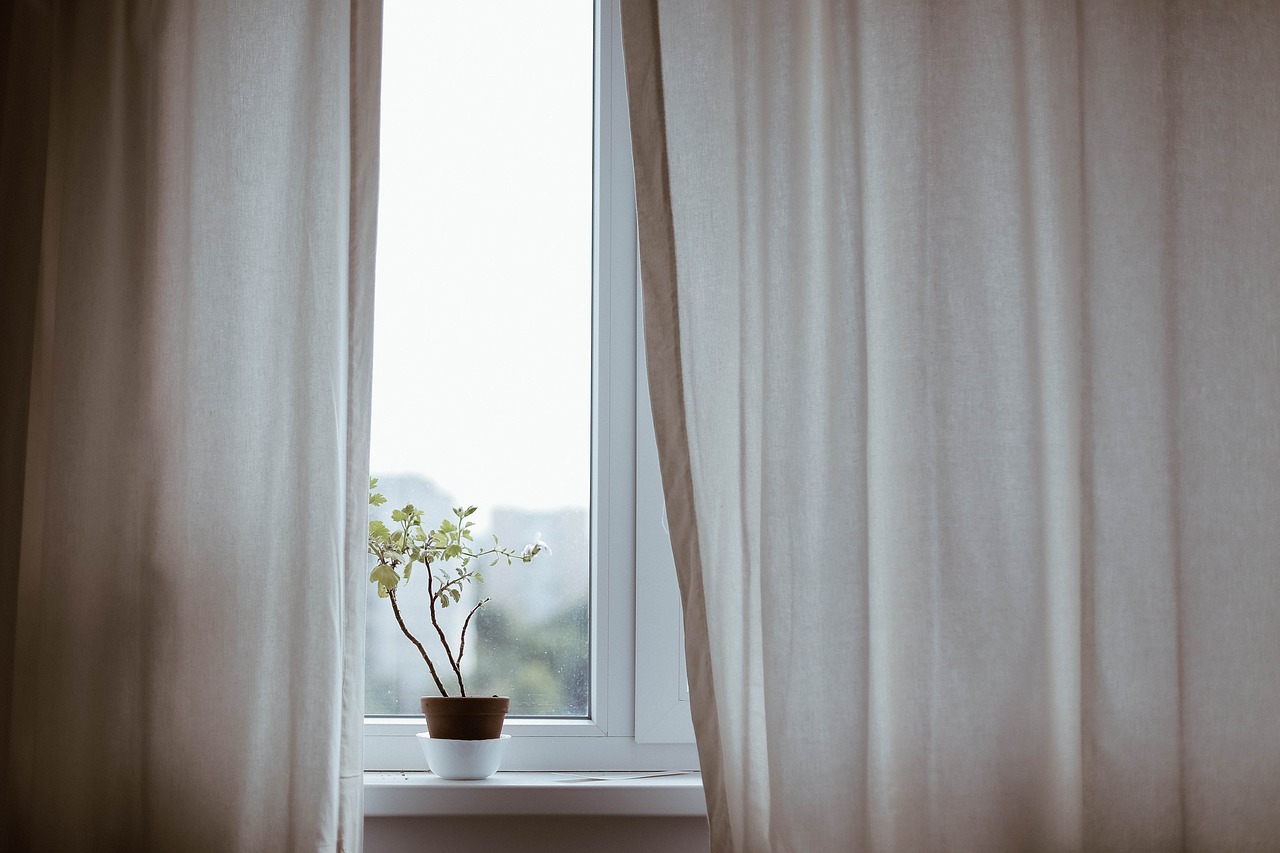
Understanding the lighting needs of indoor ferns is vital for their health. Most ferns thrive in indirect light, as direct sunlight can scorch their delicate leaves. Ideally, you should position your ferns near a window that receives filtered light or in a well-lit room that doesn’t get too much sun. If you're unsure, consider using sheer curtains to diffuse the light. Remember, if your fern starts to look leggy or its leaves turn yellow, it might be a sign that it’s not getting enough light. On the flip side, if the leaves are browning at the edges, it could be getting too much sun!
Proper watering is essential for fern health. Over-watering is a common mistake that can lead to root rot, while under-watering can leave your ferns looking droopy and sad. The key is to keep the soil consistently moist but not soggy. A good rule of thumb is to check the top inch of the soil; if it feels dry, it’s time to water. Remember, the frequency of watering can vary based on factors like the season, humidity, and the size of your pot. During the warmer months, you may need to water more often, while in winter, the frequency might decrease.
Ferns thrive in humid environments, which can be a challenge in many homes, especially during winter when heating systems can dry out the air. To maintain adequate humidity levels, consider the following tips:
- Use a humidifier in the room where your ferns are located.
- Group your ferns together to create a microclimate.
- Place a tray of water with pebbles under your pots to increase moisture.
By incorporating these strategies, you can create an environment that mimics the natural habitat of ferns, allowing them to thrive and flourish.
Choosing the right soil and fertilization schedule is key to healthy ferns. A well-draining potting mix is essential, as ferns do not like to sit in water. Look for a mix that contains peat moss, perlite, or vermiculite. As for fertilization, ferns generally don’t need a lot of extra nutrients. A diluted, balanced fertilizer applied every 4-6 weeks during the growing season is usually sufficient. Remember, over-fertilizing can lead to leaf burn, so it’s better to err on the side of caution.
Indoor ferns can be susceptible to pests and diseases. Common issues include spider mites, mealybugs, and fungal infections. Regularly inspect your plants for any signs of trouble, such as discolored leaves or webbing. Prevention strategies include keeping your ferns clean by misting them and ensuring good air circulation around the plants. If you do notice pests, a gentle spray of insecticidal soap or neem oil can often do the trick, helping to keep your ferns healthy and happy.
Repotting is essential for fern growth. As your fern grows, it may outgrow its pot, leading to root-bound conditions that can stunt its growth. It’s best to repot your fern every couple of years or when you notice roots coming out of the drainage holes. Choose a pot that is only slightly larger than the current one to avoid overwhelming the plant. When repotting, gently loosen the roots and refresh the soil to give your fern a fresh start!
Ferns require different care throughout the year. During spring and summer, when the plants are actively growing, they may need more water and humidity. Conversely, in fall and winter, you might need to dial back on watering as growth slows. Keep an eye on the temperature, too; most ferns prefer temperatures between 60°F and 75°F. Adjust your care routine accordingly, and your ferns will thank you!
Q: How often should I water my indoor fern?
A: Water your fern when the top inch of soil feels dry. This can vary based on the season and humidity levels.
Q: Can I place my fern in direct sunlight?
A: No, most ferns prefer indirect light. Direct sunlight can scorch their leaves.
Q: How can I increase humidity for my ferns?
A: Use a humidifier, group your ferns together, or place a tray of water with pebbles under the pots.
Q: When should I repot my fern?
A: Repot your fern every couple of years or when you notice roots coming out of the drainage holes.
By following these tips, you can create a thriving environment for your indoor ferns, turning your home into a green sanctuary. Happy planting!
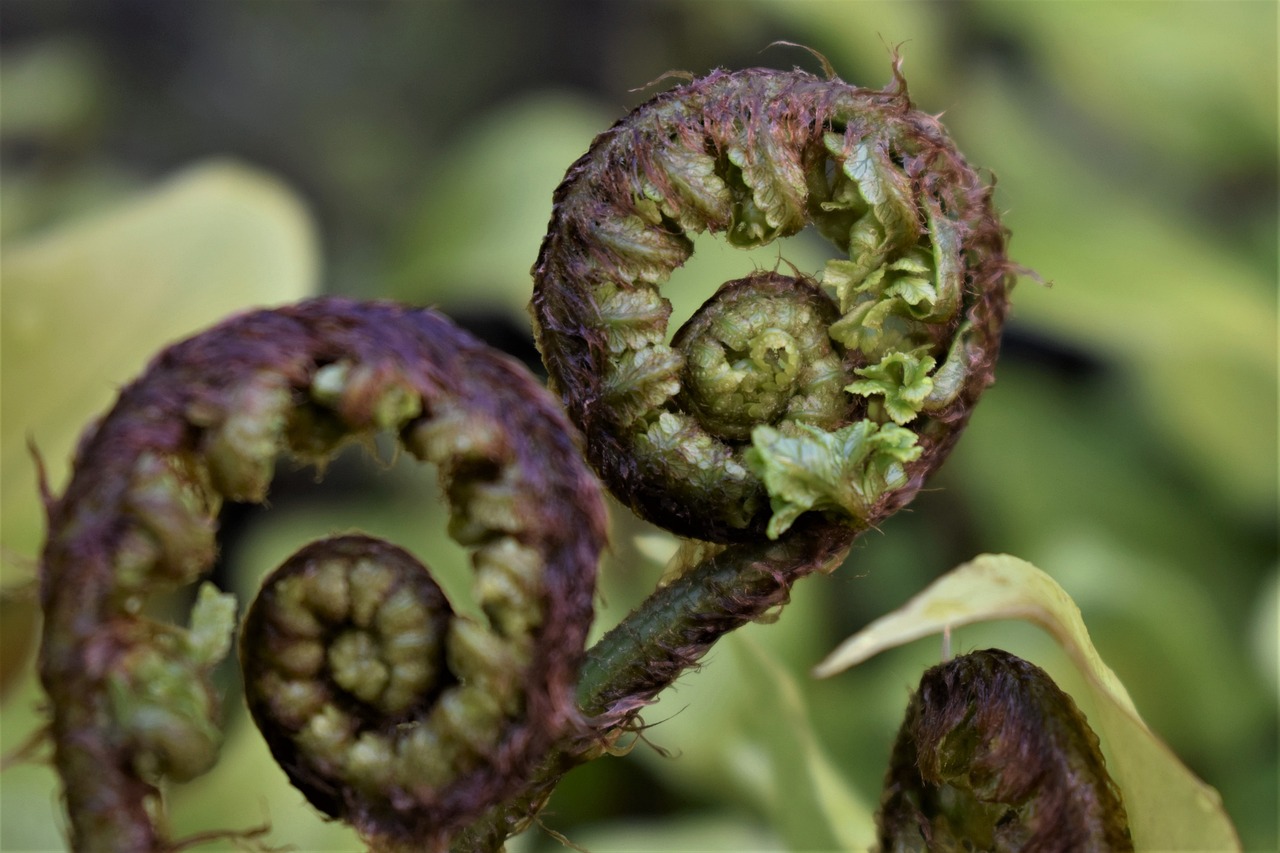
Choosing the Right Fern
When it comes to creating a lush indoor oasis, is your first step towards success. Not all ferns are created equal, and understanding their unique characteristics can make a world of difference in your plant-parenting journey. Some popular varieties you might consider include the Boston Fern, Maidenhair Fern, and Bird's Nest Fern. Each of these ferns has specific care requirements that cater to their natural habitats, so let's dive into what makes them special.
The Boston Fern is a classic choice, known for its feathery fronds that can grow quite long. This fern loves the spotlight but not the harsh sun, preferring bright, indirect light. If you can provide a cool, humid environment, your Boston Fern will reward you with vibrant greenery. On the other hand, the Maidenhair Fern is a bit more delicate and requires consistent moisture. Its fine, lacy leaves are a sight to behold, but be careful not to let it dry out completely. Lastly, the Bird's Nest Fern is a hardy option that thrives in low light and doesn’t require as much humidity, making it an ideal choice for beginners.
Before you make your selection, consider the following factors:
- Light Levels: Different ferns have different light requirements. Assess the lighting conditions in your home to match them with the fern's needs.
- Humidity: Most ferns love humidity, so think about how you can create a moist environment for them.
- Space: Consider the size of the fern at maturity. Make sure you have enough space for it to grow without feeling cramped.
- Care Level: Some ferns are more forgiving than others. If you're new to plant care, opt for a variety that’s easier to maintain.
In summary, choosing the right fern is about understanding your environment and matching it with the fern's needs. With the right selection, you'll find that caring for these beautiful plants can be incredibly rewarding. So, take your time, do a little research, and soon you’ll be on your way to cultivating a stunning indoor garden filled with thriving ferns!

Optimal Lighting Conditions
When it comes to nurturing indoor ferns, understanding their lighting requirements is absolutely crucial. Unlike many houseplants that can thrive in direct sunlight, ferns prefer a more gentle touch when it comes to light exposure. They are naturally found in the understory of forests, where they bask in filtered light, so replicating these conditions in your home is key. Indirect light is your fern's best friend, and achieving this can make all the difference in their health and vibrancy.
So, what does optimal lighting look like for your ferns? Ideally, you want to place them in a spot where they can receive bright, but indirect sunlight. A north-facing window is often a perfect location, as it provides the soft light that ferns crave without the harsh rays that can scorch their delicate leaves. If your only option is a south or west-facing window, consider using sheer curtains to diffuse the light and create a more suitable environment.
It's also important to rotate your ferns occasionally. This simple practice ensures that all sides of the plant receive equal light exposure, promoting even growth. Think of it as giving your fern a little spa treatment—every side deserves some love! If you notice that your fern is growing leggy or leaning towards the light source, it might be time to adjust its position. A fern that is stretching too much is a clear sign it's not getting enough light.
Now, let’s talk about the different types of ferns and their specific lighting needs. Here’s a quick table to help you understand:
| Fern Variety | Light Preference |
|---|---|
| Boston Fern | Bright, indirect light |
| Maidenhair Fern | Low to medium indirect light |
| Staghorn Fern | Bright, filtered light |
| Asparagus Fern | Bright, indirect light |
As you can see, while many ferns enjoy bright, indirect light, some can tolerate lower light conditions. However, remember that lower light might slow their growth and reduce their lushness. If you notice your ferns are not thriving, experiment with moving them to a brighter location. Just be cautious of the sudden change; it's best to gradually acclimate them to brighter conditions to avoid shock.
In addition to light intensity, consider the duration of light exposure. Most ferns thrive with about 12 hours of light a day, so if your home doesn’t get enough natural light, you might want to invest in a grow light. These lights mimic natural sunlight and can help your ferns flourish even in the darkest corners of your home.
Lastly, always keep an eye out for signs that your fern is not happy with its lighting situation. If you see yellowing leaves, browning tips, or a general decline in health, it might be time to reassess its lighting conditions. Remember, your ferns are trying to communicate with you! By paying attention to their cues, you can create an environment where they not only survive but truly thrive.
Q: Can I place my fern in direct sunlight?
A: It's best to avoid direct sunlight, as it can scorch the leaves. Indirect light is ideal.
Q: How can I tell if my fern is getting enough light?
A: Look for vibrant, green foliage. If the leaves are yellowing or the plant is leggy, it may need more light.
Q: What type of grow light should I use for my ferns?
A: LED grow lights are a great option as they emit less heat and can be adjusted for light intensity.
Watering Techniques
Watering your indoor ferns is a delicate dance; too much or too little can lead to disastrous results. The secret lies in understanding the specific needs of your fern species, as they can vary widely. Generally, ferns prefer their soil to be consistently moist but not soggy. A good rule of thumb is to check the top inch of soil—if it feels dry, it’s time to water. But don’t just pour water in indiscriminately; instead, consider the method you use. Using a watering can with a long spout allows you to direct water precisely where it’s needed, avoiding the fronds and ensuring the roots get the moisture they crave.
Another effective technique is to use the bottom watering method. This involves placing your fern pot in a basin of water and allowing the plant to absorb moisture through the drainage holes. This method encourages deep root growth and helps prevent overwatering, as your fern will only take up what it needs. Remember, however, to remove the pot from the water once the topsoil feels moist to avoid waterlogged roots.
When it comes to frequency, it’s essential to adjust based on the season and your home’s humidity levels. During the warmer months, you may find yourself watering more frequently, while in winter, when the air is drier, you might need to cut back. As a general guide, check your ferns once a week, but always trust your instincts and the condition of the soil. If you notice yellowing leaves or wilting, these could be signs of overwatering, while crispy, brown tips might indicate underwatering.
To help you better understand the watering needs of your ferns, here’s a simple table summarizing the signs of overwatering and underwatering:
| Condition | Signs |
|---|---|
| Overwatering | Yellowing leaves, wilting, root rot |
| Underwatering | Crispy leaf tips, drooping, dry soil |
Lastly, consider the quality of water you’re using. Tap water can contain chemicals like chlorine and fluoride, which may not be ideal for your ferns. If possible, use distilled water or rainwater, as these options are gentler and more beneficial for your plants. Remember, your indoor fern is not just a plant; it’s a living entity that thrives on the care you provide. So, take the time to learn its preferences, and you’ll be rewarded with lush, vibrant foliage!
Q: How often should I water my indoor fern?
A: Generally, check the soil weekly. Water when the top inch feels dry, but adjust based on your home's humidity and the season.
Q: Is it better to water from the top or bottom?
A: Both methods have their benefits. Top watering is quick and easy, while bottom watering encourages deep root growth and prevents overwatering.
Q: What type of water is best for ferns?
A: Distilled water or rainwater is preferable, as it’s free from chemicals found in tap water that can harm your ferns.
Humidity Requirements
When it comes to caring for indoor ferns, one of the most crucial factors to consider is humidity. These plants are native to tropical and subtropical regions, where they thrive in environments with high moisture levels. Therefore, replicating these conditions in your home is essential for their health and vibrancy. Ideally, indoor ferns prefer humidity levels between 40% and 60%. If the air in your home is too dry, your ferns may show signs of distress, such as browning leaf tips or wilting fronds.
To maintain the right humidity levels, you can employ several strategies. One effective method is to use a humidifier. Placing a humidifier near your ferns can create a microclimate that mimics their natural habitat. Alternatively, grouping your ferns together can help increase humidity through transpiration, where water evaporates from the leaves, creating a more humid environment.
If you prefer a more natural approach, consider the following tips:
- Pebble trays: Fill a shallow tray with pebbles and water, then place your fern pot on top. As the water evaporates, it will increase humidity around the plant.
- Misting: Lightly misting your ferns with water can provide temporary relief from dry air. However, it's important not to overdo it, as excessive moisture can lead to mold growth.
- Bathroom placement: If you have a bright bathroom, this can be an ideal spot for your ferns, as bathrooms often have higher humidity levels due to showers and baths.
It's also essential to monitor your ferns regularly. If you notice that the leaves are curling or the tips are turning brown, it may be a sign that the humidity is too low. Conversely, if you see mold or mildew on the soil surface, it could indicate that the humidity is too high or that the soil is retaining too much moisture.
In summary, maintaining the right humidity levels is vital for the health of your indoor ferns. By utilizing humidifiers, pebble trays, or simply grouping your plants together, you can create a thriving environment that mimics their natural habitat. Remember, a little attention to humidity can go a long way in keeping your ferns lush and vibrant!
Q: How can I tell if my fern needs more humidity?
A: Look for signs like browning leaf tips, wilting fronds, or leaf curling. These are indicators that your fern may be struggling with low humidity levels.
Q: Is misting my fern enough to maintain humidity?
A: Misting can provide temporary relief but is not a long-term solution. It's best used in conjunction with other methods like humidifiers or pebble trays.
Q: Can I keep my ferns in a dry room?
A: While it's possible, it's not ideal. If you must keep them in a dry area, make sure to use a humidifier or regularly check the humidity levels to ensure they are within the optimal range.
Soil and Fertilization
When it comes to nurturing your indoor ferns, the foundation of their growth lies in the soil and fertilization. Choosing the right soil mix is not just a matter of preference; it’s crucial for the health and vibrancy of your ferns. Ideally, you want a soil that retains moisture yet drains well. A good mix often includes components like peat moss, perlite, and pine bark. This combination ensures that your ferns have access to the moisture they love while preventing the roots from sitting in water, which can lead to rot. Aim for a pH level of around 5.0 to 7.0, as ferns prefer slightly acidic to neutral conditions.
Now, let’s talk about fertilization. Indoor ferns don’t require a lot of nutrients, but they do benefit from a balanced fertilizer during the growing season, typically from spring through early fall. Using a diluted liquid fertilizer every 4 to 6 weeks can give your ferns the boost they need. Look for a fertilizer that has a balanced NPK ratio, such as 20-20-20, which provides equal parts of nitrogen, phosphorus, and potassium. However, be cautious—too much fertilizer can harm your ferns. If you notice yellowing leaves or stunted growth, it might be a sign that you’re overdoing it.
Here’s a quick overview of the fertilization schedule:
| Season | Fertilization Frequency |
|---|---|
| Spring | Every 4 weeks |
| Summer | Every 4 weeks |
| Fall | Every 6 weeks |
| Winter | No fertilization |
Additionally, consider the environmental factors affecting your ferns. If your home is particularly dry, you might need to adjust your watering and fertilization practices. Ferns often thrive in humid, moist conditions, so using a humidity tray or misting can enhance their growing environment. Remember, the key is to observe your ferns closely. If they appear to be thriving, you’re likely on the right track. On the flip side, if they show signs of distress, it might be time to reassess your soil and fertilization choices.
In summary, the right soil mix and a careful fertilization schedule can make a world of difference in the health of your indoor ferns. By paying attention to these essential elements, you’ll create a nurturing environment where your ferns can flourish and bring a touch of lush greenery to your home.
Pest and Disease Management
Indoor ferns, while generally resilient, can fall victim to a variety of pests and diseases if not properly cared for. Understanding the common culprits and how to manage them is essential for keeping your ferns healthy and vibrant. One of the most common pests that can invade your ferns is the spider mite. These tiny pests thrive in dry conditions and can quickly cause damage by sucking the sap from the leaves. Another frequent visitor is the mealybug, which appears as small, white, cotton-like clusters on your plant. If you spot these unwelcome guests, don't panic! There are effective strategies to combat them.
To prevent pest infestations, maintaining a clean environment is crucial. Regularly wipe down the leaves of your ferns with a damp cloth to remove dust, which can attract pests. Additionally, consider introducing natural predators like ladybugs, which can help keep pest populations in check. If you notice a pest problem developing, act quickly. A simple solution is to spray your ferns with a mixture of water and a few drops of dish soap. This can suffocate pests without harming your plants. For more severe infestations, you may need to resort to insecticidal soap or neem oil, both of which are effective yet gentle on your ferns.
Diseases can also plague your indoor ferns, with root rot being one of the most serious threats. This condition often arises from overwatering, which creates a damp environment that encourages fungal growth. To avoid root rot, ensure your ferns are planted in well-draining soil and that their pots have adequate drainage holes. If you suspect your fern has root rot, carefully remove it from its pot and inspect the roots. Healthy roots should be firm and white, while rotting roots will appear brown and mushy. Trim away any affected roots and repot your fern in fresh, dry soil.
Another common issue is leaf spot, which can be caused by both fungal infections and bacterial pathogens. This disease manifests as dark spots on the leaves, often accompanied by yellowing. To manage leaf spot, remove any affected leaves and improve air circulation around your plant. Avoid overhead watering, as wet leaves can promote the spread of disease. If the problem persists, consider applying a fungicide specifically designed for ferns.
In summary, keeping your indoor ferns healthy requires vigilance against pests and diseases. By maintaining a clean environment, promptly addressing infestations, and ensuring proper watering practices, you can enjoy lush, thriving ferns in your home. Remember, prevention is always better than cure! Regular monitoring and care will go a long way in protecting your ferns from unwanted issues.
- How do I know if my fern has pests? Look for signs like webbing, sticky residue, or visible bugs on the leaves.
- What is the best way to treat root rot? Trim away affected roots and repot the fern in fresh, well-draining soil.
- Can I use household soap to combat pests? Yes, a mixture of water and a few drops of dish soap can effectively suffocate pests.
- How often should I check my ferns for pests or diseases? Regular checks, at least once a week, can help catch any issues early.

Repotting Your Fern
Repotting your fern is not just a chore; it's a vital part of keeping your leafy friend healthy and thriving. Just like we need a change of scenery sometimes, ferns also benefit from a new pot when they outgrow their current home. But how do you know when it’s time to repot? Well, if you notice roots peeking out of the drainage holes or if the soil dries out faster than usual, it’s a clear sign that your fern is ready for a bigger space. Think of it as giving your fern a cozy new apartment where it can stretch its fronds and flourish!
Timing is everything when it comes to repotting ferns. The best time to make this move is during the spring or early summer when the plant is actively growing. This ensures that your fern has the best chance to adapt to its new environment. Before you start the process, gather your materials: a pot that is one size larger than the current one, fresh potting soil, and a gentle touch. You wouldn’t want to shock your fern, would you?
When you’re ready to repot, gently remove the fern from its current pot. This is where you need to be extra careful. Fern roots can be quite delicate, and you don’t want to break them. If the roots are tightly bound, you might need to tease them apart gently. Once out, inspect the roots for any signs of rot or disease; if you see any dark, mushy roots, trim them away with clean scissors. This is akin to giving your fern a fresh start!
Next, it’s time to prepare the new pot. Make sure it has good drainage holes—this is crucial because ferns dislike sitting in water. Fill the bottom of the new pot with a layer of fresh potting soil, then place your fern in the center. You want it to sit at the same depth it was in the old pot. After positioning your fern, gently fill in around the sides with more soil, patting it down lightly to remove any air pockets. Remember, a snug fit is important, but don’t compact the soil too much; your fern needs to breathe!
After repotting, give your fern a good drink of water. This helps settle the soil around the roots and provides much-needed hydration after the move. It’s like offering a refreshing drink after a long journey! Place your newly potted fern in a spot with indirect sunlight for a few days to help it acclimate. Avoid placing it in direct sunlight immediately after repotting as this can stress the plant.
Regularly check your fern's moisture levels for the first few weeks after repotting. It might need a little extra attention as it adjusts to its new home. Keeping an eye on its leaves and soil moisture will help you catch any issues early. Remember, repotting isn’t just about giving your fern a new pot; it’s about giving it a new lease on life. With the right care, your fern will reward you with lush, vibrant foliage!
Q: How often should I repot my fern?
A: Generally, ferns should be repotted every 1-2 years, or when you notice they’ve outgrown their pot.
Q: What type of soil is best for ferns?
A: A well-draining potting mix, ideally one formulated for houseplants or ferns, is best. You can also add perlite or peat moss for added drainage.
Q: Can I repot my fern in the winter?
A: It’s best to avoid repotting during the winter months as ferns are in a dormant phase. Spring is the ideal time for repotting.
Q: What signs indicate that my fern needs repotting?
A: Signs include roots growing out of the drainage holes, soil drying out quickly, or stunted growth.
Seasonal Care Tips
Taking care of indoor ferns is not just a one-size-fits-all approach; it varies with the seasons. Each season brings its own challenges and opportunities for your ferns, and understanding these can make a world of difference in their health and vibrancy. So, let’s dive into how to adjust your care routine throughout the year to keep your ferns looking their best!
In the winter, many indoor ferns enter a period of dormancy. This means they require less water and fertilizer than during the growing seasons. However, don't let your guard down! Even though they’re not growing as actively, they still need adequate moisture and humidity. You might want to consider using a humidifier or placing a tray of water near your ferns to maintain humidity levels. Remember, dry air can lead to crispy fronds!
As spring rolls in, it's time to give your ferns some extra love. This is the season when they start to wake up from their slumber, and you'll notice new growth emerging. During this time, you should gradually increase their watering schedule and introduce a balanced fertilizer to support their growth. It’s also a great time to inspect your ferns for any signs of pests or diseases that may have taken hold during the winter months.
Summer is the peak growing season for most ferns. They thrive in warm temperatures and bright, indirect light. Make sure to check the soil more frequently, as it tends to dry out faster during this time. You can also increase humidity levels by misting them regularly or grouping them together, as they naturally create a more humid microclimate. Just be cautious of direct sunlight; while ferns love light, too much can scorch their delicate leaves!
As we transition into autumn, your ferns may begin to slow down again. It’s important to reduce watering slightly, as the air becomes less humid and temperatures drop. This is also a good time to repot your ferns if you notice they’ve outgrown their containers. Make sure to use fresh, well-draining soil to give them a healthy start for the next growing season.
To summarize the seasonal care tips for your indoor ferns, here’s a quick reference table:
| Season | Care Tips |
|---|---|
| Winter | Reduce watering, maintain humidity, check for pests |
| Spring | Increase watering, introduce fertilizer, inspect for issues |
| Summer | Check soil moisture frequently, mist regularly, avoid direct sunlight |
| Autumn | Reduce watering, consider repotting, prepare for dormancy |
By tailoring your care routine to the seasons, you’ll not only keep your ferns healthy but also enjoy their lush greenery throughout the year. Remember, the key to thriving indoor ferns is to observe their needs and adjust accordingly. Happy fern gardening!
Q: How often should I water my ferns in winter?
A: During winter, it's best to water your ferns less frequently, about once every two weeks, or when the top inch of soil feels dry.
Q: Can I place my fern in direct sunlight?
A: Most ferns prefer bright, indirect light. Direct sunlight can scorch their leaves, so it's best to keep them in a well-lit area without direct sun exposure.
Q: What type of fertilizer should I use for my ferns?
A: A balanced, water-soluble fertilizer diluted to half strength is ideal for ferns, especially during their growing season in spring and summer.
Q: How can I increase humidity for my ferns?
A: You can increase humidity by misting them regularly, using a humidifier, or placing a tray of water with pebbles under the pots to create a humid microclimate.
Frequently Asked Questions
- What type of fern is best for indoor care?
When it comes to choosing a fern for your home, some of the best options include the Boston fern, maidenhair fern, and the bird's nest fern. Each of these varieties has unique characteristics and care requirements, but they all thrive indoors with the right conditions. Remember, selecting the right fern is like picking a pet; you want one that fits your lifestyle and environment!
- How much light do indoor ferns need?
Indoor ferns generally prefer indirect light. Too much direct sunlight can scorch their delicate leaves, while too little can stunt their growth. Think of it like finding the sweet spot in a cozy café—just enough light to enjoy your coffee without being blinded by the sun!
- How often should I water my fern?
Watering frequency can vary based on the type of fern and your home's humidity levels. A good rule of thumb is to check the top inch of soil; if it's dry, it's time to water. Overwatering is a common mistake, so be cautious. It’s like finding a balance in life—too much or too little can lead to trouble!
- Do ferns need high humidity?
Absolutely! Ferns thrive in humid environments, so maintaining humidity levels is crucial. You can use a humidifier, or simply place a tray of water near your ferns to help increase moisture in the air. It's like creating a mini rainforest right in your living room!
- What type of soil is best for indoor ferns?
Ferns prefer a well-draining potting mix that retains some moisture without becoming soggy. A blend of peat moss, perlite, and compost works wonders. Think of it as the perfect recipe for a cake—every ingredient plays a vital role in achieving the best results!
- How can I prevent pests on my ferns?
Regularly inspecting your ferns for signs of pests is key. You can keep them healthy by maintaining proper humidity and air circulation. If pests do appear, natural remedies like neem oil can be effective. Think of it as giving your fern a little shield to keep the bad guys away!
- When should I repot my fern?
Repotting is typically needed every 1-2 years or when you notice roots growing out of the drainage holes. This is like giving your fern a new home—more space and fresh nutrients to help it thrive!
- What seasonal care tips should I follow for my ferns?
During spring and summer, ferns usually need more water and humidity, while in fall and winter, you might want to cut back a bit. Adjusting your care routine with the seasons is like changing your wardrobe—what works in the heat doesn’t always work in the cold!


