Repurpose Your Old Cap into a Cute Pin Cushion
Have you ever looked at an old cap and thought, "What on earth am I going to do with this?" Well, instead of tossing it aside or letting it gather dust, why not transform it into a charming pin cushion? This delightful DIY project not only breathes new life into your forgotten accessories but also adds a personal touch to your sewing space. Imagine having a cute, functional piece that showcases your creativity while keeping your pins organized! In this article, we'll explore the steps to turn that old cap into a whimsical pin cushion, offering you a fun way to engage in crafting while being eco-friendly. Are you ready to dive into this exciting project? Let's get started!
When it comes to crafting a pin cushion from an old cap, the first step is selecting the right one. Not every cap will lend itself well to this transformation, so consider a few key factors. Size is essential; you want a cap that offers enough surface area for your pins to sit comfortably. A larger cap can accommodate more pins, while a smaller one may be cute but less practical. Additionally, the material matters—soft, durable fabrics like cotton or denim work best, while stiff materials might not yield the plush feel you desire. Lastly, think about the style of the cap. A vibrant, patterned cap can add a splash of personality to your workspace, making it not just functional but also a conversation starter!
Before we jump into the crafting process, let’s gather all the necessary materials. Having everything on hand will make your project smoother and more enjoyable. Here’s a quick rundown of what you’ll need:
- An old cap (baseball cap, beanie, etc.)
- Stuffing material (cotton, polyester fiberfill, or natural fillers)
- Fabric for embellishments (optional)
- Sewing needle and thread
- Scissors
- Buttons, ribbons, or any decorative items you want to use
With these materials ready, you’re all set to embark on your crafting adventure!
The stuffing you choose can significantly impact the feel and functionality of your pin cushion. Here are a couple of options to consider:
Natural fillers like cotton or wool are excellent choices. Not only are they eco-friendly, but they also provide great support for your pins. Cotton is soft and breathable, making it a popular option for many crafters. Wool, on the other hand, is resilient and can help keep your pins sharp, preventing them from dulling over time.
If you prefer something more readily available, synthetic fillers like polyester fiberfill are a fantastic option. They are lightweight, easy to manipulate, and provide a plush feel. Plus, they are machine washable, which is a bonus if your pin cushion ever gets dirty!
Now that you have your cap and stuffing, it’s time to think about how to make your pin cushion uniquely yours. Adding decorative elements can elevate its aesthetic appeal. Consider using buttons, ribbons, or even embroidery to personalize your creation. For example, sewing a few colorful buttons onto the cap can add a playful touch, while a ribbon around the brim can give it a polished look. The possibilities are endless, and this is where your creativity can truly shine!
Ready to turn that cap into a pin cushion? Follow these simple steps to create your own:
First things first, you need to prepare the cap. Start by giving it a good wash to remove any dust or grime. Once it's clean, check for any structural issues—like loose threads or broken parts—and fix those up. This ensures that your pin cushion will be sturdy and long-lasting.
Next, it’s time to assemble your pin cushion. Begin by cutting a small hole in the top of the cap. This is where you'll add your stuffing. Carefully fill the cap with your chosen stuffing material, making sure to pack it in tightly for a plush feel. Once filled, sew the hole closed, ensuring it’s secure. You can then add your decorative touches, sewing on buttons or tying ribbons as you see fit. Voila! You now have a charming pin cushion that’s both functional and a reflection of your personal style.
To ensure your DIY project turns out beautifully, here are some helpful tips:
- Take your time with sewing; neat stitches make for a polished look.
- Experiment with different stuffing materials to find what feels best for you.
- Don’t be afraid to get creative with decorations—this is your chance to express yourself!
As with any crafting project, there are a few common pitfalls to watch out for. One mistake is overstuffing the cap, which can make it difficult to sew closed. Another is not securing the decorations properly, which can lead to them falling off. Remember, patience is key!
Finally, let’s talk about personalization. Your pin cushion is a reflection of you, so why not make it special? Consider using fabric paint to add designs or your initials to the cap. You could also choose a color scheme that matches your sewing room, or even create themed cushions for different seasons. The sky's the limit!
Q: Can I use any type of cap for this project?
A: While you can use various types of caps, soft and flexible materials work best for a comfortable pin cushion.
Q: What if I don’t have stuffing at home?
A: You can get creative! Old fabric scraps, rice, or even sawdust can work as alternatives.
Q: How do I clean my pin cushion if it gets dirty?
A: If you used synthetic stuffing, you can usually spot clean it or remove the stuffing and wash the cap separately.
Choosing the Right Cap
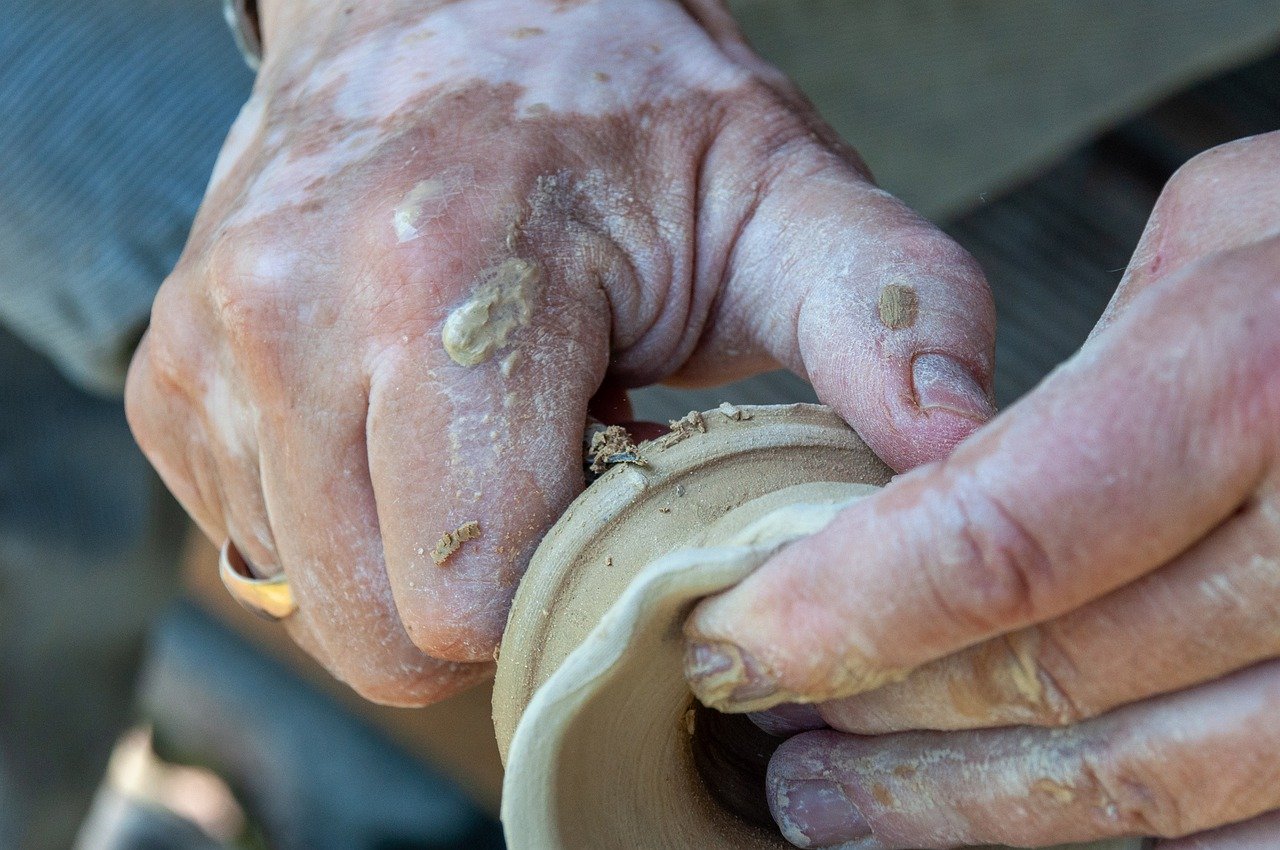
When embarking on the journey to transform an old cap into a charming pin cushion, the first step is to choose the right cap. It's not just about grabbing any old hat from your closet; the cap you select can significantly impact the final look and functionality of your pin cushion. So, what should you consider?
Start by thinking about the size of the cap. A larger cap might provide a more spacious area for pins, while a smaller cap could be more compact and adorable. However, don’t underestimate the power of a well-chosen small cap; it can add a touch of whimsy to your sewing space. Next, consider the material. Caps made from sturdy fabrics like denim or canvas will hold their shape better than those made from flimsy materials. Plus, a thicker fabric can give your pins a secure place to rest without the cushion collapsing under pressure.
Another important factor is the style of the cap. Do you want something classic, like a baseball cap, or perhaps something a bit more funky, like a beanie? The style will influence not only the aesthetics of your pin cushion but also how it fits into your crafting environment. If you’re going for a vintage look, a well-loved cap with a bit of character might be just what you need. On the other hand, a bright, modern cap can add a pop of color to your workspace.
Here’s a quick checklist to help you decide on the perfect cap:
- Size: Ensure it’s large enough to hold pins but not so big that it takes up too much space.
- Material: Choose sturdy fabrics like cotton, denim, or canvas for durability.
- Style: Pick a cap that reflects your personality and complements your crafting area.
Ultimately, the right cap will not only serve as a functional pin cushion but will also become a delightful addition to your sewing supplies. So, take your time in selecting the perfect cap, and let your creativity flow as you embark on this fun DIY project!
Materials Needed
When diving into the world of DIY, having the right materials on hand is essential for a successful project. In the case of transforming your old cap into a charming pin cushion, you’ll need to gather a few key supplies that will not only make your crafting easier but also enhance the final product's functionality and aesthetic appeal. First and foremost, you'll need your old cap. It can be any style you fancy—be it a baseball cap, a beanie, or even a snapback. The choice of cap will influence the overall look and feel of your pin cushion, so choose one that resonates with your personal style.
Next, consider the stuffing. This is where you can get a bit creative! You can opt for natural fillers like cotton or wool, which are eco-friendly and provide excellent support. Alternatively, synthetic fillers like polyester fiberfill are widely available and easy to work with. Each type of stuffing has its unique benefits, and the choice largely depends on the feel you want for your cushion. For instance, if you're looking for a plush, soft texture, polyester fiberfill might be your best bet.
In addition to the cap and stuffing, you’ll also need some basic sewing supplies. These include:
- Needle and thread: Choose a thread color that complements your cap for a seamless look.
- Scissors: A good pair of fabric scissors will make cutting your materials much easier.
- Pins: These will help hold everything in place while you sew.
Don’t forget about embellishments! Adding decorative elements can elevate your pin cushion from ordinary to extraordinary. Think about incorporating buttons, ribbons, or even embroidery to give it a personal touch. You might also want to consider fabric glue if you're not keen on sewing these elements on. This allows for a quick and easy way to add flair without the fuss of needle and thread.
Lastly, having a work surface that can handle a bit of mess is crucial. Whether it’s a crafting table or a large piece of cardboard, make sure you have enough space to spread out your materials and work comfortably. With these materials gathered, you're all set to embark on your delightful DIY journey of creating a pin cushion that’s not only functional but also a reflection of your creativity!
Stuffing Options
When it comes to creating the perfect pin cushion, the stuffing you choose plays a crucial role in determining its functionality and feel. Think of stuffing as the heart of your pin cushion; it gives it shape, support, and that delightful squishiness that makes using it a pleasure. There are a variety of stuffing materials available, each with its own unique benefits that can elevate your DIY project from good to exceptional.
Let’s dive into the two main categories of stuffing: natural fillers and synthetic fillers. Each option has its pros and cons, and your choice will depend on what you value most in your pin cushion. If you’re aiming for an eco-friendly project, natural fillers might be right up your alley. Consider options like:
- Cotton: Soft, breathable, and biodegradable, cotton is a classic choice that provides a gentle feel.
- Wool: Not only is wool eco-friendly, but it also has natural moisture-wicking properties, making it a great option for durability.
On the flip side, if you’re looking for something that’s easy to work with and widely available, synthetic fillers could be your best bet. For example:
- Polyester Fiberfill: This is a popular choice among crafters due to its affordability and plush feel. It’s also machine washable, which adds to its practicality.
- Sawdust: For those who want a more traditional approach, sawdust offers a firm feel and can be an excellent option for a pin cushion that firmly holds pins.
In summary, the stuffing you choose will not only affect the look of your pin cushion but also how it performs. Whether you go for the natural charm of cotton or wool or the convenience of polyester fiberfill, each option can help you create a delightful and functional accessory for your sewing needs. So, take a moment to consider what you value most in your pin cushion, and let that guide your stuffing choice.

Natural Fillers
When it comes to creating a delightful pin cushion, offer an eco-friendly and sustainable option that can significantly enhance the quality and functionality of your cushion. Materials like wool and cotton not only provide excellent support but also add a touch of warmth and softness, making your pin cushion a pleasure to use. Imagine the comforting feel of a wool-filled cushion as you pin your fabrics together; it’s like giving your sewing projects a cozy hug!
Wool, in particular, is a fantastic choice due to its natural resilience and ability to maintain shape over time. It’s breathable, which helps to prevent moisture build-up, making it ideal for storing pins and needles. Cotton, on the other hand, is widely available and comes in various textures and colors, allowing you to customize your pin cushion to match your personal style. You could even mix and match different types of cotton to create a unique tactile experience!
Here are some benefits of using natural fillers for your pin cushion:
- Eco-Friendly: Natural materials are biodegradable, making them a responsible choice for environmentally-conscious crafters.
- Durability: Wool and cotton are known for their longevity, ensuring your pin cushion will stand the test of time.
- Comfort: The softness of natural fillers makes handling pins and needles more pleasant.
Moreover, using natural fillers can also be a great conversation starter! Next time you’re sewing with friends, you can proudly share that your pin cushion is filled with locally sourced wool or organic cotton. It’s not just a functional item; it’s a statement piece that reflects your values and creativity. So, as you embark on this DIY journey, consider the benefits of natural fillers and how they can transform your old cap into a charming and functional pin cushion.
1. Can I use synthetic fillers instead of natural fillers?
Yes, synthetic fillers can be used, but they may not provide the same level of comfort and breathability as natural options. It’s all about personal preference!
2. How do I clean natural fillers if my pin cushion gets dirty?
Most natural fillers can be spot-cleaned with mild soap and water. However, it's best to check the specific care instructions for the type of filler you choose.
3. Where can I find natural fillers for my pin cushion?
Natural fillers can often be found at craft stores, fabric shops, or online retailers. Look for organic or sustainably sourced materials for the best quality.
Synthetic Fillers
When it comes to crafting your charming pin cushion, are a fantastic option that you might want to consider. These materials are not only widely available but also incredibly easy to work with, making them a favorite among DIY enthusiasts. One of the most popular synthetic fillers is polyester fiberfill. This fluffy material is known for its softness and resilience, providing a plush feel that can make your pin cushion both functional and comfortable to use.
Another advantage of synthetic fillers is their durability. Unlike natural fillers, which may compress over time, synthetic options tend to maintain their shape and loft, ensuring that your pin cushion remains effective for years to come. This means you can confidently stick your pins into it without worrying about the cushion losing its form. Plus, synthetic fillers are often hypoallergenic, making them a safer choice for those with sensitivities.
When selecting a synthetic filler, consider the following options:
- Polyester Fiberfill: Soft, resilient, and easy to find.
- Memory Foam: Offers excellent support and conforms to the shape of your pins.
- Microbeads: Provides a unique texture and is lightweight, making it easy to handle.
Each type of synthetic filler has its own unique benefits. For example, if you're looking for a pin cushion that offers a bit more structure, memory foam can be an excellent choice due to its ability to return to its original shape after pressure is applied. On the other hand, if you prefer something that has a bit of give, polyester fiberfill is your best bet. No matter which synthetic filler you choose, you can be sure that your pin cushion will be both attractive and functional.
In summary, synthetic fillers are an ideal choice for your DIY pin cushion project, providing durability, ease of use, and a plush feel. By selecting the right synthetic material, you can enhance the overall quality of your pin cushion, making it a delightful addition to your sewing space.
Q: Can I use synthetic fillers if I have allergies?
A: Yes! Many synthetic fillers, such as polyester fiberfill, are hypoallergenic and safe for those with sensitivities.
Q: How do I maintain my pin cushion filled with synthetic materials?
A: Simply spot clean any stains with a damp cloth. Avoid soaking the entire pin cushion, as it may affect the filler.
Q: Are synthetic fillers more expensive than natural fillers?
A: Generally, synthetic fillers are quite affordable and can often be found at lower prices than some natural alternatives.
Decorative Touches
When it comes to crafting a pin cushion from an old cap, the fun doesn’t stop at just functionality. Adding can transform your simple project into a stunning piece that showcases your personal style. Think of your pin cushion as a canvas; how can you make it reflect your personality? From vibrant colors to intricate designs, the possibilities are endless!
One of the easiest ways to add flair to your pin cushion is through embellishments. Consider using buttons, which can be sewn onto the cap to create a playful and textured look. You might opt for a mix of sizes and colors for a whimsical effect. Ribbons can also be a charming addition; tying a bow around the base of the cap or weaving it through the fabric can introduce an elegant touch. If you're feeling particularly crafty, why not try your hand at embroidery? A simple stitch pattern can elevate the overall aesthetic and make your pin cushion a true work of art.
Another creative idea is to incorporate fabric scraps into your design. These can be sewn or glued onto the cap to create unique patterns or even shapes like flowers or stars. Mixing different textures and fabrics can add depth and interest to your pin cushion, making it not just a tool for sewing but a lovely decorative item for your workspace. You could also use felt to create fun shapes and attach them for a pop of color and personality.
Don’t forget about the color scheme! Choosing a cohesive palette can make your pin cushion look professionally made. You might want to match the colors to your sewing room decor or go for a bold contrast that catches the eye. Remember, your pin cushion can be a reflection of your creative spirit—let it shine!
Lastly, consider adding a personal touch with initials or a small quote that inspires you. This small detail can make your pin cushion feel special and uniquely yours. No matter how you choose to decorate, the key is to have fun and let your creativity flow. After all, crafting is all about expressing yourself!
- Can I use any type of cap for this project? Yes! While baseball caps are popular, you can use any cap that has a sturdy structure.
- What stuffing should I use for my pin cushion? Both natural and synthetic fillers work well. Choose based on your preference for eco-friendliness or ease of use.
- How can I clean my cap before using it? Gently wash it with mild soap and water, then let it air dry completely before starting your project.
- Is it difficult to sew decorations onto the cap? Not at all! Even beginners can easily sew on buttons or ribbons with a needle and thread.
Step-by-Step Instructions
Transforming your old cap into a charming pin cushion is not only a fun DIY project but also a fantastic way to give new life to something that might otherwise go unused. To get started, gather your materials and follow these detailed steps. Don’t worry if you’re a beginner; we’ll walk you through each part of the process!
First, you'll want to prepare your cap. Start by giving it a good wash to remove any dirt or grime. This step is crucial because you want your pin cushion to be as clean as possible, especially since it will be used for pins and needles. Once it’s clean, dry it thoroughly. If your cap has any rigid parts, like a stiff brim, you might want to consider cutting or altering it to create a softer shape. After all, we want a cozy spot for those pins!
Next, it’s time to assemble your pin cushion. Begin by cutting a piece of fabric that matches or complements your cap. This fabric will serve as the top layer of your cushion. You can choose cotton for a classic look or something more vibrant to add personality. Lay the fabric over the cap’s opening, and pin it in place. Make sure it’s taut but not overly stretched, as you want a nice, rounded finish.
Now comes the fun part—stuffing! Gather your stuffing material, whether it’s natural like cotton or synthetic like polyester fiberfill. Start filling the cap through the opening you’ve created. Don’t be shy; pack it in tightly to ensure your pin cushion has a good structure. As you stuff, you might find it helpful to use a pencil or a chopstick to push the filling into the corners, ensuring every nook and cranny is filled.
Once your cap is stuffed to your liking, it’s time to sew it shut. Using a needle and thread that matches your fabric, carefully stitch the fabric closed. You can opt for a simple whip stitch or a more decorative stitch if you’re feeling adventurous. Remember to tie off your thread securely to prevent any stuffing from escaping. After sewing, you might want to add a few decorative touches to personalize your pin cushion. Think about buttons, ribbons, or even a small embroidered design. These little embellishments can really make your pin cushion stand out!
And there you have it! Your old cap has been transformed into a delightful pin cushion. Not only does it serve a practical purpose, but it also adds a touch of charm to your sewing space. Plus, every time you reach for a pin, you’ll be reminded of the creative journey you embarked on to repurpose that cap.
Here are some common questions you might have as you embark on this fun project:
- What type of cap works best for a pin cushion? Any cap with a soft crown and a comfortable fit can be repurposed into a pin cushion. Consider using caps that are made of durable materials.
- Can I use different types of stuffing? Absolutely! You can mix and match stuffing materials to achieve the desired firmness and texture.
- How can I make my pin cushion more decorative? Adding buttons, ribbons, or even fabric paint can enhance the aesthetic appeal of your pin cushion.
- Is it difficult to sew the cap closed? Not at all! Just take your time, and if you're unsure, practice on a scrap piece of fabric first.

Preparing the Cap
Before diving into the exciting world of crafting your pin cushion, it's essential to prepare the cap properly. This preparation phase ensures that your final product not only looks great but also functions effectively. First things first, give your cap a good wash! Whether it’s been sitting in the back of your closet or has been a trusty companion on your adventures, cleaning it will remove any dust or grime that may have accumulated over time. Use warm water and mild detergent, and let it air dry to maintain its shape.
Once your cap is clean and dry, take a moment to inspect it for any damages. Look for frayed edges, holes, or loose seams. A cap in good condition will not only enhance the aesthetic appeal of your pin cushion but also ensure its durability. If you find any imperfections, don’t worry! A little sewing can go a long way. Simply stitch up any holes or reinforce the seams to make your cap sturdy enough for its new role.
Next, consider the style of your cap. Is it a baseball cap, a beanie, or perhaps a stylish vintage piece? The style will influence the overall look of your pin cushion. If your cap has a brim, you might want to think about how it will sit on a flat surface. A cap with a brim can add character to your pin cushion, but it might also require some adjustments to ensure it doesn’t topple over when you start using it. For instance, you can trim the brim or even fold it under to create a more stable base.
Additionally, think about the interior of the cap. If it has a lining, you might want to remove it to create more space for stuffing. If the cap is too tight, it can lead to a lumpy cushion, which isn’t ideal for pin storage. To give you a better idea, here’s a quick checklist of what to consider when preparing your cap:
- Wash and dry the cap thoroughly.
- Inspect for damages and repair any issues.
- Consider the style of the cap and how it will affect stability.
- Check the interior for lining and adjust as necessary.
By taking these steps, you’ll ensure that your cap is ready for its transformation into a delightful pin cushion. Remember, preparation is key in any DIY project, and taking the time to get it right will pay off in the end. With your cap prepped and ready, you’re now one step closer to creating a charming and functional addition to your sewing space!
Assembling the Pin Cushion
Now that you've prepared your cap, it’s time to dive into the fun part: assembling your pin cushion! This step is where all your hard work begins to take shape, transforming that old cap into a delightful and functional accessory for your sewing space. First, make sure you have all your materials ready—this includes your cap, stuffing, needle, thread, and any decorative items you plan to use. It's like setting the stage before the big performance, ensuring everything is in place for a successful outcome.
Start by turning the cap inside out. This allows you to work with the inner fabric, which is often cleaner and more suitable for sewing. If your cap has a stiff brim, you might want to remove it carefully. This will give your pin cushion a softer, more rounded appearance. Next, take your stuffing material and begin to fill the cap. You want to achieve a nice balance here; too little stuffing will make your pin cushion floppy, while too much can cause it to bulge awkwardly. Aim for a firm yet plush feel, similar to a well-cooked soufflé—light and airy but with structure.
Once you’ve reached your desired stuffing level, it’s time to sew the opening shut. Thread your needle and tie a knot at the end of your thread. Start at one end of the opening, making small, even stitches along the edge. This process is akin to closing a book; you want to ensure it’s neat and tidy. As you sew, gently pull the thread to gather the fabric, which will help create a smooth finish. When you reach the other end, secure the thread with a few tight knots to prevent any stuffing from escaping. If you're feeling adventurous, you can even add a decorative stitch along the edge for an extra flair!
After securing the opening, it’s time to add those decorative touches that will make your pin cushion uniquely yours. Consider sewing on buttons, attaching ribbons, or even embroidering a small design on the cap. These embellishments not only enhance the visual appeal but also add a personal touch that reflects your style. Think of it as accessorizing an outfit; the right details can elevate the entire look!
Finally, once everything is assembled and secured, place your new pin cushion in a prominent spot on your sewing table. It’s not just a tool; it’s a piece of art that showcases your creativity and resourcefulness. Plus, every time you reach for a pin, you’ll be reminded of the fun you had transforming that old cap into something beautiful and functional. So grab your sewing supplies, let your imagination run wild, and enjoy the process of assembling your charming pin cushion!
Q: Can I use any type of cap for this project?
A: Yes, you can use various types of caps, including baseball caps, beanies, or any other fabric cap. Just ensure it has enough space for stuffing and a suitable shape for a pin cushion.
Q: What kind of stuffing is best for a pin cushion?
A: Both natural and synthetic stuffing options work well. Natural fillers like wool or cotton provide excellent support, while synthetic options like polyester fiberfill are easy to work with and widely available.
Q: How can I personalize my pin cushion?
A: You can personalize your pin cushion by choosing fabrics in your favorite colors, adding unique embellishments like buttons or ribbons, or even embroidering a design that reflects your personality.
Q: Is this a beginner-friendly project?
A: Absolutely! This DIY project is perfect for beginners. The steps are straightforward, and you can customize it as you become more comfortable with sewing.

Tips for Success
When embarking on your journey to transform an old cap into a charming pin cushion, it's essential to keep a few in mind. Crafting can be a delightful experience, but it can also come with its challenges. By being aware of common pitfalls and best practices, you can ensure that your DIY project not only meets your expectations but exceeds them!
First and foremost, always start with a clean cap. It might seem like a no-brainer, but a quick wash can make a significant difference in the final look of your pin cushion. Dust, dirt, or old sweat stains can detract from the charm of your creation. Once your cap is clean, inspect it for any damages. If there are any tears or worn-out areas, consider reinforcing these spots with fabric patches or stitching before you begin the transformation.
Another crucial tip is to choose your stuffing wisely. The filling you select will affect the feel and durability of your pin cushion. Natural fillers like cotton or wool provide a soft touch and are eco-friendly, while synthetic options like polyester fiberfill offer resilience and ease of use. Experiment with different stuffing materials to find the perfect balance that suits your style and needs.
As you assemble your pin cushion, take your time with the sewing process. It might be tempting to rush through, but remember: quality over speed. A sturdy and well-stitched cushion will stand the test of time and serve you well. Don’t be afraid to double-stitch areas that will endure more wear, especially if you plan to use the cushion frequently.
Finally, don't shy away from personalizing your pin cushion! Adding decorative touches can turn a simple project into a beautiful statement piece. Consider incorporating your favorite colors, patterns, or even a meaningful quote. You can use buttons, ribbons, or even embroidery to give your pin cushion a unique flair. Remember, this is your creation, so let your personality shine through!
While crafting is all about creativity, avoiding common mistakes can save you time and frustration. One frequent error is overstuffing the cushion. It might seem like a good idea to fill it to the brim, but this can lead to an awkward shape and make it difficult to use. Instead, aim for a firm yet flexible cushion that holds its shape without being overly stuffed.
Another mistake is neglecting to secure your embellishments properly. If you add decorative elements, ensure they are stitched or glued down securely. The last thing you want is for a button to pop off when you're reaching for a pin! Taking the time to secure your embellishments will enhance the longevity of your project.
Personalizing your pin cushion can be one of the most enjoyable aspects of this DIY project. Think about the colors that inspire you or the patterns that make you smile. You might even consider using fabric scraps from old clothes or projects that hold sentimental value. This way, each time you use your pin cushion, you’ll be reminded of cherished memories.
Additionally, consider the shape of your cushion. While a traditional round or square shape is lovely, experimenting with different forms can make your project stand out. Think about creating a heart-shaped cushion for a romantic touch or a whimsical animal shape for a fun twist. The sky's the limit when it comes to creativity!
Q: Can I use any type of cap for this project?
A: While most caps can be repurposed, it's best to choose one that has a sturdy structure and is in good condition. Caps made from thicker materials will hold their shape better as a pin cushion.
Q: What if I don’t have stuffing materials at home?
A: No worries! You can use alternatives like old fabric scraps, rice, or even sawdust. Just ensure that whatever you use is clean and safe for your pins.
Q: How can I make my pin cushion more functional?
A: Consider adding a small pocket to your pin cushion for holding extra pins or needles. This added feature can enhance its practicality while still looking cute!
Q: Is this project suitable for beginners?
A: Absolutely! This DIY project is perfect for beginners. The steps are straightforward, and it’s a great way to practice basic sewing skills.

Common Mistakes to Avoid
When embarking on your journey to transform an old cap into a charming pin cushion, it's essential to steer clear of common pitfalls that can hinder your crafting experience. One of the most frequent mistakes is choosing the wrong cap. Not all caps are created equal; some may be too small or made from materials that don’t hold up well when stuffed. For instance, a cap that’s too flimsy might collapse under the weight of the pins, making your pin cushion less functional and aesthetically pleasing.
Another common error is neglecting the cleanliness of the cap. Before you start the crafting process, ensure that your cap is clean and free from any dirt or stains. A quick wash can do wonders, and it’s important to let it dry completely. If you skip this step, you could end up with a pin cushion that looks shabby and uninviting, which is the opposite of what you want!
Additionally, many crafters underestimate the importance of proper stuffing. Using too little stuffing can lead to a pin cushion that’s too soft and floppy, while overstuffing can cause it to bulge unattractively. Aim for a balance that provides both support and a pleasing shape. You might find it helpful to use a combination of stuffing materials to achieve the desired firmness and texture.
Moreover, forgetting to sew securely is a mistake that can be quite frustrating. If your stitches are loose, the stuffing can escape, and your beautiful creation might unravel. Take your time with this step, and don't hesitate to double-check your seams. A well-constructed pin cushion not only looks good but also lasts longer.
Lastly, many DIY enthusiasts overlook the importance of personalization. While it’s tempting to stick with a basic design, adding unique touches can make your pin cushion truly special. Consider embellishments like buttons, embroidery, or even fabric paint to give your project a personal flair. Remember, your pin cushion should reflect your personality and style!
If you have any lingering questions about turning your old cap into a pin cushion, you're not alone! Here are some frequently asked questions to help guide you:
- Can I use any type of cap? While most caps can be repurposed, it's best to choose one that is sturdy and has a shape that you find appealing.
- What kind of stuffing is best? Natural fillers like cotton or wool offer great support, while synthetic options like polyester fiberfill are easy to work with and widely available.
- How can I clean my cap before using it? A gentle wash with soap and water is usually sufficient. Make sure to dry it completely before starting your project.
- Is it necessary to sew the cap closed? Yes, sewing the cap securely is crucial to prevent the stuffing from escaping and to ensure the durability of your pin cushion.
- Can I add my own designs or patterns? Absolutely! Personalizing your pin cushion with designs, colors, or embellishments makes it uniquely yours.

Personalization Ideas
When it comes to crafting a pin cushion from an old cap, the sky's the limit in terms of personalization! This is your chance to let your creativity shine and make something that truly reflects your style. Think about the colors and patterns that resonate with you. Perhaps you have a favorite fabric lying around that could be used to embellish your cap. A splash of vibrant fabric can turn a simple pin cushion into a stunning centerpiece on your sewing table.
Moreover, consider adding some unique embellishments. Buttons, for instance, can add a charming touch. You could sew a few colorful buttons onto the cap, creating a playful design that draws the eye. Ribbons also work wonders; a simple bow can add a touch of elegance. If you're feeling adventurous, why not try your hand at some embroidery? A few stitches can transform your pin cushion into a work of art. You could embroider your initials or a small design that holds special meaning to you.
Another fun idea is to create a theme for your pin cushion. For example, if you love nature, you could use floral patterns or colors that remind you of the outdoors. Alternatively, if you're a fan of a particular movie or book, consider incorporating elements that reflect that passion. This could be as simple as using fabric in the colors of your favorite character or even adding small charms related to the theme.
Lastly, don’t shy away from incorporating functional elements into your design. You could sew small pockets onto the side of your pin cushion to hold needles or scissors. This not only adds a personal touch but also enhances the usability of your creation. Remember, the goal is to make something that is not only cute but also functional!
Q: Can I use any type of cap for this project?
A: While you can use various types of caps, it's best to choose one that has a sturdy base and enough surface area to work with. Baseball caps or snapbacks are great options!
Q: What if I don’t have any embellishments on hand?
A: No worries! You can always find inspiration from your surroundings. Look for old jewelry, scraps of fabric, or even natural elements like dried flowers to personalize your pin cushion.
Q: How do I ensure my pin cushion is durable?
A: Make sure to securely sew all elements together and use high-quality stuffing. Additionally, reinforcing seams can help extend the life of your pin cushion.
Frequently Asked Questions
- Can I use any type of cap for this project?
Absolutely! While most caps can be repurposed into pin cushions, it's best to choose one that is sturdy and has a good structure. Consider the size and material as well; a baseball cap or a fitted cap usually works well.
- What stuffing materials are best for a pin cushion?
There are several great options for stuffing your pin cushion. Natural fillers like cotton or wool are eco-friendly and provide excellent support. On the other hand, synthetic fillers such as polyester fiberfill are easy to work with and widely available, giving you a plush finish.
- How can I personalize my pin cushion?
Personalizing your pin cushion can be so much fun! You can add decorative touches like buttons, ribbons, or even embroidery. Think about colors and designs that reflect your personality or match your sewing room decor.
- What tools do I need to assemble the pin cushion?
For assembling your pin cushion, you'll need basic sewing tools such as a needle, thread, scissors, and possibly some pins to hold everything in place. If you want to add embellishments, you might need glue or additional sewing supplies.
- Are there any common mistakes to avoid?
Yes, one common mistake is overstuffing the pin cushion, which can make it look lumpy. Additionally, be careful with your sewing; loose stitches can lead to the stuffing escaping. Take your time, and don’t rush the process!
- Can I wash my pin cushion after making it?
It’s generally not recommended to wash the pin cushion, especially if it has embellishments. If it gets dirty, try spot cleaning it instead. Make sure to check the materials used for stuffing and embellishments to avoid any damage.
- Is this project suitable for beginners?
Definitely! This DIY project is beginner-friendly. With some basic sewing skills and patience, anyone can create a charming pin cushion from an old cap. Just follow the step-by-step instructions carefully!


