Patterns to Attempt After Your First Quilt
Are you ready to take your quilting skills to the next level? After completing your first quilt, you might be feeling a mix of excitement and trepidation about tackling more complex patterns. Fear not! This article explores a variety of quilting patterns that are perfect for beginners eager to advance their skills. Each pattern offers unique challenges and opportunities for creativity, ensuring that your quilting journey is not only educational but also incredibly fulfilling. So grab your fabric, thread, and a cup of coffee, and let's dive into the world of quilting patterns that will inspire and enhance your projects!
The simple squares pattern is an excellent next step for beginners. It introduces the concept of piecing together blocks while allowing for creativity in fabric selection and arrangement. Imagine a quilt made entirely of colorful squares, each telling a different story through its fabric choice. This pattern is not just about sewing; it's about creating a visual narrative that reflects your personality. By experimenting with different colors and arrangements, you can create a quilt that is uniquely yours!
Half-square triangles are not just versatile; they are a gateway to endless design possibilities. This pattern helps quilters learn precise cutting and sewing techniques while creating visually appealing geometric designs. Think of half-square triangles as the building blocks of quilting. Once you master this technique, you'll find yourself able to combine them in various ways to create stunning patterns. Plus, they make for great practice in accuracy—essential for any quilter looking to step up their game!
The rail fence quilt pattern is perfect for beginners looking to practice their sewing skills. This design uses strips of fabric, allowing for quick assembly and a striking visual effect. Picture a beautiful quilt that resembles a rustic fence, with alternating colors that draw the eye. The simplicity of this pattern makes it an ideal choice for those who want to see quick results without sacrificing style. You can even play around with the width of the strips to create different looks!
Flying geese blocks are a classic quilting design that introduces more complex shapes. Learning this technique will enhance your skills in measuring and cutting accurately for better results. Just like a flock of birds in formation, these blocks can create stunning visual effects when arranged correctly. The challenge of mastering flying geese will not only boost your confidence but also prepare you for even more intricate designs in the future!
The log cabin quilt pattern is a timeless choice that offers endless design possibilities. It teaches quilters about color placement and the importance of fabric choices in quilt aesthetics. Imagine a cozy log cabin nestled in the woods; that's the kind of warmth and charm this pattern can evoke. By experimenting with light and dark fabrics, you can create a striking contrast that adds depth and dimension to your quilt. The log cabin pattern is a fantastic way to express your creativity while honing your skills!
The nine-patch quilt is a fundamental pattern that helps beginners master the basics of piecing. This design encourages creativity through various layout options while building confidence in sewing. Think of it as a puzzle where each piece fits together to form a larger picture. The nine-patch can be adapted in countless ways, making it a fantastic foundation for your quilting journey. Plus, it’s a great way to use up fabric scraps!
The Dresden plate pattern adds elegance and complexity to your quilting repertoire. It involves curved piecing, which challenges beginners to expand their skills while creating stunning visual effects. Picture a beautiful flower blooming in your quilt, with each petal crafted from a different fabric. This pattern not only looks impressive but also teaches valuable skills that will serve you well as you tackle more advanced projects in the future.
The churn dash pattern is a delightful design that combines simplicity with charm. This quilt block teaches beginners about different fabric placements and introduces new techniques for block assembly. Imagine a charming country kitchen where everything is warm and inviting; that’s the feeling a churn dash quilt can evoke. It's a wonderful way to learn about symmetry and balance in quilting while creating a cozy masterpiece.
Star patterns are a fantastic way to explore more intricate designs. They encourage quilters to practice precision and creativity, resulting in beautiful quilts that showcase unique star formations. Think of each star as a beacon of your hard work and dedication. With numerous variations available, star patterns can range from simple to complex, allowing you to choose a design that matches your skill level while still pushing you to grow. The sky's the limit!
Q: What is the best pattern for a beginner?
A: The simple squares pattern is often recommended as it is easy to piece together and allows for creativity in fabric choices.
Q: How can I improve my quilting skills?
A: Practice is key! Try different patterns, take your time with measuring and cutting, and don't be afraid to experiment with colors and layouts.
Q: What tools do I need to start quilting?
A: Essential tools include a rotary cutter, cutting mat, quilting ruler, sewing machine, and quality fabric. Don't forget a good iron!

1. Simple Squares
This article explores various quilting patterns suitable for beginners looking to advance their skills. Discover new techniques and designs that will enhance your quilting journey and inspire creativity in your projects.
The simple squares pattern is an excellent next step for beginners. Imagine stepping onto a path that leads you deeper into the world of quilting, where each square you sew is a building block of creativity. This pattern introduces the concept of piecing together blocks, allowing you to play with different fabric selections and arrangements. You can choose vibrant colors, soft pastels, or even a mix of both to create a quilt that reflects your personality and style.
One of the greatest advantages of simple squares is their versatility. You can use this pattern to create a variety of designs, from a basic checkerboard to more intricate layouts. The beauty of this pattern lies in its simplicity, yet it opens up a world of possibilities. As you piece together your squares, you’ll find that each choice you make—whether it’s the fabric, color, or arrangement—adds a unique touch to your quilt.
To give you an idea of how to get started, here’s a simple breakdown of the process:
| Step | Description |
|---|---|
| 1 | Choose your fabric. Aim for a mix of colors and patterns that complement each other. |
| 2 | Cut your fabric into equal squares. A common size is 5 inches, but feel free to experiment! |
| 3 | Arrange your squares in a layout you like. Don’t be afraid to move them around until it feels right. |
| 4 | Sew the squares together, row by row. Press the seams as you go for a neat finish. |
| 5 | Once all rows are sewn, join them together to complete your quilt top! |
As you embark on this journey of sewing simple squares, remember that quilting is not just about the final product; it’s about the experience and the joy that comes with creating something from scratch. Each square you sew is a testament to your growing skills and creativity. Plus, don’t forget to have fun with it! You might even find yourself experimenting with different sizes or adding embellishments to make your quilt truly one-of-a-kind.
In conclusion, the simple squares pattern is more than just a beginner's project; it’s an opportunity to explore your creativity and build a solid foundation for future quilting endeavors. So gather your fabric, grab your sewing machine, and let the adventure begin!
- What fabric should I use for my first quilt? Start with cotton fabric, as it is easy to work with and widely available.
- How long will it take to complete a simple squares quilt? Depending on your sewing speed and the size of the quilt, it can take anywhere from a few hours to a couple of days.
- Can I use different sizes of squares? Absolutely! Mixing different sizes can add a unique touch to your quilt.
2. Half-Square Triangles
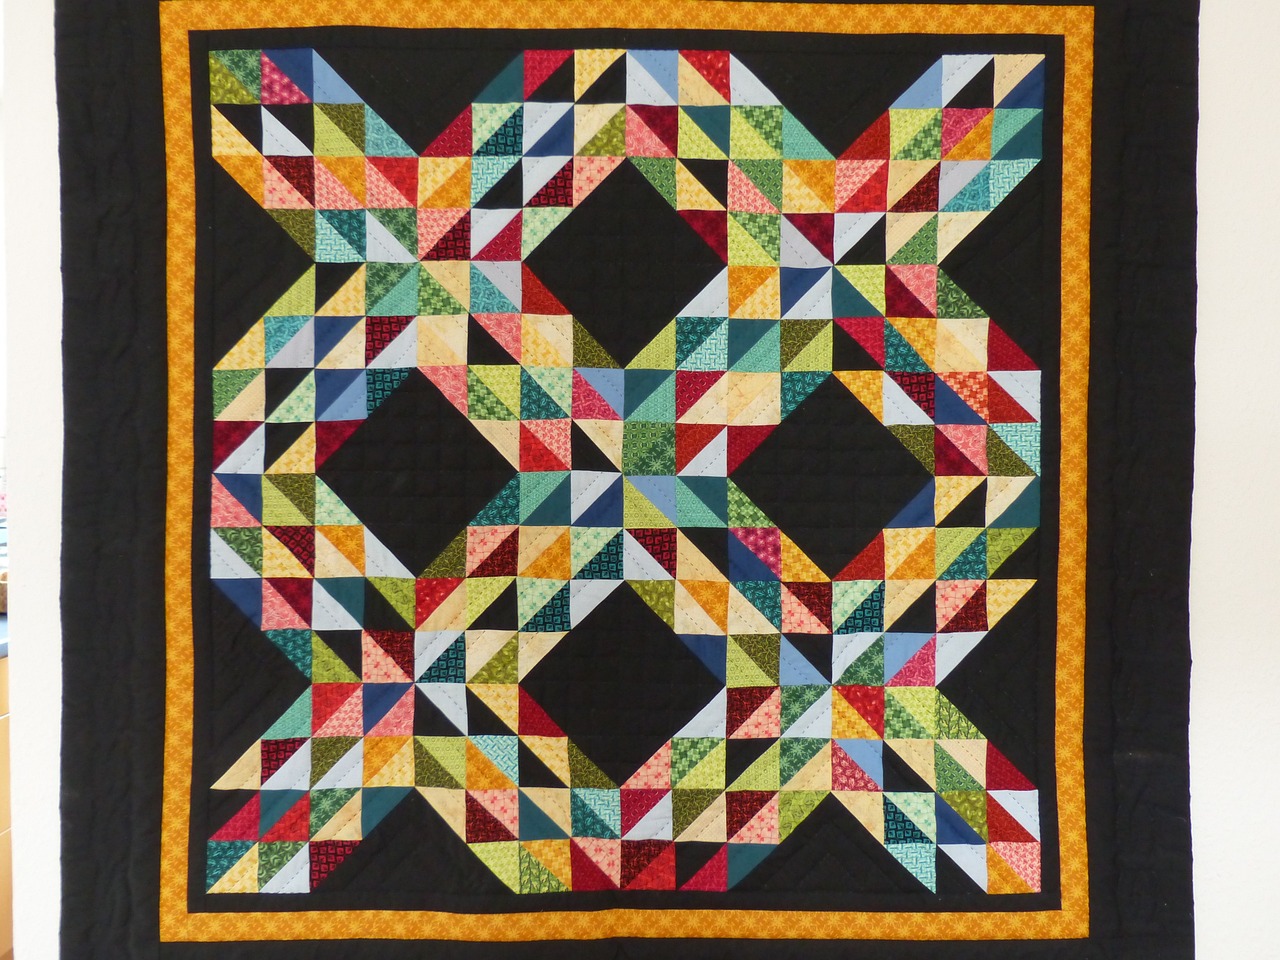
The Half-Square Triangle (HST) pattern is a fantastic stepping stone for quilters eager to expand their skills beyond the basics. Imagine taking two simple squares, slicing them diagonally, and then sewing them back together to create a stunning geometric design. This technique not only enhances your quilting repertoire but also teaches you essential skills such as precise cutting and accurate sewing. The beauty of HSTs lies in their versatility; they can be arranged in countless ways, allowing for a plethora of creative possibilities.
To get started, you'll need to gather your materials. A rotary cutter, cutting mat, and ruler will be your best friends in achieving those clean, sharp edges. When selecting fabrics, consider contrasting colors or patterns that will pop against each other. The thrill of seeing those triangles come together is akin to piecing together a puzzle—each piece is vital to the overall picture.
Here’s a simple step-by-step process to create your first Half-Square Triangles:
- Choose Your Fabric: Select two squares of fabric, ideally 7 inches each, to create a finished size of 6.5 inches after sewing.
- Draw a Diagonal Line: On the wrong side of one square, draw a diagonal line from corner to corner.
- Layer the Squares: Place the marked square on top of the other square, right sides together.
- Sew Along the Edges: Stitch 1/4 inch from the drawn line on both sides.
- Cut Along the Line: Slice the square in half along the drawn line to reveal two triangles.
- Press Open: Press the seams open to reveal your stunning Half-Square Triangle!
As you become more comfortable with this technique, don’t hesitate to experiment with different sizes and fabric combinations. You might find yourself creating intricate patterns that dazzle anyone who sees them. Whether you’re making a quilt for yourself, a gift, or a community project, HSTs can transform your vision into a tangible work of art.
In addition, the Half-Square Triangle pattern serves as a gateway to more advanced designs. Once you’ve mastered the basics, you can explore how to incorporate HSTs into larger quilt patterns, such as pinwheels or stars. The possibilities are endless, and with each project, you’ll find your skills and confidence growing.
To illustrate the impact of Half-Square Triangles, here’s a simple table showcasing some popular quilt patterns that utilize HSTs:
| Pattern Name | Description |
|---|---|
| Pinwheel | A vibrant design that creates a spinning effect using HSTs. |
| Stars | Incorporates HSTs to form stunning star shapes, perfect for a night sky theme. |
| Chevron | Creates a zigzag pattern that adds movement and energy to any quilt. |
In conclusion, mastering Half-Square Triangles is not just about learning a new technique; it’s about unlocking a world of creativity and design possibilities. So grab your fabric, cut those squares, and let your imagination soar as you create beautiful quilts that tell your unique story!
Q: What is the best fabric to use for Half-Square Triangles?
A: Cotton fabric is highly recommended due to its durability and ease of handling. However, feel free to experiment with other fabrics as well!
Q: Can I use pre-cut fabric for HSTs?
A: Absolutely! Pre-cut squares can save time and make the process easier for beginners.
Q: How do I ensure my triangles are the correct size?
A: Always measure and cut accurately. Using a rotary cutter and mat will help you achieve precise measurements.

3. Rail Fence Quilt
The Rail Fence Quilt pattern is an absolute gem for quilters who are ready to take their skills to the next level. Imagine a beautiful, flowing design that resembles a fence made of colorful fabric strips. This pattern not only offers a visually striking effect but also provides a fantastic opportunity to practice sewing skills. As a beginner, you might be wondering, "How can something so simple look so stunning?" Well, that's the magic of the Rail Fence pattern!
One of the best aspects of the Rail Fence Quilt is its straightforward construction. You start by cutting fabric into strips, which can be any width you prefer, typically ranging from 2.5 to 6 inches. Then, you sew these strips together in a staggered manner to create the iconic zigzag effect. This process not only enhances your sewing speed but also allows for a lot of creative freedom in terms of fabric choice and arrangement. You can mix and match fabrics from your stash, creating a quilt that reflects your unique style.
To help you visualize, here’s a simple breakdown of how to approach the Rail Fence Quilt:
- Choose Your Fabric: Select a variety of fabrics that complement each other. Think about color schemes and patterns that resonate with you.
- Cut Your Strips: Decide the width of your strips. The beauty of this pattern is that you can experiment with different widths for added interest.
- Sewing Technique: Start sewing your strips together. You can create a traditional Rail Fence with three strips per block or mix it up with more.
- Assemble the Quilt Top: Once you have your blocks, arrange them in a way that pleases your eye before sewing them into a quilt top.
This pattern is not just about sewing; it’s about storytelling through fabric. Each strip can represent a memory, a season, or even a feeling. As you stitch together these pieces, you’re creating a narrative that’s uniquely yours. Plus, the quick assembly means you can finish this quilt in no time, making it a great gift option or a cozy addition to your home.
As you dive into the world of Rail Fence Quilts, remember that the journey is just as important as the destination. Don't stress about perfection; instead, embrace the process. Each quilt you create will teach you something new, whether it’s about fabric choices, sewing techniques, or even your own creative preferences. So grab your fabric, fire up your sewing machine, and let the Rail Fence pattern guide you through a delightful quilting experience!
Q: What skill level is required for the Rail Fence Quilt?
A: The Rail Fence Quilt is perfect for beginners as it focuses on basic sewing techniques and allows for creativity.
Q: Can I use scraps for this quilt?
A: Absolutely! The Rail Fence pattern is a fantastic way to use up fabric scraps, making it both economical and eco-friendly.
Q: How do I choose colors for my Rail Fence Quilt?
A: Consider using a color palette that speaks to you. You can opt for complementary colors for a cohesive look or contrasting colors for a vibrant effect.

4. Flying Geese
The Flying Geese pattern is a quintessential design in the quilting world that not only captivates the eye but also serves as an excellent way for beginners to enhance their sewing skills. Imagine a flock of geese soaring across the sky; this pattern mimics that elegant formation, creating a stunning visual impact in any quilt. The beauty of Flying Geese lies in its versatility and the myriad of designs you can create with it. You can incorporate it into larger quilts, use it as a border, or even create a quilt entirely made up of these charming blocks.
To create a Flying Geese block, you will need to master the art of measuring and cutting accurately. This pattern typically consists of a rectangle flanked by two triangles, which form the 'geese.' While it may seem simple at first glance, achieving precision is key. Think of it like building a house: if the foundation is shaky, the entire structure is at risk. Therefore, investing time in learning the correct measurements and cutting techniques will pay off significantly in the quality of your finished quilt.
One of the most exciting aspects of the Flying Geese pattern is the opportunity to play with colors and fabric choices. You can choose to go for a monochromatic look, where all your fabrics are in the same color family, or you can mix and match vibrant colors for a more eclectic feel. The arrangement of colors can drastically change the overall effect of the quilt. For instance, placing darker fabrics at the bottom and lighter ones at the top can create a beautiful ombre effect that draws the eye upward, just like the geese flying toward the sun.
As you embark on your Flying Geese journey, here are some tips to keep in mind:
- Practice Your Cutting: Use a rotary cutter and mat for precise cuts.
- Stay Consistent: Ensure all your triangles are the same size to maintain uniformity.
- Experiment: Don't hesitate to try different color combinations and layouts.
In conclusion, the Flying Geese pattern is not just a stepping stone in your quilting journey; it's a gateway to exploring more intricate designs and techniques. As you stitch these blocks together, you’ll not only improve your skills but also gain confidence in your quilting abilities. So, grab your fabric, put on your favorite music, and let your creativity take flight!
Q: What materials do I need to start a Flying Geese quilt?
A: You'll need fabric, a rotary cutter, a cutting mat, a ruler, and a sewing machine. Don't forget the thread!
Q: How do I ensure my Flying Geese blocks are the same size?
A: Consistency in measuring and cutting is crucial. Always double-check your measurements before cutting your fabric.
Q: Can I use different fabric types for Flying Geese?
A: Absolutely! Mixing different fabric types can add texture and interest to your quilt. Just make sure they are compatible in terms of weight and washability.
5. Log Cabin Quilt
The Log Cabin Quilt pattern is not just a design; it's a beautiful journey through the world of quilting that has stood the test of time. Imagine a cozy cabin nestled in the woods, its logs stacked perfectly to create a warm and inviting space. That’s the essence of the Log Cabin quilt—each strip of fabric representing a log, coming together to form a stunning piece of art. This pattern is particularly appealing for beginners because it allows for a lot of creativity while also teaching essential quilting skills.
One of the most exciting aspects of the Log Cabin quilt is the variety of layouts you can create. The traditional design features a central square, often in a darker shade, surrounded by light-colored strips. This creates a striking contrast that draws the eye. However, you can experiment with different color placements to achieve various effects. For instance, some quilters prefer the “Light in the Center” layout, which flips the traditional design on its head, giving the quilt a fresh and modern look. The choice of fabrics can also drastically change the overall aesthetic, making it a perfect project for those who love to explore different fabrics and colors.
To get started on your Log Cabin quilt, you’ll need to gather your materials. Here’s a quick list of what you’ll need:
- Fabric in various colors (at least two contrasting colors)
- Rotary cutter and mat
- Quilting ruler
- Sewing machine
- Thread that matches your fabric
As you begin piecing your quilt, remember that the key to a successful Log Cabin quilt is precision. Accurate cutting and consistent seam allowances will ensure that your blocks fit together beautifully. It's a great exercise in measuring and cutting, which are essential skills for any quilter. Plus, the repetitive nature of sewing these strips can be quite meditative, allowing you to get lost in the rhythm of your sewing machine.
Once you have your blocks completed, you can arrange them in various layouts to see what speaks to you. Some quilters prefer a more structured approach, while others enjoy a more randomized look. The beauty of the Log Cabin quilt lies in its versatility—no two quilts need to look the same!
After piecing the top, the next step is to layer your quilt. This involves placing the quilt top, batting, and backing fabric together. Make sure to smooth out any wrinkles to avoid bumps in your finished quilt. Then, you can either quilt it by hand or use a sewing machine, depending on your comfort level. Whichever method you choose, this is where your quilt truly comes to life.
Finally, once your quilt is quilted and the edges are bound, you’ll have a gorgeous Log Cabin quilt that not only showcases your growing skills but also tells a story with every stitch. It’s a fantastic way to express your personality through fabric and design. So grab your fabrics, unleash your creativity, and let the Log Cabin quilt be your next big quilting adventure!
Q: What fabrics work best for a Log Cabin quilt?
A: You can use a variety of fabrics, but cotton is the most popular due to its durability and ease of handling. Consider using a mix of solids and prints for added interest!
Q: How do I choose my color scheme?
A: Think about the mood you want to convey. For a classic look, opt for dark and light contrasts. For something more modern, try using a monochromatic scheme or bright, bold colors.
Q: Can I make a Log Cabin quilt by hand?
A: Absolutely! While many quilters use a sewing machine, hand-sewing can add a personal touch and is a great way to connect with the quilt-making process.
6. Nine-Patch Quilt
The Nine-Patch Quilt is more than just a simple design; it’s a stepping stone into the vast world of quilting that every beginner should embrace. Picture this: a quilt made up of nine squares, arranged in a way that creates a beautiful, cohesive pattern. It’s like a puzzle where each piece fits perfectly, and the satisfaction of completing it is truly rewarding. This pattern is not only fundamental for mastering the basics of piecing but also serves as a canvas for your creativity.
What makes the Nine-Patch so special? For starters, it introduces you to the essential quilting techniques that will become second nature as you progress. You’ll learn how to cut fabric accurately, sew pieces together with precision, and understand the importance of seam allowances. But don’t worry, it’s not all about the technicalities! The Nine-Patch also encourages you to play with color and fabric choices, allowing your personality to shine through in your work.
As you embark on creating your Nine-Patch quilt, consider the following aspects:
- Fabric Selection: Choose fabrics that resonate with you. Whether you prefer bold colors or soft pastels, the fabric can drastically change the quilt's mood.
- Layout Options: While the traditional Nine-Patch is a 3x3 grid, don’t hesitate to experiment with different layouts. You can alternate colors or even mix in other blocks to create a unique design.
- Finishing Touches: Once your quilt top is assembled, think about how you want to quilt it. Whether you choose to hand quilt, machine quilt, or tie it, each method adds its own charm.
To give you a clearer picture of how versatile the Nine-Patch can be, let’s explore some popular variations:
| Variation | Description |
|---|---|
| Color Block Nine-Patch | Utilizes different colors for each block, creating a vibrant and eye-catching quilt. |
| Scrappy Nine-Patch | Made from various leftover fabric scraps, giving it a charming, eclectic feel. |
| Diagonal Nine-Patch | Arranges the blocks diagonally, adding a dynamic twist to the traditional layout. |
In conclusion, the Nine-Patch Quilt is not just a project; it’s an opportunity to explore your creativity, refine your skills, and build confidence in your quilting journey. As you piece together each square, you’ll find that this pattern is both a learning experience and a delightful way to express yourself. So grab your fabric, fire up your sewing machine, and let the adventure begin!
Q: How long does it take to complete a Nine-Patch quilt?
A: The time it takes can vary based on your sewing speed and the size of the quilt. On average, expect to spend a few hours to a couple of days, depending on your experience level.
Q: Can I use different sizes of squares for my Nine-Patch?
A: Absolutely! While the traditional Nine-Patch uses 3-inch squares, feel free to experiment with different sizes to create a unique look.
Q: What is the best way to quilt my finished Nine-Patch?
A: You can choose to hand quilt, machine quilt, or even tie your quilt. Each method has its own charm, so pick one that suits your style!

7. Dresden Plate
The Dresden Plate pattern is a stunning choice for quilters looking to elevate their skills while creating a visually captivating project. It’s like taking a leap into a colorful garden of petals, where each piece you sew brings you closer to a masterpiece. The design features a circular shape made up of individual "petals" that radiate out from a central circle, resembling a blooming flower. This pattern not only enhances your sewing abilities but also allows you to explore a myriad of fabric combinations, making each quilt unique.
One of the most exciting aspects of the Dresden Plate is its curved piecing. While it may seem daunting at first, mastering this technique can be incredibly rewarding. Think of it as learning to ride a bike; the initial wobble is just part of the journey to smooth sailing. As you practice, your confidence will grow, and soon you’ll be able to tackle more complex designs with ease. Plus, the end result—a quilt that showcases intricate designs and vibrant colors—makes all the effort worthwhile.
To get started with the Dresden Plate, you’ll need to gather a few materials:
- Fabric: Choose a variety of fabrics that complement each other. This is where your creativity shines!
- Rotary cutter and mat: Precision is key when cutting your petals.
- Template: You can either purchase a Dresden Plate template or create your own for the perfect petal shape.
- Sewing machine: A reliable machine will make the piecing process smoother.
As you begin piecing your petals, remember to take it slow. Each petal is a chance to experiment with different fabrics and colors, allowing you to express your personal style. Once you have your petals sewn together, you can attach them to a central circle, completing the flower-like design. The beauty of the Dresden Plate is that it can be used in various projects, from wall hangings to full-sized quilts, making it a versatile addition to your quilting repertoire.
In conclusion, the Dresden Plate pattern is not just a quilt; it’s a celebration of creativity and skill. So grab your fabrics, let your imagination run wild, and enjoy the process of bringing this beautiful design to life. You might just find that the journey of creating a Dresden Plate quilt is as fulfilling as the final product itself!
Q: Is the Dresden Plate pattern suitable for beginners?
A: Yes! While it involves curved piecing, beginners can successfully create a Dresden Plate quilt with practice and patience.
Q: What types of fabrics work best for the Dresden Plate?
A: Cotton fabrics are generally preferred for quilting due to their durability and ease of handling. However, feel free to experiment with different textures and patterns!
Q: Can I use the Dresden Plate design in other projects?
A: Absolutely! The Dresden Plate can be incorporated into various projects, including table runners, pillows, and wall hangings, allowing for endless creative possibilities.
8. Churn Dash
The Churn Dash quilt pattern is a delightful blend of simplicity and charm, making it a favorite among quilters, both novice and experienced. Imagine a quilt that radiates warmth and nostalgia, reminiscent of cozy family gatherings and cherished memories. This pattern not only captivates the eye but also serves as an excellent opportunity for beginners to enhance their quilting skills. It's like stepping into a warm kitchen filled with the sweet aroma of freshly baked cookies—comforting and inviting.
One of the most appealing aspects of the Churn Dash pattern is its versatility. The design consists of a combination of squares and triangles, creating a beautiful block that can be arranged in various layouts. This flexibility allows quilters to experiment with different fabric combinations, colors, and textures, fostering creativity and personal expression. You can think of it as a painter's canvas, where each choice of fabric is a stroke of color that brings your vision to life.
When working on a Churn Dash quilt, you'll find that the construction process is both straightforward and rewarding. The pattern typically features a central square surrounded by triangles, forming a unique and eye-catching design. Here’s a quick breakdown of the components involved:
| Component | Description |
|---|---|
| Central Square | The focal point of the block, often in a contrasting color. |
| Triangles | Four triangles are placed around the central square, creating the churn effect. |
| Corner Squares | Additional squares in the corners enhance the overall design. |
As you embark on your Churn Dash journey, remember that practice makes perfect. The more you sew, the more comfortable you'll become with measuring, cutting, and piecing together your blocks. It's like learning to ride a bike; at first, it may feel wobbly, but with each stitch, you gain confidence and balance. Plus, the satisfaction of seeing your blocks come together is incredibly fulfilling!
To truly make your Churn Dash quilt your own, consider playing with fabric placement. The way you arrange colors can dramatically change the quilt's appearance. For instance, using a monochromatic palette can create a modern look, while a mix of bright, bold fabrics can evoke a more traditional feel. Don’t be afraid to experiment—after all, quilting is about expressing your unique style!
In conclusion, the Churn Dash quilt pattern is not just a project; it’s a journey of creativity and skill-building. It's a wonderful way to practice new techniques while producing a stunning quilt that can be cherished for years to come. So grab your fabric, thread, and sewing machine, and let your imagination run wild with this charming pattern!
- What skill level is required for the Churn Dash quilt pattern?
While the Churn Dash is beginner-friendly, it also offers room for more advanced quilters to experiment with complex layouts and fabric choices. - How can I customize my Churn Dash quilt?
You can customize your quilt by choosing different fabric colors, patterns, and layouts. Try mixing prints with solids for a dynamic look! - What size should I make my Churn Dash blocks?
The size of your Churn Dash blocks can vary, but a common size is 12 inches finished. Adjust according to your quilt size preference!
9. Star Patterns
This article explores various quilting patterns suitable for beginners looking to advance their skills. Discover new techniques and designs that will enhance your quilting journey and inspire creativity in your projects.
The simple squares pattern is an excellent next step for beginners. It introduces the concept of piecing together blocks while allowing for creativity in fabric selection and arrangement.
Half-square triangles are versatile and can be used in numerous designs. This pattern helps quilters learn precise cutting and sewing techniques while creating visually appealing geometric designs.
The rail fence quilt pattern is perfect for beginners looking to practice their sewing skills. This design uses strips of fabric, allowing for quick assembly and a striking visual effect.
Flying geese blocks are a classic quilting design that introduces more complex shapes. Learning this technique will enhance your skills in measuring and cutting accurately for better results.
The log cabin quilt pattern is a timeless choice that offers endless design possibilities. It teaches quilters about color placement and the importance of fabric choices in quilt aesthetics.
The nine-patch quilt is a fundamental pattern that helps beginners master the basics of piecing. This design encourages creativity through various layout options while building confidence in sewing.
The Dresden plate pattern adds elegance and complexity to your quilting repertoire. It involves curved piecing, which challenges beginners to expand their skills while creating stunning visual effects.
The churn dash pattern is a delightful design that combines simplicity with charm. This quilt block teaches beginners about different fabric placements and introduces new techniques for block assembly.
Star patterns are a fantastic way to explore more intricate designs in quilting. They not only allow you to practice precision but also encourage a burst of creativity that results in stunning quilts showcasing unique star formations. Imagine the joy of seeing a quilt come to life with radiant stars, each one a testament to your growing skills!
When you dive into star patterns, you’ll encounter a variety of styles, such as the Ohio Star, Texas Star, and Star of Bethlehem. Each of these designs has its own charm and complexity, providing a perfect challenge for quilters ready to elevate their craft. The beauty of star patterns lies not just in their appearance but also in the techniques they teach, such as:
- Accurate cutting for symmetry
- Precision piecing for sharp points
- Creative fabric choices to enhance visual appeal
Working with star patterns can feel like a journey through the cosmos. As you stitch together the points and angles, you’re not just creating a quilt; you’re crafting a piece of art that tells a story. It’s a wonderful way to express your personality and style, whether you prefer bold colors or soft pastels.
Moreover, star patterns can be combined with other quilting techniques, allowing you to create stunning visual effects. For instance, you might choose to incorporate half-square triangles into your star design, adding depth and dimension to your project. The possibilities are truly endless!
Q: What materials do I need to start quilting with star patterns?
A: To start quilting with star patterns, you will need fabric (cotton is a popular choice), a rotary cutter, a cutting mat, a ruler, pins, and a sewing machine. Don’t forget to have a good pair of scissors on hand for trimming threads!
Q: Are star patterns suitable for beginners?
A: Yes, many star patterns can be adapted for beginners. Start with simpler designs, like the Ohio Star, and gradually work your way up to more complex patterns as you gain confidence.
Q: How can I improve my quilting skills?
A: Practice is key! Try different patterns, experiment with fabric combinations, and don’t hesitate to join quilting classes or online communities for tips and support.
Q: Can I use star patterns in other sewing projects?
A: Absolutely! Star patterns can be used in various projects like pillow covers, table runners, and wall hangings, allowing you to showcase your quilting skills in multiple ways.
Frequently Asked Questions
- What is the best pattern for a beginner quilter?
The simple squares pattern is often recommended for beginners. It allows you to get comfortable with piecing blocks together while also encouraging creativity in fabric choices and arrangements.
- How do half-square triangles enhance my quilting skills?
Half-square triangles are incredibly versatile and teach you precise cutting and sewing techniques. They can be used in various designs, helping you create visually appealing geometric patterns that will impress!
- What are the advantages of using the Rail Fence Quilt pattern?
The rail fence quilt pattern is perfect for honing your sewing skills. It uses strips of fabric, making it quick and easy to assemble, while also providing a striking visual effect that will make your quilt stand out.
- Can I create complex designs with the Flying Geese pattern?
Absolutely! The flying geese blocks introduce more complex shapes and enhance your skills in measuring and cutting accurately. This pattern will definitely elevate your quilting game!
- What makes the Log Cabin Quilt pattern timeless?
The log cabin quilt pattern is cherished for its endless design possibilities. It teaches you about color placement and how fabric choices can dramatically affect the aesthetics of your quilt.
- How does the Nine-Patch Quilt help beginners?
The nine-patch quilt is fundamental for mastering piecing basics. It encourages creativity through various layout options, helping to build your confidence in sewing and design.
- What skills do I gain from making a Dresden Plate quilt?
The dresden plate pattern involves curved piecing, which is a fantastic way to challenge yourself. It allows you to create stunning visual effects while expanding your quilting skills.
- Why should I try the Churn Dash pattern?
The churn dash pattern combines simplicity with charm. It teaches you about different fabric placements and introduces new techniques for block assembly, making it a delightful choice for any quilter.
- How can star patterns improve my quilting projects?
Star patterns are a fantastic way to explore intricate designs. They encourage you to practice precision and creativity, resulting in beautiful quilts that showcase unique star formations and your growing skills!


