Master the Art of Wooden Doll Making
Have you ever gazed at a beautifully crafted wooden doll and wondered how it came to life? Well, you're not alone! The art of wooden doll making is a fascinating blend of creativity, craftsmanship, and a touch of magic. In this article, we will explore the intricate process of creating these charming figures, from selecting the right materials to the final touches that make each doll unique. Whether you're a novice or an experienced artisan, this guide will provide you with valuable insights and techniques to help you master the craft of wooden doll making.
Imagine the satisfaction of holding a doll that you've crafted with your own hands, each curve and detail reflecting your personal touch. Wooden dolls have a timeless appeal, often passed down through generations, becoming cherished keepsakes filled with stories and memories. But what does it take to create such a masterpiece? The journey begins with understanding the basics of doll making, including the types of materials you'll need, the various styles of dolls you can create, and the overall process involved in bringing your vision to life.
As we delve deeper into this enchanting world, we'll also discuss the importance of choosing the right type of wood. Did you know that the wood you select can significantly affect the durability and aesthetic of your dolls? From softwoods to hardwoods, each type has its unique properties that can enhance or hinder your crafting experience. We'll explore popular wood choices like pine, basswood, and maple, examining their characteristics and suitability for different doll styles.
But that's not all! We'll also cover the essential tools you'll need to get started, from chisels to sanders, ensuring that you have everything necessary to create stunning dolls. And once you've shaped your wooden masterpiece, we won't forget the finishing touches that bring your dolls to life, including painting techniques and protective coatings to ensure they stand the test of time.
In addition to the technical aspects, we'll also dive into the creative side of doll making. Personalizing your dolls with unique outfits and expressive faces can make them truly one-of-a-kind. Imagine crafting a doll that not only looks beautiful but also has a personality that shines through its features. By the end of this article, you'll be equipped with the knowledge and inspiration to embark on your own wooden doll-making journey.
So, are you ready to unlock the secrets of wooden doll making? Grab your tools, and let’s get started on this delightful adventure where creativity knows no bounds!
- What type of wood is best for beginners? Pine and basswood are excellent choices due to their softness and ease of carving.
- How can I personalize my wooden dolls? You can create unique outfits and paint different facial expressions to give each doll its own character.
- What tools do I need to start making wooden dolls? Basic tools include a carving knife, chisels, sandpaper, and paintbrushes.
- How do I ensure my painted dolls last? Use high-quality paint and sealants to protect your dolls from wear and tear.
Understanding the Basics of Doll Making
Before diving into the enchanting world of wooden doll making, it's essential to grasp the fundamental concepts that will set the foundation for your crafting journey. Doll making is not just a hobby; it’s an art form that allows you to express your creativity while creating something truly unique. To begin, you'll need to familiarize yourself with the materials involved, the different types of dolls you can create, and the overall process that brings your vision to life.
First and foremost, let's talk about materials. While wood is the primary component, you’ll also need various tools and embellishments. The most common materials include:
- Wood: The star of the show, which can be sourced from various types of trees.
- Paints: For adding color and personality to your dolls.
- Fabric: To create clothing and accessories that complement your wooden creations.
- Glue: For assembling different parts and securing embellishments.
Understanding the types of dolls you can create is equally important. There are several styles, ranging from traditional to contemporary. Some popular types include:
- Jointed dolls: These have movable limbs and can be posed in various positions.
- Flat dolls: These are two-dimensional and can be easily decorated.
- Decorative dolls: Often used for display, these dolls may not be intended for play.
Once you have a grasp of the materials and types of dolls, it’s time to consider the overall process of doll making. This journey typically involves several steps:
- Designing: Sketch your ideas and decide on the features you want for your doll.
- Choosing materials: Select the wood and other materials based on your design.
- Shaping and carving: Use your tools to bring your doll to life through carving.
- Painting and finishing: Add color and protective coatings to enhance beauty and durability.
- Personalizing: Add unique clothing and facial features to make your doll stand out.
By understanding these basics, you’ll be well on your way to creating beautiful, handcrafted dolls that can be cherished for generations. Remember, every doll you make tells a story, and the process is just as rewarding as the final product. So, grab your tools, unleash your creativity, and let the magic of wooden doll making begin!
Here are some common questions that aspiring doll makers often ask:
- What type of wood is best for beginners? Basswood is a popular choice due to its softness and ease of carving.
- Do I need special tools for doll making? While basic carving tools are essential, you can start with a simple whittling knife.
- Can I use recycled wood for my dolls? Absolutely! Reclaimed wood can add character and is an eco-friendly option.

Choosing the Right Wood
When it comes to crafting beautiful wooden dolls, one of the most important decisions you'll make is choosing the right type of wood. The wood you select not only affects the durability of your dolls but also their aesthetic appeal. Imagine spending hours carving and painting, only to find that the wood doesn’t hold up or looks less than stunning. To avoid such disappointments, it’s crucial to understand the characteristics of various wood types.
In the world of doll making, the choice of wood can be categorized primarily into two types: softwoods and hardwoods. Each has its own set of advantages and disadvantages. For instance, softwoods like pine are generally easier to work with, making them perfect for beginners. However, they may not offer the same level of durability as hardwoods like maple or oak, which are more robust but can be challenging to carve. Understanding these differences can significantly impact your crafting experience.
Here’s a quick comparison of softwoods and hardwoods:
| Type of Wood | Pros | Cons |
|---|---|---|
| Softwoods |
|
|
| Hardwoods |
|
|
Now, let’s delve into some popular wood types used in doll making. Pine is favored for its affordability and ease of use, making it a great choice for beginners. Basswood is another excellent option, known for its fine grain and ability to hold intricate details, making it a favorite among experienced doll makers. Lastly, maple stands out for its strength and beautiful finish, perfect for those looking to create heirloom-quality dolls.
As you consider your wood options, it’s also vital to think about environmental considerations. With sustainability becoming a significant concern, opting for reclaimed or sustainably harvested wood can not only help the planet but also add a unique story to your dolls. Imagine telling your friends that your doll is made from wood that was once part of a beautiful old tree, giving it character and history. It’s a win-win!
In conclusion, choosing the right wood is a foundational step in the doll-making process. Whether you lean towards softwoods for their ease of use or hardwoods for their durability and beauty, understanding the properties of different woods will empower you to create stunning, lasting pieces that can be cherished for generations.
Softwoods vs. Hardwoods
When it comes to wooden doll making, one of the first decisions you'll face is whether to use softwoods or hardwoods. Each type of wood has its unique characteristics that can significantly influence the quality and durability of your finished doll. So, what exactly are the differences?
Softwoods come from coniferous trees, which are often evergreen. These woods, such as pine and cedar, tend to be lighter and easier to work with, making them ideal for beginners. Their softness allows for easier carving and shaping, which can be particularly beneficial when you're just starting out. However, while softwoods are generally more affordable and readily available, they may not hold up as well over time compared to their hardwood counterparts. They can be prone to dents and scratches, which could affect the longevity of your cherished creations.
On the other hand, hardwoods are derived from deciduous trees, which lose their leaves seasonally. Woods like oak, maple, and cherry are classified as hardwoods. These types of wood are denser and more durable, providing a sturdier foundation for your dolls. While they can be more challenging to carve due to their hardness, the results are often worth the effort. Hardwoods typically offer a more refined finish and can withstand the wear and tear of play, making them an excellent choice for dolls that will be cherished for generations.
To help you better understand the differences, here's a quick comparison:
| Property | Softwoods | Hardwoods |
|---|---|---|
| Weight | Lighter | Heavier |
| Workability | Easy to carve | More difficult to carve |
| Durability | Less durable | More durable |
| Cost | Generally cheaper | Usually more expensive |
Ultimately, the choice between softwoods and hardwoods depends on your specific needs and preferences. If you're looking for an easy starting point with the potential for beautiful results, softwoods may be your best bet. However, if you're ready to tackle a challenge and want to create a doll that can withstand the test of time, hardwoods might be the way to go. Remember, each type of wood has its own personality, and the best choice will resonate with your artistic vision.
- What is the best wood for beginners? Softwoods like pine are often recommended for beginners due to their workability.
- Can I mix softwoods and hardwoods in my projects? Absolutely! Mixing woods can add unique character to your dolls.
- How do I know if my wood is sustainably sourced? Look for certifications like FSC (Forest Stewardship Council) that indicate sustainable practices.

Popular Wood Types
When it comes to crafting beautiful wooden dolls, the choice of wood is paramount. Each type of wood carries its own unique characteristics, which can significantly affect the final product. Let's delve into some of the most popular wood types that doll makers often use, highlighting their properties and suitability for different styles of dolls.
Pine is a favorite among beginners due to its availability and ease of carving. This softwood is lightweight, making it easy to handle, and it takes paint and finishes well. However, it can be prone to dents and scratches, so it's essential to apply a good sealant once your doll is complete.
Basswood is another excellent choice, especially for intricate carvings. Its fine grain and softness allow for detailed work without the risk of splintering. Basswood is often used for making the heads of dolls, as it can be shaped easily and painted with vibrant colors, giving your creations a lifelike appearance.
On the other hand, maple is a hardwood that offers durability and a beautiful finish. It's denser than pine or basswood, which means it can withstand wear and tear much better. However, this density also makes it more challenging to carve, so it's typically recommended for more experienced doll makers who have mastered the basics.
| Wood Type | Characteristics | Best For |
|---|---|---|
| Pine | Lightweight, easy to carve, prone to dents | Beginners, simple dolls |
| Basswood | Soft, fine grain, great for detailed work | Intricate carvings, doll heads |
| Maple | Durable, beautiful finish, harder to carve | Advanced projects, long-lasting dolls |
Additionally, considering environmental factors is vital when selecting wood. Opting for reclaimed or sustainably sourced wood not only contributes to preserving our forests but also adds a unique story to your dolls. Each piece of reclaimed wood carries its own history, making your creations even more special and meaningful.
In summary, choosing the right wood type for your dolls can enhance both their beauty and durability. Whether you go for the softness of pine, the detail-friendly basswood, or the sturdy maple, understanding the properties of these woods will help you create dolls that can be cherished for generations. Remember, the wood you select is not just a material; it’s the foundation of your artistic expression!
- What is the best wood for beginners? Pine is highly recommended for beginners due to its availability and ease of carving.
- Can I use any type of paint on wooden dolls? It's best to use acrylic paints, as they adhere well to wood and provide a durable finish.
- How do I protect my wooden dolls after painting? Applying a clear sealant will help protect your dolls from wear and tear.

Environmental Considerations
In today's world, where environmental consciousness is at the forefront of many discussions, wooden doll making offers a unique opportunity to engage in a sustainable craft. As a doll maker, it's crucial to consider the environmental impact of your choices, particularly when it comes to sourcing materials. The wood you select can either contribute to or mitigate environmental issues, making informed decisions essential.
One of the most significant factors to consider is the source of your wood. Opting for reclaimed wood is a fantastic way to reduce waste and give new life to materials that might otherwise end up in a landfill. Reclaimed wood not only has a unique character and history but also minimizes the demand for newly harvested trees. Additionally, using wood from sustainably managed forests ensures that you are supporting practices that prioritize ecological balance and biodiversity.
When selecting wood, look for certifications that indicate responsible sourcing, such as the Forest Stewardship Council (FSC) certification. This label guarantees that the wood comes from forests that are managed in an environmentally appropriate, socially beneficial, and economically viable manner. By choosing FSC-certified wood, you are not just making a purchase; you are contributing to the health of our planet.
Moreover, understanding the lifecycle of the materials you use can help you make better choices. For instance, consider the following environmental impacts of different wood types:
| Wood Type | Environmental Impact |
|---|---|
| Pine | Fast-growing and often sustainably sourced, making it a good choice for eco-friendly projects. |
| Maple | Durable and long-lasting, but ensure it’s sourced from responsibly managed forests. |
| Basswood | Lightweight and easy to carve, often sourced sustainably, but check for certifications. |
By making conscious choices about the wood you use, you can create beautiful dolls while also being a steward of the environment. Remember, every small decision counts in the grand scheme of sustainability. So, as you embark on your wooden doll making journey, take a moment to appreciate the materials you work with and the impact they have on our planet.
- What is the best type of wood for beginners?
Pine is often recommended for beginners due to its softness and ease of carving.
- How can I ensure the wood I use is sustainably sourced?
Look for certifications like FSC or ask suppliers about their sourcing practices.
- What are the benefits of using reclaimed wood?
Reclaimed wood reduces waste, has unique character, and often requires less processing than new wood.

Essential Tools for Doll Making
When it comes to crafting exquisite wooden dolls, having the right tools is absolutely crucial. Just like a painter needs their brushes and a chef requires their knives, a doll maker must be equipped with specific instruments to bring their visions to life. While you might think you can get away with just a few basic tools, investing in a well-rounded toolkit will significantly enhance the quality of your creations and make the entire process much more enjoyable.
To start, you'll want to have a good set of carving knives. These knives come in various shapes and sizes, each designed for different tasks. A whittling knife is essential for shaping the wood, while a detail knife will help you carve intricate features. Additionally, a chip carving knife can add unique designs to your dolls, making them stand out even more. Each of these knives serves a specific purpose, and mastering their use can lead to stunning results.
Next on your list should be a sturdy cutting board. A good cutting surface protects both your tools and your workbench. Look for a board that is thick and durable, as this will withstand the repeated pressure of your carving activities. You might also consider investing in a bench vise, which can hold your work securely in place while you carve, allowing for greater precision and control.
Another essential tool is a set of files and rasps. These tools are perfect for smoothing out rough edges and refining the shape of your dolls. Files come in various shapes, including flat, round, and half-round, providing versatility for different areas of your doll. Using these tools can make a world of difference in achieving that polished finish that every doll maker strives for.
Don't forget about sandpaper! It’s a must-have for any doll maker. Sandpaper comes in various grits, allowing you to start with a rougher grit to remove larger imperfections and then move to finer grits for a smooth, refined surface. This is especially important for the delicate areas of your dolls, ensuring that they feel as good as they look.
Lastly, a wood glue is essential for assembling your dolls. Whether you're attaching limbs or adding accessories, a strong adhesive will keep everything in place. Additionally, consider having a variety of clamps on hand. They can be invaluable when you need to hold pieces together while the glue dries, ensuring a sturdy and lasting bond.
In summary, assembling a comprehensive toolkit for wooden doll making is an investment in your craft. The right tools not only enhance the quality of your work but also make the entire process smoother and more enjoyable. As you gather your supplies, remember that each tool has its purpose, and mastering their use will elevate your doll-making skills to new heights.
Q: What tools do I need to start making wooden dolls?
A: Essential tools include carving knives, a cutting board, files and rasps, sandpaper, wood glue, and clamps. These tools will help you shape, carve, and assemble your dolls effectively.
Q: Can I use any type of wood for doll making?
A: While you can technically use any wood, it's best to choose softwoods like pine or basswood for beginners, as they are easier to carve. Hardwoods like maple can be used for more advanced projects.
Q: How do I maintain my tools?
A: Regularly clean your tools after use, and sharpen them as needed. Proper maintenance will extend their lifespan and improve their performance.
Q: Is it necessary to have advanced tools to create beautiful dolls?
A: No, you can create stunning dolls with basic tools. However, as you advance in your skills, investing in specialized tools can enhance your craftsmanship.

Techniques for Shaping and Carving
When it comes to wooden doll making, the techniques for shaping and carving are vital to bringing your creations to life. Think of this stage as the moment when a sculptor transforms a block of marble into a beautiful statue; it requires both skill and a touch of artistry. Whether you’re a novice or a seasoned craftsman, mastering these techniques can elevate your doll-making game to new heights. Let’s explore the essential methods that will help you carve and shape your wooden dolls with precision and creativity.
First and foremost, understanding the basic carving techniques is crucial. These foundational skills serve as the building blocks for more intricate designs. Techniques like whittling, chiseling, and sanding are essential for achieving smooth and refined finishes. Whittling, for instance, involves using a sharp knife to shave off thin slices of wood, allowing you to shape your doll gradually. It’s almost like peeling an onion—layer by layer, you reveal the beauty beneath. Chiseling, on the other hand, allows for more defined cuts and can be used to create detailed features such as hands and facial expressions. Sanding is the final touch that ensures your doll feels as good as it looks, smoothing out any rough edges and preparing the surface for painting.
Once you’ve got a handle on the basics, you can dive into advanced detailing methods. This is where your creativity can truly shine. Techniques like woodburning allow you to add intricate designs and textures directly onto the wood, creating a unique look that’s hard to replicate. Imagine giving your doll a beautiful floral pattern on its dress or adding fine lines to mimic hair strands. Painting is another fantastic way to enhance your dolls, allowing for vibrant colors and lifelike details. You can use various paint techniques, such as dry brushing or layering, to achieve depth and dimension. The goal here is to breathe life into your dolls, making them not just objects but characters with personalities.
Don’t forget about the importance of tools in this process. Having the right tools can make a world of difference in your carving and shaping efforts. Here’s a quick glance at some essential tools you might want to consider:
| Tool | Purpose |
|---|---|
| Carving Knife | For whittling and shaping wood |
| Chisel Set | For more defined cuts and details |
| Sanding Block | To smooth surfaces and edges |
| Woodburning Tool | For adding designs and textures |
As you embark on your doll-making journey, remember that practice makes perfect. Each doll you create is an opportunity to refine your skills and explore new techniques. Don’t hesitate to experiment with different styles and methods; after all, the beauty of handcrafted dolls lies in their uniqueness. The more you carve, shape, and detail, the more your personal style will emerge, allowing you to create dolls that are not only beautiful but also meaningful.
Q: What type of wood is best for carving dolls?
A: Softwoods like pine and basswood are often preferred for beginners due to their ease of carving. Hardwoods like maple are durable but require more advanced skills.
Q: How can I improve my carving skills?
A: Regular practice is key! Start with simple shapes and gradually move to more complex designs. Joining a woodworking community can also provide valuable tips and feedback.
Q: Is it necessary to use a woodburning tool?
A: While not essential, a woodburning tool can add unique designs and textures to your dolls, enhancing their overall appearance.
Basic Carving Techniques
When it comes to wooden doll making, mastering the basic carving techniques is like learning to walk before you run. These foundational skills are essential for anyone looking to create beautiful, handcrafted dolls that not only look good but also stand the test of time. Whether you’re a complete novice or someone with a bit of experience, understanding these techniques can significantly enhance your crafting journey.
One of the first techniques you’ll want to get comfortable with is whittling. This method involves using a sharp knife to shave away thin layers of wood, gradually revealing the shape of your doll. It’s a straightforward process, but it requires patience and a steady hand. Start with softwoods like pine or basswood, as they are easier to carve. With practice, you’ll develop a feel for the wood and become more adept at controlling your cuts.
Next up is chiseling. Unlike whittling, chiseling involves using a chisel and mallet to remove larger chunks of wood. This technique is great for creating more defined features, such as arms and legs. It can be a bit intimidating at first, especially if you’re not used to wielding a mallet, but with proper technique, it can yield fantastic results. Remember, safety first! Always make sure to carve away from your body to avoid any accidents.
After you’ve shaped your doll, the final step in the carving process is sanding. This crucial technique smooths out any rough edges and imperfections, giving your doll a polished and professional finish. Use a variety of sandpaper grits, starting with a coarser grit to remove larger imperfections and gradually moving to finer grits for that silky-smooth feel. Sanding is not just about aesthetics; it also prepares the surface for painting and finishing, ensuring that your hard work pays off in the end.
To summarize, here’s a quick look at the basic carving techniques you should focus on:
- Whittling: Shaving away thin layers of wood with a knife.
- Chiseling: Removing larger pieces of wood with a chisel and mallet.
- Sanding: Smoothing the surface for a polished finish.
These techniques lay the groundwork for more advanced methods, and as you gain confidence, you can start experimenting with different styles and approaches. Remember, every great doll maker started from the same place—so don’t be discouraged if your first few attempts don’t turn out perfect. Keep practicing, and soon enough, you’ll be crafting wooden dolls that are not just toys but treasured pieces of art.
Q1: What type of wood is best for beginners?
A1: For beginners, softwoods like pine and basswood are ideal as they are easier to carve and shape.
Q2: How do I avoid injuries while carving?
A2: Always carve away from your body, use sharp tools, and take your time to maintain control while working.
Q3: Can I use power tools for carving?
A3: Yes, power tools can speed up the process, but it's essential to have a good understanding of hand tools first to maintain control and precision.
Q4: How can I achieve fine details on my dolls?
A4: Once you master the basics, you can explore advanced techniques like woodburning and painting to add intricate details to your dolls.

Advanced Detailing Methods
Once you've mastered the foundational techniques of wooden doll making, it's time to take your creations to the next level with . These techniques not only enhance the aesthetic appeal of your dolls but also allow you to express your unique artistic vision. Think of this phase as the makeup artist's touch – it's where the magic happens! You can transform a simple wooden figure into a lifelike character that tells a story.
One of the most exciting aspects of advanced detailing is woodburning. This technique involves using a heated tool to etch designs or textures onto the surface of the wood. Imagine adding delicate lace patterns or intricate tattoos to your doll's skin! Not only does woodburning create stunning visual effects, but it also adds depth and character to your work. When using this method, make sure to practice on scrap wood first to get a feel for the tool and the pressure needed.
Another method to consider is painting. This is where you can really let your creativity shine! While basic painting techniques might involve simple color applications, advanced painting allows for layering, shading, and even the use of mixed media. For example, you could combine acrylic paints with watercolor effects to create a dreamy, ethereal look. Don’t forget about the importance of color theory – understanding how colors interact can make a huge difference in the overall appeal of your dolls.
Additionally, adding intricate features can truly elevate your dolls. This could involve sculpting tiny accessories, such as hats or jewelry, or even creating unique hairstyles using fibers or threads. The goal here is to add those little touches that make your dolls feel alive. For instance, consider using a fine brush to paint delicate eyelashes or tiny freckles; these details can evoke emotion and personality, making your doll relatable and engaging.
Lastly, don't overlook the importance of finishing touches. Applying a protective coating not only enhances the beauty of your work but also ensures its longevity. You might choose a matte finish for a more natural look or a glossy finish for a vibrant, eye-catching effect. Whatever you choose, make sure it complements the overall design of your doll. Remember, the details are what make your creations truly special!
- What tools do I need for woodburning? You'll need a woodburning tool, various tips for different effects, and a piece of scrap wood to practice on.
- Can I use regular paint on wooden dolls? While you can use regular paint, it's best to choose paints specifically designed for wood to ensure durability and adherence.
- How do I protect my painted dolls? A clear sealant or varnish can protect your painted dolls from scratches and fading over time.
Painting and Finishing Your Dolls
When it comes to wooden doll making, the painting and finishing stages are where your creations truly transform from simple wood carvings into vibrant, lifelike characters. This process is not just about applying color; it's about bringing your dolls to life and ensuring they can withstand the test of time. Think of this stage as the final brushstroke on a masterpiece, where every detail matters. The right paint and finish can enhance the beauty of your dolls, making them not just toys, but cherished collectibles.
Choosing the right paint is crucial. You want something that not only looks good but also adheres well to wood and lasts over time. There are several types of paint available, including acrylics, oils, and watercolors. Each type has its own unique properties:
| Type of Paint | Characteristics | Best Use |
|---|---|---|
| Acrylic | Fast-drying, water-based, vibrant colors | General doll painting; easy to clean up |
| Oil | Rich colors, slow-drying, durable | Detailed work; can create depth and texture |
| Watercolor | Translucent, gentle hues | Soft effects; best for delicate details |
Once you've chosen your paint, it's essential to apply it correctly. Start with a base coat to create an even layer. This not only helps the subsequent layers adhere better but also enhances the vibrancy of the colors. Use fine brushes for detailed work, particularly when painting facial features or clothing patterns. Remember, patience is key! Allow each layer to dry thoroughly before applying the next one to avoid smudging and ensure a smooth finish.
After the painting is complete, the finishing touches are just as important. Applying a protective sealant is crucial for preserving your work. Sealants can protect against scratches, moisture, and fading. You can choose from various finishes such as matte, satin, or glossy, depending on the look you want to achieve. A matte finish gives a soft, natural look, while a glossy finish can make colors pop and add a vibrant sheen. It's like choosing the perfect frame for a painting; the right finish can elevate your doll to a whole new level!
To apply the sealant, use a clean brush or spray for an even coat. Make sure to cover all areas, including hard-to-reach spots. For added protection, consider applying multiple coats of sealant, allowing each to dry completely before adding the next. This extra layer of care can ensure your dolls remain beautiful for years to come.
In conclusion, painting and finishing your wooden dolls is an art form in itself. It’s not just about color; it’s about creating a lasting impression, adding depth, and ensuring durability. So, take your time, enjoy the process, and let your creativity shine through!
- What type of paint is best for wooden dolls? Acrylic paint is often recommended for its ease of use and vibrant colors.
- How do I seal my painted wooden dolls? You can use a clear sealant spray or brush-on sealant, applying multiple coats for extra durability.
- Can I use regular craft paint on wooden dolls? Yes, but ensure it is suitable for wood to achieve the best adhesion and finish.
- How long should I wait between paint layers? It’s best to wait at least 30 minutes to an hour, depending on the type of paint used.
Choosing the Right Paint
When it comes to painting your wooden dolls, the choice of paint can make or break your creation. It’s not just about slapping on some color; it’s about enhancing the beauty of your handcrafted work while ensuring the longevity of the finish. So, how do you choose the right paint? Let’s dive into the world of paints and see what fits best for your dolls.
First off, you need to consider the type of paint that will adhere well to wood. Acrylic paints are a popular choice among doll makers due to their versatility and quick drying time. They come in a wide range of colors and finishes, allowing for creativity to flow freely. On the other hand, oil-based paints offer a rich depth of color and durability, but they require a longer drying time and can be more challenging to work with. If you’re looking for something eco-friendly, water-based paints are an excellent option, as they have lower levels of volatile organic compounds (VOCs) and are easier to clean up.
Here’s a quick comparison of different paint types:
| Type of Paint | Pros | Cons |
|---|---|---|
| Acrylic | Fast drying, vibrant colors, easy to use | Can chip easily if not sealed properly |
| Oil-based | Rich colors, durable finish | Long drying time, difficult cleanup |
| Water-based | Low VOCs, easy to clean, eco-friendly | May require multiple coats for opacity |
Another important factor is the finish you want for your dolls. Do you prefer a matte look, or are you aiming for something more glossy? Matte finishes tend to hide imperfections better, while glossy finishes can make colors pop and give a polished look. Remember, the finish can also influence the overall feel of the doll, so choose according to the character you want to portray.
Once you've selected the right paint, it's essential to prepare your surface properly. Always ensure your wooden doll is sanded smooth and clean from dust or oils before applying any paint. This preparation will help the paint adhere better and provide a more uniform finish. If you’re feeling adventurous, you can even experiment with layering different paints or finishes to create unique effects that stand out!
In summary, choosing the right paint for your wooden dolls is a blend of personal preference and understanding the characteristics of each paint type. Whether you opt for acrylics, oils, or water-based paints, the key is to experiment and find what works best for you. After all, your dolls are a reflection of your creativity, so let your imagination run wild!
- What type of paint is best for wooden dolls? Acrylic paint is often the best choice due to its versatility and quick drying time.
- Can I use regular paint on wooden dolls? It's best to use paint specifically designed for wood to ensure proper adhesion and durability.
- How do I seal the paint on my dolls? You can use a clear acrylic sealant or varnish to protect your painted dolls from wear and tear.
Sealing and Protecting Your Work
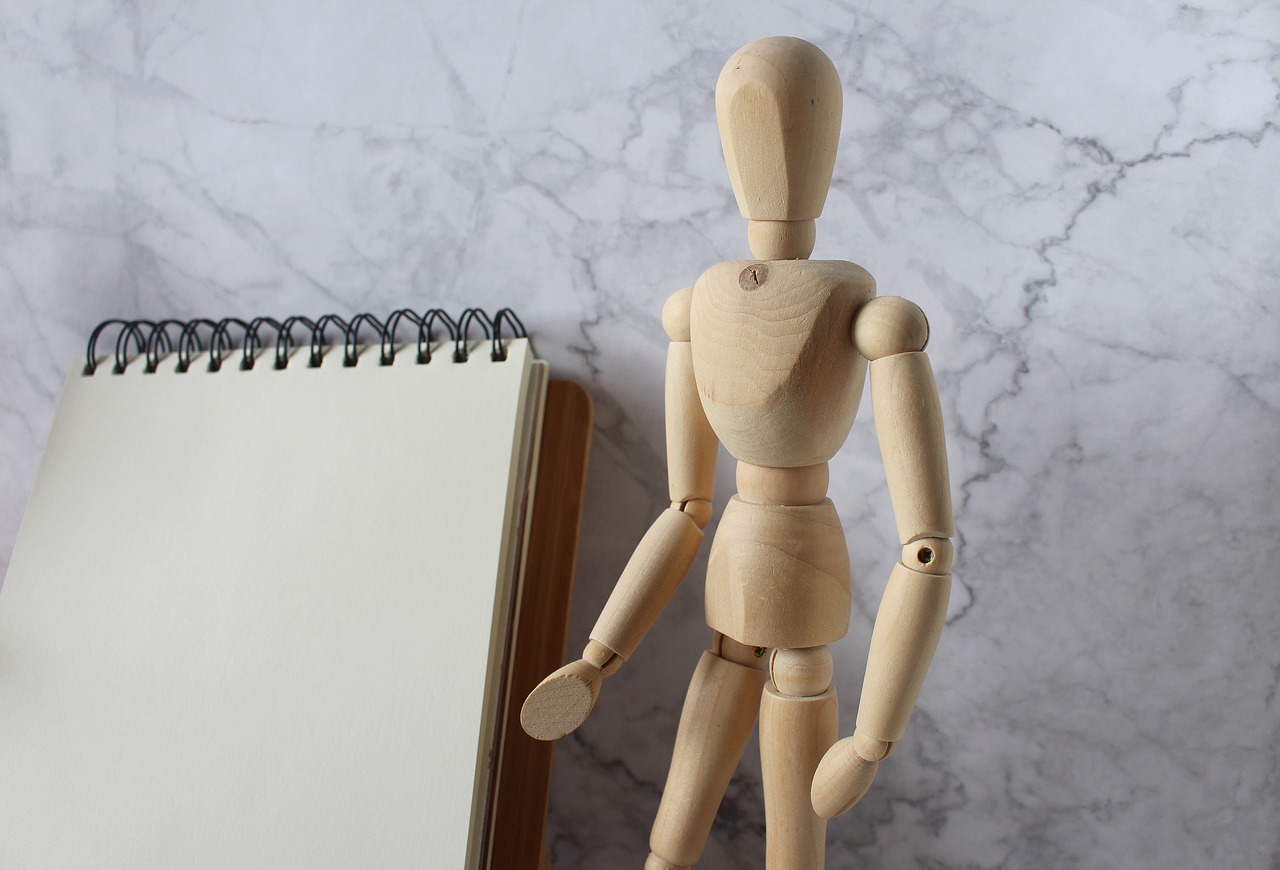
Once you've poured your heart and soul into crafting a beautiful wooden doll, it’s crucial to ensure that your hard work lasts for years to come. Sealing and protecting your dolls is not just about aesthetics; it’s about preserving the integrity of your creation. Imagine spending countless hours shaping and painting, only to have your masterpiece fade or deteriorate over time. That's where the right sealants and finishes come into play!
First off, you’ll want to choose a sealant that suits the type of paint and wood you've used. There are several options available, each with its own set of advantages:
- Polyurethane: This is a popular choice for its durability and water resistance. It comes in both oil-based and water-based forms, with the latter being easier to clean up and less odorous.
- Varnish: Varnish provides a hard finish that’s resistant to scratches and moisture. It’s great for dolls that might be handled frequently.
- Shellac: This natural finish gives a warm glow to your dolls and dries quickly. However, it’s less durable than polyurethane and varnish, making it better suited for decorative pieces.
- Wax: If you prefer a more traditional approach, wax can provide a soft sheen and is easy to apply. Just keep in mind that it may require more frequent reapplication.
Application is just as important as the choice of sealant. Before sealing, make sure your paint is completely dry. Apply the sealant in thin, even coats, allowing each layer to dry thoroughly before adding the next. This not only ensures a smooth finish but also prevents any potential bubbling or peeling. A good rule of thumb is to apply at least two to three coats, especially for pieces that will be displayed or played with.
After sealing, it’s wise to let your dolls cure for a few days in a dust-free environment. This allows the sealant to fully harden and bond with the wood, providing maximum protection. Remember, the goal is to create a barrier that shields your doll from moisture, dirt, and wear while enhancing its overall beauty.
Finally, regular maintenance can extend the life of your wooden dolls. Dust them gently with a soft cloth and avoid exposing them to extreme temperatures or direct sunlight, which can cause fading and warping. If you notice any wear over time, a light reapplication of sealant can work wonders.
Q: How long should I wait before sealing my painted dolls?
A: Always ensure that your paint is completely dry before applying any sealant. This could take anywhere from a few hours to a couple of days, depending on the type of paint used.
Q: Can I use any type of sealant on my wooden dolls?
A: While many sealants can be used, it's important to choose one compatible with your paint and wood type. Always read the manufacturer's instructions for best results.
Q: How often should I reapply the sealant?
A: This depends on how often your dolls are handled and displayed. Generally, a light reapplication every couple of years is sufficient for most pieces.
Q: Is it safe to use chemical sealants on dolls intended for children?
A: If your dolls are intended for children, opt for non-toxic, child-safe sealants. Always check labels and choose products specifically designed for children's toys.

Tips for Personalizing Your Dolls
Creating wooden dolls is not just about the craftsmanship; it's also about infusing a piece of your personality into each creation. Personalization transforms a simple doll into a cherished keepsake, making it unique and special. So, how can you make your dolls stand out? Let’s explore some creative ideas that will help you add those personal touches.
One of the most exciting aspects of doll making is designing unique outfits. The clothing can reflect not only the style of the doll but also your own taste and creativity. Consider using a variety of fabrics, such as cotton, felt, or even recycled materials, to create outfits that tell a story. You could design a vintage dress for a classic doll or a modern outfit for a contemporary look. The possibilities are endless! Additionally, embellishments like buttons, lace, and ribbons can add a delightful flair to your doll's attire. Remember, the outfit should complement the doll's personality, so let your imagination run wild!
Another vital aspect of personalization is the facial expressions and features. The face is the window to the doll's soul, and how you choose to carve and paint the features can bring your doll to life. Experiment with different expressions; maybe a cheeky grin or a serene smile. You can use simple carving techniques to create depth in the eyes and mouth, giving your doll character. Painting the facial features allows you to play with colors and styles. For instance, you could opt for a whimsical style with oversized eyes or a more realistic approach. This attention to detail can make your dolls not just toys, but characters with stories waiting to be told.
Don’t forget about the accessories! Adding small items like hats, jewelry, or even miniature pets can enhance your doll's personality. These accessories can serve as conversation starters and add layers to the story behind each doll. You might create a tiny handbag for a fashionable doll or a little book for an adventurous one. Accessories can be crafted from leftover materials, making them not only a creative addition but also an eco-friendly choice.
Moreover, consider incorporating cultural elements into your dolls. Drawing inspiration from different cultures can add a rich depth to your creations. Whether it’s traditional clothing styles, hairstyles, or accessories, integrating these elements can make your dolls more meaningful. This approach not only personalizes your dolls but also celebrates diversity and heritage, giving each piece a unique backstory.
Finally, remember to document your process! Keeping a journal or a scrapbook of your doll-making journey can be incredibly rewarding. You can jot down ideas, sketches, and the stories behind each doll. This not only helps you track your progress but also allows you to reflect on your growth as a doll maker. Plus, it’s a great way to share your journey with others who might be inspired to create their own wooden dolls!
In conclusion, personalizing your wooden dolls is all about expressing creativity and individuality. From designing outfits and facial features to adding accessories and cultural elements, the options are limitless. So, what are you waiting for? Grab your tools, and let your imagination soar!
Q: What materials do I need to personalize my wooden dolls?
A: To personalize your dolls, you’ll need various fabrics for clothing, paints for facial features, and materials for accessories. Consider using recycled items for a sustainable approach!
Q: Can I use any type of paint on wooden dolls?
A: It's best to use acrylic paints or water-based paints, as they adhere well to wood and provide vibrant colors. Always ensure the paints are non-toxic, especially if the dolls are intended for children.
Q: How can I ensure the outfits fit my dolls?
A: Before sewing or crafting outfits, take accurate measurements of your dolls. You can create patterns based on these measurements to ensure a perfect fit.
Q: Are there any eco-friendly options for doll making?
A: Absolutely! Use reclaimed wood, organic fabrics, and non-toxic paints to create beautiful and environmentally friendly dolls.
Creating Unique Outfits
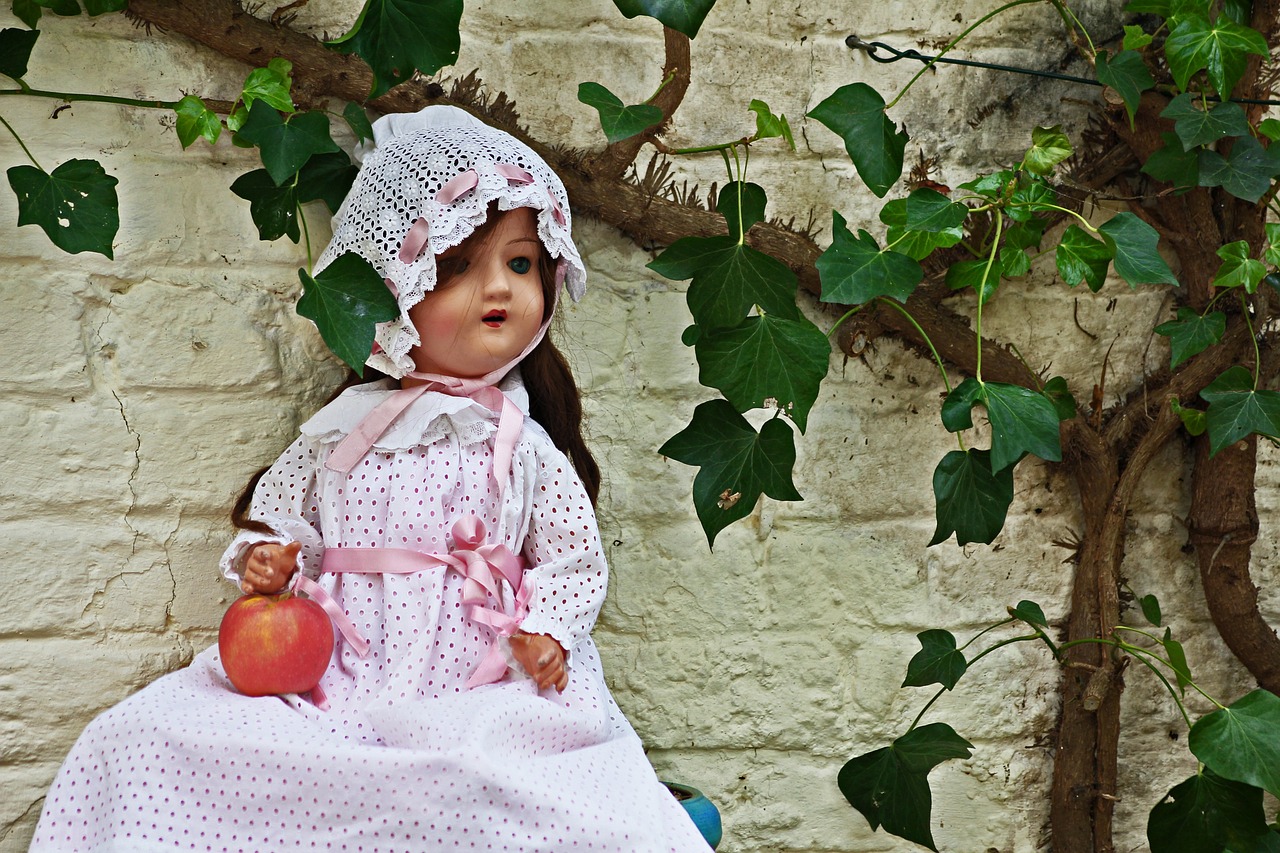
When it comes to wooden doll making, one of the most delightful aspects is the opportunity to create unique outfits that truly reflect your personal style and creativity. Just like dressing up for a special occasion, the outfits you design for your dolls can bring them to life in a way that resonates with your artistic vision. Imagine your doll sporting a vibrant dress adorned with intricate patterns or a cozy sweater that feels like a warm hug. The possibilities are endless!
To start crafting these one-of-a-kind outfits, consider the following elements that can significantly influence your design:
- Fabric Selection: Choosing the right fabric is essential. You might opt for cotton for its comfort and versatility, or perhaps silk for a touch of elegance. Each fabric brings its own texture and color palette, allowing you to express different themes and moods.
- Color Coordination: Think about the color wheel! Mixing and matching colors can create visually stunning outfits. For instance, a pastel palette can evoke a soft, dreamy feel, while bold, contrasting colors can add a vibrant and energetic vibe.
- Accessorizing: Don't forget the power of accessories! Hats, scarves, and shoes can elevate your doll's look. A well-placed accessory can transform a simple outfit into something extraordinary.
As you begin to sew and assemble the outfits, remember to incorporate personal touches. Perhaps you want to add a pocket for tiny treasures or embroider a name on the clothing. These little details not only enhance the visual appeal but also make the doll feel more like a cherished companion.
Another exciting aspect of creating outfits is the ability to explore different styles. You can draw inspiration from various eras, cultures, or even your favorite stories. For example, a doll dressed in a Victorian gown can evoke a sense of nostalgia, while a modern casual outfit can resonate with today’s fashion trends. You might even consider a themed collection, where each doll showcases a different style or story, creating a cohesive narrative through their outfits.
Moreover, don’t hesitate to experiment with different crafting techniques. You can use techniques like patchwork for a bohemian vibe, or appliqué to add fun shapes and designs. The key is to let your imagination run wild—after all, these outfits are a canvas for your creativity!
Finally, as you complete each outfit, take a moment to step back and admire your work. Each piece you create is not just clothing; it's a part of the doll's story, a reflection of your creativity, and a testament to the time and effort you put into your craft. Remember, the joy of wooden doll making lies not only in the finished product but also in the journey of creation.
Q: What materials are best for making doll outfits?
A: Natural fabrics like cotton and linen are great choices for doll outfits due to their durability and ease of use. For more luxurious looks, consider silk or satin.
Q: How can I ensure the outfits fit my dolls perfectly?
A: Always measure your doll before cutting your fabric. Creating a pattern or using an existing doll clothing pattern can help achieve the right fit.
Q: Are there any specific sewing techniques I should learn?
A: Basic sewing techniques like hemming, gathering, and applying closures (like buttons or Velcro) are essential. As you gain confidence, you can explore more advanced techniques!
Q: Can I use recycled materials for doll outfits?
A: Absolutely! Recycled materials like old clothes or fabric scraps can be creatively transformed into unique outfits, adding an eco-friendly touch to your doll-making process.
Facial Expressions and Features
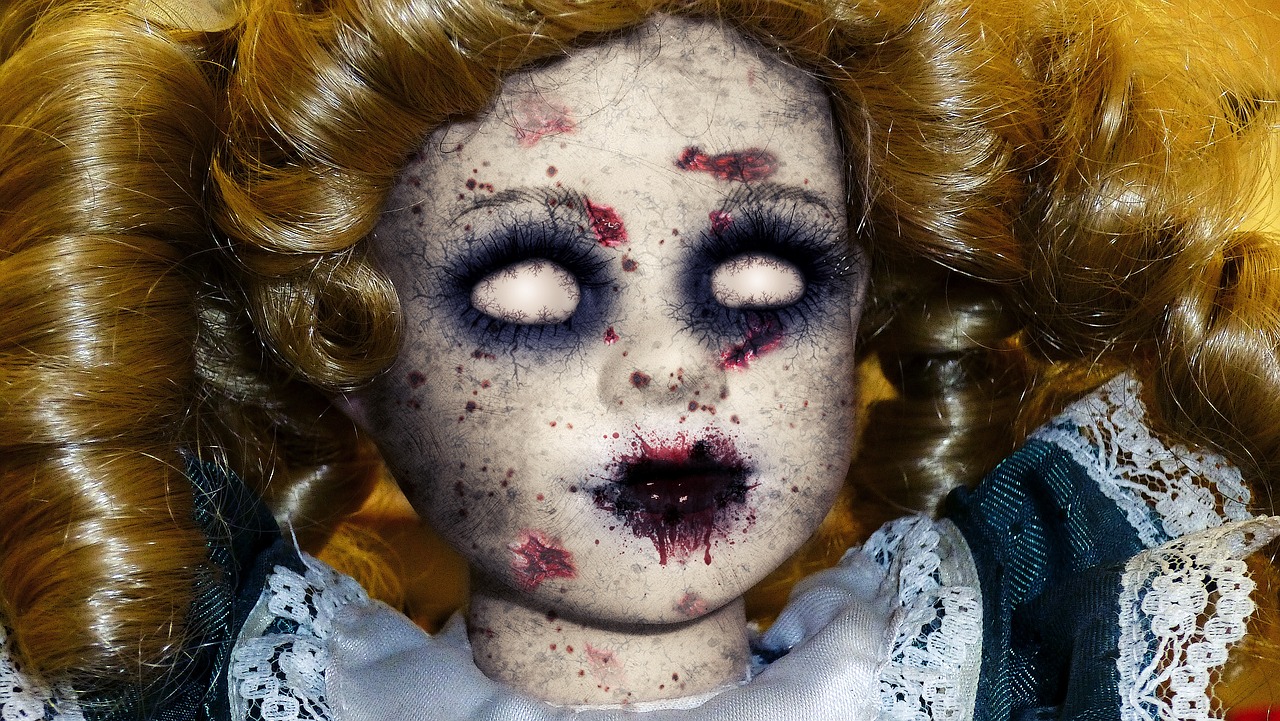
When it comes to wooden dolls, facial expressions can truly bring them to life. Imagine a doll with a gentle smile or one with a playful grin; these features can evoke emotions and create a connection between the doll and its owner. The art of carving and painting facial features is where your creativity can shine. It's not just about making the doll look pretty; it's about infusing personality and character into every piece.
To start, you'll want to consider the shape of the face. The proportions of the eyes, nose, and mouth are crucial. A well-proportioned face can convey a range of emotions—from joy to sadness. For instance, a wider mouth can suggest a cheerful demeanor, while a more downturned mouth can indicate a somber expression. You can use a simple grid method to help with the placement of features, ensuring they are balanced and visually appealing.
Once you've established the basic shape, you can dive into the details. Carving techniques play a significant role here. Using tools like gouges and knives, you can create the contours of the nose and the curvature of the lips. Remember to take your time; rushing can lead to mistakes that are hard to fix. After the initial carving, sanding is essential to achieve a smooth finish, which will make painting much easier.
Next comes the painting process. Choosing the right colors can dramatically affect how your doll is perceived. For instance, soft pastels can create a delicate, innocent look, while bold colors can give a more vibrant, lively personality. Don't forget to add subtle details like blush on the cheeks or a hint of gloss on the lips to create depth. These small touches can transform a simple face into something truly special.
Additionally, consider the emotion you want your doll to express. Do you want it to look happy, sad, or perhaps curious? Each emotion can be conveyed through slight adjustments in the features. For example, raising the eyebrows a bit can give a surprised look, while drooping them can express sadness. Experiment with different expressions to see what resonates with you and your vision for the doll.
Finally, remember that personalization is key. Adding unique features, such as freckles, beauty marks, or even unique hairstyles, can make your doll stand out. Think of it as giving your doll its own story, making it a cherished piece that reflects not just your craftsmanship but also your creative spirit.
- What tools do I need for carving facial features? You will need a set of carving knives, gouges, and sandpaper for smoothing the surface.
- How can I ensure my paint adheres well to the wood? Make sure to sand the surface well before painting and consider using a primer designed for wood.
- Can I use regular acrylic paint for my dolls? Yes, but make sure it’s non-toxic and suitable for children if the doll is intended for play.
- What if I make a mistake while carving? Don’t worry! You can always sand down the area and start again or creatively incorporate the mistake into your design.
Frequently Asked Questions
- What materials do I need to start making wooden dolls?
To kick off your wooden doll-making journey, you'll need some essential materials, including high-quality wood (like basswood or pine), carving tools (such as knives and chisels), sandpaper for smoothing surfaces, and paints or finishes for decoration. Don't forget about safety gear like gloves and goggles!
- How do I choose the right type of wood for my dolls?
Selecting the right wood is crucial for both durability and aesthetics. Softwoods like pine are easier to carve, making them great for beginners. Hardwoods like maple offer more durability and a finer finish but can be challenging to work with. Consider the style and purpose of your doll when making your choice!
- What basic carving techniques should I learn?
Start with foundational techniques like whittling, which involves removing thin shavings from the wood, and chiseling, which allows for more precise cuts. Sanding is also key to achieving a smooth finish. Mastering these basics will set you up for success in more advanced techniques later on!
- How can I personalize my wooden dolls?
Personalizing your dolls can be a fun and creative process! You can design unique outfits using fabric scraps or even knit tiny sweaters. For facial features, try carving different expressions or painting them with vibrant colors. The sky's the limit when it comes to making your dolls truly one-of-a-kind!
- What type of paint is best for wooden dolls?
When it comes to painting your wooden dolls, acrylic paints are often the best choice. They adhere well to wood, are easy to work with, and come in a wide range of colors. Just make sure to choose non-toxic options, especially if the dolls will be handled by children!
- How do I seal and protect my finished dolls?
To ensure your wooden dolls last for years, sealing them with a clear varnish or polyurethane is essential. This will protect the paint and wood from moisture and wear. Apply a few thin coats, allowing each one to dry thoroughly before adding the next for the best results!


