Easy DIY Ladder Shelf for Trendy Decor
Are you looking to add a touch of style and functionality to your home? Look no further! A DIY ladder shelf is not just a practical storage solution; it’s also a trendy decor piece that can elevate any room. Imagine a beautiful wooden ladder leaning against your wall, adorned with your favorite books, plants, and decorative items. It’s like bringing a piece of art into your space while keeping it organized!
Creating your own ladder shelf is easier than you might think, and it offers a sense of accomplishment that comes from crafting something with your own hands. Plus, you can personalize it to match your unique style and preferences. Whether you want a rustic charm or a modern sleekness, the options are endless. In this article, we will guide you through each step of the process, from gathering materials to the final touches that will make your ladder shelf truly one-of-a-kind.
So, roll up your sleeves and get ready to unleash your creativity! With just a few materials and some simple tools, you’ll be on your way to creating a stunning ladder shelf that not only serves a purpose but also makes a statement in your home. Let’s dive into the details and start crafting a piece that you’ll be proud to show off!

Materials Needed
Creating your very own ladder shelf is not only a fun DIY project but also a fantastic way to add a personalized touch to your home. To kick things off, you'll need to gather some essential materials and tools. Trust me, having everything ready before you start will save you from those frustrating trips to the hardware store in the middle of your project!
First and foremost, let's talk about the wood. You'll want to choose a sturdy type that can support your decorative items without buckling under pressure. Popular choices include pine, oak, and plywood. Each type has its own unique characteristics, so consider what fits your style. For instance, pine is lightweight and easy to work with, while oak offers a more robust structure. You might also want to think about the finish you'll apply later, as some woods take paint or stain better than others.
Next up, you'll need some basic tools. Here’s a quick rundown of what you should gather:
- Measuring tape: Precision is key, so a measuring tape is a must-have.
- Saw: A circular saw or a handsaw will do the trick for cutting your wood to size.
- Screwdriver: You’ll need this for assembling the pieces together.
- Sandpaper: To smooth out those rough edges and ensure a polished finish.
- Wood glue: For extra stability, especially if you’re not using screws for every joint.
Don't forget about safety gear! A pair of safety goggles and a dust mask can go a long way in keeping you protected while you work. Now, if you’re feeling a bit adventurous, you might also want to invest in some decorative brackets or hooks to give your ladder shelf that extra flair. These little details can transform your shelf from ordinary to extraordinary!
To sum it up, here’s a quick table of the materials you'll need:
| Material/Tool | Purpose |
|---|---|
| Wood (Pine, Oak, Plywood) | Main structure of the ladder shelf |
| Measuring Tape | For accurate measurements |
| Saw | Cutting wood to size |
| Screwdriver | Assembling the shelf |
| Sandpaper | Smoothing edges |
| Wood Glue | For added stability |
| Safety Goggles & Dust Mask | For personal protection |
By gathering these materials and tools, you’re setting yourself up for success. Remember, the right preparation can make all the difference in your DIY journey. So, roll up your sleeves, and let’s get ready to build something beautiful!
Step-by-Step Instructions
Creating your own ladder shelf may seem daunting at first, but with the right guidance, it can be a fun and rewarding project. Let’s dive into the step-by-step instructions that will help you build a stylish and functional ladder shelf that complements your home decor.
First, make sure you have your materials ready. You’ll need wood planks for the ladder sides and shelves, screws, a drill, a saw, and sandpaper. Having everything on hand will save you time and keep your momentum going. Now, let’s get started!
The first step in building your ladder shelf is preparing the wood. This is where you’ll ensure that your materials are ready for assembly. Begin by sanding the edges and surfaces of your wood planks. This step is crucial to avoid splinters and ensure a smooth finish. You can use a power sander or sandpaper, depending on what you have available. Don't skip this step; it’s like putting on a fresh coat of paint before the big reveal!
Next, you’ll want to cut your wood to the desired lengths. For a standard ladder shelf, you might consider the following dimensions:
| Component | Length (inches) |
|---|---|
| Side Rails | 60 |
| Shelves | 30 |
Once you’ve cut your pieces, treat the wood with a sealant or stain if you want a specific color or finish. This will not only enhance the look of your shelf but also protect the wood from wear and tear.
Now that your wood is prepared, it’s time to assemble the ladder shelf. Start by laying the two side rails parallel to each other. Place the first shelf at your desired height, ensuring that it is level. Use a drill to secure the shelf into the side rails with screws. Repeat this process for each shelf, maintaining equal spacing between them. A good rule of thumb is to leave about 12-15 inches between shelves to allow for adequate storage space.
As you assemble, take a moment to step back and check your work. Is everything aligned? Are the shelves sturdy? It’s important to ensure that your structure is stable before moving on to the finishing touches.
Once you’ve assembled your ladder shelf, the fun part begins! You can personalize it with paint, stain, or even decorative touches that reflect your style. Remember, this is your creation, so let your personality shine through!
Q: How long does it take to build a ladder shelf?
A: Depending on your experience level and the complexity of your design, it typically takes a few hours to a full day.
Q: Can I use different types of wood?
A: Absolutely! Just be aware that different woods may require different treatments and finishes.
Q: What if I don't have a drill?
A: You can use screws and a screwdriver, but a drill will make the process much quicker and easier.

Preparing the Wood
Preparing the wood is a crucial step in creating a sturdy and visually appealing ladder shelf. Think of this process as the foundation of a house; without a solid base, everything else can crumble. First, you’ll want to gather your wood and ensure it’s of high quality. The last thing you want is to invest time and effort into a project only for it to fall apart due to subpar materials. So, how do you ensure your wood is ready for the task? Here are the essential steps:
Start by sanding the wood. This is key to achieving a smooth finish that not only looks great but also feels pleasant to the touch. Use a medium-grit sandpaper to remove any rough spots, followed by a fine-grit sandpaper for that silky finish. Don't forget to sand the edges as well; those sharp corners can be a safety hazard and can ruin the aesthetic of your shelf.
Next, you’ll need to cut the wood to the desired dimensions. Accurate cuts are vital to ensure that your ladder shelf is not only functional but also visually appealing. Measure twice and cut once, as the saying goes! A miter saw or circular saw can be your best friends here, allowing for clean and precise cuts. If you’re unsure about your cutting skills, consider practicing on scrap wood first.
Once your pieces are cut, it’s time to treat the wood. This is where you can really personalize your shelf and add some character. You have a few options here:
- Staining: This enhances the natural grain of the wood and adds color without hiding its beauty.
- Sealing: If you want to protect your wood from moisture or damage, applying a wood sealant is a wise choice.
- Painting: For a bold statement, consider painting your shelf in a color that complements your decor.
Whichever method you choose, ensure you follow the manufacturer's instructions for the best results. Allow the wood to dry completely before moving on to the assembly phase. Remember, this preparation stage is all about setting the stage for your stunning ladder shelf. Take your time, and don’t rush through it—great things take time!
Q: What type of wood is best for a ladder shelf?
A: Popular choices include pine for its affordability and ease of use, oak for its durability, and plywood for a budget-friendly option that can be stained or painted.
Q: Do I need to seal the wood?
A: While sealing is not mandatory, it is recommended if you want to protect your shelf from moisture or wear, especially in humid environments.
Q: Can I use reclaimed wood for this project?
A: Absolutely! Reclaimed wood can add a unique character to your ladder shelf, but be sure to inspect it for any damage or rot before using it.

Choosing the Right Wood
When it comes to crafting your own ladder shelf, is crucial. Not only does it affect the overall aesthetic of your shelf, but it also determines its durability and strength. You want a wood that can hold your favorite books, plants, or decorative items without bowing or breaking under pressure. So, what should you consider when selecting wood for your DIY project? Let's dive into the options!
First, think about the type of wood. Softwoods like pine, cedar, and fir are popular choices for DIY projects because they are generally more affordable and easier to work with. However, they may not be as durable as hardwoods. On the other hand, hardwoods such as oak, maple, and cherry are more robust and can provide a stunning finish, but they come with a higher price tag and may require more effort to cut and shape.
Consider the finish you desire. If you’re looking for a rustic look, reclaimed wood or barn wood can add character and uniqueness to your shelf. Alternatively, if a sleek, modern appearance is what you’re after, opting for plywood or a well-finished hardwood may be the better route. Each type of wood can dramatically change the vibe of your decor, so take your time choosing!
Another factor to consider is the weight capacity. If you plan to use your ladder shelf for heavier items, like books or large plants, ensure that the wood you choose can handle the load. For instance, plywood is often a good choice for shelving because it’s designed to bear weight without sagging. Here’s a simple table to help you compare some common types of wood:
| Type of Wood | Durability | Cost | Best For |
|---|---|---|---|
| Pine | Moderate | Low | Lightweight items, casual decor |
| Oak | High | High | Heavy items, formal decor |
| Plywood | High | Moderate | Versatile shelving, strong support |
| Cedar | Moderate | Moderate | Outdoor decor, aromatic appeal |
Lastly, don’t forget about the environmental impact. Look for sustainably sourced wood or consider using reclaimed materials to reduce your carbon footprint. Not only is it good for the planet, but it can also add a unique story to your ladder shelf.
In summary, choosing the right wood for your ladder shelf is about balancing aesthetics, durability, and environmental responsibility. Take your time to explore different options and select the wood that best aligns with your vision and needs. After all, this shelf will be a part of your home decor, and you want it to be both beautiful and functional!

Measuring and Cutting
When it comes to creating your DIY ladder shelf, your wood accurately is crucial. Think of this step as laying the foundation for a house; if the foundation is shaky, everything built on top will be unstable. To begin, gather your materials and tools, including a measuring tape, a square, a saw, and safety goggles. Safety first, right? You wouldn’t want to end up with a splinter or, worse, an injury!
Start by deciding the dimensions of your ladder shelf. A typical ladder shelf might be around 60 inches tall and 24 inches wide, but feel free to customize it according to your space and style. Once you have your desired height and width, use your measuring tape to mark these dimensions on your wood. A good rule of thumb is to measure twice and cut once. This way, you can avoid any costly mistakes!
After marking your wood, it’s time to make those cuts. Use a square to ensure your cuts are straight and precise. If you’re using a circular saw, guide it slowly along your marked line for a clean cut. If you’re not comfortable with power tools, a hand saw can also do the trick, but it may take a bit more effort. Remember, patience is key! Rushing through this step can lead to uneven pieces, which will affect the overall look of your shelf.
Here’s a quick overview of the cutting process:
| Step | Action |
|---|---|
| 1 | Measure the height and width of your desired shelf. |
| 2 | Mark the measurements on your wood using a pencil. |
| 3 | Use a square to ensure your lines are straight. |
| 4 | Cut the wood along the marked lines with your saw. |
Once you’ve cut all your pieces, it’s a good idea to dry fit them together before assembling. This will help you visualize the final product and make any necessary adjustments. If you find any rough edges after cutting, don’t fret! A bit of sanding will smooth everything out and ensure that your shelf not only looks great but is also safe to handle.
In summary, measuring and cutting your wood may seem like a daunting task, but with a little care and attention, it can be a straightforward process. Just remember to take your time, double-check your measurements, and enjoy the journey of creating your own stylish ladder shelf!

Assembling the Ladder Shelf
Now that you've prepared your wood, it's time to dive into the exciting part—assembling your ladder shelf! This is where all your hard work starts to pay off, and you can see your vision come to life. First, gather all your materials and tools. You'll need wood pieces that you've cut to size, wood screws, a drill, and a level. Having everything ready will make the process smoother and more enjoyable.
Begin by laying out the side pieces of your ladder shelf. These will serve as the vertical supports. Position them parallel to each other, ensuring they are aligned properly. This alignment is crucial because it sets the foundation for the entire shelf. Once you have them in place, use your level to check that they are straight. A crooked shelf is not only unsightly but can also compromise stability.
Next, it’s time to attach the horizontal shelves. Start with the bottom shelf, as this will give you a solid base to work from. Measure approximately 12 inches from the bottom of each side piece and mark where the shelf will sit. Using your drill, create pilot holes to prevent the wood from splitting when you insert the screws. Secure the shelf in place with wood screws, ensuring they are tight but not overly so, as this can strip the wood.
Continue this process for the remaining shelves, spacing them evenly. A common spacing is around 12-15 inches apart, but feel free to adjust based on your storage needs and aesthetic preferences. As you attach each shelf, keep checking with the level to ensure everything remains straight. It’s a good idea to step back occasionally and view your assembly from a distance. This will help you identify any misalignments before you move on.
Once all the shelves are attached, reinforce the structure by adding diagonal braces. These can be made from leftover wood pieces and will significantly increase the stability of your ladder shelf. Attach them to the back of the shelf at an angle, connecting the side pieces to the shelves. Not only does this add strength, but it also gives your shelf a stylish, finished look.
Finally, take a moment to inspect your ladder shelf. Ensure all screws are secure and that there are no sharp edges or splinters. If everything looks good, congratulations! You've successfully assembled your ladder shelf. This project not only enhances your home decor but also gives you a sense of accomplishment. Now, let’s move on to the finishing touches that will truly personalize your creation!

Finishing Touches
Now that you've built your ladder shelf, it’s time to add those that will truly make it shine! This is where you can let your creativity flow and personalize your shelf to reflect your unique style. Think of this step as the icing on the cake; it’s what transforms a simple structure into a stunning piece of decor that can elevate any room. Whether you prefer a rustic charm or a sleek modern look, the finishing touches are vital in making your ladder shelf a true statement piece.
One of the most impactful ways to enhance your ladder shelf is through painting or staining. If you opt for paint, consider colors that complement your existing decor. A soft pastel can bring a touch of tranquility, while a bold hue can add a splash of excitement. On the other hand, staining can highlight the natural grain of the wood, giving it a warm, inviting feel. When choosing your finish, think about the overall vibe you want to create. Are you going for cozy and rustic, or sleek and contemporary? This decision will guide your choice of paint or stain.
For those who want to take it a step further, consider using different painting techniques to add texture and depth to your shelf. Techniques like distressing or ombre can create a unique look that sets your shelf apart from the rest. You might even want to incorporate stencils or decals for a more personalized touch. Just imagine how a beautifully painted shelf can become a conversation starter in your living room!
Once your ladder shelf is painted or stained to perfection, it’s time to think about decorating it. This is where the real fun begins! You can style your shelf with a variety of items that reflect your personality and interests. Here are some ideas to get you started:
- Books: Stack your favorite novels or display some beautiful coffee table books. They not only add character but also make great conversation starters.
- Plants: Incorporate some greenery with potted plants or succulents. They bring life to your space and improve air quality.
- Decorative Items: Use unique trinkets, vases, or framed photos to showcase your style. Mixing different textures and heights can create visual interest.
Finally, don’t forget about lighting! Adding a small lamp or fairy lights can create a cozy ambiance, especially in the evenings. A well-lit shelf draws attention and can highlight your carefully chosen decor pieces.
In conclusion, the finishing touches you apply to your ladder shelf can transform it from a simple DIY project into a stunning focal point in your home. Whether it’s through color, texture, or thoughtful decoration, remember that this is your chance to express yourself. So go ahead, unleash your creativity, and enjoy the process of making your ladder shelf uniquely yours!
Q: What type of wood is best for a ladder shelf?
A: The best wood depends on your aesthetic preference and budget. Popular choices include pine for a budget-friendly option, oak for durability, and plywood for a versatile option.
Q: How do I ensure my ladder shelf is stable?
A: Make sure to use sturdy brackets and secure the shelf to the wall for added stability. Additionally, ensure that the wood is properly cut and assembled.
Q: Can I use my ladder shelf outdoors?
A: Yes, but you will need to treat the wood with a weather-resistant sealant to protect it from the elements.

Painting Techniques
When it comes to adding the perfect finishing touch to your DIY ladder shelf, can make all the difference. The right paint can transform a simple wooden structure into a stunning centerpiece that complements your home decor. But where do you start? Let's dive into some popular painting techniques that will not only enhance the aesthetic appeal of your ladder shelf but also ensure that it stands the test of time.
First off, consider the type of paint you want to use. Acrylic paints are popular for their quick drying times and vibrant colors, while chalk paint offers a matte finish that gives a rustic charm. If you’re aiming for durability, especially if your shelf will hold heavier items, opt for a high-quality latex paint that can withstand wear and tear. You might also want to think about using a primer, as it helps the paint adhere better and can prevent wood knots from bleeding through.
Next, let's talk about application methods. The way you apply your paint can create different effects. Here are a few techniques to consider:
- Brush Painting: Using a brush allows for precise application, especially in corners and edges. It’s great for achieving a smooth finish, but it can also leave brush strokes, which some people prefer for a more textured look.
- Spray Painting: If you're looking for an even coat without the brush strokes, spray painting is the way to go. It’s fast and covers large areas quickly, but requires a bit more skill to avoid drips and uneven spots.
- Sponging: For a unique, textured finish, try sponging. This technique involves dabbing a sponge into the paint and applying it to the surface, creating a soft, layered look that adds character.
One technique that has gained popularity in recent years is the ombre effect. This involves blending two or more colors together, creating a gradient that adds depth and interest. To achieve this, start with the lighter color at the top of the shelf and gradually blend in the darker shade towards the bottom. This technique can give your ladder shelf a modern and artistic flair.
Don't forget about finishing products! Once you've painted your ladder shelf, applying a clear sealant can protect the paint from scratches and stains. Polyurethane or a water-based sealant will provide a durable finish that keeps your shelf looking fresh for years to come. Just be sure to choose a sealant that matches the sheen of your paint—matte, satin, or glossy—to maintain a cohesive look.
Finally, let your creativity shine! Experiment with different colors, patterns, and techniques. You could even incorporate stencils or decals to add a personal touch. Remember, your ladder shelf is not just a storage solution; it’s also a reflection of your style and personality. So, unleash your inner artist and have fun with this project!
Q: Can I use outdoor paint for my ladder shelf?
A: Yes, outdoor paint can be used for indoor projects as well. It’s designed to withstand the elements, making it more durable against scratches and stains.
Q: How long should I wait between coats of paint?
A: Generally, it’s best to wait at least 2-4 hours between coats, but always check the paint can for specific drying times.
Q: Is it necessary to sand the wood before painting?
A: Yes, sanding the wood helps create a smooth surface for the paint to adhere to, which can lead to a better finish.
Q: Can I mix different paint types?
A: It’s not recommended to mix different types of paint (like oil-based and water-based) as they may not adhere properly to each other, leading to peeling or flaking.
Decorating Your Ladder Shelf
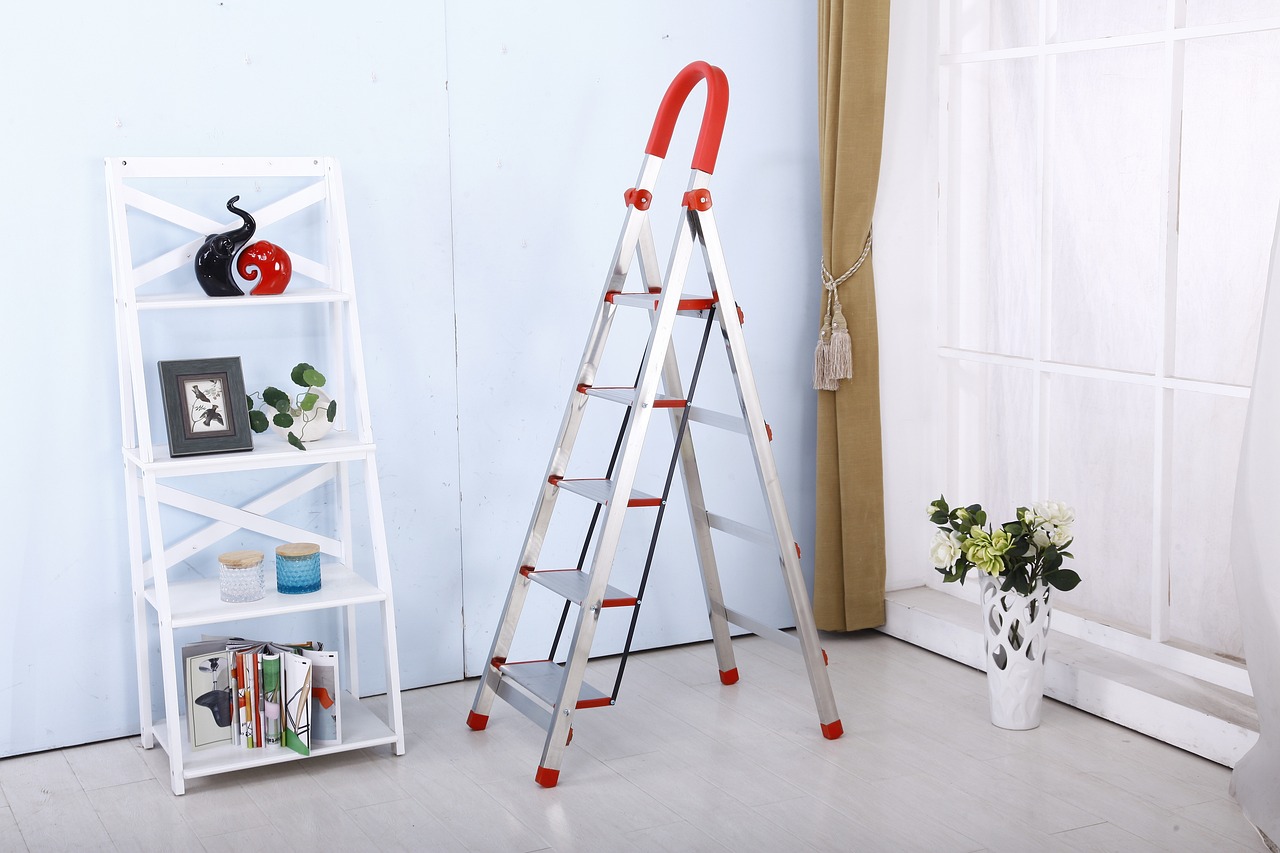
Now that you've built your stunning ladder shelf, it’s time to bring it to life with some creative decorating! Think of your ladder shelf as a blank canvas, waiting for your unique touch. The key to a beautifully styled shelf is balance and variety. You want to create visual interest while also ensuring that it remains functional. Start by choosing a few larger items as your focal points, such as a statement plant or an eye-catching piece of art. These larger items will draw the eye and give your shelf a sense of purpose.
Next, layer in smaller items to add depth. This could include books, candles, or decorative boxes. When arranging these items, consider the rule of thirds, which suggests that you should divide your space into three sections, both horizontally and vertically. Place items at varying heights to create a dynamic look. For instance, stack a couple of books horizontally on one shelf, and place a potted plant next to them on a slightly higher shelf. This creates a pleasing visual rhythm that keeps the eye moving.
Don't forget about color! A cohesive color palette can tie your shelf together and enhance your overall decor. You might choose to stick with neutrals for a more minimalist look, or go bold with vibrant colors that pop against the wood of your shelf. Incorporate different textures as well, such as a woven basket or a ceramic vase, to add another layer of interest. Remember, the goal is to create a space that feels curated and personal, reflecting your style and personality.
Finally, consider functionality. If you’re using your ladder shelf in a living room, think about incorporating items that are not only decorative but also practical. For example, you could add a small basket for remote controls or a decorative box for miscellaneous items. This way, your shelf remains stylish without becoming cluttered. The beauty of a ladder shelf is its versatility; it can be a display for your favorite books, a home for your plants, or even a showcase for your treasured collectibles. Let your imagination run wild and have fun with it!
- What items are best for decorating a ladder shelf?
Consider using a mix of plants, books, decorative boxes, and personal memorabilia to create a well-rounded look.
- How can I ensure my ladder shelf remains functional?
Incorporate practical items like baskets for storage or use the lower shelves for frequently accessed items.
- Can I change the decor seasonally?
Absolutely! Changing your decor with the seasons can keep your space feeling fresh and exciting.
Frequently Asked Questions
- What materials do I need to build a DIY ladder shelf?
To create your trendy ladder shelf, you will need wood (like pine or plywood), screws, a saw, a drill, sandpaper, and a level. Optional items include paint or stain for finishing touches and decorative items for styling.
- How do I choose the right type of wood for my ladder shelf?
Choosing the right wood depends on your style and budget. Softwoods like pine are affordable and easy to work with, while hardwoods like oak provide durability and a more polished look. Consider the weight capacity you need and the overall aesthetic you want to achieve.
- What are the steps for preparing the wood?
Start by measuring and cutting your wood to the desired lengths. Sand the edges and surfaces to remove any splinters and ensure a smooth finish. If you’re treating the wood, apply a wood conditioner or sealant to protect it from moisture and enhance its appearance.
- How can I ensure my ladder shelf is stable?
To ensure stability, make sure all your cuts are accurate and that the pieces fit together snugly. Use a level during assembly to keep everything aligned. Additionally, consider adding brackets or screws at the joints for extra support.
- What finishing techniques can I use to paint or stain my shelf?
You can choose from various techniques, such as using a brush for detailed work, a roller for a smooth finish, or spray paint for an even coat. If staining, apply with a cloth or brush and wipe off excess to achieve the desired color intensity.
- How should I decorate my ladder shelf once it's complete?
Get creative! You can style your ladder shelf with books, plants, picture frames, or decorative items. Mix and match sizes and textures to create visual interest. Remember, it’s all about showcasing your personality through your decor!
- Is this project suitable for beginners?
Absolutely! The DIY ladder shelf project is beginner-friendly, especially with clear instructions. Just take your time, measure carefully, and don't hesitate to ask for help if needed. It's a great way to build your DIY skills!


