
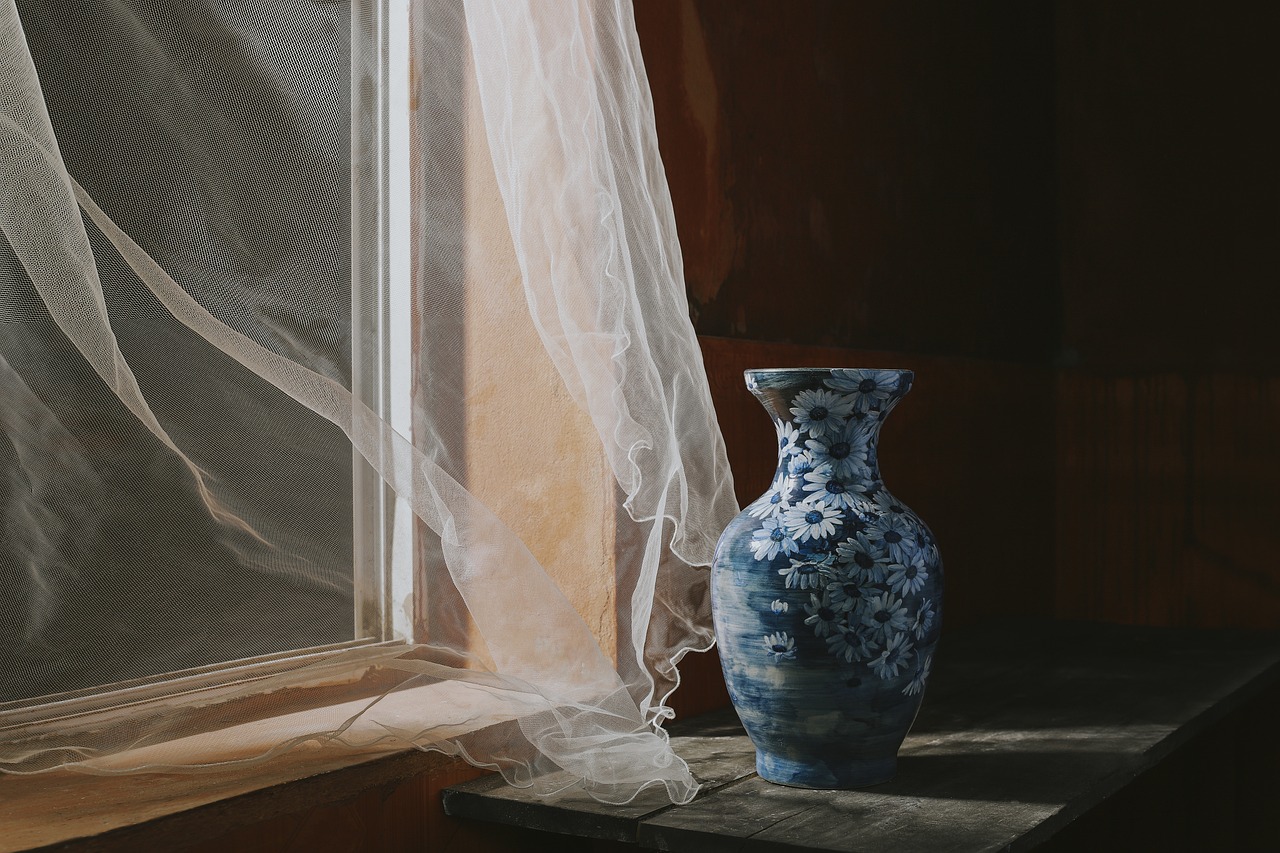
Creating Captivating Ceramic Art: What You Need to Know
Welcome to the fascinating world of ceramic art, where creativity and craftsmanship collide to produce stunning pieces that can be both functional and decorative. Whether you’re a seasoned artist or a curious beginner, this article is your gateway to understanding the essential techniques, tools, and tips that will elevate your ceramic creations to the next level. So, grab your apron and let’s dive into the art of ceramics!
Before you start shaping your masterpiece, it’s crucial to understand the different types of clay available. Each type of clay has its own unique characteristics and uses, which can significantly affect the outcome of your work. Here’s a quick overview:
| Type of Clay | Characteristics | Common Uses |
|---|---|---|
| Earthenware | Low firing temperature, porous, often reddish-brown in color | Functional pottery, decorative pieces |
| Stoneware | Medium to high firing temperature, durable, non-porous | Tableware, sculptures, functional items |
| Porcelain | High firing temperature, very smooth and white, often translucent | Fine china, detailed sculptures, high-end pottery |
Choosing the right clay is the first step to ensuring your artistic vision comes to life. Each type has its own strengths, so consider what you want to create and select accordingly.
No artist works without their tools, and ceramicists are no exception. A variety of tools can help you achieve your desired results, making the crafting process smoother and more enjoyable. Here are some of the essentials:
- Pottery Wheel: The heart of many ceramic studios, allowing for the creation of symmetrical forms.
- Sculpting Tools: Various tools for shaping, carving, and detailing your pieces.
- Kiln: Essential for firing your creations, transforming raw clay into durable ceramics.
Having the right tools not only enhances your efficiency but also opens up a world of possibilities for your artistic expression. Think of them as your paintbrushes in a painter's studio.
Mastering the pottery wheel is a rite of passage for many ceramic artists. It’s where the magic happens, and learning the basic techniques can set a solid foundation for your skills. Let’s break down some key techniques:
Centering is the very first step in wheel throwing. It’s all about getting the clay perfectly balanced on the wheel. Why is this important? Well, if your clay isn’t centered, your piece will be wonky, and nobody wants that! Proper technique involves not just your hands but your entire body posture. Think of it like balancing a spinning top; the more centered it is, the better it spins!
Once your clay is centered, it’s time to unleash your creativity! There are several shaping techniques you can explore:
- Throwing: Using the wheel to create forms like bowls and vases.
- Coiling: Building pieces by stacking coils of clay, great for larger forms.
- Slab Building: Flattening clay into slabs to construct geometric shapes.
Experimenting with these methods will allow you to create unique forms and structures that reflect your personal style.
Now that you have your shape, it’s time to add some flair! Glazing is what gives your ceramic pieces color and texture. There are various glazing methods, such as dipping, brushing, and spraying, each offering different effects. Remember, the firing temperature plays a crucial role in achieving the desired finish. Think of glazing as the icing on a cake; it’s what makes your creation truly pop!
Firing is the transformative step that turns your clay into a durable piece of art. There are two primary firing methods you should know about:
- Bisque Firing: The first firing that hardens the clay and prepares it for glazing.
- Glaze Firing: The second firing that melts the glaze and creates a glass-like surface.
Each firing method impacts the final product, so understanding these processes is vital for any ceramic artist.
Kilns are the unsung heroes of the ceramic world. They come in various types, including electric, gas, and wood-fired kilns, each with its own unique characteristics. Choosing the right kiln depends on the type of ceramic work you’re doing. Think of it as selecting the right oven for your favorite recipe; the right environment will yield the best results.
Finding inspiration can sometimes feel like searching for a needle in a haystack. However, there are countless sources to ignite your creativity! Consider studying nature, diving into art history, or experimenting with different styles and techniques. Remember, the creative process is all about exploration and growth, so don’t be afraid to step outside your comfort zone!
Q: What type of clay should I start with as a beginner?
A: Earthenware is a great choice for beginners due to its low firing temperature and versatility.
Q: Do I need a kiln to create ceramic art?
A: Yes, a kiln is essential for firing your pieces, but some artists use alternative methods for low-fire projects.
Q: How long does it take to learn pottery?
A: It varies by individual, but consistent practice can lead to noticeable improvements in just a few months.
Q: Can I glaze my pieces at home?
A: Yes, you can apply glaze at home, but you'll still need access to a kiln for firing.

Understanding Clay Types
When it comes to creating stunning ceramic art, the choice of clay is absolutely crucial. Each type of clay has its own unique properties, characteristics, and intended uses, making it essential for artists to understand the distinctions. The three primary types of clay used in ceramic art are earthenware, stoneware, and porcelain. Let’s dive deeper into each type and explore how they can influence your creative process.
Earthenware is perhaps the most accessible type of clay, often favored by beginners due to its ease of use. It is a low-fire clay, which means it is fired at lower temperatures, typically between 1,830°F and 2,100°F (1,000°C to 1,150°C). This type of clay is known for its terracotta color and porous nature, making it ideal for decorative pieces rather than functional ware. Artists often use earthenware for pottery that is painted or glazed, as it readily absorbs color. However, keep in mind that earthenware is not as durable as other types of clay and may chip or break more easily.
Stoneware, on the other hand, is a mid to high-fire clay that is much more robust and versatile. Fired at temperatures ranging from 2,190°F to 2,400°F (1,200°C to 1,300°C), stoneware becomes non-porous and is suitable for functional items such as dinnerware and bakeware. Its natural earthy tones and ability to hold heat make it a popular choice among potters who are looking to create durable and practical pieces. Stoneware can also be decorated with various glazing techniques, allowing for both aesthetic appeal and functionality.
Lastly, we have porcelain, the crème de la crème of clays. Known for its white, translucent quality, porcelain is a high-fire clay that requires temperatures of at least 2,300°F (1,260°C) to achieve its characteristic finish. This type of clay is incredibly strong and can be made into very thin, delicate pieces without compromising durability. Porcelain is often used for fine china and artistic sculptures, but it does require a higher skill level to work with due to its demanding nature and tendency to warp if not handled correctly.
| Type of Clay | Firing Temperature | Characteristics | Best For |
|---|---|---|---|
| Earthenware | 1,830°F - 2,100°F (1,000°C - 1,150°C) | Porous, soft, easy to shape | Decorative pieces, non-functional ware |
| Stoneware | 2,190°F - 2,400°F (1,200°C - 1,300°C) | Durable, non-porous, earthy tones | Functional items, dinnerware |
| Porcelain | 2,300°F (1,260°C) or higher | Translucent, strong, delicate | Fine china, artistic sculptures |
Choosing the right type of clay is like selecting the perfect canvas for a painter; it sets the stage for what you can create. Understanding the properties of earthenware, stoneware, and porcelain not only helps you make informed decisions but also enhances your overall ceramic experience. So, whether you’re a novice potter or an experienced artist, take the time to explore these clay types and let them inspire your next masterpiece!
Essential Tools for Ceramic Artists
When diving into the world of ceramic art, having the right tools can make all the difference between a frustrating experience and a fulfilling creative journey. Imagine trying to paint a masterpiece without a brush; that's how it feels to work without the essential tools of the trade. From the moment you touch the clay to the final firing of your piece, the tools you choose will influence your artistic expression and the quality of your work.
First and foremost, the pottery wheel is a cornerstone of ceramic creation. This magical device allows artists to shape clay into beautiful forms with precision and ease. Whether you're crafting bowls, vases, or intricate sculptures, a pottery wheel can help you achieve that perfect symmetry. But remember, mastering the wheel requires practice—think of it like learning to ride a bike; it might be wobbly at first, but with persistence, you'll be cruising smoothly in no time!
Next on the list is a set of sculpting tools. These are your trusty sidekicks, helping you refine details, carve textures, and add unique features to your pieces. A basic toolkit often includes items like loop tools, rib tools, and needle tools. Each serves a specific purpose, allowing you to manipulate the clay in various ways. For instance, a loop tool is fantastic for carving out shapes and adding depth, while a rib tool can help smooth surfaces and create clean lines. Having a range of tools at your disposal can spark creativity and innovation in your work.
Another essential component is the kiln. This is where the magic truly happens, transforming your raw clay creations into durable, finished pieces. There are several types of kilns, including electric, gas, and wood-fired options, each offering unique benefits. Electric kilns are popular for beginners due to their ease of use and control over firing temperatures. However, wood-fired kilns can impart a beautiful, organic quality to your work that many artists cherish. Understanding the type of kiln that best suits your style and the materials you're using is crucial for achieving the desired results.
To give you a clearer picture, here's a simple table highlighting some essential tools and their functions:
| Tool | Function |
|---|---|
| Pottery Wheel | Used for shaping clay into symmetrical forms. |
| Sculpting Tools | Used for carving, refining details, and adding textures. |
| Kiln | Used for firing clay to transform it into a durable finished product. |
| Glazing Tools | Used for applying glaze to enhance color and finish. |
Additionally, glazing tools are vital for adding that final touch of personality and flair to your creations. Brushes, sponges, and sprayers are just a few examples of how you can apply glaze to your pieces. The glazing process is where you can truly express your artistic vision, experimenting with colors and textures that reflect your style. Remember, the right tools can elevate your work from ordinary to extraordinary!
In conclusion, investing in quality tools is essential for any ceramic artist looking to enhance their craft. Each tool plays a significant role in the creative process, from shaping the clay to firing it in the kiln. As you embark on your ceramic journey, remember that practice and experimentation are key. Embrace the learning curve, and don't hesitate to explore new techniques and tools that can help you grow as an artist.
- What is the most important tool for a beginner ceramic artist? The pottery wheel is often considered essential for creating symmetrical pieces, but having a basic set of sculpting tools is also crucial.
- Can I create ceramics without a kiln? While a kiln is necessary for firing clay, some artists use alternative methods like air-drying clay for non-functional pieces.
- How do I choose the right kiln for my projects? Consider the types of clay and glazes you plan to use, as well as the size of your pieces. Electric kilns are great for beginners, while more experienced artists might prefer gas or wood-fired options.

Pottery Wheel Techniques
Mastering the pottery wheel is like learning to ride a bike; it takes practice, patience, and a bit of courage to fall and get back up. The wheel is a magical tool that transforms a lump of clay into beautiful, symmetrical pieces of art. But before you start spinning, it's essential to understand some fundamental techniques that will lay the groundwork for your pottery journey. In this section, we will delve into the basics of centering clay, pulling walls, and shaping forms, each step crucial in the creation of your ceramic masterpiece.
First up is the centering of clay, which is the foundation of all wheel-throwing techniques. Imagine trying to build a tower on a shaky base; it’s bound to topple over! Centering ensures that your clay is perfectly balanced on the wheel, allowing for even shaping. To center your clay effectively, start by placing a well-wedged ball of clay onto the wheel head. With your hands wet and your elbows anchored to your body, apply pressure to the clay as the wheel spins. This technique requires a keen sense of touch and body posture; your movements should be fluid and controlled. If you're struggling, don’t be discouraged—many potters have spent hours honing this skill. Remember, practice makes perfect!
Once your clay is centered, it’s time to explore shaping techniques. This is where the real fun begins! You can choose from various methods, each offering unique results:
- Throwing: This involves using your hands to shape the clay as it spins. It’s the most common technique for creating bowls and pots.
- Coiling: Here, you roll out long strips of clay and stack them to form walls. This method is great for creating larger, sculptural pieces.
- Slab Building: This technique involves rolling out flat sheets of clay and assembling them into shapes. It’s perfect for creating tiles or boxes.
Each of these techniques has its own charm and challenges, allowing for endless creativity. As you experiment with these methods, you’ll discover your personal style and preferences. Just like a painter chooses their brush strokes, you’ll find the shaping technique that resonates with you.
Now, let’s not forget about the importance of practice and experimentation. Think of the pottery wheel as a dance floor; the more you practice your steps, the more graceful you become. Don’t be afraid to try new things! Mix techniques, play with different clay types, and explore various forms. Each piece you create is a learning experience, teaching you more about your craft and your artistic voice.
In conclusion, mastering pottery wheel techniques is a journey filled with excitement and discovery. By focusing on centering your clay, experimenting with different shaping methods, and embracing the learning process, you’ll find yourself creating stunning ceramic pieces that reflect your unique style and creativity. So, roll up your sleeves, get your hands dirty, and let the pottery wheel take you on a wonderful adventure!
Q: How long does it take to master pottery wheel techniques?
A: Mastery varies from person to person. Some may feel comfortable after a few sessions, while others might take months or even years. The key is consistent practice.
Q: What type of clay is best for beginners?
A: Earthenware clay is often recommended for beginners due to its workability and lower firing temperature. It’s forgiving and allows for easier shaping.
Q: Can I use a pottery wheel at home?
A: Absolutely! There are many affordable options for home pottery wheels. Just ensure you have enough space and the necessary tools to get started.

Centering Clay
Centering clay is one of the most crucial steps in the pottery wheel process, acting as the foundation upon which all your beautiful creations will be built. Imagine trying to build a house on a shaky foundation—it's just not going to work! Similarly, if your clay isn’t centered properly, any subsequent shaping will lead to uneven, wobbly pieces that can be frustrating to work with. The goal here is to achieve a perfectly symmetrical form, which not only looks aesthetically pleasing but also ensures the integrity of the piece during firing.
To center your clay effectively, it’s essential to focus on both technique and body posture. First, start with a well-prepared ball of clay, typically around 1 to 2 pounds for beginners. Place it firmly in the center of the wheel head. Once you begin spinning the wheel, you’ll want to apply consistent pressure with your hands. This pressure must be firm yet gentle—think of it as coaxing the clay into position rather than forcing it. As the wheel spins, use your dominant hand to press down and inward while your other hand supports the clay from the side, guiding it into a centered position.
Here’s a quick breakdown of the steps to center your clay:
- Prepare the Clay: Knead the clay to remove air bubbles and create a uniform texture.
- Position the Clay: Place the clay ball on the wheel head, ensuring it is as close to the center as possible.
- Apply Pressure: Use your hands to apply even pressure, adjusting as necessary to keep the clay centered.
- Check for Symmetry: As the clay spins, observe its shape. It should form a perfect cone as you work.
It’s also important to maintain a comfortable and stable posture while centering. Sit at a height where your elbows can rest on your knees, allowing you to use your body weight to apply pressure rather than just your arms. This not only helps in centering the clay effectively but also reduces fatigue during longer sessions. Remember, practice makes perfect! Every potter has their own rhythm and style, so don’t be discouraged if it takes time to master this skill. Keep at it, and soon you’ll find yourself centering like a pro.
- What if my clay keeps moving off-center?
It may be due to uneven pressure or improper body posture. Ensure you’re applying consistent pressure and adjust your stance as needed. - How do I know when the clay is centered?
Look for symmetry as the clay spins. If it appears to wobble or shift, it may not be centered. - Can I center clay that is too dry?
Dry clay can be challenging to center. It’s best to work with clay that is adequately moist for optimal results.
Shaping Techniques
When it comes to creating stunning ceramic art, mastering is absolutely essential. Once you've successfully centered your clay on the pottery wheel, the real fun begins! There are several methods you can use to transform that lump of clay into a beautiful work of art. Let's dive into some of the most popular shaping techniques that every aspiring ceramic artist should know.
First up is the classic throwing technique. This method involves using the pottery wheel to spin the clay while you apply pressure with your hands to shape it. It's like dancing with the clay—finding that perfect rhythm and balance can take some practice, but the results are often breathtaking. With throwing, you can create anything from bowls to vases, and the possibilities are endless!
Next, we have the coiling technique, which is a bit more hands-on and allows for a greater level of creativity. This method involves rolling out long, snake-like pieces of clay and stacking them on top of each other to form your desired shape. Think of it like building a tower with spaghetti! Coiling is fantastic for making larger pieces or more intricate designs, as you can easily manipulate the coils to create unique textures and patterns.
Another technique worth mentioning is slab building. This method involves rolling out flat sheets of clay and cutting them into shapes that you can assemble to create your piece. It's perfect for creating geometric forms or even functional items like plates and tiles. With slab building, you have the freedom to explore different shapes and sizes, allowing your creativity to shine through.
While these methods are the most common, there are also some hybrid techniques that combine aspects of each. For example, you might start with slabs to create the base of your piece and then use coiling to add decorative elements. The key is to experiment and find what works best for you. Remember, art is all about exploration and finding your unique style!
As you delve into these shaping techniques, it's important to keep in mind that practice makes perfect. Don't be discouraged if your first few attempts don't turn out as expected. Like a sculptor chiseling away at a block of marble, each piece you create will bring you closer to mastering your craft. And who knows? You might just surprise yourself with what you can create!
In conclusion, whether you prefer throwing, coiling, or slab building, each shaping technique offers its own unique advantages and challenges. Embrace the process, let your creativity flow, and remember that the journey of becoming a skilled ceramic artist is just as important as the final product. Happy shaping!
- What is the best technique for beginners? Throwing is often recommended for beginners as it helps develop hand-eye coordination and an understanding of clay dynamics.
- Can I combine different shaping techniques? Absolutely! Many artists combine techniques like coiling and slab building to create unique pieces.
- How do I know which technique to use? It depends on the form you want to create. Experiment with different methods to find out what works best for your artistic vision.

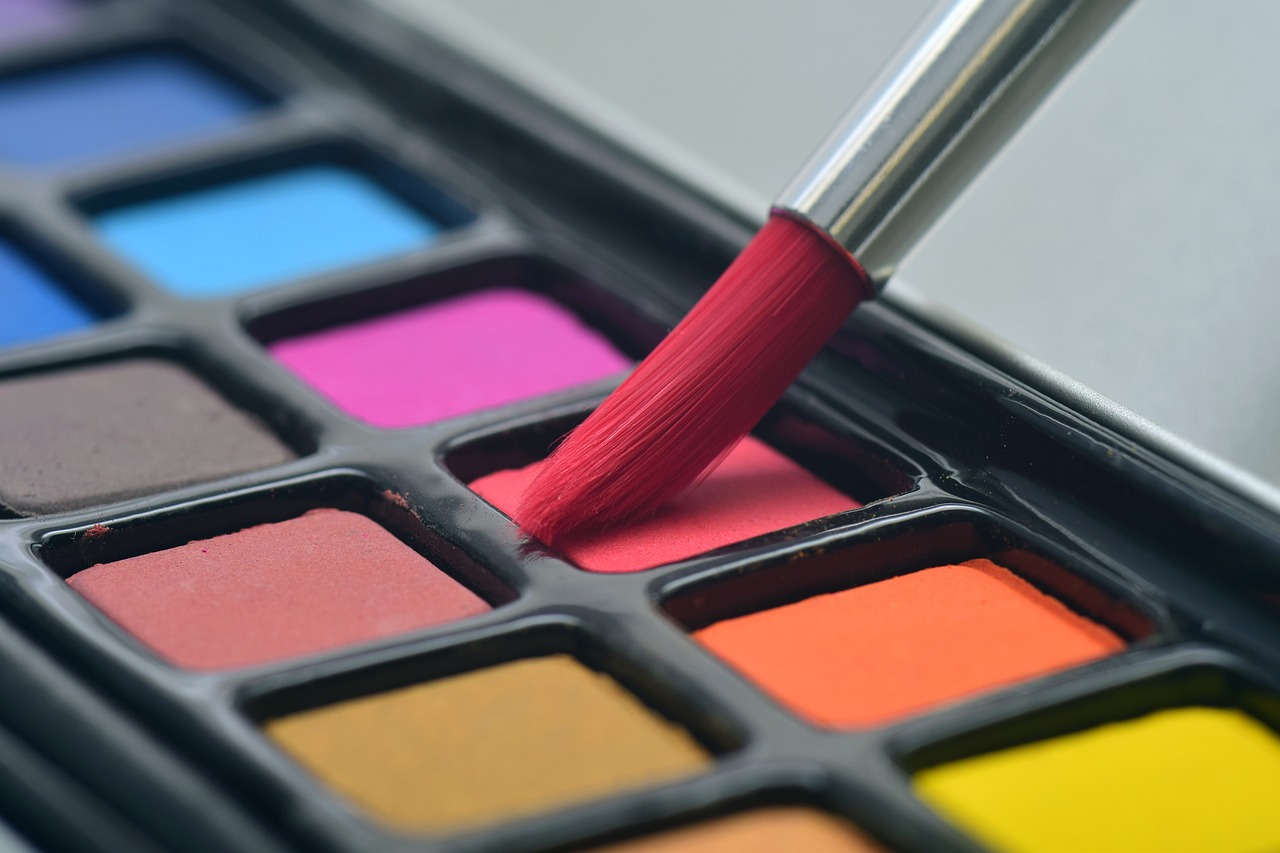
Glazing and Finishing Techniques
When it comes to ceramic art, glazing is like the cherry on top of a delicious sundae. It not only adds color and shine but also enhances the texture and durability of your pieces. Understanding the various glazing methods is crucial for any ceramic artist looking to elevate their work. There are several techniques you can employ to achieve different effects, and each method has its own unique charm.
One popular technique is the dip glaze method, where you immerse your ceramic piece into a bucket of glaze. This method is straightforward and efficient, allowing for an even coating. However, be careful not to dip too deeply, as it can lead to glaze pooling at the bottom, which may cause the piece to stick to the kiln shelf during firing.
Another option is the brush-on technique, which offers more control and allows for intricate designs. This method is perfect for artists who want to create personalized touches or layer different colors. You can use a variety of brushes to achieve different textures, from fine details to bold strokes. The key here is to ensure that each layer dries before applying the next, preventing unwanted blending.
For those looking to create a more organic look, the spray glazing technique can be a game-changer. Using a spray gun, you can achieve a soft, diffused effect that mimics natural elements. This method is particularly effective for larger pieces, where even coverage is essential. Just remember to wear a mask and work in a well-ventilated area to avoid inhaling any fumes.
Let’s not forget about the importance of firing temperatures in achieving the desired finish. Different glazes react differently depending on the temperature they are fired at. For instance, some glazes may turn vibrant and glossy at high temperatures, while others may remain matte. Understanding the firing range of your chosen glaze is fundamental to achieving the look you want. Here's a quick reference table:
| Glaze Type | Firing Temperature (°F) | Finish Type |
|---|---|---|
| Low-Fire Glazes | 1820 - 1940 | Bright, glossy |
| Mid-Fire Glazes | 2100 - 2230 | Varied, often satin |
| High-Fire Glazes | 2230 - 2380 | Earthy, matte or glossy |
Finishing techniques are equally important. After glazing, you might want to consider applying a clear glaze over your colored glaze for added depth and protection. This not only enhances the visual appeal but also makes your ceramics more functional and easier to clean. Additionally, polishing techniques can be used on unglazed surfaces to create a smooth finish that feels as good as it looks.
The world of glazing and finishing techniques is vast and full of possibilities. Experimenting with different methods can lead to unexpected and delightful results. So, don’t be afraid to play around and let your creativity shine through! Remember, every artist has their own unique style, and finding what works best for you is part of the artistic journey.
- What is the best type of glaze for beginners? Low-fire glazes are often recommended for beginners due to their vibrant colors and forgiving nature.
- Can I mix different glazes? Yes! Mixing glazes can create unique colors and finishes, but be sure to test them first to see how they interact.
- How do I know if my glaze has been applied correctly? An even coating without drips or pools is a good indicator. Practice makes perfect!
Firing Processes Explained
Firing is not just a step in the ceramic creation process; it’s the magical transformation that turns your raw clay into durable art. Think of firing as the moment when a caterpillar becomes a butterfly—it's where the real beauty and strength emerge. There are two primary firing processes that every ceramic artist should understand: bisque firing and glaze firing. Each serves a unique purpose and contributes to the final integrity and aesthetic of your ceramic pieces.
First up is bisque firing. This initial firing process is crucial because it removes all the moisture from the clay and hardens it, making it easier to handle in subsequent stages. During bisque firing, the clay is heated to a temperature typically between 1,600°F and 1,900°F (about 870°C to 1,040°C). This process not only strengthens the clay but also makes it porous enough to absorb glazes. Think of bisque firing as the first step in a long journey; it sets the foundation for everything that follows.
Once your pieces have undergone bisque firing, it’s time for the glaze firing. This is where the magic truly happens, as glazes melt and form a glassy surface that adds color, texture, and durability. The temperature for glaze firing usually ranges from 1,800°F to 2,300°F (approximately 1,000°C to 1,260°C), depending on the type of glaze and clay used. The right temperature is critical; too low, and the glaze won’t properly melt; too high, and you risk damaging your piece. During this process, the ceramic undergoes a stunning transformation that brings your creative vision to life.
| Firing Process | Temperature Range | Purpose |
|---|---|---|
| Bisque Firing | 1,600°F - 1,900°F (870°C - 1,040°C) | Removes moisture and hardens clay |
| Glaze Firing | 1,800°F - 2,300°F (1,000°C - 1,260°C) | Melt glazes, enhance color and texture |
Understanding these firing processes is essential for any ceramic artist. They not only impact the final appearance of your work but also determine its functionality. For instance, if you're creating functional ware like plates or mugs, proper firing is critical to ensure they can withstand everyday use. On the other hand, if you’re crafting decorative pieces, the firing process can help you achieve unique finishes that make your art stand out.
In addition to bisque and glaze firing, there are other firing methods worth mentioning, such as raku firing and wood firing. Raku firing involves removing pieces from the kiln while they are still glowing hot and placing them in combustible materials, creating stunning, unpredictable surfaces. Wood firing, on the other hand, uses a wood-burning kiln and can produce beautiful natural ash glazes. Each method offers a different aesthetic and experience, allowing artists to explore a wide range of creative possibilities.
In conclusion, mastering the firing processes is crucial for any ceramic artist looking to create captivating work. It’s not just about knowing the temperatures; it’s about understanding how each firing stage affects the final piece. So, whether you’re a seasoned potter or just starting, take the time to experiment with different firing techniques and watch your creations come to life in the kiln!
- What is the difference between bisque and glaze firing?
Bisque firing hardens the clay and prepares it for glazing, while glaze firing melts the glaze to create a finished surface. - Can I glaze my pieces after bisque firing?
Yes, after bisque firing, your pieces can be glazed and then undergo a glaze firing to achieve the desired finish. - What temperature do I need for raku firing?
Raku firing typically occurs at lower temperatures than traditional glaze firing, around 1,800°F (1,000°C).
Understanding Kilns
When it comes to ceramic art, kilns are the unsung heroes of the process. These specialized ovens are essential for transforming raw clay into durable, finished pieces. Imagine trying to bake a cake without an oven; that’s how crucial kilns are for potters! They come in various types, each serving a unique purpose depending on the desired outcome of the ceramic work. Understanding these different kilns can significantly enhance your crafting experience.
There are primarily three types of kilns used by ceramic artists: electric kilns, gas kilns, and wood-fired kilns. Each type has its own characteristics, advantages, and challenges. For instance, electric kilns are popular among beginners due to their ease of use and consistent firing temperatures. On the other hand, gas kilns provide more control over the atmosphere, which can lead to unique effects in glazing. Wood-fired kilns, while labor-intensive, offer a rustic charm and unpredictable results that many artists find appealing.
Here’s a quick breakdown of the different kiln types:
| Kiln Type | Fuel Source | Advantages | Disadvantages |
|---|---|---|---|
| Electric Kiln | Electricity | Easy to use, consistent temperature | Limited atmosphere control |
| Gas Kiln | Natural gas or propane | Greater control over atmosphere, unique glazing effects | Requires more skill to operate |
| Wood-Fired Kiln | Wood | Natural aesthetics, unpredictable results | Labor-intensive, requires constant monitoring |
Choosing the right kiln depends on your specific needs and the type of ceramic art you wish to create. For beginners, an electric kiln might be the best starting point due to its user-friendly nature. However, as you grow in your craft, exploring gas or wood-fired kilns can open up a whole new world of artistic possibilities.
Moreover, understanding the firing process is just as important as knowing the kiln type. The temperature and atmosphere within the kiln can significantly affect the final appearance and durability of your pieces. For example, bisque firing is the initial firing that prepares the clay for glazing, while glaze firing is when the final surface finish is achieved. Knowing when and how to fire your pieces can be the difference between a masterpiece and a mishap!
In conclusion, kilns are not just tools; they are an integral part of the ceramic art journey. By understanding the different types of kilns and their firing processes, you can make informed decisions that will elevate your work. So, whether you’re just starting out or looking to refine your skills, take the time to explore the world of kilns. You might just find that they inspire your next great creation!
- What is the best kiln for beginners? Electric kilns are generally recommended for beginners due to their ease of use and consistent results.
- How do I know what temperature to fire my ceramics? Each type of clay has a recommended firing temperature, which can usually be found on the packaging or the manufacturer's website.
- Can I use a regular oven to fire ceramics? No, regular ovens do not reach the necessary temperatures for firing clay and can be dangerous to use for this purpose.

Inspiration and Creative Process
Creating captivating ceramic art is not just about the techniques and tools; it's also about the inspiration that fuels your creativity. Finding that spark can sometimes feel like searching for a needle in a haystack. However, inspiration is all around us, waiting to be discovered. Whether it’s the intricate patterns found in nature, the vibrant colors of a sunset, or even the texture of an old wall, every detail can ignite your imagination. Have you ever noticed how a simple walk in the park can lead to a flood of ideas? That's the beauty of being an artist!
One effective way to cultivate your creative process is to immerse yourself in various forms of art and design. This could mean visiting galleries, browsing through art books, or even following fellow ceramic artists on social media platforms. By studying different styles and techniques, you can gain valuable insights and inspiration that may influence your own work. Remember, creativity often thrives in diversity!
Another important aspect is to embrace the concept of experimentation. Don’t be afraid to try new methods or materials. Sometimes, the most stunning pieces come from unexpected combinations or techniques that you might consider unconventional. For instance, mixing different types of clay or experimenting with unique glazing techniques can lead to fascinating results. The key is to allow yourself to play and explore without the fear of making mistakes. After all, every artist has a story of trial and error that led to their greatest achievements!
Additionally, keeping a sketchbook can be a wonderful tool for capturing fleeting ideas. Jot down your thoughts, doodle designs, or even collect images that inspire you. This sketchbook becomes a personal treasure trove of inspiration that you can revisit whenever you feel stuck. And remember, inspiration can also come from collaboration. Engaging with other artists can open up new perspectives and ideas, leading to a richer creative experience.
To summarize, here are some ways to find inspiration and enhance your creative process:
- Explore nature and your surroundings.
- Study different art forms and styles.
- Experiment with techniques and materials.
- Keep a sketchbook for ideas and inspirations.
- Collaborate with other artists.
Ultimately, the journey of creating ceramic art is as important as the final piece itself. Embrace the ups and downs, and allow your creative process to evolve. You might just find that the most unexpected sources of inspiration lead to your most remarkable works!
Q1: Where can I find inspiration for my ceramic art?
A1: Inspiration can be found in nature, art galleries, social media, and even everyday life. Keep your eyes open and be receptive to your surroundings!
Q2: How important is experimentation in the creative process?
A2: Experimentation is crucial! Trying new techniques and materials can lead to surprising and innovative results, helping you develop your unique style.
Q3: Should I collaborate with other artists?
A3: Absolutely! Collaborating with other artists can provide fresh perspectives and inspire new ideas, enriching your creative process.
Frequently Asked Questions
- What type of clay should I use for my ceramic projects?
Choosing the right clay is essential for your project's success. If you're looking for something versatile, earthenware is great for beginners due to its ease of use and vibrant colors. Stoneware is perfect for functional pieces, as it's durable and can withstand high temperatures. If you want fine, delicate work, go for porcelain, but be prepared for a steeper learning curve!
- What tools do I need to start working with ceramics?
To kick off your ceramic journey, you'll need a few essential tools. A pottery wheel is crucial for shaping, while sculpting tools help with details and finishing touches. Don't forget a kiln for firing your creations! Each tool plays a vital role in bringing your artistic vision to life.
- How do I center clay on the pottery wheel?
Centering clay is a fundamental skill every potter must master. Start by throwing a ball of clay onto the wheel and pressing it down firmly. Use your body to maintain the right posture, applying even pressure with your hands to shape the clay into a cone. This technique is crucial for achieving symmetry in your pieces!
- What are the different glazing techniques I can use?
Glazing can transform your ceramic work into stunning pieces of art! You can experiment with dipping, where you dip your piece into a glaze, or
- What is the purpose of firing ceramics?
Firing is a critical step in ceramics that transforms soft clay into durable art. During the firing process, the clay undergoes chemical changes that strengthen it, making it suitable for everyday use. There are two main types: bisque firing, which hardens the clay, and glaze firing, which melts the glaze and creates that beautiful finish!
- How do I choose the right kiln for my ceramics?
Selecting a kiln can be overwhelming, but it’s all about your needs! Consider the size of your projects and the type of firing you’ll do. Electric kilns are user-friendly and perfect for beginners, while gas kilns offer more control over the firing atmosphere. Research and choose one that fits your artistic style!
- Where can I find inspiration for my ceramic art?
Inspiration is everywhere! Nature, art history, and even everyday objects can spark your creativity. Try visiting museums, exploring local galleries, or simply taking a walk outside. Keep a sketchbook handy to jot down ideas or make quick sketches of things that catch your eye. Your personal voice will develop as you experiment!


