Unleashing Your Creativity with Ceramic Slab Building
Have you ever felt the urge to create something unique with your hands? Something that not only showcases your artistic flair but also serves a purpose? Ceramic slab building might just be the answer you're looking for! This technique opens a world of possibilities, allowing artists of all skill levels to express themselves through clay. Whether you're a seasoned potter or a curious beginner, slab building offers a way to unleash your creativity and bring your ideas to life.
Imagine rolling out a flat piece of clay, much like you would with dough for a pizza, and then transforming that simple slab into a stunning vase, a decorative tile, or even a functional plate. The beauty of slab building lies in its versatility. You can create functional pieces that serve everyday purposes or dive into more sculptural forms that make bold artistic statements. The only limit is your imagination!
One of the most appealing aspects of ceramic slab building is how approachable it is. Unlike wheel throwing, which can be daunting for newcomers, slab building provides a more forgiving medium. You don't need to worry about centering clay on a wheel; instead, you can focus on shaping and molding your slabs into whatever form you desire. This makes it a fantastic option for artists looking to experiment with their ideas without the pressure of mastering complex techniques right away.
As you embark on your slab building journey, you'll discover that the process is not just about creating beautiful pieces; it's also about the joy of working with your hands. The tactile experience of manipulating clay can be incredibly therapeutic. You might find that, as you roll, cut, and assemble your slabs, you enter a state of flow that allows you to forget the stresses of daily life. It's a form of mindfulness, where the act of creation becomes a meditation.
Throughout this article, we will dive deeper into the world of ceramic slab building. We'll explore the essential tools you'll need, the different types of clay and their properties, and various techniques that will help you refine your skills. Plus, we’ll share some fantastic surface decoration methods to take your creations to the next level. So, roll up your sleeves, grab some clay, and let's get started on this exciting artistic adventure!
- What is ceramic slab building?
Ceramic slab building is a technique where flat slabs of clay are rolled out and shaped into various forms, allowing for both functional and decorative pieces. - Do I need special tools for slab building?
While basic tools like a rolling pin, knife, and rib are essential, there are many other tools that can enhance your slab building experience. - Can beginners try slab building?
Absolutely! Slab building is a great starting point for beginners due to its simplicity and versatility. - What types of clay are best for slab building?
Both earthenware and stoneware clays can be used, but your choice will depend on the desired finish and functionality of your piece.
Understanding Ceramic Slab Building
Ceramic slab building is a fascinating and versatile technique that opens the door to endless creative possibilities for artists, regardless of their skill level. Imagine molding a flat piece of clay into a stunning work of art! This method allows you to create both functional items, like plates and bowls, and expressive sculptures that can be purely decorative. The beauty of slab building lies in its accessibility; you don’t need to be a master potter to create something beautiful. All you need is a bit of clay, some tools, and a sprinkle of imagination!
The process begins with rolling out slabs of clay, which can be shaped, cut, and assembled in various ways. This technique not only encourages creativity but also fosters a sense of experimentation. For instance, you might start with a simple rectangular slab and, through cutting and joining, transform it into a complex form. The tactile nature of working with clay allows you to feel the material and connect with your creation on a personal level. It's almost like sculpting with your hands while your mind dances with ideas!
One of the major benefits of slab building is the ability to create larger pieces that would be challenging to achieve with traditional wheel throwing methods. This opens up new avenues for artistic expression, allowing you to construct pieces that are both visually striking and functional. Plus, the slab technique is a great way to explore different textures and designs, making each piece unique. You can add decorative elements, experiment with glazing, and even incorporate mixed media to enhance your work further.
In addition to its artistic advantages, slab building is a fantastic way to develop your skills as a ceramic artist. As you practice, you'll learn how to manipulate the clay, understand its properties, and discover how different techniques can yield diverse results. Whether you’re a beginner or an experienced artist, the journey of mastering slab building can be incredibly rewarding.
So, if you're ready to dive into the world of ceramic slab building, gather your materials, and let your creativity flow! Remember, the only limit is your imagination. Embrace the process, enjoy the journey, and watch as your ideas transform into tangible art pieces.
Essential Tools for Slab Building
When diving into the world of ceramic slab building, having the right tools can make all the difference between a frustrating experience and a creative explosion! Think of your tools as the paintbrushes to your canvas; they are essential for bringing your artistic vision to life. Whether you are a seasoned artist or a curious beginner, equipping yourself with the right tools will not only simplify the process but also enhance your ability to express your creativity.
First on the list is a sturdy work surface. A dedicated workspace, such as a large table or a specially designed pottery wheel, provides the perfect foundation for rolling out your clay slabs. This surface should ideally be flat and non-stick to prevent your clay from adhering and tearing. Many artists prefer using a piece of canvas or a silicone mat to roll their slabs, as these materials help maintain the integrity of the clay while allowing for easy cleanup.
Next, let’s talk about the essential rolling pin. A good rolling pin is crucial for achieving uniform thickness in your slabs. You want to roll your clay out evenly so that it can be shaped and manipulated without cracking. Some artists opt for a traditional wooden rolling pin, while others prefer a more specialized option, such as a PVC pipe. The choice really depends on your personal preference and the size of the slabs you intend to create.
In addition to these basics, you will also need a set of cutting tools. A simple knife can do the trick, but investing in a wire cutter or a clay cutter can make your life much easier. These tools allow for clean, precise cuts, which are essential when you are working with intricate designs or larger pieces. You might also want to have a set of shaping tools on hand, such as rib tools and sponges, which can help you refine the edges and surfaces of your slabs.
Another must-have is a slab roller, especially if you plan on creating larger pieces. A slab roller can save you time and effort, allowing you to produce perfectly even slabs with minimal strain. If you don’t have access to a slab roller, you can always use a rolling pin and your hands, but it may require a bit more finesse.
Lastly, let’s not forget about texture and decoration tools. Items like stamps, stencils, and texture mats can add a unique flair to your ceramic pieces. These tools allow you to imprint designs and patterns onto your slabs, transforming a simple piece into a work of art. You can even use everyday objects around your home—like leaves or lace—to create beautiful textures, making your work even more personal and unique.
In summary, here’s a quick rundown of the essential tools for slab building:
- Sturdy work surface (canvas or silicone mat)
- Rolling pin (wooden or PVC)
- Cutting tools (knife, wire cutter, clay cutter)
- Shaping tools (rib tools, sponges)
- Slab roller (for larger projects)
- Texture and decoration tools (stamps, stencils, everyday objects)
With these tools at your disposal, you’ll be well-equipped to embark on your ceramic slab building journey. Remember, the right tools not only enhance your efficiency but also empower your creativity, allowing you to explore and express your artistic ideas fully. So gather your tools, roll up your sleeves, and let your imagination run wild!
Q: What type of clay is best for slab building?
A: The best type of clay depends on your project. For functional ware, stoneware is often preferred due to its durability. Earthenware is great for decorative pieces but is less sturdy.
Q: Can I use regular kitchen tools for slab building?
A: Absolutely! Many artists use kitchen tools like rolling pins and cutters. Just ensure they are clean and free from any food residues.
Q: How do I prevent my slabs from cracking?
A: To prevent cracking, keep your slabs covered with plastic when not in use, and ensure they dry evenly. Working in a controlled environment helps, too!
Clay Types for Slab Building
When diving into the world of ceramic slab building, one of the first and most crucial decisions you'll face is selecting the right type of clay. Each clay type has its unique properties, which can significantly influence not only the aesthetic quality of your finished piece but also its functionality. Imagine embarking on a culinary adventure without knowing the ingredients—choosing the wrong clay can lead to a creative disaster! So, let’s break down the most common types of clay you'll encounter in slab building.
The most widely used clays in slab building are earthenware, stoneware, and porcelain. Each of these clays has distinct characteristics that can enhance or limit your artistic expression. For instance, earthenware is known for its vibrant colors and ease of use, making it a favorite among beginners. It fires at a lower temperature, which means it’s less forgiving in terms of durability, but it allows for a wide range of decorative possibilities. Stoneware, on the other hand, is celebrated for its strength and versatility. It can withstand higher temperatures and is perfect for functional pieces like plates and bowls. Porcelain, often considered the crème de la crème of clays, offers a fine texture and translucency that can elevate any work of art, but it requires a bit more skill to handle.
To help you navigate these options, here’s a quick comparison table:
| Clay Type | Firing Temperature | Durability | Best For |
|---|---|---|---|
| Earthenware | Low (1830°F - 2100°F) | Low | Decorative pieces, pottery |
| Stoneware | Medium to High (2100°F - 2381°F) | High | Functional ware, sculptural pieces |
| Porcelain | High (2230°F - 2460°F) | Very High | Fine art, intricate designs |
Understanding these clay types is just the beginning. The moisture content and plasticity of the clay are also vital factors to consider. A clay that is too dry will crack during the building process, while overly wet clay can lead to sagging and deformation. Finding the right balance is key to achieving a successful slab. Moreover, you might want to experiment with different clays to find the one that resonates with your style and technique. Think of it as trying on different outfits until you find the one that makes you feel confident and creative!
In conclusion, the choice of clay is fundamental in slab building. Whether you prefer the vibrant hues of earthenware, the robust nature of stoneware, or the elegant finish of porcelain, each type offers unique opportunities for creativity. Embrace the journey of exploration, and don’t hesitate to mix and match clays to discover new textures and effects. After all, the world of ceramics is as limitless as your imagination!
- What is the best clay for beginners? Earthenware is often recommended for beginners due to its workability and vibrant colors.
- Can I mix different types of clay? Yes, mixing clays can lead to interesting textures and effects, but be cautious of their firing temperatures.
- How do I prevent my slabs from cracking? Ensure your clay has the right moisture content and work in a controlled environment to avoid rapid drying.

Earthenware vs. Stoneware
When it comes to ceramic slab building, understanding the differences between earthenware and stoneware is essential for any artist looking to create unique pieces. Both types of clay offer distinct characteristics that can significantly influence the final outcome of your work. So, what sets them apart? Let's dive into the details!
Earthenware is a type of clay that is known for its natural warmth and versatility. Typically fired at lower temperatures (around 1,830°F or 1,000°C), earthenware is porous and often has a reddish-brown color. This makes it perfect for creating decorative pieces and functional pottery that doesn’t require a high level of durability. However, its porous nature means that it can absorb moisture, which may not be ideal for all applications. In fact, if you plan to use earthenware for functional items like plates or bowls, you'll need to glaze them thoroughly to make them food-safe.
On the other hand, stoneware is fired at much higher temperatures (around 2,192°F or 1,200°C), resulting in a denser, more durable material. This makes stoneware an excellent choice for functional pottery that needs to withstand everyday use. Its non-porous nature means that it won’t absorb liquids, making it ideal for items like dinnerware or baking dishes. Visually, stoneware often showcases a more muted and earthy palette, which many artists find appealing for its rustic charm.
| Property | Earthenware | Stoneware |
|---|---|---|
| Firing Temperature | 1,830°F (1,000°C) | 2,192°F (1,200°C) |
| Porosity | Porous | Non-porous |
| Durability | Less durable | Highly durable |
| Color | Reddish-brown | Earthy tones |
| Best Uses | Decorative pieces, non-food items | Functional pottery, dinnerware |
In summary, the choice between earthenware and stoneware largely depends on your artistic goals and the intended use of your ceramic pieces. If you're looking to create beautiful decorative items, earthenware might be your best bet. However, if you want to make functional pieces that can withstand the test of time, stoneware is the way to go. Remember, the beauty of ceramic art lies in the ability to experiment and find what works best for your unique style!
- Can I use earthenware for outdoor pottery? - It's not recommended, as earthenware is porous and can absorb moisture, leading to cracking in cold weather.
- Is stoneware safe for the oven? - Yes, stoneware is typically oven-safe, but always check the manufacturer's guidelines.
- How can I tell if my clay is earthenware or stoneware? - A simple test is to check the color and feel; earthenware is often softer and more porous, while stoneware feels denser and heavier.
Choosing the Right Clay Body
When it comes to creating stunning ceramic pieces through slab building, is a critical step that can make or break your artistic vision. Just like a painter selects the perfect canvas, a ceramic artist must consider the properties of different clay bodies to achieve their desired outcome. The clay you choose will not only affect the aesthetics of your work but also its functionality and durability.
First and foremost, it’s essential to understand that different clay bodies have unique characteristics. For instance, some clays are more porous, while others are denser and more robust. This can influence everything from the piece's weight to how it handles glazing. If you're looking to create a functional item, like a plate or mug, you might prefer a clay body that can withstand the rigors of daily use. On the other hand, if your goal is to create a decorative sculpture, you might opt for a clay that allows for more intricate details.
Here are a few key factors to consider when choosing your clay body:
- Firing Temperature: Different clays require different firing temperatures. Earthenware typically fires at lower temperatures (around 1,830°F or 1,000°C), while stoneware needs higher temperatures (around 2,190°F or 1,200°C). Make sure your kiln can accommodate the firing temperature of your chosen clay.
- Texture and Workability: Some clays are smoother and easier to work with, while others may be coarser. If you're a beginner, you might want to start with a more forgiving clay body that allows for easier manipulation.
- Color and Finish: The color of the clay body can affect the final appearance of your piece, especially after glazing. Experimenting with different clays can lead to exciting results, as some clays produce unexpected colors when fired.
Additionally, consider your artistic goals. If you’re aiming for a specific texture or finish, you might need to try a few different clay bodies to see which one aligns best with your vision. Many artists keep a variety of clays on hand, allowing them to switch between them based on the demands of their current project.
Ultimately, the right clay body is one that resonates with your creative spirit and meets the practical needs of your project. So, don’t hesitate to experiment! Grab a few samples, roll out some slabs, and see how each clay body behaves under your hands. You might just discover a new favorite that takes your slab building to the next level!
Q: What should I consider when selecting a clay body for slab building?
A: Consider factors such as firing temperature, texture, workability, and the final color and finish you desire for your piece.
Q: Can I mix different clay bodies?
A: While it's possible to mix clay bodies, be cautious as they may have different shrinkage rates and firing temperatures, which could lead to issues during the firing process.
Q: What is the best clay body for beginners?
A: Many beginners find that using a smooth stoneware or earthenware clay is a great starting point due to their workability and forgiving nature.

Techniques for Working with Slabs
When it comes to ceramic slab building, mastering various techniques can truly elevate your artistic game. Think of it like learning to play an instrument: the more techniques you know, the more expressive your creations can be. One of the foundational techniques in slab building is rolling out slabs. This involves using a rolling pin to flatten your clay to an even thickness, which is crucial for ensuring that your pieces are uniform and structurally sound. Aim for a thickness of about 1/4 inch; too thick and your piece may take forever to dry, too thin and it could crack during firing.
Another essential technique is cutting and joining. Once you have your slabs rolled out, you can use a variety of tools—like a knife, a rib, or even a template—to cut your desired shapes. Joining these pieces together may seem straightforward, but it requires finesse. Use a technique called scoring and slipping: score the edges of the slabs you want to join with a serrated rib, then apply slip (a mixture of clay and water) to create a strong bond. This is similar to using glue in paper crafts; without it, your pieces won’t stick together properly.
Don't underestimate the power of shaping and molding. Once your slabs are cut, you can manipulate them into various forms. For example, you might want to create bowls or plates. To do this, you can drape your slabs over molds or use your hands to form them into the desired shape. This part of the process is where creativity really shines. Imagine sculpting a piece of clay as if it were a warm loaf of bread; the more you mold it, the more unique it becomes.
In addition to shaping, texturing your slabs can add a whole new dimension to your work. You can use a variety of objects—like stamps, natural materials, or even your fingers—to create interesting patterns and textures. This is akin to adding the perfect seasoning to a dish; it can transform a simple piece into something extraordinary. For instance, using leaves to imprint a design can give your ceramic a natural, organic feel.
Finally, let’s talk about assembly and finishing techniques. Once you've created your individual components, you'll need to assemble them into a cohesive piece. This might involve additional scoring and slipping or even using coils to reinforce joints. After assembly, you can refine the surface by sanding or smoothing it out to ensure it’s pleasing to the touch. Think of this as polishing a gemstone; the more care you take at this stage, the more your piece will shine in the end.
In summary, mastering these techniques will not only improve your skills but also inspire you to experiment and push the boundaries of your creativity. Whether you’re a beginner or a seasoned artist, embracing these methods will lead to stunning results that reflect your unique style. So, roll up your sleeves, grab that clay, and let your imagination run wild!
- What type of clay is best for slab building?
While both earthenware and stoneware can be used, stoneware is often preferred for its durability and versatility.
- Can I use any tools for cutting slabs?
Yes, you can use a variety of tools such as knives, ribs, and even cookie cutters to achieve your desired shapes.
- How thick should my slabs be?
A thickness of about 1/4 inch is ideal for most projects, ensuring they dry evenly and maintain structural integrity.
Surface Decoration Techniques
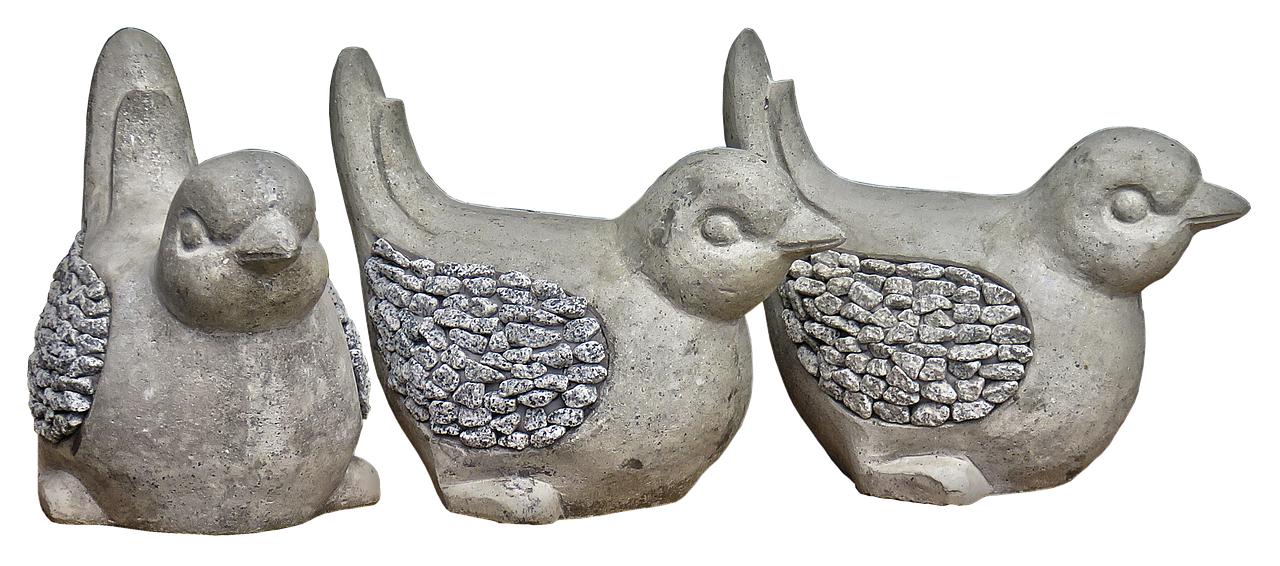
When it comes to ceramic slab building, the surface decoration techniques you choose can truly transform your pieces from simple clay forms into stunning works of art. Imagine walking into a gallery where each piece tells a story, not just through its shape, but through its intricate details and vibrant colors. Surface decoration is like the icing on the cake—it can elevate your work from ordinary to extraordinary. Whether you’re looking to create functional pottery or expressive sculptures, understanding various decoration techniques is essential.
There are numerous ways to enhance the surface of your slab-built ceramics, and each method offers unique possibilities. For instance, you might want to explore glazing, which not only adds color but also provides a glossy finish that can make your pieces pop. Or perhaps you’re interested in texturing and imprinting, which can add a tactile quality to your work, inviting viewers to reach out and feel the surface. The beauty of these techniques is that they can be combined, allowing for endless creative possibilities.
Let’s dive deeper into some popular surface decoration techniques that can bring your ceramic creations to life:
- Glazing: This is one of the most popular methods for surface decoration. Glazes come in a variety of colors and finishes, from matte to glossy. You can apply glaze by dipping, pouring, or brushing it onto your piece. Each application method can yield different effects, so don’t hesitate to experiment!
- Texturing: Adding texture can create visual interest and depth. You can use tools like stamps, rollers, or even natural materials like leaves to imprint patterns onto the surface of your slabs. This technique can evoke a sense of nature and organic beauty.
- Under-glazing: This involves applying color to the clay body before it is glazed. It allows for detailed painting and drawing, which can be especially effective for adding intricate designs or illustrations.
- Engobe: This technique uses colored slips that can be applied to the surface of the clay. Engobes can be used to create a base color or to add decorative elements, offering a wide range of color options.
Each of these techniques can be tailored to fit your artistic vision. For example, you might choose to combine glazing with texturing to create a rich, multi-layered effect. Picture a bowl with a smooth, glossy interior and a rough, textured exterior that invites touch. This contrast can be visually striking and serves to engage the viewer on multiple levels.
Moreover, experimenting with layering techniques can yield surprising results. You might apply a layer of engobe, followed by a clear glaze, allowing the colors beneath to peek through. This method not only enhances the visual appeal but also adds complexity to your work. Remember, art is about exploration—don’t be afraid to try new things and see where your creativity takes you!
In addition to these techniques, consider the firing process as part of your decoration strategy. The way your piece is fired can significantly impact the final appearance. Different firing temperatures and atmospheres can alter the colors and textures of glazes, leading to unexpected and delightful outcomes. So, keep an open mind and embrace the surprises that come with the firing process.
As you develop your skills in surface decoration, remember that practice makes perfect. Take the time to experiment with different techniques, materials, and firing methods. The more you play with the clay, the more you’ll discover your unique style and voice as an artist. So roll up your sleeves, grab your tools, and let your imagination run wild!
Q: Can I mix different types of glaze on a single piece?
A: Yes! Mixing glazes can create unique colors and textures. Just be sure to test your combinations on small samples first to see how they interact during firing.
Q: What tools do I need for texturing my slabs?
A: Basic tools like stamps, rollers, and textured mats are great for adding texture. You can also use everyday items like sponges or fabric to create interesting patterns.
Q: How do I choose the right glaze for my project?
A: Consider the intended use of your piece. If it will hold food, make sure to choose food-safe glazes. Also, think about the color and finish you want to achieve, and don’t hesitate to experiment!
Q: Is it necessary to apply a clear glaze over under-glaze?
A: While it’s not always necessary, applying a clear glaze can enhance the colors and add a protective layer, making your piece more durable and visually appealing.

Glazing Methods
Glazing is not just a finishing touch; it's the magic ingredient that transforms your ceramic pieces from ordinary to extraordinary. Whether you want a glossy shine, a matte finish, or something in between, understanding the different can significantly enhance your work's aesthetic and functional qualities. So, let’s dive into the fascinating world of glazing!
First off, there are two primary types of glazes: glossy and matte. Glossy glazes reflect light, creating a vibrant and lively appearance that can make colors pop. They are ideal for functional pieces like dinnerware, as they provide a smooth surface that is easy to clean. On the other hand, matte glazes offer a softer, more subdued look. They can give your work a rustic or earthy feel, making them perfect for artistic pieces that prioritize texture and form over shine.
Another important aspect to consider is the application method. You can apply glaze in several ways, including dipping, brushing, pouring, or spraying. Each method has its unique characteristics and can produce different effects:
- Dipping: This method is quick and allows for even coverage, but it can lead to pooling if not done carefully.
- Brushing: Ideal for detailed work, brushing gives you control over the application but may require multiple coats for even coverage.
- Pouring: This technique allows for creative layering and can create unique patterns, but it requires careful planning to avoid drips.
- Spraying: Perfect for achieving a smooth, even coat, spraying can be tricky and requires a well-ventilated area.
When it comes to achieving desired effects, experimenting with layering different glazes can yield stunning results. Imagine applying a transparent glossy glaze over a matte underglaze; the depth and complexity of color can be breathtaking! Additionally, you can incorporate stains and underglazes to add even more personality to your pieces. Stains can provide a rich color that penetrates the clay body, while underglazes allow for detailed painting before the final glaze is applied.
Furthermore, don’t underestimate the importance of firing temperature. The temperature at which you fire your glazed pieces can dramatically affect the final outcome. High-fire glazes tend to produce more vibrant colors and durable finishes, while low-fire glazes can create softer, more delicate hues. It’s crucial to test your glazes on sample pieces before committing to a larger project, as the results can be unpredictable.
Finally, let’s not forget about the creative possibilities that glazing offers. You can use techniques like sgraffito, where you scratch through a layer of glaze to reveal the clay body underneath, or crystalline glazing, which creates stunning crystal-like formations during the firing process. The sky’s the limit when it comes to expressing your artistic vision through glazing!
Q: What is the best glaze for beginners?
A: For beginners, low-fire glazes are often recommended as they are easier to work with and offer vibrant colors. They also fire at lower temperatures, making them more accessible.
Q: Can I mix different types of glazes?
A: Yes, mixing glazes can lead to exciting new colors and effects. Just be sure to test your mixtures on small samples before applying them to your final pieces.
Q: How do I avoid glaze runs?
A: To prevent glaze runs, ensure you apply an even coat and avoid pooling in areas. You can also use a glaze that’s formulated to be less prone to running.
Q: What should I do if my glaze turned out uneven?
A: Uneven glazing can sometimes be fixed by applying a second coat or by experimenting with different application techniques. If all else fails, you can always sand down the surface and re-glaze!

Texturing and Imprinting
When it comes to ceramic slab building, one of the most exciting aspects is the ability to add texture and imprint designs into your pieces. This is where your creativity can truly shine, transforming a simple slab into a work of art that tells a story. Imagine your ceramic piece as a blank canvas, waiting for your unique touch. By incorporating textures and patterns, you can evoke emotions and create visual interest that captivates the viewer.
Texturing can be achieved in various ways, from using natural materials to incorporating tools specifically designed for this purpose. For example, you might use leaves, fabric, or even household items like sponges to create unique textures. Each material will leave its own mark on the clay, allowing you to explore endless possibilities. Additionally, tools such as texture rollers and stamps can help you achieve consistent patterns across multiple pieces, making it easier to create a cohesive body of work.
Imprinting, on the other hand, involves pressing an object into the clay to leave a permanent design. This technique is perfect for those who want to add intricate details without relying solely on painting or glazing. A simple impression of a shell, for instance, can evoke a sense of nature and tranquility, while geometric shapes can add a modern flair. The key is to experiment with different objects and techniques to find what resonates with your artistic vision.
Here are some popular methods for texturing and imprinting:
- Using Natural Materials: Items like leaves, flowers, and bark can create beautiful, organic textures.
- Texture Rollers: These rollers come with various patterns and can be rolled over the clay to create uniform textures.
- Stamps: Custom stamps can be made or purchased to imprint specific designs onto your slabs.
- Tools: Items like carving tools and brushes can be used to create more detailed textures by carving into the clay.
Remember, the beauty of texturing and imprinting lies in the exploration of techniques. Don't be afraid to experiment! Try combining different methods to create layered effects, or use contrasting textures within the same piece. For example, you might have a smooth surface juxtaposed with rough, textured areas, creating a dynamic visual experience.
As you work with textures and imprints, consider how they will interact with your glazing process. Some textures may hold glaze differently, enhancing or muting certain colors. This interplay can lead to unexpected and delightful results, so keep an open mind and embrace the surprises that come along the way.
Q: What tools do I need for texturing and imprinting?
A: Basic tools include texture rollers, stamps, carving tools, and natural materials like leaves or fabric. Experiment with what you have to discover what works best for you!
Q: Can I texture my clay before it dries?
A: Yes, it's best to texture your clay while it's still malleable. Once it dries, adding texture becomes much more difficult and may lead to cracking.
Q: How do I ensure my textures won't get lost during firing?
A: Make sure your textures are deep enough to withstand the firing process. Test pieces can help you determine how much texture will remain after firing.
Q: Can I combine different texturing techniques?
A: Absolutely! Combining techniques can lead to unique and stunning results. Don't hesitate to mix and match to find your own style.
Frequently Asked Questions
- What is ceramic slab building?
Ceramic slab building is a technique that involves shaping clay into flat slabs, which can then be assembled to create both functional and artistic pieces. It's a versatile method that allows for creativity and experimentation, making it suitable for artists of all skill levels.
- What tools do I need for slab building?
To get started with slab building, you'll need a few essential tools including a rolling pin, a slab roller (if available), a knife or wire cutter, and various modeling tools. These tools help in shaping, cutting, and refining your slabs to achieve the desired results.
- What types of clay are best for slab building?
Different types of clay can be used for slab building, but earthenware and stoneware are the most common. Earthenware is softer and easier to work with, while stoneware is more durable and can withstand higher temperatures. Your choice depends on the final look and functionality you desire for your piece.
- How do I choose the right clay body?
Selecting the right clay body depends on your artistic goals. Consider the firing temperature, the desired finish, and the type of work you want to create. For instance, if you aim for vibrant colors, earthenware might be your go-to, while stoneware is great for functional items.
- What techniques can I use to work with slabs?
There are several techniques to master in slab building, such as scoring and slipping, which help in joining pieces together, as well as various methods for shaping and texturing your slabs. Experimenting with these techniques can lead to stunning and unique ceramic works.
- How can I decorate my slab-built ceramics?
Surface decoration can greatly enhance your slab-built pieces. Techniques like glazing, painting, and adding textures or imprints can add visual interest. Each method can create different effects, so don’t hesitate to mix and match to find the style that speaks to you!
- What are the different glazing methods for slab ceramics?
There are various glazing methods available, including dipping, brushing, and spraying. Each method offers different results, so experimenting with them can help you achieve the desired look for your ceramic pieces. Remember, glazing not only adds beauty but also functionality to your work.
- Can I texture my slabs, and how?
Absolutely! Texturing and imprinting can add depth and interest to your ceramic pieces. You can use tools, stamps, or even natural objects to create unique patterns and textures on your slabs. This is a fantastic way to personalize your work and make it truly one-of-a-kind.


