DIY Decor Tips: Framing Embroidery for Wall Art
Are you ready to transform your embroidery projects into stunning wall art that will leave your guests in awe? Framing your handmade pieces is not just about protecting them; it’s about showcasing your creativity and adding a personal touch to your home decor. This guide dives deep into creative framing techniques, ensuring your embroidery stands out and complements your space beautifully. Whether you’re a seasoned stitcher or a newbie, you’ll find valuable tips to enhance your artwork and make it a focal point in any room.
Selecting the perfect frame is crucial for enhancing your embroidery's visual appeal. Think of the frame as the finishing touch that can either elevate your piece or detract from it. Consider factors like style, color, and material that harmonize with your artwork and home decor. For instance, a sleek modern frame can beautifully contrast a vintage embroidery piece, creating a stunning visual dialogue. On the other hand, a rustic wooden frame might be just what you need to complement a nature-themed embroidery. Don't forget to consider the size of the frame; it should not overwhelm your piece but rather highlight its beauty.
Before you dive into framing, it’s essential to ensure your embroidery is clean and pressed. Think of this step as preparing a canvas for a masterpiece; the better the preparation, the more stunning the final presentation will be. Proper preparation not only enhances the overall look but also contributes to the longevity of your artwork on display. So, let’s get into the nitty-gritty of cleaning and pressing your embroidery.
Cleaning your embroidery is a delicate task that requires a gentle touch. Depending on the fabric type, you might need different cleaning techniques. For instance, delicate fabrics like silk or lace require a soft approach, while sturdier materials can withstand a bit more scrubbing. Here are some common cleaning methods:
- Spot Cleaning: For minor stains, use a damp cloth with mild detergent to gently blot the area.
- Hand Washing: If your piece is heavily soiled, hand wash it in cool water with a gentle detergent.
- Machine Washing: Only use this method for durable fabrics. Place your embroidery in a mesh bag to protect it.
When deciding between hand washing and machine washing, consider the delicacy of your embroidery. Hand washing is ideal for intricate designs or fragile fabrics, as it minimizes wear and tear. However, if you're dealing with sturdier fabrics, machine washing can save time and effort. Just remember, each method has its pros and cons, impacting your embroidery's condition. Choose wisely!
Once your embroidery is clean, it's time to iron it. But hold on! You can't just crank up the heat and go for it. Use a low heat setting and a pressing cloth to prevent scorching. Think of the pressing cloth as a protective shield for your masterpiece. Proper ironing ensures a smooth surface for framing, making your embroidery look crisp and polished.
Pressing your embroidery correctly eliminates wrinkles and enhances its appearance. Each fabric type may require a different technique, so be sure to follow specific guidelines for the best results. For example, cotton can handle a higher heat, while synthetic fibers need a cooler touch. Remember, a well-pressed piece is a happy piece!
Matting can add depth and contrast to your framed embroidery, creating a stunning visual impact. When selecting matting, explore different colors and textures to find the ideal option that complements your artwork. Think of matting as the frame's best friend; it enhances and elevates the entire presentation.
Selecting matting colors that enhance the colors in your embroidery can create a cohesive look. This thoughtful choice draws attention to your artwork, making it the star of the show. For example, if your embroidery features vibrant flowers, consider a mat that picks up one of the colors in the design, creating harmony.
Don’t shy away from using textured mats! They can add a layer of visual interest that transforms your embroidery into a true work of art. Textured materials can create a dynamic backdrop, enhancing the overall presentation and making your piece pop.
Now that your embroidery is beautifully framed, where should you display it? Strategically placing your framed embroidery can elevate your space and make a statement. Consider various display ideas to showcase your artwork effectively. After all, what's the point of a stunning piece if it's hidden away?
Creating a gallery wall allows you to display multiple pieces together, adding a personal touch to your decor. Arrange your embroidery with other art, photographs, or even mirrors for a curated look that reflects your style. This arrangement not only showcases your embroidery but also tells a story about your artistic journey.
To keep your decor fresh and engaging, consider rotating your framed embroidery seasonally. This practice allows you to showcase different pieces throughout the year, keeping your space vibrant and exciting. Imagine the joy of revealing a new piece every few months, making your home feel alive and ever-changing!
Q: How do I choose the right size frame for my embroidery?
A: Measure your embroidery piece and select a frame that allows for a little extra space around it for matting. A good rule of thumb is to leave at least an inch of space around the edges.
Q: Can I frame my embroidery without glass?
A: Yes! While glass protects your work, you can frame without it for a more casual look. Just be mindful of dust and handling.
Q: How often should I clean my framed embroidery?
A: It depends on the environment. If your piece is in a high-traffic area, consider cleaning it every few months. For less exposed pieces, once or twice a year should suffice.
Choosing the Right Frame
When it comes to displaying your beautiful embroidery, the frame you choose can make all the difference. A well-selected frame not only protects your artwork but also enhances its visual appeal, turning your handmade piece into a stunning focal point in your home. So, how do you pick the right frame? Let’s dive into some essential factors to consider.
First and foremost, think about the style of your embroidery. Is it vibrant and modern, or does it have a vintage charm? The frame should complement the essence of your work. For instance:
- Modern Embroidery: Consider sleek, minimalist frames in materials like metal or acrylic.
- Traditional Designs: Ornate wooden frames can add a classic touch that enhances the beauty of your embroidery.
Next up is color. The frame should harmonize with the colors in your embroidery and the overall decor of the room. A neutral frame can act as a canvas, allowing your embroidery to shine, while a bold frame can create a striking contrast. Don't forget about the material of the frame as well. Wood, metal, and even plastic frames each offer a different vibe. For a rustic look, go for natural wood; for a contemporary feel, metal frames might be your best bet.
Another crucial aspect to consider is the size of the frame. It’s essential to choose a frame that fits your embroidery perfectly. Too tight, and you risk damaging your work; too loose, and it may look unintentional. Measure your piece carefully and select a frame that gives it the right amount of breathing room. Additionally, consider whether you want a single frame or a multi-frame setup for a gallery wall. A single frame can make a statement, while multiple frames can create a dynamic display.
Finally, don’t overlook the style of the matting. A well-chosen mat can enhance the overall presentation of your embroidery. Matting adds depth and can help your piece stand out even more. Choose a mat color that complements your embroidery, and consider using textured mats for added visual interest. Remember, the right frame is not just about aesthetics; it’s also about protecting your artwork for years to come.
In summary, choosing the right frame involves a thoughtful approach that considers style, color, material, size, and matting. By paying attention to these elements, you’ll ensure that your embroidery is showcased beautifully, making it a cherished part of your home decor.
Preparing Your Embroidery
Before you dive into the exciting world of framing your beautiful embroidery, it’s essential to ensure that your piece is in the best possible condition. Think of this stage as prepping a canvas before painting; the cleaner and smoother your embroidery is, the more it will shine once framed. So, let’s roll up our sleeves and get down to the nitty-gritty of preparing your handiwork for its big debut on your wall!
First things first, you’ll want to make sure your embroidery is clean. Over time, even the most careful stitchers can find their pieces have accumulated dust or the occasional stray mark. Depending on the fabric you’ve used, cleaning methods can vary significantly. For instance, delicate fabrics like silk or linen may require a gentle touch, while sturdier materials like cotton might hold up better to a bit more vigorous cleaning. Here’s a quick guide:
| Fabric Type | Cleaning Method |
|---|---|
| Silk | Hand wash in cold water with mild detergent |
| Linen | Gentle hand wash or delicate machine cycle |
| Cotton | Machine wash on a gentle cycle |
Once your embroidery is clean, it’s time to address any wrinkles. Just like a well-pressed shirt can make a world of difference in your appearance, a smooth embroidery piece will enhance its presentation. Use a low heat setting on your iron and always place a pressing cloth between the iron and your fabric to prevent scorching. This simple step can save you from a potential disaster!
Now, let’s talk about pressing your work. This step is crucial for eliminating those pesky wrinkles that can detract from the beauty of your embroidery. Depending on the fabric type, the pressing technique may vary. For example, when dealing with a delicate fabric, you might want to use a steam iron to gently relax the fibers without direct contact. In contrast, sturdier fabrics can handle a bit more direct heat. The goal here is to achieve a smooth, flat surface that’s ready for framing.
In summary, preparing your embroidery is all about ensuring it looks its best before it takes center stage on your wall. A little care in cleaning and pressing can make all the difference in how your artwork is perceived. Remember, the effort you put into this stage will pay off in the long run, showcasing your beautiful work in all its glory!
- How often should I clean my embroidery? It depends on the environment; if it’s displayed in a dusty area, consider cleaning it every few months.
- Can I use bleach on my embroidery? No, bleach can damage the fabric and the threads. Always opt for mild detergents.
- What if my embroidery is too wrinkled to iron? Try steaming it or using a fabric spray to relax the fibers before ironing.
Cleaning Techniques
Explore creative ways to frame your embroidery projects, transforming them into stunning wall art. This guide offers tips, techniques, and inspiration for showcasing your handmade pieces beautifully in your home.
Selecting the perfect frame is crucial for enhancing your embroidery's visual appeal. Consider factors like style, color, and material that complement your artwork and home decor.
Before framing, ensure your embroidery is clean and pressed. Proper preparation enhances the overall presentation and longevity of your artwork on display.
Cleaning your embroidery is an essential step to ensure that it looks its best when framed. Using gentle cleaning methods helps to preserve the integrity of the fabric and the stitches. The technique you choose will largely depend on the type of fabric used in your embroidery. For example, delicate fabrics such as silk or linen require a more cautious approach compared to sturdier materials like cotton or canvas.
Here are some effective cleaning methods:
- Spot Cleaning: For minor stains, spot cleaning is often the best approach. Use a soft cloth or cotton swab dipped in a mild detergent solution. Gently dab the stained area without rubbing, as this can cause damage.
- Hand Washing: If your embroidery is heavily soiled, consider hand washing it. Fill a basin with lukewarm water and add a few drops of a gentle detergent. Submerge the embroidery and gently agitate the water. Rinse thoroughly with clean water and lay it flat to dry.
- Machine Washing: For more durable fabrics, machine washing may be suitable. Place your embroidery in a mesh laundry bag to protect it. Use a gentle cycle with cold water and a mild detergent. However, always check the fabric care label to avoid any mishaps.
Regardless of the cleaning method you choose, it's crucial to test any cleaning solution on a small, inconspicuous area first. This will help you avoid any unwanted discoloration or damage to your precious work.
Deciding between hand washing and machine washing can be tricky. Hand washing is often recommended for delicate pieces, as it allows for greater control. On the other hand, machine washing can save time and effort for sturdier fabrics. Just remember, each method has its pros and cons:
| Method | Pros | Cons |
|---|---|---|
| Hand Washing | Gentle on fabric; better control | Time-consuming; requires more effort |
| Machine Washing | Quick and efficient | Risk of damage; less control |
Once your embroidery is clean, it’s time to tackle those pesky wrinkles. When ironing your embroidery, always use a low heat setting to avoid scorching the fabric. A pressing cloth can be your best friend here; it acts as a barrier between your iron and the embroidery, preventing direct heat contact. This technique is particularly important for delicate fabrics, ensuring that your hard work remains intact and beautiful.
Pressing your embroidery correctly eliminates wrinkles and enhances its appearance. Follow specific techniques tailored to the fabric type for the best results.
Matting can add depth and contrast to your framed embroidery. Explore different colors and textures to find the ideal matting that complements your artwork.
Select matting colors that enhance the colors in your embroidery. This can create a cohesive look and draw attention to your artwork.
Consider using textured mats to add visual interest. Textured materials can create a dynamic backdrop that enhances the overall presentation of your embroidery.
Strategically placing your framed embroidery can elevate your space. Explore various display ideas to showcase your artwork effectively.
Creating a gallery wall allows you to display multiple pieces together, adding a personal touch to your decor. Arrange your embroidery with other art for a curated look.
Consider rotating your framed embroidery seasonally to keep your decor fresh and engaging. This practice allows you to showcase different pieces throughout the year.
Q: How often should I clean my embroidered pieces?
A: It depends on the environment. If your embroidery is displayed in a dusty area, consider cleaning it every few months. Otherwise, a yearly clean should suffice.
Q: Can I use bleach on my embroidery?
A: No, bleach can damage the fabric and threads. Stick to mild detergents for cleaning.
Q: How can I prevent my embroidery from fading?
A: Display your embroidery away from direct sunlight to minimize fading. Using UV-protective glass in your frame can also help.

Hand Washing vs. Machine Washing
When it comes to cleaning your precious embroidery, the debate between hand washing and machine washing can feel like a tug-of-war. Each method has its own set of advantages and drawbacks, and the choice often boils down to the fabric type and the intricacy of your design. Hand washing is generally considered the gentler option, perfect for delicate fabrics like silk or fine linen. It allows you to control the amount of pressure and movement, ensuring that your stitches remain intact and your colors stay vibrant. Think of it as giving your embroidery a gentle spa day, where you can pamper it with care.
On the flip side, machine washing can be a real time-saver, especially for sturdier fabrics like cotton or blends. If your embroidery is well-secured and you’re confident in the durability of your materials, tossing it in the washing machine can be a quick and effective solution. Just remember to use a gentle cycle and cold water to avoid any potential mishaps. It’s like putting your embroidery in a cozy little blanket for a quick wash—efficient, but you need to ensure it’s safe!
Here’s a quick comparison to help you decide:
| Method | Pros | Cons |
|---|---|---|
| Hand Washing |
|
|
| Machine Washing |
|
|
Ultimately, the best approach is to assess the specific needs of your embroidery. If you’re dealing with a cherished piece that deserves the utmost care, hand washing is likely the way to go. However, if you’re in a hurry and your embroidery can handle it, machine washing can save you time while still getting the job done. Just remember, whatever method you choose, proper care will ensure your artwork remains as stunning as the day you finished stitching it!
Ironing Tips
When it comes to ironing your embroidery, the goal is to achieve a smooth, wrinkle-free surface without damaging your hard work. First and foremost, always start with a clean iron. Residue from previous projects can transfer onto your fabric, leaving unwanted marks. Set your iron to a low heat setting; this is crucial because high temperatures can scorch delicate threads or fabrics. To further protect your embroidery, use a pressing cloth—this can be a clean cotton cloth or even a thin towel. Place it over your embroidery before running the iron over it. This simple step acts as a barrier, ensuring that your artwork remains pristine.
While ironing, it’s essential to avoid using steam directly on your embroidery, as it can cause the threads to swell or warp. Instead, if you need some moisture, lightly mist the pressing cloth with water before placing it over your work. This method allows for gentle smoothing without the risk of damage. Remember, patience is key here! Move the iron in a smooth, gliding motion rather than pressing down hard. This technique helps to avoid creating new creases or damaging the fabric.
For larger pieces, it might be beneficial to iron in sections. Start from one corner and work your way across, ensuring that you’re not missing any spots. If your embroidery has embellishments like beads or sequins, be extra cautious around those areas. You might want to avoid ironing directly over them; instead, use the tip of the iron to gently press around them. This helps maintain the integrity of your design while keeping everything looking neat.
In summary, here are some quick tips to keep in mind while ironing your embroidery:
- Use a low heat setting on your iron.
- Always use a pressing cloth to protect your fabric.
- Avoid steam directly on your embroidery.
- Iron in sections for larger pieces.
- Be cautious around embellishments.
By following these ironing tips, you'll ensure that your embroidery not only looks fantastic but is also well-prepared for framing. A little care in this step can go a long way in enhancing the overall presentation of your beautiful handiwork!
Q: Can I use a steam iron on my embroidery?
A: It's best to avoid using steam directly on your embroidery, as it can warp or damage the threads. Use a pressing cloth instead.
Q: How do I remove stubborn wrinkles from my embroidery?
A: If wrinkles are particularly stubborn, lightly mist your pressing cloth with water before ironing. This can help relax the fibers without direct steam.
Q: Is it necessary to iron my embroidery before framing?
A: Yes! Ironing your embroidery ensures a smooth surface, which enhances its overall appearance when framed.
Q: What if my embroidery has embellishments?
A: Be cautious around embellishments. Use the tip of the iron to gently press around them rather than directly over them.

Pressing Your Work
Pressing your embroidery is an essential step that can significantly enhance its appearance and prepare it for framing. Think of it as giving your artwork a fresh, polished look—like a new coat of paint on a classic car. When you press your work correctly, you not only eliminate wrinkles but also ensure that every stitch stands out, showcasing the intricate details of your craftsmanship.
Before you start, it’s important to consider the type of fabric you’re working with, as different materials require different approaches. For instance, delicate fabrics like silk or chiffon demand a softer touch compared to sturdier materials like cotton or linen. Here are a few key techniques to keep in mind:
- Use a Low Heat Setting: Always start with a low heat setting on your iron. High temperatures can scorch or damage your embroidery, ruining all your hard work.
- Utilize a Pressing Cloth: Placing a thin cloth between the iron and your embroidery acts as a protective barrier. This prevents direct contact and helps to avoid any potential damage.
- Iron from the Back: If possible, turn your embroidery over and press from the back. This technique helps maintain the integrity of the stitches and avoids flattening them out.
In addition to these techniques, the method of pressing can vary based on the type of embroidery. For example:
| Fabric Type | Pressing Method |
|---|---|
| Silk | Use a low setting and a pressing cloth; press gently. |
| Cotton | A medium setting works well; press directly or with a cloth. |
| Linen | Higher heat is acceptable; use steam for best results. |
Once you’ve pressed your embroidery, take a moment to admire your work. You’ll notice how much more vibrant and inviting it looks, ready to be framed and displayed. Remember, the goal is to create a smooth, even surface that highlights your artistic efforts. So, don’t rush through this process; it’s all about the details!
- Can I use steam when pressing my embroidery?
Yes, steam can help remove stubborn wrinkles, especially in fabrics like linen. Just be cautious not to overdo it, as too much moisture can distort your work. - What if my embroidery has beads or sequins?
For embellished pieces, it's best to press from the back and avoid direct contact with the iron. You can also use a low heat setting and a pressing cloth for extra protection. - How often should I press my embroidery?
It's a good practice to press your work before framing it and whenever you notice wrinkles forming. Keeping it well-pressed ensures it looks its best on display.
Choosing Matting Options
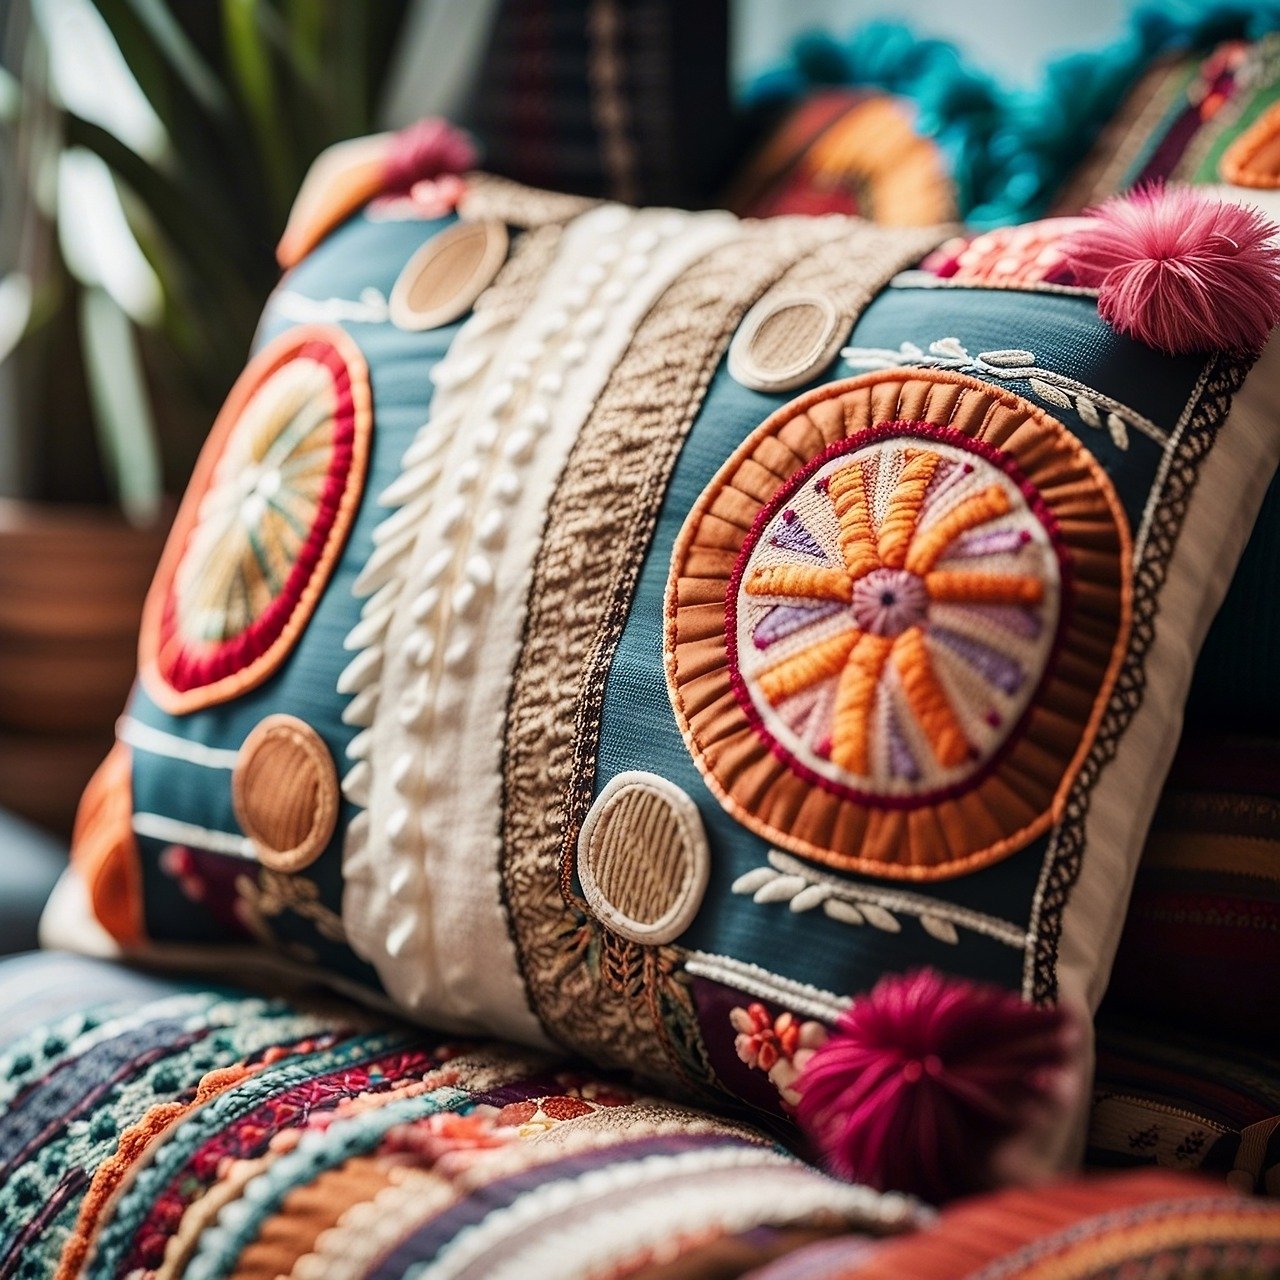
When it comes to framing your embroidery, matting plays a pivotal role in elevating the overall aesthetic of your artwork. The right mat can not only enhance the visual appeal but also provide a protective barrier between your embroidery and the glass, preventing any potential damage. It’s essential to explore various options available for matting, as the choices you make can significantly impact the presentation of your handmade piece. Think of matting as the stage on which your artwork performs; it should highlight your embroidery without overshadowing it.
One of the first things to consider is the color coordination. The color of the mat can either complement or contrast the colors in your embroidery. For instance, if your piece is vibrant and colorful, a neutral mat may help it stand out more prominently. Conversely, if your embroidery has a softer palette, a colored mat that echoes one of the hues can create a harmonious look. Here’s a quick guideline to help you choose the right color:
| Embroidery Color Scheme | Recommended Mat Color |
|---|---|
| Bright and Bold | Neutral tones (white, cream, gray) |
| Pastel Shades | Soft, complementary colors |
| Monochromatic | Darker shades of the same color |
Another exciting option to consider is textured mats. These mats can add a layer of depth and interest to your display. Textures can range from linen to suede, and they can create a dynamic backdrop that enhances the overall presentation of your embroidery. Imagine your delicate floral embroidery framed against a rich, textured mat; it adds a tactile element that invites viewers to appreciate the piece even more. Just like a well-chosen outfit, the right textured mat can elevate your artwork to new heights.
When selecting matting, also consider the width of the mat. A wider mat can create a more dramatic effect and draw the eye to your embroidery, while a narrower mat may offer a more subtle and modern look. It’s all about finding the balance that works best for your specific piece and the space where it will be displayed. Remember, the mat should serve to enhance the beauty of your embroidery, not compete with it.
In summary, choosing the right matting options is a crucial step in framing your embroidery. By paying attention to color coordination, exploring textured mats, and considering the width of the mat, you can create an eye-catching display that showcases your handmade artistry beautifully. Whether you decide to go bold or subtle, the right matting will ensure your embroidery takes center stage in your home.

Color Coordination
When it comes to framing your embroidery, is an essential aspect that can make or break the overall aesthetic of your wall art. Imagine your beautiful embroidery piece sitting in a frame that clashes with its colors; it can be like wearing a stunning dress with the wrong shoes—just doesn't work! To create a harmonious look, you should consider a few key factors when selecting your matting and frame colors.
First off, think about the dominant colors in your embroidery. Are there vibrant reds, soft pastels, or earthy tones? You want to enhance those colors rather than compete with them. For instance, if your embroidery features lush greens and yellows, a muted beige or cream mat can help those colors pop without overwhelming the viewer. Alternatively, if you have a piece with bold colors, a darker mat can provide a striking contrast that draws the eye straight to your artwork.
Another fun tip is to use a color wheel as your guide. This tool can help you identify complementary and analogous colors. Complementary colors are those that sit opposite each other on the wheel and can create a vibrant look when paired together. For example, if your embroidery has a lot of blue, consider a warm orange mat to make the blue stand out. On the other hand, analogous colors are next to each other on the wheel and can create a more harmonious and soothing effect. If your embroidery has shades of green, you might choose a mat in a soft yellow-green for a cohesive look.
Here’s a quick reference table to help you visualize some effective color pairings:
| Embroidery Color | Complementary Mat Color | Analogous Mat Colors |
|---|---|---|
| Blue | Orange | Blue-Green, Purple |
| Red | Green | Red-Orange, Red-Pink |
| Yellow | Purple | Yellow-Green, Orange |
| Green | Red | Blue-Green, Yellow-Green |
Lastly, don’t forget about the texture of your matting and frame. A matte finish can soften the look, while a glossy finish can add a modern touch. Mixing textures can also provide depth, making your embroidery stand out even more. So, when you’re shopping for that perfect frame, take the time to hold different colors and textures against your embroidery. Trust your instincts—if it feels right, it probably is!
In conclusion, effective color coordination not only enhances your embroidery but also transforms it into a stunning focal point in your home. So, get creative, experiment with colors, and most importantly, have fun with it!
- What color matting works best for bright embroidery?
Bright colors often pair well with neutral or darker matting for contrast. - Can I mix different frame colors?
Yes! Mixing frames can add a unique touch, especially in gallery walls. - How do I clean my frame without damaging it?
Use a soft, dry cloth for dusting and avoid harsh chemicals.
Textured Mats
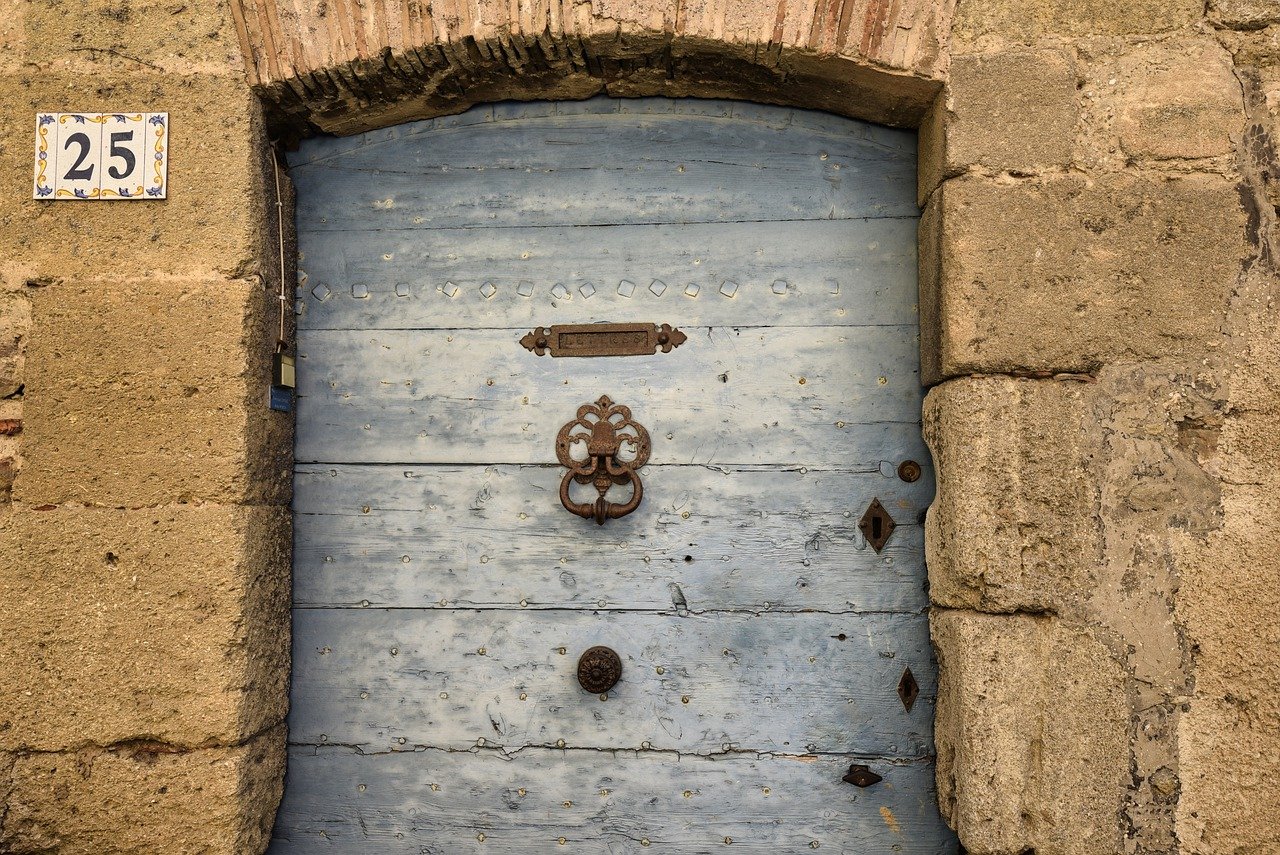
When it comes to framing your beautiful embroidery, one of the most exciting options to consider is the use of . These mats can transform the way your artwork is perceived, adding a layer of depth and intrigue that flat, smooth mats simply can't achieve. Think of textured mats as the unsung heroes of wall art; they provide a backdrop that not only enhances your embroidery but also adds a tactile element that invites viewers to appreciate the piece from a closer distance.
Choosing the right texture is crucial. You might want to explore various materials such as linen, canvas, or even handmade paper. Each of these options offers a unique feel and look, allowing you to tailor the presentation of your embroidery to match your personal style and the overall vibe of your home. For instance, a rustic linen mat can complement a vintage embroidery piece beautifully, while a more modern canvas mat might suit contemporary designs.
Additionally, consider the color of your textured mat. A neutral tone can help your embroidery stand out, while a bold color can create a striking contrast that draws the eye. Here’s a quick overview of how different textures can impact the presentation of your embroidery:
| Texture Type | Visual Impact | Best For |
|---|---|---|
| Linen | Soft, natural feel | Traditional or vintage pieces |
| Canvas | Rugged and modern | Contemporary designs |
| Handmade Paper | Unique and artistic | Artistic or abstract works |
Moreover, the textural qualities can also play a significant role in how light interacts with your artwork. Textured mats can create shadows and highlights that enhance the visual experience, making your embroidery appear more dynamic. Imagine walking into a room and being instantly captivated by the way the light dances across the surface of a textured mat, drawing your attention to the intricate details of the embroidery above it.
In summary, textured mats are not just a framing accessory; they are a vital component that can elevate your embroidery from a simple craft to a stunning piece of art. So, next time you're framing your work, take a moment to explore the world of textures. You might be surprised at how much they can enhance your handmade treasures!
- What types of textured mats are available? Textured mats can include materials like linen, canvas, and handmade paper, each offering a unique look and feel.
- How do I choose the right texture for my embroidery? Consider the style of your embroidery and the overall decor of your space. A rustic piece may pair well with linen, while a modern design might look best with canvas.
- Can textured mats affect the longevity of my embroidery? Yes, choosing the right materials can protect your embroidery from wear and tear while enhancing its visual appeal.
Displaying Your Framed Embroidery
When it comes to showcasing your framed embroidery, the way you display it can completely transform the ambiance of your space. Think of your embroidery as a piece of art that tells a story, and the display is the stage that brings that story to life. There are numerous ways to arrange your framed pieces, and each method can evoke a different mood or feeling in your home. For instance, you might consider a gallery wall as a vibrant, eclectic showcase or a single statement piece that draws the eye and sparks conversation.
Creating a gallery wall is an exciting way to display multiple pieces of embroidery together. This approach allows you to curate a collection that reflects your personality and interests. Imagine a wall filled with various frames, each containing a unique piece of embroidery that harmonizes in color or theme. To achieve a cohesive look, try to coordinate the frames in terms of color and style. For instance, you could use a mix of vintage wooden frames alongside sleek modern ones, or stick to a monochromatic palette for a more streamlined appearance. The key is to arrange the pieces in a way that feels balanced and visually appealing.
Another fantastic idea is to consider seasonal rotations. This practice not only keeps your decor fresh but also allows you to showcase different pieces of your embroidery collection throughout the year. For example, during the fall, you might display pieces with warm, earthy tones or autumn-themed designs, while in spring, you could switch to lighter, floral motifs. This way, your home remains dynamic, and you can enjoy a variety of your handiwork without overwhelming your space with too many pieces at once.
To make your display even more engaging, think about the placement of your framed embroidery. Here are some tips to keep in mind:
- Height Matters: Hang your pieces at eye level for the best viewing experience. If you're creating a gallery wall, consider the average height of the viewers in your home.
- Lighting: Good lighting can enhance the colors and details of your embroidery. Natural light is great, but avoid direct sunlight to prevent fading. Consider using spotlights or wall sconces to highlight specific pieces.
- Mix and Match: Don’t be afraid to mix embroidery with other types of art or photographs. This can create a more interesting visual narrative and make your space feel more personalized.
Ultimately, displaying your framed embroidery is about expressing your unique style and creating an inviting atmosphere. Whether you opt for a gallery wall, seasonal rotations, or a single standout piece, remember that your embroidery deserves to be celebrated. So, grab your frames, find the perfect spot, and let your creativity shine!
Q1: How do I choose the best location for displaying my embroidery?
A1: Consider areas of your home where you spend the most time, like living rooms or hallways. Ensure the area has good lighting and is at eye level for the best visual impact.
Q2: Can I mix different styles of frames when creating a gallery wall?
A2: Absolutely! Mixing frame styles can add character to your display. Just ensure that there is some common theme or color scheme to maintain cohesion.
Q3: How often should I rotate my embroidery pieces?
A3: It depends on your preference! Some people enjoy changing their displays seasonally, while others might switch them out every few months. Find what works best for you.

Gallery Walls
Creating a gallery wall is one of the most exciting ways to showcase your framed embroidery pieces while adding a personal touch to your home decor. Imagine walking into a room where your favorite handmade creations are arranged in a visually appealing layout, drawing the eye and sparking conversation. The beauty of a gallery wall lies in its versatility; you can mix and match different art styles, colors, and sizes to create a unique tapestry of creativity that reflects your personality.
When planning your gallery wall, consider the overall theme you want to convey. Are you aiming for a cozy, eclectic vibe, or something more modern and minimalist? This decision will guide your choices in terms of frame styles, colors, and the types of embroidery you display. For instance, if you're going for a rustic feel, wooden frames with a distressed finish could beautifully complement your embroidered pieces. On the other hand, sleek metal frames can enhance a contemporary look, making your artwork pop against the wall.
To get started, gather all the pieces you want to include. Lay them out on the floor first to visualize how they will look together. This step is crucial; it allows you to play around with different arrangements without committing to nail holes in your wall just yet. You might find that some pieces work better together than others, or that certain colors complement each other beautifully. Don't be afraid to mix in other types of art—like photographs or prints—to create a more dynamic display.
Once you have your layout finalized, it's time to hang your embroidery. A good rule of thumb is to keep the center of the gallery at eye level, ensuring that your art is easily appreciated by anyone who enters the room. If you have larger pieces, consider placing them in the center, surrounded by smaller works. This creates a sense of balance and draws attention to your most cherished pieces.
If you're feeling adventurous, you can even incorporate some three-dimensional elements into your gallery wall. Think about adding small shelves to display decorative items or plants alongside your embroidery. This not only adds depth but also creates a lively atmosphere that invites exploration and admiration.
Finally, remember that your gallery wall is not set in stone. Feel free to rotate your pieces periodically or update them with new embroidery projects as you complete them. This keeps your space feeling fresh and engaging, allowing you to celebrate your creativity continually. After all, the joy of embroidery lies not just in the creation but in sharing it with the world!
- How do I choose the right location for my gallery wall?
Look for a wall that is visible and can serve as a focal point in the room. Avoid areas with too much foot traffic to prevent damage to your artwork. - Can I mix different styles of frames?
Absolutely! Mixing frame styles can add character and interest to your gallery wall, making it more visually appealing. - How often should I change my gallery wall?
There's no set rule! You can change it as often as you like, whether it's seasonally, annually, or whenever you complete a new piece.

Seasonal Rotations
When it comes to decorating your home, one of the most delightful ways to keep things fresh and exciting is through . Imagine walking into a room and feeling a wave of newness wash over you with each changing season. By rotating your framed embroidery, you not only keep your decor vibrant but also give each piece a moment to shine. It's like giving your artwork a little vacation, allowing it to be appreciated in a different context throughout the year.
So, how do you go about this delightful practice? First, consider the themes that resonate with each season. For instance, in the spring, you might want to showcase light, floral designs that evoke feelings of renewal and growth. Summer could be the perfect time for bright, bold colors that capture the essence of sunshine and fun. As autumn rolls in, rich, warm tones can reflect the changing leaves, while winter might call for cozy, muted hues that evoke a sense of warmth and togetherness.
To make the most of your seasonal rotations, here are a few tips:
- Plan Ahead: Create a schedule for when you’ll change out your pieces. This could be monthly, or with the start of each new season. Mark it on your calendar as a fun reminder!
- Storage Solutions: Invest in quality storage for your embroidery when it’s not on display. Keep them in acid-free boxes or wrapped in fabric to prevent damage.
- Mix and Match: Don’t hesitate to combine your embroidery with other decor elements. Seasonal decorations like garlands, candles, or even fresh flowers can enhance the overall aesthetic.
Additionally, consider creating a display rotation checklist. This could be a simple table that outlines which pieces to display each season, along with a brief description of the artwork and why it fits that time of year. Here’s a quick example:
| Season | Embroidery Piece | Theme/Description |
|---|---|---|
| Spring | Floral Bouquet | Bright colors and blooming designs that signify new beginnings. |
| Summer | Beach Scene | Vibrant blues and yellows that capture the essence of summer fun. |
| Autumn | Harvest Motif | Warm oranges and browns that reflect the fall harvest. |
| Winter | Snowy Landscape | Cool whites and blues that evoke the serene beauty of winter. |
By engaging in seasonal rotations, you’ll not only enhance your living space but also create a dynamic relationship with your artwork. Each time you swap out a piece, it’s like rediscovering a long-lost treasure. Plus, it keeps your home feeling inviting and tailored to the current time of year, making it a cozy haven for both you and your guests.
Q: How often should I rotate my embroidery pieces?
A: It really depends on your personal preference! Many people choose to rotate their pieces with each season, while others may do it monthly. Find a rhythm that works for you.
Q: What’s the best way to store embroidery when not on display?
A: Store your embroidery in acid-free boxes or wrap them in breathable fabric to protect them from dust and damage. Avoid storing them in damp or humid areas.
Q: Can I mix different styles of embroidery in my seasonal displays?
A: Absolutely! Mixing styles can create an eclectic and personalized look. Just make sure the colors and themes complement each other for a cohesive display.
Frequently Asked Questions
- What type of frame is best for my embroidery?
Choosing the right frame depends on your embroidery's style, color, and the overall decor of your home. A wooden frame often adds warmth, while a sleek metal frame can give a modern touch. Always consider how the frame will complement your artwork and surrounding furnishings.
- How should I clean my embroidery before framing?
Cleaning your embroidery is essential to ensure it looks its best. For delicate fabrics, hand washing with mild soap is recommended, while sturdier fabrics can handle a gentle machine wash. Always check the care instructions for your specific fabric type to avoid damage.
- What are the benefits of using matting?
Matting can significantly enhance the visual appeal of your framed embroidery. It adds depth and contrast, drawing the eye to your artwork. Choose colors that complement your embroidery, and consider textured mats for a more dynamic look that elevates the overall presentation.
- How do I display my framed embroidery effectively?
Strategically displaying your framed embroidery can transform your space. Consider creating a gallery wall to showcase multiple pieces together, or rotate your displays seasonally to keep your decor fresh and engaging. Both methods allow you to express your personal style beautifully.
- Can I use a machine to iron my embroidery?
While you can use a machine to iron your embroidery, it's crucial to use a low heat setting and a pressing cloth to prevent scorching. Always test a small area first, especially if your embroidery features delicate threads or embellishments.


