Beginner's guide to mastering the potter's wheel
Welcome to the fascinating world of pottery! If you're a beginner eager to dive into this creative journey, you're in the right place. The potter's wheel is a magical tool that transforms a lump of clay into beautiful works of art. But before you start spinning, it's essential to grasp the basics. This guide will equip you with the essential tips and techniques needed to effectively use the potter's wheel, helping you unleash your creativity and shape clay like a pro!
The first step in your pottery journey is understanding the potter's wheel itself. There are two main types of wheels: kick wheels and electric wheels. Kick wheels are traditional, powered by your foot, which can give you a unique sense of control and rhythm. On the other hand, electric wheels are more popular among beginners due to their ease of use and consistency. Choosing the right wheel for your pottery journey is crucial, as it can significantly influence your experience and results.
Before you start throwing clay, you'll need to gather some essential tools. Having the right equipment can make a world of difference in your pottery-making experience. Here’s a quick list of must-have tools:
- Potter's knife: For trimming and shaping your clay.
- Sponge: Useful for smoothing surfaces and keeping your hands wet.
- Calipers: To measure and ensure uniformity in your pieces.
- Wire cutter: Perfect for cutting clay from the wheel.
With these tools at your disposal, you'll be well on your way to crafting stunning pottery!
Now, let's talk about clay. The type of clay you choose can greatly affect your final piece. There are three primary types of clay suitable for wheel throwing: earthenware, stoneware, and porcelain. Each type has its unique properties:
| Type of Clay | Characteristics | Best Uses |
|---|---|---|
| Earthenware | Low firing temperature, porous, often red or brown | Functional and decorative pieces |
| Stoneware | Mid to high firing temperature, durable, often gray or brown | Functional items like dishes and mugs |
| Porcelain | High firing temperature, smooth, often white | Fine art pieces and delicate items |
Understanding these differences will help you select the right clay for your projects and ensure you achieve the desired outcomes.
When selecting clay, consider your skill level and the type of pottery you want to create. If you're just starting, earthenware might be a good choice due to its forgiving nature. As you gain confidence, you can experiment with stoneware and porcelain, which offer more durability and versatility.
Before you can start throwing, it's crucial to prepare your clay properly. This involves wedging and kneading the clay to remove air bubbles and ensure a consistent texture. Think of it like kneading dough; you want to create a smooth, workable material that will respond well on the wheel. This preparation is vital for successful wheel throwing and will save you a lot of frustration down the line.
Once your clay is prepared, it’s time to master the fundamental techniques for centering and shaping. Centering is the most critical skill you’ll learn, as it sets the foundation for all your pottery forms. Start by throwing your clay onto the wheel and applying consistent pressure with your hands. As you practice, you’ll develop a feel for the clay and learn how to shape it into beautiful forms.
As with any new skill, beginners often encounter common pitfalls. One frequent mistake is not wedging the clay enough, leading to air bubbles that can cause cracks during firing. Another issue is applying too much pressure while centering, which can distort your shape. Being aware of these mistakes is the first step in improving your technique and avoiding frustration.
To refine your throwing skills, practice is key. Try setting aside time each week to work on specific techniques, such as centering or shaping. You can also watch tutorials or join pottery classes to gain insights from experienced potters. Remember, every expert was once a beginner, so don’t be discouraged by initial challenges!
After you’ve shaped your pottery, the final steps are trimming, drying, and glazing. Trimming helps refine the shape and remove excess clay, while drying ensures your piece is sturdy before firing. Glazing is where the magic happens, adding color and finish to your work. Choosing the right glaze can enhance your piece’s beauty, making it a true reflection of your creativity.
When selecting glazes, consider how they will complement your pieces. There are various glazing techniques, such as dipping, brushing, and spraying, each offering different effects. Experimenting with glazes can be a fun part of the pottery process, allowing you to personalize your creations and make them truly unique!
Q: How long does it take to learn pottery?
A: While everyone learns at their own pace, with consistent practice, you can expect to see significant progress within a few months.
Q: Can I use any type of clay on the potter's wheel?
A: Not all clays are suitable for wheel throwing. It's best to stick with clay types specifically designed for this purpose, like stoneware or porcelain.
Q: What if my piece collapses while throwing?
A: Don’t worry! It happens to everyone. Just take a deep breath, re-center your clay, and try again.
Understanding the Potter's Wheel
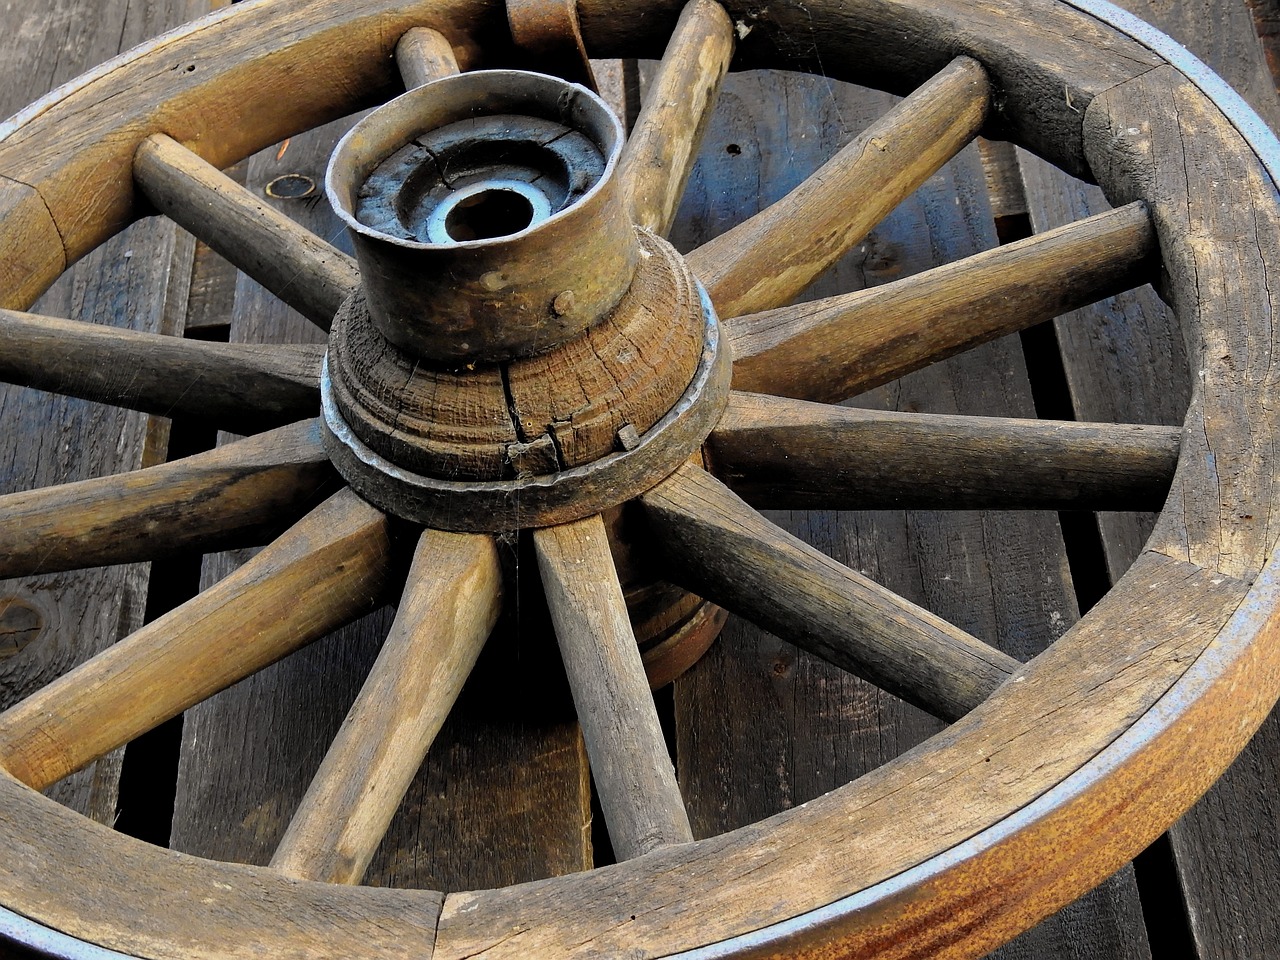
When you first step into the world of pottery, the potter's wheel can seem like a magical device, spinning clay into beautiful forms right before your eyes. But what exactly is this wheel, and how does it work? At its core, the potter's wheel is a tool that allows you to shape clay while it spins, giving you the ability to create symmetrical pieces with ease. There are two main types of potter's wheels: kick wheels and electric wheels. Each has its own unique characteristics and benefits.
Kick wheels are powered by your foot, allowing you to control the speed and rhythm of the wheel as you work. This can be a great way to connect with the physicality of the clay and the wheel. On the other hand, electric wheels are more common in studios today and offer consistent speed, making it easier for beginners to focus on their technique without worrying about maintaining momentum.
Choosing the right wheel is crucial for your pottery journey. If you’re just starting out, you might want to consider a few factors:
- Space: Do you have enough room for a kick wheel, or would an electric wheel fit better in your workspace?
- Budget: Electric wheels can be more expensive, so consider your budget when making your choice.
- Personal Preference: Some potters swear by the tactile experience of kick wheels, while others prefer the ease of electric models.
Once you’ve chosen your wheel, it’s essential to understand its components. The main parts include the wheel head, which is where the clay sits, and the bat system, which allows you to easily remove your work without disturbing it. Familiarizing yourself with these parts will help you feel more comfortable when you start throwing.
Another important aspect is the speed control. If you're using an electric wheel, getting accustomed to the pedal is key. You’ll want to practice controlling the speed to ensure that you can manipulate the clay effectively. Too fast, and you might lose control; too slow, and the clay won’t respond well. Finding that sweet spot is part of the learning process.
In summary, understanding the potter's wheel involves knowing the types available, their components, and how to control them effectively. As you embark on your pottery journey, remember that practice is your best friend. The more you work with the wheel, the more intuitive it will become. Embrace the learning curve, and soon enough, you’ll be creating stunning pieces that reflect your unique style!
Q1: What type of potter's wheel is best for beginners?
A1: Electric wheels are often recommended for beginners due to their ease of use and consistent speed. However, if you’re interested in a more traditional approach, a kick wheel can also be a great choice.
Q2: How much space do I need for a potter's wheel?
A2: Ideally, you should have enough space to comfortably sit at the wheel and have room for clay, tools, and your finished pieces. A small corner in your home or a dedicated studio space works well.
Q3: Can I use any type of clay on the potter's wheel?
A3: While you can use various types of clay, it's best to start with a clay that is specifically designed for wheel throwing, such as stoneware or earthenware, as they are more forgiving for beginners.
Essential Tools for Pottery
When diving into the world of pottery, having the right tools is like having a trusty map on an adventurous journey. Without them, you might find yourself lost in a sea of clay, unsure of how to navigate your creative path. So, let’s explore the essential tools every beginner should have in their pottery toolkit. These tools not only enhance your efficiency but also allow you to express your artistic flair more freely.
First up, the potter's wheel itself is the heart of your pottery experience. Whether you choose an electric or kick wheel, this is where the magic happens. Electric wheels are great for beginners as they offer consistent speed and ease of use, while kick wheels provide a more traditional experience that many find rewarding. Make sure to choose one that fits your space and budget.
Next, you’ll need some clay. It’s the medium that allows your creativity to flow. As a beginner, opting for a versatile stoneware clay is a smart choice since it’s durable and forgiving. You can experiment with different types of clay as you progress, but starting with one that’s easy to work with will help you build confidence.
Don’t forget about your tools! Here’s a quick rundown of must-have tools that will make your pottery journey smoother:
- Wire cutter: Perfect for slicing off chunks of clay and removing your pieces from the wheel.
- Wooden rib: This tool helps shape and smooth the clay as it spins, allowing for a refined finish.
- Metal rib: It’s great for creating sharp edges and fine details on your pottery.
- Sponges: Essential for adding moisture and smoothing surfaces, sponges are your best friends in the studio.
- Trimming tools: These are crucial for refining your pieces after they’ve been thrown on the wheel.
Additionally, a bat is a useful accessory that allows you to easily remove your pottery from the wheel without damaging it. You can purchase pre-made bats or make your own from plywood. A good work surface is also essential; a sturdy table will help you work comfortably. Consider investing in a pottery apron to keep yourself clean and protect your clothes from the inevitable splashes of clay.
Once you’ve mastered the basics, you might want to explore glazing tools. Brushes, spray bottles, and dipping tools will allow you to add those beautiful finishing touches to your pieces. Each tool plays a unique role in your pottery journey, and as you become more skilled, you’ll find new ways to use them creatively.
Finally, don’t overlook the importance of a kiln. While this may not be an immediate purchase for every beginner, it’s essential for firing your pieces once they’re complete. Many pottery studios offer kiln services, so you can focus on creating while they handle the firing process.
In summary, having the right tools is vital for any pottery enthusiast. They not only facilitate the creation process but also empower your artistic expression. As you gather your tools and start working with clay, remember that practice is key. The more you use these tools, the more comfortable and skilled you will become. So, roll up your sleeves, get your hands dirty, and let your creativity shine!
Q1: Do I need to buy all the tools at once?
A: No, start with the basics and gradually build your collection as you become more comfortable with pottery.
Q2: What type of clay is best for beginners?
A: Stoneware is a great choice for beginners due to its versatility and durability.
Q3: Can I use regular kitchen tools for pottery?
A: While some kitchen tools can work in a pinch, investing in proper pottery tools will yield better results and enhance your experience.

Clay Types and Their Uses
When it comes to pottery, the type of clay you choose can make or break your creation. Each clay type has its own unique properties, which can significantly influence the final appearance and functionality of your pottery. Let's dive into the three most common types of clay used for wheel throwing: earthenware, stoneware, and porcelain.
Earthenware is perhaps the most beginner-friendly option. It’s known for its low firing temperature, typically around 1,830°F (1,000°C). This means it's easier to work with and less intimidating for newcomers. Earthenware is often characterized by its reddish-brown color and porous nature, making it ideal for decorative pieces rather than functional dinnerware. However, it can be glazed to enhance its durability and aesthetic appeal. Think of earthenware as your trusty companion in the pottery world—easy to mold and forgiving, perfect for those just starting out!
Next up is stoneware, a fantastic all-rounder that is known for its durability and versatility. Fired at higher temperatures (around 2,192°F or 1,200°C), stoneware is non-porous and can be used for functional items like dishes and mugs. Its natural color ranges from gray to brown, and it often has a speckled appearance due to the minerals in the clay. Stoneware is like the Swiss Army knife of clays; it can handle both decorative and functional roles, making it a favorite among potters at all skill levels.
Lastly, we have porcelain, often considered the “gold standard” of pottery clays. With a firing temperature that can reach up to 2,600°F (1,400°C), porcelain is known for its strength and translucency. It’s a bit more challenging to work with due to its fine texture and tendency to warp if not handled properly. However, the results can be stunning, producing delicate pieces that are both beautiful and functional. If you think of pottery as a journey, porcelain is like that challenging mountain climb—rewarding but requiring some experience and patience.
To summarize, here's a quick comparison of these three clay types:
| Clay Type | Firing Temperature | Characteristics | Best Uses |
|---|---|---|---|
| Earthenware | 1,830°F (1,000°C) | Low firing, porous, often reddish-brown | Decorative pieces, non-functional items |
| Stoneware | 2,192°F (1,200°C) | Durable, non-porous, speckled | Functional items, dishes, mugs |
| Porcelain | 2,600°F (1,400°C) | Strong, translucent, fine texture | Delicate pieces, fine dinnerware |
Choosing the right clay is crucial for your pottery projects. Each type has its own strengths and weaknesses, and understanding these can help you make informed decisions that align with your artistic vision. Whether you’re crafting a simple bowl or an intricate vase, knowing your clay is like knowing your canvas—it sets the stage for your creativity to flourish.
- What is the best clay for beginners? Earthenware is generally recommended for beginners due to its ease of use and lower firing temperature.
- Can I use different types of clay together? It's best to avoid mixing different clay types as they have varying shrinkage rates and firing temperatures, which can lead to issues in the final product.
- How do I know which clay is right for my project? Consider the intended use of your piece. For functional items, stoneware is ideal, while porcelain is great for artistic and delicate works.
Choosing the Right Clay
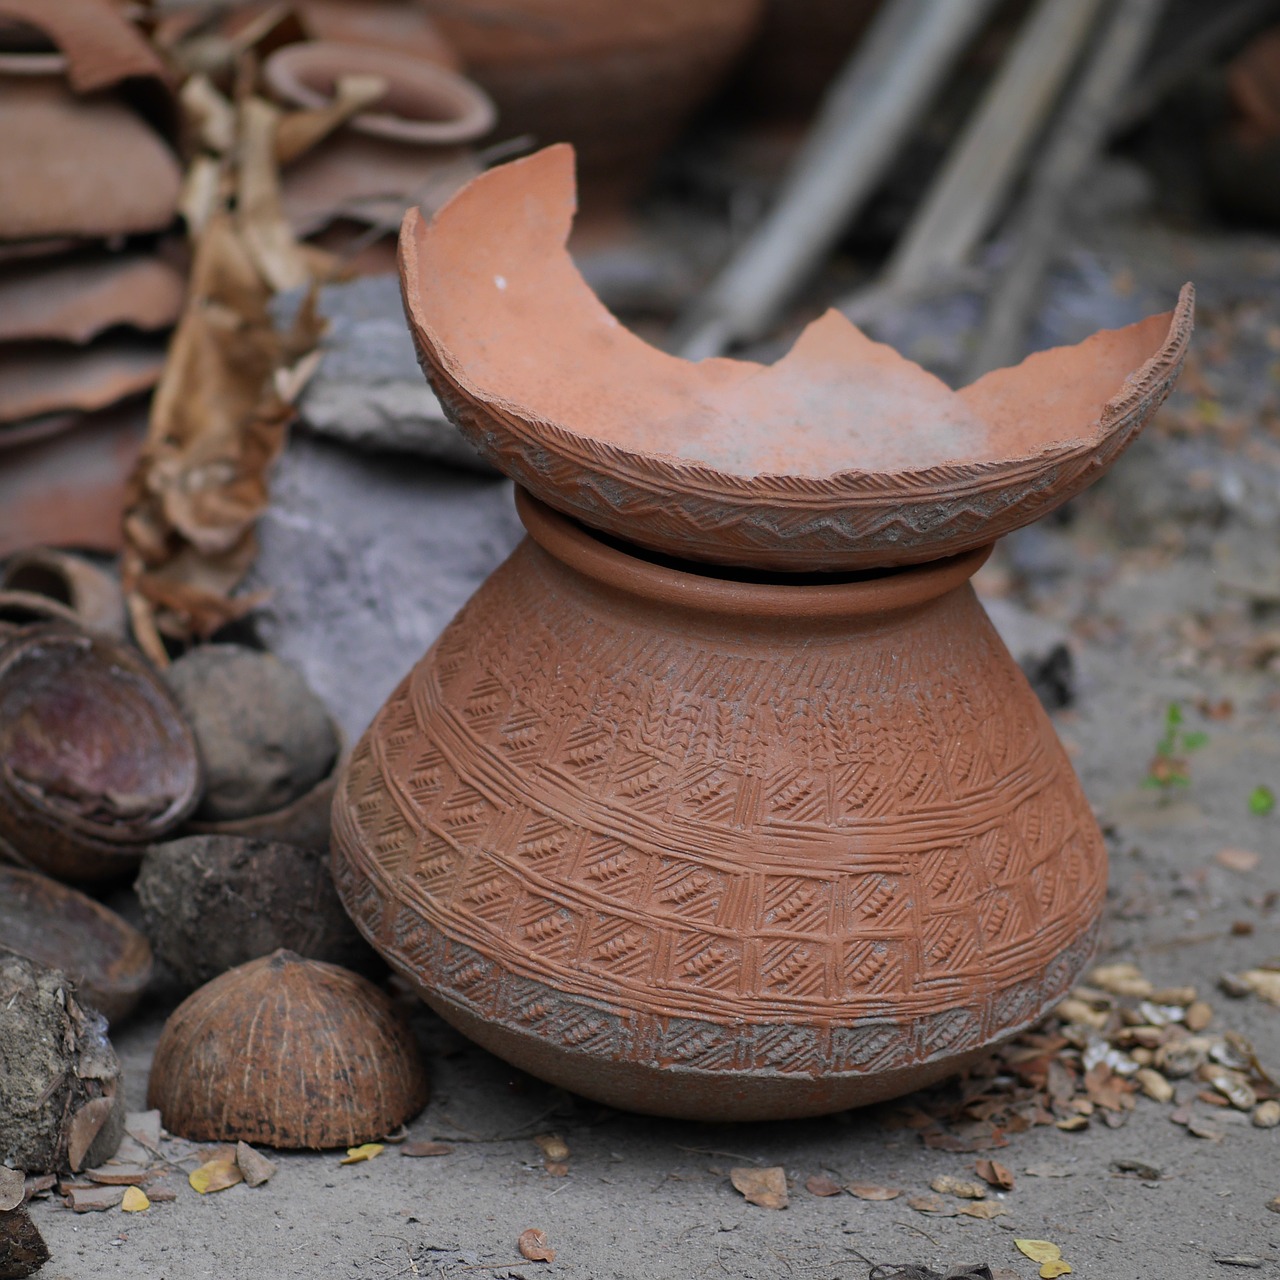
When it comes to pottery, the clay you choose can make or break your creative journey. Think of clay as the canvas for a painter; the quality and type of clay can significantly influence the outcome of your artwork. So, how do you decide which clay is right for you? It all boils down to your skill level, the type of pottery you want to create, and the final look you envision for your pieces.
First off, let’s explore the three main types of clay that are popular among potters:
- Earthenware: This clay is perfect for beginners. It’s easy to work with and fires at a low temperature, making it ideal for simple projects. Plus, it’s usually less expensive, which is a bonus when you’re just starting out.
- Stoneware: If you’re looking for durability, stoneware is your go-to option. It fires at a higher temperature and is known for its strength and versatility. This type of clay is great for functional pieces like mugs and bowls.
- Porcelain: Now, this is where things get fancy! Porcelain is known for its delicate appearance and smooth texture. However, it’s a bit more challenging to work with, making it better suited for those who have some experience under their belt.
Now that you have a basic understanding of the different types of clay, consider what you want to achieve with your pottery. Are you aiming for vibrant, colorful pieces that can be used every day, or are you leaning towards more artistic, decorative items? Your choice of clay will directly impact the aesthetics and functionality of your work.
Another factor to consider is the firing process. Each type of clay has its own firing temperature and requirements. For instance, earthenware typically fires at around 1,830°F (1,000°C), while stoneware needs a hotter environment, around 2,192°F (1,200°C). Porcelain, on the other hand, requires even higher temperatures, usually between 2,192°F to 2,372°F (1,200°C to 1,300°C). Understanding these temperatures is crucial because they dictate not only the strength of your pieces but also their final appearance.
Lastly, don’t forget about the texture and color of the clay. Some clays are naturally more coarse, which can add an interesting element to your work, while others are smooth and fine, perfect for detailed designs. As you experiment, you’ll find that the clay you choose can inspire different styles and techniques, so don’t be afraid to try out various types until you find your perfect match!
- What type of clay is best for beginners? Earthenware is often recommended for beginners due to its ease of use and lower firing temperature.
- Can I mix different types of clay? While it’s possible, it’s generally not recommended as they can have different firing temperatures and shrinkage rates, leading to issues in the final product.
- How do I know if my clay is dry enough to fire? A good rule of thumb is to wait until the clay is leather-hard, which means it’s firm but still has some moisture left.
Preparing Your Clay
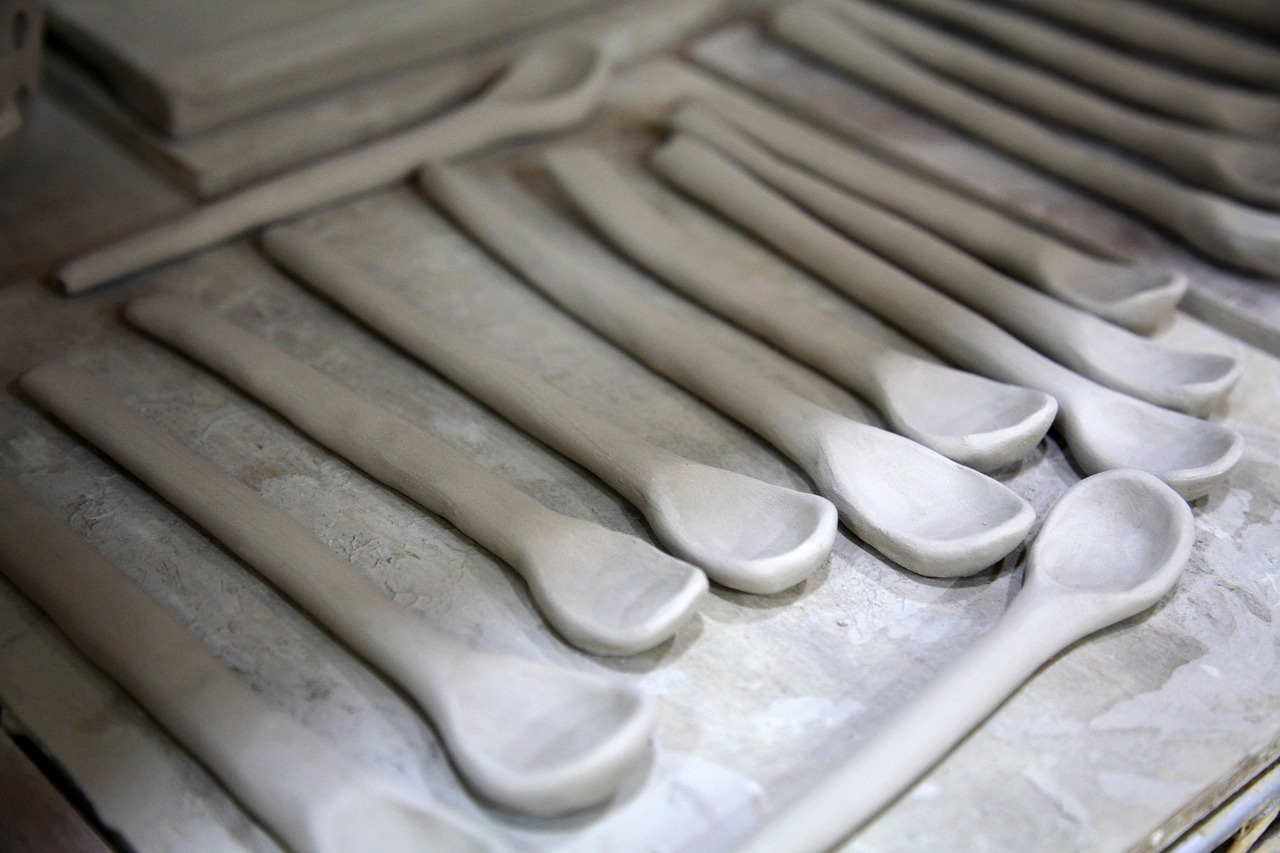
When it comes to pottery, the journey begins long before you even sit down at the potter's wheel. One of the most crucial steps in the pottery-making process is . This preparation is not just a mere formality; it's the foundation upon which your entire creation rests. Think of it as the warm-up before a big game—essential for achieving optimal performance!
The first thing you need to understand is the importance of wedging. This technique involves kneading the clay to remove any air bubbles that may be trapped inside. Air bubbles can wreak havoc during the firing process, causing your piece to crack or explode. To wedge your clay effectively, you can use the following method:
- Start by cutting your clay into manageable pieces.
- Then, slap the clay down onto a clean surface, pushing it away with your palms.
- Fold the clay back over itself and repeat the process, turning it slightly each time.
This method not only eliminates air but also helps create a consistent texture throughout your clay. It’s like making bread—kneading is essential for a good loaf, just as wedging is vital for a successful pottery piece.
Next, let's talk about kneading. While wedging is a specific technique, kneading can be seen as a broader action that helps to further refine the clay's texture. Kneading ensures that the clay is evenly mixed and free of any dry spots, which can lead to uneven results when you start throwing on the wheel. To knead your clay, you can use a similar technique as wedging, but focus more on pressing and folding the clay into itself until it feels smooth and pliable.
Once your clay is wedged and kneaded to perfection, it’s time to consider the moisture content. The ideal clay should feel damp but not overly wet. If it’s too dry, it will crack during the throwing process; too wet, and it will collapse under its own weight. A simple test is to squeeze a small piece of clay into a ball. If it holds its shape without cracking, you're good to go. If it crumbles, add a bit of water and knead it again.
Finally, don’t forget to cover your prepared clay with a damp cloth or plastic wrap if you’re not using it immediately. This prevents it from drying out and ensures that it remains workable when you return to your wheel. Just like a well-tended garden, your clay needs attention and care to flourish!
In summary, preparing your clay is an art in itself. By mastering the techniques of wedging, kneading, and managing moisture, you set the stage for a successful pottery experience. So get your hands dirty, embrace the process, and watch as your creativity unfolds on the potter's wheel!
Q: How long should I wedge my clay?
A: Typically, you should wedge your clay for about 5-10 minutes until it feels smooth and free of air bubbles.
Q: What should I do if my clay starts to dry out?
A: If your clay is drying out, you can spray it lightly with water and knead it to restore moisture.
Q: Can I reuse leftover clay?
A: Yes, you can reclaim leftover clay by wedging it with a bit of water to bring it back to a workable state.

Basic Throwing Techniques
When it comes to mastering the potter's wheel, are the foundation upon which your pottery skills will be built. Think of it as learning to ride a bike; you need to get the basics right before you can perform tricks or ride with confidence. The first technique to focus on is centering the clay. This is crucial because if your clay isn't centered, it will wobble and make it nearly impossible to create anything useful. To center your clay, start by placing a ball of clay on the wheel head and wetting your hands. As you begin to spin the wheel, apply gentle pressure with your palms to shape the clay into a cone. Gradually push down and inward, using your fingers to guide the clay into the center.
Once your clay is centered, the next step is opening up the clay. This is where the magic happens! With your fingers gently pressing down into the center of the clay, you will create a hollow space. It's important to maintain a steady, even pressure to avoid any cracks or unevenness. Think of it as making a well in a mound of sand; you want it to be deep enough to hold water but not so deep that it collapses.
After opening the clay, you'll want to pull up the walls. This is where you can start to see your piece take shape. With one hand on the outside and the other on the inside, gently pull the clay upward while applying even pressure. This might feel a bit like you're trying to stretch a balloon—too much force, and it will pop, too little, and it won't stretch at all. Finding that sweet spot is key!
As you pull up the walls, you can begin to shape your piece. Whether you're going for a bowl, a vase, or something more intricate, this is your chance to let your creativity shine. Use your fingers to pinch, squeeze, or flatten the clay as you see fit. Remember, practice makes perfect, and don’t be discouraged if your first few attempts don’t turn out exactly as you envisioned.
Finally, it's essential to trim and refine your piece once you've shaped it. This involves using a trimming tool to remove excess clay and create a polished finish. It's similar to sculpting; you’re not just making a vessel, but you’re also refining a work of art. Take your time during this process; the more effort you put into the finishing touches, the more professional your piece will look.
In summary, mastering basic throwing techniques is all about practice and patience. As you become more comfortable with centering, opening, pulling, shaping, and trimming, you'll find that your confidence grows alongside your skills. Remember to enjoy the process—pottery is as much about the journey as it is about the final product!
- What is the most challenging part of using a potter's wheel? Many beginners find centering the clay to be the most challenging part. It takes practice to develop the right touch and technique.
- How long does it take to get good at throwing pottery? Everyone learns at their own pace, but with consistent practice, you can expect to see significant improvements within a few weeks.
- Do I need to take a class to learn pottery? While classes can be incredibly beneficial, many people learn through online tutorials, books, and practice. Just be sure to have the right tools and materials!
Common Mistakes to Avoid
When diving into the world of pottery, especially when using a potter's wheel, it’s all too easy to make some common mistakes that can hinder your progress. One of the most frequent pitfalls is not properly centering the clay. Imagine trying to spin a top that’s off-balance; it just won’t work! If your clay isn’t centered, you’ll struggle to shape it effectively, leading to frustration and uneven pieces. So, take your time to master this fundamental skill; it’s worth it!
Another mistake beginners often make is using too much water while throwing. While a little moisture can help with shaping, too much can cause the clay to become slippery and difficult to control. Think of it like trying to write on a wet piece of paper; the words just won’t stick! Instead, aim for a balance where the clay remains workable yet firm enough to hold its shape.
Many newcomers also underestimate the importance of properly wedging and kneading clay. This step is crucial for removing air bubbles and achieving a uniform texture. Skipping this process can lead to cracks and imperfections in your finished piece. It’s like trying to bake a cake without mixing the ingredients properly; you’ll end up with a lumpy mess! So, take the time to knead your clay thoroughly before throwing.
Additionally, it’s vital to be aware of your body positioning and how you apply pressure while shaping the clay. Beginners often lean too heavily on one side or apply uneven pressure, which can distort the form. Consider your body as a conductor of an orchestra; each movement should be intentional and fluid to create a harmonious outcome. Keep your posture relaxed and your hands steady to ensure better results.
Lastly, one of the biggest mistakes is neglecting to practice. Pottery is an art that requires time and dedication to master. Many beginners expect immediate results, but the reality is that skill comes with consistent practice. Don’t be discouraged by initial failures; instead, view them as stepping stones toward improvement. Set aside time each week to practice, and you’ll be amazed at how quickly you progress!
In summary, avoiding these common mistakes can significantly enhance your pottery journey. Focus on centering your clay, managing water usage, wedging properly, maintaining good posture, and committing to regular practice. Each of these elements plays a vital role in your development as a potter, paving the way for beautiful, handcrafted pieces that reflect your unique style.
- What is the most important skill to learn on the potter's wheel? Centering the clay is essential for creating even and well-shaped pieces.
- How can I prevent cracks in my pottery? Ensure you properly wedge your clay and avoid using excessive water during the throwing process.
- How often should I practice pottery? Regular practice is key; aim for several times a week to see significant improvement.
- What type of clay is best for beginners? Earthenware is a great choice for beginners due to its workability and forgiving nature.
Improving Your Technique
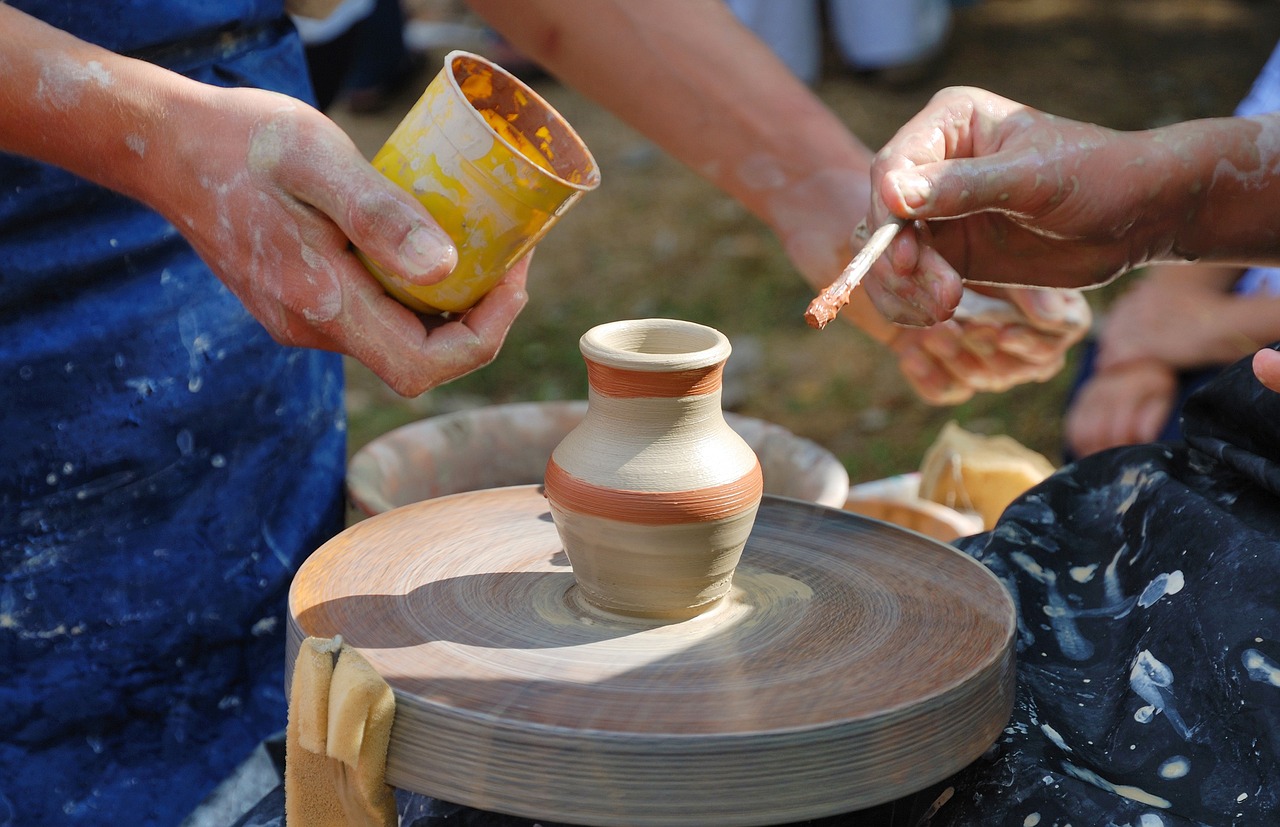
When it comes to pottery, the journey of improvement is both exciting and challenging. Every time you sit at the potter's wheel, you're not just shaping clay; you're also shaping your skills. To truly enhance your technique, it's essential to focus on a few key areas that can make a significant difference in your pottery-making experience.
One of the most effective ways to improve your throwing technique is through consistent practice. Think of it like learning to ride a bike; the more you practice, the better you become. Set aside dedicated time each week to work on your skills. This will not only help you get comfortable with the wheel but also allow you to experiment with different forms and styles. Remember, even the most skilled potters started as beginners, and practice is the bridge to mastery.
Another vital aspect to consider is self-awareness. Pay close attention to your body posture and hand movements while throwing. Are you leaning too far forward? Is your grip too tight? These small adjustments can lead to significant improvements. Take a moment to observe how your body interacts with the wheel and the clay. It might be helpful to record yourself while you work, so you can review and spot areas for improvement.
Additionally, don't shy away from seeking feedback. Join a pottery class or an online community where you can share your work and receive constructive criticism. Engaging with fellow potters can provide fresh perspectives and new techniques that you may not have considered. Plus, the camaraderie and support can be incredibly motivating!
Here are some specific tips that can help you refine your throwing skills:
- Centering: Focus on centering the clay properly. If the clay isn't centered, it will be challenging to create even shapes. Take your time and practice this fundamental skill.
- Speed Control: Experiment with the speed of your wheel. Slower speeds can give you more control, especially when you're just starting out.
- Hand Positioning: Keep your hands steady and positioned correctly. Use your fingers to guide the clay gently, allowing it to rise and take shape without applying too much pressure.
- Practice Different Forms: Try making various forms such as bowls, vases, and mugs. Each form presents unique challenges that can enhance your versatility as a potter.
Lastly, embrace the beauty of mistakes. Each misstep is an opportunity for growth. When a piece doesn’t turn out as planned, analyze what went wrong and how you can adjust your technique next time. This mindset will not only help you improve but also make the process more enjoyable.
Q: How often should I practice to improve my pottery skills?
A: Ideally, try to practice at least a few times a week. Consistency is key to developing your technique and confidence.
Q: Is it normal to struggle with centering the clay?
A: Absolutely! Centering is one of the most challenging aspects for beginners. With practice, you'll find it becomes easier over time.
Q: Should I take a pottery class or learn on my own?
A: Both options have their benefits. Classes provide structured learning and feedback, while self-learning allows for flexibility. Consider trying a class to kickstart your journey!
Q: What should I do if my clay keeps collapsing?
A: This can happen if the clay is too wet or if you’re applying too much pressure. Try adjusting the moisture level and practice gentle hand movements.
By focusing on these techniques and maintaining a positive attitude towards improvement, you’ll find yourself not just creating pottery, but also enjoying the entire process of learning and growing as an artist.
Finishing and Glazing Your Pieces
Once you've successfully shaped your pottery on the wheel, the journey doesn't end there. In fact, the finishing and glazing process is where your pieces truly come to life! This stage is not just about aesthetics; it's also crucial for durability and functionality. Imagine spending hours crafting a beautiful bowl, only to have it crack or absorb water because you skipped this vital step. So, let's dive into the world of finishing and glazing!
The first step in this process is trimming. After your piece has dried to a leather-hard state, it's time to refine its shape. Trimming allows you to remove excess clay from the base, giving your piece a professional finish. Use a trimming tool to carve out the foot of the pot, which not only enhances its appearance but also ensures stability. Remember, a well-trimmed piece is like a well-tailored suit—it's all about the details!
Next comes the drying phase. Patience is key here! Allow your piece to dry completely before moving on to glazing. This can take anywhere from a few hours to a couple of days, depending on the thickness of your clay and the humidity of your workspace. Rushing this step can lead to cracks during firing, which is something no potter wants to deal with. Think of it like letting a cake cool before frosting; you wouldn’t want to ruin your hard work by being too hasty!
Now, let’s talk about the exciting part: glazing. This is where you can unleash your creativity and personality! Glazes come in a variety of colors and finishes, from glossy to matte, and can dramatically change the look of your pottery. When choosing a glaze, consider the type of clay you used, as some glazes react differently with various clay bodies. For instance, stoneware glazes often look stunning on stoneware clay, while earthenware glazes may not adhere as well.
When applying glaze, you can use different techniques such as dipping, brushing, or spraying. Each method offers a unique effect, so feel free to experiment! Just remember to apply the glaze evenly to avoid drips and runs, which can detract from your masterpiece. It’s like painting a canvas; a steady hand and a clear vision can make all the difference!
After glazing, it's time for the final step: firing. This process transforms your raw clay and glaze into a durable, finished product. Depending on the type of clay and glaze you used, you may need to fire your pieces in a bisque kiln followed by a glaze kiln. Each firing brings out different qualities in your work, so don’t be afraid to explore and see how your pieces evolve.
Finally, once your pottery has been fired and cooled, take a moment to admire your work! You've transformed a lump of clay into a functional piece of art. Whether it's a mug, bowl, or decorative item, each piece tells a story—your story. So, celebrate your creativity and enjoy the fruits of your labor!
- What is the best way to clean my pottery before glazing? Make sure to wipe your piece with a damp sponge to remove any dust or debris.
- How can I avoid glazing mistakes? Always test your glaze on a small piece of clay before applying it to your main project.
- Can I glaze over underglaze? Yes, glazing over underglaze can create beautiful effects, but ensure the underglaze is completely dry first.
- What temperature should I fire my pottery? This depends on the type of clay and glaze used; consult the manufacturer's instructions for specifics.
Choosing the Right Glaze
When it comes to pottery, the right glaze can truly transform your piece from ordinary to extraordinary. Imagine your freshly thrown bowl or vase, and now picture it adorned with a stunning glaze that enhances its shape and texture. Choosing the right glaze isn’t just about aesthetics; it also plays a crucial role in the functionality and durability of your pottery. So, how do you go about selecting the perfect glaze for your creations?
First off, it’s essential to understand the different types of glazes available. There are glossy, matte, and satin finishes, each offering a unique look and feel. Glossy glazes tend to reflect light beautifully, giving your pottery a vibrant and shiny finish, while matte glazes provide a more subdued, earthy appearance. Satin glazes, on the other hand, strike a balance between the two, offering a soft sheen that can be quite appealing.
Next, consider the color of the glaze. This is where your creativity can really shine! Glazes come in a myriad of colors, and some even change color during the firing process. It’s like playing with a box of crayons, but the results can be far more permanent. When selecting a color, think about how it will complement the shape and design of your piece. For instance, a vibrant blue glaze might highlight the curves of a bowl, while a soft green could enhance the rustic charm of a mug.
One important factor to keep in mind is the firing temperature of the glaze. Different glazes are formulated for specific firing ranges, such as low-fire or high-fire. Using a glaze that isn’t compatible with your clay body can lead to disastrous results, including crazing or even shattering. Always check the packaging or consult with your supplier to ensure you’re using the right glaze for your clay type.
Additionally, think about the functionality of your piece. If you’re creating dinnerware, you’ll want to choose a food-safe glaze that can withstand the rigors of daily use. Some glazes can be sensitive to heat or chemicals, so it’s essential to do your homework. Look for labels that indicate the glaze is non-toxic and food-safe, especially if your pottery will be used for serving food or beverages.
Lastly, don’t forget about the application technique. How you apply the glaze can also affect the final look of your piece. You can dip, brush, or spray the glaze onto your pottery, each method yielding different results. Experimentation is key here—try out different techniques to see which one resonates best with your style.
In summary, choosing the right glaze is a delightful journey of exploration and creativity. Consider the finish, color, firing temperature, functionality, and application technique to find the glaze that best suits your pottery. Remember, the right glaze can not only beautify your work but also enhance its overall quality and usability.
- What is the difference between low-fire and high-fire glazes? Low-fire glazes are typically fired at lower temperatures and are often more vibrant, while high-fire glazes are fired at higher temperatures and tend to be more durable.
- Can I mix different glazes? Yes! Mixing glazes can create unique colors and effects, but it’s advisable to test your mixture on a small piece first to see the results.
- How do I know if a glaze is food-safe? Always check the label or product description. Look for glazes that specifically state they are non-toxic and food-safe.
Frequently Asked Questions
- What is a potter's wheel and how does it work?
A potter's wheel is a device used in pottery to shape clay into various forms. It consists of a rotating disk that allows the potter to manipulate the clay while it spins. The key to mastering the wheel is learning to center the clay and apply pressure evenly, which helps create symmetrical pieces.
- What type of clay should I use as a beginner?
As a beginner, it's best to start with earthenware clay because it's easy to work with and forgiving. Earthenware is great for practice and allows you to focus on mastering your techniques without worrying too much about the complexities of other clay types like stoneware or porcelain.
- How do I prepare my clay before throwing?
Preparing your clay involves wedging, which is the process of kneading the clay to remove air bubbles and ensure a consistent texture. This step is crucial because it prevents cracks and ensures your piece holds its shape during the throwing process.
- What are some common mistakes beginners make on the potter's wheel?
Common mistakes include failing to center the clay properly, using too much water, or not applying enough pressure. These errors can lead to uneven shapes or collapsed forms, which can be frustrating. Recognizing these pitfalls can help you adjust your technique and improve your skills.
- How can I improve my throwing technique?
Improving your technique requires practice and patience. Focus on the fundamentals, such as centering and shaping, and consider setting aside time each week to hone your skills. You can also watch tutorials or take classes to gain insights from experienced potters.
- What are the finishing steps after throwing?
After you've shaped your piece, you'll need to trim excess clay, let it dry to a leather-hard state, and then glaze it. Trimming helps refine the shape, while glazing enhances the aesthetic appeal and protects the pottery. Each step is essential for achieving a professional finish.
- How do I choose the right glaze for my pottery?
Selecting the right glaze involves considering the color, finish, and effect you want to achieve. Some glazes react differently during firing, so it's a good idea to test them on small pieces first. Experimenting with various glazes can lead to stunning results!


