How to recycle broken pottery into beautiful mosaics
Have you ever looked at a broken piece of pottery and thought, "What a waste!"? Well, it's time to change that mindset! Recycling broken pottery into stunning mosaics is not just an eco-friendly craft; it's a way to express your creativity and bring life back to items that would otherwise end up in the trash. Imagine transforming those shattered pieces into a vibrant work of art that tells a story, evokes emotions, and adds a splash of color to your home. In this article, we'll explore the exciting journey of turning broken pottery into beautiful mosaics, covering everything from understanding the art form to the final touches that make your creation shine.
Mosaics date back thousands of years, with their roots in ancient civilizations like the Greeks and Romans. These intricate art pieces were created by assembling small fragments of materials, often glass or stone, to form captivating images or patterns. Today, mosaics have evolved, and you can find them in a variety of styles, from traditional to contemporary. Whether you're inspired by the stunning mosaics of ancient cathedrals or the bold designs of modern art, understanding the history and significance of mosaics will give you a strong foundation for your pottery recycling project. Mosaics are not just art; they are a celebration of creativity, culture, and history.
When it comes to creating your mosaic masterpiece, selecting the right broken pottery is crucial. Not all pottery is created equal, and the type you choose can significantly impact the final look of your artwork. You might be wondering, "What types of pottery should I look for?" Well, let's break it down:
Different pottery types offer unique textures and colors that can elevate your mosaic. Here are a few common pottery materials you might encounter:
- Ceramics: These are widely used in pottery and come in various colors and patterns. They are often more durable, making them ideal for outdoor mosaics.
- Porcelain: Known for its sleek finish and delicate appearance, porcelain can add a touch of elegance to your designs.
- Stoneware: This type is robust and can provide a rustic charm to your mosaic, perfect for earthy designs.
Each type of pottery contributes differently to your mosaic's overall aesthetic, so consider what look you're going for when choosing your materials.
Color and texture are vital in mosaic design. Think of your mosaic as a canvas where each piece plays a role in the bigger picture. When selecting pottery pieces, aim for a mix that complements each other. For instance, if you want a vibrant piece, consider using bright ceramics along with neutral stoneware to create balance. On the other hand, if you're after a more subdued look, a palette of pastel porcelain might be just what you need. Remember, the right combination can create a cohesive visual effect that draws the eye and captivates the viewer.
Now that you know what types of pottery to look for, where can you find them? Broken pottery can be sourced from various places:
- Thrift Stores: You can often find discarded pottery that’s perfect for recycling.
- Yard Sales: Keep an eye out for sales in your neighborhood; you might score some unique pieces.
- Personal Collections: Don’t hesitate to ask friends or family if they have any broken pottery lying around.
Each source can provide a treasure trove of materials waiting to be transformed into art!
Before diving into your mosaic project, proper preparation of the broken pottery is essential. Start by cleaning each piece thoroughly to remove any dirt or residue. This ensures that the adhesive will bond effectively. If you have larger pieces that need shaping, use a tile cutter or hammer to break them down into smaller, more manageable sizes. Just remember to wear safety goggles to protect your eyes! Properly prepared pottery will make your mosaic assembly much smoother and more enjoyable.
Gathering the right tools and materials is key to a successful mosaic project. Here’s a quick rundown of what you’ll need:
- Adhesives: Choose a strong adhesive that works well with your type of pottery, such as tile adhesive or glue specifically for ceramics.
- Grout: This will fill the gaps between your pieces and provide a finished look.
- Cutting Tools: A tile cutter or glass cutter will be essential for shaping your pottery.
Having these tools at your disposal will set you up for success and make the process much more enjoyable.
Q: Can I use any type of broken pottery for my mosaic?
A: While you can use a variety of pottery types, it's best to choose those that are durable and have interesting colors and textures to create a visually appealing design.
Q: How do I secure the pieces together?
A: Use a strong adhesive to attach the pieces to your base. Once everything is arranged, apply grout to fill in gaps and secure the pieces further.
Q: How do I clean my mosaic after it's finished?
A: Gently wipe the surface with a damp cloth to remove any dust or residue without damaging the pieces.
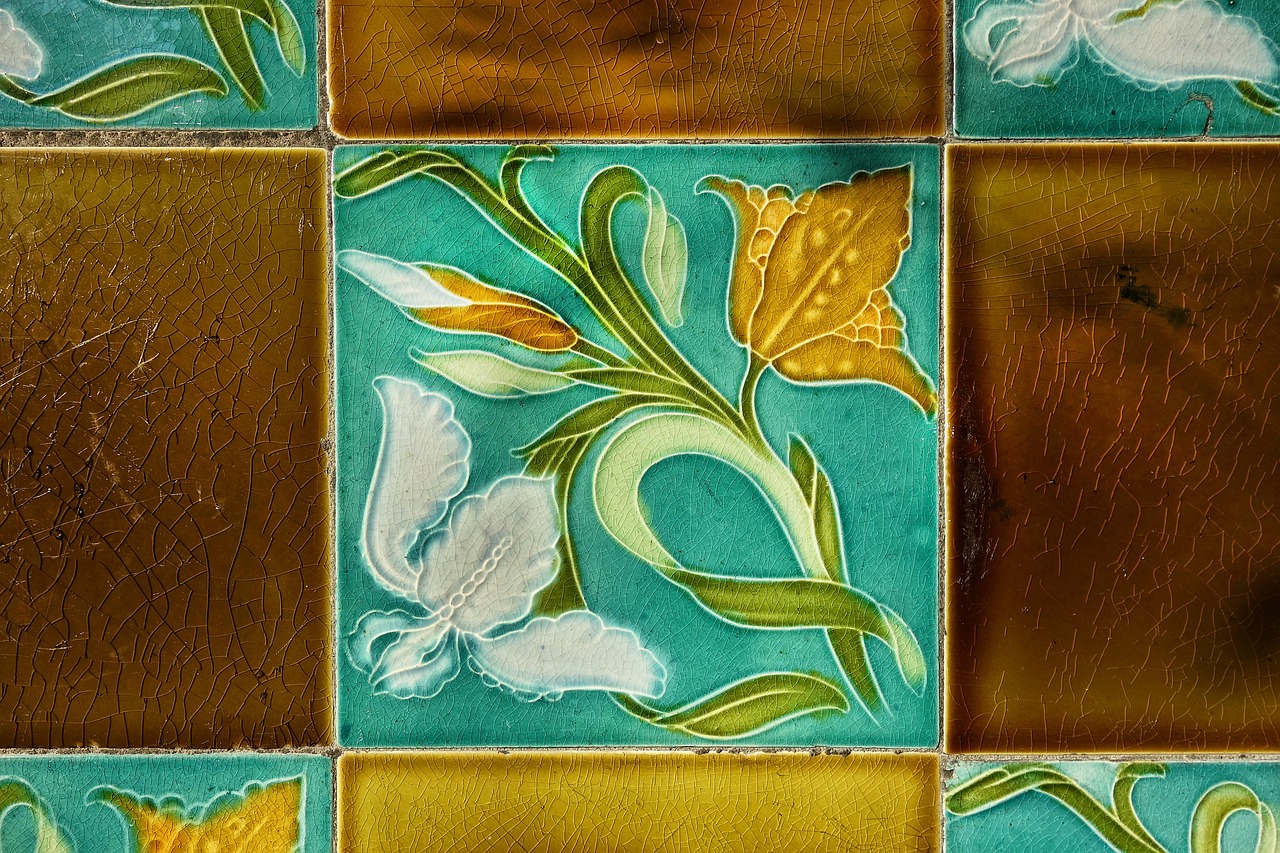
Understanding Mosaics
Mosaics are not just a form of art; they are a beautiful language of colors, shapes, and stories woven together through time. The practice of creating mosaics dates back thousands of years, with roots in ancient civilizations such as the Greeks and Romans, who used this technique to decorate floors, walls, and even ceilings. Imagine walking through a grand palace and being mesmerized by the intricate designs that tell tales of mythology and history, all created from tiny, colorful pieces of stone or glass. Mosaics are more than just decoration; they are a celebration of culture and creativity.
Throughout history, mosaics have served various purposes, from religious symbols in churches to decorative elements in public spaces. Each piece in a mosaic can represent a fragment of a larger narrative, often reflecting the beliefs, values, and artistic styles of the time. For instance, Byzantine mosaics are renowned for their use of gold and vibrant colors, creating an ethereal effect that draws viewers in. The significance of mosaics goes beyond aesthetics; they are a testament to human ingenuity and the desire to create beauty from the mundane.
As you embark on your journey to recycle broken pottery into mosaics, it's essential to understand the various styles and techniques that have evolved over the centuries. Mosaics can range from the simple and rustic, often found in folk art, to the highly detailed and sophisticated works seen in galleries and museums. By familiarizing yourself with these styles, you can draw inspiration for your own creations. Here are a few popular styles to consider:
- Classical Mosaics: Characterized by intricate designs and detailed imagery, often depicting scenes from mythology or nature.
- Contemporary Mosaics: Emphasizing abstract forms and modern themes, these mosaics often use unconventional materials.
- Folk Art Mosaics: Typically more playful and colorful, these pieces often reflect cultural traditions and personal stories.
In addition to their historical and cultural significance, mosaics also offer a unique opportunity for personal expression. Each piece of broken pottery you choose can embody your story, your experiences, and your creativity. The beauty of mosaic art lies in its imperfections; the cracks and chips in the pottery can add character and depth to your work. As you begin to piece together your mosaic, think about the emotions and messages you want to convey. Remember, your mosaic is a reflection of you!
In summary, understanding mosaics involves appreciating their rich history, cultural significance, and the artistic freedom they offer. As you embark on your pottery recycling project, let the stories of the past inspire you, and allow your creativity to flourish in this timeless art form.

Choosing the Right Pottery
When it comes to creating stunning mosaics, the first step is to choose the right broken pottery. Not all pottery is created equal, and the pieces you select can significantly influence the overall aesthetic and feel of your mosaic art. The beauty of mosaics lies not only in the arrangement of the pieces but also in the variety of textures, colors, and styles that each fragment brings to the table. So, how do you identify which pottery will work best for your project? Let's dive into some essential considerations.
First and foremost, think about the style and theme of your mosaic. Are you aiming for a rustic look, or do you prefer something more modern and sleek? For a rustic vibe, consider using pieces from terracotta pots or vintage ceramics, which can add warmth and character. On the other hand, if you're leaning towards a contemporary design, smooth, glossy porcelain or stoneware may be the way to go. The key is to envision the final product and select pottery that aligns with that vision.
Next, variety is the spice of life—and this holds true for pottery as well. Mixing different types of pottery can create a dynamic visual experience. For instance, combining matte finishes with shiny glazes can add depth to your work. You might want to experiment with a mix of ceramics, porcelain, and even glass to see how they interact. Each type of material offers unique qualities, so don't hesitate to let your creativity shine.
Another crucial factor to consider is the color palette. The colors of your pottery pieces should complement each other to ensure a harmonious design. Think about the mood you wish to convey: warm colors like reds and oranges can evoke feelings of warmth and comfort, while cool colors like blues and greens can impart a sense of tranquility. You can also use color theory to your advantage by incorporating complementary colors to make your mosaic pop. For example, pairing a deep blue with a vibrant orange can create a striking contrast that draws the eye.
Now that you have a sense of style, variety, and color, the next step is to source your broken pottery. There are numerous places where you can find suitable materials, such as:
- Thrift Stores: These treasure troves often have a wide range of unique pottery pieces at affordable prices.
- Yard Sales: You never know what gems you might find at local yard sales; many people are eager to part with their broken items.
- Personal Collections: Don’t overlook your own collection of dishes and pots. Those chipped plates could be the perfect addition to your mosaic.
In conclusion, choosing the right pottery is a vital step in the mosaic-making process. By considering the style, variety, color palette, and sourcing options, you'll be well on your way to creating a beautiful and unique piece of art that reflects your personal touch. Remember, the journey of transforming broken pottery into a stunning mosaic is as rewarding as the final product itself!
Q: Can I use any type of pottery for mosaics?
A: While you can technically use any pottery, it's best to choose materials that are durable and have interesting textures and colors. Avoid pottery that is too fragile, as it may not hold up well in your design.
Q: How do I clean broken pottery before using it in my mosaic?
A: Cleaning broken pottery is essential. You can wash the pieces with warm, soapy water and a soft brush to remove any dirt or residue. Make sure they are completely dry before starting your mosaic.
Q: Where can I find inspiration for my mosaic design?
A: Inspiration can come from various sources, including nature, art books, or even online platforms like Pinterest. Don't hesitate to explore different styles and ideas to find what resonates with you!
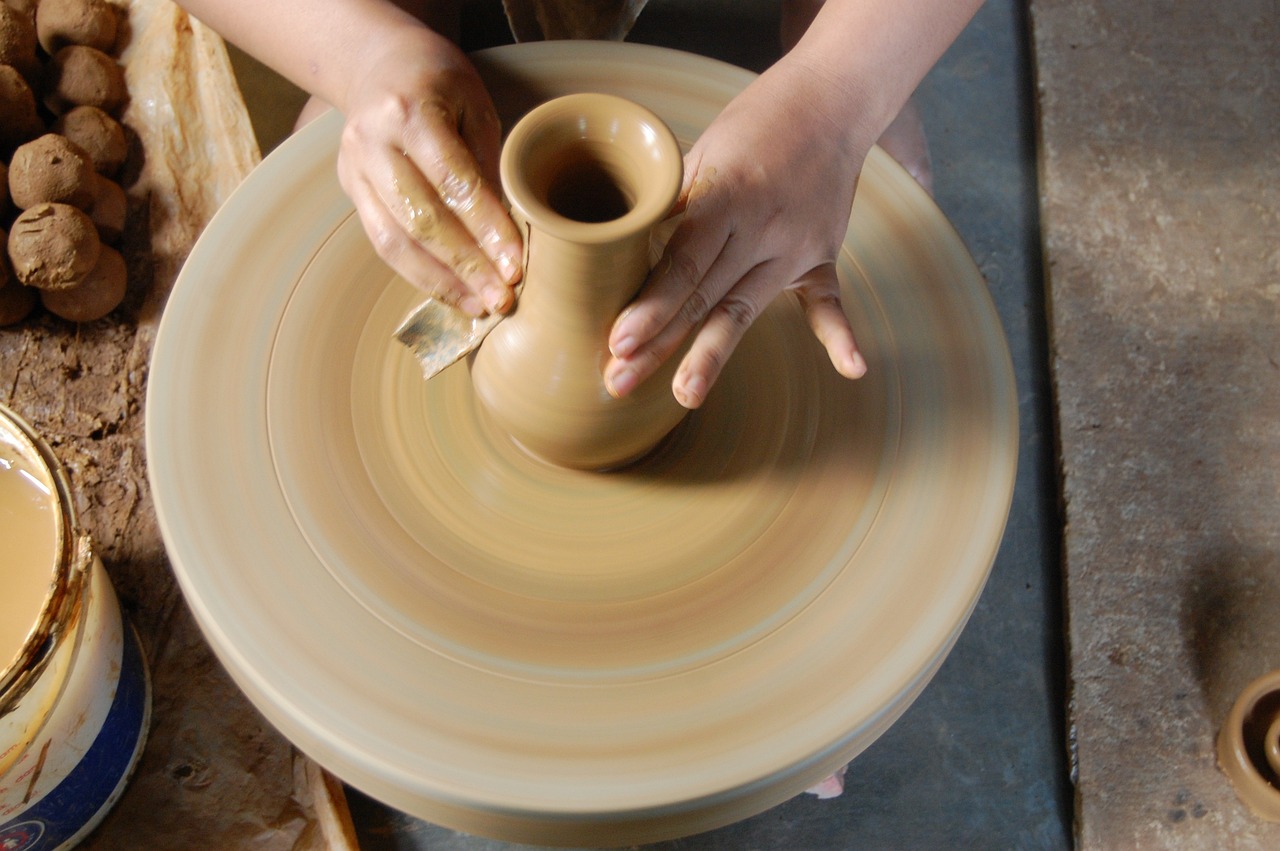
Types of Pottery
When it comes to creating stunning mosaics, the type of pottery you choose can significantly influence the final result. Different pottery materials not only offer a variety of colors and textures but also bring unique characteristics to your artwork. Understanding these differences can help you make informed decisions that will enhance your mosaic's aesthetic appeal. The most common types of pottery include ceramics, porcelain, and stoneware. Each type has its own unique properties, and knowing these can elevate your artistic creations.
Ceramics are perhaps the most versatile option for mosaics. They come in a myriad of colors and finishes, allowing for endless creative possibilities. Ceramics can be easily broken into smaller pieces, making them ideal for mosaic work. Whether you're using brightly colored dinnerware or decorative tiles, ceramics can add a playful touch to your design.
Next up is porcelain, known for its delicate and refined appearance. This type of pottery is usually white or off-white, with a smooth, glossy finish. Porcelain can bring an element of elegance to your mosaics, especially when combined with bolder colors. However, it's essential to handle porcelain carefully, as it can be more fragile than other types of pottery.
Stoneware is another excellent choice for mosaics. It is typically more robust than ceramics and porcelain, making it less prone to chipping. Stoneware often features earthy tones and textures, which can add a rustic charm to your artwork. If you’re looking to create a more natural or organic feel in your mosaic, stoneware could be the perfect fit.
In addition to these primary types, there are also other materials that can be incorporated into your mosaic projects, such as glass and natural stones. These materials can complement pottery and add depth to your designs. For instance, using glass pieces alongside ceramic tiles can create a stunning contrast that draws the eye.
Ultimately, the choice of pottery will depend on your personal style and the overall vision you have for your mosaic. Consider experimenting with various materials to see how they interact with each other. The beauty of mosaic art lies in its ability to combine different elements to create something truly unique. So, go ahead and gather your broken pottery treasures, and let your imagination run wild!
Q: Can I use any type of pottery for mosaics?
A: While you can use various types of pottery, ceramics, porcelain, and stoneware are the most commonly used due to their availability and ease of use. Make sure to choose pieces that fit your design vision.
Q: Where can I find broken pottery for my mosaic projects?
A: You can find broken pottery at thrift stores, yard sales, or even in your own home. Additionally, online marketplaces and local art supply stores may have broken or surplus pieces available.
Q: How do I ensure my mosaic is durable?
A: To ensure durability, choose strong adhesives and grout specifically designed for mosaic work. Properly sealing your finished mosaic will also help protect it from moisture and wear.
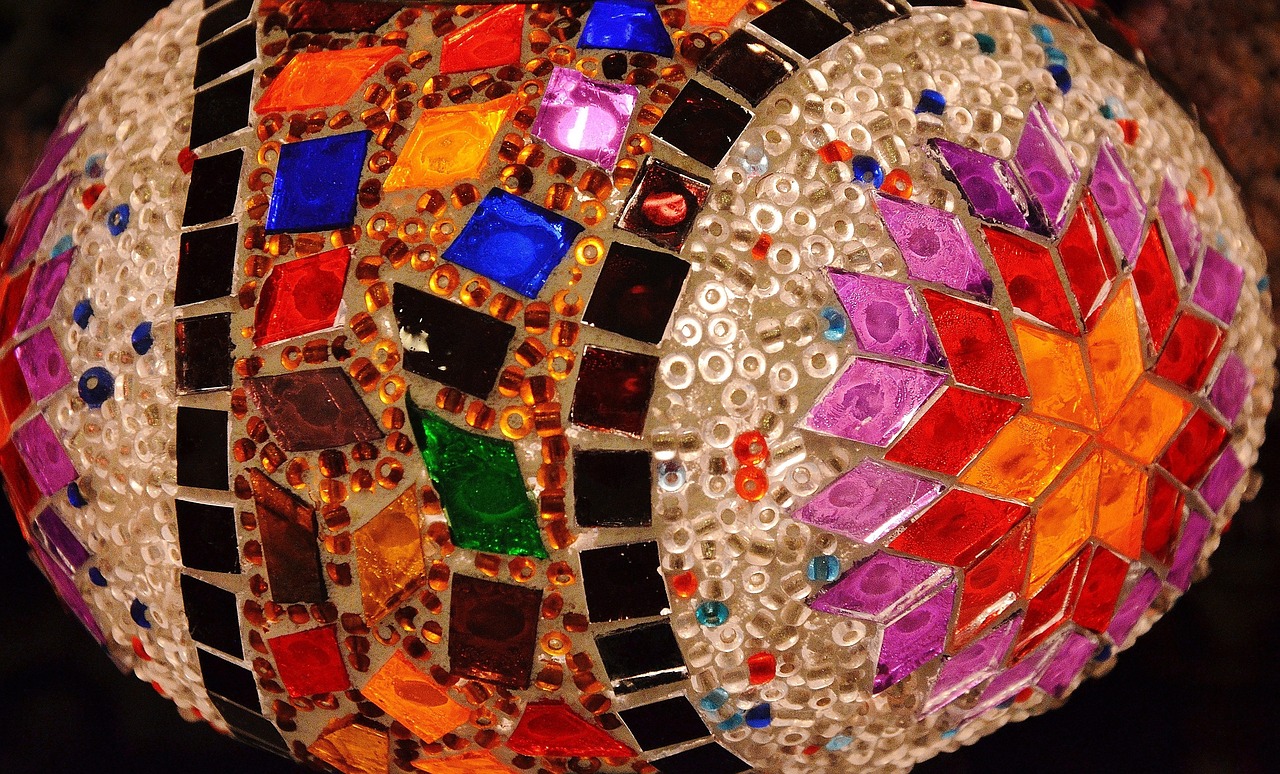
Color and Texture Considerations
When it comes to creating breathtaking mosaics, color and texture are your best friends! These elements not only define the visual appeal of your artwork but also evoke emotions and set the mood of the piece. Imagine stepping into a room adorned with a vibrant mosaic that radiates warmth and joy, or one that whispers elegance and sophistication through its muted tones. The right combination of colors can transform your broken pottery into a stunning masterpiece that catches the eye and sparks conversation.
First off, let’s talk about color. Choosing the right hues is crucial in achieving a cohesive look. You might want to consider the overall theme or feeling you wish to convey. For instance, if you’re aiming for a lively and cheerful vibe, opt for bright, saturated colors like reds, yellows, and blues. On the other hand, if your goal is to create a more serene and calming atmosphere, softer shades such as pastels or earth tones might be more appropriate. Think of your mosaic as a canvas; just as a painter chooses their palette carefully, so should you!
Texture is equally important in your mosaic design. Different types of pottery offer unique tactile qualities that can add depth and interest to your piece. For example, a piece of rough stoneware can contrast beautifully with the smooth surface of porcelain, creating a dynamic interplay that draws the viewer in. You might want to consider mixing various pottery types to achieve a rich textural experience. Here are a few texture ideas to explore:
- Glossy vs. Matte: Combining shiny and matte finishes can create a stunning visual contrast.
- Rough vs. Smooth: Pairing rough-textured pieces with smooth ones can add depth and intrigue.
- Shapes and Patterns: Look for pottery pieces with different shapes and surface patterns to enhance the overall design.
As you select your pottery, keep in mind the balance of color and texture. Too many contrasting elements can create chaos, while a harmonious blend can produce a visually pleasing mosaic. It’s all about finding that sweet spot where your artistic vision comes to life, captivating the audience without overwhelming them. A well-thought-out color scheme paired with interesting textures can elevate your mosaic from simply being a collection of broken pieces to a cohesive work of art.
Lastly, don't hesitate to experiment! Sometimes the best designs come from unexpected combinations. Test out different arrangements before finalizing your layout. Remember, the beauty of mosaics lies in their imperfection. Embrace the uniqueness of each broken piece, and let your creativity shine through!
Q: Can I use any type of broken pottery for my mosaic?
A: While you can technically use any broken pottery, some types work better than others. Ceramics and porcelain are popular choices due to their range of colors and textures. Stoneware can also add a rustic touch.
Q: How do I ensure my mosaic is durable?
A: Choosing the right adhesives and grout is crucial for durability. Make sure to select products that are suitable for outdoor or high-moisture areas if needed.
Q: What if I don’t have broken pottery?
A: You can often find broken pottery at thrift stores, yard sales, or even in your own home. Alternatively, consider purchasing mosaic tiles specifically designed for crafting.
Finding Broken Pottery
Finding broken pottery for your mosaic projects can be an exciting treasure hunt! It’s not just about sourcing materials; it’s about uncovering unique pieces that tell a story. You might be surprised at the variety of places where you can find these gems. Thrift stores are often a goldmine, filled with discarded dishes and ceramics that just need a new purpose. Yard sales can also yield delightful finds, where you can negotiate prices and sometimes walk away with a box of beautiful, broken pottery for just a few bucks!
If you’re feeling adventurous, consider asking friends or family if they have any old or chipped dishes lying around. You’d be amazed at how many people are willing to part with their mismatched china or broken planters. Not only does this help you source materials, but it also gives your mosaic a personal touch, infused with memories and connections.
Another great option is to check online marketplaces and social media groups. Websites like Facebook Marketplace or local buy/sell/trade groups can have listings for broken pottery or even whole sets that are no longer wanted. Be sure to keep an eye out for estate sales and auctions as well; these can be fantastic opportunities to score unique pottery pieces that you won’t find anywhere else.
Here’s a quick overview of some of the best places to find broken pottery:
- Thrift Stores: Often have a variety of ceramics at low prices.
- Yard Sales: Great for bargaining and finding unique items.
- Online Marketplaces: Websites like eBay and Facebook Marketplace.
- Friends and Family: Ask around for any unwanted or damaged pottery.
- Estate Sales and Auctions: Usually feature unique and vintage pieces.
Once you’ve gathered your broken pottery, take a moment to appreciate the textures and colors of each piece. Remember, every shard has the potential to transform into a stunning work of art. So, don’t shy away from imperfections; they can add character and depth to your mosaic. Happy hunting!
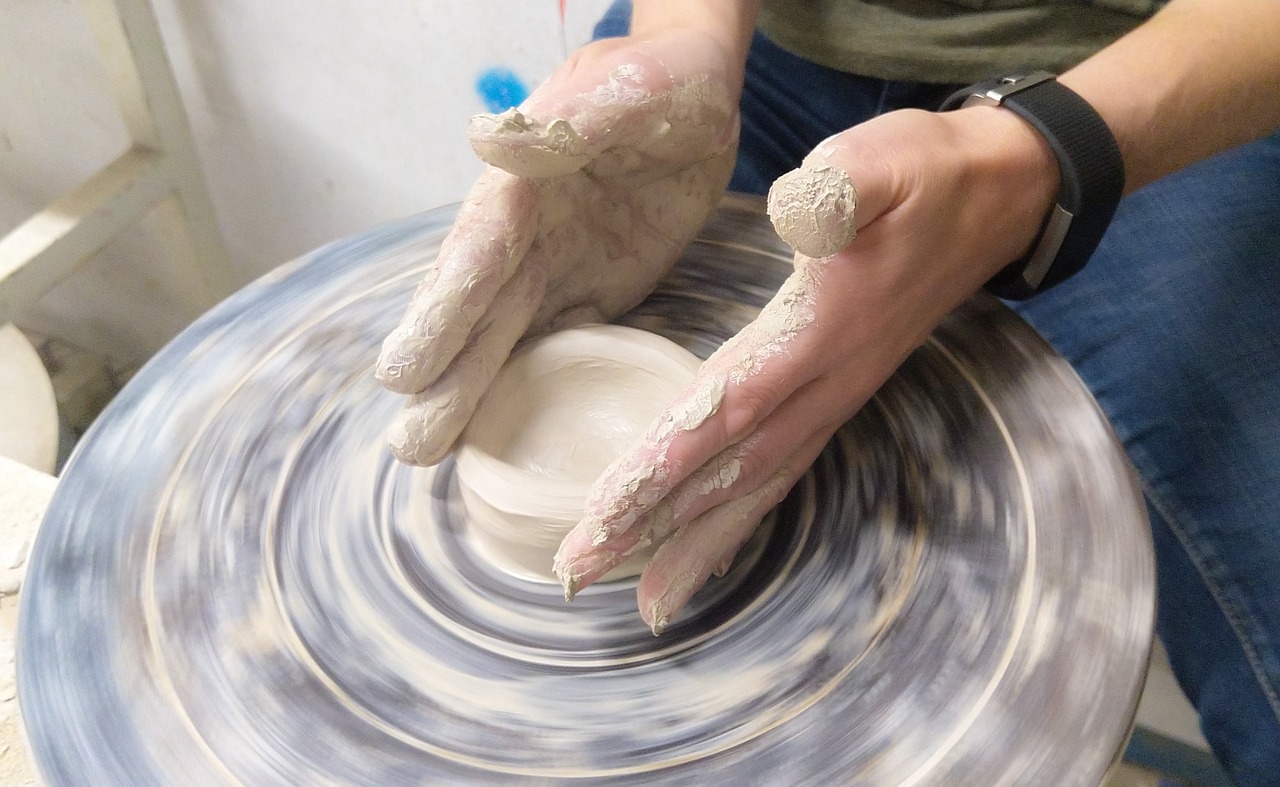
Preparing Your Pottery
Before diving into the exciting world of mosaic creation, it's essential to properly prepare your broken pottery. This crucial step ensures that your pieces are not only ready for assembly but will also contribute to the overall beauty and durability of your mosaic masterpiece. First things first, you'll want to clean your pottery thoroughly. Dust, dirt, and any remnants of previous use can interfere with the adhesive you’ll be using later. A simple wash with soap and water will do the trick, but don’t forget to dry them completely to avoid any moisture-related issues.
Once your pieces are clean, the next step is to assess their shapes and sizes. Depending on your design, you may want to cut or shape some of the pottery to fit your vision. For this, a tile cutter or a glass cutter can be incredibly useful. If you’re new to cutting pottery, take your time and practice on less important pieces first. Remember, it’s all about finding the right fit for your mosaic; think of it like a puzzle where every piece has its perfect spot.
When you’re ready to start cutting, consider wearing safety goggles and gloves. Pottery can be sharp and unpredictable, so it's better to be safe than sorry! As you cut, try to create a variety of shapes and sizes. This adds an interesting texture and depth to your design. Once you have your pieces shaped to your liking, give them another quick clean to remove any dust created during the cutting process.
After cleaning, it’s a good idea to lay out your pieces on a flat surface before adhering them together. This allows you to visualize the final design and make any necessary adjustments. You might find that some pieces work better together than others, or perhaps you’ll want to swap out certain colors for a more harmonious look. Think of this as the dress rehearsal before the big show!
Finally, consider the overall arrangement of your pottery. The placement of each piece can dramatically affect the final aesthetic of your mosaic. Play around with different layouts until you find one that feels just right. Once you’re satisfied with your design, you’ll be ready to move on to the next exciting phase: assembling your mosaic!
Q: How do I clean broken pottery before using it for mosaics?
A: Use warm soapy water to clean your pottery. Make sure to dry them completely to avoid moisture issues.
Q: What tools do I need to cut pottery?
A: A tile cutter or glass cutter is recommended for shaping your pottery pieces. Safety goggles and gloves are also important for protection.
Q: Can I use any type of pottery for mosaics?
A: While you can use various types of pottery, ceramics, porcelain, and stoneware are often the best choices due to their durability and color variety.
Q: How can I ensure my mosaic pieces fit together well?
A: Take your time to lay out your pieces before adhering them. Experiment with different arrangements to find the best fit.
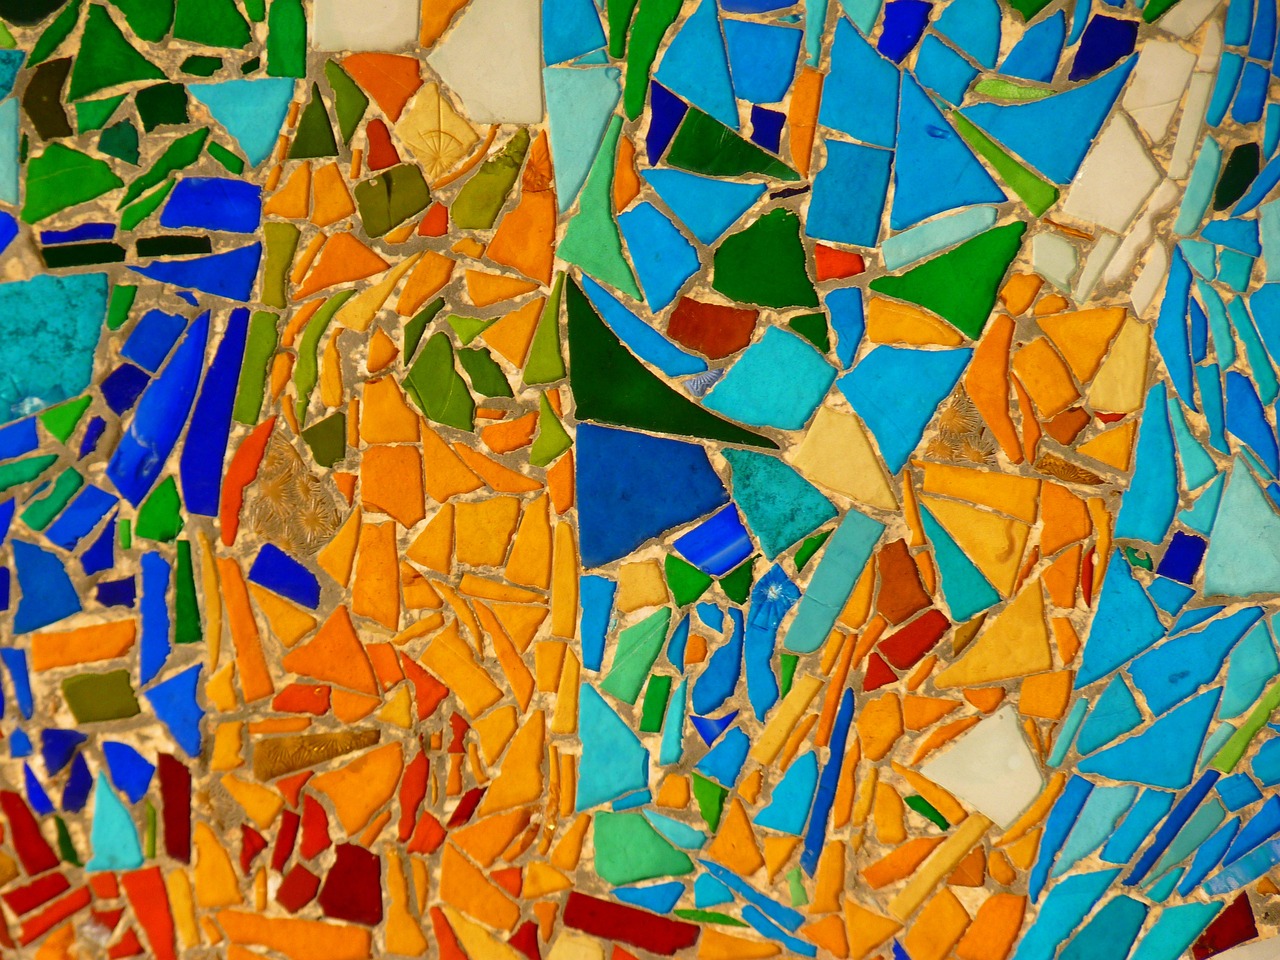
Tools and Materials Needed
When embarking on your journey to create stunning mosaics from broken pottery, it's essential to gather the right tools and materials. Having the proper equipment not only makes the process smoother but also enhances the quality of your final artwork. Think of it like cooking; you wouldn't want to bake a cake without the right utensils, right? Similarly, your mosaic project requires specific items to ensure success.
First and foremost, you'll need cutting tools to shape your pottery pieces. A glass cutter or tile nippers are excellent choices for this task. These tools allow you to create various shapes and sizes, giving you the flexibility to design your mosaic as you envision. Additionally, a sturdy pair of gloves is a must for safety, as handling broken pottery can lead to unexpected cuts.
Next, consider the adhesives you'll use to secure your pieces. An appropriate adhesive is crucial for ensuring that your mosaic withstands time and wear. Waterproof glue is highly recommended, especially for outdoor mosaics, as it prevents moisture damage. You may also want to have a grout on hand, which will fill in the gaps between your pieces, providing a professional finish. The choice of grout color can significantly impact the overall look of your mosaic, so choose wisely!
In addition to adhesives and cutting tools, you'll need a few other essentials to round out your toolkit:
- Sponges and Rags: For cleaning up excess grout and adhesive.
- Mixing Bucket: To mix your grout and any other materials.
- Palette Knife: Useful for applying grout smoothly.
- Sealer: To protect your finished mosaic from moisture and wear.
Finally, don't forget about your workspace. A flat, sturdy surface will make your assembly process much easier. You might also want to consider a board or canvas as a base for your mosaic. This will give you a solid foundation to work on and can be painted or decorated to complement your design.
In summary, the right tools and materials are the backbone of your mosaic project. By investing in quality cutting tools, adhesives, and protective gear, you're setting yourself up for success. Remember, creating art is a journey, and having the right equipment will make that journey enjoyable and fulfilling. So gear up and get ready to transform those broken pottery pieces into something truly beautiful!
Q1: What type of adhesive is best for mosaics?
A1: Waterproof adhesives, such as epoxy or tile adhesive, are recommended for their durability and resistance to moisture.
Q2: Can I use any type of pottery for mosaics?
A2: While most pottery can be used, ceramics and porcelain are preferred for their colors and textures. Avoid using pottery that crumbles easily.
Q3: How do I clean my mosaic after assembly?
A3: Use a damp sponge to gently wipe away any excess grout or adhesive. Make sure not to scrub too hard to avoid damaging the pieces.
Q4: Is sealing necessary for indoor mosaics?
A4: While sealing is more critical for outdoor mosaics, sealing indoor mosaics can enhance their longevity and protect against spills and stains.
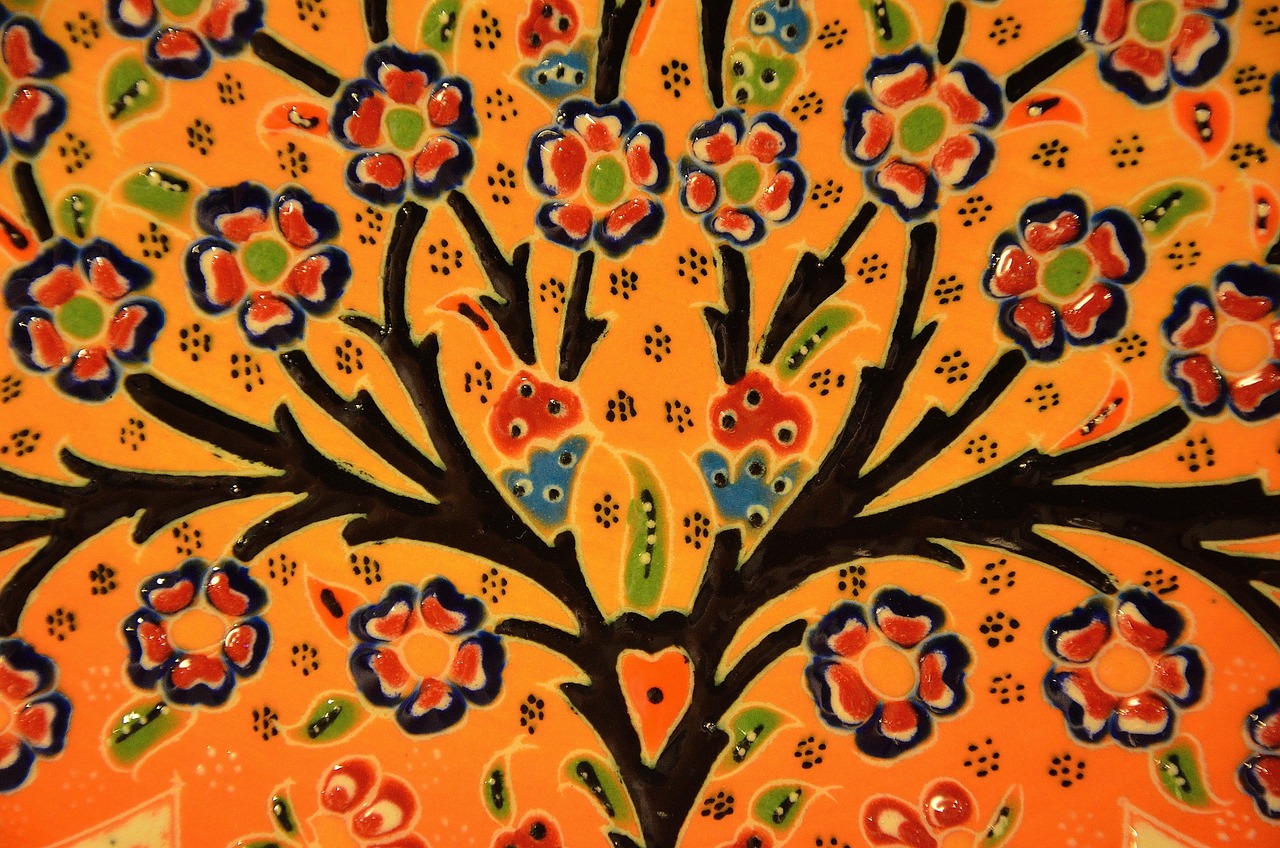
Essential Tools
When diving into the world of mosaics, having the right tools can make all the difference between a frustrating experience and a delightful creative journey. Think of your tools as your artistic paintbrushes, each serving a unique purpose in bringing your vision to life. Here’s a rundown of the essential tools you’ll need to create stunning mosaics from your broken pottery.
First and foremost, a tile cutter is a must-have. This tool allows you to easily cut your pottery pieces into the desired shapes and sizes, ensuring they fit perfectly into your design. If you're looking for precision, consider investing in a glass cutter as well, especially if you plan to incorporate glass pieces into your mosaic.
Next, you'll need a reliable adhesive. A strong, waterproof adhesive is crucial for ensuring that your pieces stay securely in place. You can choose between different types, such as thin-set mortar for larger pieces or craft glue for smaller, lighter tiles. Remember, the right adhesive can make or break your project, so choose wisely!
In addition to adhesives, grout is another essential component. Grout fills the gaps between your tiles, providing not only structural integrity but also a finished look. You’ll want to select a grout that complements your color scheme and is suitable for outdoor or indoor use, depending on where your mosaic will be displayed.
Don’t forget about sponges and rags! These are your best friends when it comes to cleaning up excess grout and adhesive. A damp sponge will help you achieve that smooth finish by wiping away any residue without damaging your mosaic pieces. It’s all about the details, right?
Lastly, a safety kit is essential for any DIY project. This should include gloves to protect your hands from sharp edges and a dust mask if you're cutting tiles. Safety should always be a priority, especially when working with broken pottery.
In summary, here’s a quick reference table of the essential tools you'll need:
| Tool | Purpose |
|---|---|
| Tile Cutter | To cut pottery into desired shapes |
| Adhesive | To secure pottery pieces |
| Grout | To fill gaps and provide a finished look |
| Sponges/Rags | For cleaning excess grout and adhesive |
| Safety Kit | To protect yourself while working |
With these essential tools at your disposal, you'll be well-equipped to embark on your mosaic-making adventure. Remember, each tool plays a vital role in your artistic process, so take the time to familiarize yourself with them. Happy crafting!
Q: Can I use any type of pottery for my mosaic?
A: While you can use various types of pottery, ceramics and porcelain are generally the best choices due to their durability and ease of cutting. Stoneware can also work well, but it may be more challenging to cut.
Q: What kind of adhesive is best for outdoor mosaics?
A: For outdoor mosaics, a waterproof thin-set mortar is recommended as it provides strong adhesion and withstands weather conditions.
Q: How do I clean my mosaic after grouting?
A: Use a damp sponge to gently wipe away excess grout. Be careful not to disturb the grout lines between your tiles.
Q: Is it necessary to seal my mosaic?
A: Yes, sealing your mosaic is important, especially for outdoor pieces, as it protects them from moisture and enhances their longevity.
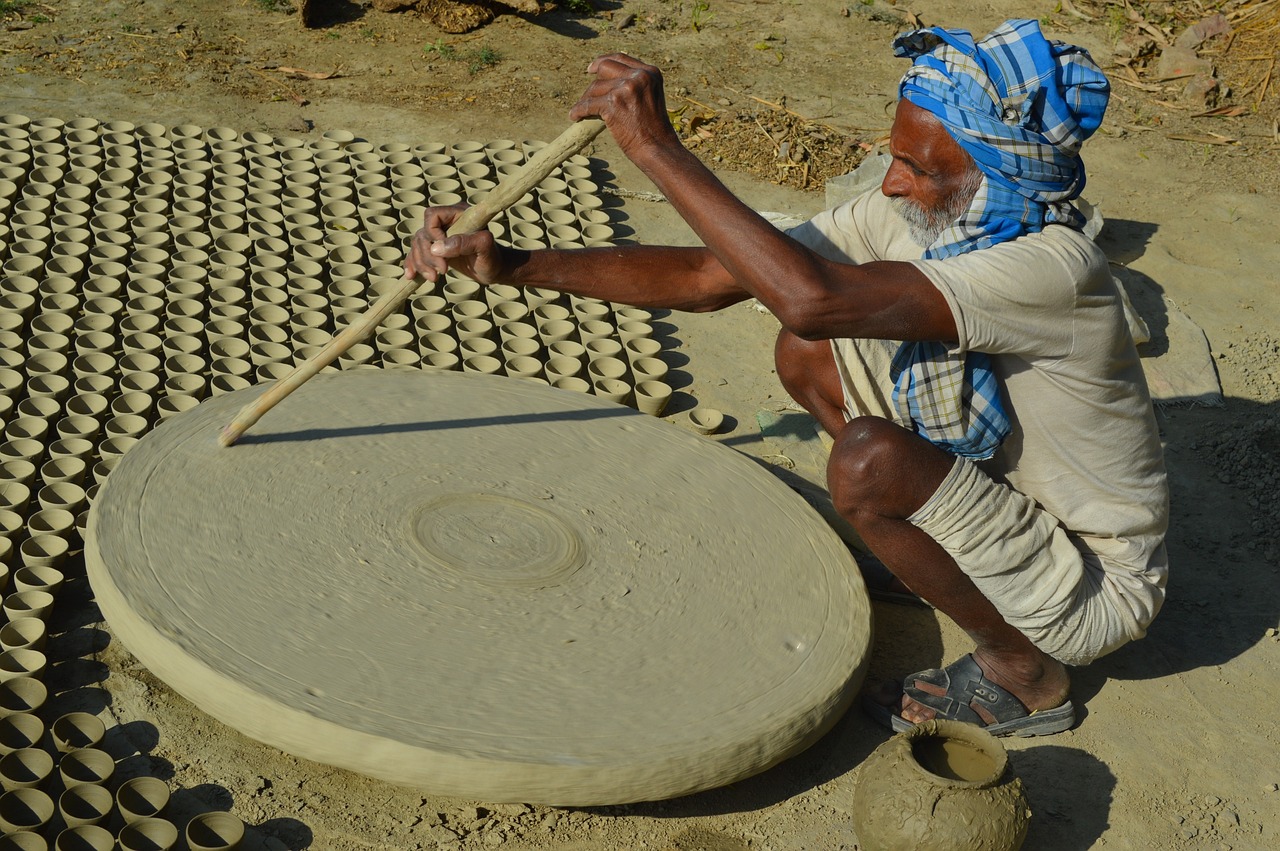
Choosing Adhesives and Grout
When it comes to creating stunning mosaics from broken pottery, one of the most crucial decisions you'll face is selecting the right adhesives and grout. These materials not only hold your pieces together but also contribute to the overall durability and aesthetic of your finished artwork. So, how do you choose the best options for your project? Let's dive into the essential factors to consider.
First off, it's important to understand that different types of pottery may require different adhesives. For example, if you're working with porous materials like terracotta, a strong waterproof adhesive is essential to ensure that the pieces bond effectively and resist moisture over time. On the other hand, for non-porous materials such as porcelain, a clear epoxy or a specialized ceramic adhesive might be more suitable. Always check the manufacturer's recommendations to ensure you're using the right product for your specific pottery type.
Another key aspect to consider is the setting time of your adhesive. Some adhesives dry quickly, which can be beneficial when you're eager to see your design come to life. However, if you're a beginner, you might prefer a product with a longer setting time. This will give you the flexibility to make adjustments to your arrangement without the pressure of a fast-drying glue. Think of it as a safety net while you're still honing your skills!
Once you've secured your pottery pieces with the appropriate adhesive, it's time to think about grout. The role of grout in your mosaic is twofold: it fills the gaps between your pieces and adds a finishing touch that can either complement or contrast with your design. When choosing grout, consider the following:
- Color: The color of your grout can dramatically affect the overall look of your mosaic. A contrasting color can make your pottery pieces pop, while a matching color can create a more seamless and subtle effect.
- Type: There are various types of grout to choose from, including sanded, unsanded, and epoxy grout. Sanded grout is ideal for larger joints, while unsanded is best for smaller gaps. Epoxy grout, although more expensive, offers superior durability and is resistant to stains and moisture.
- Sealing: Some grouts require sealing after application to protect them from moisture and stains. Make sure to read the product specifications to know if sealing is necessary and what type of sealant works best.
In summary, choosing the right adhesives and grout is vital for the success of your mosaic project. By selecting products that suit your pottery type and considering factors like setting time and color, you can ensure that your artwork not only looks beautiful but also stands the test of time. Remember, this is your creative journey, so take the time to experiment and find what works best for you!
Q: What type of adhesive should I use for outdoor mosaics?
A: For outdoor mosaics, it's best to use a waterproof and weather-resistant adhesive, such as a clear epoxy or a specialized outdoor adhesive, to ensure your artwork can withstand the elements.
Q: Can I use regular grout for my pottery mosaic?
A: While you can use regular grout, it's recommended to choose a grout specifically designed for mosaics, as it will provide better adhesion and durability for your project.
Q: How long does it take for adhesive to set?
A: The setting time can vary depending on the adhesive used. Some may set within minutes, while others can take several hours. Always refer to the manufacturer's instructions for the specific product you're using.
Designing Your Mosaic
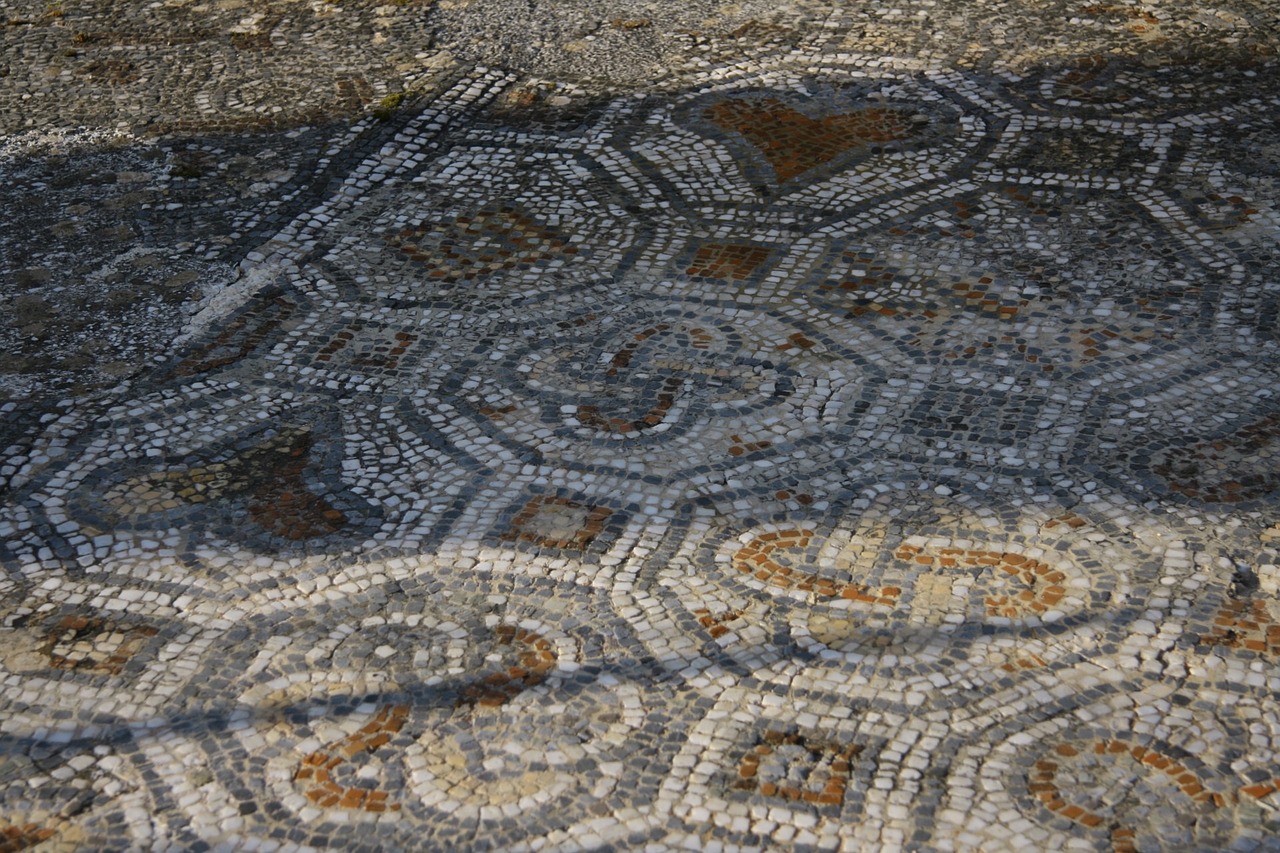
Creating a stunning mosaic is not just about piecing together broken pottery; it's about bringing your vision to life. The design phase is where the magic begins, allowing you to express your creativity and imagination. Before you dive into the assembly, it's essential to have a clear design plan. This step ensures that your mosaic not only looks cohesive but also tells a story or conveys a message. Think of your mosaic as a puzzle, where each piece contributes to the bigger picture.
One effective way to start is by sketching your ideas. Grab a pencil and paper, and let your thoughts flow freely. You don’t need to be an artist; just create a rough layout to visualize how the pieces will fit together. Consider the shapes, colors, and textures of the pottery you’ve gathered. By sketching, you can experiment with different arrangements without committing to any particular design. This process allows you to play around with various concepts until you find one that resonates with you.
As you sketch, keep in mind the principles of color theory. Understanding how colors interact can significantly enhance the visual appeal of your mosaic. For instance, using complementary colors—colors that are opposite each other on the color wheel—can create vibrant contrasts that draw the eye. Alternatively, you might want to explore analogous colors, which are next to each other on the wheel, for a more harmonious and soothing effect. Mixing different textures can also add depth and interest to your design. Imagine a smooth piece of porcelain paired with a rough stoneware fragment; the contrast can be striking!
Once you have a design in mind, lay out your pottery pieces on a flat surface. This step is crucial as it allows you to see how the colors and shapes work together in real life. Take your time with this part; sometimes the best designs emerge from unexpected combinations. You might find that a piece you initially thought wouldn’t fit perfectly complements another, creating a beautiful balance. Don’t hesitate to rearrange pieces until you’re satisfied with the overall look.
After finalizing your layout, it’s a good idea to take a photo of your arrangement. This will serve as a reference when you start assembling your mosaic. Remember, the design phase is all about exploration and experimentation. So, embrace the process, and let your creativity shine!
- What type of adhesive should I use for my mosaic? It's best to use a strong, waterproof adhesive specifically designed for ceramics or pottery to ensure durability.
- Can I use other materials besides pottery? Absolutely! You can incorporate glass, beads, or even stones to enhance your mosaic's texture and visual appeal.
- How can I ensure my mosaic design is balanced? Consider the distribution of colors and shapes across your design. Try to avoid clustering similar colors in one area and maintain a good flow throughout the piece.

Sketching Your Idea
Sketching your mosaic design is an essential step that can significantly influence the final outcome of your artwork. Think of it as the blueprint for your masterpiece; without a solid plan, you might find yourself lost in a sea of colorful shards. Start by gathering your materials and finding a comfortable workspace where you can let your creativity flow. You don’t need to be a professional artist to sketch your ideas—just let your imagination take the lead!
Begin with a rough layout of your design. You can use a pencil and paper or even a digital drawing tool if that suits your style better. The key here is to experiment freely. Don’t be afraid to draw multiple versions of your design. You might find that your initial idea evolves into something even more stunning as you play around with different shapes and arrangements. Consider the following tips while sketching:
- Start Simple: Begin with basic shapes and outlines. You can add details later.
- Experiment with Layout: Try different arrangements of your pottery pieces. Move them around in your sketch to see what feels right.
- Incorporate Color: If you’re feeling adventurous, add color to your sketches. This can help you visualize how the final piece will look.
As you sketch, think about the story you want your mosaic to tell. Are you aiming for a vibrant explosion of colors that evoke joy, or a more subdued palette that whispers tranquility? Your choice of colors and shapes will play a crucial role in conveying this message. Once you have a sketch that resonates with you, take a moment to step back and evaluate it. Does it feel balanced? Are the colors harmonious? If not, don’t hesitate to make adjustments.
Remember, sketching is not set in stone; it’s a fluid process. Just like a sculptor chisels away at a block of marble, you can refine your sketch until it feels just right. Once you’re satisfied with your design, you can move forward with the exciting process of selecting and preparing your pottery pieces. Your sketch will serve as a guide, helping you stay true to your vision as you bring your mosaic to life.

Color Theory in Mosaics
When diving into the world of mosaics, understanding color theory is like having a secret weapon in your artistic arsenal. Just like a painter chooses colors to evoke emotions or set a mood, you can do the same with your mosaic pieces. Color theory encompasses the principles of how colors interact, how they can be combined, and the feelings they can evoke, which is essential for creating visually stunning mosaics that captivate viewers.
At its core, color theory is divided into three primary categories: primary colors, secondary colors, and tertiary colors. The primary colors—red, blue, and yellow—cannot be created by mixing other colors together. By combining these, you can create secondary colors like green, orange, and purple. Tertiary colors result from mixing a primary color with a secondary color, leading to a rich palette that can enhance your mosaic's visual appeal.
One of the most effective ways to apply color theory in your mosaics is through the use of complementary colors. These are colors that sit opposite each other on the color wheel, such as blue and orange or red and green. When placed next to each other, complementary colors create a vibrant contrast that can make your mosaic pop. Imagine a serene blue pottery piece surrounded by fiery orange shards; the result is a dynamic visual experience that draws the eye.
On the other hand, you might consider using analogous colors, which are colors that are next to each other on the color wheel, like blue, blue-green, and green. This approach creates a more harmonious and soothing effect, ideal for projects where you want to evoke a sense of calm or unity. Think of a mosaic that transitions smoothly from a deep ocean blue to a soft turquoise; it tells a story of water and tranquility.
To further enhance your designs, consider the emotional impact of colors. For instance, warm colors (like reds and yellows) tend to evoke feelings of energy and warmth, while cool colors (like blues and greens) often convey calmness and serenity. You can use this knowledge to set the mood of your mosaic, making it not just a visual piece, but an emotional one as well.
In practice, sketching out your design with color in mind can help you visualize how your chosen pieces will work together. Play around with different arrangements and combinations before committing to a final layout. This experimentation can lead to surprising and delightful results, as you discover how colors interact in real life.
In summary, mastering color theory can elevate your mosaic art from simple to stunning. By understanding how colors work together, you can create pieces that are not only beautiful but also convey emotion and meaning. So, the next time you sit down to create, remember: the colors you choose can tell a story, evoke feelings, and transform broken pottery into breathtaking art.
- What is the best way to start a mosaic project? Begin by gathering your materials and sketching out a design that incorporates color theory principles.
- How do I choose colors for my mosaic? Consider using complementary or analogous colors to create contrast or harmony, respectively.
- Can I use any type of pottery for my mosaic? Yes, but different materials will yield different textures and effects, so choose wisely based on your design goals.
- How can I protect my mosaic after completion? Sealing your mosaic with a suitable sealant will help protect it from moisture and wear.

Assembling Your Mosaic
Assembling your mosaic is where the magic truly happens! This is the moment when all your careful planning and preparation come together to create a stunning piece of art. The process may seem daunting at first, but with a little patience and creativity, you’ll find that it can be incredibly rewarding. Start by laying out your pottery pieces on your workspace. This is your chance to play around with the arrangement and see how the colors and textures interact. Don’t be afraid to move things around until it feels just right!
Once you have a layout that speaks to you, it’s time to secure those pieces. Use a strong adhesive that’s suitable for the type of pottery you’re working with. Apply the adhesive to the back of each piece and press it firmly onto your base. It’s important to work in small sections to avoid the adhesive drying out before you can place the next piece. Think of this as assembling a jigsaw puzzle—each piece has its own place, and finding it is part of the fun!
After securing the pieces, allow the adhesive to dry completely. This is crucial because it ensures that your mosaic will hold together as you move on to the next step. Once dry, you can begin the grouting process. Grout acts like the mortar between bricks, filling in the gaps and providing a finished look. Choose a grout color that complements your pottery; it can either blend in or contrast, depending on the effect you want to achieve. Apply the grout generously, pushing it into the spaces between the pottery pieces with a rubber float or your fingers, making sure to cover all gaps.
As you work, keep a damp sponge handy. After applying the grout, use it to wipe away any excess from the surface of the pottery. This is where you can really shine—take your time to ensure that the surface of each piece is clean and free from grout residue. Remember, the finishing touches can make a world of difference in the final appearance of your mosaic!
Lastly, once the grout has set according to the manufacturer's instructions, you can add any final embellishments or protective coatings. These can include sealing the mosaic to protect it from moisture, especially if it will be displayed outdoors. With these steps, you’re well on your way to creating a beautiful, unique mosaic that showcases your creativity and love for art!
- How long does it take for the adhesive to dry? The drying time can vary based on the type of adhesive used, but generally, it takes about 24 hours for a strong bond to form.
- Can I use any type of grout for my mosaic? While you can use many types of grout, it’s best to choose one that is specifically designed for mosaics, as they are more durable and offer better adhesion.
- What if my pieces don't stick properly? If you notice that some pieces are not adhering well, you can apply more adhesive and press them down again. Make sure to give them enough time to dry.
- Is it necessary to seal my mosaic? Sealing your mosaic is highly recommended, especially for outdoor pieces, as it protects against moisture and enhances the longevity of your artwork.
Arranging Pottery Pieces
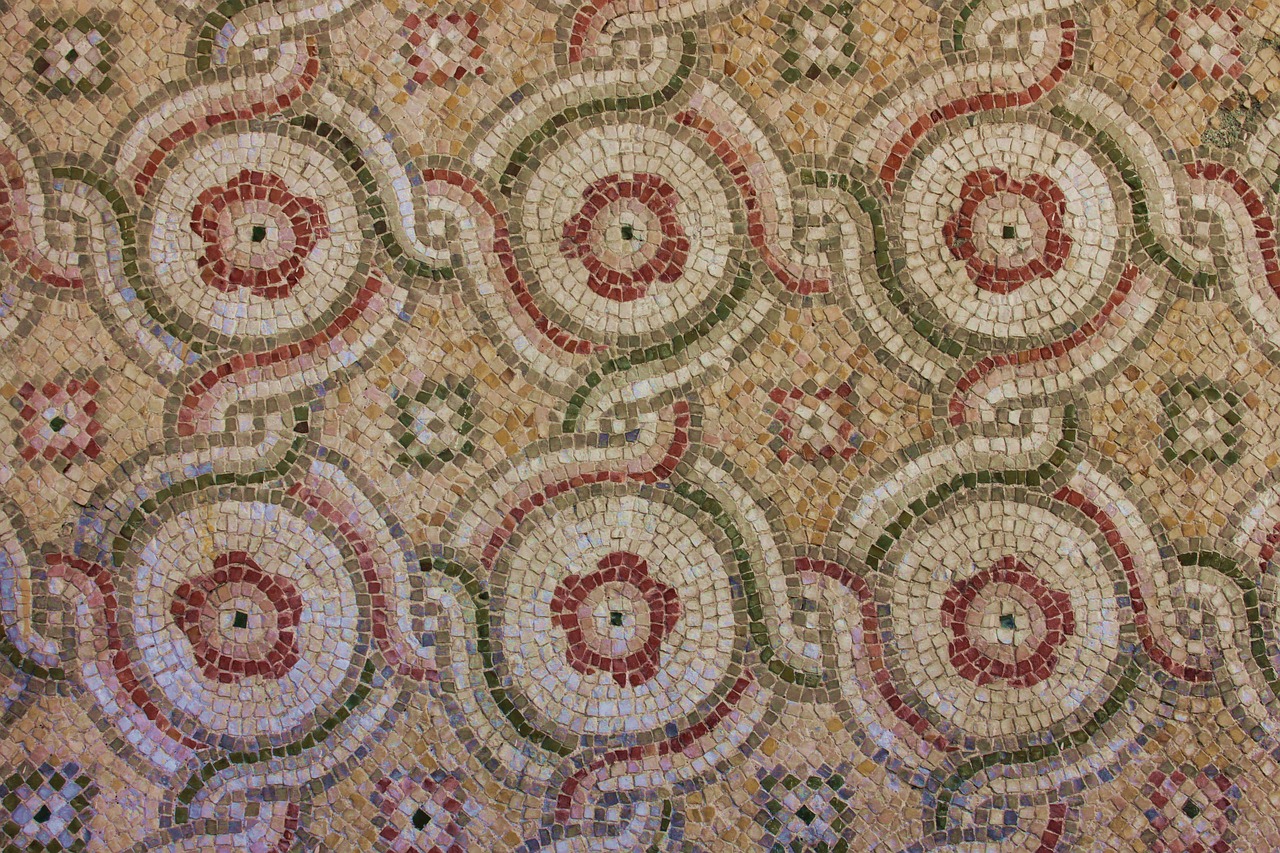
Arranging your pottery pieces is a crucial step in creating a stunning mosaic. It’s like laying the foundation for a beautiful home; if the base isn’t solid, the final product may not stand the test of time. Start by spreading out all your broken pottery pieces on a flat surface. This allows you to see the colors and textures available, giving you a clearer idea of how they might work together. You want to create a visual flow that guides the viewer’s eyes across the mosaic, so think about balance and contrast as you lay out your design.
One effective technique is to begin with larger pieces and then fill in around them with smaller fragments. This creates a sense of structure while allowing for creativity in the details. As you arrange, consider the following:
- Color Harmony: Group similar colors together to create sections that pop, or use contrasting colors to make certain areas stand out.
- Texture Variation: Mix different textures to add depth. For instance, pairing a smooth porcelain piece with a rough stoneware fragment can create an engaging tactile experience.
- Shape Dynamics: Use the shapes of the pottery pieces to create movement. Curved pieces can lead the eye in a flowing manner, while angular pieces can create a more dynamic feel.
Once you have a rough layout that you’re pleased with, step back and evaluate it from different angles. Sometimes what looks good up close might not resonate from a distance. This is your chance to make adjustments before committing to any adhesive. You can even take a picture of your layout to refer back to it later, which can be especially helpful if you need to step away for a bit.
Finally, remember that arranging your pottery pieces is not just about following rules; it's about expressing your creativity. Don't be afraid to experiment! Sometimes the most beautiful designs come from unexpected arrangements. Allow yourself the freedom to play with the pieces until you find a composition that feels just right. Once you’re satisfied with the layout, you’re ready to move on to the next exciting step of securing your design!
Q: How do I know if my arrangement is balanced?
A: A balanced arrangement often has an even distribution of color and shape throughout the mosaic. Step back and look at it from a distance; if your eyes move smoothly across the piece without getting stuck on one area, you likely have a good balance.
Q: Can I rearrange my pieces after applying adhesive?
A: It's best to finalize your arrangement before applying adhesive. Once the adhesive sets, it can be difficult to reposition the pieces without damaging them. However, if you need to make minor adjustments, do so quickly before the adhesive dries.
Q: What if I run out of pieces while assembling?
A: If you find yourself short on pieces, don’t panic! You can always source more broken pottery from thrift stores or online marketplaces. Alternatively, you can creatively fill gaps with other materials like glass or stones that complement your design.
Securing and Grouting
Once you've arranged your pottery pieces into a stunning mosaic, the next crucial step is securing them in place and applying grout. This process not only ensures that your artwork holds together but also enhances its overall appearance. First, let’s talk about securing your pieces. You’ll want to use a strong adhesive, like a ceramic or tile adhesive, that can withstand the test of time. Apply the adhesive generously to the back of each piece, pressing it firmly onto your base. Make sure to leave small gaps between the pieces, as this is where the grout will fill in later.
After all the pieces are secured and the adhesive has dried—usually a few hours to overnight, depending on the product—you can start grouting. Grout is essential because it fills the spaces between your pottery pieces, providing stability and a finished look. There are various types of grout available, such as sanded and unsanded varieties. For most mosaics, sanded grout is preferred because it’s more durable and better suited for larger gaps.
To apply the grout, follow these steps:
- Mix the Grout: Follow the manufacturer’s instructions to mix the grout to a smooth, peanut butter-like consistency.
- Apply the Grout: Use a grout float or your hands (wear gloves!) to press the grout into the gaps between your pottery pieces. Make sure to push it in thoroughly to avoid any air pockets.
- Smooth the Surface: After filling the gaps, use the float to scrape away excess grout from the surface of the pottery. This step will help prevent a messy finish.
- Clean Up: Before the grout dries, use a damp sponge to wipe off any remaining grout from the surface of the pottery. Be careful not to pull the grout out of the gaps.
Once you've completed these steps, allow the grout to cure as per the manufacturer's instructions—typically around 24 hours. After curing, you can seal your mosaic to protect it from moisture and prolong its life. Applying a sealant is especially important if your mosaic will be exposed to the elements, as it will help maintain its vibrant colors and integrity.
In summary, securing and grouting your mosaic is a rewarding process that transforms your carefully arranged pottery into a cohesive work of art. With the right materials and techniques, your mosaic will not only be beautiful but also durable enough to last for years to come.
Here are some common questions that beginners often have when starting their mosaic projects:
- What type of adhesive should I use? For most pottery mosaics, a strong ceramic or tile adhesive is recommended.
- How long should I let the adhesive dry before grouting? It’s best to wait at least a few hours to overnight, depending on the adhesive used.
- Can I use colored grout? Absolutely! Colored grout can add an extra dimension to your mosaic and complement your pottery pieces.
- Is sealing necessary? Yes, sealing your mosaic is essential for protecting it from moisture and wear, especially for outdoor pieces.
Finishing Touches
Once you've assembled your mosaic masterpiece, the finishing touches are what truly elevate your artwork from good to extraordinary. These final details can make all the difference, ensuring your creation not only looks polished but also stands the test of time. First and foremost, cleaning your mosaic is essential. After all your hard work, you want to reveal its full beauty. Grit and dust can accumulate during the assembly process, so gently wipe the surface with a damp cloth to remove any debris. Be careful not to use anything too abrasive, as you don’t want to scratch the delicate surfaces of your pottery pieces.
Next, consider sealing your mosaic. This is a crucial step that protects your artwork from moisture, stains, and wear. A good sealant will not only enhance the colors of your mosaic but also ensure its longevity. There are several options available, ranging from spray sealants to brush-on varieties. It's important to choose a sealant that is compatible with the materials you've used in your mosaic. For instance, if your mosaic is primarily ceramic, a water-based sealant can work wonders. However, if it includes porous materials like terracotta, you might need a more robust, penetrating sealant.
Here’s a quick comparison of sealant options:
| Sealant Type | Best For | Application Method |
|---|---|---|
| Water-Based Sealant | Ceramics, Glass | Brush or Spray |
| Penetrating Sealant | Pore-rich materials | Brush |
| Epoxy Sealant | High durability | Mix and apply |
After sealing, allow your mosaic to cure properly according to the sealant's instructions. This step is crucial; rushing it could lead to unsatisfactory results. Once everything is dry, you might want to add some final embellishments or decorative elements. Perhaps a frame that complements the colors of your mosaic or some additional smaller pieces to create depth and interest. Remember, the goal is to enhance what you’ve already created, not to overwhelm it.
In conclusion, the finishing touches are what will make your mosaic truly shine. By taking the time to clean, seal, and embellish your artwork, you're not just preserving it; you're honoring the creativity and effort you've poured into the project. So, step back, admire your work, and let it bask in the glory of its finished state!
- How long should I wait before sealing my mosaic? It's best to wait at least 24 hours after grouting to ensure everything is fully set before applying sealant.
- Can I use any type of sealant for my mosaic? No, it's important to choose a sealant that is compatible with the materials used in your mosaic to ensure the best results.
- What should I do if my mosaic gets dirty? Use a damp cloth to gently clean it. Avoid harsh chemicals or abrasive materials that could damage the pottery.
- How can I display my mosaic? You can hang it on a wall, place it on a stand, or even integrate it into garden decor, depending on its size and design.
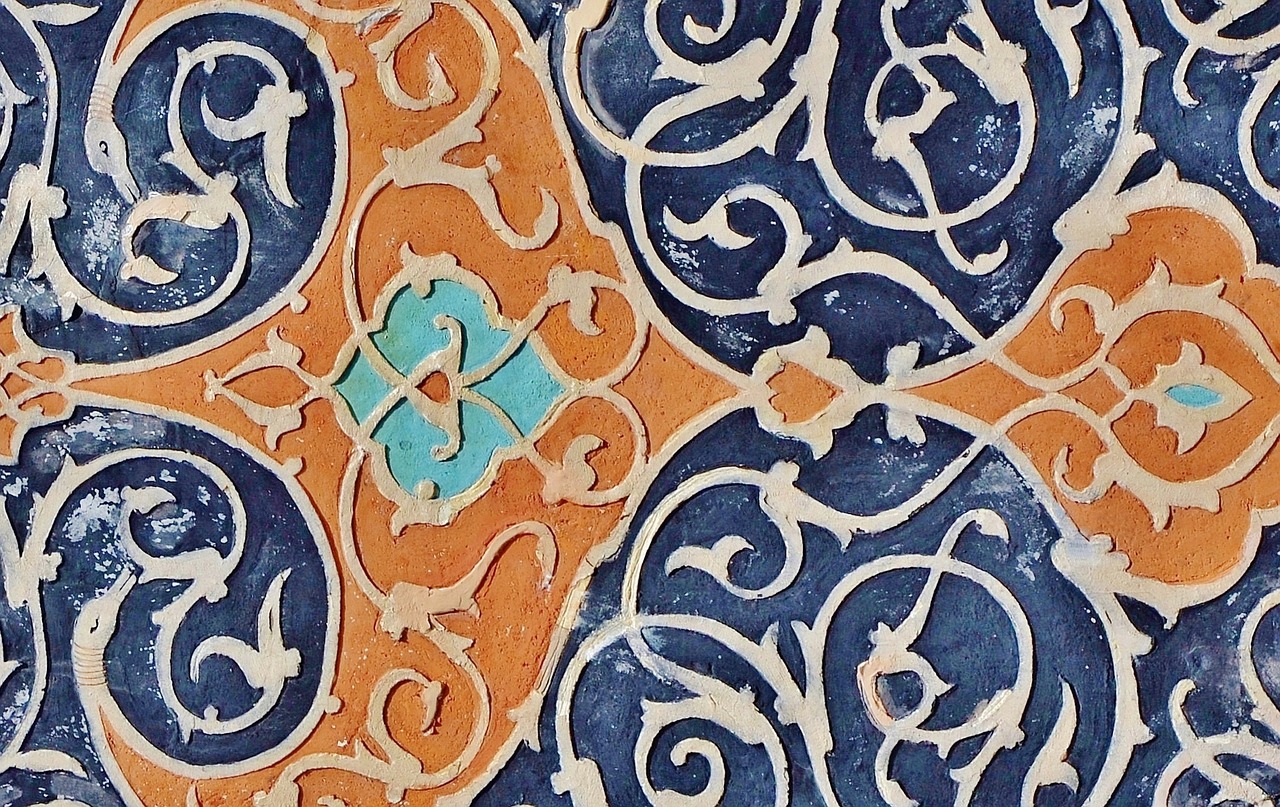
Cleaning Your Mosaic
Cleaning your mosaic after assembly is not just a chore; it's a vital step that unveils the true beauty of your hard work. After spending hours selecting, arranging, and securing those beautiful pieces of broken pottery, you want to make sure they shine! The right cleaning techniques can enhance the colors and textures, making your mosaic a stunning centerpiece. So, how do you go about this? Let’s dive into some essential tips!
First and foremost, it's crucial to allow your mosaic to cure properly before you start cleaning. Typically, this means waiting at least 24 hours after applying grout. This time allows the adhesive and grout to set firmly, ensuring that your pieces stay in place during the cleaning process. Once you're ready to clean, gather a few supplies: a soft cloth, a sponge, warm water, and a mild detergent. Avoid harsh chemicals, as they can damage the pottery or the grout.
Start by gently wiping the surface of your mosaic with a damp cloth to remove any dust or debris. This initial step is like giving your artwork a refreshing shower! If you notice any grout haze—an often unavoidable residue that can dull your mosaic's appearance—don't panic. A damp sponge can work wonders here. Lightly scrub the affected areas, being careful not to dislodge any tiles. For stubborn haze, a mixture of warm water and a drop of mild detergent can be effective. Just remember, less is more; you want to clean, not scrub away your hard work!
Once you've tackled the haze, rinse your sponge or cloth thoroughly and go over the mosaic one more time with plain water. This step ensures that no soap residue is left behind, which could dull the finish over time. After cleaning, allow your mosaic to air dry completely. This drying period is essential, as it helps prevent moisture from getting trapped under the grout, which can lead to mold or mildew.
Finally, consider sealing your mosaic once it's clean and dry. A good sealant not only enhances the colors but also provides a protective layer against moisture and dirt. When selecting a sealant, look for one that is specifically designed for mosaics or ceramics. Applying it will be the cherry on top, ensuring that your artwork remains vibrant and intact for years to come!
In summary, cleaning your mosaic is an art in itself. By following these steps, you can ensure that your creation not only looks its best but also lasts through the test of time. So grab those cleaning supplies and get ready to unveil the masterpiece you've created!
- How often should I clean my mosaic? It's best to clean it whenever you notice dust or grime accumulating, but a thorough cleaning once or twice a year should suffice.
- Can I use vinegar to clean my mosaic? While vinegar is a natural cleaner, it can be too harsh for some types of pottery. Stick with mild detergents for the best results.
- Is sealing necessary for outdoor mosaics? Yes, sealing is crucial for outdoor mosaics to protect them from the elements and prolong their lifespan.
- What should I do if my grout cracks? If you notice cracks in your grout, you may need to remove the damaged area and reapply fresh grout to maintain the integrity of your mosaic.

Sealing and Protecting
Once you've lovingly assembled your mosaic masterpiece, the next crucial step is it. This process not only enhances the visual appeal of your artwork but also ensures its longevity against the elements. Just like a knight dons armor before heading into battle, your mosaic needs a protective layer to shield it from moisture, dirt, and wear. But how do you choose the right sealant, and what steps should you follow to apply it effectively?
First things first, selecting the appropriate sealant is key. There are various options available, each with its own set of benefits. Here’s a brief overview of some popular types of sealers:
| Type of Sealant | Best For | Notes |
|---|---|---|
| Acrylic Sealers | Indoor mosaics | Water-based and easy to apply, but may not be as durable outdoors. |
| Epoxy Sealers | Outdoor mosaics | Highly durable and resistant to moisture, making them ideal for outdoor use. |
| Polyurethane Sealers | High-traffic areas | Provides a tough finish and is resistant to scratches and stains. |
When applying the sealant, it's essential to prepare your mosaic properly. Start by ensuring that the surface is clean and free of dust or debris. A gentle wipe with a damp cloth can do wonders. Then, using a soft brush or sponge, apply the sealant evenly across the surface of your mosaic. Be sure to cover all areas, including the grout lines, as these are particularly susceptible to moisture. Allow the first coat to dry completely before applying a second coat for added protection.
After sealing, you might want to consider additional protective measures, especially for outdoor mosaics. Using a waterproofing spray can provide an extra layer of defense against rain and humidity. Also, positioning your mosaic in a sheltered area can help minimize exposure to harsh weather conditions. Think of it as tucking your artwork into a cozy blanket during a storm!
Finally, don’t forget about routine maintenance. Just like you would check on a garden, keeping an eye on your mosaic will help preserve its beauty. Regularly clean the surface with a soft cloth and mild soap to remove any dirt or grime that may accumulate over time. This simple act can keep your mosaic looking vibrant and fresh, allowing your creative expression to shine through for years to come.
- How often should I seal my mosaic? It’s recommended to seal your mosaic every 2-3 years, especially if it’s displayed outdoors.
- Can I use any type of sealant? Not all sealants are suitable for mosaics. Choose one that is compatible with the materials used in your artwork.
- What if my mosaic gets damaged? If a piece chips or breaks, you can replace it by carefully removing the damaged part and reapplying the adhesive and grout.
Frequently Asked Questions
- What types of broken pottery are best for mosaics?
When it comes to selecting broken pottery for your mosaic project, ceramics, porcelain, and stoneware are excellent choices. Each type brings unique textures and colors, which can enhance the overall aesthetic of your artwork. It's all about finding pieces that resonate with your creative vision!
- How do I clean and prepare broken pottery for my mosaic?
Cleaning broken pottery is essential before you start. Begin by rinsing the pieces to remove any dirt or debris. If necessary, use a soft brush to scrub off stubborn spots. After cleaning, you might want to cut or shape the pieces to fit your design better. Safety first—always wear gloves and goggles when cutting!
- What tools do I need for creating mosaics?
Essential tools for your mosaic project include tile nippers, adhesive, grout, and a spatula for applying grout. Additionally, having a cutting mat and a pair of safety goggles will ensure a smoother and safer working experience. Remember, the right tools can make all the difference!
- Can I use any adhesive for my mosaic?
Not all adhesives are created equal! For mosaics, it’s important to choose a strong, waterproof adhesive suitable for the type of pottery you’re using. Options like thin-set mortar or tile adhesive work well for most projects. This ensures your pieces stay secure and intact over time.
- How do I apply grout to my mosaic?
Applying grout is a crucial step in finishing your mosaic. First, ensure your pieces are securely adhered and let the adhesive cure. Then, using a spatula, spread the grout over the surface, filling in the gaps between the pottery pieces. Wipe off excess grout with a damp sponge and let it cure according to the manufacturer's instructions.
- How can I protect my finished mosaic?
Sealing your mosaic is essential for protecting it from moisture and wear. After cleaning, apply a suitable sealant designed for mosaics to keep your artwork looking vibrant. This step not only enhances the colors but also adds durability, ensuring your creation lasts for years to come!


