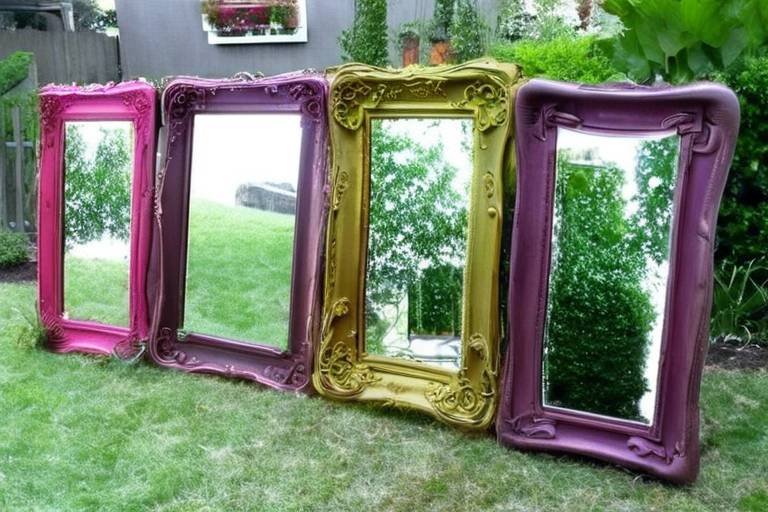
DIY Upcycled Pet Bed Ideas
Are you looking for a way to give your furry friends a cozy place to rest while also being kind to the planet? Upcycling is the answer! Instead of tossing out old items, why not breathe new life into them by transforming them into stylish and comfortable pet beds? Not only will you create a warm nook for your pets, but you’ll also contribute to a more sustainable lifestyle. Think of it as a win-win situation: your pets get a comfy spot to snooze, and you get to flex your creative muscles while reducing waste. So, let’s dive into some innovative ideas that will make your pets purr with delight!
When embarking on your DIY pet bed journey, the first step is selecting the right materials. You want to ensure that whatever you choose is not only durable but also safe for your pets. Consider items like old blankets, cushions, or even furniture that might otherwise end up in a landfill. Think about the texture—soft fabrics will make for a more inviting bed. Additionally, keep in mind the ease of cleaning; pets can be messy, so materials that are machine washable are a huge plus!
Transforming old furniture into pet beds is a fantastic way to add a unique touch to your home décor while providing your pets with a special place to rest. Imagine turning a vintage chair or an unused dresser into a cozy nook for your furry companion. Not only does this approach save money, but it also gives a second life to items that might be gathering dust. The possibilities are endless, and you can customize each piece to fit your space and style!
One of the most creative ways to upcycle furniture is by converting an old chair into a stylish pet bed. This process is surprisingly simple! Start by removing the seat cushion, which can often be replaced with a plush foam pad for added comfort. Once you have your new cushion, cover it with a fabric that complements your home’s aesthetic. Think of it as giving your chair a makeover, but this time, it’s for your pet’s benefit!
Before you dive into this project, gather the essential materials:
- Foam padding
- Fabric (choose something soft and durable)
- Staple gun or sewing kit
- Scissors
- Old chair
Here’s a quick guide to help you convert that old chair into a cozy pet bed:
- Remove the seat cushion from the chair.
- Cut the foam padding to fit the seat area.
- Cover the foam with your chosen fabric, securing it with a staple gun or sewing it in place.
- Reattach the cushion to the chair frame.
- Place the chair in a comfortable spot for your pet to enjoy!
If you have an old crate lying around, it can easily be transformed into a comfortable pet bed. Crates are great because they can be customized in size and design to fit any pet. Simply add a soft cushion or blanket inside, and your pet will have a cozy retreat that feels safe and secure. Plus, you can personalize the crate with paint or fabric to make it truly unique!
Let’s face it—hard surfaces can be pretty uncomfortable for our pets. If your home has a lot of tile or hardwood floors, your furry friends might be looking for a softer spot to rest. You can easily soften these areas by layering cushions, blankets, or even using upcycled materials. Think of it like creating a little oasis for your pet, where they can lounge in comfort.
Layering blankets and pillows can transform even the hardest surfaces into a cozy resting area. Choose soft, plush blankets that your pet loves, and pile them up to create a nice cushy bed. You can also add a few pillows for extra support and comfort. It’s like making a fort for your pet—who wouldn’t love that?
If you’re feeling particularly crafty, consider making a DIY mattress for your pet using upcycled materials. Gather foam, fabric, and any other soft materials you have on hand. Cut the foam to your desired size and sew a cover that can be easily removed for washing. This custom bed will provide your pet with a plush sleeping surface that’s made just for them!
To make your pet bed truly special, consider adding some personal touches. Personalizing your pet bed not only makes it unique but also reflects your pet's personality. You can choose fabrics in their favorite colors or patterns. Don't be afraid to get creative!
One fun way to personalize your pet’s bed is by incorporating their name or playful designs. Use fabric paint or embroidery to add these elements. This personal touch makes the bed feel special and uniquely theirs, turning a simple bed into a cherished spot in your home.
Why not have some fun with seasonal themes? You can create themed pet beds that reflect different holidays or seasons. For instance, use festive fabrics during the holidays or bright colors in the summer. This not only keeps your pet's space fresh and exciting but also adds a playful touch to your home décor!
Q: Can I use any type of fabric for my pet bed?
A: While you can use various fabrics, it's best to choose materials that are soft, durable, and machine washable.
Q: How do I clean an upcycled pet bed?
A: Most upcycled beds can be cleaned easily; just follow the washing instructions for the materials used. Many fabrics can be machine washed, making maintenance simple.
Q: Is it safe to use old furniture for pet beds?
A: Yes, as long as the furniture is in good condition and free from harmful chemicals or sharp edges, it can be a safe and stylish option for your pet.
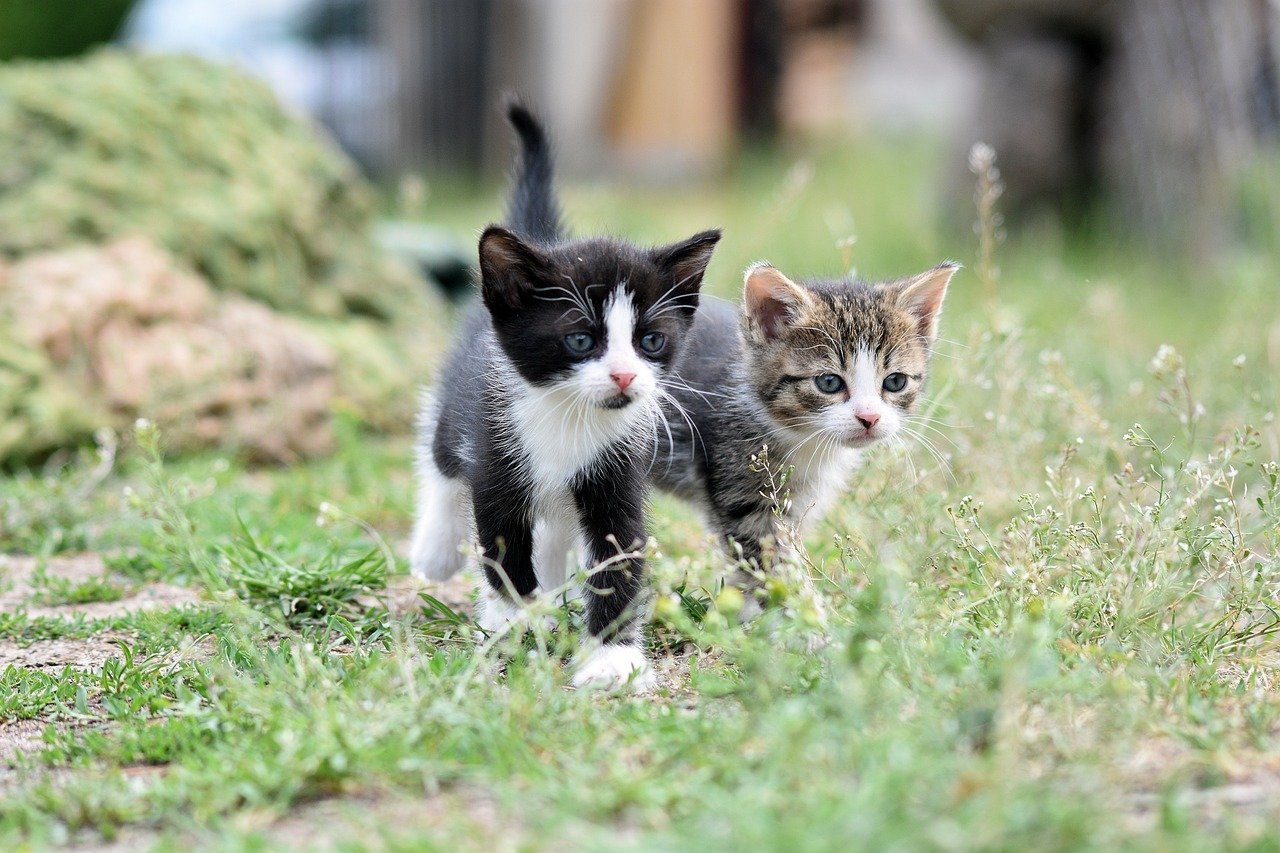
Choosing the Right Materials
When it comes to creating a cozy pet bed, is essential for ensuring both comfort and durability. You wouldn't want your furry friend to snuggle up on something uncomfortable, would you? Think about it: just like we love our soft blankets and plush pillows, our pets deserve the same level of comfort. So, what should you consider when selecting materials for your DIY pet bed? Let's break it down!
First and foremost, texture matters. You want to choose fabrics that are soft and inviting. Look for materials like fleece, cotton, or even an old flannel shirt that your pet will love to curl up against. Avoid anything too rough or scratchy, as it might irritate their sensitive skin. Additionally, consider the durability of the material. Pets can be playful, and their beds can face a lot of wear and tear. Fabrics like canvas or denim can provide a sturdy option that stands up to the test of time.
Safety is another crucial factor. Ensure that the materials you select are non-toxic and free from harmful chemicals. This is especially important if you're using any upcycled items. For instance, if you're repurposing an old piece of furniture, check if it has been treated with any harmful substances. You want your pet’s bed to be a safe haven, not a potential hazard.
Now, let’s talk about the ease of cleaning. Pets can be messy creatures, and their beds can accumulate dirt, fur, and the occasional accident. Opt for materials that are machine washable or easy to wipe down. Fabrics like microfiber or those with a water-resistant coating can make your life a lot easier when it comes to maintenance. After all, a clean pet bed means a happy pet!
In summary, choosing the right materials for your DIY pet bed involves a mix of comfort, durability, safety, and practicality. Here’s a quick recap:
- Texture: Soft fabrics like fleece or cotton
- Durability: Sturdy options like canvas or denim
- Safety: Non-toxic and chemical-free materials
- Ease of Cleaning: Machine washable or wipeable fabrics
By keeping these factors in mind, you can create a pet bed that not only looks great but also provides a cozy and safe resting spot for your beloved companion. So, gather your materials and get ready to create something special that your pet will adore!

Old Furniture Transformations
Transforming old furniture into pet beds is not just a fantastic way to give your furry friends a cozy place to rest; it’s also a brilliant method to add a touch of style to your home while being environmentally conscious. Imagine taking that old chair or dresser that’s been gathering dust in your living room and turning it into a chic pet bed. It’s like giving your furniture a second chance at life, and your pet will love it too! Plus, you save money by upcycling instead of buying new. So, what do you think? Ready to dive into some creative transformations?
When considering which pieces of furniture to repurpose, think about items that are sturdy and can support your pet's weight. For instance, an old wooden crate can easily be transformed into a stylish bed with just a bit of creativity and effort. You can paint it, add a cushion, and voilà! You have a trendy pet bed that not only looks good but is also functional. Not to mention, you’re keeping waste out of landfills. It’s a win-win situation!
In the world of furniture transformations, the possibilities are truly endless. Here are a few ideas to get your creative juices flowing:
- Chairs: Remove the seat cushion, add some foam padding, and cover it with beautiful fabric. Your pet will enjoy lounging in style!
- Dressers: Convert a drawer into a cozy nook by adding some soft bedding. This can become a perfect hideaway for your pet.
- Crates: Old crates can be painted and outfitted with a plush cushion to create a rustic yet modern pet bed.
Now, let’s dive deeper into one of the most popular transformations: converting an old chair into a pet bed. This project is not only simple but also incredibly satisfying. Imagine the pride you'll feel knowing you’ve taken something that was once considered trash and turned it into a cherished spot for your pet.
To kick off this transformation, you’ll need a few essential materials. Gather foam padding, a stylish fabric of your choice, and some basic tools like a screwdriver and a staple gun. Don’t worry; you don’t need to be a DIY expert to pull this off! With a little patience and creativity, you can create a beautiful and functional pet bed.
Here’s a quick overview of the steps involved in the chair-to-pet-bed conversion:
- Remove the existing seat cushion from the chair.
- Measure the seat area to cut your foam padding to size.
- Cover the foam with the chosen fabric, securing it with a staple gun underneath the seat.
- Reattach the seat cushion to the chair frame, ensuring it’s secure.
- Add some decorative touches like a blanket or pillow for extra comfort.
By following these steps, you’ll have a unique pet bed that not only provides comfort but also adds character to your home. Each piece you create tells a story, and your pet will appreciate the effort you put into making their resting spot special. So, what are you waiting for? Grab that old chair and let’s get crafting!
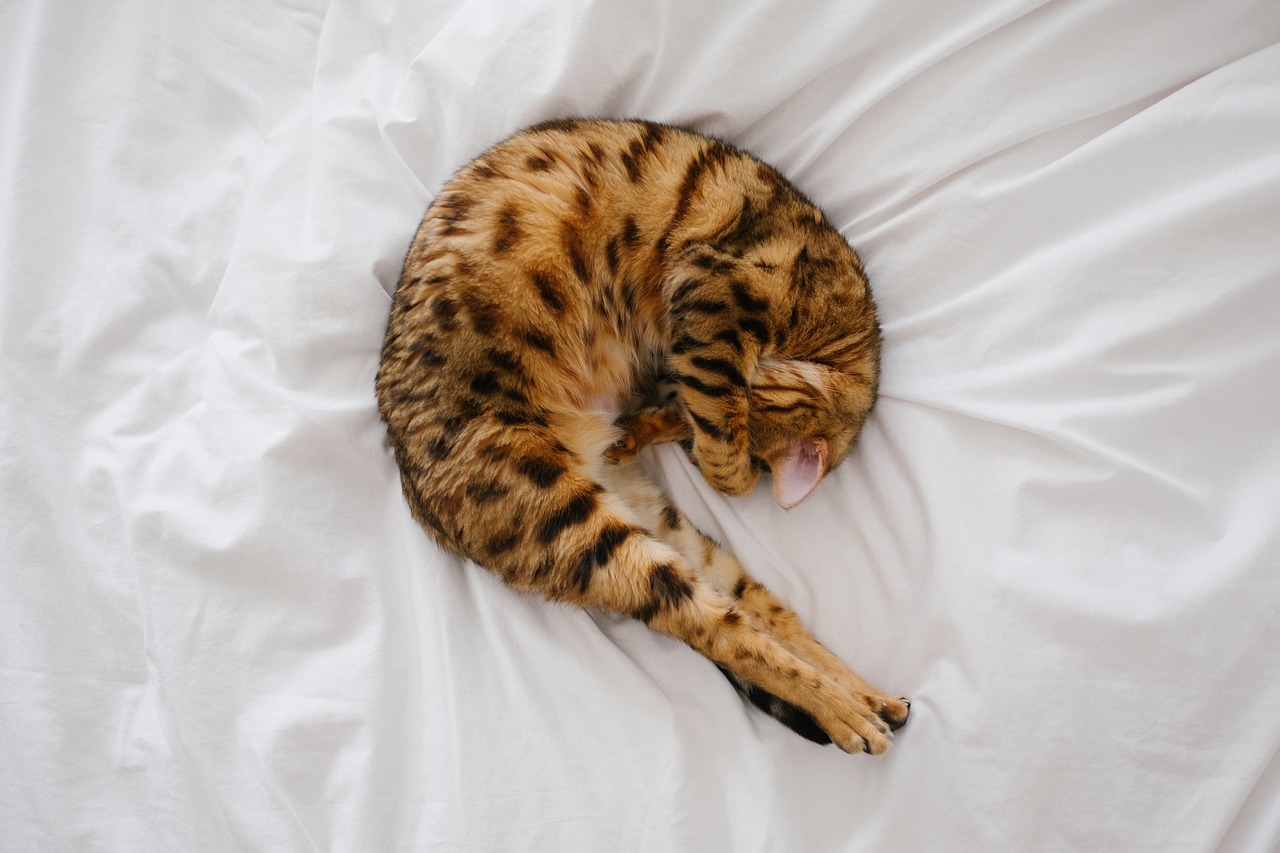
Chair to Pet Bed Conversion
Transforming an old chair into a pet bed is not just a fun DIY project; it’s a fantastic way to give your furry friend a cozy place to rest while also being environmentally conscious. Imagine that old, dusty chair in the corner of your living room, once a proud piece of furniture but now merely taking up space. With a little creativity and some elbow grease, that chair can be reborn as a stylish and comfortable pet bed! So, how do you go about this transformation? Let’s dive into the process!
First things first, you need to select the right chair. Look for something sturdy and spacious enough for your pet to lounge comfortably. A chair with a removable cushion is ideal, as it allows for easy access to the seat area where your pet will snuggle up. Once you’ve chosen your chair, it’s time to gather your materials. You’ll need some foam padding for comfort, fabric of your choice for aesthetics, and a few simple tools like a staple gun and scissors. This is where the fun begins!
Before you start cutting and stapling, it’s essential to prepare the chair. Remove the seat cushion and any old upholstery that may be peeling or worn out. This step not only refreshes the chair but also ensures that your pet will have a clean space to rest. Once the old fabric is off, measure the seat area and cut your foam padding accordingly. The foam will provide that much-needed softness, making it a plush haven for your pet.
Now, let’s talk about the fabric. Choose something durable and easy to clean, as pets can be a bit messy! You might want to opt for fabrics like canvas or denim, which can withstand wear and tear. If you’re feeling adventurous, you could even go for a fun pattern that complements your home decor. Once you’ve selected your fabric, lay it out flat, place the foam on top, and then position the chair’s seat cushion over everything. This layering will create a comfy spot for your pet to curl up in.
After everything is in place, it’s time to secure the fabric. Use a staple gun to attach the fabric to the underside of the seat cushion, pulling it taut to avoid any wrinkles. Make sure to leave enough fabric to fold over the edges for a neat finish. Once you’ve stapled all around, trim any excess fabric, and voilà! You now have a fabulous pet bed that not only looks great but also keeps your furry companion comfy.
Remember, the key to a successful chair-to-pet-bed conversion is to have fun with the process. Personalize it with your pet’s name or even add some decorative elements like a cute pillow or blanket to make it extra inviting. Your pet will love snuggling up in their new bed, and you’ll feel great knowing you’ve given new life to an old piece of furniture!
Q: What type of chair is best for conversion?
A: Look for chairs with removable cushions and a sturdy frame. Armchairs or dining chairs can work well, depending on your pet's size.
Q: How do I clean the pet bed after it's made?
A: Choose fabrics that are machine washable or easy to wipe down. You can also use removable covers for easy cleaning.
Q: Can I use an upholstered chair for this project?
A: Yes, but make sure to remove any old upholstery and check for any potential hazards like exposed springs or sharp edges.
Q: How can I make the bed more comfortable?
A: Add extra foam padding or layer blankets on top for added softness. Your pet will appreciate the extra coziness!

Materials Needed for Conversion
Explore creative and sustainable ways to repurpose materials into cozy pet beds, perfect for giving your furry friends a comfortable place to rest while being environmentally friendly.
Selecting appropriate materials is crucial for creating a durable and comfortable pet bed. Consider factors like texture, safety, and ease of cleaning when choosing items to upcycle.
Transforming old furniture into pet beds can add style to your home. Discover how to repurpose items like chairs, dressers, and crates into unique sleeping spaces for your pets.
Learn how to convert an old chair into a stylish pet bed. This process involves removing the seat cushion and adding new fabric for comfort and aesthetics.
To successfully convert an old chair into a cozy pet bed, you will need a few essential materials that ensure both comfort and durability. Here’s a breakdown of what you’ll require:
- Foam Padding: This will serve as the main cushioning for your pet's bed. Choose a thickness that offers adequate support while still being soft enough for your pet to sink into comfortably.
- Fabric: Select a durable and washable fabric that complements your home décor. Fabrics like canvas or upholstery material are great options due to their strength and ease of cleaning.
- Tools: You’ll need basic tools such as a staple gun, scissors, and a measuring tape to help with the conversion process.
- Thread and Needle: If you plan to sew any parts together, having a sturdy thread and needle will be essential, especially if you want to add decorative elements.
Once you have gathered these materials, you can start the transformation process. Each item plays a crucial role in ensuring that your pet bed is not only functional but also stylish. The foam padding will provide the necessary comfort, while the fabric will give it an aesthetic appeal that fits your home. Remember, the right tools will make the conversion process smoother and more enjoyable!
Follow a detailed guide that outlines each step in the conversion process to create a comfortable and appealing pet bed from an old chair.
Explore creative ways to turn an old crate into a comfortable pet bed. This project allows for customization in size and design, making it perfect for any pet.
Hard surfaces can be uncomfortable for pets. Learn how to soften these areas with cushions, blankets, or upcycled materials to create a cozy resting spot for your furry friends.
Discover how to layer blankets and pillows in your pet's resting area to provide extra comfort and warmth, ensuring they have a cozy space to relax.
Crafting a DIY mattress from upcycled materials can offer your pet a plush sleeping surface. Find out how to use foam, fabric, and other materials to create a custom bed.
Personalizing your pet bed adds a unique touch that reflects your pet's personality. Explore creative ideas for customization, including fabric choices, colors, and decorative elements.
Incorporate your pet’s name or fun designs into the bed using fabric paint or embroidery. This personal touch makes the bed special and uniquely theirs.
Consider creating seasonal-themed pet beds that reflect holidays or seasons. This fun approach allows for creativity and keeps your pet's space fresh and exciting throughout the year.
Q: Can I use any type of chair for this project?
A: While you can use most types of chairs, it's best to choose one that has a solid frame and enough surface area to accommodate your pet comfortably.
Q: How do I clean the pet bed once it's made?
A: Most fabrics can be spot cleaned with mild soap and water. If you've used removable covers, simply toss them in the washing machine for easy cleaning.
Q: What if my pet has allergies?
A: Opt for hypoallergenic materials and ensure that all fabrics are thoroughly cleaned before use to minimize any allergic reactions.

Step-by-Step Conversion Process
Transforming an old chair into a cozy pet bed may seem daunting, but it's a fun and rewarding project that can be completed in just a few steps. First, gather your materials; you'll need foam padding, durable fabric, scissors, a staple gun, and possibly some wood glue. Don't worry if you're not a DIY expert—this project is accessible for anyone willing to give it a try!
Start by removing the seat cushion from the chair. Most cushions can be easily detached by unscrewing a few bolts or simply lifting them off. Once the cushion is off, you can assess the condition of the chair. If it’s sturdy and clean, you’re ready to move on. If there are any rough edges or splinters, consider sanding them down to ensure a safe resting space for your pet.
Next, measure the seat area to determine the size of the foam padding you’ll need. Cut the foam to fit snugly within the chair’s seat frame. This foam will serve as the base of your pet bed, providing comfort and support. To enhance the look and feel, you might want to layer multiple pieces of foam or use a thicker option if the chair allows for it.
Once you have your foam in place, it's time to dress it up! Choose a fabric that complements your home decor while also being durable enough to withstand your pet's wear and tear. You can go for a fun pattern or a solid color—whatever suits your style! Cut the fabric to size, leaving extra material to wrap around the foam and secure it underneath.
Now comes the exciting part: assembling the pet bed! Lay the fabric face down, place the foam on top, and then position the chair frame over it. Pull the fabric tightly around the foam and staple it to the underside of the chair seat. Make sure to keep it taut to avoid any sagging. If you want to add a bit of flair, consider using decorative upholstery tacks along the edges for a polished look.
Finally, let’s add some finishing touches. You can include a soft blanket or a few plush toys to make the bed even more inviting. Your furry friend will appreciate the extra comfort, and you’ll love the stylish addition to your home. Remember, the goal is to create a space that feels safe and cozy for your pet, so feel free to customize it as you see fit!
Q: What type of fabric is best for a pet bed?
A: Look for durable, machine-washable fabrics like canvas or upholstery-grade materials. These are easy to clean and can withstand wear from claws and fur.
Q: How can I ensure the pet bed is safe for my animal?
A: Always check for sharp edges or loose parts on the chair. Make sure the materials used are non-toxic and suitable for pets.
Q: Can I use an old sofa instead of a chair?
A: Absolutely! The same principles apply. Just ensure you have enough space and materials to create a comfortable area for your pet.

Crate Bed Ideas
Transforming an old crate into a cozy pet bed is not only a fun DIY project but also a fantastic way to give your furry friend a personalized space to relax. Crates are often sturdy and can be customized to fit your pet's size, making them a versatile option for any pet owner. Imagine your pet snuggling into a warm, inviting bed that you crafted yourself—it’s a win-win for both you and your pet!
One of the best aspects of using crates is the sheer variety of designs you can create. For example, you can paint the crate in your pet's favorite color or even add decals to make it more visually appealing. If you’re feeling particularly crafty, consider adding a soft cushion inside the crate. This not only enhances comfort but also gives your pet a sense of security, similar to how they would feel in a den. Plus, you can easily change the cushion cover to match your home décor!
Here are a few ideas to get you started:
- Layered Comfort: Use multiple layers of soft blankets or fabric to create a plush sleeping surface. You can mix and match textures and colors for added flair.
- Custom Cushion: Measure the interior dimensions of your crate and create a custom cushion using foam or old pillows. Wrap it in a soft, washable fabric to ensure it's easy to clean.
- Built-in Storage: If you have a larger crate, consider adding a bottom shelf or drawer for storing your pet's toys or supplies. This not only keeps things tidy but also makes the crate more functional.
To take it a step further, you could also incorporate a removable cover for the cushion. This way, you can easily wash it whenever your pet has a little accident or just needs a refresh. Remember, the key is to create a space that feels safe and inviting for your pet. A well-thought-out crate bed can become your pet's favorite spot in the house!
In addition to comfort, consider the environmental impact of your project. By upcycling an old crate, you're not only saving money but also contributing to a more sustainable lifestyle. It’s a small step that makes a big difference! Plus, every time you see your pet lounging in their new bed, you’ll feel a sense of pride knowing you crafted it with love.
Lastly, don’t forget to share your creations! Whether you post pictures on social media or show them off to friends and family, your DIY crate bed could inspire others to get creative with their own pet projects. Who knows? You might just start a trend!
Softening Hard Surfaces
We all know how uncomfortable it can be to lay on a hard surface, and our furry friends feel the same way! Imagine your pet trying to find a cozy spot on a cold, hard floor—it's not a pretty picture, right? That’s why it’s essential to soften those hard surfaces in your home to create a welcoming and comfortable resting area for your pets. Whether it's a wooden floor, tile, or even concrete, there are plenty of ways to add some much-needed cushioning and warmth.
One of the simplest solutions is to use cushions and blankets. By layering these items, you can create a plush oasis for your furry companions. Think of it like building a fort! You start with a solid base and then add layers of comfort. Not only do these layers provide softness, but they also offer warmth, especially during those chilly nights. You can use old blankets, throw pillows, or even pet-specific cushions to achieve the desired effect.
Another fantastic option is to repurpose materials you already have at home. For instance, old towels can be folded and stacked to create a makeshift bed. This not only softens the surface but is also an eco-friendly choice. You might also consider using memory foam or foam padding, which can be cut to size and placed under a decorative cover. This way, you can customize the thickness and feel, ensuring your pet has the perfect sleeping surface.
Curious about how to get started? Here are a few ideas to help you soften those hard surfaces:
- Layer Up: Stack multiple blankets or cushions to create a thicker, more comfortable resting area.
- Use a Pet Mattress: Invest in a pet mattress or create your own using foam and fabric for a plush sleeping spot.
- Incorporate Textiles: Utilize various textiles like fleece, cotton, or even faux fur to add warmth and coziness.
Remember, the goal is to create a cozy haven for your pet. Think about their preferences—do they like to burrow? If so, you might want to add extra layers or even a small blanket they can snuggle into. Or perhaps they prefer to sprawl out? In that case, a larger cushion or mattress would be the way to go. The key is to observe your pet’s behavior and adapt the space to suit their needs.
| Question | Answer |
|---|---|
| What materials are best for softening hard surfaces? | Soft blankets, cushions, foam padding, and pet mattresses are excellent choices. |
| How often should I change the bedding for my pet? | It's best to change the bedding weekly or as needed, especially if your pet sheds a lot. |
| Can I use human bedding for my pet? | Yes, as long as the materials are safe and comfortable for your pet! |

Using Blankets and Pillows
When it comes to creating a cozy resting area for your furry friend, blankets and pillows can work wonders. Imagine your pet curling up in a soft, warm nook that feels like a gentle hug. Using these items not only enhances comfort but also allows you to utilize materials you may already have at home. Who wouldn’t want to give their pet a plush paradise without breaking the bank?
Start by gathering an assortment of old blankets and pillows. You might have a few that are too worn out for your own use but are still perfect for your pet. Consider the texture and material of the blankets: soft fleece or plush fabric can provide a luxurious feel, while cotton options are breathable and easy to wash. The pillows can be used to create a layered effect, offering different levels of support for your pet.
To create a comfy spot, simply layer the blankets on the floor or inside a pet crate. You can fold them to create a thicker base or use a combination of different textures for added interest. For instance, placing a fluffy blanket on top of a firmer one can give your pet the best of both worlds—support and softness. You can also tuck the blankets into corners or around the edges of a crate to create a snug environment that feels safe and secure.
Don’t forget to add pillows! They can serve as a great backrest or bolster, giving your pet a perfect place to lean against while they snooze. If your pet loves to burrow, consider using smaller pillows that they can nestle into. This not only provides comfort but also allows them to feel more protected, reminiscent of how they might snuggle in a den.
For a touch of personalization, you can even decorate the blankets or pillows with your pet’s name using fabric paint or embroidery. This little detail can make the resting area feel like their very own special retreat. And let’s be honest, who wouldn’t want a pet bed that looks as good as it feels?
In addition to comfort, layering blankets and using pillows can help keep your pet warm during colder months. You can easily switch out lighter blankets for thicker ones as the seasons change, ensuring that your pet always has a comfortable resting spot. Plus, when it’s time for cleaning, these items can be easily removed and washed, keeping your pet’s area fresh and inviting.
So, whether you’re looking to create a simple sleeping nook or a plush haven for your furry friend, using blankets and pillows is an easy and effective way to enhance their comfort. With a little creativity and resourcefulness, you can transform any space into a cozy retreat that your pet will love.
- How often should I wash my pet's blankets and pillows?
It’s best to wash them every couple of weeks, or more frequently if your pet sheds a lot or has accidents. - Can I use old blankets that have holes in them?
While it's generally okay to use old blankets, ensure that they are safe and free from any small parts that could be ingested. - What should I do if my pet is allergic to certain materials?
Always choose hypoallergenic fabrics and materials to ensure your pet's comfort and health.
Creating a DIY Mattress
Have you ever thought about how much your furry friend deserves a cozy and comfortable place to rest? Crafting a DIY mattress for your pet can be a fun and fulfilling project that not only provides a plush sleeping surface but also allows you to use upcycled materials that might otherwise go to waste. Imagine transforming old foam, fabric, or even repurposed bedding into a luxurious mattress that your pet will adore! Let's dive into the steps to create a custom mattress that suits your pet's needs.
First, you'll want to gather your materials. The beauty of a DIY mattress is that you can use a variety of items, depending on what you have on hand. Here’s a quick list of what you might need:
- Foam padding: Old mattress foam or foam pads work great.
- Fabric: Choose something soft and durable, like fleece or cotton.
- Thread and sewing supplies: You’ll need these for assembling your mattress.
- Scissors and a measuring tape: Essential for cutting materials to the right size.
Once you have your materials ready, it’s time to measure and cut the foam to fit your pet’s size. A good rule of thumb is to measure your pet while they’re lying down to ensure they have enough space to stretch out comfortably. After cutting the foam, you can layer it for added comfort. Consider using multiple layers of foam to create a thicker mattress that offers more support.
Next, you’ll want to create a cover for your mattress. This is where the fun begins! Choose a fabric that not only complements your home decor but is also easy to clean. You can go for vibrant colors or patterns that reflect your pet’s personality. Once you’ve decided on the fabric, cut it to size, leaving a little extra for seams. If you’re feeling crafty, you can even add a zipper to the cover, making it easier to wash when necessary.
Now, let’s talk about assembly. Start by placing the foam on a flat surface and then lay the fabric over it. Fold the fabric over the foam, pinning it in place. Make sure to leave one side open if you’re adding a zipper or to allow for easy removal. Sew the edges together, ensuring a snug fit. For added flair, consider adding decorative elements like piping or contrasting stitching to give your pet’s mattress a unique touch.
After sewing, turn the cover inside out, insert the foam, and zip or close it up. Voilà! You now have a custom DIY mattress that will make your pet feel like royalty. Not only is this project rewarding, but it also allows you to express your creativity while ensuring your pet has a cozy place to rest their head.
Q: What materials are best for a DIY pet mattress?
A: Opt for soft, durable fabrics like fleece or cotton for the cover, and use foam padding for comfort. Recycled materials work wonderfully too!
Q: How do I clean the DIY mattress?
A: If you’ve added a zipper, simply remove the cover and machine wash it. For foam, spot clean with mild soap and water as needed.
Q: Can I customize the size of the mattress?
A: Absolutely! Measure your pet while they’re lying down to determine the perfect size for their mattress.
Q: Is it safe to use upcycled materials?
A: Yes, as long as the materials are clean and free from harmful substances. Always inspect items before using them for your pet’s comfort.
Personalizing Your Pet Bed
When it comes to making your furry friend's sleeping area feel like home, personalization is key. Just like we love to snuggle into our own cozy spaces that reflect our personality, pets appreciate a bed that feels uniquely theirs. Imagine your pet curling up on a bed that not only offers comfort but also showcases their individuality! From fabric choices to decorative elements, there are countless ways to add a personal touch to your pet's bed.
One of the simplest yet most impactful ways to personalize your pet bed is by incorporating their name. You can easily do this using fabric paint or by embroidering their name onto the fabric. Not only does this make the bed feel special, but it also adds a fun element to the decor of your home. Picture a vibrant pet bed with your dog's name proudly displayed, instantly becoming a conversation starter!
Moreover, consider the colors and patterns that resonate with your pet's personality. For instance, if your cat is a playful little rascal, bright colors and whimsical patterns might be the perfect fit. On the other hand, if your dog is more of a laid-back, gentle giant, earthy tones and soft textures could create a calming environment. You can even get creative with seasonal themes, changing the bed's look to match holidays or seasons. Imagine a festive red and green bed for Christmas or a floral design for spring! This allows you to keep your pet’s space fresh and exciting throughout the year.
Another fun idea is to add decorative elements like paw prints or fun shapes that can complement the overall design of the bed. You could use upcycled fabric scraps to create patches or appliqués that reflect your pet's favorite toys or activities. For example, if your dog loves to chase balls, consider adding a cute ball design to the bed's side. This not only personalizes the bed but also tells a story about your pet's personality and interests.
To make it even more engaging, consider creating a themed pet bed. For instance, if your pet loves the beach, you could use fabrics with ocean motifs and colors reminiscent of the sea. This not only personalizes the bed but also creates a fun atmosphere that reflects your pet's adventures and your shared experiences together.
In conclusion, personalizing your pet bed is a delightful way to show your furry friend just how much you care. By incorporating their name, choosing the right colors and patterns, and adding fun decorative elements, you can create a cozy, unique space that your pet will love. So, roll up your sleeves and let your creativity flow—your pet’s dream bed is just a DIY project away!
- How can I clean a personalized pet bed? - Most personalized pet beds can be spot cleaned with mild soap and water. If the fabric is machine washable, follow the care instructions to keep it looking fresh.
- What materials are best for personalizing a pet bed? - Soft, durable fabrics like cotton or fleece are great for comfort and personalization. Look for materials that are easy to clean and safe for pets.
- Can I change the design of the bed seasonally? - Absolutely! You can create covers or use removable fabric that can be swapped out to reflect different seasons or holidays.

Adding Names and Designs
When it comes to making your pet bed truly special, adding names and designs is a fantastic way to reflect your pet's personality and make their space feel uniquely theirs. Imagine your furry friend curling up on a cozy bed that not only feels comfortable but also showcases their name in a fun and creative way! This personal touch not only enhances the aesthetic of your home but also gives your pet a sense of belonging.
One of the simplest ways to incorporate your pet's name is through fabric paint. You can choose a bold color that contrasts beautifully with the fabric of the bed or go for a more subtle shade that complements the overall design. If you're feeling crafty, consider using stencils to create neat lettering. This method allows you to play with different fonts and sizes, ensuring that your pet's name stands out. Alternatively, if you're skilled with a needle and thread, embroidery can add a charming, handmade touch. Not only does it look great, but it also adds texture to the bed.
Beyond just names, think about incorporating fun designs or patterns that resonate with your pet's character. For instance, if your dog is a playful spirit, you might want to add paw prints or bone shapes around the edges of the bed. If your cat loves to lounge in the sun, a sun motif could be a delightful addition. The possibilities are endless! You can even create a mini gallery of designs that tell a story about your pet's adventures or favorite activities.
To help you get started, here are some ideas for designs you might consider:
- Paw Prints: A classic choice that never goes out of style.
- Cartoon Characters: If your pet resembles a famous character, why not add a fun illustration?
- Seasonal Themes: Incorporate seasonal motifs like snowflakes for winter or flowers for spring.
In addition to names and designs, you can also think about using fabrics that have patterns or textures your pet loves. For example, a soft fleece with a fun print can be both stylish and cozy. You could even mix and match different fabrics to create a patchwork effect that’s visually appealing and comfortable. The key is to let your creativity flow and design a bed that not only serves as a resting spot but also as a piece of art in your home.
Ultimately, personalizing your pet bed is about making it a reflection of your furry friend’s personality and your style. So grab your supplies, unleash your creativity, and transform that simple pet bed into a masterpiece that both you and your pet will adore!
- What materials are best for painting on fabric? Use fabric paint specifically designed for textiles to ensure durability and washability.
- Can I wash the bed after adding designs? Yes, but ensure you follow the care instructions for the paint or embroidery to avoid damage.
- How do I choose the right font for my pet's name? Consider the overall style of the bed and your home decor. A playful font may suit a lively pet, while a more elegant font could complement a sophisticated look.

Seasonal Themes
Creating seasonal-themed pet beds is not just a fun project; it’s a delightful way to keep your furry friend’s space fresh and exciting all year round. Just like we change our home decor with the seasons, why not do the same for our pets? Imagine your pet snuggling into a bed adorned with autumn leaves in October or nestled in a cozy, snowflake-patterned blanket during the winter months. It’s all about adding a touch of creativity that reflects the spirit of each season!
When it comes to seasonal themes, the possibilities are endless. You can incorporate different colors, patterns, and even textures that resonate with the time of year. For instance, in the spring, think of soft pastels and floral prints that bring a breath of fresh air into your pet’s resting area. Summer can be all about vibrant colors and lightweight fabrics that are perfect for warm weather. In contrast, autumn could feature rich, earthy tones and cozy, warm materials to keep your pet snug. And let’s not forget winter, where fluffy, warm fabrics can create a haven for your pet during those chilly nights.
To get started on your seasonal pet bed, consider the following ideas:
- Spring: Use floral patterns and light colors. Consider adding a removable cover that can be easily washed.
- Summer: Choose breathable fabrics like cotton or linen. Bright colors and fun prints can make your pet's bed feel like a summer getaway.
- Autumn: Opt for warm colors like orange, red, and brown. Adding a plaid or checkered pattern can evoke a cozy, rustic feel.
- Winter: Use thick, plush fabrics. Think about incorporating snowflake designs or deep, rich colors that evoke the holiday spirit.
Additionally, you can personalize these seasonal beds with accessories that reflect the time of year. Think of adding small decorative elements like seasonal toys or themed cushions. For instance, during Halloween, you might add a cute pumpkin-shaped toy or a blanket with ghost patterns. In December, a bed with Christmas-themed pillows can make your pet feel part of the holiday festivities.
Ultimately, creating seasonal-themed pet beds is not just about aesthetics; it’s about making your pet feel loved and comfortable in their own space. By infusing a bit of creativity and seasonal flair into their resting area, you’re not just giving them a bed; you’re creating a cozy retreat that they can enjoy throughout the year. So, gather your materials, unleash your creativity, and watch your pet snuggle into their new favorite spot!
Q1: How do I choose the right fabric for a seasonal pet bed?
A1: When selecting fabric, consider the season and your pet's comfort. For warmer months, opt for breathable fabrics like cotton, while for colder seasons, thicker materials like fleece or flannel can provide warmth.
Q2: Can I wash the seasonal-themed pet bed?
A2: Absolutely! It’s advisable to use removable covers that can be machine washed. This ensures that your pet’s bed remains clean and fresh throughout the seasons.
Q3: How often should I change the theme of my pet’s bed?
A3: You can change the theme with each new season or holiday. This not only keeps your pet’s space looking fresh but also allows you to express your creativity!
Frequently Asked Questions
-
What materials are best for upcycling into a pet bed?
When choosing materials for your DIY pet bed, look for items that are soft, durable, and easy to clean. Fabrics like cotton or fleece are excellent choices, while sturdy bases can come from old furniture or crates. Always ensure that the materials are safe for pets, avoiding anything that could pose a choking hazard or contain harmful chemicals.
-
How can I transform an old chair into a pet bed?
Transforming an old chair into a pet bed is a fun project! Start by removing the seat cushion and replacing it with foam padding for comfort. Then, cover it with a soft fabric that matches your home decor. Secure everything in place, and voilà! You’ve created a stylish and cozy resting spot for your furry friend.
-
Can I use blankets and pillows to make my pet's bed more comfortable?
Absolutely! Layering blankets and pillows is a fantastic way to add extra comfort and warmth to your pet's bed. You can use upcycled blankets or pillows that you no longer need. Just make sure they are clean and safe for your pet to snuggle up with!
-
What are some creative ways to personalize my pet's bed?
Personalizing your pet's bed can be as simple as adding their name or fun designs with fabric paint or embroidery. You can also choose fabric patterns and colors that reflect your pet’s personality or even create seasonal themes to keep things fresh and exciting throughout the year.
-
How do I create a DIY mattress for my pet?
Creating a DIY mattress can be a rewarding project! Start by gathering materials like foam, old blankets, or even old mattresses. Cut the foam to the desired size, cover it with fabric, and secure it. This way, you can create a plush sleeping surface tailored to your pet's needs!


