Reinvent Old Garage Stuff into Something Useful
Have you ever opened your garage door and been greeted by a chaotic jumble of forgotten treasures? It’s like stepping into a time capsule filled with potential! Instead of letting those old items collect dust, why not breathe new life into them? In this article, we’re diving into the exciting world of upcycling and repurposing. We’ll explore creative ways to transform cluttered garage items into functional and stylish objects that not only declutter your space but also tell a story. Think of your garage as a treasure trove waiting to be discovered, where each item has the potential to become something extraordinary.
Imagine turning that rusty old bicycle into a chic garden planter or transforming an outdated chair into a trendy side table. The possibilities are endless! Not only does this process save you money, but it also allows you to express your creativity and personality in your home decor. So grab your tools, roll up your sleeves, and let’s embark on a journey to reinvent old garage stuff into useful and beautiful creations!
Before we dive headfirst into our projects, it’s crucial to take stock of what you have lurking in your garage. This isn’t just about clearing out the clutter; it’s about discovering hidden gems that can be transformed into something marvelous. Start by pulling everything out and categorizing your items. You might find old furniture, tools, crates, or even forgotten decor items. By assessing your inventory, you can identify potential materials for repurposing and ensure you make the most of your garage’s hidden treasures.
As you sort through your items, ask yourself some key questions:
- What items do I no longer use or need?
- Which pieces are in good condition and can be easily transformed?
- What materials do I have that could serve as a base for new creations?
Taking the time to evaluate your garage inventory will not only streamline your projects but also spark inspiration for new ideas. You’ll be surprised at how many useful items are just waiting to be reinvented!
Old furniture pieces can be revitalized with a bit of creativity and elbow grease. Instead of tossing out that worn-out chair or table, consider how you can transform it into something stylish and functional. For instance, a shabby chic coffee table can be painted and distressed to create a vintage look that enhances your living space. Or, an outdated dining chair can be reupholstered with vibrant fabric, giving it a fresh new vibe.
Here are a few techniques for upcycling furniture:
- Painting: A fresh coat of paint can do wonders. Choose colors that complement your decor.
- Reupholstering: Change the fabric on cushions or seats to give them a modern twist.
- Adding Hardware: Swap out old knobs and handles for unique ones that add character.
By using these techniques, you can turn old furniture into statement pieces that reflect your personal style and enhance your home.
Wooden pallets are a fantastic resource for DIY enthusiasts. They are not only versatile but also readily available and often free! With a little creativity, you can transform pallets into various projects that serve both functional and aesthetic purposes. From outdoor furniture to garden planters, the potential is limitless.
Building a bench from pallets is a straightforward project that can add seating to your space, whether it’s indoors or outdoors. Start by selecting sturdy pallets and sanding them down to remove any rough edges. Then, stack them to your desired height and secure them with screws. Finish it off with a coat of outdoor paint or sealant to protect it from the elements. This simple project not only provides additional seating but also serves as a conversation starter!
Transforming pallets into planters can enhance your garden or patio while saving space. Consider creating vertical planters that allow you to grow herbs or flowers in a compact area. Simply attach a pallet to a wall, fill the slats with soil, and plant your favorites. Alternatively, horizontal planters can be made by cutting a pallet in half and using it as a raised bed. These creative designs not only beautify your outdoor space but also promote sustainability.
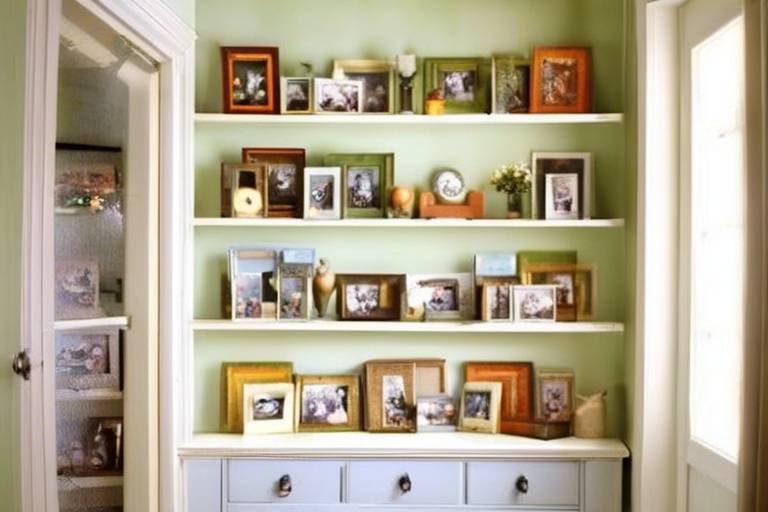
Old items can be reimagined into practical storage solutions that help declutter your space while adding character. Think outside the box—crates can become stylish shelves, jars can serve as organizers for small items, and old suitcases can be turned into unique storage boxes. By creatively repurposing these items, you can create functional storage that also adds a touch of charm to your home.
Unwanted items can be transformed into unique art pieces that reflect your personality. Why not take that old bicycle wheel or rusty tools and turn them into eye-catching sculptures or wall art? This not only gives new life to forgotten objects but also adds a personal touch to your decor. Art made from garage finds can tell a story and serve as a conversation starter in your home.
Repurposing tools into art can add a quirky touch to your decor. Imagine a sculpture made from old wrenches or a wall hanging crafted from saw blades. These projects can be as simple or complex as you like, allowing you to showcase your creativity and craftsmanship. Plus, they’re a great way to honor the tools that have served you well over the years!
Scrap metal can be transformed into stunning art pieces that capture attention and spark conversation. Explore various techniques for welding and assembling metal scraps into sculptures that reflect your style. Whether it’s a whimsical garden decoration or a striking indoor piece, the beauty of scrap metal art lies in its uniqueness and the stories behind each piece.
Q: What are some easy projects for beginners?
A: Start with simple projects like painting old furniture, creating pallet planters, or making decorative storage solutions from jars and crates.
Q: How can I find materials for upcycling?
A: Check local classifieds, garage sales, or even your own garage! Many items can be repurposed with a little creativity.
Q: Do I need special tools for these projects?
A: Basic tools like a hammer, screwdriver, and paintbrush are often sufficient. As you progress, you can invest in more specialized tools if needed.

Assessing Your Garage Inventory
Before diving headfirst into your next DIY project, it's crucial to take a moment and assess your garage inventory. Picture this: you open your garage door, and a treasure trove of forgotten items greets you. But wait! Instead of feeling overwhelmed by the clutter, think of it as an opportunity to uncover hidden gems. This step is not just about clearing space; it’s about recognizing the potential in what you already have. So, where do you begin?
Start by pulling everything out into the open. This might feel like a daunting task, but trust me, it’s the best way to get a clear view of what you’re working with. As you sift through the items, categorize them into three groups: keep, donate, and repurpose. This method not only helps declutter but also sparks creativity as you consider how each item could be transformed.
While sorting, pay special attention to the materials you have on hand. Old furniture, wooden pallets, and even rusty tools can be reimagined into something beautiful and functional. For example, wooden crates can become stylish storage solutions, while an old chair can be transformed into a chic garden planter. The possibilities are endless! Here’s a quick table to help you visualize some common garage items and their potential repurposing ideas:
| Item | Potential Repurposing Ideas |
|---|---|
| Wooden Pallets | Pallet benches, garden planters, wall art |
| Old Chairs | Garden planters, pet beds, decorative shelving |
| Glass Jars | Storage containers, candle holders, herb gardens |
| Rusty Tools | Art pieces, garden decorations, wall hangings |
As you evaluate your inventory, don’t forget to consider the emotional value of certain items. Maybe that old bicycle holds memories of summer adventures, or a worn-out table reminds you of family gatherings. While it’s essential to declutter, it’s also important to keep items that bring joy or nostalgia. Balance is key! A good rule of thumb is to ask yourself, “Will I use this? Does it spark joy?” If the answer is no, it might be time to let it go.
Once you've assessed your garage inventory, you’ll be better equipped to embark on your upcycling journey. The next step is to brainstorm creative projects that utilize your newfound materials. Remember, every item has a story, and with a little imagination, you can turn those stories into something spectacular. So roll up your sleeves, grab your tools, and let’s get started on transforming those forgotten treasures into functional and stylish pieces!
- What if I don’t know how to repurpose an item? No worries! There are countless resources online, including tutorials and DIY blogs, that can guide you through the process.
- Can I repurpose items that are broken? Absolutely! Sometimes, broken items can be even more interesting when repurposed creatively.
- How do I decide what to keep and what to toss? Consider the item's condition, potential uses, and emotional value. If it doesn’t fit into any of these categories, it might be time to let it go.

Upcycling Furniture
Old furniture pieces can often feel like unwanted guests in our homes, taking up space and collecting dust. But what if I told you that these forgotten items could be transformed into beautiful, functional pieces that enhance your living space? Upcycling furniture is not just a way to declutter; it’s an opportunity to express your creativity and give new life to items that might otherwise end up in a landfill. Imagine turning that old, scratched-up coffee table into a stunning centerpiece for your living room or transforming a worn-out chair into a stylish accent piece. The possibilities are endless!
One of the best parts about upcycling furniture is that it allows you to customize pieces to fit your personal style. You can choose colors, textures, and finishes that reflect your unique taste. For instance, if you have an old wooden dresser, consider giving it a fresh coat of paint and swapping out the knobs for something more modern. This simple update can completely change the look of the piece and make it feel brand new. Not only does this process save money, but it also adds character to your home, making it truly yours.
Let’s dive into some creative techniques for upcycling furniture:
- Painting and Staining: A fresh coat of paint or stain can completely transform the look of any piece. Consider using chalk paint for a matte finish or a bold color to make a statement.
- Reupholstering: If you have an old chair or sofa that’s seen better days, reupholstering it can breathe new life into it. Choose a fabric that complements your decor and get to work!
- Adding New Hardware: Sometimes, all it takes to elevate a piece is changing out the hardware. New knobs or handles can make a world of difference.
But upcycling furniture isn’t just about aesthetics; it’s also about sustainability. By repurposing old furniture, you’re helping to reduce waste and minimize your carbon footprint. It’s a win-win situation! Plus, each upcycled piece tells a story, adding depth and history to your home. You can even involve your family in the process, turning it into a fun weekend project that everyone can enjoy.
As you embark on your upcycling journey, remember that the only limit is your imagination. So, gather your tools, channel your inner artist, and let’s transform those old furniture pieces into stunning works of art that you’ll be proud to showcase in your home!

Repurposing Wooden Pallets
Wooden pallets are not just the unsung heroes of shipping and storage; they are also the perfect canvas for your next DIY project! With a little creativity and some elbow grease, these pallets can be transformed into stunning furniture pieces, garden enhancements, or even decorative art. Imagine turning a stack of old, forgotten pallets into a beautiful outdoor bench or a rustic planter that adds charm to your garden. The possibilities are endless, and the best part is that it's an eco-friendly way to give new life to what would otherwise be considered waste.
Before diving into your pallet projects, it's essential to understand the different types of pallets you might encounter. Most commonly, you'll find two varieties: standard pallets and Euro pallets. Standard pallets are typically made from softwood, while Euro pallets are made from a combination of hardwood and softwood, making them sturdier. When selecting pallets for your projects, look for ones that are in good condition—free from major damage or excessive wear. A quick inspection will ensure you choose the best candidates for your creative endeavors.
One of the most popular projects to undertake is creating a pallet bench. This project is not only straightforward but also incredibly rewarding. You can start by disassembling the pallets to create flat pieces of wood. From there, you can customize the size and design to fit your space perfectly. Adding some cushions can make your bench not only functional but also comfortable, turning it into a cozy spot for relaxation or entertaining guests. Plus, you can stain or paint the wood to match your existing decor, giving it a personalized touch.
Another fantastic way to repurpose pallets is by creating garden planters. Vertical planters made from pallets are particularly trendy, as they save space while adding a vertical element to your garden. To create a vertical planter, simply secure the pallets upright and fill the slats with soil and your favorite plants. This not only beautifies your outdoor space but also makes gardening accessible, even in small areas. Horizontal planters are equally charming and can be used to create a rustic display for herbs or flowers on your patio.
In summary, repurposing wooden pallets is a fun and rewarding way to enhance your living space and garden. Whether you're crafting a bench, a planter, or something entirely unique, the only limit is your imagination. So, gather those old pallets from your garage, roll up your sleeves, and let your creativity run wild!
- What types of pallets are best for DIY projects? Standard and Euro pallets are ideal for most projects, with Euro pallets being sturdier.
- How do I ensure my pallets are safe to use? Look for pallets that are clean, free of chemicals (marked with "HT" for heat-treated), and in good condition.
- Can I use pallets indoors? Yes, as long as they are properly cleaned and treated to avoid any pests or contaminants.

Creating a Pallet Bench
Building a pallet bench is not only a fun DIY project but also a fantastic way to add some rustic charm to your outdoor or indoor space. Imagine transforming those old, forgotten wooden pallets into a cozy seating area where you can sip your morning coffee or enjoy an evening with friends. This project is surprisingly simple and can be completed in just a few hours, making it perfect for both seasoned DIY enthusiasts and beginners.
To get started, you'll need to gather your materials. The beauty of using pallets is that they are often free or low-cost, making this project budget-friendly. Here’s a quick list of what you’ll need:
- 2-4 wooden pallets (depending on the size of the bench)
- Sandpaper or a power sander
- Wood screws
- Drill
- Wood stain or paint (optional)
- Outdoor cushions (for comfort)
Once you have your materials, the first step is to prepare the pallets. Start by sanding down the surfaces to remove any rough edges or splinters. This is crucial for safety, especially if you plan to use cushions. After sanding, you can choose to stain or paint the pallets to match your decor. This is where you can really let your creativity shine! Consider using bright colors for a playful look or stick to natural wood tones for a more classic feel.
Next, it’s time to assemble your bench. The simplest design is to stack two pallets on top of each other for the seat and use another pallet for the backrest. Secure them together with wood screws, ensuring that everything is sturdy. If you want to get a bit more advanced, you can create a more elaborate design with armrests or even a built-in storage area underneath the seat.
Finally, once your bench is assembled, add some comfortable cushions to make it a cozy spot to relax. You can even throw in some outdoor pillows for a pop of color and extra comfort. Now, you’ve not only created a functional piece of furniture but also a stylish addition to your space that showcases your creativity and resourcefulness.
In summary, creating a pallet bench is an excellent way to repurpose old materials while adding a personal touch to your home or garden. It’s a project that reflects your style and is sure to impress your guests. Plus, every time you sit down, you’ll be reminded of the hard work and creativity that went into making it. So, grab those pallets and get started on your next DIY adventure!
1. How much weight can a pallet bench hold?
A well-constructed pallet bench can hold a significant amount of weight, typically up to 500 pounds, depending on the quality of the pallets used and the construction methods.
2. Can I use pallets that have been treated with chemicals?
It's best to avoid using pallets that are marked with the "MB" stamp, as they may have been treated with harmful chemicals. Look for pallets that are marked with "HT" (heat-treated) or are untreated for safety.
3. How do I maintain my pallet bench?
To maintain your pallet bench, regularly check for any signs of wear or damage. If you’ve stained or painted it, consider reapplying a protective coat every few years to keep it looking fresh.
4. Can I use my pallet bench indoors?
Absolutely! A pallet bench can be a stylish addition to any indoor space. Just be sure to sand it down thoroughly and finish it properly to avoid splinters.
Pallet Planter Ideas
Transforming wooden pallets into planters is not just a sustainable way to utilize those old, forgotten pieces of wood; it’s also a fantastic opportunity to add a splash of green to your garden or patio. Imagine turning that dusty, neglected pallet into a vibrant display of flowers or herbs that not only beautifies your space but also showcases your creativity. With a little bit of imagination and some basic tools, you can create stunning pallet planters that will have your neighbors asking for tips!
One of the simplest yet most effective designs is the **vertical pallet planter**. This design allows you to save space while maximizing your planting area. To create a vertical planter, you can lean a pallet against a wall or fence and fill the slats with soil and your choice of plants. Think of it as a **living wall**! You can plant cascading flowers like petunias or even herbs like basil and thyme, which can be easily snipped for cooking. The best part? It’s a conversation starter that will surely catch the eye.
If you prefer something a bit more traditional, consider crafting a **horizontal pallet planter**. This design involves laying the pallet flat on the ground and filling the open spaces with soil. You can then plant flowers, vegetables, or even succulents. To add a personal touch, why not paint the pallet in a bright color or stain it to match your outdoor decor? You can also add a trellis on one side for climbing plants like peas or beans, creating a stunning visual effect while maximizing your garden’s potential.
For those who want to get a little more adventurous, try creating a **tiered pallet planter**. This involves stacking multiple pallets on top of each other, allowing you to create different planting levels. Each tier can host different plants, creating a beautiful gradient effect as they grow. Imagine a tiered planter filled with colorful flowers, herbs, and even small vegetables, all thriving together. This type of planter not only looks great but also makes it easier to care for your plants, as you can access each level without bending down too much.
To help you get started, here’s a quick checklist of items you’ll need:
- Old wooden pallets
- Soil suitable for your chosen plants
- Plants or seeds
- Paint or wood stain (optional)
- Gardening tools (shovel, gloves, etc.)
In addition to being functional, pallet planters can also be a delightful addition to your home’s aesthetic. You can decorate them with fairy lights for a whimsical touch or even add some decorative stones around the base for a polished look. The possibilities are endless, and the only limit is your imagination. So, roll up your sleeves and get ready to breathe new life into those old pallets!
Q: Can I use any type of pallet for planting?
A: It's best to use heat-treated pallets rather than chemically treated ones, as the latter may leach harmful substances into the soil.
Q: How do I ensure proper drainage in my pallet planters?
A: Make sure to drill holes in the bottom of the pallet slats to allow excess water to escape. You can also add a layer of gravel at the bottom for improved drainage.
Q: What types of plants work best in pallet planters?
A: Herbs, flowers, and small vegetables are great choices. Just ensure that the plants you choose are compatible with the amount of sunlight and space available in your planter.
Crafting Storage Solutions
When it comes to decluttering your home, the garage often harbors a treasure trove of forgotten items that can be transformed into functional storage solutions. Imagine turning that dusty old crate into a chic organizer for your living room or repurposing glass jars into stylish storage for your craft supplies. The beauty of crafting storage solutions from garage finds lies in the ability to blend creativity with practicality, making your space not just organized but also uniquely yours.
Old wooden crates, for instance, can serve a dual purpose. Not only do they provide ample storage, but they can also add a rustic charm to your decor. You can stack them to create a bookshelf, or even hang them on the wall for a trendy display that holds your favorite books or decorative items. The versatility of crates allows you to customize their look by simply painting or staining them to match your existing color scheme.
Another fantastic option is repurposing glass jars. These little gems can be used to store everything from spices in the kitchen to small tools in the garage. You can group them on a shelf or use them as a centerpiece on your dining table. For a more organized approach, consider labeling each jar. This not only makes it easier to find what you need but also adds a personal touch that reflects your style. Here’s a quick idea: paint the lids of the jars in different colors to create a vibrant display!
If you have old shoe boxes lying around, don’t throw them away just yet! They can be transformed into decorative storage boxes. Simply cover them with wrapping paper or fabric that matches your decor, and voilà! You now have stylish boxes to store anything from seasonal decorations to office supplies. You can even stack them for a more organized look, making use of vertical space that often goes unnoticed.
For those with a bit more DIY spirit, consider creating a pegboard wall in your garage or workspace. This allows you to hang tools, craft supplies, or even kitchen utensils, keeping everything visible and easily accessible. Plus, you can customize the layout to suit your needs, making it a truly personal storage solution. The best part? It’s an inexpensive project that can significantly declutter your space.
As you embark on your journey of crafting storage solutions, remember that the key is to let your imagination run wild. The possibilities are endless, and the only limit is your creativity. By repurposing old items, you not only save money but also contribute to a more sustainable lifestyle. So, gather those forgotten treasures from your garage, and start transforming them into practical and stylish storage solutions that reflect your unique taste.
- What types of items can I repurpose for storage? You can repurpose crates, jars, boxes, and even furniture. Almost anything can be transformed with a bit of creativity!
- How do I ensure my repurposed items match my decor? Consider painting or staining items to match your color scheme, or use fabric and wrapping paper for a cohesive look.
- Are there any specific tools I need for these projects? Basic tools like a hammer, nails, glue, and paint are often sufficient for most repurposing projects.
- Can I create storage solutions without any DIY experience? Absolutely! Many projects are simple and can be done with minimal skills. Start with easy tasks and gradually take on more complex projects.

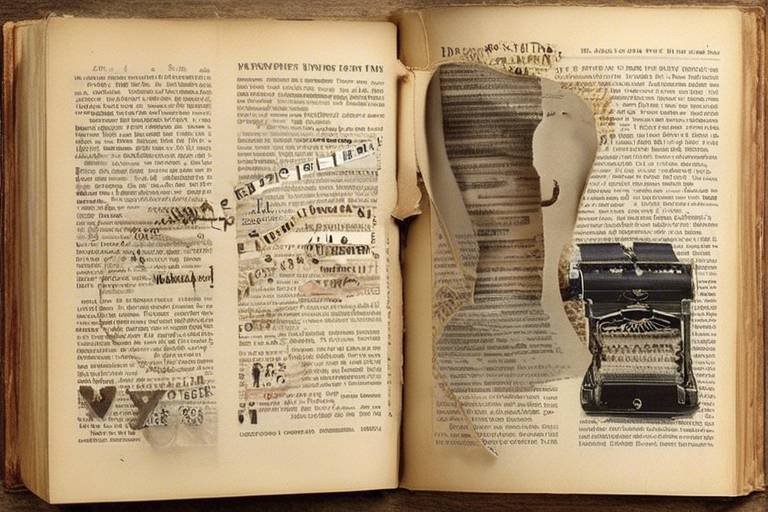
Creating Art from Garage Finds
Have you ever looked at a pile of junk in your garage and thought, "This could be something amazing"? Well, you’re not alone! Many of us have treasures hidden beneath layers of dust and forgotten memories. The beauty of transforming unwanted items into art lies in the creativity and imagination you bring to the table. With a little bit of effort, those rusty tools and old scraps can become stunning pieces that embody your unique style and personality.
Let’s dive into the world of art made from garage finds! Imagine turning a broken bicycle into a whimsical garden sculpture or using old drawers to create an eye-catching wall display. The possibilities are endless! Not only does this process allow you to express your artistic flair, but it also promotes sustainability by giving new life to items that would otherwise end up in a landfill.
To get started, consider the types of materials you have on hand. Here are some common garage finds that can be transformed into art:
- Old Tools: Wrenches, hammers, and saws can be repurposed into unique wall art or garden decorations.
- Scrap Metal: Pieces of metal can be welded or assembled into sculptures that make bold statements.
- Wooden Pallets: These can be transformed into rustic signs, wall art, or even furniture.
- Glass Jars: With a little creativity, these can become beautiful lanterns or terrariums.
One of the most popular projects is creating tool art. This involves taking old, rusty tools and arranging them in creative ways. For example, you could create a shadow box display featuring vintage tools, or even make a garden trellis using old rakes and shovels. The contrast of the weathered metal against a vibrant backdrop can create a striking visual effect that captures attention.
Another exciting avenue is using scrap metal to create sculptures. If you have some welding skills (or know someone who does), you can experiment with various metal pieces to form anything from abstract shapes to lifelike animals. The beauty of scrap metal art lies in its unpredictability; each piece tells a story through its textures and shapes, making it a conversation starter in any space.
As you embark on your artistic journey, remember to let your imagination run wild. There are no strict rules when it comes to creating art from garage finds. It’s all about experimenting, playing with different materials, and finding joy in the process. So, gather your tools, roll up your sleeves, and let’s turn that clutter into something truly spectacular!
Q: What types of materials are best for creating art from garage finds?
A: Almost anything can be used! Look for old tools, scrap metal, wooden pallets, glass jars, and any other items that catch your eye.
Q: Do I need special skills to create art from garage finds?
A: While some projects may require basic crafting or welding skills, many can be completed with simple tools and a bit of creativity. Don’t be afraid to experiment!
Q: How do I protect outdoor art made from garage finds?
A: To protect your creations from the elements, consider using weather-resistant finishes or paints. This will help preserve the art and keep it looking fresh for years to come.
Q: Can I sell my garage find art?
A: Absolutely! Many people enjoy purchasing unique, handmade items. Consider setting up an online shop or participating in local craft fairs to showcase your creations.
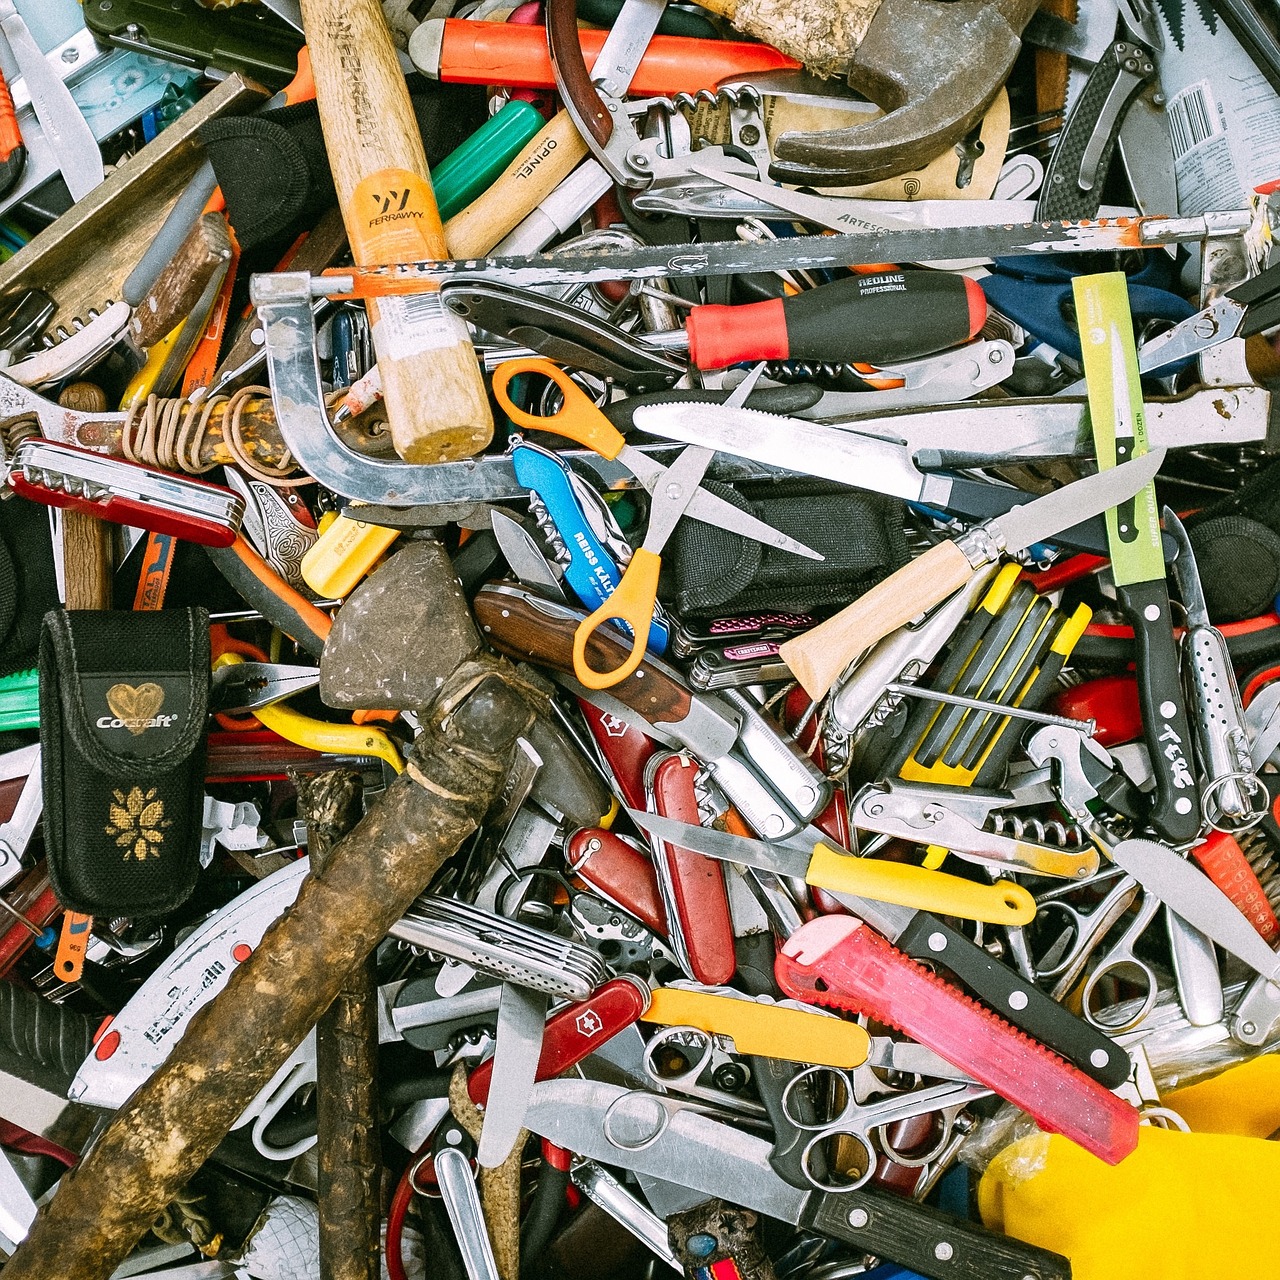
Tool Art Projects
Have you ever looked at a rusty old wrench or a broken saw and thought, "What a shame to just toss this away!"? Well, you're not alone! are a fantastic way to breathe new life into forgotten garage items, turning them into stunning pieces of decor that tell a story. Imagine walking into your home and being greeted by a quirky sculpture made from tools that once served a purpose but are now retired. It’s like giving your old tools a second chance at life, and the best part? It’s a fun, creative outlet!
One of the most exciting aspects of creating tool art is the sheer variety of items you can use. From hammers and screwdrivers to old saw blades and pliers, the possibilities are endless. You can create everything from wall hangings to free-standing sculptures. For instance, consider making a wall-mounted art piece that features a collection of vintage tools arranged in an artistic manner. Not only does this showcase your creativity, but it also adds a unique, industrial vibe to your space.
But how do you get started? First, gather your tools and any other scrap materials you might have lying around. Then, think about the kind of art you want to create. Here are a few ideas to spark your imagination:
- Tool Shadow Boxes: Create a shadow box filled with tools arranged in an eye-catching pattern. Frame it nicely, and you have a conversation starter!
- Garden Sculptures: Use larger tools like shovels or rakes to create whimsical garden sculptures that can add character to your outdoor space.
- Tool Wreaths: For a seasonal touch, consider making a wreath using small tools. This can be a fun project for holidays, adding a unique twist to traditional decorations.
When working with tools, safety should always be a priority. Make sure to wear gloves and goggles, especially when cutting or welding metal. If you're new to welding, consider taking a class or watching some tutorials online to get the hang of it. Once you feel confident, you'll be amazed at what you can create!
Finally, don't forget to let your personality shine through in your projects. Whether you prefer a rustic look or something more modern, your tool art should reflect your unique style. So, the next time you find yourself in your garage, take a moment to look at those old tools with a new perspective. They could become the centerpiece of your home, a conversation starter, or even a cherished gift for someone special.
Q: What types of tools can I use for tool art projects?
A: Almost any old tools can be used! Common choices include wrenches, screwdrivers, hammers, and saw blades. Just ensure they are clean and safe to handle.
Q: Do I need special skills to create tool art?
A: While some projects may require basic welding skills, many can be completed with just a little creativity and basic crafting tools. Tutorials are available online to guide you through the process.
Q: How can I display my tool art?
A: Tool art can be displayed in various ways, such as wall hangings, garden sculptures, or even as part of your home decor. Get creative with how you showcase your work!
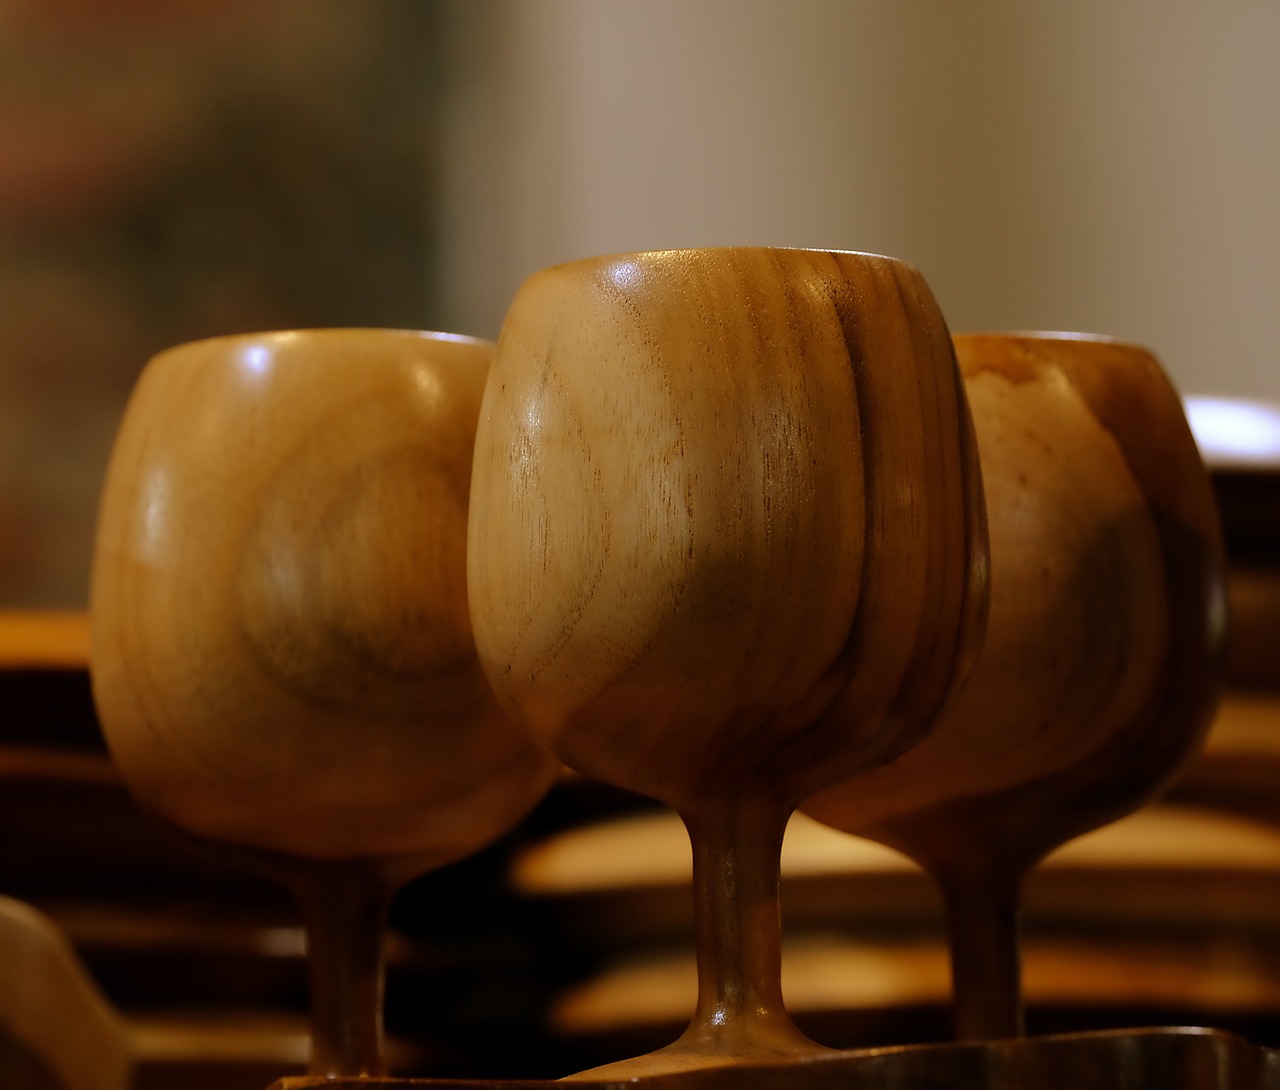
Using Scrap Metal Creatively
When it comes to transforming your garage clutter into something spectacular, scrap metal is like a treasure trove waiting to be discovered. You might think of it as just a pile of rusty junk, but with a little imagination and creativity, those scraps can turn into stunning art pieces that not only beautify your space but also spark conversations. Imagine walking into your home and being greeted by a whimsical sculpture made entirely from old tools and metal scraps; it’s a fantastic way to showcase your personality and artistic flair!
One of the most exciting aspects of working with scrap metal is the freedom of expression it offers. You don’t have to be a professional artist to create something beautiful. Start by gathering your scrap metal pieces—this could include anything from old car parts, discarded tools, to leftover pieces from previous projects. The key is to look at each piece with a fresh perspective. What can this become? Can that old wrench be transformed into a bird? Could those rusty gears form the base of a unique lamp? The possibilities are endless!
To get you started, here are some creative ideas to inspire your scrap metal art projects:
- Sculptures: Use various metal pieces to create abstract or themed sculptures. For example, intertwining rods can form a modern art piece, while old hammers and wrenches can be arranged to create a whimsical animal figure.
- Garden Art: Enhance your garden with metal flowers or garden stakes made from scrap. These can add a touch of charm and uniqueness to your outdoor space.
- Furniture Accents: Integrate scrap metal into furniture designs. Think about using old metal pipes as table legs or creating a stunning coffee table with a metal base and a glass top.
Once you have your vision, it’s time to get to work. Depending on your project, you might need some basic tools such as a welder, grinder, and safety gear. If welding is new to you, don’t worry! There are plenty of online tutorials and local workshops that can guide you through the basics. Just remember to prioritize safety—metalworking can be hazardous if proper precautions aren’t taken.
As you start assembling your pieces, think about the story each item tells. For instance, a rusty old bicycle wheel can become a stunning wall clock, or an old shovel can be transformed into a unique garden sign. This not only adds character to your creations but also gives them a personal touch that reflects who you are.
Finally, don’t be afraid to experiment and make mistakes. Art is all about exploration and finding what works for you. If a project doesn’t turn out as planned, consider it a learning experience. You might even discover a new technique or idea that leads to your next masterpiece!
Q: What tools do I need to start working with scrap metal?
A: Basic tools include a welder, grinder, pliers, and safety gear like goggles and gloves. Depending on your project, you might also need a drill and cutting tools.
Q: Can I work with scrap metal indoors?
A: It's best to work with scrap metal outdoors or in a well-ventilated area due to fumes and sparks produced during welding and cutting.
Q: Where can I find scrap metal?
A: Look for scrap metal at junkyards, construction sites, or even in your garage. Friends and family might also have old items they’re willing to part with!
Q: Do I need to clean the metal before using it?
A: Yes, cleaning the metal will help with adhesion and improve the overall look of your finished piece. Remove any rust, dirt, or grease before starting your project.
Frequently Asked Questions
- What items can I repurpose from my garage?
You can repurpose a wide variety of items from your garage, including old furniture, wooden pallets, jars, crates, and even tools. The key is to assess what you have and think creatively about how to transform these items into something functional or artistic.
- How do I start assessing my garage inventory?
Begin by taking everything out of your garage and sorting items into categories: keep, donate, recycle, and repurpose. This will help you see what you have and identify potential materials for your projects. Don’t forget to check hidden corners or shelves for forgotten treasures!
- Can I really make furniture from wooden pallets?
Absolutely! Wooden pallets are incredibly versatile and can be transformed into various furniture pieces like benches, tables, and even beds. There are countless tutorials available online that can guide you through the process of disassembling and reassembling pallets into stylish furniture.
- What are some creative ideas for pallet planters?
Pallet planters can be designed in many ways, such as vertical gardens, tiered planters, or even simple horizontal boxes. You can paint them, add liners, and customize them to fit your garden style. They’re a fantastic way to save space while showcasing your favorite plants!
- How can I turn old tools into art?
Old tools can be transformed into unique art pieces by arranging them into sculptures or wall art. You can create a shadow box display, a garden sculpture, or even a quirky wall-mounted piece that reflects your personality. The possibilities are endless!
- Is scrap metal suitable for artistic projects?
Yes, scrap metal is an excellent material for creating stunning art pieces. You can weld or assemble various metal scraps into sculptures, garden art, or decorative items. Just be sure to handle sharp edges with care and use proper safety equipment when working with metal.