
Repurpose Old Wine Corks into a Charming Bulletin Board
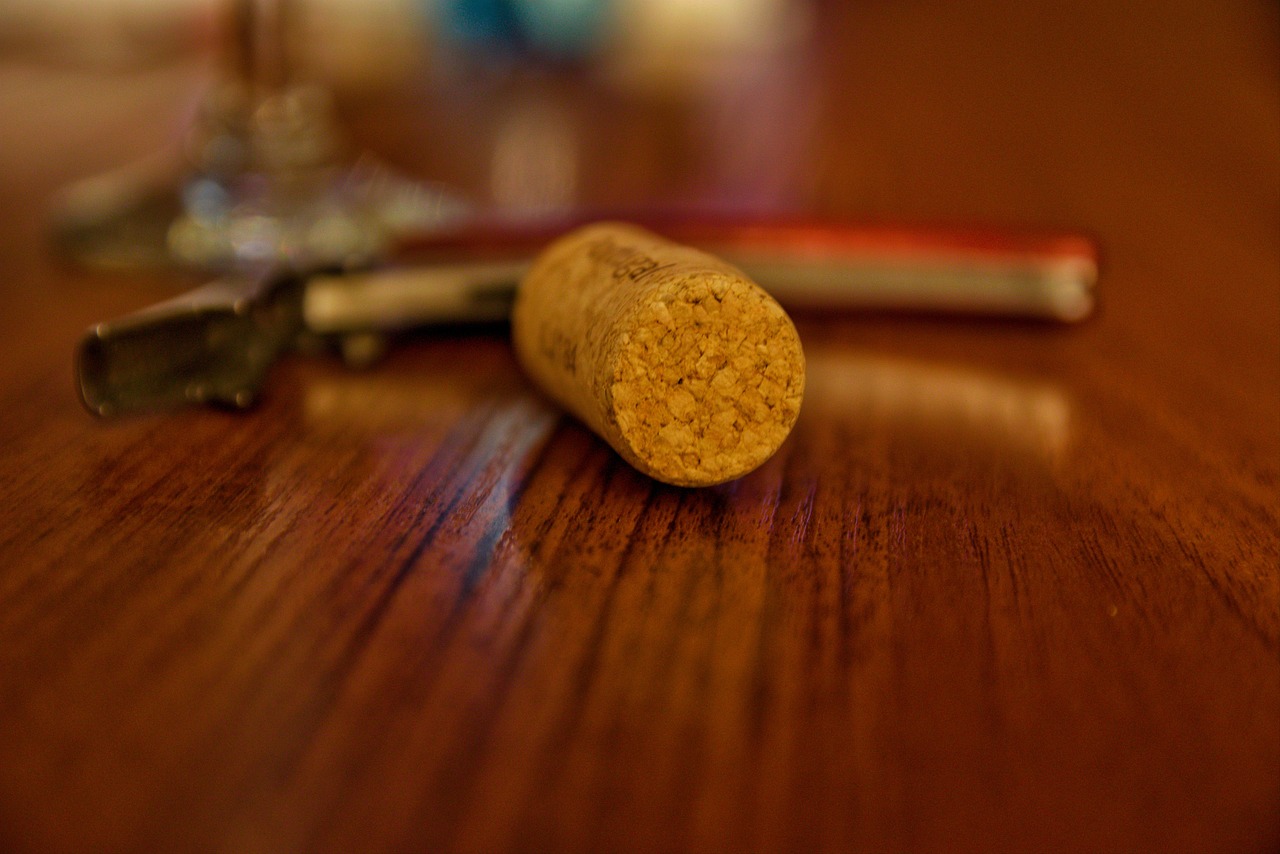
Have you ever found yourself staring at a pile of old wine corks, wondering what to do with them? Instead of tossing them in the trash, why not transform them into a delightful bulletin board? This project not only gives your home a unique touch but also promotes sustainability and resourcefulness. Imagine a charming board filled with memories, notes, and reminders, all held together by these little pieces of cork. It’s like giving your old wine corks a second life—one that’s both functional and decorative!
Creating a bulletin board from wine corks is an exciting way to express your creativity. You can customize it to match your home decor, making it a perfect conversation starter. Plus, it’s a fantastic way to showcase your love for wine and the memories associated with it. Whether you’re a wine enthusiast or simply looking for a fun DIY project, repurposing wine corks into a bulletin board is a rewarding endeavor that adds character to any room.
In this article, we’ll guide you through the process step-by-step, from gathering materials to adding those final touches that make your cork board truly unique. Get ready to unleash your creativity and turn those old corks into something spectacular!
Before diving into this exciting project, it’s essential to gather all the necessary materials. You’ll need:
- Old wine corks (the more, the merrier!)
- A base for your bulletin board (options include corkboard, wood, or canvas)
- Adhesives (hot glue, craft glue, or epoxy)
- Tools for cutting or shaping (if needed)
- Decorative elements (optional, but highly encouraged!)
Once you have everything ready, you’ll be well on your way to creating a charming piece of decor that not only serves a purpose but also tells a story.
Selecting the ideal base for your bulletin board is crucial. The base you choose will significantly impact the final design and functionality of your board. Let’s explore some options:
- Corkboard: A classic choice that complements the corks beautifully.
- Wood: Offers durability and a rustic feel.
- Canvas: Provides a unique texture and is lightweight.
Each option has its own charm, and your choice will depend on your personal style and the look you want to achieve. A wooden base, for instance, can add a touch of warmth and elegance, making it a popular choice among DIY enthusiasts.
Using a wooden base for your bulletin board comes with several advantages. Not only does it provide a sturdy foundation, but it also adds a rustic charm that pairs beautifully with wine corks. The natural grain of the wood can enhance the aesthetic appeal, creating a warm and inviting atmosphere in your space. Plus, wood is incredibly versatile—you can paint it, stain it, or leave it natural, depending on your design preferences.
When selecting wood for your bulletin board, consider these options:
| Type of Wood | Characteristics | Suitability |
|---|---|---|
| Pine | Lightweight, easy to work with | Great for beginners |
| Oak | Durable, strong, beautiful grain | Ideal for a more polished look |
| Plywood | Cost-effective, stable | Good for larger boards |
Each type of wood brings its own unique qualities to the project, so choose one that resonates with your style and needs.
Proper preparation of the wooden base is key to ensuring a successful project. Start by sanding the surface to create a smooth finish. This step is crucial as it helps the adhesive bond better. You can also consider painting or staining the wood to match your decor or to create a contrasting backdrop for the corks. A well-prepared base will make your bulletin board not only look better but also last longer.
Once your base is ready, it’s time to think about how to arrange the corks. The arrangement can significantly affect the overall look of your bulletin board. Here are some ideas to inspire you:
- Random Pattern: For a casual, eclectic vibe.
- Color Gradient: Arrange corks by color for a striking visual effect.
- Spelling Out Words: Create a fun message or quote with the corks.
Let your imagination run wild! The arrangement you choose can reflect your personality and style, making your bulletin board truly one-of-a-kind.
Now that you have your corks arranged, it’s time to secure them in place. There are several adhesive options available, each with its own benefits. Hot glue is a popular choice for its quick-drying properties, making it easy to work with. Simply apply a small amount to the cork and press it onto the base. Be careful, though; hot glue can be tricky if you’re not used to it!
Hot glue is fantastic for this project because it dries quickly and forms a strong bond. Just remember to work swiftly and avoid applying too much glue, as it can ooze out and create a mess. If you’re new to hot glue, practice on a scrap piece of material first to get the hang of it!
If hot glue isn’t your preferred method, don’t worry! There are other adhesive options available, such as craft glue or epoxy. Craft glue is easier to work with, but it may take longer to dry. Epoxy provides a strong bond, making it suitable for heavier corks. Each adhesive has its pros and cons, so choose one that fits your project needs.
To make your bulletin board truly unique, consider adding some finishing touches. Decorative elements like frames, hooks, or even fairy lights can enhance both functionality and aesthetics. Think about how you can personalize your board to reflect your style. Perhaps you want to add a frame that complements your room or hooks to hang keys or small items.
Incorporating decorative elements can take your board to the next level. A simple frame can elevate the overall look, while hooks can add practicality. You might also consider adding a small shelf or a few clips for holding important notes or photos. The possibilities are endless!
Finally, applying a protective coating can significantly extend the life of your bulletin board. Sealants can protect it from wear and tear, ensuring that it remains a beautiful addition to your home for years to come. Look for a clear sealant that won’t alter the appearance of your corks or wood. A little extra care goes a long way in preserving your masterpiece!
Q: Can I use synthetic corks for this project?
A: Yes, synthetic corks can be used, but they may not have the same aesthetic appeal as natural corks.
Q: How do I clean my cork bulletin board?
A: You can use a damp cloth to wipe down the board. Avoid using harsh chemicals that could damage the cork or wood.
Q: What can I hang on my cork board?
A: You can hang notes, photos, reminders, or anything lightweight. Just make sure it's not too heavy to avoid damaging the corks.
Q: How can I make my bulletin board more functional?
A: Consider adding hooks for keys or small shelves for additional storage. You can also integrate clips for quick note changes!
Now that you’re armed with all this knowledge, it’s time to get creative and start your project! Happy crafting!
Gathering Your Materials
Before embarking on your delightful journey to create a charming bulletin board from old wine corks, it's essential to gather all the materials you'll need. Think of this step as laying the foundation for a beautiful home; without the right tools and supplies, your project might not reach its full potential. So, let’s dive into what you’ll need to make this creative endeavor a success!
First and foremost, you'll need a collection of wine corks. If you're a wine enthusiast, this might be the easiest part! However, if you're starting from scratch, consider asking friends or family to save their corks for you, or you can even find them at local craft stores or online. Aim for at least 50-100 corks to give you plenty of options for your design. Remember, each cork tells a story, so choose a variety that reflects your personality!
Next, you’ll need a base for your bulletin board. The base can be made from several materials, but the most popular choices include:
- Corkboard: This is a classic choice that provides a natural backdrop for your corks.
- Wood: A wooden base can add rustic charm and durability.
- Canvas: For a more artistic flair, a canvas can be an exciting alternative.
Once you've chosen your base, it’s time to gather some tools. Here’s a quick rundown:
- Hot glue gun: Essential for securing those corks firmly in place.
- Scissors: Handy for trimming any excess materials.
- Pencil: Useful for marking your design layout before gluing.
- Sandpaper: If you're using wood, this will help you prepare the surface.
Additionally, you might want to consider some decorative elements to personalize your bulletin board further. Think about adding frames, hooks, or even a splash of paint to make it uniquely yours. Perhaps you want to incorporate some twine for a rustic touch or even some fairy lights for a magical ambiance. The sky's the limit!
With all these materials in hand, you're well on your way to creating a stunning bulletin board that not only looks great but also tells a story of sustainability and creativity. Remember, the process should be as enjoyable as the final product, so take your time gathering these materials and let your imagination run wild!

Choosing the Right Base
When it comes to creating a charming bulletin board from old wine corks, selecting the right base is crucial for both aesthetics and functionality. The base serves as the foundation of your project, and it can significantly influence the overall look and feel of your finished piece. You have several options to consider, each with its unique characteristics and advantages. Are you leaning towards a classic corkboard, a rustic wooden frame, or perhaps a modern canvas? Let’s dive deeper into these choices and see what fits your vision best!
The most popular choice for many DIY enthusiasts is the corkboard itself. It’s designed for pinning notes and photos, making it a practical option. However, if you want to add a touch of personality, wood can be a fantastic alternative. A wooden base not only provides durability but also brings a natural warmth that complements the corks beautifully. Imagine the rustic charm of a weathered wood frame paired with the rich textures of cork—it's a match made in DIY heaven!
Another option is canvas. This modern choice allows for a more artistic approach. You can paint or decorate the canvas in any color or pattern that suits your style, creating a vibrant backdrop for your corks. The flexibility of canvas gives you the freedom to let your creativity shine. However, keep in mind that canvas may not hold pins as securely as corkboard or wood, so consider how you intend to use your bulletin board.
Ultimately, the choice of base will depend on your personal style and how you plan to use the bulletin board. Here’s a quick comparison of the three options:
| Base Type | Advantages | Considerations |
|---|---|---|
| Corkboard | Easy to pin notes, widely available | May lack personality |
| Wood | Durable, rustic charm, customizable | Requires more preparation |
| Canvas | Artistic, vibrant, customizable | Less secure for pinning |
As you weigh your options, think about the overall theme of your space. Are you aiming for a cozy, rustic vibe, or do you prefer a sleek, modern aesthetic? Each base can dramatically alter the look of your bulletin board, so choose one that resonates with your style. Remember, this project is not just about functionality; it’s also about expressing your creativity and enhancing your home decor. So, take your time, envision your ideal board, and choose a base that will bring that vision to life!
Wooden Base Advantages
When it comes to creating a charming bulletin board out of old wine corks, opting for a wooden base can be a game changer. Not only does wood offer exceptional durability, but it also brings a touch of rustic charm that complements the natural texture of wine corks beautifully. Imagine walking into a room where your bulletin board not only serves a functional purpose but also acts as a stunning piece of art that sparks conversation. That's the magic of using wood!
One of the standout advantages of a wooden base is its stability. Unlike corkboard or canvas, which can sometimes sag or warp, a well-crafted wooden base provides a solid foundation. This means your corks will stay securely in place over time, allowing you to pin notes, photos, and reminders without fear of them falling off. Additionally, wood is incredibly versatile; you can choose to leave it in its natural state for a more organic look or paint it to match your existing decor. The options are endless!
Furthermore, using a wooden base allows for a variety of finishing techniques that can enhance the overall aesthetic of your bulletin board. You might consider staining the wood to bring out its natural grain or even applying a coat of paint for a pop of color. Each choice can dramatically change the look and feel of your board, making it truly unique to your style.
Here's a quick overview of why a wooden base is a fantastic choice for your cork bulletin board:
| Advantage | Description |
|---|---|
| Durability | Wood provides a sturdy structure that can withstand the weight of multiple corks and pinned items. |
| Rustic Charm | The natural beauty of wood adds an aesthetic appeal that complements the corks perfectly. |
| Versatility | Wood can be painted or stained to fit any decor style, making it a customizable option. |
| Stability | Unlike other materials, wood remains stable and does not warp over time, ensuring your corks stay secure. |
In conclusion, a wooden base not only enhances the functionality of your bulletin board but also elevates its aesthetic appeal. So, if you're looking to create a stunning focal point in your home while repurposing old wine corks, a wooden base is undoubtedly the way to go!
Types of Wood to Consider
When embarking on your charming bulletin board project, the choice of wood can significantly influence both the aesthetics and durability of your creation. Each type of wood comes with its own unique characteristics, making some more suitable than others depending on your desired look and functionality. Let's delve into a few popular types of wood that you might consider:
- Pine: This is a fantastic option if you're looking for a budget-friendly choice. Pine is lightweight, easy to work with, and can be stained or painted to fit your style. Its natural knots and grains add a rustic charm that pairs beautifully with wine corks.
- Oak: If you're after durability and a classic look, oak is the way to go. Known for its strength and resistance to wear, oak can withstand the test of time. Its rich grain patterns can create a stunning backdrop for your corks, making your bulletin board a standout piece.
- Plywood: For those who prefer a more modern approach, plywood is an excellent choice. It's versatile and can be easily cut into different shapes and sizes. Plus, it provides a smooth surface that allows for a clean and polished finish, perfect for showcasing your cork arrangements.
Each type of wood brings its own flavor to your bulletin board. Pine's affordability might appeal to the DIY enthusiast, while oak's robustness could attract those looking for a long-lasting piece. On the other hand, plywood's sleekness might resonate with a contemporary design lover. Remember, your choice of wood not only affects the look but also the longevity of your project.
Before making a decision, consider the overall theme of your home decor and how the wood will complement the colors and textures of your space. Additionally, think about the weight of the corks and any items you plan to pin up; a sturdier wood like oak might be more suitable for heavier items, while lighter woods can suffice for more decorative purposes.
In conclusion, the type of wood you choose for your bulletin board can transform it from a simple DIY project into a stunning piece of art that enhances your home. So, take your time, weigh your options, and select the wood that speaks to your creative vision!
Preparing the Wooden Base
Getting your wooden base ready is like laying the foundation for a charming little cottage; it sets the stage for everything that follows. First and foremost, you want to ensure that the surface is smooth and free of any imperfections. A rough or uneven base can lead to an uneven cork arrangement, which might throw off the entire aesthetic of your bulletin board. Start by grabbing some sandpaper—preferably a medium grit—and gently sand down the surface of your wood. This will help eliminate any splinters or rough patches that could snag on your fingers or the corks.
Once you've achieved a smooth finish, it’s time to consider the color. Do you want your bulletin board to have a natural wood finish, or are you leaning towards something more vibrant? If you're aiming for a rustic look, you might want to leave the wood as is, perhaps applying a clear sealant to enhance its natural beauty. On the other hand, if you're feeling adventurous, you can paint or stain the wood to match your home decor. A soft, pastel color can create a lovely contrast with the earthy tones of the corks, while a deep stain can bring out a rich, classic vibe.
When painting or staining, remember to apply even coats for a professional finish. Allow each coat to dry completely before adding another layer. If you’re using paint, a foam brush can help you achieve a smooth application without brush strokes. For stains, a clean cloth will work wonders to wipe away excess and ensure an even distribution.
After you’ve achieved your desired finish, consider applying a protective coating. This is especially important if your bulletin board will be placed in a high-traffic area or if you anticipate it being used frequently. A clear polyurethane can provide a durable layer of protection against scratches and wear, ensuring that your beautiful creation lasts for years to come.
In summary, preparing your wooden base involves:
- Sanding for a smooth finish
- Choosing a color or stain that fits your aesthetic
- Applying a protective coating for longevity
With your wooden base prepped and ready, you’re now set to move on to the fun part—arranging those delightful wine corks!

Cork Arrangement Ideas
When it comes to arranging your old wine corks, the world is your oyster! Think of your bulletin board as a blank canvas waiting for your creative touch. One of the most exciting aspects of this project is the freedom to play with different arrangements that reflect your personality and style. Have you ever thought about how a simple layout can transform the entire vibe of a room? Just like a well-composed piece of music, the right arrangement can create harmony in your space.
To kick off your cork arrangement journey, consider various themes that resonate with you. For instance, if you adore a rustic farmhouse aesthetic, you might want to create a random scatter pattern. This involves placing corks of different sizes and colors in a seemingly haphazard manner, which can evoke a cozy, lived-in feel. Alternatively, if you lean towards a more modern look, a grid pattern could be your best bet. This method is all about precision and symmetry, where you align your corks in neat rows and columns, creating a visually appealing and orderly design.
Another fun idea is to create a themed collage that tells a story. For example, you could arrange corks based on their colors to create a gradient effect, transitioning from light to dark shades. This not only looks stunning but also adds depth to your board. You could even incorporate some decorative elements like photos, postcards, or quotes among the corks to enhance the storytelling aspect. Imagine a vibrant sunset made of corks, with a favorite travel photo nestled in between—how inviting does that sound?
Don’t forget about the spatial dynamics of your board. If you have a larger space to work with, consider leaving some areas empty to create a sense of balance. This negative space allows your eye to rest and can make the corks you do have pop even more. On the flip side, if your board is smaller, clustering corks together can create a bold statement. You might even want to experiment with layering corks—stacking them in a way that creates a three-dimensional effect can add a delightful twist to your design.
Lastly, remember that your arrangement doesn’t have to be permanent! Feel free to change it up as your style evolves or as you collect more corks. After all, creativity is all about exploration and discovery. So, grab those corks, let your imagination run wild, and create a bulletin board that’s not just functional but a true reflection of you!
Q: How many wine corks do I need for my bulletin board?
A: The number of corks you'll need depends on the size of your board and the arrangement you choose. Generally, a standard bulletin board may require anywhere from 50 to 100 corks.
Q: Can I use synthetic corks for this project?
A: Yes, synthetic corks can be used, but they may not have the same aesthetic appeal as natural corks. However, they can still provide a unique look!
Q: What if I don't have enough corks?
A: If you find yourself short on corks, consider asking friends or visiting local restaurants and bars. Many are happy to give away used corks for creative projects.
Q: How can I personalize my bulletin board further?
A: You can add photos, notes, or decorative elements like ribbons and washi tape to make your board truly unique and personal.
Securing the Corks
Once you've arranged your wine corks to your liking, the next step is to ensure they stay put. Securing the corks is crucial to maintaining the integrity and aesthetic of your bulletin board. After all, there's nothing more frustrating than seeing your hard work unravel because the corks are loose or falling off. So, how do you effectively secure those little beauties? Let’s dive into the options available to you.
One of the most popular methods for securing corks is using hot glue. This method is favored for its quick-drying properties, allowing you to work swiftly without waiting around for adhesives to set. To use hot glue, simply apply a generous amount to the back of each cork and press it firmly onto your base. The heat from the glue will create a strong bond, ensuring that your corks remain in place for years to come. However, be cautious—hot glue can be a bit messy, so keep a paper towel handy to catch any drips!
If hot glue isn’t your cup of tea, there are alternative adhesives you might consider. Craft glue is a versatile option that works well for lighter materials. It dries clear and provides a decent hold, but it may not be as strong as hot glue, especially for heavier corks or larger boards. Another option is epoxy, which offers an incredibly strong bond. However, it requires a bit more preparation, as you need to mix two components before application. Epoxy is perfect for those who want a long-lasting hold, but keep in mind that it usually takes longer to cure compared to hot glue.
Here’s a quick comparison of the adhesive options:
| Adhesive Type | Pros | Cons |
|---|---|---|
| Hot Glue | Quick drying, strong bond | Can be messy, not ideal for delicate corks |
| Craft Glue | Easy to use, dries clear | Weaker bond, longer drying time |
| Epoxy | Very strong bond, durable | Requires mixing, longer curing time |
Before you start securing your corks, it’s a good idea to test your adhesive on a spare cork to see how well it holds. This will give you a feel for the drying time and the strength of the bond. Remember, the goal is to create a beautiful yet functional bulletin board that can withstand the test of time. Once you’ve settled on your adhesive of choice, go ahead and secure those corks, making sure to apply even pressure to ensure a solid bond. Happy crafting!
Q: Can I use wine corks that have been used for something else?
A: Absolutely! Just make sure they're clean and dry before you start working with them. A little soap and water can do wonders.
Q: How can I ensure my bulletin board stays in good condition?
A: Regularly check the corks for any looseness and reapply adhesive if necessary. Additionally, keep it out of direct sunlight to prevent fading.
Q: What can I use to embellish my cork bulletin board?
A: You can add decorative elements like frames, hooks, or even paint the edges of the board for a pop of color. Get creative!
Using Hot Glue
When it comes to securing your wine corks to the bulletin board, hot glue emerges as a top contender for several compelling reasons. First off, its quick-drying properties allow you to work efficiently, meaning you won't be left waiting around for your project to dry. Imagine trying to arrange those corks perfectly, only to have them slide out of place because the glue isn't set yet! With hot glue, you can stick, press, and move on to the next cork in a matter of seconds, keeping your creative flow intact.
To effectively use hot glue for your project, start by preheating your glue gun. This ensures that the glue flows smoothly and adheres properly to both the corks and your chosen base. Once your glue gun is ready, apply a generous amount of hot glue to the bottom of each cork. It's essential to work in small sections, especially if you're creating a complex pattern or design. This way, you can adjust the placement of the corks before the glue hardens completely.
One of the best aspects of hot glue is its versatility. Not only does it bond well with cork, but it also adheres to various surfaces, including wood, canvas, and even some metal. However, be cautious: while hot glue is strong, it’s not impervious to moisture. If your bulletin board is destined for a humid environment, consider applying a protective layer over the corks once everything is securely in place. This extra step will help ensure that your beautiful creation stands the test of time.
In case you're wondering about the cleanup, hot glue is relatively easy to manage. If you accidentally get some glue on your hands or the surrounding area, simply wait for it to cool and peel it away gently. However, if you find yourself with a mess of strings from the glue gun, don't fret! A quick swipe with a pair of scissors will tidy things up in no time.
In summary, using hot glue is a fantastic method for securing your wine corks to your bulletin board. Its quick application, strong adhesion, and easy cleanup make it an ideal choice for this creative project. So grab your glue gun and let your imagination run wild as you transform those old wine corks into a stunning display!
Alternative Adhesives
When it comes to securing your wine corks to the base of your bulletin board, hot glue is a popular choice, but it's not the only option out there. If you're looking for something different, or perhaps you just want to experiment with various adhesives, there are several alternatives to consider. Each option has its own set of benefits and drawbacks, so let’s dive into a few of these alternatives and see how they might fit into your project.
One of the most commonly used alternatives is craft glue. This type of adhesive is versatile and easy to work with, making it a great option for beginners. Craft glue typically dries clear, which is a bonus for aesthetic purposes. However, it may not provide the instant hold that hot glue does, requiring you to hold the corks in place for a bit longer while the glue sets. If you're patient and willing to invest a little extra time, craft glue can be a reliable choice.
Another option is epoxy resin. This adhesive is incredibly strong and durable, making it perfect for projects that might experience wear and tear over time. Epoxy comes in two parts that you mix together before application, which can be a bit of a hassle but results in a bond that can withstand significant pressure. If you choose this route, ensure you follow the instructions carefully for the best results.
For those who prefer a more flexible adhesive, silicone glue is an excellent choice. This type of glue remains flexible after curing, which can be beneficial if your bulletin board will be subjected to changes in temperature or humidity. Silicone glue also has a strong bond and is water-resistant, making it a solid choice for a project that may be hung in a kitchen or bathroom.
To help you decide which adhesive might work best for your project, here’s a quick comparison table:
| Adhesive Type | Strength | Drying Time | Flexibility | Best Use |
|---|---|---|---|---|
| Craft Glue | Moderate | Medium | Low | General crafts |
| Epoxy Resin | Very High | Long | Low | Heavy-duty projects |
| Silicone Glue | High | Medium | High | Moisture-prone areas |
In conclusion, while hot glue may be the go-to for many DIYers, don't overlook the potential of these alternative adhesives. Each has its unique properties that can enhance your project in different ways. Whether you want a quick fix, a strong bond, or flexibility, there’s an adhesive option that can meet your needs. So, grab your corks and get ready to create a stunning bulletin board that reflects your style and resourcefulness!
1. Can I use regular white glue for my cork bulletin board?
While regular white glue can work, it may not provide the same strength or quick-drying benefits as hot glue or epoxy. It's best for lighter projects.
2. How long does it take for epoxy to cure?
Epoxy typically takes anywhere from 24 to 48 hours to fully cure, depending on the specific product you use. Always check the manufacturer's instructions for precise timing.
3. Is silicone glue safe for indoor use?
Yes, silicone glue is safe for indoor use and is often used in kitchens and bathrooms due to its water-resistant properties.
4. What if I want to remove the corks later?
If you think you might want to remove the corks in the future, consider using craft glue or silicone glue, as these can be easier to work with when disassembling your project.
Finishing Touches
So, you’ve crafted your charming bulletin board using those old wine corks, and now it’s time to add the that will make it pop! This is where you can let your creativity shine even brighter. Think of this stage as the icing on a cake; it’s what turns a simple dessert into a masterpiece. You want your bulletin board to not only be functional but also a stunning piece of art that reflects your personality and style.
One of the easiest ways to personalize your board is by incorporating decorative elements. This could be anything from a beautiful frame that matches your home decor to stylish hooks for hanging keys or notes. Imagine a rustic wooden frame that contrasts beautifully with the natural tones of the corks. This frame can add depth and character, making your bulletin board a focal point in any room. You might also consider adding a few decorative pins or clips that can hold up your notes or photos in style.
Furthermore, don’t overlook the importance of protective coatings. Applying a sealant can extend the life of your creation, ensuring that it withstands the test of time. You have several options here, including matte or glossy finishes, depending on the look you want to achieve. A matte finish can give a more subtle, understated vibe, while a glossy finish can make the colors of your corks pop and shine. When choosing a protective coating, consider the following:
| Type of Coating | Finish | Durability | Application Method |
|---|---|---|---|
| Polyurethane | Glossy | High | Brush or Spray |
| Varnish | Matte | Medium | Brush |
| Mod Podge | Satin | Low | Brush |
Once you’ve selected your coating, make sure to apply it in a well-ventilated area. Follow the manufacturer’s instructions for the best results. This step not only protects your board from wear and tear but also enhances its overall appearance, giving it that polished look you desire.
Finally, don’t forget to step back and admire your work! Maybe even hang it up and see how it looks in its new home. Consider using it as a space to display your favorite memories, quotes, or even reminders for daily tasks. The beauty of your bulletin board lies not just in its creation but in how it becomes a part of your everyday life.
Q: Can I use any type of cork for my bulletin board?
A: While you can use various types of cork, wine corks are particularly charming due to their unique shapes and textures. However, ensure they are clean and dry before use.
Q: How do I keep my cork bulletin board looking fresh?
A: Regularly clean the surface with a damp cloth and avoid exposing it to excessive moisture. If you’ve applied a protective coating, it should help maintain its appearance.
Q: Is it necessary to use a frame for my bulletin board?
A: No, it’s not necessary, but a frame can enhance the aesthetic appeal and provide additional support. It’s all about your personal preference!
Q: Can I add lights to my bulletin board?
A: Absolutely! Adding fairy lights or LED strips can create a cozy ambiance and highlight your beautiful corks.
Adding Decorative Elements
When it comes to personalizing your bulletin board, the possibilities are as vast as your imagination! Adding decorative elements not only enhances the visual appeal of your corkboard but also boosts its functionality. Think of your bulletin board as a blank canvas where each embellishment adds a splash of color and personality. For instance, incorporating a stylish frame can transform your corkboard from a simple DIY project into a stunning focal point in your room. A frame doesn’t just add elegance; it also protects the edges of your board, giving it a polished look.
Another fantastic way to elevate your bulletin board's functionality is by integrating hooks or clips. These little additions allow you to hang keys, bags, or even your favorite artwork, making your board a multi-purpose organizer. Imagine walking into your home and having a designated spot for everything—no more frantic searches for your keys! You can also consider using decorative washi tape along the edges or to create fun patterns on the board itself, adding a pop of color that can easily be changed out with the seasons or your mood.
Don't forget about the power of lighting! If you want to take your bulletin board to the next level, consider adding fairy lights around the perimeter. This not only creates a warm ambiance but also draws attention to your beautiful creation. You could also use small LED lights to highlight specific areas or notes, giving your board a modern twist.
Lastly, think about incorporating natural elements such as dried flowers or small plants. These can add a touch of nature to your board, making it feel fresh and inviting. Just be mindful of the weight and how you secure them—lightweight options like air plants or small succulents can work wonders without overwhelming your corkboard.
In summary, the decorative elements you choose can significantly impact both the aesthetics and functionality of your cork bulletin board. Whether you opt for a chic frame, practical hooks, or enchanting lights, each addition tells a story and showcases your unique style. So, let your creativity flow and make your bulletin board a true reflection of you!
- What type of frame works best for a cork bulletin board?
While any frame can work, a lightweight wooden or plastic frame is ideal as it won't add too much weight to the corkboard. Consider a frame that complements your home decor for a cohesive look.
- Can I use regular glue to secure decorative elements?
Regular craft glue may work for lightweight items, but for heavier decorations, it's best to use a stronger adhesive like epoxy or hot glue to ensure they stay in place.
- Are there any specific plants I should use on my bulletin board?
Air plants or small succulents are great options as they require minimal care and can thrive in small spaces. Just ensure they are secured properly to avoid any accidents!
Protective Coatings for Longevity
Once you've crafted your charming bulletin board using old wine corks, the next step is to ensure it stands the test of time. Just like a fine wine ages gracefully, your bulletin board deserves a protective coat to keep it looking fresh and vibrant. A good protective coating not only enhances the appearance of your corkboard but also shields it from wear and tear, moisture, and dust. So, let's dive into the various options available for sealing your masterpiece!
One popular choice is polyurethane, which comes in both water-based and oil-based formulas. Water-based polyurethane dries quickly and has a low odor, making it a favorite for indoor projects. On the other hand, oil-based polyurethane offers a richer finish but takes longer to dry. Both options provide a durable layer that can withstand everyday use. When applying, remember to use a clean brush and apply thin, even coats to avoid drips and bubbles.
Another fantastic option is a clear acrylic sealer. This type of sealer is easy to apply and dries clear, ensuring that your beautiful corks remain visible. It’s particularly useful if you plan to display your bulletin board in a high-traffic area or near a kitchen where spills might occur. Just like a protective raincoat for a rainy day, this sealer will keep your corks safe from moisture and stains.
For those looking to add a bit of flair, consider using a decorative spray lacquer. This not only seals your board but also adds a glossy finish that can make the colors of the corks pop. However, be cautious with this option, as the fumes can be strong. Always spray in a well-ventilated area and wear a mask to protect yourself.
When applying any protective coating, here are some tips to keep in mind:
- Preparation is Key: Ensure your corks are clean and free from dust before applying any sealant.
- Test First: Always test your chosen coating on a small, inconspicuous area to see how it reacts with the cork.
- Apply Multiple Coats: For enhanced protection, consider applying multiple thin coats rather than one thick layer.
Ultimately, the choice of protective coating will depend on your personal preference and the environment where your bulletin board will reside. Whether you opt for polyurethane, acrylic, or lacquer, remember that these coatings are your board's best friends, ensuring it remains a stylish and functional part of your home for years to come. So go ahead, give your corkboard the love it deserves and watch it flourish in your space!
Q: How long does it take for the protective coating to dry?
A: Drying times can vary depending on the type of coating used. Water-based polyurethane usually dries within 2-4 hours, while oil-based options can take up to 24 hours. Always check the manufacturer's instructions for specific drying times.
Q: Can I apply a protective coating over painted corks?
A: Yes, you can! Just ensure the paint is fully dry before applying any sealer. This will help prevent smudging and ensure a smooth finish.
Q: How often should I reapply the protective coating?
A: It depends on the level of use and exposure to elements. Generally, reapplying every couple of years or as needed is a good practice to maintain the board's appearance and durability.
Frequently Asked Questions
- What materials do I need to create a bulletin board from wine corks?
To get started on your charming bulletin board, you'll need a collection of old wine corks, a suitable base (like corkboard, wood, or canvas), and some basic tools. Additionally, you'll need adhesive to secure the corks in place, and possibly some decorative elements to add a personal touch.
- Which type of base works best for a wine cork bulletin board?
The choice of base can significantly affect the look and durability of your bulletin board. Wooden bases are popular for their rustic charm and durability. Options like pine, oak, or plywood can enhance the aesthetic appeal while providing a sturdy foundation for your corks.
- How should I arrange the corks on my bulletin board?
Arranging the corks can be a fun and creative process! You can create various patterns, such as a grid or a random layout, depending on your style. Consider themes like color coordination or alternating sizes to make your board visually interesting and unique.
- What adhesive works best for securing the corks?
Hot glue is often the go-to choice for securing corks due to its quick-drying properties and strong bond. However, if you prefer alternatives, craft glue and epoxy are also effective options. Just be sure to choose an adhesive that suits your project needs.
- How can I add finishing touches to my bulletin board?
Finishing touches can really make your bulletin board stand out! Consider adding decorative elements like frames, hooks, or even a coat of paint or stain to the wooden base. A protective coating can also help extend the life of your board, keeping it looking fresh and vibrant.
- Can I use new corks instead of old ones?
While using old corks adds character and a story to your bulletin board, new corks can certainly be used if you prefer a cleaner look. Just keep in mind that the charm of repurposing old corks lies in their unique shapes and colors!
- How do I maintain my cork bulletin board?
To maintain your cork bulletin board, simply dust it off regularly to keep it clean. If you've used a protective coating, it will help prevent wear and tear. If you notice any corks coming loose, just reapply your adhesive to keep everything secure.


