
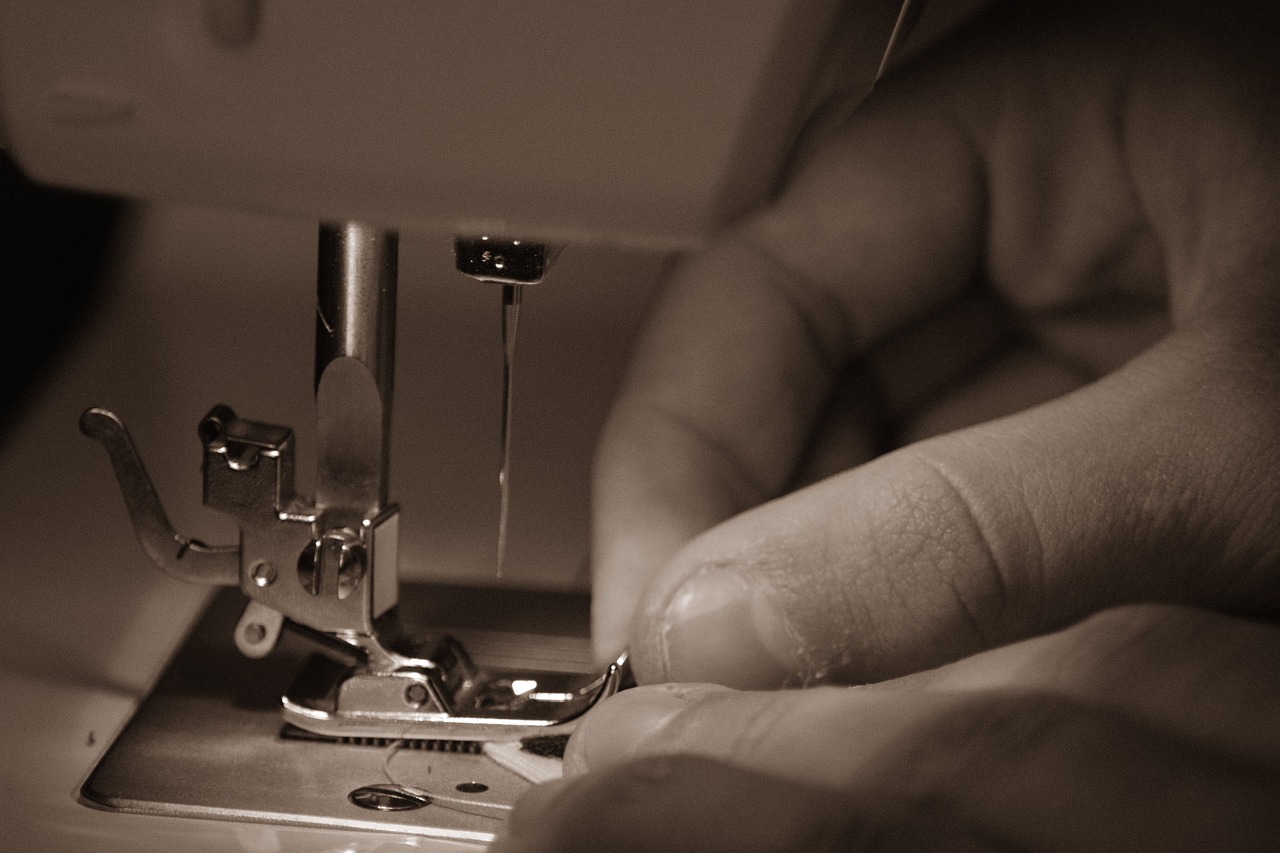
Tips on Organizing Your Sewing Space
Are you ready to transform your sewing space into a haven of creativity and productivity? Organizing your sewing area is not just about tidiness; it's about creating an environment that sparks inspiration and makes your crafting experience enjoyable. Imagine stepping into a space where everything is in its place, your tools are easily accessible, and your materials are neatly stored. Sounds dreamy, right? In this article, we will dive into practical tips that will help you efficiently organize your sewing area, ensuring you make the most of the available space.
First things first, take a moment to assess your current sewing space. Understanding what you have and how you use it is crucial. Is your sewing machine tucked away in a corner, or is it front and center, ready for action? Do you have piles of fabric stacked haphazardly, or are they neatly folded and stored? Evaluating your setup allows you to identify both strengths and weaknesses. It’s like taking a snapshot of your creative chaos and figuring out what works and what doesn’t. Once you have a clear picture, you can start making changes that will enhance your workflow.
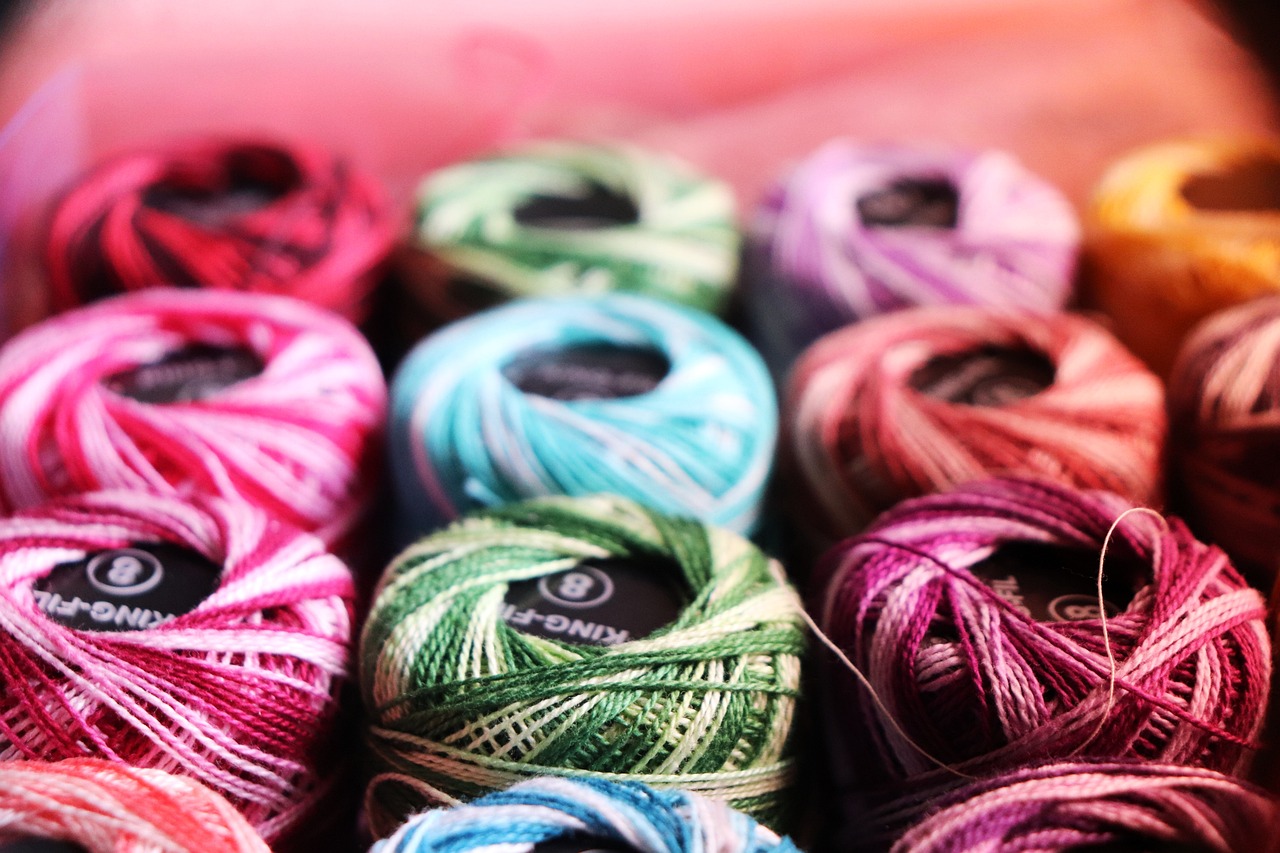
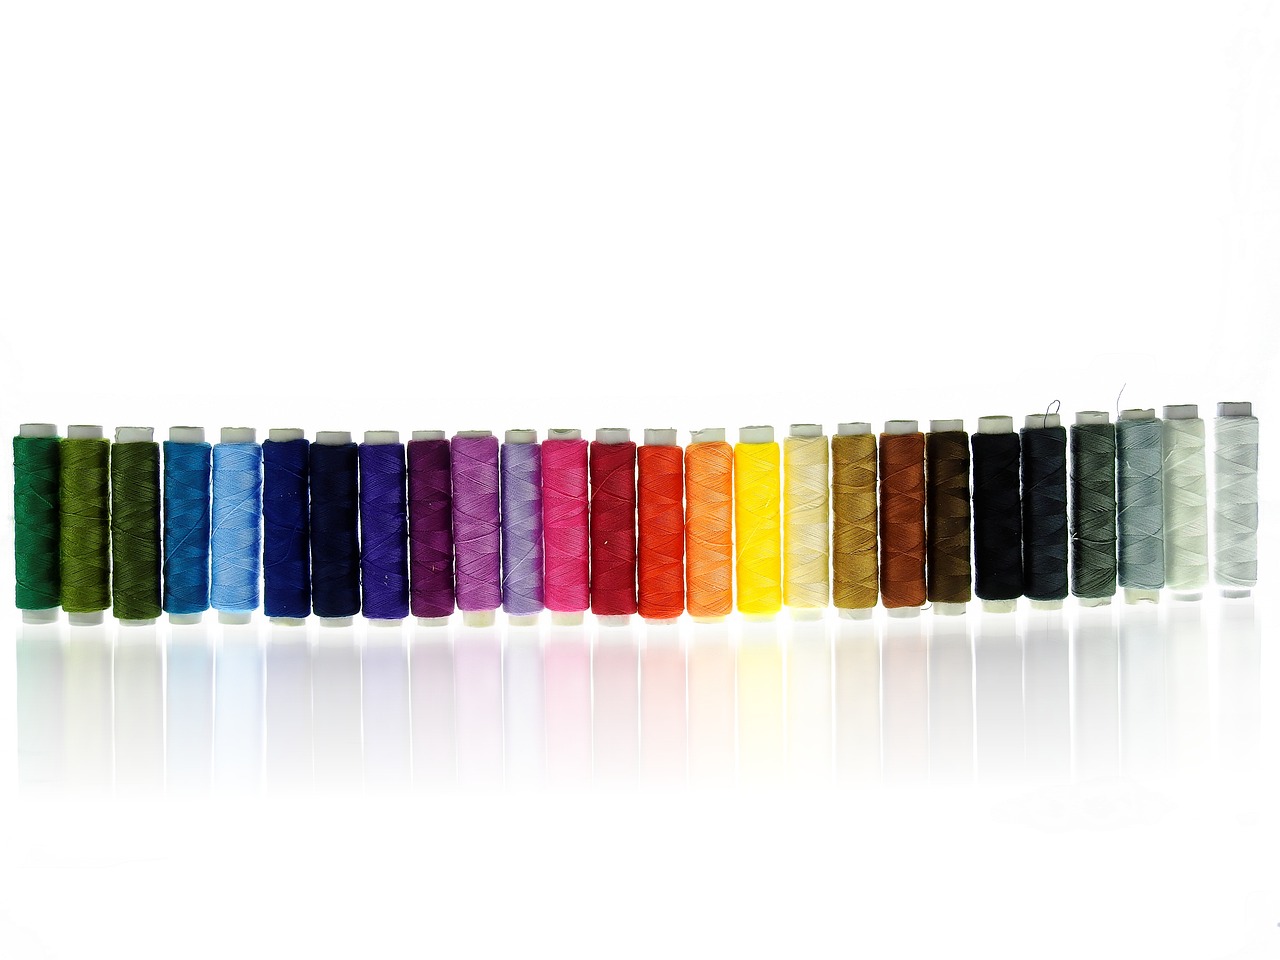
Next up, let’s talk about storage solutions. Effective storage is the backbone of any organized sewing space. From shelves and bins to specialized organizers, the right storage options can make a world of difference. Consider using clear bins for your fabric; this way, you can see what you have at a glance. You can also dedicate a shelf for your sewing threads, keeping them organized by color. A well-thought-out storage plan helps you choose the best fit for your supplies and tools, ensuring that everything has its designated spot.
Now, don’t forget about the importance of utilizing vertical space. When floor space is limited, look up! Wall-mounted shelves, pegboards, and hooks can free up valuable surface area while keeping your essentials within arm's reach. For instance, a pegboard can hold your scissors, rulers, and other tools, making them easily accessible and visually appealing. This not only keeps your workspace tidy but also adds a touch of creativity to your sewing area.
In addition, wall-mounted organizers are fantastic for keeping your tools organized. Whether you opt for a simple shelf or a more complex system, these organizers can streamline your workflow. Imagine having your sewing machine, cutting tools, and fabric all within easy reach—what a game changer! You can even incorporate decorative elements into your organizers, making your space feel more personalized.
Let’s not forget about hanging storage options. Fabric bins and baskets can be a lifesaver for decluttering surfaces. By hanging these storage solutions, you can keep your materials organized while adding a decorative flair to your sewing space. They’re perfect for storing everything from scraps to larger pieces of fabric, ensuring that your supplies are always neatly tucked away yet easily accessible.
Creating a functional layout is another essential aspect of organizing your sewing space. A well-planned layout can significantly enhance your sewing experience. Think about how you use your sewing machine, cutting area, and storage solutions. Arrange them in a way that allows for smooth transitions between tasks. For example, placing your cutting mat close to your sewing machine can save you time and effort. Comfort is key; after all, you want your sewing space to be a place where you can lose yourself in creativity without feeling cramped or overwhelmed.
Regularly decluttering your supplies is vital for maintaining an organized space. Over time, it’s easy for extra materials and tools to accumulate, leading to a cluttered environment. Set aside some time to sort through your supplies. Ask yourself, “When was the last time I used this?” If the answer is more than a year, it might be time to let it go. You can donate items you no longer need, ensuring they find a new home where they’ll be appreciated.
Effective sorting techniques can simplify the decluttering process. Consider categorizing your supplies into groups: fabrics, threads, tools, and patterns. This not only makes it easier to see what you have but also helps you make decisions about what to keep and what to discard. Once your space is organized, maintaining that order becomes crucial. Establish a routine for tidying up after each project to prevent clutter from accumulating again.
Finally, let’s talk about personalizing your space. Adding personal touches to your sewing area can inspire creativity and make it a place you love to be. Whether it’s hanging up your favorite fabric swatches, displaying your finished projects, or incorporating colors that resonate with you, your sewing space should reflect your style. Remember, an organized space doesn’t have to be bland; it can be vibrant and full of personality!
- How often should I declutter my sewing space? It's a good idea to declutter every few months to keep your area organized and functional.
- What are some budget-friendly storage solutions? Consider using repurposed containers, like jars or boxes, to store small items.
- How can I make my sewing area more comfortable? Invest in a good chair and ensure your sewing machine is at a comfortable height.
- What should I do with fabric scraps? You can donate them, use them for small projects, or even create a scrap quilt!
Assessing Your Space
Understanding your sewing area is crucial for creating an efficient and inspiring workspace. Think of your sewing space as a canvas; if it’s cluttered and disorganized, it’s like trying to paint a masterpiece on a crumpled piece of paper. Start by taking a good look around. What do you see? Is your sewing machine buried under a pile of fabric? Are your tools scattered like confetti across the table? Identifying these aspects is the first step toward transformation.
Begin by evaluating the strengths of your current setup. Do you have a large table that provides ample workspace? Is there natural light flowing in, making your sewing projects more enjoyable? Acknowledge these positive features as they can significantly enhance your creativity. On the flip side, pinpoint the weaknesses. Perhaps your storage solutions are inadequate, or maybe your workspace feels cramped and uninspiring. It’s essential to recognize both sides to create a balanced and functional sewing environment.
Next, consider how you use your sewing area. Are you someone who enjoys a variety of projects, or do you prefer to focus on one at a time? Understanding your workflow will help you decide what changes need to be made. For instance, if you often switch between quilting and garment making, you might need designated areas for each type of project. This can help prevent chaos and save time, allowing you to dive into your projects without the hassle of searching for tools and materials.
To help you visualize your current setup, you might want to create a simple diagram of your sewing space. Use a piece of paper to sketch out where everything is located, including your sewing machine, cutting area, and storage solutions. This can be a great way to see at a glance what works well and what doesn’t. You can even categorize your supplies into different zones on your diagram, which will make it easier when it comes time to reorganize.
Ultimately, the goal is to create a sewing space that not only meets your practical needs but also inspires you to create. Once you’ve assessed your area, you'll be better equipped to make informed decisions about storage solutions and layout adjustments. Remember, a well-organized sewing space can be the difference between a frustrating sewing session and a productive, enjoyable experience. So roll up your sleeves, grab a notepad, and start envisioning the sewing sanctuary you’ve always dreamed of!

Storage Solutions
When it comes to creating a sewing space that truly inspires creativity, effective storage is not just a luxury—it's a necessity. Imagine walking into a room where every item has its place, where you can easily find that perfect shade of fabric or the right tool without rummaging through piles of supplies. Sounds dreamy, right? Well, it can be your reality! In this section, we’ll dive into various storage options that can transform your sewing area from chaotic to organized bliss. Whether you're a seasoned sewist or a beginner, the right storage solutions can make all the difference in how you approach your projects.
First off, let’s talk about the essentials: shelves, bins, and specialized organizers. Each of these solutions plays a critical role in maximizing your available space. Open shelves are fantastic for displaying your fabric stash, allowing you to see what you have at a glance. You can categorize your fabrics by color or type, creating a visually appealing and functional display. On the other hand, storage bins are perfect for stashing away items that you don’t use often, like seasonal fabrics or tools. Clear bins can be especially helpful, as they allow you to see the contents without having to open each one. Furthermore, investing in specialized organizers for your sewing tools can streamline your workflow. Think of a caddy for your scissors, threads, and measuring tapes—all in one spot!
Now, let’s not forget about the magic of vertical space. When you think about it, why limit yourself to just the floor when there are walls just waiting to be utilized? By installing wall-mounted shelves and pegboards, you can free up valuable floor space while keeping your essentials within arm's reach. Picture this: a pegboard adorned with your most-used tools, neatly arranged and ready for action. It’s not just functional; it’s an inspiring sight that can spark your creativity every time you step into your sewing sanctuary.
Maximizing vertical space can completely change the game in your sewing area. You might be surprised at how much room you have when you start looking up! Wall-mounted shelves can hold everything from your fabric rolls to jars filled with buttons and threads. This not only keeps your supplies organized but also adds a personal touch to your space. You can even color-coordinate your shelves for a pop of visual interest. Additionally, pegboards are a fantastic solution for hanging tools like rulers, scissors, and rotary cutters. They make it easy to grab what you need without digging through drawers.
Wall-mounted organizers are a game changer for keeping your tools within reach. They come in various styles, from simple racks to intricate designs that can hold multiple items. For instance, a wall-mounted tool holder can keep your scissors, rotary cutters, and other essentials neatly organized. This not only enhances your workflow but also adds an element of design to your sewing room. Imagine how much easier it would be to grab your tools without having to search through a cluttered drawer!
Hanging storage solutions can also help declutter surfaces, giving you more room to work on your projects. Consider incorporating fabric bins or baskets that can be hung on the wall or from a ceiling-mounted rod. These options are perfect for storing fabric scraps, patterns, or even unfinished projects. They keep everything off your workspace, allowing you to focus on what really matters—your sewing! Plus, they can add a splash of color and personality to your sewing area.
In conclusion, the right storage solutions are critical in creating a sewing space that is both functional and inspiring. By utilizing shelves, bins, and vertical space, you can transform your area into a haven of creativity. Remember, an organized space leads to a more productive and enjoyable sewing experience!
| Question | Answer |
|---|---|
| What are the best storage solutions for small sewing spaces? | Utilizing vertical space with wall-mounted shelves and pegboards can maximize your area. Additionally, clear bins for categorizing supplies are great for small spaces. |
| How can I keep my sewing area organized? | Regularly declutter your supplies, use labeled storage bins, and create a designated spot for each item to maintain organization. |
| What is the best way to store fabric? | Storing fabric on open shelves or in clear bins allows for easy visibility. Rolling fabric instead of folding can also save space and prevent creases. |
Utilizing Vertical Space
When it comes to organizing your sewing space, one of the most underutilized areas is the vertical space around you. Think of your sewing room as a canvas; the walls are just as important as the floor! By maximizing vertical space, you can free up precious floor area for movement and creativity. Imagine being able to reach for your favorite tools without rummaging through piles of fabric or boxes. Utilizing your walls can transform your sewing area into a well-ordered haven of inspiration.
One effective way to utilize vertical space is by installing wall-mounted shelves. These shelves can hold everything from fabric bolts to sewing books, keeping them off your work surface and easily accessible. You can create a mini-library of sewing resources that not only looks great but also serves a practical purpose. Additionally, consider using pegboards. They are incredibly versatile and allow you to hang tools like scissors, rulers, and thread spools. With a pegboard, you can customize your setup to fit your workflow, making it easier to grab what you need when you need it.
Another fantastic option is to incorporate hooks and racks. These can be used for hanging various items, including spools of thread, scissors, and even finished projects. Picture this: a beautifully arranged wall where your tools dangle in colorful harmony, making your workspace not only functional but also visually appealing. This approach not only declutters your surfaces but also adds a personal touch to your sewing area.
To give you a clearer picture of how to implement these ideas, here’s a simple table summarizing some vertical storage options:
| Storage Option | Description | Benefits |
|---|---|---|
| Wall-Mounted Shelves | Flat surfaces attached to the wall for holding supplies. | Maximizes space, keeps items organized and visible. |
| Pegboards | Boards with holes for hooks to hang tools. | Customizable, versatile, and easy to rearrange. |
| Hooks and Racks | Items that allow you to hang tools and materials. | Clears surfaces, adds a decorative element. |
Lastly, don't forget about the potential of hanging storage solutions. Fabric bins or baskets can be hung on the wall to store smaller items like buttons, threads, or even small fabric scraps. This not only keeps your supplies organized but also adds a splash of color to your sewing space. By creatively using vertical space, you can turn your sewing area into an organized, efficient, and inspiring environment.
So, the next time you step into your sewing sanctuary, take a moment to look up! You might be surprised at the possibilities that await you. With a little creativity and some thoughtful planning, you can make vertical space work for you, enhancing both your productivity and enjoyment while sewing.
Q: How can I determine what to hang on my walls?
A: Start by assessing your most-used tools and supplies. Hang items you frequently need to keep them accessible.
Q: What if my walls are not suitable for heavy items?
A: Consider lightweight options such as fabric bins or smaller shelves that can hold lighter supplies without damaging the wall.
Q: Can I use vertical space if I have limited wall area?
A: Absolutely! Look for creative solutions like over-the-door organizers or even using the backs of doors for additional storage.

Wall-Mounted Organizers
When it comes to organizing your sewing space, are a game changer. Imagine transforming a cluttered corner into a streamlined haven where your tools and materials are not only easy to find but also beautifully displayed. These organizers are perfect for maximizing your vertical space, allowing you to keep your sewing essentials off the table and within arm's reach. They can include everything from pegboards to shelves, each serving a unique purpose in your creative workflow.
One of the most popular options is the pegboard. This versatile solution allows you to customize your setup by using hooks, baskets, and shelves that can be rearranged as your needs change. You can hang scissors, threads, and even fabric swatches, ensuring everything is visible and accessible. Have you ever spent precious minutes searching for that elusive pair of fabric scissors? With a pegboard, those days are behind you!
Another fantastic choice is the wall-mounted shelf. These shelves can hold everything from books and patterns to jars filled with buttons and embellishments. Not only do they provide storage, but they also add a decorative element to your sewing space. You can even paint them in your favorite color or add a fun wallpaper backdrop to make the area truly yours. The key is to choose organizers that reflect your style while serving a practical purpose.
For those who prefer a more enclosed solution, consider cabinets with open shelving. These can be mounted on the wall and often come with doors to keep your supplies dust-free. You can use the top for display items, while the lower part can be used for storing less frequently needed materials. This dual function keeps your sewing area looking tidy and organized.
To make the most of your wall-mounted organizers, think about the following:
- **Location**: Place them in areas where you do most of your work. The closer your tools are, the more efficient your workflow.
- **Accessibility**: Make sure frequently used items are at eye level. This way, you won’t have to reach too high or bend too low.
- **Aesthetics**: Choose organizers that match your overall decor. A cohesive look can make your sewing space feel more inviting.
By implementing wall-mounted organizers, you not only enhance the functionality of your sewing area but also create a visually appealing environment that inspires creativity. Imagine walking into a space where everything has its place, and you can dive right into your projects without the distraction of chaos. With the right wall-mounted solutions, your sewing room can become a sanctuary of creativity and productivity.
Q: What materials are best for wall-mounted organizers?
A: Materials like wood, metal, and plastic are commonly used. Choose based on your aesthetic preference and the weight of the items you plan to store.
Q: How do I install wall-mounted organizers?
A: Most organizers come with installation instructions. It's important to use the right hardware for your wall type (drywall, concrete, etc.) to ensure stability.
Q: Can I customize my wall-mounted organizers?
A: Absolutely! Many organizers are designed to be modular, allowing you to rearrange or add components as your needs change.
Q: How do I keep my wall-mounted organizers tidy?
A: Regularly assess what you have and remove items that you no longer use. A quick weekly tidy-up can keep your space in top shape.

Hanging Storage Options
When it comes to organizing your sewing space, can be a game-changer. Imagine walking into your sewing area and seeing everything neatly arranged, with no clutter on your tables. Hanging solutions not only save space but also keep your tools and materials within easy reach, allowing for a more efficient workflow.
So, what are some effective hanging storage options? Let's dive into a few popular choices that can transform your sewing area:
- Fabric Bins: These are fantastic for storing fabric scraps or larger pieces. You can hang them on walls or doors, keeping your materials visible and accessible. Plus, they come in various colors and patterns, adding a pop of personality to your space!
- Wall-Mounted Baskets: Perfect for holding smaller supplies like threads, scissors, and measuring tapes. They can be arranged in a way that suits your workflow, making it easy to grab what you need without rummaging through drawers.
- Pegboards: If you're looking for versatility, pegboards are the way to go. You can customize them with hooks, shelves, and baskets to fit your specific needs. Hang your most-used tools and supplies, and you'll never have to search for them again!
- Hanging Racks: These can be particularly useful for storing rolls of fabric or ribbons. By keeping them off the ground, you not only save space but also prevent them from getting wrinkled or damaged.
Incorporating these hanging storage solutions can drastically improve the functionality of your sewing area. Imagine the ease of reaching for a pair of scissors or a spool of thread without having to dig through a cluttered drawer! It’s like having your very own sewing command center.
As you consider which hanging options to implement, think about your unique sewing habits. Do you prefer having everything visible, or do you like to tuck some items away? Tailoring your hanging storage to your personal style will make your sewing space not just organized, but also a reflection of you!
In summary, hanging storage options are an excellent way to keep your sewing area neat and functional. By utilizing fabric bins, wall-mounted baskets, pegboards, and hanging racks, you can create a space that enhances your creativity and productivity. So, why not give these ideas a try? Your future sewing projects will thank you!
1. What are the benefits of using hanging storage for sewing supplies?
Hanging storage maximizes vertical space, keeps tools and materials easily accessible, and helps maintain a clean and organized workspace.
2. Can I use hanging storage in a small sewing area?
Absolutely! Hanging storage solutions are perfect for small spaces as they utilize wall space and can help free up valuable floor area.
3. How do I decide which hanging storage option is best for me?
Consider your sewing habits, the types of supplies you have, and how often you use them. Choose options that make your workflow easier and suit your personal style.
4. Are there DIY options for hanging storage?
Yes! You can create DIY hanging storage using items like old crates, repurposed shelves, or even hooks attached to a board. Get creative!
Creating a Functional Layout
When it comes to sewing, the layout of your workspace can make all the difference between a smooth, enjoyable experience and one fraught with frustration. Imagine trying to bake a cake in a cramped kitchen with everything scattered around; it just doesn’t work, right? The same principle applies to your sewing area. A functional layout not only enhances your productivity but also sparks your creativity. So, how do you achieve this? Let's dive into some practical strategies!
First off, consider the flow of your workspace. Your sewing machine, cutting table, and storage solutions should be arranged in a way that allows you to move seamlessly from one task to another. For example, position your sewing machine close to your cutting area to minimize the distance you need to travel with fabric. This setup can save you time and keep your creative momentum flowing. Think of it as creating a mini assembly line where each station serves a purpose and leads you smoothly to the next.
Next, it’s vital to think about ergonomics. You’ll want to set up your sewing machine at a comfortable height to avoid straining your back and neck. A good rule of thumb is to have your elbows at a 90-degree angle when you’re seated. Investing in a quality chair that supports good posture can also make a significant difference, especially during those long sewing sessions. Remember, comfort is key to maintaining focus and enjoyment in your craft.
Another important aspect is lighting. A well-lit workspace is essential for any sewing project. Natural light is fantastic, but it’s not always available, especially during late-night sewing marathons. Consider adding a combination of overhead lights and task lighting, like a bright desk lamp, to illuminate your work area effectively. Not only will this help you see your fabric and stitches clearly, but it will also reduce eye strain, making your sewing experience much more pleasant.
Now let’s talk about the storage solutions you’ve chosen. Make sure they’re not just functional but also strategically placed. For instance, keep your most-used supplies—like threads, scissors, and rulers—within arm’s reach. You might want to use a combination of open shelving for frequently accessed items and closed storage for less-used supplies. This way, you can maintain a tidy appearance while having everything you need close at hand. Here’s a quick idea of how you might organize your supplies:
| Supply Type | Storage Solution |
|---|---|
| Threads | Wall-mounted thread racks |
| Scissors & Tools | Magnetic strips or pegboards |
| Fabrics | Open shelving or clear bins |
| Patterns & Books | Vertical file organizers |
Lastly, don’t forget to personalize your space! Add elements that inspire you, whether it’s a vibrant color palette, artwork, or even a few plants. A sewing area that reflects your personality can boost your mood and creativity, making you excited to dive into your next project. Think of your sewing space as your creative sanctuary—one that rejuvenates and motivates you every time you step in.
By carefully considering the layout of your sewing area, you can create a space that is not only functional but also a joy to work in. So roll up those sleeves, put on your favorite playlist, and get ready to sew in style!
- What is the best way to organize my sewing supplies?
Consider categorizing them by type and frequency of use. Keep essentials within arm's reach and use clear bins for visibility.
- How can I create a comfortable sewing environment?
Invest in an ergonomic chair, ensure proper lighting, and arrange your workspace to minimize strain on your body.
- What are some space-saving storage ideas?
Use vertical storage solutions like wall-mounted shelves, pegboards, and hanging organizers to maximize your sewing area.
Decluttering Your Supplies
Regularly decluttering your supplies is essential for maintaining an organized space. Imagine walking into your sewing area and feeling overwhelmed by the sheer amount of fabric, tools, and notions scattered everywhere. It’s like trying to find a needle in a haystack! To avoid this chaos, make decluttering a regular part of your sewing routine. Start by assessing what you truly need and what can be let go. Ask yourself: “When was the last time I used this?” If it’s been collecting dust for months, it might be time to say goodbye.
One effective strategy is to set aside a specific time each month dedicated to decluttering. This could be a weekend morning where you sip your favorite coffee while sorting through your supplies. As you sort, categorize your items into three groups: Keep, Donate, and Discard. This method not only helps you make decisions but also gives you a clear visual of what you have. For instance, if you have multiple spools of the same color thread, consider keeping just one or two and donating the rest to a local community center or school.
When sorting through your supplies, it’s helpful to have a designated area for each category. You could use small bins or boxes labeled accordingly. This way, you can easily see what you have and avoid repurchasing items you already own. Below is a simple table that illustrates how to categorize your supplies:
| Category | Examples | Action |
|---|---|---|
| Keep | Essential tools, frequently used fabrics | Store in easy-to-reach locations |
| Donate | Unused fabric, extra tools | Give to local charities or schools |
| Discard | Broken tools, expired supplies | Dispose of responsibly |
Once you’ve sorted your supplies, maintaining organization becomes much easier. Consider implementing a “one in, one out” rule. For every new item you bring into your sewing space, let go of an old one. This approach not only helps keep your supplies manageable but also encourages you to be more mindful of your purchases.
Finally, remember that decluttering is not a one-time event but an ongoing process. It’s like a garden that needs regular weeding. By consistently evaluating your supplies and making adjustments, you’ll ensure that your sewing space remains a haven for creativity rather than a source of stress.
- How often should I declutter my sewing supplies? It's recommended to declutter at least once a month to keep your space organized.
- What should I do with supplies I no longer need? Consider donating them to local schools, community centers, or friends who sew.
- How can I prevent clutter from accumulating again? Implement a “one in, one out” rule and regularly assess your supplies.
Sorting Techniques
When it comes to organizing your sewing supplies, effective can make all the difference. Think of your sewing space as a puzzle; each piece needs to fit perfectly to create a beautiful picture. First, take a moment to assess what you have. Gather all your supplies in one area and prepare to dive into the sorting process. This is your chance to see everything clearly and decide what truly deserves a spot in your sewing sanctuary.
One effective method is the categorization technique. Start by grouping similar items together. For instance, you might have a category for threads, another for fabrics, and yet another for tools. You can use small bins or boxes to keep these categories separate, making it easier to find what you need when inspiration strikes. Consider using labels on your bins; a little clarity goes a long way in a busy sewing environment. When you can quickly locate your supplies, your creativity can flow without interruption.
Another approach is the one-year rule. If you haven’t used a particular item in the past year, it might be time to let it go. This helps prevent clutter from accumulating and keeps only the supplies that genuinely inspire you. You can sort items into three categories: keep, donate, and discard. This simple act of decluttering can breathe new life into your sewing space, allowing you to focus on the materials that spark joy and creativity.
To make the sorting process even more manageable, consider using a color-coding system. Organizing your fabrics and threads by color can create a visually appealing display that not only looks great but also makes it easier to find what you need. Imagine walking into your sewing area and being greeted by a rainbow of colors that inspire your next project! This technique not only enhances aesthetics but also serves as a quick reference when you’re in the middle of a creative flow.
Lastly, don’t forget about the importance of regular maintenance. Set aside time, perhaps once a month, to revisit your organized space. This helps ensure that everything stays in its designated spot and allows you to reassess what you have. Remember, a well-organized sewing area is not a one-time project; it’s an ongoing journey. With these sorting techniques, you can transform your sewing space into a haven of creativity and productivity.
- Q: How often should I declutter my sewing space?
A: It's a good idea to declutter your sewing space at least once a month to keep things organized and manageable. - Q: What should I do with supplies I no longer need?
A: You can donate them to local schools, charities, or sell them at craft fairs to give them a new life. - Q: How can I maintain organization after sorting?
A: Regularly revisit your space and set up a system to ensure everything goes back to its designated spot after use.
Maintaining Organization
Once you've invested time and effort into organizing your sewing space, the last thing you want is for it to spiral back into chaos. Maintaining organization is like nurturing a garden; it requires regular attention, but the rewards are worth it! Here are some practical strategies to ensure your sewing area remains a haven of creativity and productivity.
First and foremost, develop a routine. Just as you might schedule a weekly grocery trip or a monthly car wash, set aside time each week to tidy up your sewing area. This doesn't have to be a lengthy process—perhaps just 15 to 30 minutes to put things back in their rightful places, check your supplies, and ensure everything is where it should be. You might find it helpful to create a checklist of tasks to accomplish during these sessions. For example:
- Check for any new supplies that need organizing.
- Sort through fabric scraps and decide what to keep or discard.
- Wipe down surfaces to keep dust and lint at bay.
- Reorganize any tools that have been moved during your projects.
Another key aspect of maintaining organization is to stay mindful of your habits. Are you prone to leaving fabric out after a project? Or maybe you have a tendency to let threads accumulate on your workspace? Recognizing these patterns can help you create a system that minimizes clutter. For instance, consider designating a specific bin for fabric scraps or using a small container for threads. By having a designated spot for items that tend to create mess, you can quickly address the clutter before it becomes overwhelming.
Additionally, consider implementing a one-in, one-out rule. This simple guideline can be a game-changer in keeping your supplies in check. Every time you bring in a new fabric or tool, make it a habit to remove one item from your collection. This not only helps control the volume of supplies you have but also encourages you to be more selective about what you choose to add to your sewing space.
Finally, remember that organization is not a one-time task; it's an ongoing journey. Regularly reassess your setup to see if it still meets your needs as your sewing projects evolve. If you find that certain tools or materials are no longer being used, consider donating them to a local school or community center. Not only does this declutter your space, but it also helps others who might benefit from your unused supplies.
By incorporating these strategies into your routine, you can maintain a sewing space that inspires creativity and enhances productivity. Just like keeping a tidy kitchen makes cooking more enjoyable, a well-organized sewing area allows you to immerse yourself in your projects without distractions. So, roll up your sleeves, keep that sewing space sparkling, and let your creativity flow!
Q: How often should I organize my sewing space?
A: It’s a good idea to set aside time weekly for quick tidying, but a more thorough organization might be needed monthly or seasonally, depending on how much you sew.
Q: What are the best storage options for fabric?
A: Clear bins or fabric drawers are excellent for visibility and accessibility. Consider folding fabrics neatly and labeling containers for easy identification.
Q: How can I prevent clutter from accumulating?
A: Adopt a "clean as you go" approach. After completing a project, take a few minutes to put everything back in its place before starting a new one.
Q: What should I do with supplies I no longer use?
A: Consider donating them to local schools, charities, or community sewing groups. This way, you can help others while decluttering your space.
Personalizing Your Space
When it comes to sewing, your workspace should be more than just functional; it should be a reflection of your unique personality and creativity. Think of your sewing area as a blank canvas, waiting for you to splash it with your style and flair. Personalizing your space not only enhances its aesthetic appeal but also fosters a sense of comfort and inspiration, making you want to spend more time there. So, how can you transform your sewing corner into a vibrant sanctuary?
First, consider the color palette of your sewing room. Color can significantly influence your mood and creativity. Soft pastels may create a calming atmosphere, while bold, bright colors can energize and motivate you. You might choose to paint the walls in a color that speaks to you or incorporate colorful storage bins and accessories. Don't shy away from using patterns—think floral prints, polka dots, or even stripes on your fabric storage. These small touches can bring joy and excitement to your workspace.
Next, think about decorative elements that showcase your personality. Perhaps you have a collection of vintage sewing machines or quirky fabric scissors that deserve a place of honor. Creating a display area can be a delightful way to celebrate your passion for sewing. Use shelves or shadow boxes to exhibit your favorite tools, fabrics, or even completed projects. This not only keeps your supplies organized but also creates a visually appealing focal point in your sewing space.
Lighting is another crucial aspect of personalization. A well-lit area can make a world of difference in your sewing experience. Consider adding a stylish lamp that complements your decor, or string fairy lights to create a cozy ambiance. Natural light is also a great mood enhancer, so if you have the option, position your sewing table near a window. The right lighting can help reduce eye strain and make your creative process more enjoyable.
To further personalize your space, think about incorporating inspirational quotes or artwork that resonates with you. You could frame quotes from your favorite designers or hang up artwork that inspires your sewing projects. This not only adds character to your workspace but also serves as a constant reminder of your passion and goals. You might even consider creating a vision board with fabric swatches, project ideas, and motivational phrases to keep your creativity flowing.
Lastly, don't forget about the functionality of your personalized space. While it’s essential to infuse your personality into your sewing area, it’s equally important to ensure that it remains organized and efficient. Use decorative boxes or bins to store your supplies while maintaining a cohesive look. You can label these containers with fun, colorful tags that match your decor, merging organization with style seamlessly.
In conclusion, personalizing your sewing space is all about creating an environment that inspires you while reflecting who you are. With thoughtful color choices, decorative elements, effective lighting, and a touch of functionality, you can transform your sewing area into a haven of creativity. Remember, this is your space—make it a place you love to be!
Q: How can I make my sewing space more organized?
A: Start by decluttering your supplies, using storage solutions like bins and shelves, and maintaining a functional layout that suits your workflow.
Q: What are some easy ways to personalize my sewing area?
A: Incorporate your favorite colors, display inspirational quotes or artwork, and use decorative storage options that reflect your style.
Q: How often should I declutter my sewing supplies?
A: It's a good practice to declutter your sewing supplies every few months to keep your space organized and efficient.
Frequently Asked Questions
- How can I assess my current sewing space effectively?
Start by taking a good look around your sewing area. Identify what you love about it and what feels cluttered or inefficient. Make a list of your supplies and tools, and think about how often you use each item. This will help you pinpoint areas that need improvement and allow you to create a more functional workspace.
- What are the best storage solutions for a small sewing space?
When space is tight, think vertically! Wall-mounted shelves, pegboards, and hooks can help you utilize your walls for storage. Additionally, clear bins and labeled containers can keep your supplies organized and visible, making it easier to find what you need without digging through piles.
- How do I create a functional layout in my sewing area?
A functional layout starts with zoning your space. Place your sewing machine in a comfortable spot where you can easily access your cutting area and storage. Keep frequently used tools within arm's reach to minimize movement and streamline your workflow. Consider the flow of your work and arrange everything accordingly!
- What are some effective decluttering techniques for sewing supplies?
Try the "one in, one out" rule: for every new item you bring in, let go of something old. Sort your supplies into categories such as keep, donate, or discard. If you haven't used an item in the past year, it might be time to let it go. This will help you maintain a tidy and functional sewing space.
- How can I maintain organization in my sewing area?
Set aside a few minutes at the end of each sewing session to tidy up. Regularly check your supplies and reorganize as needed. Creating a habit of putting things back in their designated spots will prevent clutter from building up and keep your space inviting and efficient.
- How can I personalize my sewing space to inspire creativity?
Add personal touches like artwork, favorite fabrics, or inspirational quotes that resonate with you. Use colorful storage solutions or display your projects to make the space feel uniquely yours. A personalized environment can spark creativity and make sewing even more enjoyable!


