Master Simple Quilt Patterns in Six Easy Steps
Welcome to the world of quilting! If you've ever looked at a beautifully crafted quilt and thought, "I wish I could make that," then you're in the right place. This article outlines a straightforward approach to mastering simple quilt patterns. Follow these steps to enhance your quilting skills and create beautiful quilts with ease and confidence. Quilting is not just a craft; it's a journey filled with creativity, color, and connection. Whether you're a complete beginner or someone looking to refine your skills, these six easy steps will guide you toward becoming a quilting pro.
Before diving into the fabric and thread, it's crucial to understand the basics of quilt patterns. Quilt patterns are essentially the blueprints for your creations. They come with a variety of terms and styles that can seem overwhelming at first. However, once you familiarize yourself with the terminology, you'll find that it opens up a world of possibilities. For instance, terms like "block," "sashing," and "basting" will become second nature. There are different types of quilt patterns, including traditional, modern, and art quilts, each offering unique aesthetics and techniques. This foundational knowledge not only inspires creativity but also empowers you to design your own quilts.
Having the right tools can make all the difference in your quilting journey. Imagine trying to bake a cake without a mixer; it would be a challenge, right? Similarly, quilting requires specific tools that streamline the process and enhance the quality of your work. Here are some must-have tools:
- Rotary Cutter: This is your best friend for cutting fabric quickly and accurately.
- Quilting Ruler: A clear ruler helps you measure and cut fabric with precision.
- Cutting Mat: Protects your surfaces while providing a grid for accurate cuts.
- Seam Ripper: An essential tool for correcting mistakes.
By familiarizing yourself with these tools, you'll find that your quilting experience becomes smoother and more enjoyable.
Now that you have your tools, it's time to select the fabric! Choosing the right fabric is akin to picking the right colors for a painting; it can completely transform your quilt's aesthetic. Consider the types of fabric available, such as cotton, flannel, or blends, and think about how they will work together in your design. Color schemes are also essential. Do you want a vibrant quilt that pops, or a more subdued palette that soothes? Pay attention to prints and patterns as well; mixing solids with prints can create a dynamic visual effect. Remember, the fabric you choose will not only impact the look of your quilt but also its feel and durability.
Preparation is key in quilting. Imagine trying to build a house without a solid foundation; it wouldn't stand for long! Similarly, properly preparing your materials ensures a smooth quilting experience. Start by washing your fabrics to remove any chemicals or sizing that could affect your quilt. Once washed, iron your fabrics to eliminate wrinkles, making cutting easier. Cutting your fabric accurately is vital, so take your time here. Organizing your pieces by color or pattern can also help streamline the assembly process later on. A little preparation goes a long way in ensuring your quilt turns out beautifully!
As you embark on your quilting journey, mastering basic techniques is essential. Techniques such as piecing, pressing, and basting are the backbone of quilting. Piecing involves sewing together different fabric pieces to form a quilt top, while pressing ensures that your seams lie flat for a polished finish. Basting, on the other hand, temporarily holds your layers together before the final quilting process. Think of these techniques as the building blocks of your quilt. Once you get the hang of them, you'll find that creating precise and professional-looking quilts becomes much easier, boosting your confidence along the way.
Now comes the exciting part: assembling your quilt! This stage is where all your hard work begins to take shape. Start by planning your layout; consider how each piece will fit together and how colors interact. Once you have a plan, it's time to sew! Use a consistent seam allowance to ensure that your pieces fit together perfectly. As you sew, keep an eye on your alignment. This is crucial for achieving a cohesive look. Remember, assembling your quilt top is not just about sewing; it's about bringing your creative vision to life!
After assembling your quilt top, the next step is quilting it. There are various methods to choose from, including hand quilting and machine quilting. Hand quilting gives a personal touch and allows for intricate designs, while machine quilting is faster and can produce uniform results. Each method has its pros and cons, so choose the one that best fits your project and skill level. Whichever technique you opt for, remember that this step is what truly brings your quilt to life!
The final steps in completing your quilt are all about the finishing touches. Adding borders can frame your quilt beautifully, while binding secures the edges and gives it a polished look. Think of these steps as the icing on the cake; they elevate your quilt from good to great. Take your time with these details, as they can significantly impact the overall appearance of your quilt.
Congratulations on completing your quilt! Now, it's essential to know how to care for your masterpiece. Proper care ensures that your quilt remains beautiful for years to come. Here are some tips:
- Washing: Use cold water and gentle detergent to preserve colors.
- Storing: Keep your quilt in a cool, dry place to prevent damage.
- Displaying: Hang or fold your quilt to showcase your hard work while protecting it from dust.
By following these guidelines, you'll keep your quilt looking fresh and vibrant, allowing you to enjoy it for generations.
Q: What is the best fabric for beginners?
A: Cotton is the most recommended fabric for beginners due to its ease of handling and wide availability.
Q: How long does it take to complete a quilt?
A: The time it takes to complete a quilt varies based on size and complexity, but a simple quilt can take anywhere from a few hours to several days.
Q: Can I quilt without a sewing machine?
A: Absolutely! Hand quilting is a traditional method that many quilters still enjoy.
Understanding Quilt Patterns
When it comes to quilting, understanding quilt patterns is like learning the alphabet before you start writing a novel. Quilt patterns are the blueprints that guide you through the intricate art of quilting, allowing you to transform fabric into a beautiful piece of art. At their core, quilt patterns consist of specific designs that dictate how fabric pieces are cut, arranged, and sewn together. But before diving into the sewing machine, it's essential to familiarize yourself with some key terminology and types of patterns that will serve as your foundation.
First off, let's talk about terminology. You might encounter terms like "block," which refers to a single unit of the quilt pattern, or "layout," which describes how these blocks are arranged. Understanding these terms is crucial because they will pop up repeatedly in your quilting journey. For instance, you might hear the phrase "nine-patch block," which describes a block made up of nine smaller squares. Knowing this lingo will help you follow patterns with ease and communicate with fellow quilters.
Now, let’s explore the types of quilt patterns. There are countless designs to choose from, but they generally fall into a few categories:
- Traditional Patterns: These patterns have stood the test of time, often passed down through generations. Think of classics like the Log Cabin or Double Wedding Ring.
- Modern Patterns: If you’re looking for something fresh and contemporary, modern patterns often feature bold colors and asymmetrical designs, like the Geometric quilt.
- Art Quilts: These are less about functionality and more about expression. They often incorporate mixed media and are designed to be viewed as art pieces.
Understanding these different types of patterns not only broadens your quilting horizons but also sparks your creativity. Imagine the thrill of browsing through a quilt shop or an online fabric store, armed with the knowledge of what you’re looking for! You can envision the final product in your mind, and that’s where the magic begins. Each pattern tells a story, and with the right understanding, you can add your own twist to it.
As you start to explore quilt patterns, keep in mind that mastering them is a journey. Don’t be afraid to experiment with various designs and techniques. You might find that a traditional pattern resonates with you, or perhaps the boldness of modern quilting speaks to your artistic side. The beauty of quilting lies in its versatility and the ability to make each project uniquely yours.
In conclusion, understanding quilt patterns is the first step to unlocking your potential as a quilter. With the right knowledge and a willingness to explore, you can create stunning quilts that not only showcase your skills but also reflect your personal style. So grab your fabric, choose a pattern that excites you, and let your quilting adventure begin!
Essential Quilting Tools
When it comes to quilting, having the right tools can make all the difference between a frustrating experience and a fun, creative one. Think of your quilting tools as the magic wands that help you transform fabric into a beautiful masterpiece. Whether you're a seasoned quilter or just starting out, understanding the essential tools is crucial. So, let's dive into the must-have items that will elevate your quilting game!
First and foremost, a rotary cutter is indispensable. This handy tool is like a pizza cutter for fabric, allowing you to make precise cuts with ease. When paired with a cutting mat, it ensures that your fabric stays in place while you cut. Speaking of cutting mats, a good quality one is essential to protect your surfaces and keep your blades sharp. Make sure to choose a mat that has grid lines; they help you measure and align your fabric accurately.
Next up is the quilt ruler. This tool is your best friend when it comes to measuring and cutting fabric. With clear markings, a quilt ruler allows you to achieve straight cuts and precise angles. It’s like having a personal assistant that ensures everything is perfectly aligned. Don't forget to invest in a variety of sizes; a long ruler is great for cutting larger pieces, while a smaller one is handy for intricate details.
Now, let’s talk about pins. These little guys might seem insignificant, but they are vital for holding your fabric pieces together before sewing. Think of them as the glue that keeps everything in place. You can choose from various types, but glass-head pins are particularly useful because they can withstand the heat of an iron without melting.
Another essential tool is the sewing machine. While some purists enjoy hand quilting, a sewing machine can save you a lot of time and effort. If you're new to quilting, look for a machine with a walking foot; this feature helps feed multiple layers of fabric evenly, preventing puckering. And if you’re feeling adventurous, consider trying out a quilting foot or free-motion quilting to explore different techniques.
To keep your workspace organized, a fabric storage solution is a must. Whether it's a simple basket or a dedicated shelving unit, having a designated space for your fabrics will not only keep your sewing area tidy but also inspire you each time you see your beautiful materials. Remember, a clutter-free workspace is a happy workspace!
In addition to these tools, you might find that having a pressing mat and an iron specifically for quilting can greatly enhance your results. Pressing your seams as you go will make a huge difference in the overall appearance of your quilt. A good iron can help you achieve crisp seams, which is essential for a professional finish.
Finally, let’s not overlook the importance of a quilt pattern book or access to online resources. These can provide you with inspiration and guidance, especially when you’re unsure of where to start. Having a variety of patterns at your fingertips can spark your creativity and help you learn new techniques.
To summarize, here’s a quick table outlining the essential quilting tools:
| Tool | Purpose |
|---|---|
| Rotary Cutter | For precise fabric cutting |
| Cutting Mat | Protects surfaces and keeps fabric in place |
| Quilt Ruler | Ensures accurate measurements and cuts |
| Pins | Holds fabric pieces together before sewing |
| Sewing Machine | Speeds up the sewing process |
| Pressing Mat | Helps achieve crisp seams |
| Fabric Storage | Keeps your workspace organized |
| Quilt Pattern Book | Provides inspiration and guidance |
With these essential tools in your quilting arsenal, you're well on your way to creating stunning quilts that you'll be proud to show off. Remember, the right tools not only enhance your skills but also make the quilting process more enjoyable. Happy quilting!
Q: What is the best rotary cutter for beginners?
A: For beginners, a 45mm rotary cutter is a great choice. It's versatile and easy to handle, making it perfect for various fabric types.
Q: Do I need a special sewing machine for quilting?
A: While you can use any sewing machine, one with a walking foot and a larger throat space will make quilting much easier.
Q: How often should I replace my rotary cutter blade?
A: It’s best to replace your rotary cutter blade whenever you notice it struggling to cut through fabric cleanly, which could be every few projects depending on usage.
Choosing the Right Fabric
When it comes to quilting, one of the most exciting yet daunting tasks is . The fabric you select can make or break your quilt, influencing not only its appearance but also its feel and durability. So, how do you navigate through the sea of colors, textures, and patterns? Let’s dive into the world of fabrics and uncover the secrets to making the best choices for your quilting projects.
First off, it's essential to understand the different types of fabrics available. Most quilters opt for cotton due to its versatility, ease of handling, and vibrant prints. However, you can also explore other materials such as batiks, which are known for their rich colors and unique patterns, or flannel, which adds a cozy touch to your quilts. Each fabric type brings its own characteristics, so consider the intended use of your quilt. For example, if you're making a quilt for a child, you might want to choose soft, durable fabrics that can withstand frequent washing.
Next, let’s talk about color and print. Choosing a color palette can feel overwhelming, but think of it as painting a masterpiece. You want to create a harmonious blend that speaks to your style. A good rule of thumb is to pick a few main colors and then add complementary shades. You can use the color wheel as a guide; colors opposite each other on the wheel often look great together. Additionally, consider the scale of your prints. Large prints can dominate a quilt, while smaller prints can add subtle interest. Mixing different scales can create a dynamic and visually appealing design.
Another crucial aspect to consider is the weight of the fabric. Heavier fabrics like canvas or denim are great for quilts that need to be durable, while lighter fabrics like cotton lawn are perfect for delicate, flowing designs. If you're unsure about the fabric's weight, feel free to ask for a sample or swatch. Testing the fabric against your quilt pattern can give you a better idea of how it will look and feel once completed.
Before making your final decision, it’s wise to consider the quilt pattern you plan to use. Some patterns work better with certain fabric types. For instance, intricate patterns may require more precise cuts, making a stiffer fabric a better choice. On the other hand, simple patterns can shine with softer materials. To visualize your choices, lay out your fabric selections next to your pattern. This will help you see how they interact and whether they complement each other.
Finally, don’t forget about the importance of pre-washing your fabric. This step can prevent future surprises, like shrinking or bleeding colors, which can ruin your hard work. It’s a small effort that pays off in the long run, ensuring your quilt remains beautiful and intact for years to come.
In summary, choosing the right fabric is all about understanding your options, considering your quilt’s purpose, and letting your creativity flow. By taking the time to select fabrics that resonate with your vision, you’ll not only enhance the beauty of your quilt but also enjoy the quilting process even more. So, gather your materials, unleash your imagination, and let the fabric guide you to create a stunning quilt!
- What is the best fabric for beginners? Cotton is highly recommended due to its ease of use and availability.
- Can I mix different fabric types? Yes, but make sure they have similar weights and care instructions for best results.
- Should I pre-wash my fabric? Yes, pre-washing can prevent shrinkage and color bleeding in your finished quilt.
Preparing Your Materials
When it comes to quilting, preparation is everything. Think of it like setting the stage for a grand performance; you want everything in place before the show begins. The first step in this preparation process is to wash your fabrics. This step is crucial because it removes any chemicals or sizing that may have been applied during manufacturing. Washing your fabric not only pre-shrinks it but also ensures that your quilt will maintain its beauty over time. Use a gentle detergent and avoid fabric softeners, as they can affect the fabric's ability to hold stitches.
Once your fabrics are clean and dry, it’s time to cut them accurately. A rotary cutter is your best friend here, paired with a cutting mat and a clear ruler. This trio allows for precise cuts, which are essential for piecing your quilt together seamlessly. Remember, the more accurate your cuts, the more polished your finished quilt will look. When cutting, take your time and make sure you’re following your pattern’s dimensions closely. If you’re unsure about your cutting skills, you can practice on scrap fabric until you feel confident.
After cutting, it’s beneficial to organize your materials. This might sound tedious, but having your pieces sorted will save you time and frustration later on. Consider using labeled bins or containers for different fabric colors or sections of your quilt. For example, if you’re working on a quilt with multiple blocks, you might have one container for each block’s fabric pieces. This not only keeps your workspace tidy but also makes it easier to find what you need when you need it.
Additionally, don't forget to gather your other essential materials. You’ll need thread that matches your fabric, pins for holding pieces together, and a good sewing machine if you’re not hand quilting. Having everything at your fingertips will allow you to dive into the sewing process without unnecessary interruptions. If you’re new to quilting, you might want to create a checklist to ensure you have all your materials ready before you start.
Lastly, take a moment to visualize your quilt’s design. This is where your creativity can shine! Sketching out your quilt layout on paper can help you see how the colors and patterns work together. It’s like creating a roadmap for your quilting journey, guiding you through the assembly process. Remember, preparation is not just about gathering materials; it’s also about setting your intentions for the project ahead.

Basic Quilting Techniques
When it comes to quilting, mastering the basic techniques is like learning the ABCs of a beautiful story. These foundational skills not only enhance your quilting experience but also empower you to create stunning quilts that showcase your unique style. So, let’s dive into the essential techniques that will take your quilting game to the next level!
First off, let’s talk about piecing. This is the art of sewing together different fabric pieces to form a larger patchwork. Imagine piecing as assembling a jigsaw puzzle where each fabric square is a puzzle piece that contributes to the overall picture. To get started, it’s crucial to have an accurate 1/4 inch seam allowance, as this will ensure that your pieces fit together perfectly. Many quilters use a seam guide on their sewing machine to maintain this consistency.
Next up is pressing, which is not just about making your seams look neat; it’s about setting the stage for your quilt. Proper pressing techniques can make a world of difference. Instead of sliding your iron back and forth, which can distort your fabric, try using a pressing motion. This means lifting the iron straight up and down on the fabric. It helps to keep the pieces flat and aligned, which is crucial for the next steps.
Now, let’s not forget about basting. Think of basting as the glue that holds your quilt layers together before you start sewing. This technique can be done in several ways: using safety pins, basting spray, or hand stitching with long, loose stitches. Each method has its pros and cons, but the goal remains the same: to keep your layers from shifting while you quilt. If you’re new to basting, I recommend starting with safety pins, as they are easy to use and provide good hold.
After basting, you’ll be ready to move on to the actual quilting process. Here’s where you can let your creativity shine! You can choose to hand quilt or machine quilt, depending on your preferences and the look you want to achieve. Hand quilting can give your quilt a charming, vintage feel, while machine quilting is often faster and allows for more intricate designs. Whichever method you choose, the key is to keep your stitches even and consistent.
Finally, let’s talk about binding. This is the finishing touch that frames your quilt and gives it a polished look. Binding can be made from the same fabric as your quilt or a contrasting fabric to create a striking border. To attach the binding, fold it over the edges of your quilt and sew it down. This step is not just functional; it’s also an opportunity to add a personal touch to your quilt.
In summary, mastering basic quilting techniques is essential for any aspiring quilter. From piecing and pressing to basting, quilting, and binding, each technique plays a vital role in the overall process. So grab your fabric, gather your tools, and let your creativity flow as you embark on your quilting journey!
Q: What is the best fabric for beginners?
A: Cotton fabric is often recommended for beginners due to its ease of handling and variety of prints. It’s forgiving and holds up well during the quilting process.
Q: How do I choose a quilt pattern?
A: Start with simpler patterns that use basic shapes. As you gain confidence, you can explore more complex designs. Look for patterns that inspire you and fit your skill level.
Q: Can I quilt without a sewing machine?
A: Absolutely! Hand quilting is a traditional method that many quilters enjoy. It may take longer, but it can be a rewarding and meditative process.
Q: How do I fix mistakes in my quilt?
A: Mistakes happen to everyone! Depending on the issue, you might be able to unpick stitches and re-sew, or you could incorporate the mistake into your design creatively.
Assembling Your Quilt
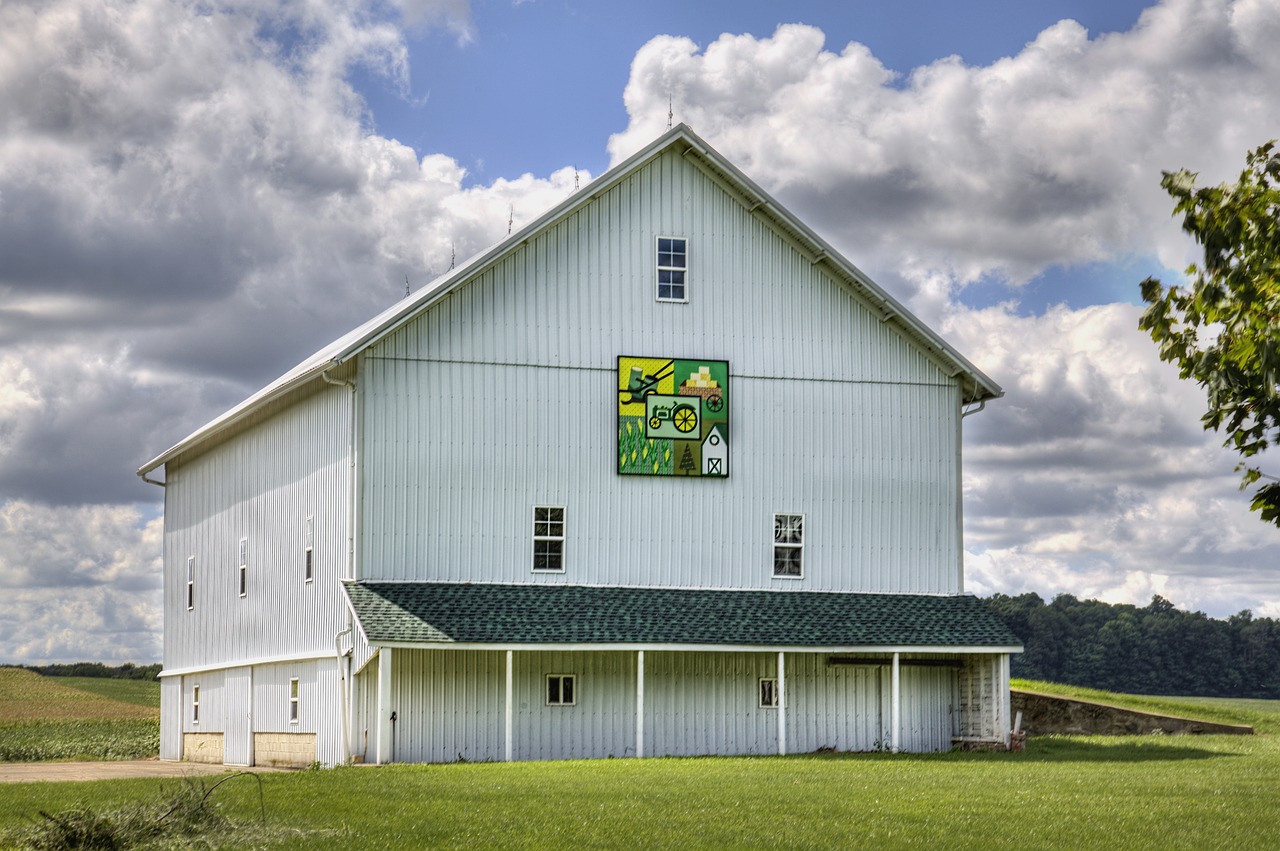
Assembling your quilt is where the magic truly begins! It’s that exhilarating moment when all your hard work comes together to create a beautiful masterpiece. But before you dive in, let’s take a moment to discuss some essential steps to ensure your quilt top turns out just as you envisioned. First, you need to have a clear plan for your layout. This is where you can let your creativity shine! Lay out your fabric pieces on a flat surface, arranging them in a way that pleases your eye. Think of it as a puzzle; you want to make sure all the pieces fit together harmoniously.
Once you’re satisfied with the layout, it’s time to start sewing. Begin by sewing the pieces together in rows. It’s often easier to work with smaller sections rather than trying to sew the entire quilt top at once. As you sew, make sure to pin your pieces together. This will help keep everything aligned and prevent any shifting while you sew. After sewing your rows, press the seams open or to one side, depending on your preference. This step is crucial because it helps eliminate bulk and gives your quilt a nice flat finish.
Now, let’s talk about the importance of seam allowance. A standard seam allowance in quilting is typically ¼ inch. Keeping your seams consistent will ensure that your quilt pieces fit together perfectly. If you stray from this measurement, you may end up with gaps or overlapping fabric, which can be frustrating! So, always keep your seam allowance in check.
After you’ve sewn your rows, it’s time to join them together. This is where you’ll want to pay close attention to matching your seams. Align the seams of the rows you’re joining, and use pins to hold them in place. This will help you achieve that beautiful, seamless look that every quilter strives for. Once everything is pinned and aligned, sew the rows together just like you did with the individual pieces.
When your quilt top is fully assembled, take a step back and admire your work! But don’t get too comfortable just yet. You still have a few more steps before your quilt is complete. It’s essential to square up your quilt top. This means trimming any uneven edges to ensure it’s perfectly rectangular. A square quilt top not only looks better but also makes it easier to quilt later on.
Finally, once your quilt top is squared and ready, you’re prepared to move on to the next stage of the quilting process. This includes layering your quilt top with batting and backing fabric, which will ultimately give your quilt its warmth and structure. So, take a moment to celebrate your progress, and get ready for the exciting journey of quilting your project!
- What is the best way to layout my quilt pieces? It's best to experiment with different arrangements on a flat surface before sewing. Take your time to see what looks best to you!
- How do I ensure my seams are consistent? Use a ¼ inch seam allowance and consider marking your sewing machine with tape to help guide your fabric.
- Should I press my seams open or to one side? It depends on your preference, but pressing seams open helps reduce bulk, especially in intricate designs.
- What does it mean to square up my quilt top? Squaring up means trimming the edges of your quilt top so that all sides are even and straight, which is crucial for a polished finish.
Quilting Your Project
Quilting your project is where the magic truly happens! It’s the stage that transforms your fabric pieces into a cohesive and beautiful quilt. Whether you're a novice or a seasoned quilter, understanding the different methods of quilting can significantly influence the final outcome of your masterpiece. So, let's dive into the world of quilting techniques that will elevate your project!
First off, you have two primary methods to choose from: hand quilting and machine quilting. Each method has its unique charm and benefits. Hand quilting, for instance, allows for a personal touch and often results in a quilt that feels more intimate and warm. It's like writing a love letter to your fabric! On the other hand, machine quilting is quicker and can produce more uniform stitches, which is perfect for those who are looking to complete their projects in a timely manner. Think of it as sending a text message—efficient and straightforward!
When selecting your quilting method, consider the following factors:
- Time: How much time do you have to dedicate to your project?
- Skill Level: Are you comfortable with your sewing machine, or do you prefer the tranquility of handwork?
- Design: Some designs lend themselves better to one method over the other.
Once you’ve chosen your method, it’s time to prepare your quilt sandwich. This is the term used to describe the three layers of your quilt: the quilt top, the batting, and the backing. Lay them out in this order: the backing (wrong side up), the batting, and finally, the quilt top (right side up). It’s essential to ensure that these layers are smooth and wrinkle-free, as any bumps can lead to uneven quilting. You can use safety pins, basting spray, or thread basting to secure these layers together. Think of it as setting the stage for a grand performance—everything needs to be just right!
Now, let’s get into the nitty-gritty of quilting. If you’re hand quilting, you’ll want to use a needle and thread that can handle the thickness of your quilt. A thimble can also be a handy tool to protect your fingers. Start by making small, even stitches, and remember to enjoy the process. Each stitch is a testament to your creativity and hard work!
For machine quilting, ensure your sewing machine is equipped with a walking foot or a free-motion foot, depending on the style you choose. Adjust your stitch length to suit your design—shorter stitches for intricate patterns and longer stitches for simple designs. As you quilt, keep an eye on the tension of your thread; this can make or break your project! If the thread is too tight or too loose, it can lead to puckering or uneven stitches.
Finally, don't forget to take breaks! Quilting can be a marathon, not a sprint. Step back and admire your work, and don't hesitate to make adjustments as you go. Remember, quilting is as much about the journey as it is about the destination. Each quilt tells a story, and your story is unfolding with every stitch.
Q: What type of thread should I use for quilting?
A: It's best to use cotton thread for quilting as it provides durability and a smooth finish. However, polyester thread can also work well, especially for machine quilting.
Q: Can I quilt without a walking foot?
A: While a walking foot is recommended for straight-line quilting, you can still quilt without one. Just be mindful of the fabric layers shifting and adjust your sewing technique accordingly.
Q: How do I choose the right batting for my quilt?
A: The type of batting you choose depends on your desired quilt weight and feel. Cotton batting is breathable and soft, while polyester batting is lightweight and holds its shape well. Consider your project’s purpose when making your choice.
Q: Is it necessary to wash my quilt after finishing it?
A: Washing your quilt is a personal choice. Some quilters prefer to wash it to remove any markings or residues, while others leave it unwashed to maintain the crispness of the fabric. Just make sure to follow care instructions based on the materials used!
Finishing Touches
As you approach the final stages of your quilting journey, the are what transform your quilt from a simple collection of fabric pieces into a stunning masterpiece. This is the moment where all your hard work pays off, and the quilt truly comes to life. You might be wondering, "What exactly are these finishing touches?" Well, let’s delve into the essentials that will give your quilt that polished, professional look.
One of the first steps in the finishing process is adding borders. Borders not only frame your quilt but also provide a beautiful transition between the quilt top and the backing fabric. When choosing borders, consider the colors and patterns of your quilt. A solid color can create a striking contrast, while a patterned border can add depth and interest. Typically, borders should be at least 4 to 6 inches wide, but feel free to experiment with different sizes to see what works best for your design.
Next comes the binding, which is arguably the most critical finishing touch. Binding is the fabric that wraps around the edges of your quilt, securing all the layers together. It’s like the icing on the cake! You can choose to make your binding from the same fabric as your quilt or opt for a contrasting color to make it pop. To create your binding, you’ll need to cut strips of fabric, usually 2.5 inches wide, and sew them together to form one long strip. Once you’ve prepared your binding, it’s time to attach it to the quilt. This process can be done either by hand or machine, depending on your comfort level and the look you want to achieve.
After binding, you might want to add a label to your quilt. This is a wonderful way to personalize your creation and share its story. A label typically includes your name, the date of completion, and perhaps a special message or the quilt's name. You can sew it onto the back of the quilt or incorporate it into the quilt top. Not only does this add a personal touch, but it also serves as a reminder of the time and effort you put into your work.
Finally, before you showcase your quilt, it’s essential to give it a good press. This step helps to smooth out any wrinkles and ensures that your quilt looks its best. Use a steam iron and press gently, being careful not to distort any seams. Once your quilt is pressed and looking fabulous, you can display it proudly or gift it to someone special.
- What is the best fabric for quilt binding? Cotton fabric is typically recommended for binding due to its durability and ease of use.
- How do I wash my finished quilt? It’s best to wash your quilt on a gentle cycle with cold water. Avoid bleach and opt for mild detergent to maintain the fabric's integrity.
- Can I machine bind my quilt? Absolutely! Machine binding is a quick and effective method. Just ensure your stitches are even for a professional finish.
Caring for Your Quilt
Caring for your quilt is essential to ensure its longevity and beauty. After all, a quilt isn't just a blanket; it’s a labor of love, a piece of art that tells a story. To keep your quilt looking fresh and vibrant, you need to follow a few simple yet effective care tips. First, let’s talk about washing. Always check the fabric content and any care labels before doing so. Most quilts can be washed in cold water on a gentle cycle, but some fabrics may require special handling. If you're unsure, hand washing is a safe bet. It’s like giving your quilt a gentle spa day!
When it comes to drying, avoid using a dryer if possible. Instead, lay your quilt flat on a clean surface or hang it to dry. This helps maintain the quilt's shape and prevents any potential shrinkage. If you must use a dryer, opt for a low heat setting and remove the quilt while it’s still slightly damp to avoid over-drying. Think of it as keeping your quilt cozy without overheating it!
Storage is another critical aspect of quilt care. If you’re not using your quilt regularly, store it in a cool, dry place away from direct sunlight. Sunlight can fade colors and weaken fabrics over time. Consider using a breathable cotton storage bag instead of plastic, as plastic can trap moisture and lead to mildew. It’s like giving your quilt a comfy bed to rest in when it’s not in use!
Lastly, don’t forget about regular maintenance. Check your quilt periodically for any loose threads or small tears and mend them promptly. This proactive approach can prevent small issues from becoming big problems. Plus, it’s a great way to keep the quilt in tip-top shape for years to come. Remember, a little love goes a long way in quilt care!
In summary, here are some quick tips for caring for your quilt:
- Wash gently in cold water.
- Air dry or use low heat in the dryer.
- Store in a cool, dry place away from sunlight.
- Regularly check for damage and mend as needed.
By following these simple steps, your quilt will not only remain beautiful but will also hold the memories and warmth of the moments spent creating it. Caring for your quilt is more than just maintenance; it’s about honoring the time and effort you put into making it.
Q: How often should I wash my quilt?
A: It depends on usage. If it’s used frequently, washing every few months is ideal. For decorative quilts, consider washing once a year.
Q: Can I use bleach on my quilt?
A: Avoid bleach as it can damage the fabrics and colors. Instead, use a gentle detergent specifically designed for delicate fabrics.
Q: What is the best way to store my quilt?
A: Store your quilt in a breathable cotton bag in a cool, dry place, away from direct sunlight.
Q: How do I repair a small tear in my quilt?
A: Use a needle and thread to mend small tears. For larger repairs, consider using a patch of similar fabric to cover the area.
Frequently Asked Questions
- What are quilt patterns and why are they important?
Quilt patterns are essentially blueprints for creating quilts. They guide you on how to cut and piece your fabric together to achieve a specific design. Understanding quilt patterns is crucial because it lays the groundwork for your quilting journey, allowing you to express your creativity and create stunning quilts with confidence.
- What essential tools do I need to start quilting?
To get started with quilting, there are a few must-have tools you'll need. These include a rotary cutter for precise cutting, a cutting mat to protect your surfaces, rulers for accurate measurements, and pins to hold your pieces together. Equipping yourself with these tools will make your quilting experience smoother and more enjoyable.
- How do I choose the right fabric for my quilt?
Choosing the right fabric is crucial for the overall look of your quilt. Consider the type of fabric, its print, and color scheme. It's often helpful to select a mix of fabrics that complement each other. Don't shy away from experimenting with different textures and patterns—this can add depth and interest to your quilt!
- What preparation is necessary before starting to quilt?
Preparation is key in quilting! Before you dive into your project, make sure to wash your fabrics to remove any chemicals. Then, cut them accurately and organize them by color or pattern. This will not only save you time but also ensure that your quilting process goes off without a hitch.
- What are some basic quilting techniques I should learn?
Some foundational techniques every quilter should master include piecing, pressing, and basting. Piecing involves sewing your fabric pieces together to form the quilt top, pressing ensures that your seams lay flat, and basting holds everything in place before the final stitching. Mastering these skills will significantly improve the quality of your quilts.
- How do I assemble my quilt once I have all the pieces?
Assembling your quilt involves laying out your pieces according to your pattern, sewing them together, and ensuring everything is aligned properly. Take your time with this step; it’s where your design really comes to life! Following a step-by-step approach will help you stay organized and focused.
- What are the different methods of quilting?
There are two main methods of quilting: hand quilting and machine quilting. Hand quilting gives you a personal touch and can be quite meditative, while machine quilting is faster and often more efficient. The choice depends on your comfort level and the look you want to achieve.
- What finishing touches should I add to my quilt?
Finishing touches can elevate your quilt from good to great! Adding borders can frame your design beautifully, and binding is essential for a polished look. These final steps are what give your quilt a professional appearance, so don't rush through them!
- How should I care for my quilt after it's finished?
To maintain your quilt's beauty and longevity, proper care is essential. Always wash it gently, preferably by hand or on a delicate cycle, and avoid harsh detergents. When storing, keep it in a cool, dry place to prevent damage. Displaying your quilt can also be a great way to appreciate your hard work!


