How to Grow a Pumpkin Patch for Halloween
Are you ready to dive into the delightful world of pumpkin growing? Growing your own pumpkin patch can be an exhilarating experience, especially as Halloween approaches! Imagine the joy of picking your own pumpkins right from your backyard, ready to be carved into spooky Jack-o'-Lanterns or transformed into delicious pies. But before you plunge into this vibrant adventure, there are essential steps to consider that will ensure your pumpkin patch flourishes.
First things first, it's crucial to understand that not all pumpkins are created equal. Different varieties serve different purposes; some are perfect for carving, while others are ideal for baking. Knowing what you want is the first step toward creating a successful patch. But that’s just the beginning! You’ll also need to prepare the soil, choose the right planting time, and care for your plants as they grow. It’s a bit like preparing for a grand feast—every ingredient matters!
In this article, we’ll guide you through each step, from selecting the right seeds to harvesting your pumpkins. We’ll cover everything you need to know to make your pumpkin patch the talk of the town this Halloween. So, roll up your sleeves and let’s get started on growing those pumpkins!
When it comes to pumpkin varieties, the options can be overwhelming. From the classic Jack-o'-Lantern to the sweet and flavorful pie pumpkins, each type has its unique charm. If you're looking to create a stunning display, consider incorporating ornamental pumpkins as well. Here’s a quick rundown of popular varieties:
| Variety | Best For |
|---|---|
| Jack-o'-Lantern | Carving |
| Pie Pumpkin | Baking |
| Ornamental Pumpkin | Decorations |
Choosing the right variety not only enhances your Halloween decor but also ensures you have pumpkins that meet your specific needs, whether it's for carving, cooking, or simply enjoying their beauty.
Healthy soil is the foundation of a thriving pumpkin patch. Before you plant, you need to prepare the soil to create the perfect environment for your pumpkins to grow. Start by testing your soil quality. You can use a simple pH test kit, which you can find at any garden center. Pumpkins thrive best in soil that has a pH level between 6.0 and 7.0. If your soil falls outside this range, don’t worry! There are plenty of ways to amend it.
Understanding soil pH is crucial because it affects nutrient availability. If your soil is too acidic or alkaline, your pumpkins may struggle to absorb essential nutrients. Once you’ve tested your soil, you can adjust the pH as needed. For example, adding lime can raise the pH, while sulfur can lower it. It’s like tuning a musical instrument—getting the right balance is key!
Next, let’s talk about organic matter. Incorporating compost and other organic materials into your soil enriches it and improves its structure. Aim to mix in about 2-4 inches of compost to your planting area. This not only enhances soil fertility but also helps retain moisture, which is vital for your growing pumpkins.
Good drainage is essential to prevent waterlogging, which can lead to root rot. If your soil tends to hold water, consider creating raised beds or adding sand to improve drainage. Think of it as giving your pumpkins a cozy, well-drained home—after all, they deserve the best!
Timing is everything in gardening, and pumpkin growing is no exception. Generally, you should plant your pumpkin seeds after the last frost date in your area. This is crucial because pumpkins love warm weather and won’t thrive in chilly conditions. Keep an eye on the weather and make sure the soil temperature is at least 70°F before planting.
Now that you know how to prepare your soil and choose the right varieties, you’re well on your way to creating a stunning pumpkin patch. But remember, growing pumpkins is a journey that requires ongoing care and attention. So, let’s explore the best planting techniques next!
- How long does it take for pumpkins to grow? Typically, pumpkins take about 75 to 100 days to mature, depending on the variety.
- Can I grow pumpkins in containers? Yes, smaller varieties can be grown in large containers, but ensure they have enough space and support.
- What pests should I watch out for? Common pests include aphids, squash bugs, and cucumber beetles. Regular monitoring and organic pest control can help.
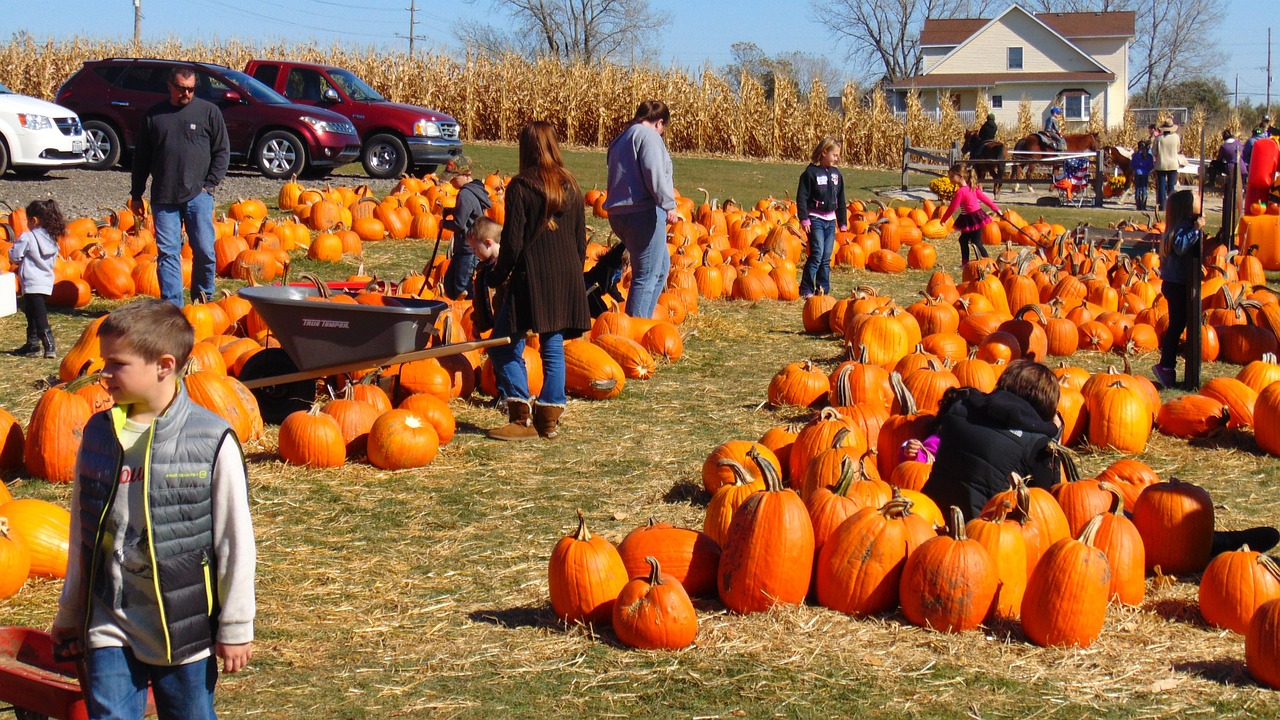
Choosing the Right Pumpkin Varieties
When it comes to growing pumpkins, selecting the right variety can make all the difference in your Halloween experience. Just like choosing the perfect costume for a spooky night, the pumpkin you grow sets the stage for your fall festivities. There are numerous pumpkin varieties available, each with its own unique characteristics, and knowing what to look for is essential. Let's dive into some popular types that can help you create the ultimate pumpkin patch.
First up, we have the classic Jack-o'-Lantern. This variety is the quintessential Halloween pumpkin, known for its bright orange skin and sturdy structure. It's perfect for carving, thanks to its thick walls and hollow interior. If you're planning on lighting up your porch with a spooky face, this is the pumpkin for you. Jack-o'-Lanterns typically weigh between 8 to 15 pounds, making them a manageable size for most families.
Next, let’s talk about pie pumpkins. Unlike their larger counterparts, pie pumpkins are smaller and have a denser flesh, which makes them ideal for baking. If you want to whip up some delicious pumpkin pie or other pumpkin-flavored treats, these little gems are your best bet. They usually weigh around 4 to 8 pounds and have a sweet, rich flavor that will elevate any dessert.
In addition to these favorites, there are also ornamental pumpkins. These come in various shapes, sizes, and colors, making them perfect for decorative purposes. Whether you want to create a stunning fall display or add a quirky touch to your Halloween decor, ornamental pumpkins can provide that unique flair. Some popular ornamental varieties include the White Ghost pumpkin and the Miniature Pumpkins, which are perfect for table centerpieces.
When choosing the right pumpkin variety, consider the following factors:
- Purpose: Are you looking to carve, cook, or decorate?
- Size: How much space do you have in your garden?
- Climate: Some varieties thrive better in certain climates, so check what works best in your area.
In conclusion, selecting the right pumpkin variety is a crucial step in ensuring a successful pumpkin patch. Whether you want to create an eye-catching Halloween display or bake delicious treats, understanding the unique traits of each type will help you make an informed decision. So, roll up your sleeves, pick your favorites, and get ready to enjoy all the fun that comes with growing your own pumpkins!
Q: What is the best pumpkin variety for carving?
A: The Jack-o'-Lantern variety is the best choice for carving due to its sturdy structure and hollow interior.
Q: Can I use any pumpkin for baking?
A: While you can use any pumpkin for baking, pie pumpkins are specifically bred for their sweet flavor and dense flesh, making them the ideal choice.
Q: How do I know which pumpkins are ornamental?
A: Ornamental pumpkins are typically smaller, come in various colors, and are often used for decoration rather than consumption.

Preparing the Soil for Planting
When it comes to growing a pumpkin patch, the foundation of your success lies in the soil preparation. Think of soil as the cozy bed where your pumpkins will grow; if it's not comfortable, they won't thrive. The first step in this journey is to test your soil quality. You can do this by using a simple soil test kit, which you can find at garden centers or online. These kits will help you determine the pH level and nutrient content of your soil, allowing you to understand what amendments are necessary for optimal pumpkin growth.
Once you've tested your soil, the next crucial step is amending it with organic matter. Adding compost is one of the best ways to enrich your soil, as it provides essential nutrients and improves soil structure. Think of compost as a multi-vitamin for your soil; it enhances fertility and helps retain moisture, which is vital for growing pumpkins. You can mix in well-rotted manure, leaf mold, or even aged grass clippings. Aim to incorporate at least 2-3 inches of organic matter into the top 12 inches of soil.
Another important factor to consider is drainage. Pumpkins are susceptible to root rot, which can occur if the soil is too wet. To ensure proper drainage, you might want to consider the following techniques:
- Raised Beds: Creating raised beds can help improve drainage by elevating the soil above ground level.
- Amend with Sand: If your soil is heavy clay, mixing in sand can help break it up and improve drainage.
- Install Drainage Tiles: In areas prone to waterlogging, installing drainage tiles can help divert excess water away from your pumpkin patch.
After addressing these aspects, you’ll want to ensure that your soil is well-aerated. Compacted soil can stunt the growth of your pumpkins, so consider using a garden fork or tiller to loosen the soil before planting. This will allow the roots to spread out easily and access the nutrients they need to flourish.
Lastly, timing your soil preparation is key. Ideally, you want to prepare your soil a few weeks before planting. This gives the organic matter time to integrate into the soil and ensures that the conditions are just right for your pumpkin seeds. Remember, a little effort in preparing your soil can lead to a bountiful harvest, so don’t skip this crucial step!
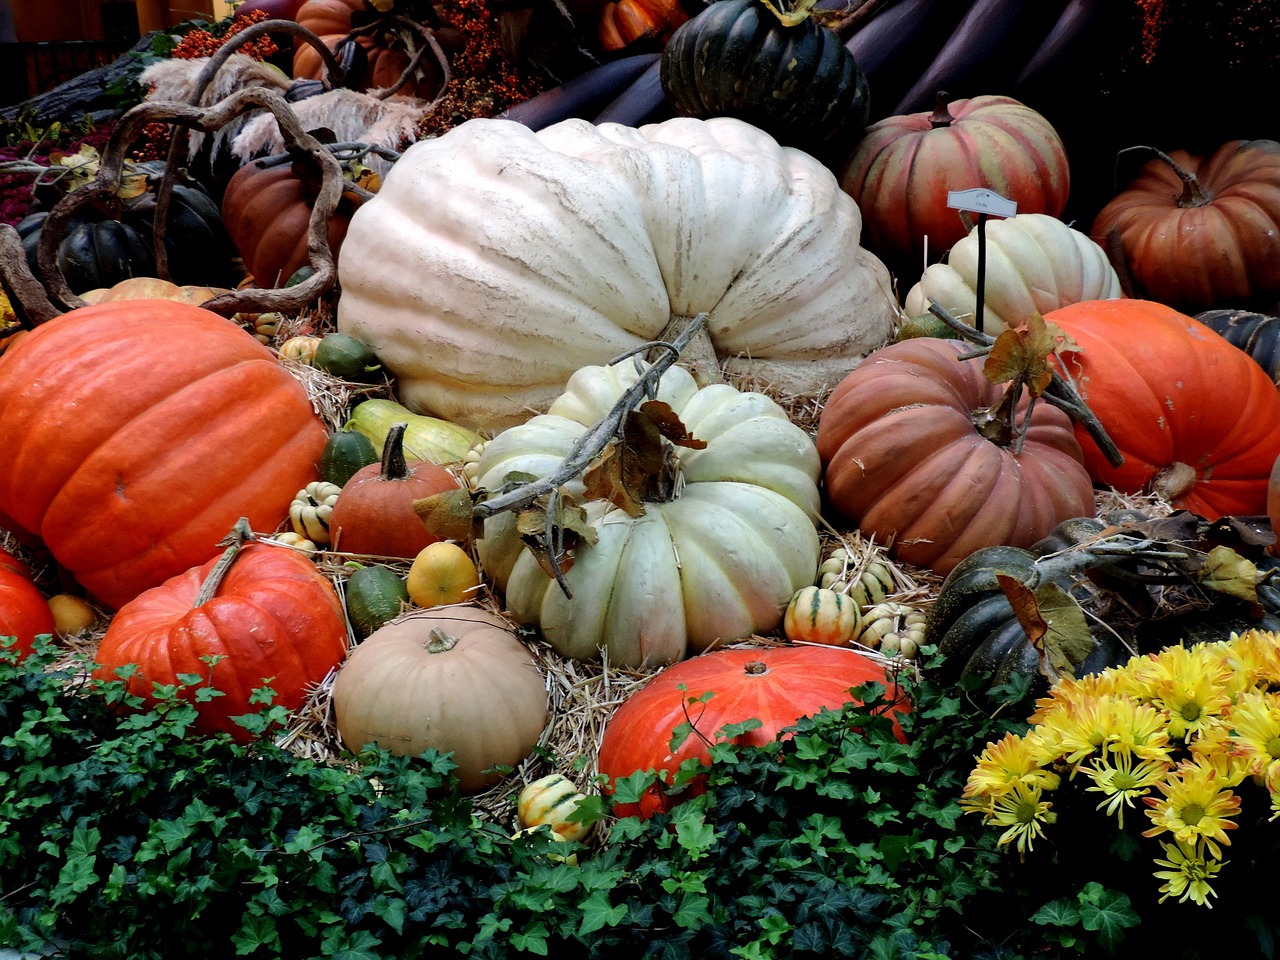
Testing Soil pH
Understanding the pH level of your soil is crucial for growing healthy pumpkins. Soil pH affects the availability of nutrients to your plants, which can significantly impact their growth and yield. In simple terms, pH is a measure of how acidic or alkaline your soil is, with a scale ranging from 0 to 14. A pH of 7 is considered neutral, while anything below 7 is acidic, and above 7 is alkaline. For pumpkins, the ideal soil pH typically falls between 6.0 and 7.0. If your soil is too acidic or alkaline, your pumpkins may struggle to absorb essential nutrients, leading to stunted growth or poor fruit quality.
To test your soil's pH, you can use a few different methods. One of the easiest ways is to purchase a soil pH test kit from a garden center or online. These kits usually come with instructions and require you to mix a soil sample with a testing solution, which will change color based on the pH level. Alternatively, you can send a soil sample to a local agricultural extension office for a more comprehensive analysis. This option often provides detailed insights into nutrient levels and recommendations for amendments.
Once you have your pH results, you may find that your soil needs some adjustments. Here’s a quick guide on how to amend your soil based on pH levels:
| Soil pH Level | Recommended Amendment |
|---|---|
| Below 6.0 (Acidic) | Add lime (calcium carbonate) to raise pH |
| 6.0 - 7.0 (Ideal) | No amendment needed |
| Above 7.0 (Alkaline) | Add sulfur or organic matter to lower pH |
When applying amendments, it's essential to mix them thoroughly into the top 6 to 12 inches of soil. This ensures that the amendments interact with the soil effectively and create a balanced environment for your pumpkin plants. Remember, making changes to soil pH is not an overnight process; it can take several weeks or even months for the amendments to fully integrate and show results. Therefore, it's wise to test your soil well in advance of planting to give your pumpkins the best chance for a fruitful growth season.
In conclusion, testing and adjusting your soil pH is a fundamental step in preparing for a successful pumpkin patch. By ensuring that your soil is within the optimal pH range, you are setting the stage for healthy plants that can produce vibrant, delicious pumpkins just in time for Halloween!
- How often should I test my soil pH? It's recommended to test your soil pH at least once a year, preferably before planting season.
- Can I use household items to test soil pH? Yes, you can use vinegar and baking soda as a DIY method, but for accurate results, a soil test kit is best.
- What if my pumpkins are not growing well? Check your soil pH and nutrient levels, as imbalances can lead to poor growth.
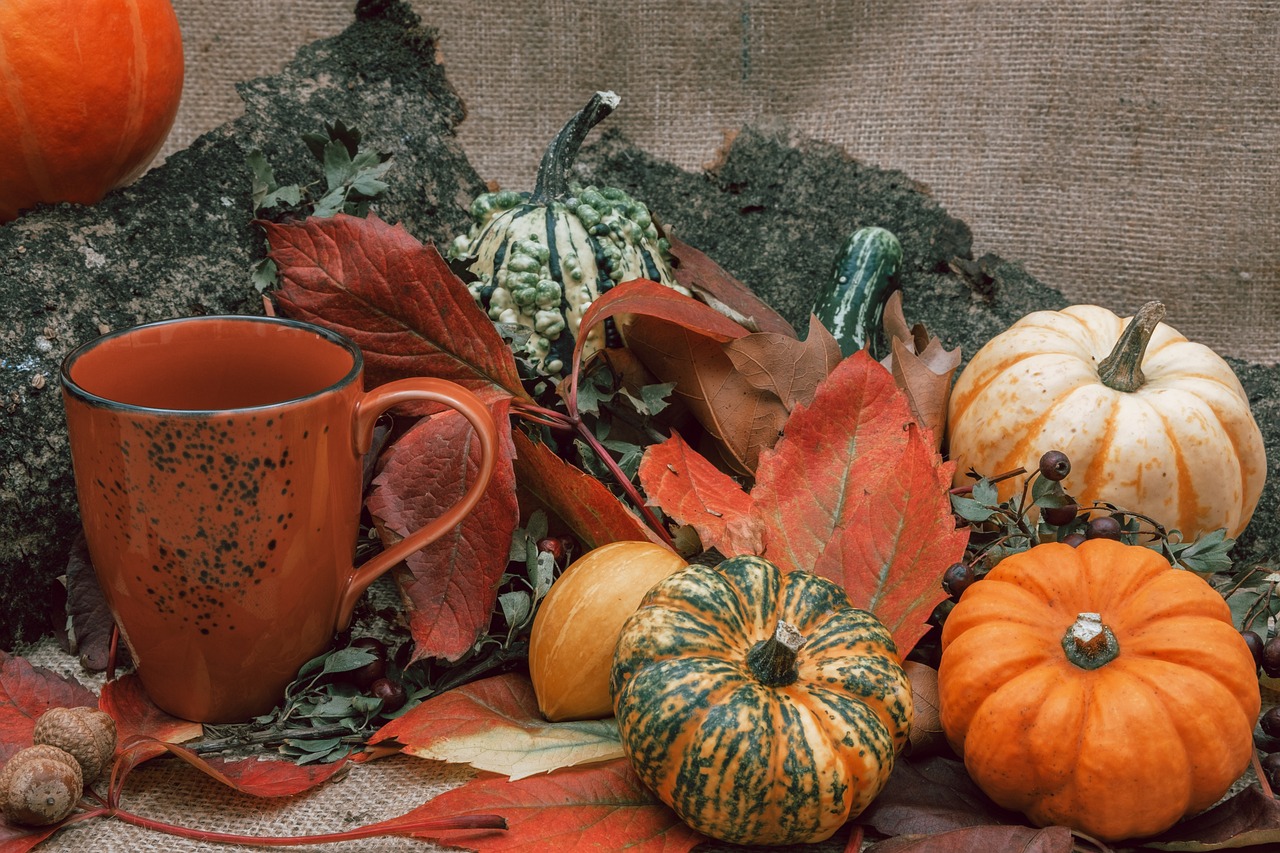
Adding Organic Matter
When it comes to growing pumpkins, to your soil is akin to giving your plants a sumptuous feast. Just as we thrive on a balanced diet, your pumpkins need nutrient-rich soil to grow strong and healthy. Organic matter includes materials like compost, well-rotted manure, and leaf mold, all of which enhance soil fertility and improve its structure. Think of it as the secret ingredient that transforms an ordinary garden into a thriving pumpkin patch!
Incorporating organic matter into your soil not only supplies essential nutrients but also improves its ability to retain moisture. This is crucial because pumpkins have a high water requirement, especially as they grow larger. When you amend your soil, you’re creating a welcoming environment for beneficial microorganisms that help break down nutrients, making them more accessible to your plants. This symbiotic relationship is what every gardener dreams of!
To effectively add organic matter, you can follow these simple steps:
- Choose Your Organic Material: Select high-quality compost or well-rotted manure. If you have access to leaf mold, it’s an excellent option too!
- Mix It In: Spread a generous layer of your chosen organic matter over the soil surface. Then, use a garden fork or tiller to mix it into the top 6-12 inches of soil.
- Test and Adjust: After mixing, consider testing your soil again to see how the organic matter has altered its structure and nutrient levels.
For those who might be wondering about the right proportions, a good rule of thumb is to aim for about 20-30% organic matter in your soil mix. This balance helps ensure that your pumpkins receive the nutrients they need without overwhelming them with too much organic material. Remember, moderation is key!
Also, keep in mind that organic matter doesn’t just benefit your pumpkins; it enhances the overall health of your garden. As it decomposes, it releases nutrients slowly, providing a steady supply for your plants. Over time, this process enriches the soil, making it more resilient against pests and diseases.
In conclusion, adding organic matter is like laying down a solid foundation for your pumpkin patch. It’s an investment in the future, ensuring that your pumpkins grow robust and vibrant, ready to be the stars of your Halloween celebrations. So, roll up your sleeves, get your hands dirty, and let nature do its magic!
Q1: How often should I add organic matter to my pumpkin patch?
A1: It's best to add organic matter at the beginning of each growing season. However, incorporating small amounts throughout the season can also be beneficial.
Q2: Can I use fresh manure as organic matter?
A2: It's advisable to use well-rotted manure instead of fresh manure, as fresh manure can burn plants and introduce harmful pathogens.
Q3: What is the best type of compost for pumpkins?
A3: A balanced compost that includes kitchen scraps, yard waste, and other organic materials is ideal. Look for compost that is dark, crumbly, and has a pleasant earthy smell.
Q4: How can I tell if my soil has enough organic matter?
A4: If your soil is crumbly, retains moisture well, and supports healthy plant growth, it likely has a good amount of organic matter. Soil testing can provide more precise information.
Ensuring Proper Drainage
When it comes to growing pumpkins, is a game-changer. Think of your pumpkin plants as guests at a party; they don't want to wade through puddles to get to the snacks! Waterlogged soil can lead to root rot, which is a surefire way to ruin your pumpkin patch. So, how do you create a welcoming environment for your pumpkins? Let’s dive into some effective techniques to improve drainage.
First off, consider the layout of your pumpkin patch. If your garden is flat, you might want to create raised beds. This not only helps with drainage but also warms the soil quicker in the spring, giving your pumpkins a head start. You can build these beds using wood, stone, or even recycled materials—just make sure they’re sturdy enough to hold the soil.
Next, amend your soil with organic matter. This includes compost, well-rotted manure, or peat moss. These materials not only enhance soil fertility but also improve its structure, allowing for better water retention where needed while enabling excess water to drain away. Mixing in about 25-30% organic matter into your soil can make a significant difference. Here’s a quick table summarizing the benefits of different organic materials:
| Organic Material | Benefits |
|---|---|
| Compost | Enhances soil fertility and structure, improves drainage |
| Well-Rotted Manure | Increases nutrient content, adds beneficial microbes |
| Peat Moss | Improves moisture retention and aeration |
Another effective method for ensuring proper drainage is to incorporate perlite or vermiculite into your soil. These lightweight materials create air pockets that allow water to flow freely, preventing the soil from becoming compacted. You can mix them in at a ratio of about 10-20% to your existing soil for the best results.
Lastly, monitor the drainage regularly. After heavy rains, check if water is pooling in your pumpkin patch. If you notice that water isn’t draining as it should, you may need to dig drainage ditches or install a French drain system. This involves digging a trench, filling it with gravel, and placing a perforated pipe at the bottom to redirect excess water away from your plants. It sounds complicated, but it can save your pumpkins from drowning!
By taking these steps to ensure proper drainage, you’ll set your pumpkin patch up for success, allowing your pumpkins to grow strong and healthy. Remember, a little effort goes a long way when it comes to creating the perfect environment for your Halloween harvest!
- What is the best soil type for pumpkins? Pumpkins thrive in loamy soil that is rich in organic matter and well-drained.
- How often should I water my pumpkin plants? Watering should be consistent; aim for about 1-2 inches per week, adjusting based on rainfall.
- Can I grow pumpkins in containers? Yes, but ensure the container is large enough (at least 5 gallons) and has good drainage holes.
- What are the signs of overwatering? Yellowing leaves, wilting, and root rot are common indicators of overwatering.
Choosing the Right Planting Time
Choosing the right time to plant your pumpkins is like setting the stage for a spectacular show. Timing can make all the difference between a bountiful harvest and a disappointing crop. Generally, pumpkin seeds should be sown after the last frost date in your area. This ensures that your seeds have the warmth and conditions they need to germinate and grow strong. But how do you know when that magical moment arrives? Well, it all comes down to understanding your local climate and frost dates.
Most pumpkin varieties thrive in warm weather, so aim for soil temperatures of at least 70°F (21°C). You can use a soil thermometer to check this, or simply dig a small hole and feel the warmth of the soil. If it feels pleasantly warm, you’re good to go! As a general rule of thumb, you should plan to plant your pumpkin seeds about 2 to 4 weeks after the last frost. This way, you give your pumpkins the best chance to grow without the risk of frost damage.
Additionally, consider the length of your growing season. Pumpkins typically take between 90 to 120 days to mature, depending on the variety. Therefore, if you live in a region with a shorter growing season, you might want to start your seeds indoors and transplant them outside once the weather is warm enough. This method gives your pumpkins a head start and can lead to a more successful harvest.
To make your planning even easier, here’s a quick reference table to help you determine the best planting time based on your local climate:
| Region | Last Frost Date | Ideal Planting Time |
|---|---|---|
| Cool Climate | Late May | Early June |
| Moderate Climate | Mid May | Late May |
| Warm Climate | Early April | Mid April |
In summary, the key to successfully growing pumpkins lies in your ability to read the signs of nature. Monitor the weather, know your frost dates, and be mindful of your local growing season. By doing so, you’ll set yourself up for a Halloween patch filled with plump, vibrant pumpkins ready for carving and decorating!
- When should I start my pumpkin seeds indoors? It's best to start seeds indoors about 3 to 4 weeks before the last expected frost date in your area.
- How can I find my last frost date? You can check local gardening resources or websites that provide climate data for your specific area.
- What happens if I plant too early? Planting too early can expose your seeds to frost, which can kill them or stunt their growth.
- Can I plant pumpkins in containers? Yes, you can plant pumpkins in large containers, but make sure they have enough space to grow and that the soil drains well.
Planting Techniques for Success
When it comes to cultivating a thriving pumpkin patch, the planting techniques you employ can make all the difference. Think of planting as the foundation of a house; if the foundation is weak, the structure will crumble. The first step is to understand the spacing between your seeds. Pumpkins are notorious for sprawling out as they grow, so giving them ample room is crucial. Ideally, you should space your seeds at least 3 to 5 feet apart, depending on the variety. This spacing allows air circulation, reduces competition for nutrients, and promotes healthy growth.
Next up is the depth at which you plant your seeds. A common mistake among novice gardeners is planting seeds too deep. For pumpkins, a depth of 1 to 2 inches is typically sufficient. This depth helps to protect the seeds while still allowing them to push through the soil as they germinate. If you're unsure, think of it like tucking a child into bed—just enough coverage to keep them safe, but not so much that they can't breathe.
Now, let’s talk about the methods of sowing your seeds. You have two primary options: direct sowing or starting seeds indoors. Direct sowing means planting seeds directly into your garden bed after the last frost, which is ideal for those who want to keep things simple and let nature take its course. On the other hand, starting seeds indoors gives you a head start. This method can be particularly beneficial in regions with shorter growing seasons. If you choose to start your seeds indoors, remember to harden them off before transplanting—this means gradually exposing them to outdoor conditions to reduce shock.
Once your seeds are sown, the next consideration is transplanting seedlings if you started them indoors. Timing is everything here; you want to wait until the seedlings have at least two to three true leaves and the outdoor temperatures are consistently warm. When you're ready to transplant, gently remove the seedlings from their pots, being careful not to disturb the roots too much. Think of it like moving a friend into a new apartment; you want to help them settle in without causing any stress. Dig a hole slightly larger than the root ball, place the seedling in, and cover it with soil, ensuring that the top of the root ball is level with the soil surface.
In summary, successful pumpkin planting hinges on understanding the right spacing, depth, sowing methods, and transplanting techniques. With these strategies in your gardening toolkit, you’ll be well on your way to creating a flourishing pumpkin patch that will delight friends and family come Halloween.
- What is the best time to plant pumpkins?
Typically, you should plant pumpkins in late spring, after the last frost date in your area. - How often should I water my pumpkin plants?
Watering should be consistent, aiming for about 1 inch of water per week, especially during dry spells. - Can I grow pumpkins in containers?
Yes, you can grow smaller pumpkin varieties in large containers, but ensure they have enough space for roots to expand. - What pests should I watch out for?
Common pests include squash bugs and aphids. Regular monitoring and organic pest control methods can help manage these issues.
Seed Sowing Methods
When it comes to sowing pumpkin seeds, the method you choose can significantly impact your garden's success. There are two primary approaches: direct sowing and starting seeds indoors. Each method has its own set of advantages and considerations that can help you decide which is best for your pumpkin patch.
Direct sowing is the most straightforward method. This involves planting seeds directly into the soil of your pumpkin patch. It's often preferred for its simplicity and the fact that it allows the seeds to germinate in their permanent location. However, timing is crucial; you want to ensure that the soil has warmed sufficiently and that the risk of frost has passed. Typically, this means waiting until late spring or early summer, depending on your local climate.
On the other hand, starting seeds indoors gives you a head start on the growing season. By germinating seeds in pots or seed trays indoors, you can plant them outside once the weather is favorable. This method is particularly useful in areas with shorter growing seasons. When starting seeds indoors, it's important to provide adequate light, warmth, and moisture to encourage healthy growth. Transplanting seedlings into your pumpkin patch should be done carefully to avoid shocking the plants.
Here’s a quick comparison of both methods:
| Method | Advantages | Disadvantages |
|---|---|---|
| Direct Sowing |
|
|
| Starting Indoors |
|
|
Ultimately, the choice between direct sowing and starting seeds indoors will depend on your specific circumstances, including your local climate, the length of your growing season, and your personal gardening preferences. Whichever method you choose, make sure to provide your pumpkin seeds with the right conditions to thrive, and soon enough, you’ll be on your way to a bountiful pumpkin harvest!
- When is the best time to sow pumpkin seeds? The best time to sow pumpkin seeds is after the last frost date in your area, typically in late spring.
- How deep should I plant pumpkin seeds? Plant seeds about 1 inch deep to ensure good soil contact and moisture retention.
- Can I transplant pumpkin seedlings? Yes, you can transplant pumpkin seedlings started indoors, but be careful to minimize root disturbance.
- How many seeds should I plant per hole? It’s best to plant 2-3 seeds per hole and thin them out later to the strongest seedling.
Transplanting Seedlings
Transplanting seedlings is a crucial step in your pumpkin-growing journey. If you started your pumpkin seeds indoors, you might be eager to get them into the garden. But hold on! There are a few important factors to consider to ensure your little plants thrive in their new environment. Think of transplanting like moving to a new home; you want to make the transition as smooth as possible for your seedlings.
First, timing is everything. It’s essential to wait until your seedlings are strong enough and the weather conditions are just right. Typically, you want to transplant when the seedlings are about 3-4 weeks old and have developed at least two sets of true leaves. This indicates they’re ready to brave the outdoors. Additionally, check your local frost dates. You don’t want to risk your tender plants being exposed to unexpected cold snaps!
Before you start the transplanting process, prepare your garden bed. Make sure the soil is well-amended and ready for your seedlings. It’s like preparing a cozy room for a new guest; you want to make sure it’s comfortable and welcoming. Dig holes that are slightly larger than the root ball of your seedlings. This gives them room to spread out and establish themselves in their new home.
When removing seedlings from their containers, be gentle. You want to avoid disturbing the roots too much. If you’re using biodegradable pots, you can plant them directly into the ground, which minimizes root disturbance. For plastic pots, carefully squeeze the sides to loosen the soil, then gently pull the seedling out by the leaves, not the stem. Remember, the stem is delicate and can easily break!
Once your seedlings are in their new holes, fill in the gaps with soil, ensuring that they are planted at the same depth they were in their pots. This is critical; planting too deep can suffocate the stem, while planting too shallow can expose the roots. After planting, water the seedlings thoroughly to help them settle in. Think of it as giving them a refreshing drink after a long journey!
Lastly, protect your newly transplanted seedlings from harsh sunlight and strong winds for the first few days. You can use row covers or shade cloth to create a more forgiving environment. This is akin to providing a warm blanket to someone who’s just moved into a new place—it helps them adjust and feel secure.
In summary, transplanting seedlings is a delicate process that requires careful attention to detail. By following these steps, you’ll set your pumpkin plants up for success, allowing them to flourish and grow into the vibrant pumpkins you envision for your Halloween festivities!
- When is the best time to transplant pumpkin seedlings? It's best to transplant seedlings when they are 3-4 weeks old and after the last frost date in your area.
- How deep should I plant my pumpkin seedlings? Plant them at the same depth they were in their pots to avoid suffocating the stem or exposing the roots.
- Should I water my seedlings after transplanting? Yes, thoroughly water your seedlings after transplanting to help them settle into their new environment.
- Can I use biodegradable pots for my seedlings? Absolutely! They can be planted directly into the ground, minimizing root disturbance.
Caring for Your Pumpkin Plants
Caring for your pumpkin plants is a bit like nurturing a new friendship; it requires attention, patience, and the right kind of support to help them flourish. Once you've planted your seeds and watched them sprout, the real work begins. Pumpkins are hearty plants, but they do have specific needs that, if met, can lead to a bountiful harvest just in time for Halloween. One of the most critical aspects of pumpkin care is ensuring they receive the right amount of water. Pumpkins thrive in consistently moist soil, so it’s essential to develop a watering routine that keeps the ground damp but not soggy. A good rule of thumb is to water your pumpkin patch deeply once a week, but during particularly hot spells, you may need to increase that frequency.
In addition to watering, fertilizing your pumpkin plants is crucial for promoting robust growth. Pumpkins are heavy feeders, which means they require a lot of nutrients to develop those big, beautiful fruits. Using a balanced fertilizer or one specifically designed for vegetables can work wonders. Apply it according to the package instructions, typically every four to six weeks, to keep your plants well-nourished. It's also beneficial to supplement with organic matter, such as compost or well-rotted manure, which enriches the soil and provides a slow release of nutrients over time.
Another essential factor in caring for your pumpkins is pest management. Like any garden, a pumpkin patch can attract unwanted visitors, including insects and diseases that can threaten your plants. Regularly inspect your pumpkin leaves for signs of pests such as aphids, squash bugs, or spider mites. If you notice any intruders, consider using organic insecticidal soap or neem oil as a natural remedy. Additionally, maintaining good air circulation around your plants can help prevent fungal diseases, which can be a common issue in humid conditions.
To summarize, here are the key components of caring for your pumpkin plants:
- Watering: Keep the soil consistently moist, especially during dry spells.
- Fertilizing: Use a balanced fertilizer every four to six weeks, along with organic matter.
- Pest Management: Regularly check for pests and apply organic remedies when necessary.
Finally, don't forget to monitor the growth of your pumpkins closely. As they begin to swell, consider using straw or cardboard under the fruits to prevent them from rotting on the ground. This simple trick can help keep your pumpkins healthy as they grow towards their glorious harvest. Caring for your pumpkin plants might require some effort, but the joy of watching them thrive and eventually transform into the perfect Halloween decorations makes it all worthwhile!
Q: How often should I water my pumpkin plants?
A: Water your pumpkin plants deeply once a week, and increase frequency during hot weather.
Q: What type of fertilizer is best for pumpkins?
A: A balanced fertilizer or one designed for vegetables is ideal. Apply it every four to six weeks.
Q: How can I prevent pests in my pumpkin patch?
A: Regularly inspect your plants, use organic insecticidal soap or neem oil, and maintain good air circulation.
Q: Should I cover my pumpkins as they grow?
A: Yes, using straw or cardboard under the pumpkins helps prevent rot and keeps them healthy.
Watering Guidelines
When it comes to growing pumpkins, consistent moisture is your best friend. Pumpkins are like thirsty teenagers; they need a lot of water to grow strong and healthy. During the growing season, you should aim to provide about 1 to 2 inches of water per week. This can come from rainfall or your watering efforts. If you're in a particularly dry area, you might need to step up your game and provide a bit more. But remember, too much water can be just as harmful as too little!
One of the best ways to ensure your pumpkins get the right amount of moisture is to water deeply but less frequently. This encourages the roots to grow deeper into the soil, which helps them access nutrients and water more effectively. A good rule of thumb is to water your pumpkins once every 5 to 7 days, adjusting based on the weather conditions. If it's particularly hot or windy, you may need to increase your watering frequency.
It's also important to consider the time of day when you water. Early morning is the ideal time, as it allows the plants to absorb the moisture before the sun heats up the soil. Watering in the evening can lead to excess moisture remaining on the leaves overnight, increasing the risk of fungal diseases. If you're using a sprinkler system, aim to direct the water at the base of the plants rather than spraying the leaves.
To keep track of your watering schedule and ensure you're providing adequate moisture, consider creating a simple watering log. This can help you monitor how much water your pumpkins are getting and make adjustments as needed. Here's a quick example of what your log might look like:
| Date | Amount of Water (inches) | Weather Conditions |
|---|---|---|
| September 1 | 1.5 | Sunny, 85°F |
| September 8 | 2 | Cloudy, 75°F |
| September 15 | 1 | Hot, 90°F |
Finally, keep an eye on your pumpkin plants. If the leaves start to droop or turn yellow, it might be a sign that they need more water. Conversely, if the soil feels soggy or you notice mold on the surface, you may be overwatering. Each pumpkin patch is unique, so be attentive and adjust your watering practices based on your plants' needs. With the right care, your pumpkins will thrive and be ready for a spectacular Halloween display!
- How often should I water my pumpkin plants? Aim for 1 to 2 inches of water per week, adjusting based on weather conditions.
- Is it better to water in the morning or evening? Early morning is best to allow plants to absorb moisture before the heat of the day.
- What signs indicate my pumpkins need more water? Look for drooping leaves or yellowing foliage as signs of underwatering.
- Can I use a sprinkler system for watering? Yes, but make sure to water at the base of the plants to avoid wetting the leaves.
Fertilizing Your Pumpkins
When it comes to growing pumpkins, fertilization is like giving your plants a hearty meal to fuel their growth. Just like you wouldn't want to run a marathon on an empty stomach, your pumpkins need the right nutrients to thrive. The key is to understand what your pumpkin plants require at different stages of their growth. Generally, pumpkins are heavy feeders, which means they need a good balance of nitrogen, phosphorus, and potassium—the three main nutrients that will help them flourish.
Before applying any fertilizer, it’s wise to conduct a soil test to determine the nutrient levels in your garden. This will help you tailor your fertilization strategy to meet the specific needs of your soil. For instance, if your soil is low in nitrogen, you might want to use a fertilizer with a higher nitrogen content, especially during the early growth stages when your plants are establishing themselves.
As a general rule, you can start by applying a balanced fertilizer, such as a 10-10-10 (N-P-K) mix, at the time of planting. This will give your pumpkins a solid foundation. Once the plants begin to flower, you can switch to a fertilizer higher in phosphorus and potassium, like a 5-10-10 mix, to promote flowering and fruit development. Remember, though, that over-fertilizing can be just as harmful as under-fertilizing; it can lead to lush foliage at the expense of fruit production.
Here’s a simple fertilization schedule to follow:
| Growth Stage | Type of Fertilizer | Application Frequency |
|---|---|---|
| Pre-Planting | Balanced Fertilizer (10-10-10) | Once before planting |
| Early Growth | High Nitrogen Fertilizer (e.g., 20-10-10) | Every 4-6 weeks |
| Flowering and Fruiting | High Phosphorus and Potassium Fertilizer (e.g., 5-10-10) | Every 4-6 weeks |
In addition to synthetic fertilizers, consider using organic options like compost, well-rotted manure, or fish emulsion. These not only provide essential nutrients but also improve soil structure and promote beneficial microbial activity. The beauty of organic fertilizers is that they release nutrients slowly, reducing the risk of over-fertilization.
Finally, keep an eye on your plants. If you notice yellowing leaves or stunted growth, it might be a sign that your pumpkins are not getting enough nutrients. Adjust your fertilization strategy accordingly, and always remember that a little goes a long way. With the right care and attention, your pumpkin patch will be the envy of the neighborhood come Halloween!
- How often should I fertilize my pumpkins? It's recommended to fertilize every 4-6 weeks during the growing season, adjusting based on your soil test results.
- Can I use organic fertilizers? Absolutely! Organic fertilizers are excellent for improving soil health and providing nutrients over time.
- What signs indicate my pumpkins need more fertilizer? Look for yellowing leaves or slow growth, which may suggest nutrient deficiencies.
Harvesting and Storing Pumpkins
Harvesting your pumpkins is like the grand finale of a spectacular show; it’s the moment you’ve been waiting for! After weeks of nurturing your plants, seeing them thrive, and watching those vibrant orange beauties grow, it's time to reap the rewards. But hold on! Before you grab your knife and head to the patch, there are a few essential things to consider to ensure you get the best pumpkins possible.
First off, knowing when to harvest is crucial. You want to make sure your pumpkins are at their peak ripeness. So, how do you determine that? Look for a deep, rich color, typically a bright orange, depending on the variety. The skin should be hard to the touch; if you can easily puncture it with your fingernail, it’s not ready yet. Also, check the stem—it should be dry and brown, indicating that the pumpkin is fully matured and ready to be picked. If you're unsure, a good rule of thumb is to harvest about 60 to 90 days after planting, depending on the specific variety.
Once you've decided it’s time to harvest, use a sharp knife or pruning shears to cut the pumpkin from the vine, leaving a few inches of stem attached. This little stem is more than just a handle; it helps prevent rot and keeps your pumpkin looking fresh longer. Handle your pumpkins gently to avoid bruising, as they can be surprisingly delicate.
After harvesting, the next step is proper storage. If you want your pumpkins to last through Halloween and beyond, you'll need to store them correctly. Here are some tips:
- Cool and Dry: Store your pumpkins in a cool, dry place, ideally between 50°F and 60°F. Avoid places with high humidity, as it can lead to mold and decay.
- Avoid Direct Sunlight: Keep them out of direct sunlight. Sunlight can cause the skin to soften and lead to quicker spoilage.
- Check Regularly: Inspect your pumpkins regularly for any signs of rot or damage. If you spot any blemishes, remove that pumpkin immediately to prevent it from affecting others.
Additionally, if you're planning to use your pumpkins for decoration, try to keep them in a well-ventilated area. This will help them maintain their quality and appearance. If you notice any pumpkins starting to show signs of decay, it’s best to use them sooner rather than later, whether that means cooking them into a delicious pie or using them in a festive soup.
Now, let’s talk about the fun part! If you want to get crafty, consider drying the seeds from your pumpkins. Not only is this a great way to reduce waste, but you can also plant them next season or roast them for a tasty snack. Just rinse the seeds, let them dry, and store them in a cool, dry place until you’re ready to plant or snack!
In summary, harvesting and storing pumpkins is an art that requires a bit of knowledge and care. By paying attention to the signs of ripeness and following the proper storage techniques, you can ensure your pumpkins remain in great shape for all your Halloween festivities and beyond. So, gather your pumpkins, store them wisely, and get ready to impress everyone with your homegrown harvest!
Q: When is the best time to harvest pumpkins?
A: The best time to harvest pumpkins is typically between 60 to 90 days after planting, depending on the variety. Look for deep color, hard skin, and a dry stem.
Q: How should I store my pumpkins after harvesting?
A: Store your pumpkins in a cool, dry place, away from direct sunlight. Regularly check for any signs of rot or damage.
Q: Can I eat my pumpkins after Halloween?
A: Yes! As long as they are stored properly and show no signs of decay, you can use them for cooking or baking long after Halloween.
Determining Ripeness
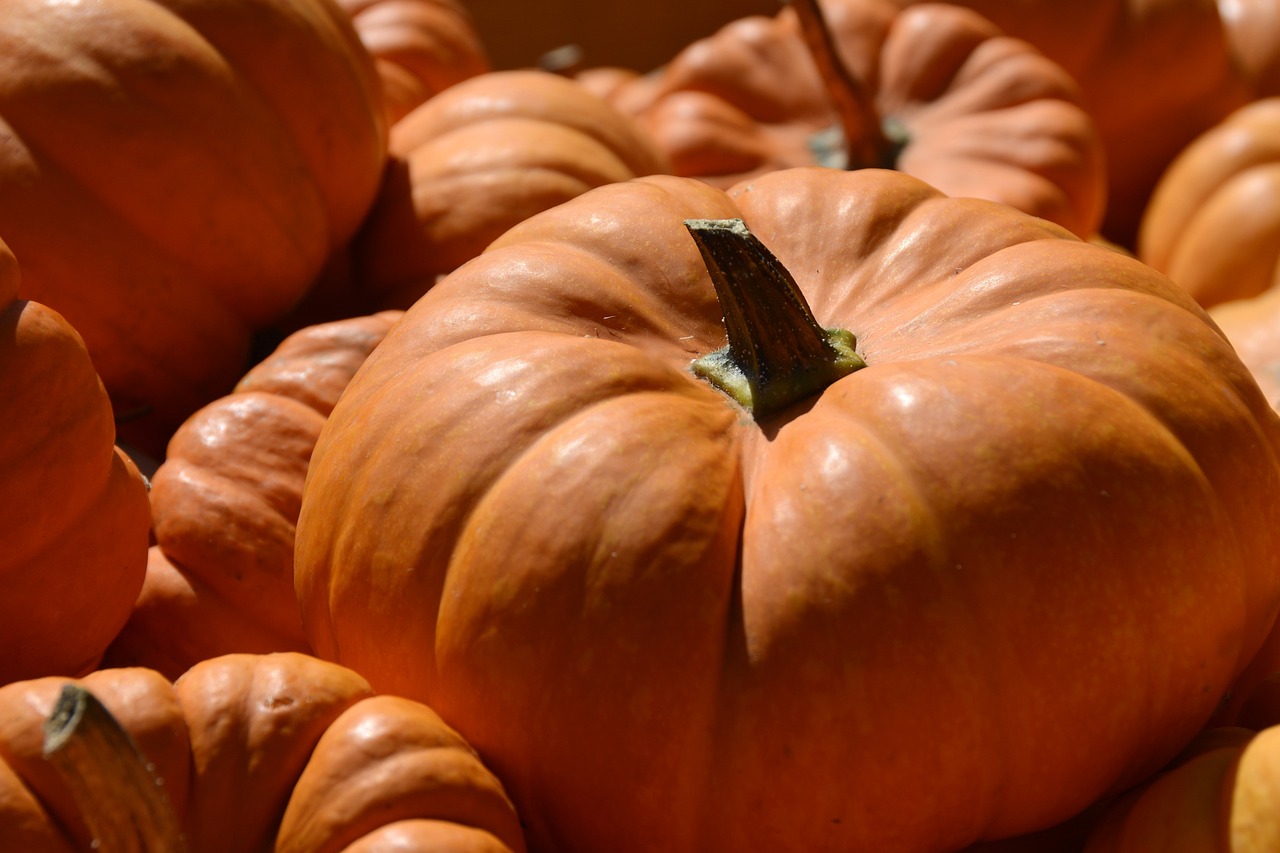
Knowing when your pumpkins are ripe is crucial not just for aesthetics but also for flavor and longevity. You don't want to carve a pumpkin that’s still immature, nor do you want to let a perfectly ripe pumpkin rot on the vine. So, how do you tell when your pumpkins are ready for harvest? Well, there are a few key indicators to keep an eye on that will guide you to the perfect pumpkin.
First off, color is a significant factor. Most pumpkin varieties will change from a green hue to a vibrant orange as they ripen. However, some varieties may have different color indicators, so it’s essential to know the type of pumpkin you’re growing. For instance, white pumpkins should be a consistent white color when they’re ready, while blue pumpkins will take on a dusty blue appearance.
Next, let’s talk about the stem condition. A ripe pumpkin will typically have a stem that is hard and brown, indicating that it has stopped taking in nutrients from the vine. If the stem is still green and pliable, your pumpkin is likely not ready to be picked. Additionally, when you gently press on the stem, it should feel firm; if it’s soft or mushy, that’s a red flag!
Another important aspect to consider is the skin hardness. You can perform a simple test by pressing your fingernail against the pumpkin's skin. If it leaves a mark, the pumpkin is still immature. A ripe pumpkin will have a tough skin that resists puncture, making it more durable for carving and display.
Finally, you might want to consider the size of your pumpkins. While this can vary based on the variety, once they reach their expected size, they are usually close to being ripe. It’s like waiting for the perfect moment to pop a balloon. You want it to be just right, not too early and not too late!
In summary, here are the primary signs to determine if your pumpkins are ripe:
- Color: Bright orange or appropriate color for the variety.
- Stem: Hard and brown, not green or soft.
- Skin: Hard to the touch; no fingernail marks.
- Size: Reached expected dimensions for the variety.
By paying attention to these indicators, you’ll ensure that your pumpkins are not only ready for Halloween festivities but also delicious for any pumpkin pie or soup you might want to whip up!
Q: How can I tell if my pumpkin is ready for harvesting?
A: Look for a deep, vibrant color, a hard stem, firm skin that resists puncture, and the expected size for your variety.
Q: Should I wait for the first frost to harvest my pumpkins?
A: It’s best to harvest pumpkins before the first frost, as frost can damage the skin and lead to rot.
Q: Can I leave my pumpkins on the vine longer to grow bigger?
A: Yes, but be cautious! Leaving them too long can lead to rot or pest issues. Monitor them closely.
Storing Your Harvest
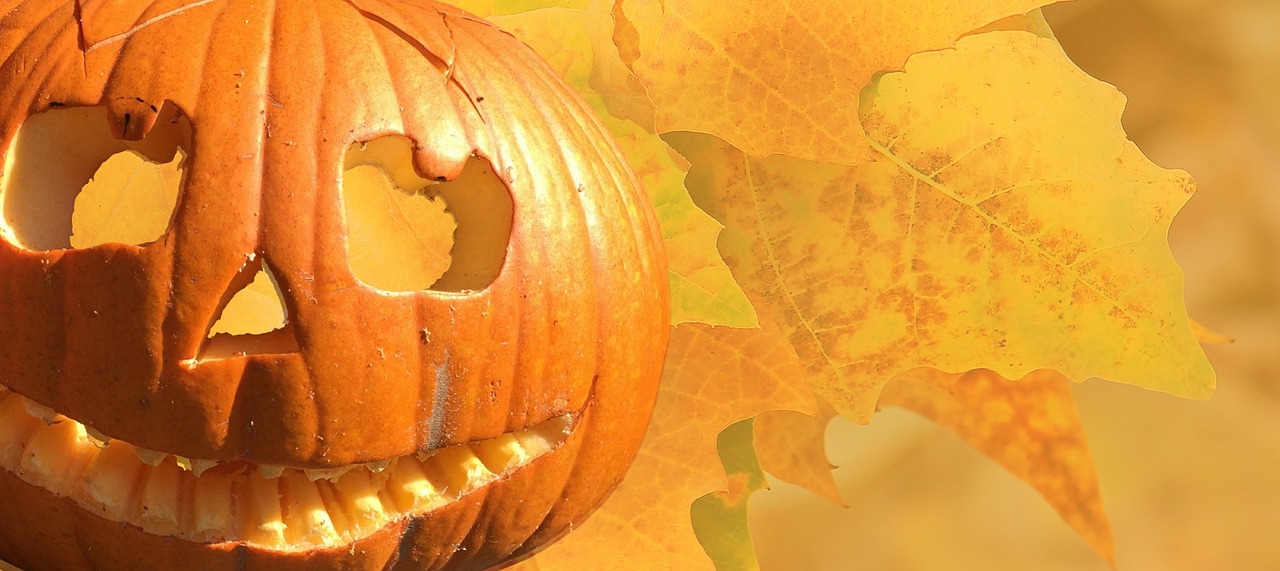
Once you've harvested your pumpkins, the excitement of Halloween is just around the corner! However, to ensure your pumpkins remain in top-notch condition for all your spooky decorations and delicious recipes, proper storage is essential. First things first, you want to choose a cool, dry place to store your pumpkins. Ideally, the temperature should be between 50°F and 60°F. This range helps to slow down the ripening process and keeps your pumpkins looking fresh.
When storing your pumpkins, avoid placing them directly on the ground. Instead, use a shelf or a crate to allow for air circulation. This prevents moisture buildup, which can lead to rot. If you have multiple pumpkins, make sure to keep them spaced apart. Crowding can create a humid environment, which is a recipe for disaster!
Another important aspect to consider is the condition of your pumpkins before storage. Make sure to inspect each pumpkin for any signs of damage or soft spots. Even minor bruises can lead to spoilage, so it's best to use those pumpkins first. If you notice any pumpkins that are starting to go bad, consider using them for cooking or baking rather than risking the quality of the others.
To help you visualize the best storage practices, here’s a quick table summarizing key points:
| Storage Tip | Description |
|---|---|
| Temperature | Store between 50°F and 60°F for optimal freshness. |
| Air Circulation | Use shelves or crates to prevent moisture buildup. |
| Inspect for Damage | Check each pumpkin for bruises or soft spots before storage. |
| Spacing | Keep pumpkins spaced apart to allow for airflow. |
Finally, remember that the longer you store your pumpkins, the more care you need to take. Regularly check on your pumpkins to ensure they are still in good condition. If you notice any changes, adjust your storage methods accordingly. By following these guidelines, you'll not only have beautiful pumpkins for Halloween but also delicious ingredients for your fall recipes!
- How long can I store my pumpkins? Generally, pumpkins can be stored for about 2-3 months if kept in the right conditions.
- Can I store carved pumpkins? It's best to avoid storing carved pumpkins as they tend to spoil much faster than whole ones.
- What’s the best way to clean my pumpkins before storage? Gently wipe them with a cloth and a mixture of water and vinegar to remove any dirt and prevent mold growth.
Frequently Asked Questions
- What are the best pumpkin varieties to grow for Halloween?
When it comes to Halloween, you can't go wrong with Jack-o'-Lantern pumpkins, which are perfect for carving. If you're looking for something to bake with, pie pumpkins are ideal due to their sweet flavor. For a unique touch, consider ornamental pumpkins that come in various colors and shapes!
- How do I prepare my soil for planting pumpkins?
Preparing your soil is crucial for a successful pumpkin patch. Start by testing the soil pH, aiming for a range of 6.0 to 6.8. Amend the soil with organic matter like compost to improve fertility and structure. Also, ensure proper drainage to prevent waterlogging, which can harm your pumpkin plants.
- When is the best time to plant pumpkins?
The best time to plant pumpkins is typically in the spring, after the last frost date in your area. Pumpkins thrive in warm soil, so aim for temperatures above 70°F (21°C). This timing ensures that your pumpkins have enough time to grow before the Halloween season.
- What are the best planting techniques for pumpkins?
When planting pumpkins, consider the spacing and depth of your seeds. Generally, plant seeds about 1 inch deep and space them at least 3-4 feet apart to allow for their sprawling vines. You can choose between direct sowing in the garden or starting seeds indoors for an early start.
- How often should I water my pumpkin plants?
Consistency is key when it comes to watering pumpkins. Aim to keep the soil moist but not soggy. A good rule of thumb is to water deeply once a week, increasing frequency during hot spells. Remember, pumpkins need about 1 inch of water per week for optimal growth!
- When is the right time to harvest my pumpkins?
Harvest your pumpkins when they are fully colored and the skin is hard. Look for a deep orange color and a dried stem. Typically, this happens in late September to early October, just in time for Halloween!
- How should I store my harvested pumpkins?
To store your pumpkins, keep them in a cool, dry place away from direct sunlight. Make sure they are well-ventilated to prevent mold. If stored properly, your pumpkins can last for several months, maintaining their quality for Halloween decorations!


