
DIY Garden Projects Using River Rocks
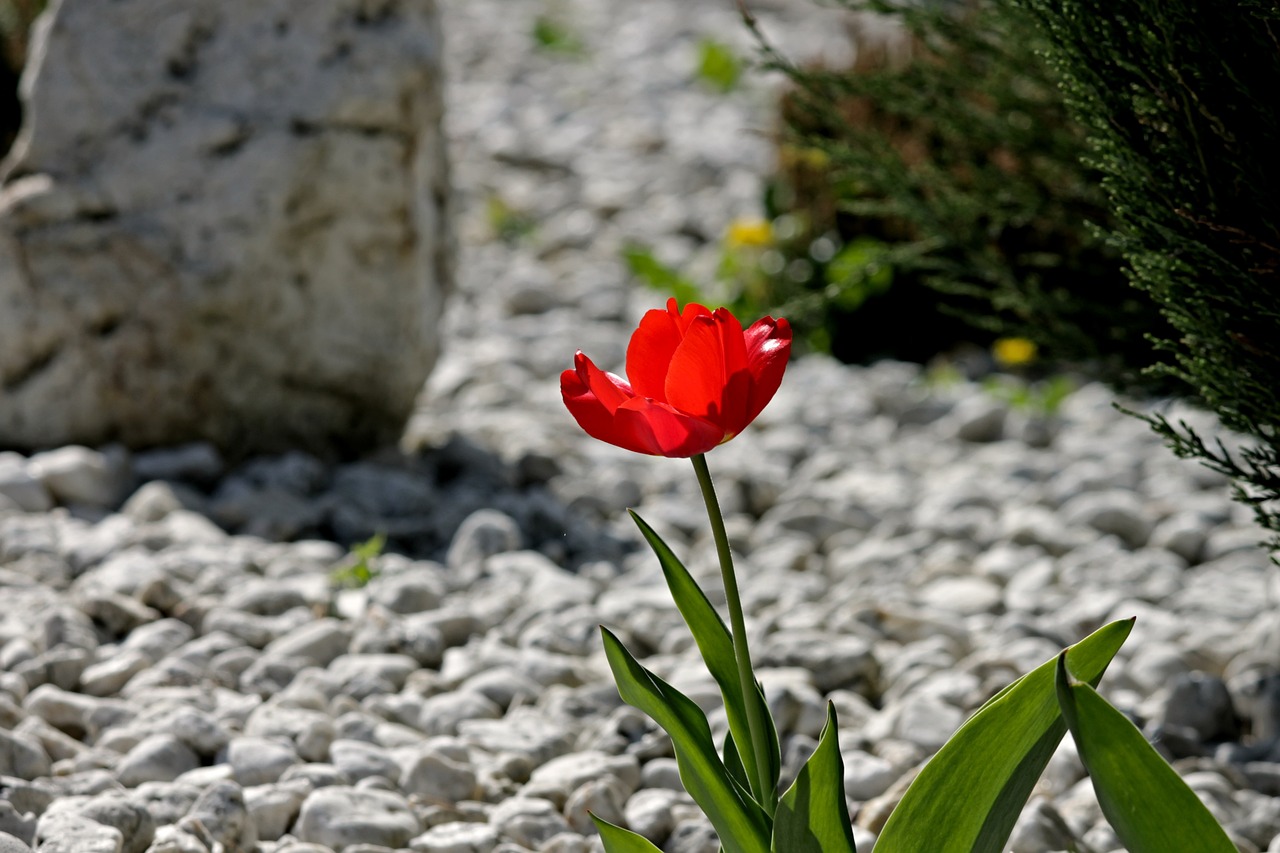
Are you tired of your garden looking plain and uninviting? Do you want to add a touch of creativity and functionality to your outdoor space? If so, using river rocks might just be the perfect solution for you! River rocks are not only beautiful to look at but also incredibly versatile. They can be used in a variety of DIY projects that will enhance the aesthetic appeal of your garden while also providing practical benefits. Imagine walking through a pathway made of smooth, colorful stones or having a stunning rock garden that requires minimal maintenance. In this article, we'll explore some creative and practical ways to use river rocks in your garden, from creating beautiful pathways to building rock borders and designing rock gardens. So grab your tools and let’s get started on transforming your garden into a stunning oasis!
One of the most effective ways to use river rocks in your garden is by creating rock pathways. These pathways not only guide visitors through your garden but also add a unique visual element. To design a beautiful pathway, start by marking the desired route in your garden. You can use a garden hose or string to outline the path. After that, dig a shallow trench along the marked line, ensuring it’s wide enough to accommodate the rocks you plan to use. Next, lay down a layer of landscaping fabric to prevent weeds from growing through. Finally, fill the trench with river rocks, arranging them in a way that suits your style. You can choose larger stones for a more rustic look or smaller pebbles for a sleek, modern pathway. The result will be a stunning, functional route that enhances your garden's charm.
Another fantastic project is building rock borders around your garden beds. Not only do these borders create a defined structure, but they also help prevent soil erosion and keep weeds at bay. To start, select the river rocks you want to use. You can mix different sizes and colors to create an interesting visual effect. Once you have your rocks, outline the perimeter of your garden bed using a garden spade to create a shallow trench. Next, place the rocks into the trench, stacking them to create a sturdy border. This not only adds a decorative touch but also helps maintain the integrity of your garden beds. Over time, these rock borders will become an integral part of your garden's landscape, blending seamlessly with the surrounding plants.
When it comes to selecting river rocks for your projects, understanding the different types available is crucial. Not all rocks are created equal! Here are some factors to consider when choosing the right rocks:
- Size: Larger rocks can create a bold statement, while smaller pebbles can fill in gaps and provide texture.
- Color: Consider the overall color scheme of your garden. Earthy tones can create a natural look, while vibrant colors can add a pop of interest.
- Texture: Smooth stones create a modern feel, while rougher textures can evoke a more rustic ambiance.
The size and color of river rocks can significantly affect the overall look of your garden. For instance, if you have a contemporary garden design, you might opt for larger, uniform stones in shades of grey or white. On the other hand, if you're aiming for a more traditional garden, a mix of smaller, earthy-toned rocks might be more appropriate. The key is to ensure that your rock choices complement the plants and other elements in your garden. A cohesive design will create a visually appealing space that feels harmonious and inviting.
Additionally, the texture and shape of your river rocks can contribute to your garden's visual interest. Smooth, rounded stones can create a calming effect, while jagged, irregular shapes can add a sense of spontaneity. Mixing different textures can also enhance the overall aesthetic. For example, pairing smooth pebbles with rough boulders can create a dynamic contrast that draws the eye. So when selecting your rocks, don’t just think about color and size—consider how their textures and shapes will interact with each other and the rest of your garden.
Now that you have your rocks selected, let’s talk about installation techniques. Proper installation is key to ensuring your rock projects are durable and attractive. Start by preparing the area where you’ll be placing the rocks. Make sure to clear away any debris or weeds. For borders, create a trench that’s deep enough to accommodate the rocks without them sinking into the soil. When placing the rocks, ensure they are snug against each other to create a seamless look. If you’re working with pathways, consider using a mixture of different sizes to create a more natural appearance. Once everything is in place, take a step back and admire your handiwork!
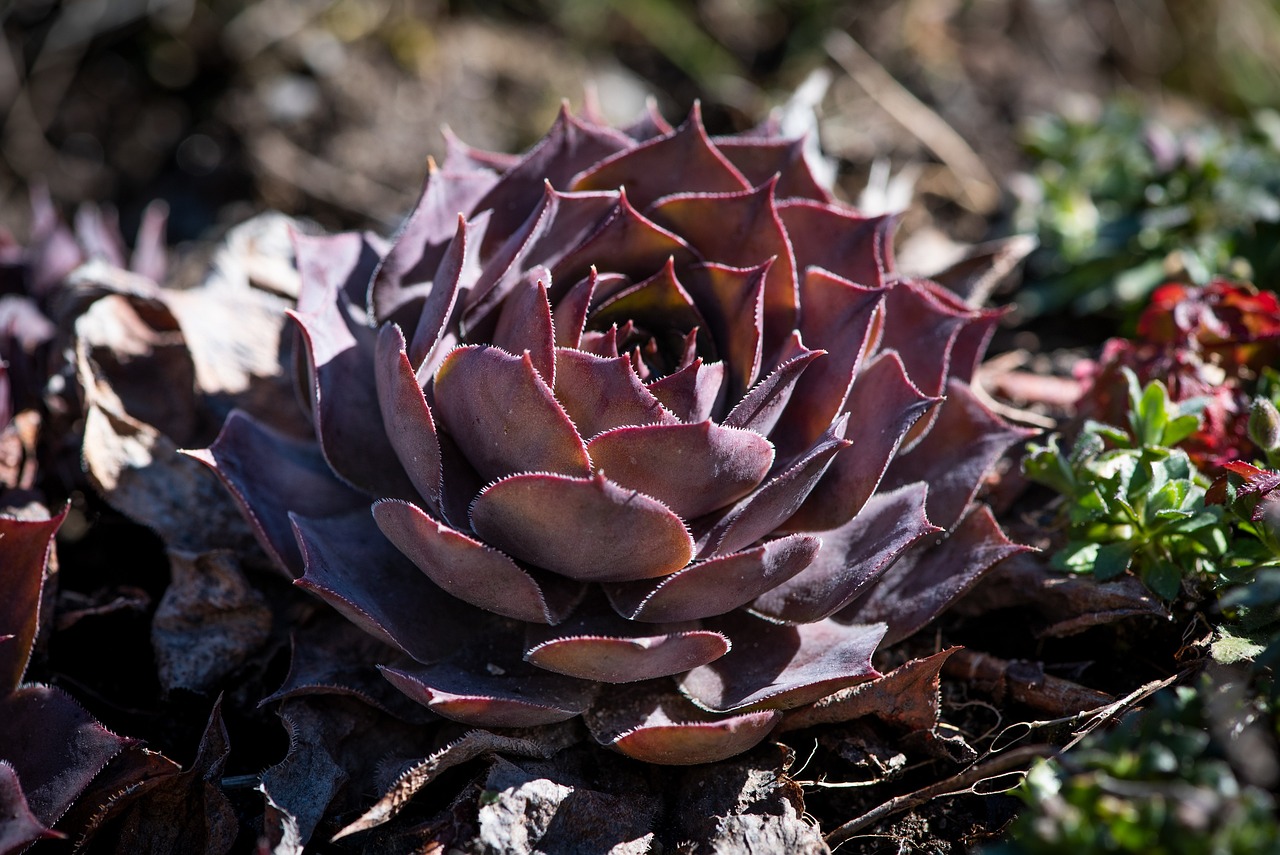
If you’re looking for a project that combines both rocks and plants, a rock garden might be the perfect choice. Rock gardens are not only visually stunning but also require minimal maintenance. They are ideal for gardeners who want to create a beautiful landscape without spending hours on upkeep. To create a rock garden, start by selecting a suitable location with good drainage. Incorporate a variety of river rocks in different sizes and shapes to create depth and interest. Then, choose plants that thrive in rocky environments, such as succulents or alpine plants. The combination of rocks and plants will create a harmonious landscape that feels both natural and inviting.
When choosing plants for your rock garden, it’s essential to consider varieties that can thrive in rocky conditions. Plants like sedums, thyme, and certain grasses are perfect for these types of gardens. They not only add color and texture but also require less water and care than traditional garden plants. By selecting the right plants, you can create a vibrant rock garden that flourishes with minimal effort.
Finally, let’s talk about designing your rock garden layout. A well-planned layout can greatly enhance the visual impact of your garden. Start by sketching your design on paper, considering the placement of rocks and plants. Think about creating layers, with larger rocks at the back and smaller ones in front. This creates depth and draws the eye through the garden. Additionally, don’t forget to leave some open spaces for plants to grow. A balanced layout will ensure your rock garden looks intentional and aesthetically pleasing.
Q: How do I maintain my rock garden?
A: Maintaining a rock garden is relatively simple. Regularly check for weeds, and remove them as needed. Additionally, ensure your plants are receiving adequate water, especially during dry spells.
Q: Can I use any type of rock for my garden?
A: While you can use various types of rocks, it’s best to choose river rocks for their natural beauty and ability to blend well with plants.
Q: How do I prevent weeds from growing in my rock pathways?
A: Laying down landscaping fabric before placing your rocks can help prevent weed growth, as it blocks sunlight and stops weed seeds from germinating.

Creating Rock Pathways
Have you ever wandered through a garden and stumbled upon a beautiful pathway that seemed to invite you to explore further? using river rocks can transform your garden into a picturesque retreat, guiding visitors through your lush landscape while adding an element of natural beauty. Not only do these pathways enhance the aesthetic appeal of your outdoor space, but they also provide a practical route that keeps your feet clean and dry, even after a rain shower.
When embarking on this DIY project, the first step is to visualize how you want your pathway to flow through your garden. Consider the shape and function of the pathway. Do you want it to be a straight line leading to a focal point, or a winding path that meanders through your flower beds? The design should complement the existing layout of your garden while ensuring it serves its purpose effectively.
Once you have a design in mind, it’s time to gather your materials. You'll need a variety of river rocks in different sizes to create a visually appealing pathway. Larger rocks can serve as stepping stones, while smaller pebbles can fill in the gaps. Here’s a quick overview of what you might need:
| Material | Purpose |
|---|---|
| Large River Rocks | Stepping stones for the main pathway |
| Medium River Rocks | Fillers between larger stones |
| Small Pebbles | Ground cover for a finished look |
Now, let’s get into the nitty-gritty of installation. Start by marking the pathway layout with stakes and string or spray paint. This will give you a clear visual of where the pathway will be and help you avoid any unexpected surprises during installation. Next, you’ll want to excavate the area to a depth of about 3-4 inches, depending on the size of the rocks you plan to use. This ensures your pathway will be stable and won’t shift underfoot.
Once the area is prepared, lay down a layer of landscaping fabric to prevent weeds from growing through your pathway. Then, begin placing your large river rocks in the desired pattern. Aim for a natural look by varying the spacing between the stones—this will give your pathway a more organic feel. After positioning the large rocks, fill in the gaps with medium and small river rocks, ensuring that they are tightly packed to create a sturdy surface.
Finally, to finish off your rock pathway, you can add a layer of fine gravel or sand to fill any remaining gaps, helping to lock everything in place. Water the pathway lightly to settle the stones and prevent shifting. Voila! You now have a stunning rock pathway that not only enhances the beauty of your garden but also provides a functional route for you and your guests to enjoy.
Incorporating rock pathways into your garden design is like adding a cherry on top of a delicious sundae; it completes the look and invites exploration. So why not take the plunge and create your own rock pathway? You’ll be amazed at how such a simple DIY project can elevate your outdoor space!
- What type of river rocks should I use for my pathway? It's best to use a mix of sizes, including large stones for stepping and smaller pebbles for filling gaps.
- How do I prevent weeds from growing in my rock pathway? Laying down landscaping fabric before placing the rocks can significantly reduce weed growth.
- How do I maintain my rock pathway? Regularly check for any shifting stones and refill gaps with small pebbles or gravel as needed.
Building Rock Borders
When it comes to enhancing the beauty and structure of your garden, is a fantastic project that offers both aesthetic appeal and practical benefits. Imagine a garden where vibrant flowers bloom, and lush greenery thrives, all neatly framed by a natural stone border. Not only do these borders add a touch of elegance, but they also serve to prevent soil erosion and keep pesky weeds at bay. So, how can you create these stunning features in your outdoor space?
First, let’s dive into the benefits of using river rocks for your borders. River rocks are not only durable but also provide a natural look that blends seamlessly with your garden’s landscape. Whether you want to outline a flower bed, a pathway, or even a vegetable garden, these stones can be arranged in various ways to suit your style. Plus, they require minimal maintenance compared to other border materials, making them a practical choice for busy gardeners.
Before you start, it’s essential to plan your design. Consider the layout of your garden and how the rock borders will fit into it. You might want to sketch your ideas on paper or use garden design software to visualize the final look. Think about the shape of your borders—will they be straight, curved, or a combination of both? The shape can significantly impact the overall feel of your garden, so choose wisely!
Next, let’s talk about choosing the right river rocks. Not all rocks are created equal, and selecting the right ones can make a world of difference. You’ll want to consider the size, color, and texture of the rocks. For instance, larger rocks can create a more dramatic look, while smaller stones may provide a softer, more subtle border. Here’s a quick table to help you decide:
| Rock Size | Visual Impact | Best Use |
|---|---|---|
| Small (1-2 inches) | Subtle and delicate | Flower beds, pathways |
| Medium (2-4 inches) | Balanced presence | General borders, decorative features |
| Large (4+ inches) | Dramatic and bold | Focal points, rustic gardens |
Once you’ve selected your rocks, it’s time to get to work! Start by marking the area where you want your border to go. Use a garden hose or string to outline the shape. This will help you visualize how the rocks will look in place. After marking, it’s essential to prepare the ground by removing any grass or weeds and leveling the soil. A solid foundation will ensure your rock border stays in place over time.
Now comes the fun part—placing the rocks! Begin by laying the first layer of rocks along the marked line. Make sure they fit snugly together, as this will help prevent soil from spilling out. You can use a mix of sizes for a more natural look, or stick to one size for a uniform appearance. As you place each rock, take a step back to assess the overall look. Adjust as needed to create a visually pleasing border.
After you’ve arranged the rocks, fill the gaps with smaller stones or gravel to stabilize the structure and prevent shifting. This step is crucial, especially if you live in an area with heavy rains or fluctuating temperatures. Finally, consider adding a layer of mulch or soil behind the rocks to help with moisture retention and further discourage weeds.
With your rock borders in place, you’ll notice an immediate transformation in your garden. Not only do they provide a clear separation between different areas, but they also enhance the overall aesthetic, creating a polished and well-thought-out space. Now, you can sit back and enjoy the fruits of your labor, knowing you’ve added both beauty and functionality to your outdoor oasis!
- What types of river rocks are best for borders? River rocks that are smooth and flat are ideal, as they can be easily stacked and arranged.
- How do I maintain my rock borders? Regularly check for weeds and remove any that pop up. You can also rinse the rocks occasionally to keep them looking fresh.
- Can I use other types of stones? Absolutely! While river rocks are popular, you can experiment with other stones that complement your garden style.
Choosing the Right Rocks
When it comes to enhancing your garden with river rocks, choosing the right type is essential for both aesthetic appeal and functionality. Imagine stepping into your garden and being greeted by a harmonious blend of colors and textures that complement your plants and landscape. The right rocks can transform your outdoor space into a serene oasis, but how do you know which ones to pick?
First, it's important to consider the style of your garden. Are you going for a modern look, or perhaps a more rustic vibe? Different types of river rocks can evoke different feelings and aesthetics. For instance, smooth, rounded stones often convey a more relaxed, natural feel, while angular, jagged rocks can lend a contemporary edge to your design.
Next, think about the scale of your project. Large boulders can serve as stunning focal points, while smaller pebbles are perfect for filling in gaps or creating pathways. It's all about finding the right balance. Too many large rocks can overwhelm your garden, while too many small ones may get lost in the landscape. A mix of sizes can often yield the best results, creating depth and interest.
Color is another critical factor. River rocks come in a variety of hues, from earthy browns and grays to vibrant reds and blues. When selecting rocks, consider how their colors will interact with your plants and other garden elements. For example, if you have a lot of green foliage, lighter-colored rocks can create a striking contrast, making both the rocks and the plants pop. Conversely, darker rocks can add a touch of sophistication and warmth.
Texture and shape also play vital roles in your selection process. Smooth stones can provide a sleek look, while rougher textures can add a rustic charm. Additionally, the shape of the rocks can affect how they fit together. Irregularly shaped stones can create a more organic feel, while uniform shapes may lend a more structured appearance. Consider how the textures and shapes of the rocks will work with one another and with the plants you intend to use.
To help you make a more informed decision, here’s a quick overview of some common types of river rocks:
| Type of Rock | Color | Size | Best Use |
|---|---|---|---|
| Smooth River Stones | Gray, Brown, Blue | Small to Medium | Pathways, Borders |
| Angular Rocks | Red, Brown | Medium to Large | Rock Gardens, Focal Points |
| Pebbles | Various | Small | Ground Cover, Decorative Accents |
Ultimately, the right rocks will depend on your personal preferences and the specific needs of your garden. Don't hesitate to mix and match different types to create a unique and visually appealing landscape. Remember, your garden is a reflection of your personality, so let your creativity shine through in your rock choices!
In conclusion, choosing the right river rocks involves considering factors such as style, scale, color, texture, and shape. By taking the time to select the perfect stones, you can elevate your garden to new heights, creating a space that is not only beautiful but also functional. So, get out there, explore your options, and let your imagination run wild!
- What are the best river rocks for pathways? Smooth river stones are ideal for pathways as they provide a comfortable surface for walking.
- How do I prevent weeds from growing in rock gardens? Using a landscape fabric beneath the rocks can help suppress weed growth while allowing water to drain.
- Can I use river rocks for drainage? Yes, larger river rocks are often used in drainage systems to facilitate water flow and prevent flooding.
Size and Color Considerations
When it comes to enhancing your garden with river rocks, size and color play a crucial role in determining the overall aesthetic and functionality of your outdoor space. Imagine walking through your garden, where the vibrant hues of the rocks complement the lush greenery around you. The right choice can transform a simple garden into a visual masterpiece, but how do you choose?
First, let’s talk about size. River rocks come in various sizes, from tiny pebbles to large boulders. The size of the rocks you choose should align with the scale of your garden and the specific projects you have in mind. For instance, if you’re creating a pathway, smaller rocks are typically easier to walk on and can fill gaps more effectively. However, if you're looking to create a dramatic focal point, larger rocks can serve as stunning centerpieces. Consider the following:
- Small Rocks (1-3 inches): Ideal for pathways and filling gaps.
- Medium Rocks (3-6 inches): Great for borders and decorative features.
- Large Rocks (6 inches and up): Perfect for creating focal points or seating areas.
Now, let’s dive into color. River rocks can range from soft grays and browns to vibrant reds and blues. The color you select not only influences the visual appeal but also affects how your garden blends with its surroundings. If your garden is filled with bright flowers, you might want to choose more muted rock colors to avoid overwhelming the senses. Conversely, if your garden is primarily green, a splash of colorful rocks can add a delightful contrast. Here are some color considerations:
| Color | Effect |
|---|---|
| Gray | Neutral, blends well with greenery. |
| Brown | Warm, earthy tone that enhances natural beauty. |
| Red | Bold, vibrant, adds a pop of color. |
| Blue | Cool, calming, creates a serene atmosphere. |
Ultimately, the size and color of river rocks should reflect your personal style and the ambiance you wish to create. Don’t be afraid to experiment! Mixing different sizes and colors can lead to stunning results that showcase your creativity. Think of your garden as a canvas, where every rock is a brushstroke that contributes to the overall picture. So, what will your masterpiece look like?
Q: How do I choose the right size of river rocks for my garden?
A: Consider the scale of your garden and the specific projects you have in mind. Smaller rocks are great for pathways, while larger rocks can serve as focal points.
Q: Can I mix different colors of river rocks?
A: Absolutely! Mixing colors can add visual interest and create a unique look in your garden.
Q: Are there any maintenance tips for keeping river rocks looking good?
A: Regularly remove debris, and consider rinsing them occasionally to maintain their color and appearance.
Texture and Shape Variations
When it comes to river rocks, one of the most captivating aspects is their texture and shape. These natural stones come in a myriad of forms, each adding a unique character to your garden. Imagine walking through your garden and feeling the smooth, rounded edges of river rocks beneath your feet, or admiring the jagged, rough surfaces that contrast beautifully with delicate flowers. The texture can range from polished and satin-like to rugged and sharp, creating a tactile experience that engages the senses.
The shape of river rocks can also vary significantly. Some are oval, while others are flat or irregular. Each shape can serve a different purpose in your garden design. For instance, flat stones are perfect for creating pathways, allowing for a stable surface to walk on, while rounded stones can be used as decorative accents, adding a playful touch to your landscape. The variety in shapes not only enhances the visual appeal but also allows for creative arrangements that can transform your garden into a work of art.
When selecting river rocks, consider how the texture and shape will complement your overall garden theme. If you’re aiming for a modern look, smooth, uniform stones might be the way to go. On the other hand, if you prefer a more rustic or natural aesthetic, incorporating a mix of shapes and textures can create an organic feel that mimics the untamed beauty of nature. Furthermore, the interplay of light on different textures can create stunning visual effects as the sun moves across the sky.
To illustrate the differences in texture and shape, here's a simple table comparing some common types of river rocks:
| Type of River Rock | Texture | Shape | Best Use |
|---|---|---|---|
| Smooth River Stones | Smooth, polished | Rounded | Pathways, decorative accents |
| Flat River Rocks | Flat, even | Flat | Stepping stones, patios |
| Jagged River Rocks | Rough, uneven | Irregular | Garden borders, naturalistic designs |
In conclusion, the texture and shape of river rocks play a crucial role in the aesthetic and functional aspects of your garden. By carefully selecting and arranging various types of river rocks, you can create a visually stunning landscape that not only looks great but also feels inviting. So, next time you're planning your garden project, remember to think about how these natural elements can enhance your outdoor space.
- What are the best types of river rocks for landscaping? Smooth river stones and flat river rocks are often preferred for pathways and decorative features, while jagged stones can be used for borders and naturalistic designs.
- How do I clean river rocks? You can clean river rocks by rinsing them with water and scrubbing them gently with a brush. For deeper cleaning, consider using a mixture of vinegar and water.
- Can I use river rocks in a pond? Yes, river rocks can be used in ponds as decorative elements or to create natural-looking edges.
Installation Techniques
When it comes to installing river rocks in your garden, the process can be both exciting and rewarding. The right installation techniques not only ensure that your pathways and borders look stunning but also help them last through the seasons. So, let’s roll up our sleeves and dive into the nitty-gritty of how to properly install those beautiful river rocks!
First things first, before you even think about laying down those rocks, you need to prepare the area. Start by marking out where you want your pathways or borders to go. You can use a garden hose or string to outline the shape. This step is crucial because it helps you visualize the final look and ensures that everything is proportionate and symmetrical. Once you’re happy with the layout, it’s time to clear the area of any grass, weeds, or debris. A clean slate will make your installation much smoother.
Next, it’s time to dig! For pathways, you’ll want to dig down about 3-4 inches to create a solid base. This depth allows for proper drainage and prevents the rocks from shifting over time. If you’re creating borders, a depth of about 2-3 inches should suffice. After digging, consider adding a layer of landscape fabric to help suppress weeds. This fabric acts as a barrier, allowing water to seep through while keeping those pesky plants at bay.
Now comes the fun part—laying down the rocks! Start with larger rocks at the edges and fill in the center with smaller stones. This technique not only looks great but also provides stability. As you place the rocks, make sure to leave small gaps between them for drainage purposes. If you’re creating a pathway, try to ensure that the rocks are level with each other; this will prevent any tripping hazards and create a smooth walking surface.
After laying the rocks, it’s essential to compact them down. You can use a tamper or even just your feet to press them into the ground slightly. This step helps to secure the rocks and prevents them from shifting over time. For added stability, you might want to sprinkle some sand or gravel between the rocks. This will fill in the gaps and lock everything in place.
If you’re feeling particularly creative, consider incorporating some plants into your rock installation. You can plant low-growing perennials or succulents in the gaps between the rocks to add a splash of color and life to your pathways or borders. Just make sure to choose plants that thrive in rocky environments!
To wrap it up, here’s a quick summary of the installation techniques:
| Step | Description |
|---|---|
| 1. Prepare the Area | Mark and clear the garden space where you’ll be installing the rocks. |
| 2. Dig the Ground | Excavate the soil to the appropriate depth for pathways or borders. |
| 3. Lay Down Landscape Fabric | Use landscape fabric to prevent weeds from growing. |
| 4. Place the Rocks | Arrange the rocks, starting with larger ones and filling in with smaller stones. |
| 5. Compact and Fill | Press the rocks down and fill gaps with sand or gravel for stability. |
| 6. Add Plants (Optional) | Incorporate low-growing plants for added beauty. |
By following these installation techniques, you’ll not only enhance your garden’s aesthetic but also create a durable and functional outdoor space. So grab those river rocks and let your creativity flow!
- How do I choose the right size of river rocks for my project? Consider the scale of your garden and the purpose of the rocks. Larger rocks are great for borders, while smaller ones work well for pathways.
- Can I use river rocks in a wet area of my garden? Yes, but ensure proper drainage to prevent water accumulation around the rocks.
- How do I maintain my river rock installations? Regularly check for weeds and remove any debris. If necessary, replenish the sand or gravel between the rocks.
Creating Rock Gardens
When it comes to transforming your outdoor space, rock gardens offer a unique blend of beauty and practicality that is hard to resist. Imagine a landscape where rugged stones meet delicate flora, creating a visual feast that requires minimal upkeep. It's like nature’s own artwork, and the best part? You can create it right in your backyard! Rock gardens are not just about throwing some rocks together; they are a thoughtful combination of design, selection, and maintenance.
To start your journey into the world of rock gardens, think about the environment you want to create. Will it be a serene retreat, a vibrant display of colors, or a rugged mountain-scape? The choice is yours! The beauty of rock gardens lies in their versatility. You can use river rocks to create a stunning contrast with vibrant plants, or you can opt for a more subdued palette to evoke a sense of calm.
One of the most exciting aspects of rock gardens is their low maintenance nature. Once established, they require far less watering and weeding than traditional gardens. This makes them perfect for busy individuals or those who simply want to enjoy their outdoor space without the constant upkeep. However, it’s essential to choose the right plants that thrive in rocky environments. Consider selecting perennials, succulents, and other drought-resistant varieties that can withstand the challenges of a less conventional garden.
When designing your rock garden layout, think about the flow of the space. You want it to feel natural, as if it has always been part of your landscape. Start by placing larger rocks as focal points and then fill in with smaller stones and plants. This layering effect not only adds depth but also creates a dynamic visual interest. You can even incorporate pathways or stepping stones to guide visitors through your garden, making it an inviting space for exploration.
Now, let’s not forget about color! The hues of your river rocks can significantly impact the overall aesthetic of your garden. For instance, lighter stones can brighten up a shaded area, while darker stones may add a sense of drama to a sunny spot. Additionally, consider the seasonal changes in your plants. A well-planned rock garden will showcase different colors and textures throughout the year, keeping your outdoor space lively and engaging.
In summary, creating a rock garden is like crafting a living piece of art. With careful planning, the right selection of plants, and a touch of creativity, you can design a space that not only enhances your garden's beauty but also provides a tranquil escape. So, roll up your sleeves, gather those river rocks, and let your imagination run wild!
- What types of plants are best for rock gardens? Look for drought-resistant varieties such as succulents, alpine plants, and perennials that thrive in rocky conditions.
- How do I maintain a rock garden? Regularly check for weeds, ensure proper drainage, and occasionally refresh the mulch or stones to keep the garden looking its best.
- Can I create a rock garden in a small space? Absolutely! Rock gardens can be designed to fit any space, including small patios or balconies.
Choosing Plants for Rock Gardens
When it comes to choosing plants for your rock garden, the key is to select varieties that not only thrive in rocky conditions but also bring a splash of color and texture to your landscape. Rock gardens are unique ecosystems that require plants capable of withstanding the challenges of limited soil and fluctuating moisture levels. Think of your rock garden as a canvas where each plant adds its own brushstroke, creating a vibrant masterpiece that changes with the seasons.
One of the best approaches is to consider native plants that naturally grow in rocky areas. These plants are often well-adapted to the local climate and soil conditions, making them a sustainable choice. For instance, you might consider the resilient Sedum varieties or the charming Thyme, both of which are not only hardy but also provide delightful blooms. Another great option is the Alpine Aster, which can add a beautiful pop of purple to your garden.
Moreover, it's essential to think about height and spread when planning your rock garden. You want to create layers of interest, so consider incorporating a mix of low-growing ground covers, mid-height perennials, and taller plants. For example, you could plant Ajuga as a ground cover to provide a lush green base, while adding Delosperma for its vibrant flowers that can spill over rocks. This layering technique not only enhances visual appeal but also helps to create a more natural look.
Another factor to keep in mind is the seasonality of your plants. Aim for a combination of early bloomers and late-season flowers to ensure your rock garden remains vibrant throughout the year. Plants like Snowdrops can herald the spring, while Chrysanthemums can keep the colors alive well into the fall. This thoughtful approach to seasonal diversity will keep your garden looking fresh and inviting no matter the time of year.
Don't forget about texture! Mixing plants with different leaf shapes and sizes can add depth and interest to your rock garden. For instance, pairing the smooth leaves of Sedum with the feathery foliage of Artemisia can create a stunning contrast that catches the eye. The interplay of textures will make your garden feel more dynamic and engaging, inviting visitors to explore every nook and cranny.
Lastly, consider the maintenance aspect of your plant choices. While rock gardens are often low-maintenance, selecting plants that are drought-resistant will make your life even easier. This way, you'll spend less time watering and more time enjoying the beauty of your outdoor space. Plants like Lavender and Catmint not only add fragrance and color but also thrive in drier conditions, making them perfect companions for your rocky landscape.
In summary, choosing the right plants for your rock garden is all about creating a harmonious blend of color, texture, and seasonal interest. By selecting native species, considering plant heights, and focusing on maintenance, you can cultivate a stunning rock garden that is both beautiful and functional.
- What are the best plants for a rock garden? Native plants like Sedum, Thyme, and Alpine Aster are excellent choices due to their hardiness and adaptability.
- How do I maintain my rock garden? Opt for drought-resistant plants and ensure proper drainage to minimize maintenance.
- Can I mix different types of plants in my rock garden? Absolutely! Mixing various heights, textures, and seasonal blooms can enhance the visual appeal of your garden.
Designing Your Rock Garden Layout
Designing a rock garden layout is not just about throwing a few rocks together and hoping for the best; it’s an art form that combines creativity with nature’s beauty. Imagine walking into your garden and feeling as though you’ve stepped into a serene oasis. To achieve this, you need to consider various elements that will harmonize with your existing landscape. Start by envisioning the overall theme of your garden. Will it be a modern minimalist design, or do you prefer a more rustic, natural look? The choice of rocks, plants, and layout will significantly affect the ambiance.
One effective approach is to sketch your ideas on paper before you start moving rocks and plants. This way, you can visualize the space and make adjustments as needed. When planning your layout, think about the flow of the garden. Pathways should lead visitors through the space, encouraging exploration. You can create a winding path that meanders through clusters of rocks and plants, or opt for a more structured approach with straight lines. Either way, ensure that the path is inviting and easy to navigate.
Next, consider the placement of your river rocks. They can be used to create focal points, such as a stunning centerpiece or a natural border. A good rule of thumb is to group rocks in odd numbers for a more natural look. For instance, three or five rocks of varying sizes can create a visually appealing arrangement that draws the eye. Additionally, think about layering your rocks. Larger rocks can serve as anchors, while smaller stones can fill in the gaps, creating depth and interest.
Don’t forget about the plants! The right plants can enhance the beauty of your rock garden layout. Choose plants that thrive in rocky, well-drained soil, such as sedums, succulents, and alpine plants. These plants not only add color and texture but also complement the ruggedness of the rocks. When placing plants, consider their height and spread. Taller plants should be positioned towards the back or center, while shorter ones can fill in the front. This layering effect will create a sense of depth and dimension.
Lastly, think about the seasonal changes in your garden. Selecting a variety of plants that bloom at different times can ensure that your rock garden remains vibrant throughout the year. For example, you might choose early bloomers like crocuses for spring, followed by summer favorites like lavender, and finish with fall beauties like asters. This way, your rock garden will be a living canvas that changes with the seasons, providing ongoing visual interest.
In conclusion, designing your rock garden layout is an exciting journey that combines planning and creativity. By considering the flow of the garden, the placement of rocks and plants, and the seasonal changes, you can create a stunning landscape that not only enhances your outdoor space but also brings you joy every time you step outside.
- What types of plants are best for rock gardens?
Plants that thrive in well-drained soil, such as sedums, succulents, and alpine plants, are ideal for rock gardens. - How do I choose the right river rocks?
Consider the size, color, and texture of the rocks to ensure they fit your garden's theme and enhance the overall aesthetic. - Can I create a rock garden in a small space?
Absolutely! Even small spaces can accommodate a rock garden by using smaller rocks and plants to create a compact yet beautiful design.
Frequently Asked Questions
- What are river rocks, and why should I use them in my garden?
River rocks are smooth, rounded stones that are naturally shaped by water erosion. They add a unique aesthetic to your garden, offering a rustic charm while also serving practical purposes like improving drainage and reducing weed growth.
- How do I choose the right river rocks for my garden?
When selecting river rocks, consider factors like size, color, and texture. Larger rocks can create a bold statement, while smaller stones can fill gaps and provide a softer look. Choose colors that complement your plants and the overall theme of your garden.
- Can I use river rocks to create a pathway?
Absolutely! River rocks are perfect for creating pathways. You can lay them out in a variety of patterns to guide visitors through your garden while adding a natural feel. Just make sure to create a solid base to prevent shifting.
- What plants work best in a rock garden?
Look for drought-resistant plants that thrive in rocky conditions, such as succulents, alpine plants, and certain perennials. These plants not only survive but also enhance the beauty of your rock garden, creating a harmonious landscape.
- How do I install rock borders effectively?
Start by marking the area where you want the border. Dig a shallow trench to accommodate the rocks, then layer them in a way that they interlock for stability. This technique prevents soil erosion and gives your garden a polished look.
- Are there maintenance requirements for rock gardens?
Rock gardens are relatively low-maintenance. However, you should regularly check for weeds and remove them, as they can still pop up in the rocky environment. Occasionally, you might want to refresh the rocks or rearrange them for a new look.
- Can I use river rocks in other areas of my yard?
Definitely! River rocks can be used in various landscaping projects, including around trees, in flower beds, or even as decorative accents in water features. Their versatility allows for creative expression throughout your outdoor space.


