Grow Big, Juicy Tomatoes in Your Backyard
Are you ready to transform your backyard into a tomato paradise? Growing big, juicy tomatoes is not just a dream; it can become your reality with the right techniques and a little love! Imagine stepping into your garden, plucking a plump, sun-ripened tomato straight from the vine, and enjoying its fresh, sweet flavor. The satisfaction of growing your own tomatoes is unmatched, and it’s easier than you might think. In this article, we’ll explore essential tips and techniques that will help you cultivate tomatoes that are not only large but bursting with flavor. So, grab your gardening gloves, and let’s dig into the world of tomato cultivation!
Selecting the right varieties is crucial for success. Different types of tomatoes have unique growth requirements and flavor profiles, making it essential to choose those that best suit your climate and taste preferences. Whether you’re aiming for the classic beefsteak, the sweet cherry, or the versatile Roma, each variety has its charm. Consider factors like your local climate, the length of your growing season, and how you plan to use the tomatoes. For instance:
- Beefsteak Tomatoes: Known for their large size and meaty texture, perfect for sandwiches.
- Cherry Tomatoes: Small, sweet, and great for snacking, salads, or garnishing dishes.
- Roma Tomatoes: Ideal for sauces and canning due to their low moisture content.
By understanding the characteristics of different tomato varieties, you can make informed decisions that will lead to a bountiful harvest.
Healthy soil is the foundation of any successful garden. To grow big, juicy tomatoes, you need to create the perfect environment for them to thrive. Start by testing your soil to understand its current nutrient levels and pH. A pH level between 6.0 and 6.8 is ideal for tomatoes. You can easily test your soil using a home testing kit available at gardening stores. Once you know your soil's pH, you can amend it accordingly.
Understanding your soil's pH level is vital for tomato growth. If your soil is too acidic or too alkaline, it can hinder nutrient absorption. Adjusting the pH can be as simple as adding lime to raise it or sulfur to lower it. Regular testing ensures that your tomatoes have access to the nutrients they need to grow strong and healthy.
Incorporating organic matter into your soil can significantly improve its structure and fertility. Compost is your best friend here! It not only enriches the soil but also enhances its ability to retain moisture, which is crucial during dry spells. You can also consider other organic amendments like well-rotted manure or peat moss. The benefits are tremendous:
- Improved soil structure
- Enhanced nutrient availability
- Better moisture retention
Proper drainage is essential to prevent root rot and other diseases. If your garden tends to hold water, consider raised beds or mounding the soil to promote drainage. Adding organic matter can also help improve drainage. Remember, happy roots lead to healthy plants!
The location of your tomato plants can greatly affect their growth. Tomatoes love the sun, so choose a spot that receives at least 6 to 8 hours of direct sunlight each day. Additionally, good airflow is important to reduce the risk of disease. A sunny, well-ventilated area will help your plants flourish.
Effective watering is key to achieving juicy tomatoes. A consistent watering schedule is crucial, especially during dry spells. Tomatoes thrive with deep watering, which encourages roots to grow deeper into the soil. Aim to water your plants early in the morning to minimize evaporation and fungal diseases. Consider using mulch to help retain moisture in the soil.
Implementing a drip irrigation system can optimize water usage and reduce disease risk. This method delivers water directly to the roots, ensuring that your tomatoes get the moisture they need without wetting the foliage. Setting up a drip system is easy and can save you time and effort in the long run.
Recognizing the signs of overwatering can save your tomato plants from stress and disease. Look for yellowing leaves, wilting, or a mushy stem. If you notice these symptoms, it’s time to adjust your watering practices. Remember, it’s better to underwater than to overwater your tomatoes!
Protecting your tomatoes from pests and diseases is crucial for a successful harvest. Common threats include aphids, whiteflies, and blight. Regularly inspecting your plants and maintaining good garden hygiene can help keep these issues at bay. If you notice any problems, act quickly to prevent them from spreading.
Implementing preventative measures can significantly reduce the likelihood of pest infestations and diseases. Rotate your crops each year, use disease-resistant varieties, and keep your garden clean. Healthy plants are less susceptible to pests and diseases.
Explore various organic pest control methods that are safe for your garden and effective against common tomato pests. Neem oil, insecticidal soap, and companion planting with marigolds can deter unwanted visitors while keeping your garden chemical-free.
Knowing when and how to harvest your tomatoes is essential for maximizing flavor and quality. The best time to pick tomatoes is when they are fully colored and slightly soft to the touch. This ensures that you’re getting the maximum flavor from your fruit.
Recognizing the signs of ripe tomatoes ensures you harvest them at the right time. Look for vibrant color, firmness, and a slightly sweet aroma. Each variety may have its specific indicators, so familiarize yourself with what’s normal for the types you’re growing.
Proper storage techniques can prolong the freshness of your harvested tomatoes. Store them at room temperature, away from direct sunlight, and avoid refrigerating them unless absolutely necessary. This helps maintain their flavor and quality until you're ready to enjoy them.
Q: How often should I water my tomato plants?
A: Water your tomato plants deeply once or twice a week, depending on weather conditions. Ensure the soil is moist but not waterlogged.
Q: What can I do if my tomatoes are not ripening?
A: If your tomatoes aren’t ripening, ensure they are getting enough sunlight and warmth. You can also try pruning excess foliage to allow more light to reach the fruits.
Q: How do I prevent blossom end rot?
A: Blossom end rot is often caused by inconsistent watering. Maintain a regular watering schedule and ensure your plants receive adequate calcium.
With these tips, you’re well on your way to growing big, juicy tomatoes right in your backyard. Happy gardening!
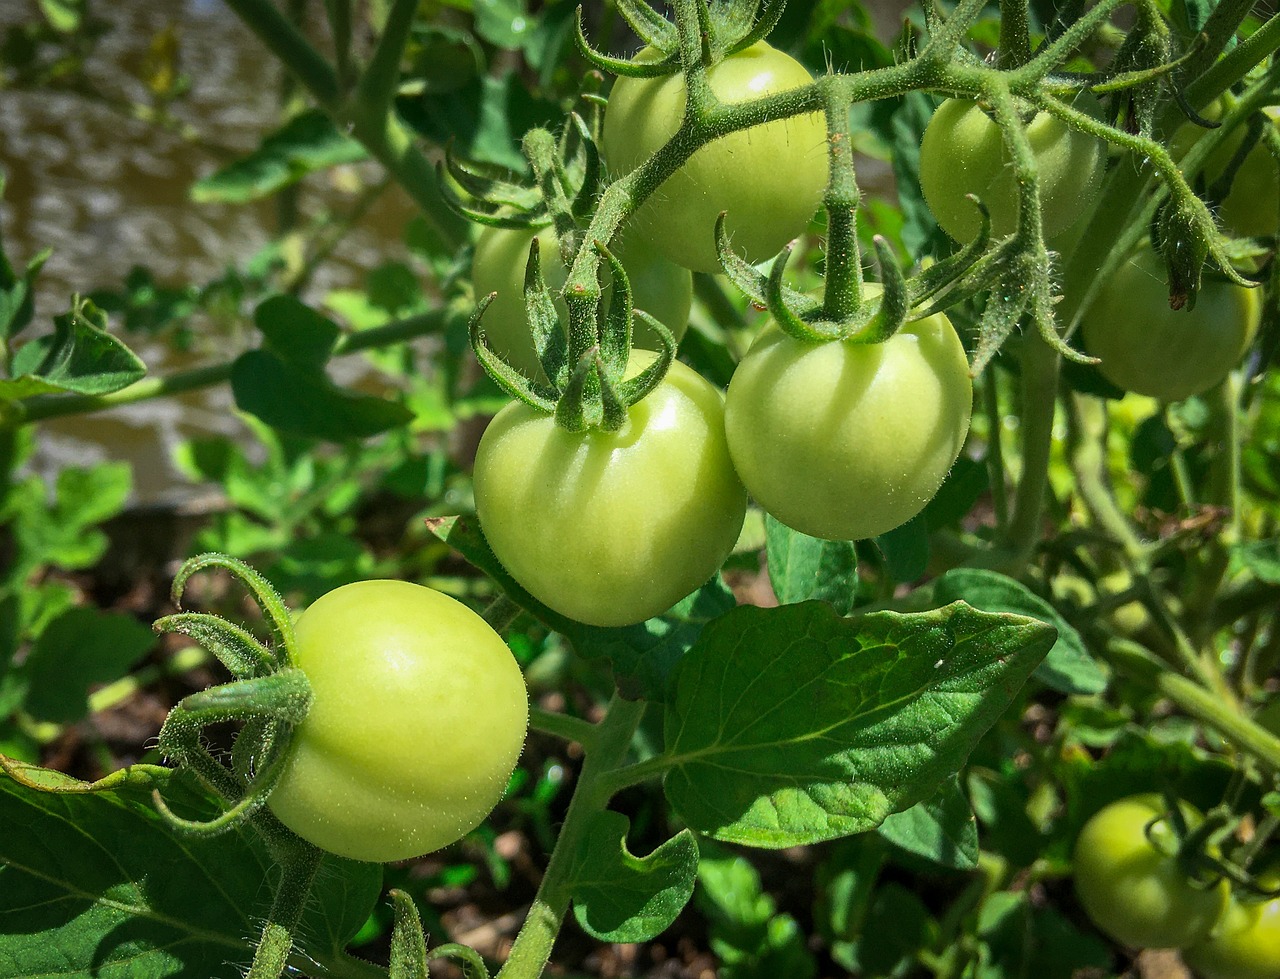
Choosing the Right Tomato Varieties
When it comes to growing tomatoes, the variety you choose can make all the difference between a mediocre harvest and a bountiful one. Just like picking the right ingredients for a delicious meal, selecting the right tomato varieties is essential for cultivating those big, juicy fruits that you dream about. With countless options available, it can feel overwhelming, but don’t worry! Let’s break it down.
First, consider your climate. Different tomato varieties thrive in different environments. For instance, if you live in a cooler region, you might want to opt for early-maturing varieties such as 'Early Girl' or 'Stupice', which can ripen before the first frost. Conversely, if you're basking in a warm climate, you can experiment with heat-loving varieties like 'Brandywine' or 'Cherokee Purple'. Choosing varieties that are well-suited to your local conditions will set the foundation for a successful garden.
Next, think about what you want to use your tomatoes for. Are you planning to make sauces, salads, or just enjoy them fresh off the vine? Different varieties have unique flavor profiles and uses. For example, Roma tomatoes are perfect for sauces due to their meaty texture and low moisture content, while Cherry tomatoes are sweet and great for snacking. If you're aiming for a diverse garden, consider planting a mix of varieties to enjoy a range of flavors and uses.
Another important factor is disease resistance. Some tomato varieties are bred specifically to withstand common diseases like blight or wilt. When selecting your seeds, look for labels indicating disease resistance, which can save you a lot of headaches down the line. For example, varieties like 'Celebrity' and 'Mountain Magic' are known for their resilience against pests and diseases.
Finally, don’t forget about the growing space you have available. Some tomato plants can grow quite large, requiring ample space for their sprawling vines. If you're limited on space, consider dwarf or determinate varieties that grow more compactly. These varieties are perfect for container gardening or smaller plots. On the other hand, if you have plenty of room, you might want to try indeterminate varieties that continue to grow and produce throughout the season, providing a steady supply of tomatoes.
In summary, choosing the right tomato varieties involves considering your climate, intended use, disease resistance, and available space. By taking the time to select the best options for your garden, you’ll be well on your way to enjoying a delicious harvest of big, juicy tomatoes that will make your taste buds dance with joy!
- What are the best tomato varieties for beginners? Varieties like 'Early Girl', 'Roma', and 'Cherry' are often recommended for novice gardeners due to their ease of growth and resilience.
- Can I grow tomatoes in containers? Absolutely! Many compact varieties are perfect for container gardening, such as 'Patio Princess' and 'Tiny Tim'.
- How long does it take for tomatoes to grow? Generally, from planting to harvest, it takes about 60 to 100 days depending on the variety.
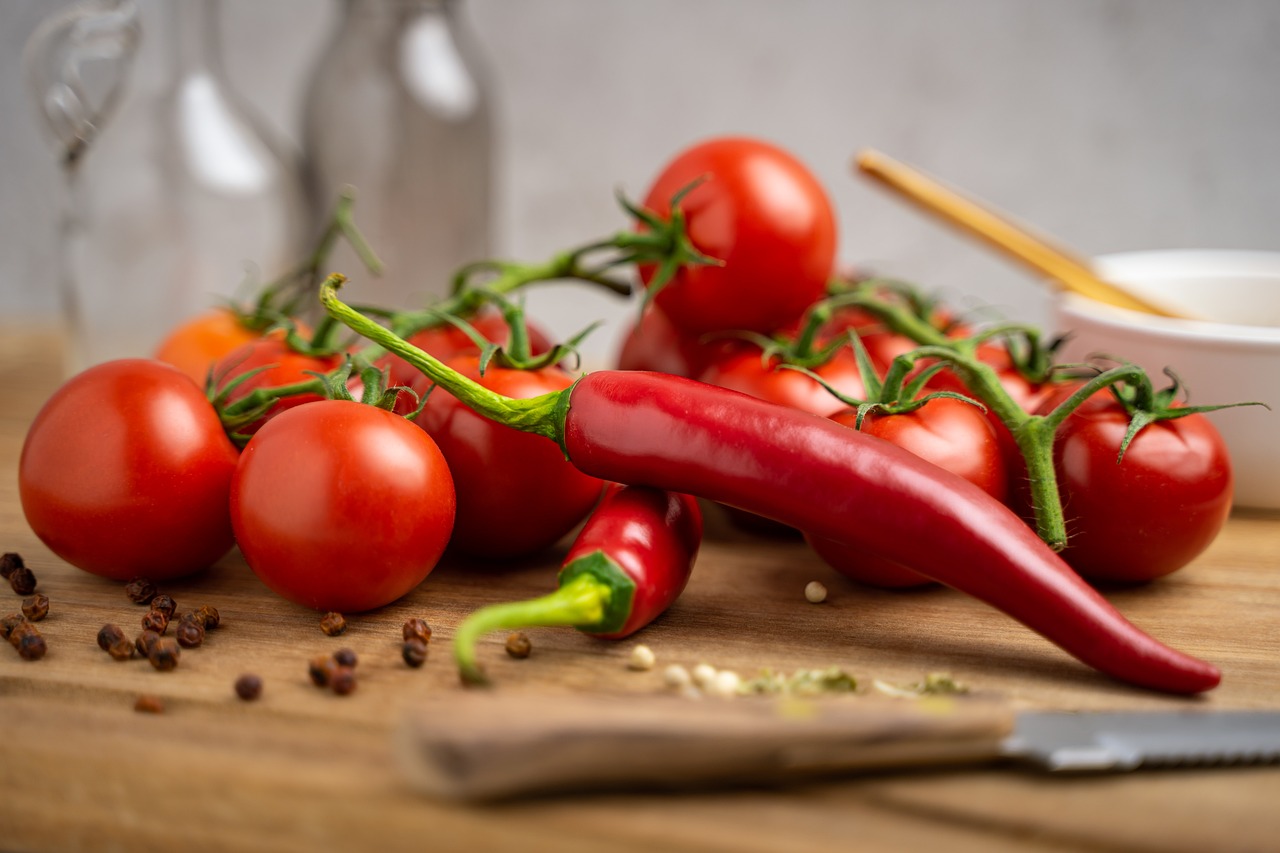
Preparing Your Soil
Healthy soil is the foundation of any successful garden, especially when it comes to growing those big, juicy tomatoes that you dream of biting into. Think of your soil as a nurturing bed that cradles your plants, providing them with the essential nutrients they need to thrive. Without proper soil preparation, even the most promising tomato seeds can struggle to grow, leaving you with a disappointing harvest. So, how do you create the perfect environment for your tomatoes? Let’s dive into the essential steps for preparing your soil.
First things first, understanding your soil's pH level is vital for tomato growth. Tomatoes prefer a slightly acidic to neutral pH, typically between 6.0 and 7.0. A quick test can reveal whether your soil falls within this range. You can purchase a soil pH test kit from your local garden center or even send a sample to a lab for analysis. If your soil is too acidic, you can add lime to raise the pH; conversely, if it's too alkaline, sulfur can help bring it down. This adjustment ensures that your plants can absorb nutrients effectively, paving the way for a bountiful harvest.
Incorporating organic matter into your soil can significantly improve its structure and fertility. Think of organic matter as a superhero for your garden—it enhances soil texture, increases moisture retention, and promotes healthy microbial activity. Compost is a fantastic option, as it’s rich in nutrients and helps improve drainage. You can also consider adding well-rotted manure or leaf mold. Aim to mix in about 2 to 3 inches of organic matter into your soil before planting. This not only enriches the soil but also creates a thriving ecosystem that supports your tomato plants.
Proper drainage is essential to prevent root rot and other diseases that can devastate your tomato crop. If your garden bed tends to hold water, consider implementing some drainage techniques. One effective method is to create raised beds, which allow excess water to drain away from the roots. Another option is to incorporate materials like sand or perlite into your soil mix, which enhances drainage capabilities. You can also dig trenches around your garden beds to redirect excess water away. Remember, happy roots make for happy plants!
Once your soil is prepared, the next step is selecting the right location for your tomato plants. Tomatoes thrive in full sun, so look for a spot in your garden that receives at least 6 to 8 hours of sunlight each day. Additionally, good airflow is crucial to reduce the risk of diseases. Avoid placing your plants too close together or in shaded areas. By giving your tomatoes the best location, you set the stage for robust growth and a plentiful harvest.
- How often should I amend my soil for tomatoes? It’s best to amend your soil every year before planting to ensure it remains nutrient-rich.
- Can I use store-bought compost? Yes, store-bought compost is a great option if you don’t have your own. Just make sure it’s organic and well-aged.
- What should I do if my soil is too sandy? If your soil is too sandy, adding organic matter will help improve its ability to retain moisture and nutrients.
- How can I tell if my soil has good drainage? If water pools on the surface after heavy rain, your soil likely has poor drainage. Conduct a simple test by digging a hole, filling it with water, and observing how quickly it drains.
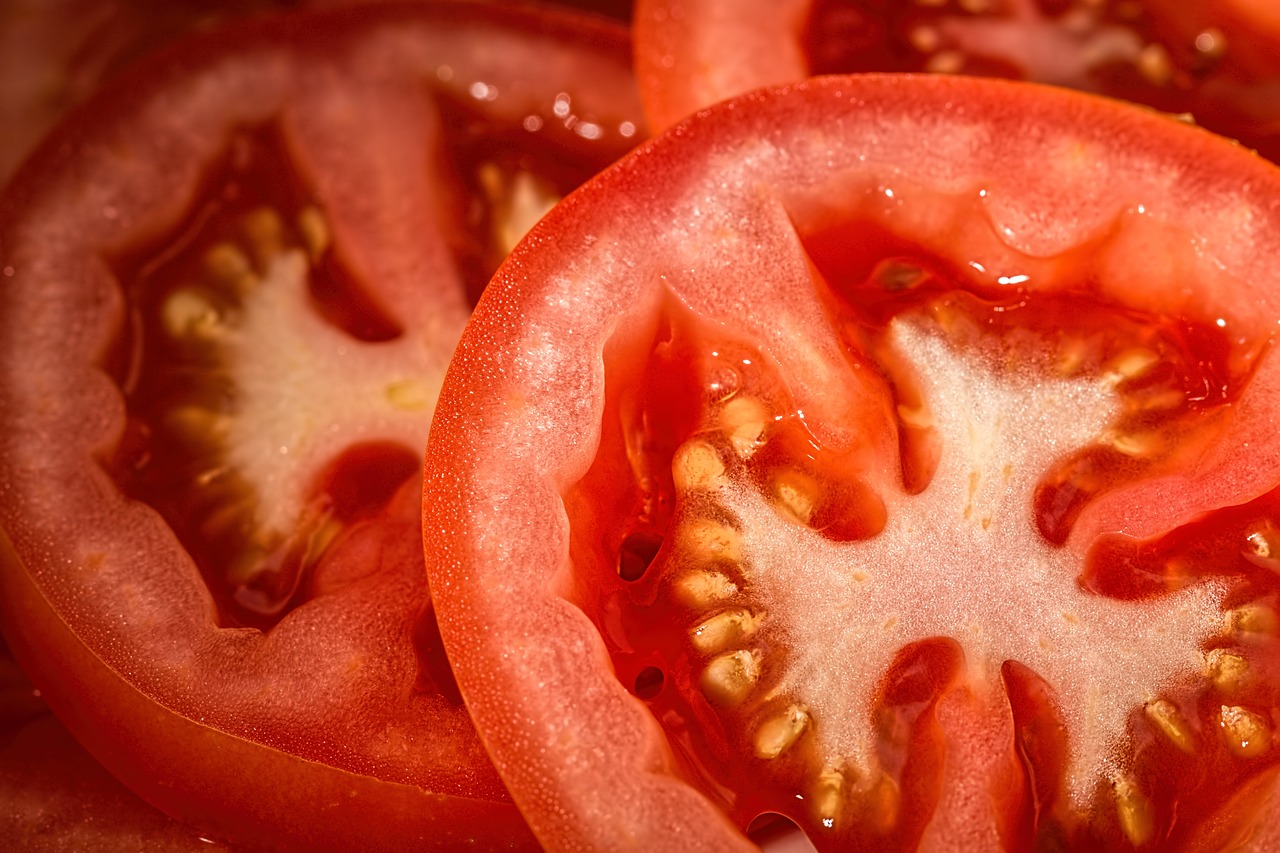
Testing Soil pH
Understanding your soil's pH level is vital for the successful growth of your tomatoes. Soil pH affects nutrient availability, which in turn influences plant health and fruit quality. If you’ve ever wondered why your tomatoes aren’t thriving or why they lack that rich flavor, the culprit might just be the pH of your soil. Ideally, tomatoes flourish in a slightly acidic to neutral pH range of 6.0 to 7.0. Testing your soil's pH can seem daunting, but it’s a straightforward process that can make a world of difference.
To start, you can use a simple soil pH test kit, which is available at garden centers or online. These kits usually include a pH meter or test strips that provide quick results. Here’s a quick step-by-step guide to testing your soil pH:
- Gather Your Tools: You’ll need a soil sample, distilled water, and your pH test kit.
- Collect Soil Samples: Take samples from various spots in your garden to get an average reading. Aim for about 6-8 inches deep.
- Mix with Water: Combine your soil sample with distilled water in a clean container, following the kit's instructions.
- Test the pH: Use the pH meter or strips according to the kit's directions to determine the pH level.
Once you have your pH reading, you can decide if any adjustments are necessary. If your soil is too acidic (below 6.0), you might want to add lime to raise the pH. On the other hand, if your soil is too alkaline (above 7.0), adding sulfur or peat moss can help lower the pH. It’s like giving your tomatoes a cozy home where they can thrive!
Keep in mind that soil pH can change over time due to factors like rainfall, fertilization, and even the types of plants you grow. Therefore, it’s a good practice to test your soil pH at least once a year, especially before planting your tomatoes. This proactive approach ensures that your plants have the best possible environment for growth and fruit production.
In summary, testing your soil pH is an essential step in growing big, juicy tomatoes. By understanding and adjusting the pH levels, you can unlock the full potential of your garden and enjoy a bountiful harvest that bursts with flavor. So, grab that test kit and get started—you’ll be amazed at how much of a difference it can make!
- How often should I test my soil pH? It's recommended to test your soil pH at least once a year, ideally before planting season.
- Can I use household items to test soil pH? While there are home methods using vinegar and baking soda, they are not as accurate as commercial test kits.
- What should I do if my soil pH is too low? If your soil is too acidic, you can add lime to raise the pH level gradually.
- How long does it take for soil amendments to affect pH? Changes in soil pH can take a few weeks to a few months, depending on the amendment used and soil conditions.
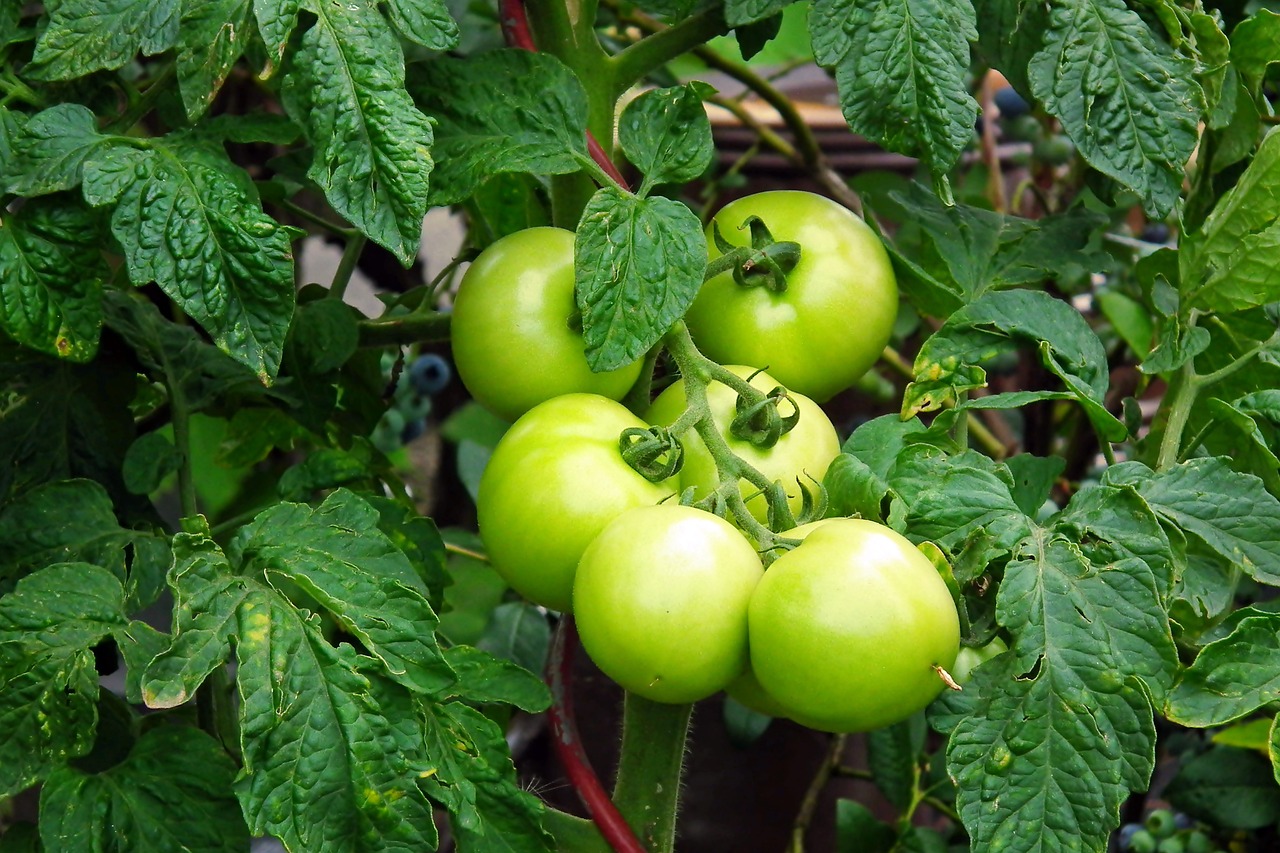
Adding Organic Matter
When it comes to growing big, juicy tomatoes, to your soil is like giving your plants a gourmet meal. It enriches the soil, improves its structure, and enhances its fertility, creating an ideal environment for your tomato plants to thrive. Organic matter can come in various forms, including compost, well-rotted manure, leaf mold, and even grass clippings. Each of these has unique benefits that contribute to the overall health of your garden.
One of the primary advantages of incorporating organic matter is its ability to improve soil structure. Think of it as the secret ingredient that helps your soil retain moisture while also allowing excess water to drain away. This balance is crucial for preventing root rot, which can be a significant issue for tomato plants. Additionally, organic matter acts like a sponge, holding onto nutrients and making them available to your plants over time, rather than washing away with the rain.
When you add organic matter to your soil, you're not just feeding your plants; you're also fostering a thriving ecosystem of beneficial microorganisms. These tiny allies work tirelessly to break down organic materials, releasing nutrients that your tomatoes can absorb. It's like having a team of little gardeners working behind the scenes to ensure your plants get everything they need to grow strong and healthy.
To effectively add organic matter to your garden, consider the following methods:
- Composting: Create a compost pile with kitchen scraps, yard waste, and other organic materials. Over time, this will break down into nutrient-rich compost that can be mixed into your garden soil.
- Mulching: Spread a layer of organic mulch, such as straw or shredded leaves, around your tomato plants. This not only adds organic matter as it decomposes but also helps retain moisture and suppress weeds.
- Green Manures: Plant cover crops during the off-season, such as clover or vetch. When tilled back into the soil, these plants enrich the soil with nutrients.
Incorporating organic matter is not just a one-time task; it’s an ongoing process. Aim to add organic amendments to your soil every year to continually boost its fertility. The result? A thriving tomato garden that produces an abundance of delicious, juicy fruit that you can enjoy all summer long. So roll up your sleeves, get your hands dirty, and watch your tomatoes flourish!
Q: How often should I add organic matter to my garden?
A: It's best to add organic matter annually, ideally in the spring before planting. This ensures your soil remains rich and fertile.
Q: Can I use any type of organic matter?
A: Yes, but it's important to avoid using fresh manure as it can burn plants. Always use well-rotted manure or compost.
Q: How do I know if my soil needs more organic matter?
A: If your soil feels compacted, drains poorly, or lacks nutrients, it's a good indication that it needs more organic matter.
Soil Drainage Techniques
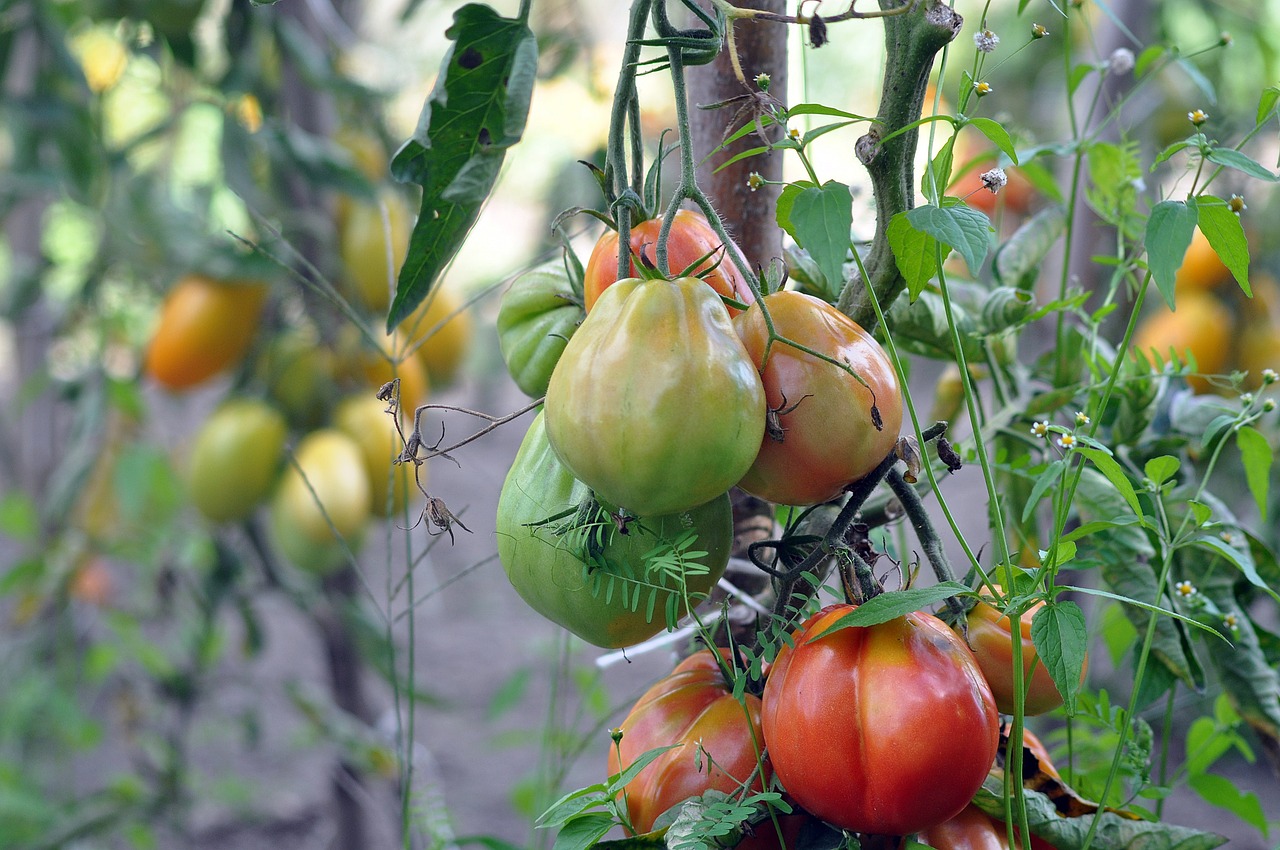
When it comes to growing big, juicy tomatoes, one of the most critical factors is ensuring that your soil has proper drainage. Without it, your tomato plants can suffer from root rot, which can lead to a host of problems, including stunted growth and reduced yields. So, how can you ensure your garden has the right drainage? Let's explore some effective techniques that can help!
First off, consider the layout of your garden. If your soil tends to retain water, creating raised beds can be a game-changer. By elevating your planting area, you allow excess water to drain away more easily. Raised beds not only improve drainage but also provide better soil temperature control, which is essential for tomato growth. You can build these beds using wood, stone, or even recycled materials. Just make sure they’re at least 12 inches high to give your tomatoes plenty of room to grow their roots.
Another technique to improve drainage is to amend your soil with organic matter. Incorporating materials such as compost, peat moss, or well-rotted manure can enhance the soil structure, allowing water to flow through more freely. This organic matter acts like a sponge, retaining just enough moisture while preventing waterlogging. Aim to mix in at least 25% organic matter into your existing soil for the best results.
Additionally, consider using drainage tiles or perforated pipes in areas where water tends to pool. These systems can help redirect excess water away from your tomato plants. To install, dig trenches where the water collects, lay the drainage tiles, and cover them with gravel. This setup can significantly reduce water accumulation and keep your plants' roots dry.
Lastly, don't forget about the importance of regular maintenance. After heavy rains, check your garden for any signs of standing water. If you notice areas where water tends to collect, you may need to regrade the soil or add additional drainage solutions. A proactive approach to drainage will ensure your tomato plants thrive and yield that delicious harvest you’re after.
In summary, effective soil drainage is essential for growing healthy tomatoes. By implementing raised beds, amending your soil with organic matter, utilizing drainage tiles, and maintaining your garden, you can create the perfect environment for your plants. Remember, happy roots lead to happy fruits!
- What are the signs of poor drainage in my tomato garden? Look for water pooling, yellowing leaves, or wilting plants, which can indicate that your soil is too wet.
- How often should I check my soil drainage? Regularly inspect your garden, especially after heavy rainfall, to ensure that water is draining properly.
- Can I grow tomatoes in containers if I have poor soil drainage? Absolutely! Using containers with drainage holes allows you to control the soil and water conditions more effectively.
- What types of organic matter are best for improving soil drainage? Compost, peat moss, and well-rotted manure are excellent choices for enhancing soil structure and drainage.
Choosing the Right Location
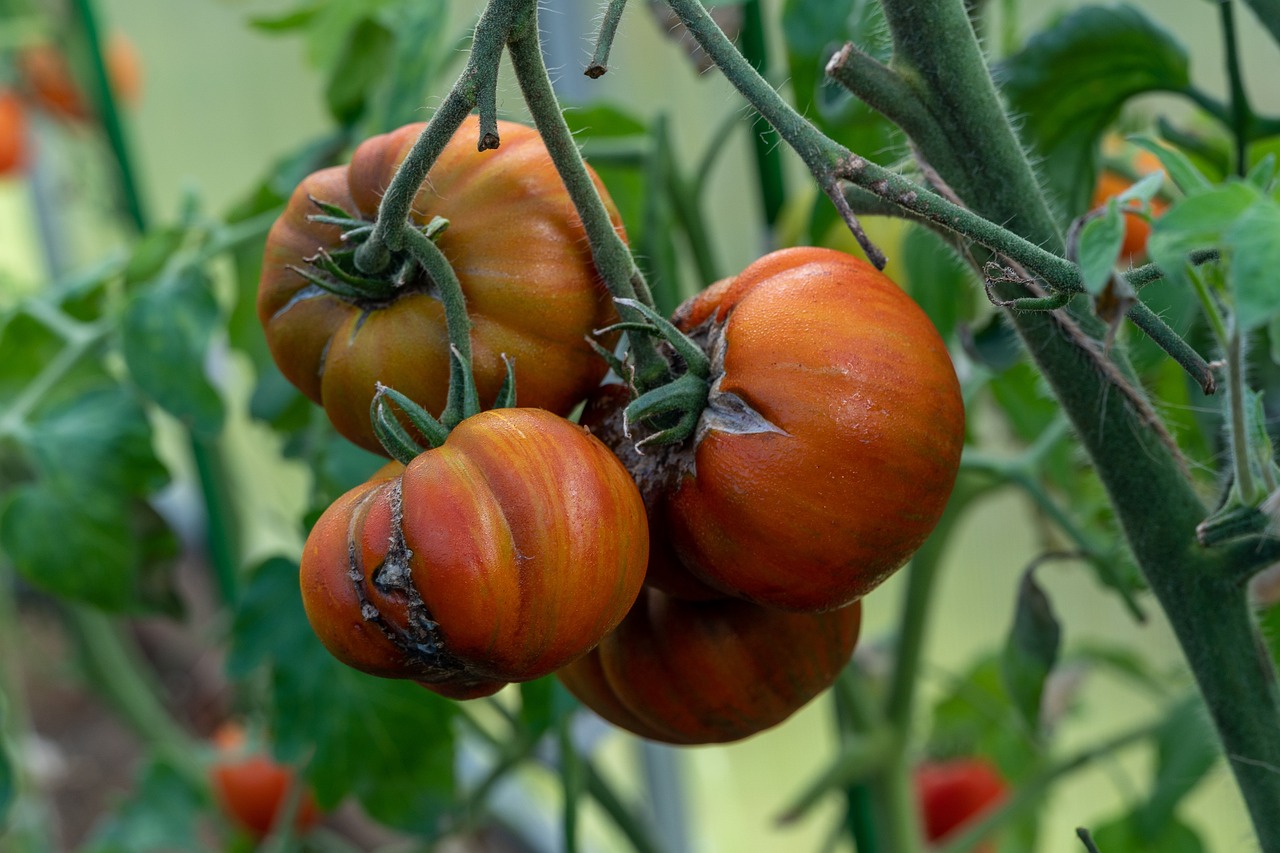
When it comes to growing big, juicy tomatoes, the location of your plants can make all the difference. Imagine trying to grow a tropical plant in a freezing environment—it just wouldn’t work, right? Similarly, tomatoes thrive in specific conditions that you can easily provide by selecting the right spot in your garden. First and foremost, tomatoes love the sun. Aim for a location that receives at least 6 to 8 hours of direct sunlight each day. This sunlight is crucial for photosynthesis, which helps your plants produce those delicious fruits you crave.
But it’s not just about sunlight; airflow is equally important. A well-ventilated area can help reduce the risk of diseases that can plague tomato plants, such as blight. Think of it like this: just as we need fresh air to breathe easily, your tomato plants need it to stay healthy. Look for a spot that allows for good air circulation, avoiding overly crowded areas or spots that are too sheltered.
Another factor to consider is the drainage. Tomatoes do not like to sit in water, as this can lead to root rot. Therefore, choose a location that has well-draining soil. If your garden area tends to retain water, consider building raised beds or planting on mounds to improve drainage. You might also want to check the soil type; sandy or loamy soils are typically better for tomatoes than heavy clay.
Lastly, think about the proximity to water sources. Having a water source nearby can make your life a lot easier when it comes time to water your plants. You don’t want to be lugging a heavy watering can across the yard every day! A hose or a drip irrigation system can be a gardener's best friend, ensuring your tomatoes receive consistent moisture without the hassle.
In summary, when choosing the right location for your tomatoes, keep these key points in mind:
- Sunlight: 6 to 8 hours of direct sunlight daily.
- Airflow: Good ventilation to reduce disease risk.
- Drainage: Well-draining soil to prevent root rot.
- Water Access: Proximity to water sources for easy irrigation.
By carefully selecting the right location, you set the stage for a bountiful harvest of luscious tomatoes that will not only satisfy your taste buds but also impress your friends and family. After all, who doesn’t love a homegrown tomato fresh off the vine?
Watering Techniques
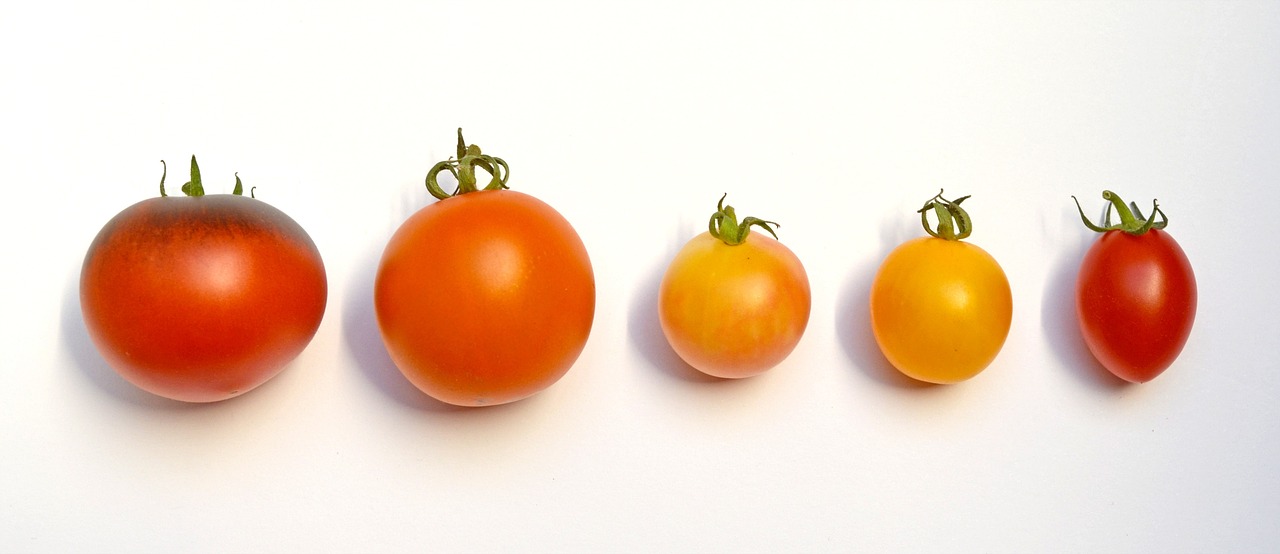
When it comes to growing big, juicy tomatoes, effective watering is absolutely key. Think of watering your tomato plants as giving them a refreshing drink on a hot summer day; just like we need the right amount of hydration to thrive, so do your plants. Too little water can lead to stress and stunted growth, while too much can drown the roots and cause rot. So, how do you strike that perfect balance? Let’s dive into some proven techniques that will keep your tomatoes happy and hydrated!
One of the most efficient methods for watering your garden is through drip irrigation systems. These systems deliver water directly to the base of the plants, minimizing waste and ensuring that moisture reaches the roots where it’s needed most. This method not only conserves water but also reduces the risk of fungal diseases that can occur when water sits on the leaves. Setting up a drip irrigation system may seem daunting at first, but it can be as simple as connecting a hose to a timer. You'll be amazed at how much easier it makes your gardening routine!
Another effective technique is to water your tomatoes deeply but infrequently. This encourages the plants to develop a robust root system that can reach down into the soil for moisture. A good rule of thumb is to aim for about 1-2 inches of water per week, depending on your climate. You can check the moisture level by sticking your finger into the soil about an inch deep; if it feels dry, it’s time to water. Remember, consistency is crucial. Try to water your plants at the same time each day, ideally in the morning, to allow the soil to absorb moisture before the sun heats up.
Now, let’s talk about the signs of overwatering. It’s essential to be vigilant because too much water can lead to yellowing leaves, wilting, and even root rot. If you notice these symptoms creeping in, it’s time to reassess your watering schedule. Also, pay attention to the weather—if it’s been rainy, you might need to hold off on watering for a bit. Your tomatoes will appreciate your attention to detail!
| Watering Technique | Benefits |
|---|---|
| Drip Irrigation | Efficient water delivery, reduced disease risk |
| Deep Watering | Encourages strong root growth, better drought resistance |
| Morning Watering | Prevents evaporation, allows for better absorption |
In summary, watering your tomato plants is more of an art than a science. By using techniques like drip irrigation and deep watering, you can create an environment where your tomatoes thrive. Always be mindful of the signs your plants give you and adjust your practices accordingly. With the right approach, you’ll be well on your way to a bountiful harvest of delicious tomatoes!
Q: How often should I water my tomato plants?
A: Aim for about 1-2 inches of water per week, adjusting based on rainfall and temperature.
Q: What is the best time of day to water?
A: Morning is the ideal time to water your plants, allowing moisture to be absorbed before the heat of the day.
Q: How can I tell if my tomatoes are overwatered?
A: Look for yellowing leaves, wilting, and a mushy texture at the base of the plant. Adjust your watering schedule if you notice these signs.
Drip Irrigation Systems
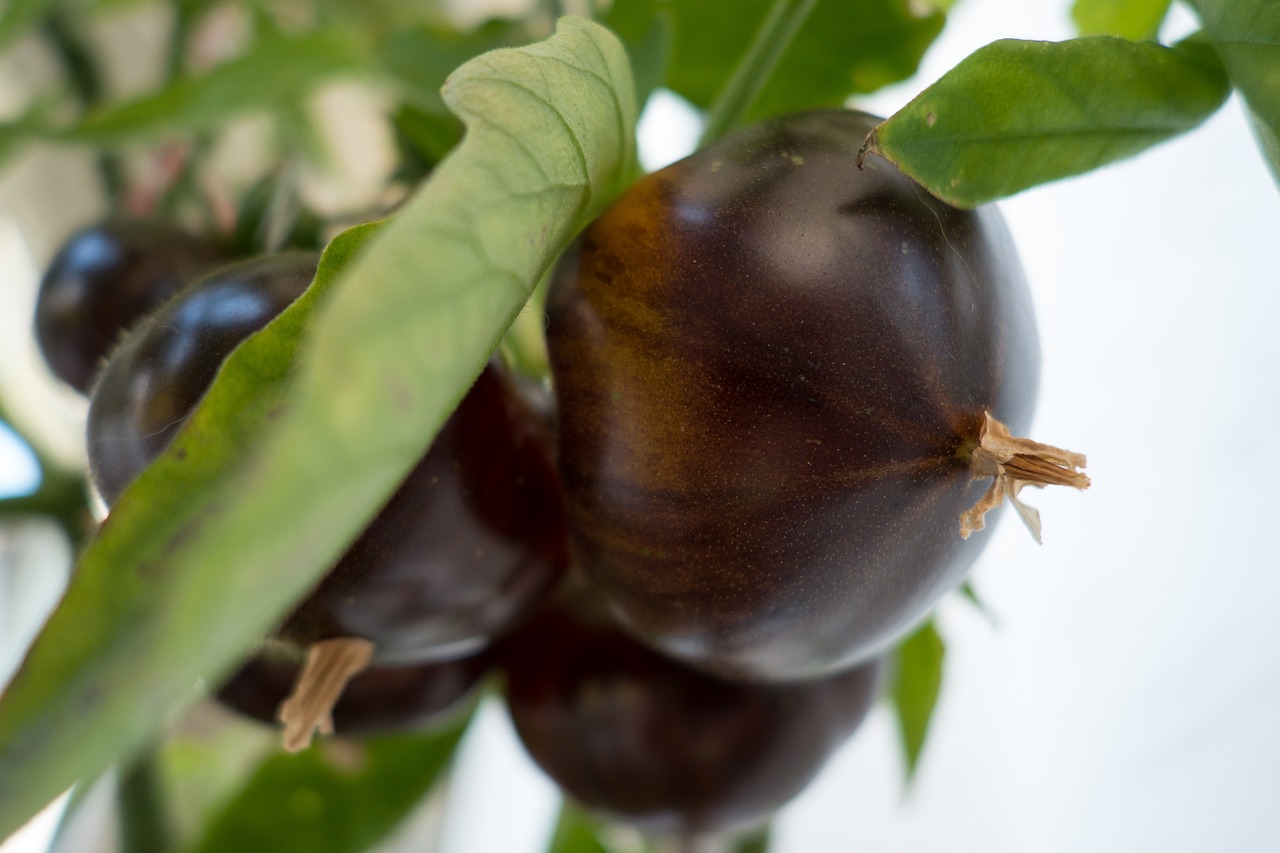
When it comes to growing big, juicy tomatoes, nothing beats the efficiency of . Imagine being able to deliver water directly to the roots of your plants, minimizing waste and maximizing moisture retention. This method not only conserves water but also reduces the risk of fungal diseases by keeping the foliage dry. It's like giving your tomatoes a refreshing drink without soaking their feet!
Setting up a drip irrigation system might sound daunting, but it’s easier than you think. Start by planning your garden layout. You’ll want to ensure that your tomato plants are spaced appropriately, allowing for ample airflow and sunlight. Once you’ve mapped out your garden, you can purchase a drip irrigation kit, which typically includes:
- Drip tubing
- Emitters
- Connectors
- Filters
- Pressure regulators
After gathering your materials, it’s time to install the system. Lay the drip tubing along the rows of your tomato plants, ensuring that each plant has an emitter positioned near its base. This allows water to seep directly into the soil, encouraging deep root growth. A handy tip is to run the system on a timer, which can automate your watering schedule, ensuring your tomatoes receive consistent moisture, especially during those hot summer days.
One of the best features of drip irrigation is its adaptability. You can easily adjust the flow rate of the emitters to cater to the specific needs of your tomato plants. For instance, if you notice your plants are wilting, you might increase the flow rate to provide them with more water. Conversely, during cooler months or rainy periods, you can reduce the flow to prevent overwatering.
To get the most out of your drip irrigation system, regular maintenance is essential. Check your emitters for clogs, clean your filters, and ensure that the tubing is intact. By keeping everything in top shape, you’ll create an optimal environment for your tomatoes to flourish.
In summary, implementing a drip irrigation system in your garden is a game-changer. It not only saves water but also promotes healthier plants by providing them with the right amount of moisture exactly where they need it. So, if you want to see those tomatoes grow to their fullest potential, consider making the switch to drip irrigation!
- How often should I water my tomatoes with a drip irrigation system?
It depends on your climate and soil type, but generally, watering once or twice a week is sufficient. Monitor your plants for signs of stress and adjust accordingly.
- Can I use a drip irrigation system for other plants?
Absolutely! Drip irrigation is versatile and can be used for a variety of garden plants, including vegetables, flowers, and shrubs.
- What is the best time to water my tomatoes?
Early morning is ideal, as it allows the plants to absorb moisture before the heat of the day. It also helps reduce evaporation.
Signs of Overwatering
Overwatering is one of the most common mistakes gardeners make, and it can lead to a host of problems for your beloved tomato plants. Just like humans can suffer from too much water, so can plants. The key is to recognize the signs early on to prevent any long-term damage. So, how do you know if you’re giving your tomatoes too much love in the form of water? Let’s dive into some telltale signs!
First and foremost, you might notice the leaves of your tomato plants starting to turn yellow. This isn’t just a sign of a bad hair day for your plants; it indicates that they are stressed from excess moisture. Yellowing leaves can be a cry for help, signaling that the roots are struggling to breathe due to waterlogged conditions. In severe cases, the leaves may even start to drop, making your plant look like it’s shedding tears!
Another sign to watch for is wilting. You might think that wilting indicates a lack of water, but paradoxically, overwatered plants can also display this symptom. When roots are saturated, they can’t absorb oxygen effectively, leading to wilting. It’s like your plant is gasping for air even though it’s surrounded by water. If you see wilting along with yellow leaves, it’s time to reassess your watering routine.
Additionally, keep an eye out for a phenomenon known as “root rot.” This dreaded condition occurs when the roots sit in water for too long, causing them to decay. If you pull up a plant and find mushy, brown roots instead of healthy white ones, you’ve got a problem. It’s essential to act quickly, as root rot can be fatal to your tomatoes.
Lastly, if you notice a foul smell emanating from the soil, it’s a clear indicator that things are not right. Overwatered soil can become anaerobic, leading to a buildup of harmful bacteria and fungi. Trust your nose—if it smells bad, your plants are likely in trouble!
To summarize, here are the key signs of overwatering:
- Yellowing Leaves: A common sign of stress.
- Wilting: Gasping for air despite being saturated.
- Root Rot: Mushy, brown roots indicate decay.
- Foul Odor: A sure sign of anaerobic conditions.
By keeping these signs in mind, you can adjust your watering habits and ensure your tomato plants thrive instead of drown. Remember, it's all about finding that perfect balance—just enough water to keep your plants happy, but not so much that they feel like they’re swimming in a pool!
Q: How often should I water my tomato plants?
A: The frequency of watering depends on various factors, including the weather, soil type, and the growth stage of the plant. Generally, a deep watering once or twice a week is sufficient, allowing the soil to dry out between waterings.
Q: Can I use mulch to help with watering?
A: Absolutely! Mulch can help retain soil moisture and regulate temperature. It’s a great way to reduce the frequency of watering while keeping your tomatoes happy.
Q: What should I do if I suspect my tomatoes are overwatered?
A: If you notice signs of overwatering, stop watering immediately and check the soil drainage. You may need to repot the plant in fresh soil or improve drainage in your garden beds.
Q: Are there specific tomato varieties that are more tolerant to overwatering?
A: While most tomato plants prefer well-drained soil, some varieties, like certain heirlooms, are more forgiving. However, it's best to maintain proper watering practices regardless of the variety.
Pest and Disease Management
Protecting your tomatoes from pests and diseases is crucial for a successful harvest. After all, what's the point of growing those big, juicy tomatoes if they fall victim to pesky insects or diseases? In this section, we'll explore the common threats that can plague your garden and share effective management strategies to keep your plants healthy and thriving. Think of your garden as a fortress; you need to build strong defenses to keep the invaders at bay!
First, let’s talk about some of the most common pests that target tomato plants. These include aphids, spider mites, and hornworms. Each of these pests can wreak havoc on your plants, causing stunted growth and reducing fruit quality. For example, aphids are tiny insects that suck the sap from your plants, weakening them over time. On the other hand, hornworms are larger caterpillars that can strip your plants bare in no time. To combat these threats, it's essential to stay vigilant and inspect your plants regularly.
Now, let's dive into some effective management strategies. One of the best approaches is to implement preventative measures. This means taking proactive steps to minimize the risk of pest infestations and diseases before they even occur. For instance, rotating your crops each year can help disrupt the life cycles of pests. Additionally, planting companion plants, such as marigolds, can deter unwanted insects with their strong scent. Not to mention, they add a splash of color to your garden!
Another key aspect of pest and disease management is understanding the signs of trouble. Here are a few indicators to watch for:
- Discoloration: Leaves turning yellow or brown can signal nutrient deficiencies or disease.
- Wilting: If your plants are drooping despite adequate watering, it could indicate root rot or pest damage.
- Visible Pests: Look for insects or their eggs on the undersides of leaves.
If you do encounter pests, don't worry! There are plenty of organic pest control options available. For example, insecticidal soap can effectively eliminate soft-bodied insects like aphids without harming beneficial insects. Additionally, introducing natural predators, such as ladybugs, can help control pest populations naturally. Remember, the goal is to maintain a healthy balance in your garden ecosystem.
Lastly, keeping your garden clean and free of debris can help prevent diseases. Remove any dead or diseased foliage promptly, as they can harbor pathogens that threaten your plants. By maintaining a tidy garden, you're not only promoting better air circulation but also reducing the chances of disease outbreaks.
1. What should I do if I notice pests on my tomato plants?
Start by identifying the type of pest and then choose an appropriate control method. You can use organic solutions like insecticidal soap or introduce beneficial insects to your garden.
2. How can I prevent diseases in my tomato plants?
To prevent diseases, practice crop rotation, ensure proper spacing for air circulation, and keep your garden clean by removing debris and dead plants.
3. Are there any signs that my tomatoes are diseased?
Yes! Look for signs such as wilting, yellowing leaves, or unusual spots on leaves and fruit. If you notice these symptoms, investigate further to determine the cause.
4. Can I use chemical pesticides on my tomatoes?
While chemical pesticides are an option, they can harm beneficial insects and disrupt the ecosystem in your garden. It's best to try organic methods first for a healthier approach.
Preventative Measures
This article explores essential tips and techniques for cultivating large, flavorful tomatoes right in your own garden, ensuring a bountiful harvest that delights your taste buds.
Selecting the right varieties is crucial for success. Different types of tomatoes have unique growth requirements and flavor profiles, making it essential to choose those that best suit your climate and taste preferences.
Healthy soil is the foundation of any successful garden. Learn how to amend and enrich your soil to create the perfect environment for growing big, juicy tomatoes that thrive and produce abundantly.
Understanding your soil's pH level is vital for tomato growth. This section discusses how to test and adjust pH to ensure optimal nutrient availability for your plants.
Incorporating organic matter into your soil can significantly improve its structure and fertility. Discover the benefits of compost and other organic amendments for robust tomato growth.
Proper drainage is essential to prevent root rot and other diseases. This section covers various techniques to improve drainage in your garden beds for healthier tomato plants.
The location of your tomato plants can greatly affect their growth. Learn how to select a sunny spot with adequate airflow to promote healthy plants and reduce disease risk.
Effective watering is key to achieving juicy tomatoes. Explore various methods and schedules to ensure your plants receive the right amount of moisture throughout their growth cycle.
Implementing a drip irrigation system can optimize water usage and reduce disease risk. This section explains how to set up a drip system for your tomato garden.
Recognizing the signs of overwatering can save your tomato plants from stress and disease. Learn how to identify these signs and adjust your watering practices accordingly.
Protecting your tomatoes from pests and diseases is crucial for a successful harvest. This section discusses common threats and effective management strategies to keep your plants healthy.
Implementing preventative measures can significantly reduce the likelihood of pest infestations and diseases. One of the best ways to protect your tomatoes is to maintain a clean garden. Regularly removing debris, fallen leaves, and dead plants can help prevent pests from finding a cozy home in your garden. Moreover, rotating your crops each year is an effective strategy to disrupt the life cycles of pests and diseases that may linger in the soil.
Consider companion planting as well. Certain plants, like marigolds, can deter pests naturally. They release substances that repel harmful insects, creating a protective barrier for your tomatoes. Additionally, planting basil alongside your tomatoes not only enhances their flavor but can also ward off pests like aphids and whiteflies.
Another crucial preventative measure is to monitor your plants regularly. Check the leaves and stems for any signs of distress or infestation. Early detection is key! If you spot any issues, act quickly to address them before they escalate. Keeping a close eye on your plants can make all the difference in preventing a minor problem from becoming a major headache.
Lastly, consider using row covers or nets to physically block pests from reaching your plants. These barriers allow sunlight and rain to penetrate while keeping unwanted critters at bay. It’s like giving your tomatoes a protective shield!
Knowing when and how to harvest your tomatoes is essential for maximizing flavor and quality. This section provides guidance on the best practices for picking ripe tomatoes at their peak.
Recognizing the signs of ripe tomatoes ensures you harvest them at the right time. Learn how to identify color, firmness, and other indicators of ripeness for optimal flavor.
Proper storage techniques can prolong the freshness of your harvested tomatoes. Discover the best methods for storing tomatoes to maintain their flavor and quality until you're ready to enjoy them.
- What is the best time to plant tomatoes? Generally, it's best to plant tomatoes after the last frost date in your area, ensuring the soil is warm.
- How much sunlight do tomatoes need? Tomatoes thrive in full sun, requiring at least 6 to 8 hours of direct sunlight each day.
- Can I grow tomatoes in containers? Absolutely! Many tomato varieties do well in containers, making them perfect for small spaces.
- How often should I water my tomato plants? Watering frequency can vary, but a general rule is to keep the soil consistently moist, watering deeply once a week.
Organic Pest Control Options
When it comes to growing tomatoes, one of the biggest challenges gardeners face is keeping pests at bay. While chemical pesticides can be effective, they often come with a host of negative side effects, not just for the environment but also for our health. That’s where come into play. These methods are safe, sustainable, and can be surprisingly effective in protecting your precious tomato plants.
One of the simplest yet most effective organic pest control methods is the use of companion planting. This technique involves planting certain crops together that can naturally repel pests. For instance, marigolds are known to deter nematodes and aphids, making them an excellent companion for tomatoes. Additionally, planting basil alongside your tomatoes can enhance their flavor while also warding off pesky insects.
Another fantastic option is the use of natural insecticides. Many gardeners swear by neem oil, which is derived from the seeds of the neem tree. It acts as a potent repellent against a variety of pests, including aphids, spider mites, and whiteflies. To use neem oil, simply mix it with water and a few drops of dish soap, then spray it directly onto the affected plants. Just remember to apply it in the early morning or late evening to avoid harming beneficial insects.
For those who prefer a more hands-on approach, handpicking pests can be an effective strategy, especially for larger insects like hornworms and caterpillars. Check your plants regularly and remove any visible pests. This method not only helps in controlling the pest population but also gives you a chance to inspect your plants for any signs of disease or distress.
In addition to these methods, creating a habitat for beneficial insects can significantly improve your pest control efforts. Ladybugs, lacewings, and parasitic wasps are all natural predators of common tomato pests. You can attract these helpful insects by planting a variety of flowers, such as dill, fennel, and yarrow, which provide nectar and pollen. By fostering a balanced ecosystem in your garden, you’ll find that nature often takes care of pest problems for you.
Lastly, don’t underestimate the power of barriers. Using row covers or floating row covers can physically block pests from reaching your plants. These lightweight fabrics allow sunlight and rain to penetrate while keeping harmful insects at bay. Just be sure to remove them during flowering to allow for pollination.
In summary, organic pest control options are not only effective but also environmentally friendly. By incorporating these methods into your gardening routine, you can enjoy a bountiful harvest of juicy tomatoes while keeping your garden ecosystem healthy and thriving.
Q: Are organic pest control methods as effective as chemical pesticides?
A: Yes, organic methods can be just as effective when used properly. They may require more frequent applications and a combination of strategies, but they are safer for the environment and your health.
Q: How often should I apply neem oil?
A: It’s recommended to apply neem oil every 7-14 days, especially after rain, to ensure maximum effectiveness. Always follow the instructions on the product label.
Q: Can I use organic pest control methods in conjunction with chemical pesticides?
A: It's best to avoid mixing organic and chemical methods, as they can counteract each other. Stick to one approach to see the best results.
Q: What are some signs that my tomatoes are infested with pests?
A: Look for holes in the leaves, discolored spots, or visible insects on the plants. Wilting or stunted growth can also be indicators of pest problems.
Q: How can I attract beneficial insects to my garden?
A: Planting a variety of flowers and herbs that provide nectar and pollen can attract beneficial insects. Avoid using chemical pesticides that may harm them.
Harvesting Tips
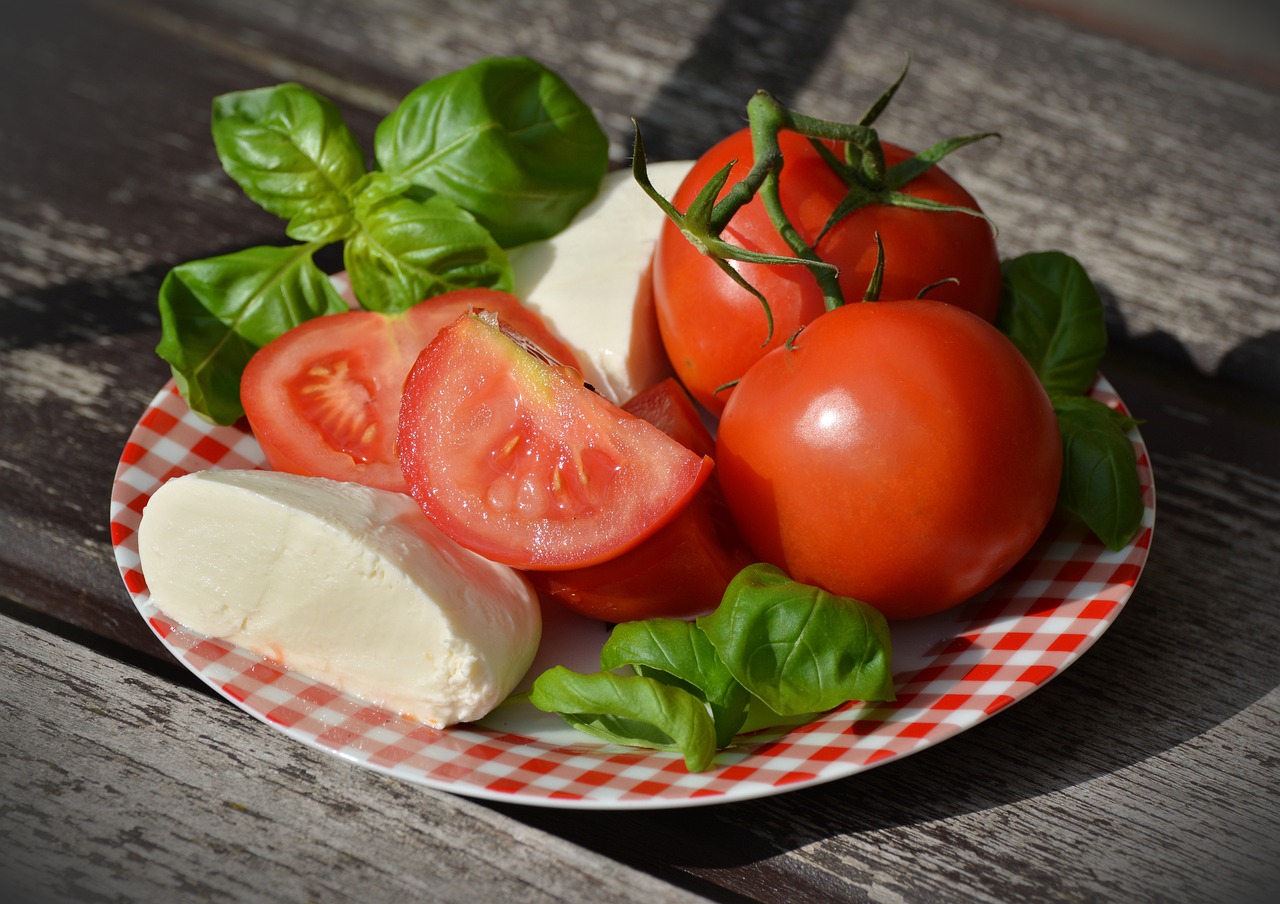
Knowing when and how to harvest your tomatoes is essential for maximizing flavor and quality. You don’t want to pick them too early, leaving you with a bland experience, nor too late, risking overripeness and spoilage. So, how do you know when it's the perfect time to pluck those juicy gems from the vine? It all comes down to a few key indicators that signal ripeness.
First off, let's talk about color. Ripe tomatoes will display a vibrant hue that varies depending on the variety. For example, classic red tomatoes should be a deep, rich red, while yellow or orange varieties should be bright and sunny. The color is your first clue, but it’s not the only one. You also need to consider the firmness. Gently squeeze the tomato; it should yield slightly to pressure without feeling mushy. Think of it like a ripe avocado—just the right amount of give is what you’re looking for!
Another great tip is to pay attention to the stem. When tomatoes are ready to be harvested, the stem will typically start to turn brown and dry out. If you notice this change, it’s a clear sign that your tomatoes are ripe and ready for picking. However, don’t just yank them off the vine! Use a sharp pair of garden scissors or pruning shears to cut the stem cleanly. This helps prevent damage to the plant and encourages future growth.
Here’s a quick reference table to help you remember the signs of ripeness:
| Indicator | Description |
|---|---|
| Color | Vibrant hue specific to the variety (e.g., deep red, bright yellow) |
| Firmness | Slight give when gently squeezed, not mushy |
| Stem | Starts to turn brown and dry out |
After you’ve harvested your tomatoes, proper storage is crucial to maintain their freshness and flavor. Store them at room temperature, away from direct sunlight, to keep them tasting their best. If you have an abundance of tomatoes, consider placing them in a single layer in a cardboard box or a shallow container to avoid bruising. If you want to prolong their shelf life, you can even refrigerate them, but be aware that this might slightly alter their taste and texture.
As you dive into the delightful world of tomato harvesting, remember that patience is key. It may take time to master the art of knowing when to pick, but the reward of biting into a perfectly ripe, homegrown tomato is absolutely worth it. So, grab your scissors, head to the garden, and enjoy the fruits of your labor!
Q: How can I tell if my tomatoes are overripe?
A: Overripe tomatoes often become very soft and may develop dark spots or wrinkles. If they feel mushy and have a strong odor, it's time to use them quickly or compost them.
Q: Should I wash tomatoes before storing them?
A: It's best not to wash tomatoes before storing, as moisture can promote mold growth. Instead, wash them right before you plan to eat or cook with them.
Q: Can I harvest tomatoes before they are fully ripe?
A: Yes, you can pick tomatoes when they are still slightly green. They will continue to ripen off the vine if kept in a warm place. Just make sure to check them regularly!
Identifying Ripeness
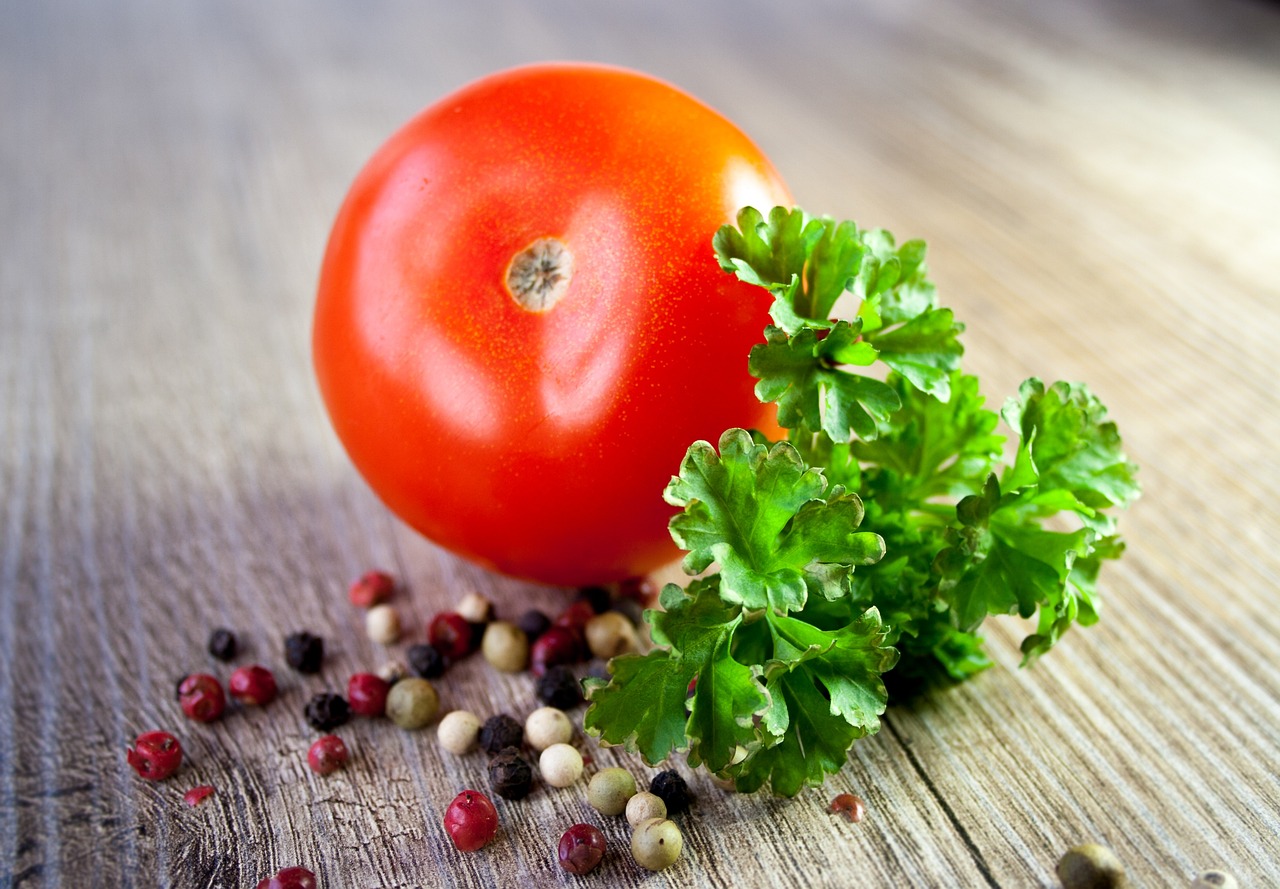
When it comes to harvesting tomatoes, timing is everything. You want to ensure that you pick them at their peak ripeness to enjoy the fullest flavor and juiciest texture. But how do you know when your tomatoes are ready to be plucked from the vine? There are several key indicators that can help you determine their ripeness, and understanding these signs can make all the difference in your culinary experience.
First and foremost, color is a crucial factor. Ripe tomatoes typically display a vibrant hue, which varies depending on the variety. For example, classic red tomatoes should be a deep, rich red, while heirloom varieties may showcase a range of colors from yellow to purple. If your tomatoes have a dull appearance, they are likely not ready for harvest. Additionally, look for an even color across the entire fruit; any green patches can indicate that the tomato is still maturing.
Next, firmness plays an essential role in identifying ripeness. Gently squeeze the tomato; a ripe tomato should yield slightly to pressure but not feel mushy. If it feels hard, it’s likely not ready, and if it’s too soft, it may be overripe. You want that perfect balance where the tomato feels plump and firm, signifying that it’s packed with flavor and moisture.
Another important aspect to consider is the stem attachment. When tomatoes are ripe, the stem should easily detach from the fruit with a gentle twist. If you find yourself tugging hard, it’s best to leave the tomato on the vine for a few more days. Moreover, observe the leaves surrounding the fruit; they may start to yellow or wilt slightly as the fruit reaches maturity, which is another sign that harvesting time is near.
Lastly, the aroma of the tomato can be a telltale sign of ripeness. Ripe tomatoes emit a sweet, earthy fragrance that is hard to miss. If you can smell that delightful scent wafting from your garden, it’s time to gather your harvest!
To summarize, here are the key indicators to help you identify ripe tomatoes:
- Color: Look for vibrant, even color.
- Firmness: Should yield slightly to pressure.
- Stem Attachment: Should detach easily with a twist.
- Leaves: May yellow slightly as fruit ripens.
- Aroma: A sweet, earthy fragrance indicates ripeness.
By paying attention to these signs, you’ll be able to enjoy your homegrown tomatoes at their best. Remember, harvesting at the right time not only enhances your dishes but also ensures that you savor the full spectrum of flavors that your garden has to offer!
Q: How long does it take for tomatoes to ripen after they change color?
A: Once tomatoes start changing color, they usually take about 5 to 7 days to fully ripen depending on the variety and environmental conditions.
Q: Can I pick tomatoes while they are still slightly green?
A: Yes, you can pick tomatoes that are just starting to change color, especially if you live in a cooler climate. They will continue to ripen off the vine.
Q: What should I do if my tomatoes are overripe?
A: Overripe tomatoes can be used in sauces, soups, or can be preserved. If they are too mushy, consider composting them.
Q: How can I store ripe tomatoes to keep them fresh longer?
A: Store ripe tomatoes at room temperature away from direct sunlight. Avoid refrigeration, as it can alter their flavor and texture.

Storage Techniques
Once you've harvested those luscious, ripe tomatoes, the next step is ensuring they maintain their flavor and quality until you're ready to enjoy them. Proper storage techniques can make a significant difference in the longevity and taste of your homegrown tomatoes. First and foremost, it’s essential to understand that tomatoes are best stored at room temperature. Refrigeration can alter their flavor and texture, making them mealy and bland. So, resist the urge to pop them in the fridge!
When it comes to storing your tomatoes, consider the following tips:
- Keep them whole: Avoid cutting your tomatoes until you're ready to use them. Once cut, they can quickly lose moisture and flavor.
- Store stem-side up: Place your tomatoes stem-side up on a flat surface or in a shallow container. This prevents bruising and helps maintain their integrity.
- Avoid direct sunlight: Store your tomatoes in a cool, dark place to prolong their freshness. A countertop away from direct sunlight is ideal.
For those tomatoes that are slightly under-ripe, you can place them in a paper bag to encourage ripening. The bag traps ethylene gas, a natural plant hormone that aids in the ripening process. Just remember to check them daily to ensure they don’t over-ripen!
If you have an abundance of tomatoes and can't use them all before they spoil, consider preserving them. Canning, freezing, or making sauces are excellent options for extending the life of your harvest. For example, diced tomatoes can be frozen in airtight containers or freezer bags. This way, you can enjoy the taste of summer even in the dead of winter!
To sum up, the key to storing your tomatoes lies in keeping them whole, away from direct sunlight, and at room temperature. By following these simple techniques, you’ll ensure that your tomatoes stay fresh and delicious, ready to enhance your favorite dishes.
Q1: Should I refrigerate my tomatoes?
A1: No, it's best to store tomatoes at room temperature. Refrigeration can affect their flavor and texture.
Q2: How can I tell if my tomatoes are ripe?
A2: Ripe tomatoes will have a deep, vibrant color and feel slightly soft to the touch. They should also have a sweet aroma.
Q3: What’s the best way to preserve tomatoes?
A3: You can preserve tomatoes by canning, freezing, or making sauces. Each method helps extend their shelf life while maintaining flavor.
Q4: Can I store cut tomatoes?
A4: It’s best to consume cut tomatoes immediately. If you must store them, keep them in an airtight container in the fridge, but consume them within a day or two for the best flavor.
Frequently Asked Questions
- What are the best tomato varieties for beginners?
For beginners, it's best to start with varieties that are known for their resilience and ease of growth. Varieties like Roma, Cherry, and Early Girl tomatoes are fantastic choices. They offer great flavors and are relatively low-maintenance, making them perfect for novice gardeners.
- How can I tell if my soil is ready for planting tomatoes?
Testing your soil's pH is crucial! Ideally, tomato plants thrive in soil with a pH between 6.0 and 6.8. You can use a home soil test kit or send a sample to a local extension service. If your soil is too acidic or alkaline, you can amend it with lime or sulfur to achieve the right balance.
- How often should I water my tomato plants?
Watering frequency depends on various factors like weather, soil type, and plant size. Generally, aim for about 1-2 inches of water per week. It's better to water deeply and less frequently than to do light watering every day. This encourages deep root growth!
- What are the signs of overwatering?
Overwatering can lead to yellowing leaves, wilting, and even root rot. If you notice your plants looking droopy despite wet soil, it might be time to cut back on watering. Always check the top inch of soil—if it's dry, it's time to water!
- How can I prevent pests from damaging my tomatoes?
Implementing preventative measures like crop rotation and companion planting can help. You can also use row covers to protect young plants. Regularly inspecting your plants and removing any affected leaves can also keep pests at bay.
- When is the best time to harvest tomatoes?
The best time to harvest tomatoes is when they have reached their full color and are slightly firm to the touch. For most varieties, this means waiting until they are a deep red, yellow, or whatever their mature color is. Harvesting in the morning can also enhance flavor!
- How should I store my harvested tomatoes?
To keep your tomatoes fresh, store them at room temperature away from direct sunlight. Avoid refrigerating them as it can affect their flavor and texture. If you have overripe tomatoes, consider making sauces or canning them for later use!


