DIY: How to Repurpose a Desk into a Makeup Vanity
Are you staring at that old desk in the corner of your room, wondering how to breathe new life into it? Well, you’re in luck! This article explores creative ways to transform an old desk into a stylish and functional makeup vanity, offering tips, tricks, and inspiration for a personalized beauty space. Imagine having a dedicated area where you can unleash your inner makeup artist, all while showcasing your unique style. With just a bit of creativity and elbow grease, you can turn that forgotten piece of furniture into a stunning focal point in your home.
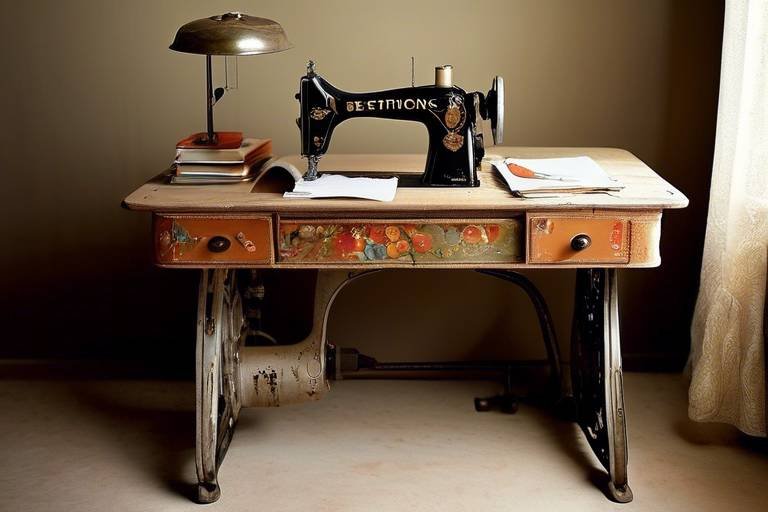
When it comes to selecting the perfect desk for your makeup vanity project, there are a few key factors to consider. First and foremost, think about the size of the desk. You want to ensure that it fits comfortably in your space while providing enough surface area for all your beauty essentials. A desk that’s too small can feel cramped and cluttered, while one that’s too large might overwhelm your room. Next, consider the style of the desk. Whether you prefer a sleek modern look or a vintage charm, the desk should complement your existing decor. Lastly, functionality is crucial—look for desks with drawers or shelves to maximize storage potential. In short, the right desk will set the foundation for your dreamy makeup vanity.
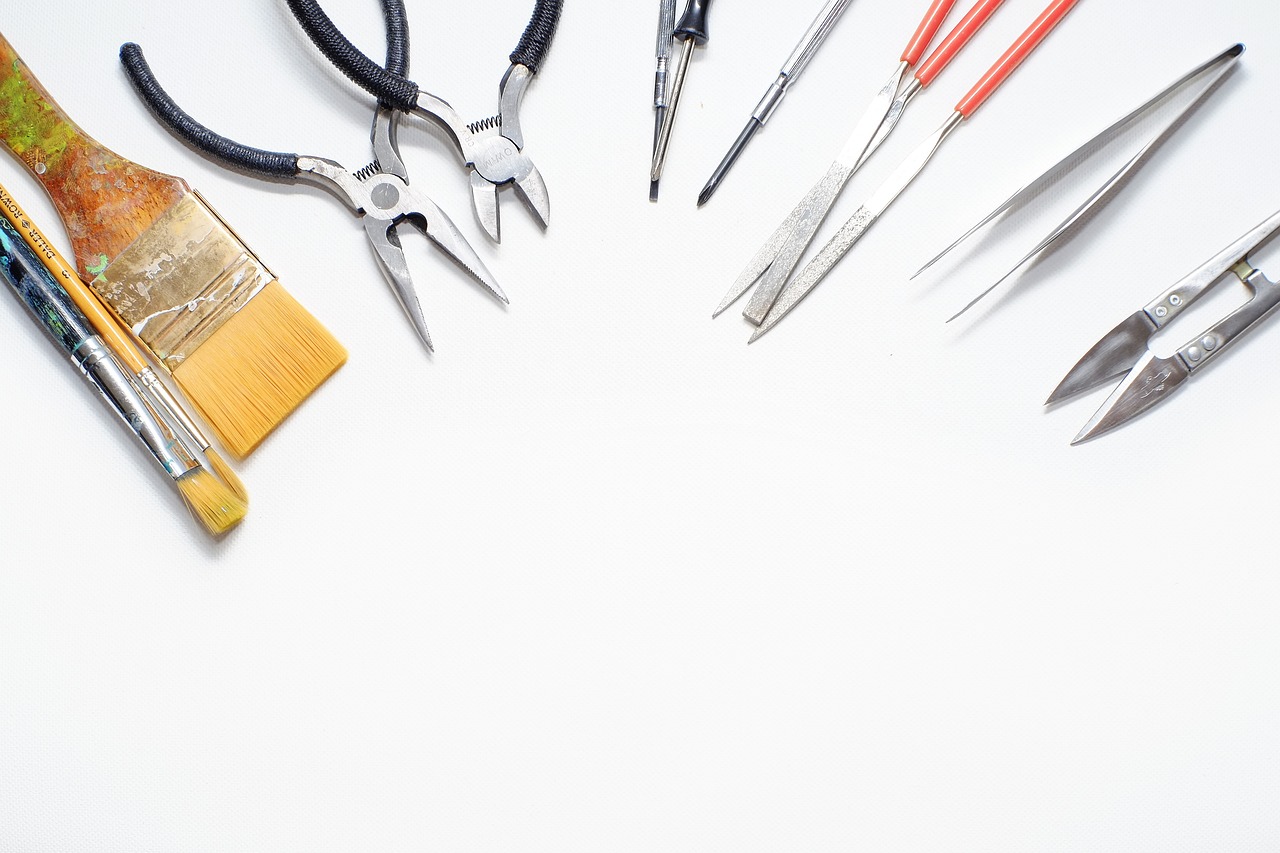
Gathering the right tools and materials is key to a successful transformation. Before you dive into this DIY project, make sure you have the following essentials on hand:
- Paint: Choose a color that reflects your personality.
- Sandpaper: For prepping the surface.
- Primer: To ensure a smooth finish.
- Brushes and Rollers: For applying paint.
- Hardware: New knobs or handles can add a fresh touch.
- Lighting: Don't forget about good lighting for makeup application.
Having these materials ready will make your DIY process smoother and more enjoyable, allowing you to focus on creating your perfect vanity.
Before starting your makeover, proper preparation is essential. Begin by cleaning the desk thoroughly to remove any dust or grime. Once it's clean, grab your sandpaper and start sanding down the surface. This step is crucial as it helps the paint adhere better. After sanding, wipe down the desk again to remove any dust particles. Now, it’s time to prime the desk. Applying a coat of primer will create a solid foundation for your new vanity and enhance the paint's color. Remember, a little prep goes a long way in achieving a professional-looking finish!
A fresh coat of paint can dramatically change the look of your desk. Choose a color that not only matches your personality but also fits the overall aesthetic of your room. Soft pastels can create a calming effect, while bold colors can make a statement. When it comes to finishing techniques, consider using a glossy finish for a chic look, or a matte finish for a more understated vibe. Don’t forget to let each coat dry completely before applying the next. The finishing touches, like new hardware or decorative accents, can really elevate your vanity's appearance.
Maximizing storage is vital for a functional makeup vanity. You want to keep your space tidy and efficient, so consider adding drawer organizers or decorative boxes to hold your makeup, brushes, and accessories. You can even repurpose small containers or jars to keep everything in its place. Think about vertical storage as well—floating shelves above your vanity can display your favorite products while saving space. The goal is to create an organized oasis where you can find everything you need at a moment’s notice.
Good lighting is essential for makeup application. Natural light is ideal, but if that’s not an option, consider various lighting solutions. Mirrors with built-in lights are a fantastic choice, providing even illumination. Alternatively, stylish lamps can add a touch of personality to your vanity. Make sure the lighting is adjustable, so you can create the perfect ambiance for your beauty routine.
Personalizing your makeup vanity with decor can elevate its aesthetic. Think about adding decorative elements that reflect your style, such as framed photos, plants, or chic storage solutions. A beautiful mirror can also serve as a statement piece. The key is to create a space that feels inviting and uniquely yours. Don’t be afraid to mix and match textures and colors to make the space pop!
An efficient layout is important for usability. Arrange your makeup products and tools for easy access while maintaining a visually appealing setup. Place frequently used items within arm's reach, and consider grouping items by category—like skincare, makeup, and tools. This way, when you sit down at your vanity, everything you need is right at your fingertips, making your beauty routine seamless and enjoyable.
To keep your vanity looking its best, regular maintenance is necessary. Simple cleaning routines, like wiping down surfaces and organizing products, can go a long way. Use gentle cleaners to avoid damaging paint or finishes. Additionally, consider touching up paint or hardware as needed to maintain that fresh look. With a little care, your repurposed desk will remain a stunning and functional part of your home for years to come!
Q: Can I use any desk for this project?
A: While you can technically use any desk, it's best to choose one that fits your style and has enough surface area for your needs.
Q: How much time will this DIY project take?
A: Depending on your experience level and the complexity of your design, it can take anywhere from a few hours to a couple of days.
Q: Do I need special tools for painting?
A: Basic painting tools like brushes, rollers, and sandpaper are sufficient. No need for anything fancy!

Choosing the Right Desk
When it comes to transforming an old desk into a stunning makeup vanity, the first step is selecting the right desk. This decision is crucial because the desk will not only serve as the foundation of your vanity but also play a significant role in your overall beauty routine. You want a piece that resonates with your style and meets your functional needs. So, how do you choose the perfect desk? Let’s break it down.
First, consider the size of the desk. You’ll want to measure your space to ensure that the desk fits comfortably without overwhelming the room. A desk that is too large can make your vanity feel cramped, while one that is too small may not provide enough surface area for your makeup essentials. Ideally, you should have enough space to spread out your products without feeling cluttered.
Next up is the style. Your desk should reflect your personal aesthetic and blend seamlessly with your existing decor. Are you drawn to a more modern look, or do you prefer something vintage? If you’re unsure, think about the overall vibe of your room. A sleek, minimalist desk can provide a chic backdrop for a makeup vanity, while a rustic desk can add warmth and character. Don’t forget to consider the color, too! A fresh coat of paint can work wonders if the desk isn’t exactly what you envisioned.
Functionality is another key factor. Think about how you will use the space. Will you be applying makeup daily, or is this more of a special occasion setup? If you use a lot of makeup, you might want a desk with drawers or shelves to keep everything organized and within reach. On the other hand, if you prefer a clean look, an open surface might be more appealing. Some desks even come with built-in mirrors, which can save you space and add a touch of glamour.
Here are a few additional considerations to keep in mind:
- Height: Make sure the desk is at a comfortable height for you to sit and apply your makeup.
- Material: Consider the durability of the desk. Wood, metal, or a combination can affect both the look and longevity.
- Condition: If you're repurposing an old desk, check for any damage that may need repair before starting your project.
In summary, choosing the right desk for your makeup vanity is all about finding a balance between size, style, and functionality. Take your time to explore different options, and don’t hesitate to think outside the box. After all, this is your personal beauty space, and it should reflect who you are. With the right desk, you’ll be one step closer to creating a vanity that not only looks fabulous but also enhances your daily beauty routine.

Essential Tools and Materials
When it comes to transforming an old desk into a stunning makeup vanity, having the right tools and materials at your disposal is crucial for a smooth and successful DIY project. Think of this as gathering your artist's palette before diving into a masterpiece. You wouldn’t want to start painting without your brushes, right? Similarly, having everything ready will make the process not just easier but also more enjoyable.
First and foremost, you’ll need some basic tools. A screwdriver is essential for removing any hardware from the desk, while a drill can help you make new holes for added fixtures or lighting. If you’re planning to sand down the desk, a sander or even some good old-fashioned sandpaper will be your best friend. Don't forget a measuring tape to ensure everything fits perfectly in your space!
Now, let’s talk about materials. A fresh coat of paint or stain can breathe new life into your desk, allowing you to choose colors that match your personal style. You might want to consider chalk paint for a matte finish or a glossy enamel for a more polished look. Additionally, having a good primer is essential to ensure the paint adheres well and lasts longer.
But wait, there’s more! You’ll also need some hardware like new knobs or handles to give your vanity that unique touch. Consider choosing pieces that reflect your personality—perhaps something vintage or modern, depending on your style. And if you’re planning to add lighting, don’t forget to grab some LED bulbs and a mirror that complements your setup.
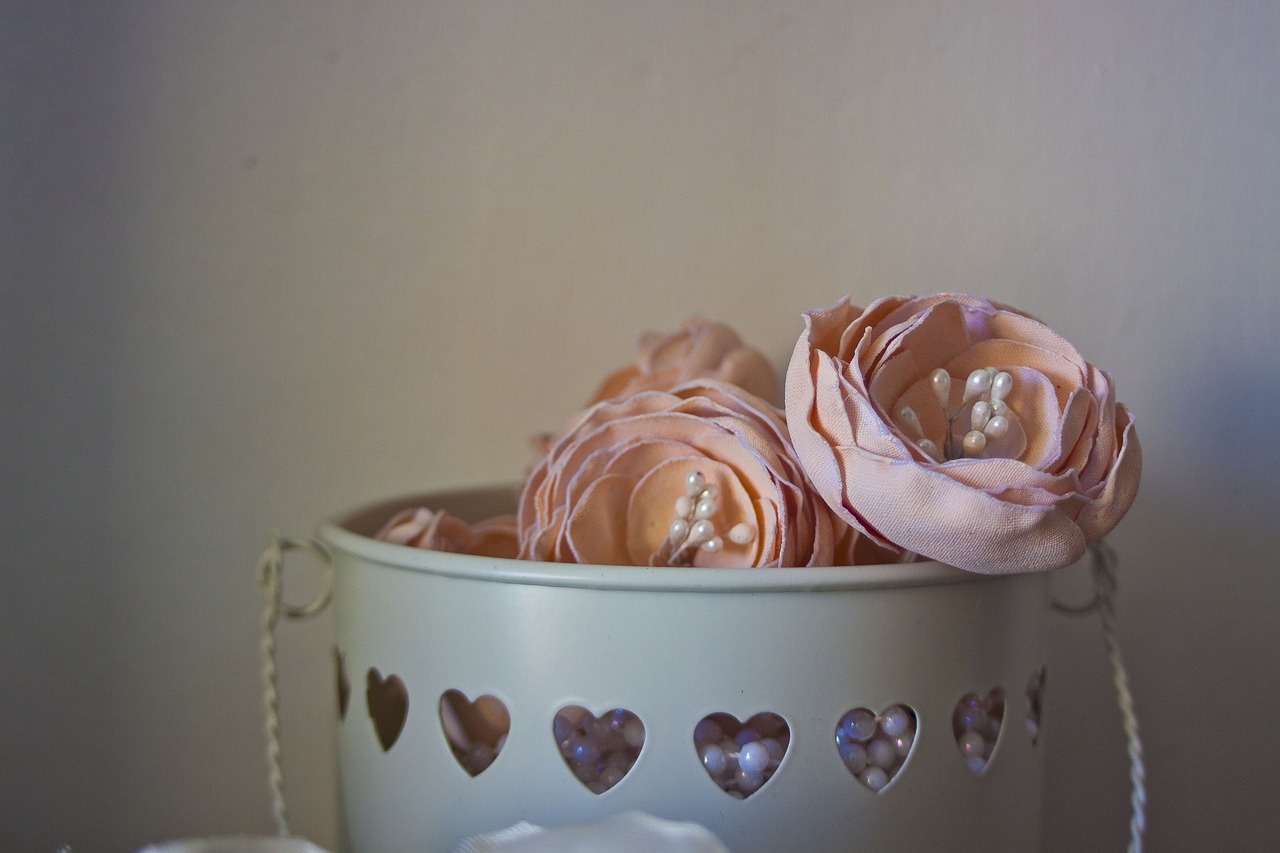
To keep your makeup organized, think about incorporating storage solutions such as small bins or drawer dividers. These can help you keep everything tidy and easily accessible. You might also want to gather some decorative elements like faux flowers or a stylish tray to hold your most-used products.
Here’s a quick summary of essential tools and materials you might need:
| Tools | Materials |
|---|---|
| Screwdriver | Paint or Stain |
| Drill | Primer |
| Sander | Knobs/Handles |
| Measuring Tape | LED Bulbs |
| Paintbrushes | Storage Bins |
By gathering these tools and materials, you’re setting yourself up for success. Remember, the goal is to create a space that not only looks fantastic but also feels personal and functional. So, take your time, enjoy the process, and soon you’ll have a beautiful makeup vanity that you can proudly call your own!
Q: Can I use any type of desk for this project?
A: Absolutely! Just ensure it has enough surface space and is sturdy enough to hold your makeup and tools.
Q: Do I need to be an expert to repurpose a desk?
A: Not at all! This project is perfect for beginners. Just follow the steps, and you’ll be amazed at what you can achieve.
Q: How much does it cost to repurpose a desk into a vanity?
A: The total cost can vary widely depending on the materials you choose, but it can be done affordably with some creativity!
Q: What if I want to change the design later?
A: That's the beauty of DIY! You can always repaint or add new accessories to refresh your vanity whenever you want.

Preparing the Desk
Before you dive into the exciting world of transforming your old desk into a stunning makeup vanity, it’s crucial to get the preparation phase right. Think of this step as laying the groundwork for a beautiful masterpiece. Just like a painter wouldn’t start without a clean canvas, you shouldn’t begin your DIY project without properly prepping your desk. This involves a few essential steps that will ensure your new vanity not only looks great but also lasts for years to come.
First off, you’ll want to give your desk a thorough cleaning. Dust, dirt, and grime can accumulate over time, so grab a microfiber cloth and some gentle cleaning solution. Wipe down every surface, making sure to get into those little nooks and crannies where dust likes to hide. A clean surface is vital because it helps the paint adhere better, which means a more durable finish.
Once your desk is sparkling clean, it’s time to tackle any imperfections. Inspect the surface for scratches, dents, or old paint that might need to be sanded down. Grab some sandpaper (around 120-grit should do the trick) and gently sand the areas that require attention. This not only smooths out the surface but also helps the new paint stick like a charm. If you’re dealing with a particularly rough area, don’t be afraid to go a bit heavier with your sanding, but always finish with a lighter grit for a polished look.
After sanding, it’s important to remove any dust particles left behind. A quick wipe with a damp cloth will do the job, ensuring that your desk is completely clean before moving on to the next step. Now, if your desk has a glossy finish, you might want to consider applying a primer. Primer serves as a fantastic base coat that helps the paint adhere better and enhances the overall color vibrancy. Choose a primer that suits your desk material—there are specific primers for wood, laminate, and metal surfaces.
In summary, preparing your desk is all about creating the perfect foundation. Here’s a quick recap of the steps:
- Clean: Use a microfiber cloth and cleaning solution.
- Sand: Smooth out imperfections with sandpaper.
- Dust Off: Wipe down the desk to remove any sanding dust.
- Prime: Apply a suitable primer if necessary.
By following these preparation steps, you’re setting yourself up for success. Think of it as the first chapter in your DIY story—one that leads to a beautifully transformed space where you can enjoy getting ready. So grab your tools, roll up your sleeves, and let’s get ready to make that desk shine!
Painting and Finishing Touches
When it comes to transforming your old desk into a stunning makeup vanity, painting is where the magic really begins. A fresh coat of paint can breathe new life into even the most tired-looking furniture, and it's an opportunity to express your personal style. So, how do you choose the right color? Think about the mood you want to create in your beauty space. Soft pastels can evoke a sense of calm, while bold colors can energize the room. Consider your existing decor and choose a color that complements or contrasts beautifully with it.
Before you dive into painting, make sure you've properly prepared your desk. This means cleaning it thoroughly to remove any dust or grease, sanding it down to create a smooth surface, and applying a primer if you're switching from a dark to a light color or if the desk has a glossy finish. Preparation is key—think of it as laying the groundwork for a beautiful masterpiece!
Once your desk is prepped, it's time to unleash your creativity. You can opt for a classic solid color or get adventurous with techniques like ombre or stenciling. If you're feeling particularly bold, why not try a two-tone effect? For instance, paint the top surface a bright color and the legs a contrasting shade. This can add a unique touch and really make your vanity stand out. Remember, the goal is to create a space that feels uniquely yours!
After painting, it's essential to apply a protective finish. This not only enhances the look of your desk but also protects it from scratches and spills—after all, makeup can be messy! You might consider using a clear polyurethane or a matte sealer depending on the finish you desire. This final touch will ensure your hard work lasts for years to come.
Additionally, think about adding some decorative touches after the paint has dried. You could incorporate gold or silver leaf accents for a touch of glamour, or even use washi tape to create patterns or borders. These small details can elevate your vanity from ordinary to extraordinary!
In conclusion, painting and finishing touches are crucial steps in the DIY journey of transforming a desk into a makeup vanity. With the right color choices, preparation, and protective finishes, your vanity will not only be functional but also a beautiful focal point in your space. So grab your paintbrush and let your creativity flow!
- What type of paint is best for a makeup vanity? Generally, a water-based acrylic paint is ideal due to its durability and quick drying time.
- How long should I wait before applying a second coat of paint? It's best to wait at least 2-4 hours, but always check the paint can for specific drying times.
- Can I use chalk paint for my vanity? Absolutely! Chalk paint provides a lovely matte finish and is great for a vintage look.
Adding Storage Solutions
When it comes to creating a makeup vanity, one of the most crucial aspects is ensuring that you have adequate storage. After all, what good is a beautifully designed space if it ends up looking cluttered? The key is to maximize your storage options while keeping everything easily accessible. Think of your vanity as a mini beauty headquarters—it should be organized, functional, and a reflection of your personal style.
Start by assessing the space you have available. If your repurposed desk comes with drawers, you're already ahead of the game! However, if your desk lacks sufficient storage, don’t fret. There are plenty of creative ways to add storage solutions without compromising on style. Consider using decorative boxes or baskets that can fit neatly on the desk or in any open spaces. These not only provide storage but also add a touch of personality to your vanity.
Another clever idea is to incorporate vertical storage. Wall-mounted shelves can be a game-changer in keeping your makeup essentials organized and off the desk surface. You could use floating shelves to display your favorite products or even install a pegboard to hang brushes and other tools. This not only saves space but also allows you to showcase your beautiful collection in a visually appealing way.
Here’s a quick breakdown of some effective storage solutions you might want to consider:
- Drawer Organizers: Use dividers in your drawers to keep everything from lipsticks to eyeshadow palettes neatly arranged.
- Clear Acrylic Containers: These are perfect for storing makeup brushes, allowing you to see exactly what you have at a glance.
- Tiered Makeup Stands: These stands maximize vertical space and make it easy to access products.
- Rolling Carts: If you need extra mobility, a stylish rolling cart can serve as additional storage and can be moved wherever you need it.
Don’t forget to think outside the box! Repurposing items like old jars or small containers can add a charming touch to your vanity while keeping it organized. For example, use a mason jar for cotton balls or a small dish for rings and hair ties. The more creative you get, the more unique your vanity will become.
Finally, remember that the goal is to create a space where you can enjoy your beauty routine. By incorporating these storage solutions, you’ll not only keep your products organized but also create an inviting atmosphere that inspires you to indulge in some self-care. So, roll up your sleeves and get ready to transform your desk into the ultimate makeup vanity!
Q: How can I maximize storage in a small vanity space?
A: Utilize vertical space with shelves, opt for drawer organizers, and consider using decorative boxes or baskets to keep everything tidy and accessible.
Q: What are some budget-friendly storage solutions?
A: Look for items you can repurpose, such as jars or small containers. You can also shop at thrift stores for unique storage options that won’t break the bank.
Q: How can I keep my makeup organized?
A: Use drawer dividers for smaller items, clear containers for visibility, and regularly declutter to remove products you no longer use.
Incorporating Lighting
When it comes to creating the perfect makeup vanity, lighting is not just an afterthought; it's a game-changer! Imagine trying to apply your favorite lipstick or blend your foundation in dim light—it's like trying to paint a masterpiece in a cave! Good lighting can make all the difference in how you see your colors and achieve that flawless look. So, let’s dive into some creative ways to incorporate lighting into your newly transformed vanity.
First off, consider the type of lighting you want to use. Natural light is ideal, but if that’s not an option, you can replicate it with the right fixtures. You might want to think about adding a mirror with built-in LED lights. These mirrors are designed to provide even illumination, which helps eliminate shadows on your face. It’s like having your own personal spotlight, allowing you to see every detail clearly. Plus, they come in various styles—whether you prefer sleek and modern or vintage glam, there’s something out there for you!
If a lighted mirror isn't your style, consider using wall-mounted sconces or a chic table lamp. Wall sconces can be positioned on either side of the mirror for balanced lighting, while a decorative lamp can add a touch of personality to your space. Just make sure to choose bulbs that mimic daylight—this will help you see how your makeup truly looks in natural light. Here’s a quick comparison of different lighting options:
| Lighting Type | Pros | Cons |
|---|---|---|
| LED Lighted Mirror | Even illumination, space-saving | Can be pricey |
| Wall-Mounted Sconces | Stylish, customizable | Requires installation |
| Table Lamp | Portable, adds decor | May take up counter space |
Another fantastic option is to use string lights. These can be draped around your vanity or hung above your mirror to create a warm, inviting glow. They’re not only functional but can also add a whimsical touch to your space. Imagine twinkling lights framing your beauty area—it’s like stepping into your own little beauty sanctuary! Just be sure to choose lights that are dimmable, so you can adjust the brightness depending on the time of day or your mood.
Finally, don’t overlook the importance of color temperature in your lighting choices. Warm white lights (around 2700K to 3000K) can create a cozy atmosphere, while cool white lights (4000K to 5000K) are closer to daylight, making them ideal for makeup application. Mixing these temperatures can also create a dynamic look, allowing you to set the perfect ambiance for both applying makeup and unwinding after a long day.
Incorporating thoughtful lighting into your vanity setup not only enhances functionality but also elevates the overall aesthetic of your beauty space. So, go ahead and illuminate your creativity—your makeup routine will thank you!
Decorating Your Vanity
When it comes to decorating your newly transformed makeup vanity, the sky's the limit! This is your chance to express your personal style and make the space uniquely yours. Think of your vanity as a canvas, waiting for your artistic touch. You can create a beautifully curated space that not only serves a purpose but also brings joy every time you sit down to get ready.
Start by considering the color palette of your room. If your room has soft pastels, you might want to incorporate similar hues into your vanity decor. On the other hand, if you're drawn to bold colors, don't hesitate to make a statement! For instance, a vibrant, patterned makeup bag or a striking mirror frame can add an unexpected pop of color.
Next, think about the functionality of your vanity. You want it to be not just pretty but also practical. A decorative tray can be a fantastic way to organize your daily essentials. Place your favorite lipsticks, perfumes, and small tools in one spot, making it easy to grab what you need without rummaging through everything. Consider using materials that match your style, like a chic marble tray or a rustic wooden one.
Lighting is another critical aspect of your vanity decor. A well-lit area is essential for makeup application, but that doesn’t mean you have to sacrifice aesthetics. Look for stylish lamps or even fairy lights that can add a touch of whimsy. You could also opt for a mirror with built-in lights, which not only serves a practical purpose but also enhances the overall look of your vanity. Imagine how lovely it would be to have soft, flattering light while you get ready!
Don't forget about adding some personal touches. Framed photos, inspirational quotes, or even a small plant can breathe life into your vanity space. A succulent or a small flower arrangement can bring a touch of nature indoors, making your area feel fresh and inviting. If you're a fan of art, consider displaying a small piece that resonates with you, creating a lovely focal point.
Lastly, think about how you can incorporate storage solutions into your decor. Decorative boxes or baskets can hide away clutter while still looking chic. Choose items that complement your overall theme—woven baskets for a boho vibe or sleek boxes for a modern look. This way, you can keep your makeup and tools organized without compromising on style.
In summary, decorating your makeup vanity is all about finding the right balance between style and functionality. With a little creativity and some thoughtful choices, you can create a space that’s not only beautiful but also perfectly suited to your beauty routine. So go ahead, unleash your inner designer, and transform your vanity into a stunning reflection of you!
- What are the best colors for a makeup vanity? It depends on your personal style! Soft pastels create a calming effect, while bold colors can energize the space.
- How can I maximize storage in a small vanity? Use decorative trays and boxes to organize your items. Vertical storage solutions can also help save space.
- Can I mix different styles in my vanity decor? Absolutely! Mixing styles can create a unique and personalized look. Just make sure to maintain a cohesive color palette.
Creating a Functional Layout
When it comes to designing your makeup vanity, the layout is everything. Think of it as the foundation of a house; without a solid base, everything else can crumble. A well-organized vanity not only enhances your beauty routine but also creates a serene space where you can unwind and indulge in some self-care. So, how do you create a functional layout that works for you? Let's dive in!
The first step in crafting the perfect layout is to assess your space. Take a moment to stand back and visualize how you want your vanity to function. Do you have a large collection of makeup, or are you more of a minimalist? This will determine how much space you need for storage and organization. Consider the dimensions of your desk and how it fits into the room. You want a layout that promotes accessibility without feeling cramped.
Next, think about the accessibility of your items. You don’t want to be rummaging through drawers looking for that elusive lipstick! Group similar items together—foundations, eyeshadows, brushes, and so on. This not only makes it easier to find what you need but also speeds up your makeup application process. You might even consider using small trays or decorative boxes to keep everything organized and visually appealing.
Another important aspect to consider is the ergonomics of your setup. Make sure that your most-used products are within arm's reach. For example, if you frequently use a specific palette, place it on top of your desk or in a drawer that’s easy to access. You can use tiered organizers or small shelves to keep items visible and accessible. Remember, the goal is to create a space that feels intuitive and easy to navigate.
Lighting also plays a crucial role in your layout. A bright, well-lit area can make a world of difference when applying makeup. If your desk is near a window, take advantage of natural light. However, consider adding some artificial lighting as well, like a stylish lamp or LED strips around your mirror. This will ensure you have ample light, no matter the time of day.
Finally, don’t forget about the decorative elements. Your makeup vanity should reflect your personality and style. Incorporate items that inspire you—perhaps a framed photo, a little plant, or a chic mirror. These details can transform your vanity from a mere workspace into a personal sanctuary. Remember, a space that feels good to you will make your beauty routine all the more enjoyable!
In summary, creating a functional layout for your makeup vanity involves careful planning and consideration. By assessing your space, organizing your products, ensuring ergonomic access, incorporating good lighting, and adding personal touches, you can create a makeup area that is both beautiful and functional. So grab your tools and get started on this exciting transformation!
- What type of desk is best for a makeup vanity? Look for a desk that offers enough surface area and storage for your makeup items. A desk with drawers can be particularly useful.
- How can I maximize storage in a small vanity? Use tiered organizers, wall-mounted shelves, or decorative boxes to keep products organized without taking up too much space.
- What lighting is best for makeup application? Natural light is ideal, but if that's not possible, opt for bright LED lights or a vanity mirror with built-in lighting.

Maintenance Tips for Longevity
To keep your newly transformed makeup vanity looking fresh and vibrant, regular maintenance is essential. Just like any cherished piece of furniture, your vanity deserves a little love and care to ensure it stands the test of time. Here are some practical tips to help you maintain its beauty and functionality:
First and foremost, cleaning is key. Dust and makeup residue can accumulate quickly, so make it a habit to wipe down your vanity at least once a week. Use a soft, lint-free cloth and a gentle cleaner to avoid scratching the surface. For stubborn stains, a mixture of warm water and mild soap does wonders. Remember, the goal is to keep it looking pristine without damaging the finish.
Next, consider the environment where your vanity resides. If it's placed near windows, be mindful of sunlight exposure, as it can fade colors over time. If possible, use curtains or blinds to shield your vanity from direct sunlight. Additionally, try to maintain a stable humidity level in the room; extreme changes can affect the integrity of the wood or paint.
Another important aspect is to check the hardware regularly. Over time, knobs and handles may become loose. A quick tightening can prevent any mishaps, like them falling off when you’re reaching for your favorite lipstick. If you notice any rust or tarnish on metal hardware, clean it with a suitable metal polish to keep it looking as good as new.
When it comes to the finish of your vanity, be proactive. If you notice any scratches or scuffs, don't panic! A little touch-up paint can work wonders. For deeper scratches, consider using a wood filler that matches your desk’s finish. After applying, sand it down gently and repaint for a seamless look.
Lastly, think about your makeup products. Store them in a way that prevents them from rolling around or falling, which can cause spills or breakage. Invest in organizers or trays that keep everything in its place. Not only does this help maintain your vanity's appearance, but it also makes your beauty routine more efficient.
By following these simple maintenance tips, you can ensure that your repurposed desk remains a stylish and functional makeup vanity for years to come. Treat it with care, and it will continue to reflect your personal style while serving all your beauty needs.
Here are some common questions people have about maintaining their makeup vanities:
- How often should I clean my vanity? - It's best to clean your vanity at least once a week to prevent build-up of dust and makeup residue.
- What type of cleaner should I use? - A gentle cleaner or a mixture of warm water and mild soap works well to avoid damaging the finish.
- How can I prevent my makeup from spilling? - Use organizers or trays to keep your makeup products secure and in place.
- What should I do if my hardware gets rusty? - Clean it with a suitable metal polish to restore its shine and prevent further corrosion.
Frequently Asked Questions
- What type of desk is best for repurposing into a makeup vanity?
When choosing a desk for your makeup vanity, look for one that has a flat surface and enough space to hold your makeup products. Desks with drawers can also provide additional storage for brushes and accessories. Consider the style and size that will fit well in your space and complement your decor.
- Do I need special tools to transform my desk into a vanity?
While you don’t need a full workshop, having some essential tools can make the process smoother. Basic tools like a screwdriver, paintbrushes, sandpaper, and a measuring tape are important. If you plan to add lights or mirrors, you may also need a drill or adhesive. Gathering these tools beforehand can save you time and frustration.
- How can I ensure my desk is properly prepared for painting?
Preparation is key! Start by cleaning the desk thoroughly to remove any dust or grime. Next, sand the surface to create a smooth base for the paint. If the desk has any old finishes, applying a primer will help the new paint adhere better. This step is crucial for achieving a professional-looking finish.
- What paint colors work best for a makeup vanity?
The choice of color can set the mood for your vanity. Soft pastels or neutrals can create a calming atmosphere, while bold colors like deep blues or pinks can add a touch of drama. Consider your personal style and the overall vibe you want to create in your beauty space. Don't forget to test a small area first!
- How can I maximize storage in my new makeup vanity?
To maximize storage, think vertically! Use organizers, shelves, or decorative boxes to keep your makeup tidy. Drawer dividers can help separate different items, making it easier to find what you need. Additionally, consider using wall-mounted shelves or pegboards for a stylish and functional storage solution.
- What lighting options are best for a makeup vanity?
Good lighting is essential for makeup application. Consider using a mirror with built-in LED lights for bright, even illumination. Alternatively, stylish table lamps or wall sconces can provide ambient lighting. Just make sure the light is bright enough to see your makeup clearly without harsh shadows.
- How can I decorate my makeup vanity?
Personalizing your vanity can make it feel special. Add decorative elements like framed photos, plants, or stylish trays to hold your makeup. You can also incorporate a statement mirror or artwork that reflects your personality. The key is to create a space that feels inviting and uniquely yours!
- What is the best way to maintain my repurposed desk vanity?
To keep your vanity looking great, regular maintenance is important. Wipe down surfaces with a gentle cleaner to remove makeup residue. Avoid harsh chemicals that can damage the finish. Additionally, keep your products organized to prevent clutter and make cleaning easier. A little upkeep goes a long way!