The Perfect Guide to Throwing Pottery at Home
Are you ready to dive into the wonderful world of pottery? This guide provides essential tips and techniques for beginners interested in pottery. From selecting materials to mastering the wheel, discover the art of creating beautiful pottery pieces in the comfort of your home. Imagine the satisfaction of molding a lump of clay into a stunning vase or bowl that you can proudly display. Pottery is not just a craft; it’s a journey of creativity and self-expression that anyone can embark on. So, let’s roll up our sleeves and get our hands dirty!
Understanding the different types of clay is crucial for successful pottery. Clay is the foundation of your creations, and selecting the right type can make all the difference. There are several types of clay, each with its unique properties:
- Earthenware: This is the most common type of clay for beginners. It fires at a low temperature and is easy to work with, making it ideal for hand-building techniques.
- Stoneware: A bit more durable than earthenware, stoneware is great for throwing on the wheel. It’s fired at a higher temperature, resulting in a strong, non-porous finish.
- Porcelain: Known for its delicate and translucent qualities, porcelain can be challenging for beginners but yields stunning results when mastered.
When choosing clay, consider the type of pottery you want to create and the techniques you plan to use. Each type of clay has its unique charm, so don’t hesitate to experiment until you find your perfect match!
Having the right tools is vital for pottery making. The right equipment can enhance your experience and help you produce beautiful pieces. Here’s a quick rundown of essential tools you'll need:
- Pottery Wheel: The heart of throwing, it allows you to shape your clay with precision.
- Clay Tools: These include rib tools, wire cutters, and sponges, which help in shaping and finishing your pieces.
- Safety Gear: Don’t forget your apron and a dust mask, especially when working with dry clay or glazes!
Investing in quality tools will pay off in the long run, making your pottery journey smoother and more enjoyable. Remember, it’s not just about having the tools, but knowing how to use them effectively!
A pottery wheel is the heart of throwing. It’s where the magic happens! There are two main types of pottery wheels: manual and electric. Each has its advantages, and your choice will depend on your style and budget.
Manual wheels require you to kick the wheelhead to spin it, giving you a fantastic connection with the clay. On the other hand, electric wheels provide consistent speed and require less physical effort. Here’s a quick comparison:
| Feature | Manual Wheel | Electric Wheel |
|---|---|---|
| Control | More tactile and responsive | Consistent speed |
| Physical Effort | More effort required | Less effort needed |
| Price | Generally cheaper | Can be more expensive |
Ultimately, the choice between manual and electric wheels comes down to personal preference. Try both if you can, and see which one feels right for you!
Proper maintenance extends the life of your pottery wheel. To keep it in optimal condition, make sure to regularly clean the wheelhead and check for any loose parts. A little care goes a long way in ensuring that your wheel performs beautifully for years to come.
Mastering throwing techniques is essential for creating pottery. It can be a bit daunting at first, but with practice, you’ll find your rhythm. Start by learning the fundamentals:
- Centering: This is the first and most crucial step. You want to make sure your clay is perfectly centered on the wheel before you start shaping it.
- Opening: Once centered, you’ll need to open the clay to create the base of your piece.
- Pulling: This technique involves pulling the walls of the clay upward to create height and form.
Practice these techniques repeatedly, and don’t be afraid to make mistakes. Each misstep is a learning opportunity that will help you improve!
Glazing adds color and texture to your pottery. It’s the icing on the cake! There are various glazing techniques and types of glazes available, each offering different finishes. Experimenting with glazes can lead to stunning results, so don’t shy away from trying new things!
Firing is a critical step in pottery making. It transforms your raw clay into a durable piece of art. There are different types of kilns available, each suited for specific types of clay and glazes. Understanding the firing process is essential for achieving the best results with your pieces.
Even experienced potters make mistakes. Here are some common pitfalls to watch out for:
- Not wedging the clay properly, which can lead to air bubbles.
- Overworking the clay, making it too dry and difficult to shape.
- Skipping the drying process before firing, which can cause cracks.
By being aware of these common mistakes, you can troubleshoot them effectively and improve your skills and outcomes.
Q: Do I need prior experience to start pottery?
A: Not at all! Pottery is accessible to everyone, and beginners can learn the basics with practice and patience.
Q: What’s the best clay for beginners?
A: Earthenware is a great option for beginners due to its workability and lower firing temperature.
Q: How much space do I need for pottery?
A: You can set up a pottery space in a small corner of your home. Just ensure you have room for your wheel and tools!
Choosing the Right Clay
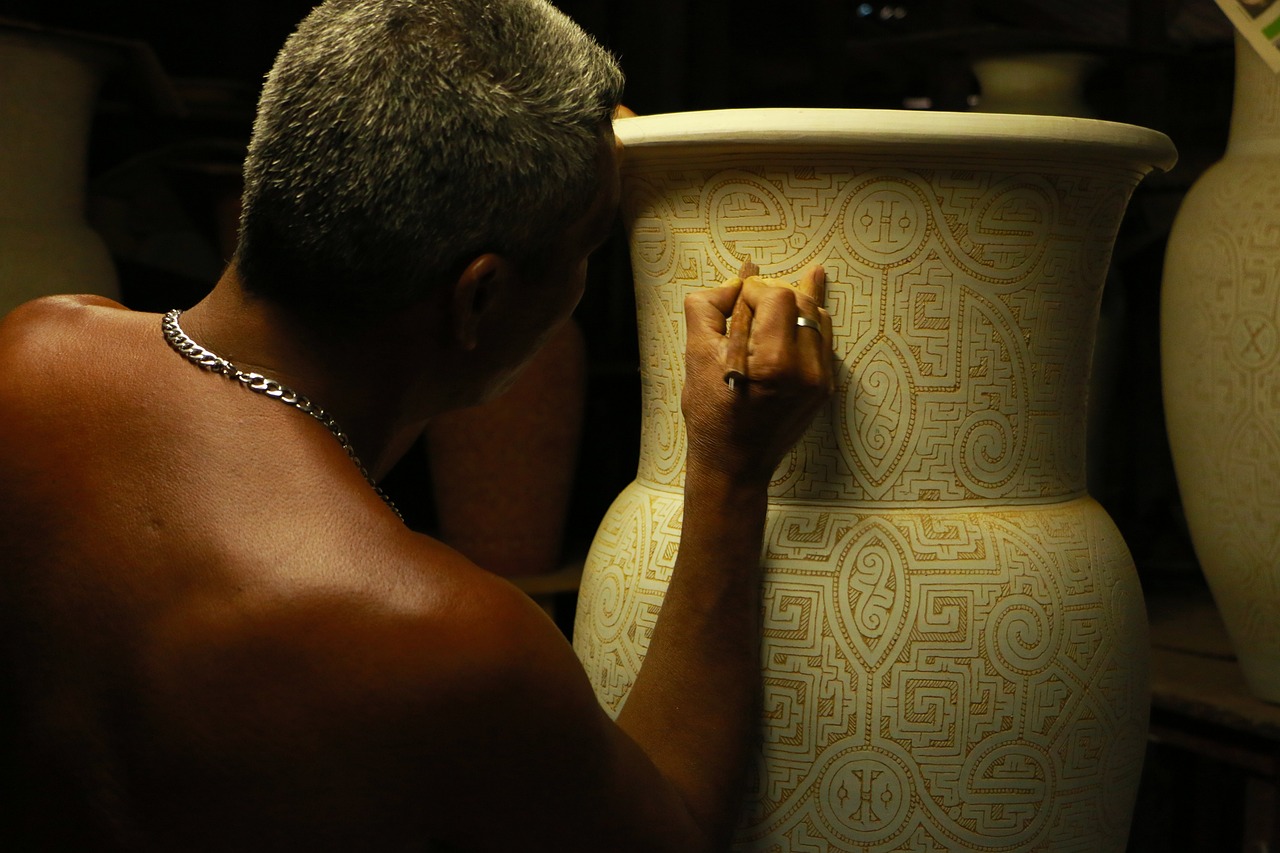
When it comes to pottery, is like picking the perfect canvas for a masterpiece. The type of clay you select can significantly affect the outcome of your work, from the strength of the final piece to the ease of shaping it on the wheel. So, how do you determine which clay is best for your projects? Let's dive into the different types of clay and their unique properties.
There are three primary types of clay that potters commonly use: earthenware, stoneware, and porcelain. Each type has its characteristics, making them suitable for different styles and techniques in pottery making.
| Type of Clay | Properties | Best For |
|---|---|---|
| Earthenware | Low fire, porous, vibrant colors | Beginner projects, decorative pieces |
| Stoneware | Mid to high fire, durable, less porous | Functional ware, dinnerware |
| Porcelain | High fire, smooth, translucent | Fine art pottery, delicate pieces |
Now, let’s break it down a bit further. Earthenware is typically the go-to choice for beginners due to its forgiving nature. It fires at a lower temperature, making it easier to work with and perfect for colorful glazes. You can create beautiful decorative pieces, but keep in mind that earthenware is more porous and not ideal for functional items like dinnerware.
If you're looking for something more robust, stoneware is your best bet. This type of clay is fired at higher temperatures, resulting in a strong and durable final product. It’s perfect for functional items such as plates, mugs, and bowls. Plus, it has a beautiful, natural finish that many potters adore.
On the other hand, if you’re aiming for elegance and fine detail, porcelain is the way to go. Known for its smooth texture and translucence, porcelain can be a bit tricky to work with, but the results are stunning. It’s perfect for intricate designs and fine art pottery, though it requires higher firing temperatures and more skill to master.
So, how do you choose the right clay for your project? Here are a few tips:
- Consider the final use of your pottery. Will it be functional or decorative?
- Think about your skill level. Are you a beginner or more advanced?
- Research the firing temperature of your kiln to ensure compatibility with your chosen clay.
Ultimately, the right clay will not only enhance your creativity but will also make your pottery experience enjoyable. Don’t hesitate to experiment with different types to find what resonates with your style!
Q: Can I mix different types of clay?
A: It's generally not recommended to mix different clays because they may have different firing temperatures and shrinkage rates, which can lead to issues during the firing process.
Q: How do I know if my clay is dry enough to fire?
A: The clay should feel cool to the touch and have a consistent color. A good test is to gently press on it; if it leaves a fingerprint, it’s still too wet.
Q: What is the best clay for beginners?
A: Earthenware is often recommended for beginners due to its ease of use and lower firing temperature.
Essential Tools and Equipment
When it comes to throwing pottery at home, having the right tools and equipment can make all the difference between a frustrating experience and a fulfilling one. Imagine trying to bake a cake without the proper pans or ingredients—it's a recipe for disaster! Similarly, in pottery, the right gear is essential for unleashing your creativity and achieving the results you desire. Let's dive into the must-have tools that will set you on the path to pottery success.
First and foremost, the centerpiece of your pottery setup will be the pottery wheel. This is where the magic happens, allowing you to shape and mold the clay into beautiful forms. There are various types of pottery wheels to choose from, each with its own unique features. Whether you opt for a manual wheel that offers a hands-on experience or an electric wheel that provides consistent speed and ease, your choice will depend on your personal style and budget.
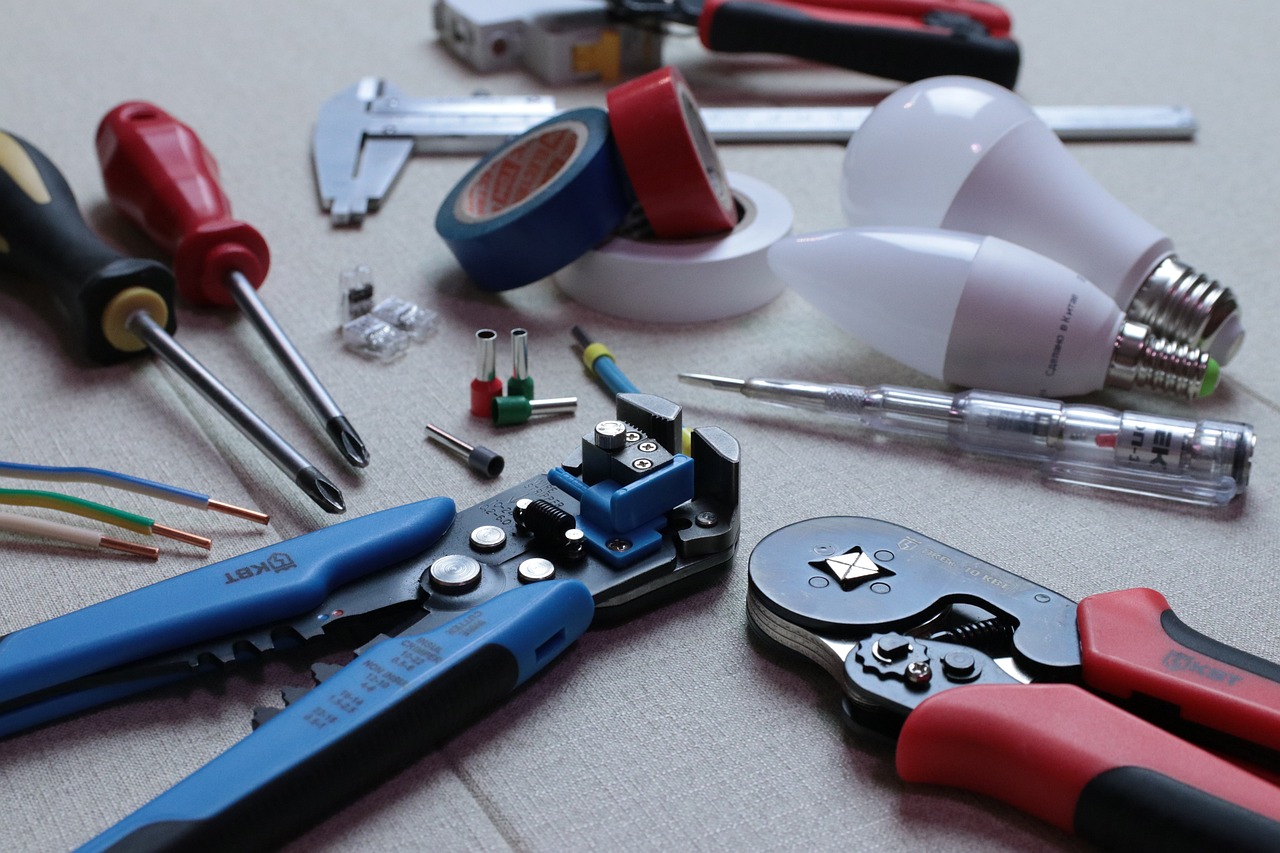
In addition to the wheel, you'll need a selection of hand tools that will aid you in the throwing process. These typically include:
- Wire Cutters: Essential for cutting clay from the block and removing your finished pieces from the wheel.
- Ribs: These tools help smooth and shape your pottery while it’s on the wheel.
- Sponges: Perfect for adding moisture to your clay and cleaning up your workspace.
- Wooden Modeling Tools: Ideal for detailing and refining your pottery designs.
Safety is another critical aspect of pottery making. Don't forget to invest in some protective gear. A good pair of gloves will protect your hands from the clay and any sharp tools, while a dust mask is essential when working with dry clay or glazes. Safety goggles are also a smart addition to keep your eyes safe from flying debris during the throwing process.
Now, let’s not overlook the importance of a work surface. A sturdy table or workbench will provide you with the necessary space to throw and store your materials. It’s also a good idea to have a dedicated area for drying your pieces, as well as shelves for organizing your tools and supplies. A well-organized workspace can significantly enhance your efficiency and creativity.
Lastly, you’ll need a place to fire your pottery once it’s completed. This is where a kiln comes into play. Depending on the scale of your projects, you might choose a small electric kiln for home use or look into community studios that offer kiln access. Firing is a crucial step that transforms your clay into durable pottery, so it's worth investing time and resources to find the right solution for your needs.
In summary, the essential tools and equipment for throwing pottery at home include:
| Tool/Equipment | Purpose |
|---|---|
| Pottery Wheel | For shaping and molding clay |
| Hand Tools | Smoothing, cutting, and detailing |
| Protective Gear | Safety while working with materials |
| Work Surface | Space for throwing and drying |
| Kiln | Firing the pottery |
With the right tools and equipment at your disposal, you're well on your way to creating stunning pottery pieces right from the comfort of your home. Remember, the journey of pottery making is just as rewarding as the final product, so enjoy every moment of this creative adventure!
1. Do I need a kiln to start pottery at home?
While a kiln is essential for firing your pottery, you can start practicing throwing with just a wheel and clay. Consider joining a local studio for firing your pieces.
2. What type of clay should I use as a beginner?
Stoneware or earthenware clays are great options for beginners due to their versatility and ease of use.
3. Can I use a regular table for my pottery work?
While you can use any sturdy surface, a dedicated workbench is recommended for better organization and comfort.
4. How often should I clean my pottery tools?
It's best to clean your tools after every use to maintain their quality and prolong their lifespan.
Pottery Wheels Explained
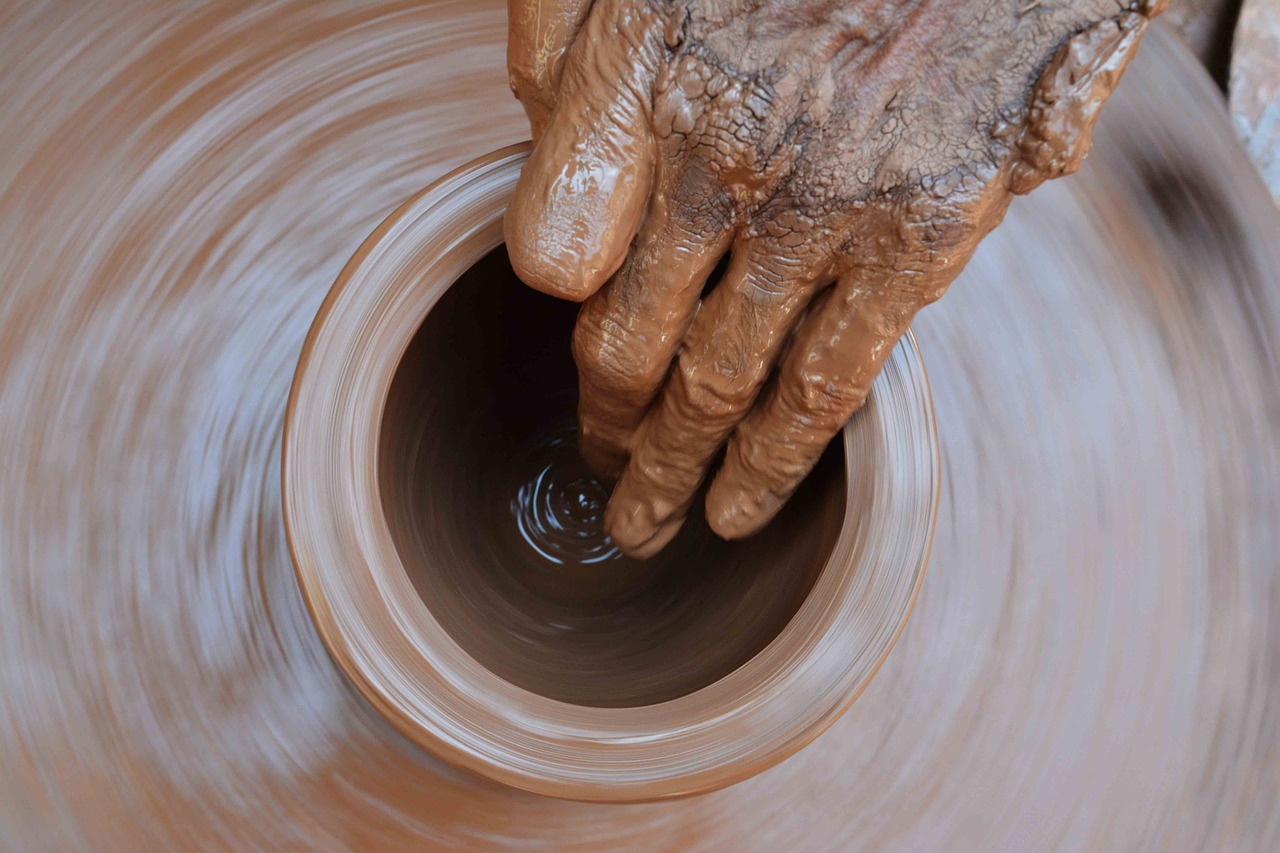
When it comes to pottery, the pottery wheel is like the heart of the operation. It’s where the magic happens, where a lump of clay transforms into a beautiful, functional piece of art. But with so many options available, you might find yourself wondering, "Which pottery wheel is right for me?" Fear not! In this section, we’ll break down the different types of pottery wheels, their features, and how to choose the best one to suit your needs.
First off, let’s talk about the two main categories of pottery wheels: manual and electric. Each type has its unique charm and functionality that caters to different styles and preferences. A manual wheel requires a bit more physical effort, as you’ll be kicking the wheel to get it spinning. This can be a great workout and gives you a more hands-on experience, but it might not be suitable for everyone, especially if you’re just starting out.
On the other hand, electric wheels are the go-to choice for many potters today. They offer a consistent speed and require less physical effort, allowing you to focus more on your technique rather than on keeping the wheel spinning. Plus, with the push of a button, you can easily adjust the speed to match your throwing style. If you’re wondering which one to choose, consider factors like your budget, the space you have available, and how much physical exertion you’re willing to put in.
| Type of Wheel | Advantages | Disadvantages |
|---|---|---|
| Manual Wheel |
|
|
| Electric Wheel |
|
|
Once you’ve chosen your wheel type, it’s important to consider its features. Look for wheels with a sturdy base to prevent wobbling during use. A wheel with a removable splash pan is also a plus, as it makes cleanup a breeze. Some wheels even come with adjustable height features, which can be a game-changer for comfort during those long throwing sessions.
In summary, selecting the right pottery wheel is a crucial step in your pottery journey. Whether you opt for a manual or electric wheel, understanding the features and how they align with your personal style will set you up for success. So, take your time, explore your options, and choose a wheel that resonates with your creative spirit!
1. What's the best pottery wheel for beginners?
The best pottery wheel for beginners often depends on personal preference. However, many find electric wheels easier to start with, as they require less physical effort and allow you to focus on learning techniques.
2. How much should I expect to spend on a pottery wheel?
Prices for pottery wheels can vary widely. Manual wheels can start around $200, while electric wheels can range from $300 to over $1,000, depending on features and brands.
3. Can I use a pottery wheel in a small space?
Yes, there are compact pottery wheels designed for small spaces. Just make sure to consider the dimensions and any necessary additional equipment you may need.
4. How often should I maintain my pottery wheel?
Regular maintenance is key to keeping your wheel in good condition. Clean it after each use, and periodically check for any loose parts or wear and tear.
Manual vs. Electric Wheels
When it comes to choosing a pottery wheel, the debate between manual and electric wheels often sparks passionate discussions among potters. Each type has its own unique set of advantages and disadvantages, making the decision largely dependent on your personal style, budget, and the specific projects you plan to undertake. Let's delve deeper into what sets these two options apart.
Manual pottery wheels, often referred to as kick wheels, operate through sheer muscle power. They require the potter to kick a pedal to spin the wheel, which can be a rewarding experience, especially for those who enjoy a more hands-on approach. One of the most appealing aspects of manual wheels is their simplicity. They are generally less expensive than electric wheels, making them an excellent choice for beginners or hobbyists who are just starting out. Additionally, because they have fewer electronic components, they tend to be more durable and require less maintenance.
On the other hand, electric pottery wheels have gained immense popularity in recent years due to their convenience and ease of use. With just a push of a button, these wheels can reach high speeds, allowing for quicker throwing and more intricate designs. Electric wheels are ideal for potters who may have physical limitations, as they require less physical exertion. Moreover, they come equipped with various features, such as adjustable speed settings and built-in splash pans, enhancing the overall pottery-making experience. However, the downside is that they can be more expensive and may require more maintenance due to the electrical components.
To help you make an informed choice, here’s a quick comparison:
| Feature | Manual Wheels | Electric Wheels |
|---|---|---|
| Cost | Generally lower | Generally higher |
| Physical Effort | Requires kicking | Minimal effort required |
| Speed Control | Less control over speed | Precise speed control available |
| Durability | More durable | May require more maintenance |
| Learning Curve | Steeper learning curve | Generally easier for beginners |
Ultimately, the choice between a manual and an electric pottery wheel boils down to your personal preferences and how you envision your pottery journey. Are you looking for a traditional, hands-on experience, or do you prefer the convenience of modern technology? Whichever path you choose, both types of wheels can lead you to create stunning pottery pieces that showcase your creativity and skill.
- What is the best type of wheel for beginners? Many beginners find electric wheels easier to use, but manual wheels can also be a great choice for those who prefer a more traditional approach.
- How much should I expect to spend on a pottery wheel? Prices can vary widely, with manual wheels starting around $200 and electric wheels ranging from $300 to over $1,000, depending on features.
- Can I use an electric wheel without electricity? No, electric wheels require a power source, while manual wheels can be used anywhere.
- How do I maintain my pottery wheel? Regular cleaning and checking for loose parts are essential for both manual and electric wheels. Always refer to the manufacturer’s guidelines for specific maintenance tips.
Maintaining Your Wheel
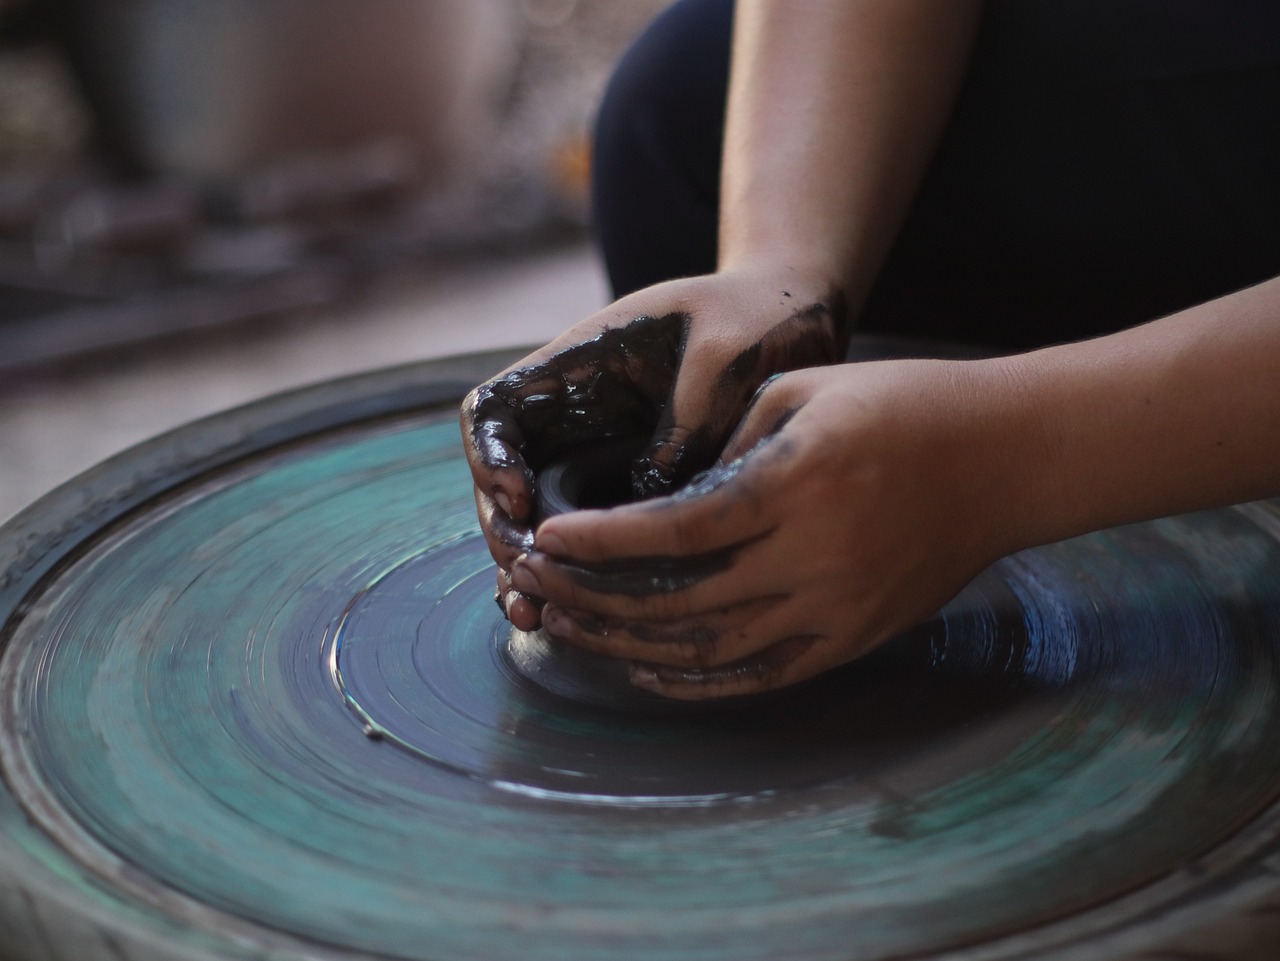
Maintaining your pottery wheel is not just about keeping it clean; it's about ensuring that your creative process flows smoothly and effortlessly. Just like a well-tuned musical instrument, a properly maintained wheel can make all the difference in your pottery-making experience. So, what are the key aspects of wheel maintenance that every potter should know?
First and foremost, regular cleaning is essential. After each throwing session, take a few moments to wipe down the wheelhead with a damp sponge. This simple act prevents clay buildup, which can affect the wheel's performance and your ability to create beautiful pieces. If you let the clay dry on the wheelhead, it can become a real headache to remove later, requiring more effort than necessary. So, do yourself a favor and clean as you go!
Next, check the belt and motor of your wheel. If you have an electric wheel, the belt is crucial for transferring power from the motor to the wheelhead. Over time, belts can wear out or become loose, which may lead to inconsistent spinning speeds. To avoid this, inspect the belt regularly and replace it if you notice any signs of wear. A well-functioning motor is equally important—make sure it runs smoothly without any strange noises. If something seems off, don’t hesitate to consult the manufacturer's guidelines or a professional for repairs.
Another important aspect of maintenance is lubrication. Many pottery wheels have moving parts that require lubrication to function properly. Check your wheel's manual for recommendations on the type of lubricant to use and how often to apply it. A little bit of lubrication can go a long way in extending the life of your wheel and ensuring a smooth operation.
Lastly, consider the environment where your wheel is located. Pottery wheels thrive in stable conditions. Avoid placing your wheel in areas with extreme temperature fluctuations or high humidity. If possible, keep it in a dedicated workspace where you can control the conditions. This not only protects your wheel but also enhances your overall pottery-making experience.
In summary, maintaining your pottery wheel involves:
- Regular cleaning after each use to prevent clay buildup.
- Inspecting the belt and motor for wear and tear.
- Lubricating moving parts according to the manufacturer's guidelines.
- Creating a stable environment for your wheel to operate optimally.
By following these maintenance tips, you can ensure your pottery wheel remains in excellent condition, allowing you to focus on what you love most—creating beautiful pottery!
Q: How often should I clean my pottery wheel?
A: It's best to clean your pottery wheel after every use to prevent clay buildup and maintain optimal performance.
Q: What type of lubricant should I use for my pottery wheel?
A: Always refer to your wheel's manual for specific recommendations on the type of lubricant suitable for your model.
Q: Can I use my pottery wheel in a damp basement?
A: It's not advisable to use your pottery wheel in areas with high humidity, as it can affect the wheel's performance and the quality of your clay.
Basic Throwing Techniques
This guide provides essential tips and techniques for beginners interested in pottery. From selecting materials to mastering the wheel, discover the art of creating beautiful pottery pieces in the comfort of your home.
Understanding the different types of clay is crucial for successful pottery. This section explores various clay options, their properties, and how to select the best one for your projects.
Having the right tools is vital for pottery making. Here, we outline the essential equipment needed for throwing pottery, including wheels, tools, and safety gear to ensure an efficient workspace.
A pottery wheel is the heart of throwing. This subsection discusses the different types of pottery wheels available, their features, and how to choose the best one for your needs.
Manual and electric wheels each have unique advantages. This section compares the two, helping you decide which type suits your pottery style and budget.
Proper maintenance extends the life of your pottery wheel. Learn essential tips on cleaning and caring for your wheel to keep it in optimal condition.
Mastering throwing techniques is essential for creating pottery. As a beginner, you might feel overwhelmed by the thought of shaping clay, but fear not! The process is as much about practice as it is about technique. The journey of throwing pottery is akin to learning to ride a bike; it takes time, balance, and a bit of courage to push forward. Here are some fundamental techniques to get you started:
Centering the Clay: This is the first and most crucial step in throwing pottery. Start by placing a ball of clay in the center of your wheel. As the wheel spins, use your hands to apply pressure and shape the clay into a cone. This helps to eliminate any lumps and ensures that the clay is perfectly centered. Think of it as tuning a musical instrument; if it's off, the whole piece will be affected.
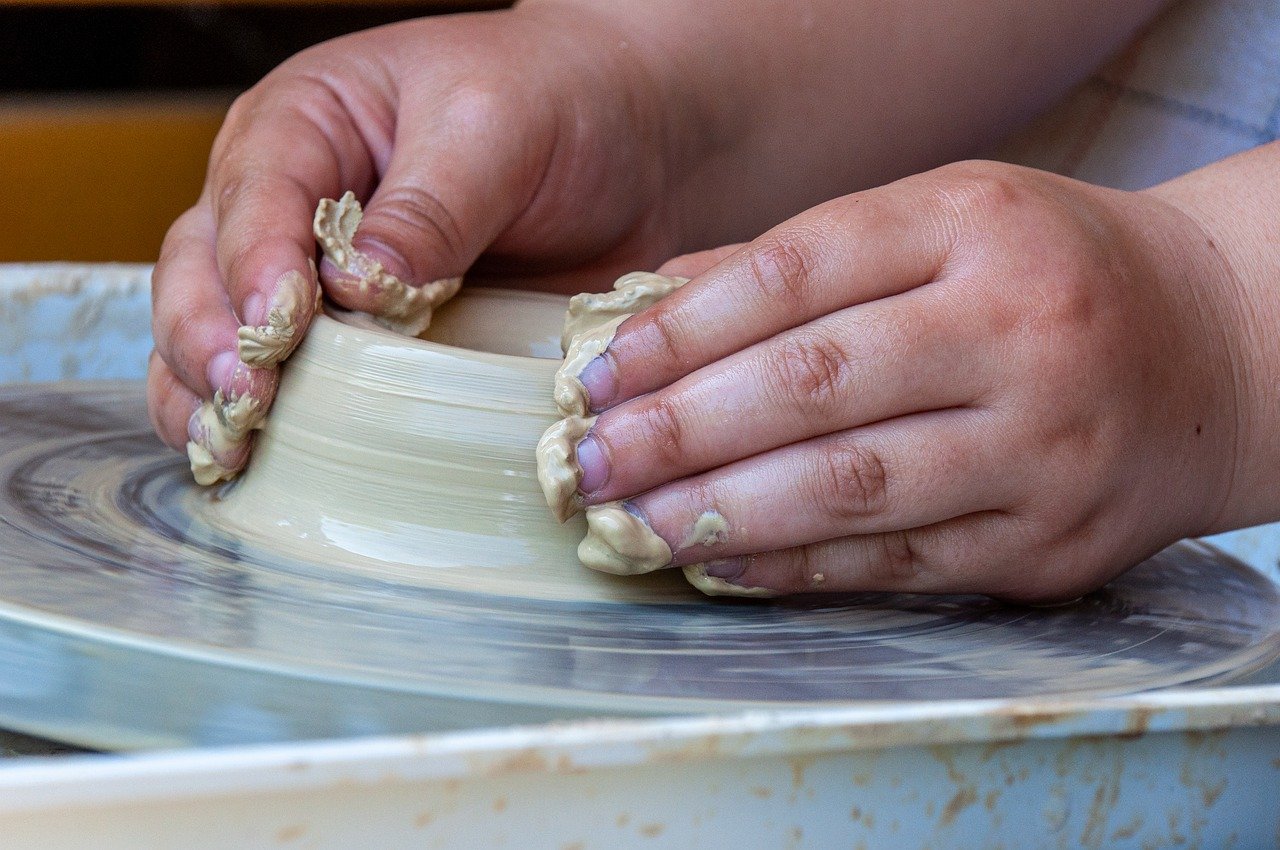
Opening the Clay: Once your clay is centered, it's time to open it up. With your fingers, press down into the center of the clay while the wheel is spinning. This motion should be gentle yet firm, allowing you to create a hollow space. Imagine creating a small well in the center; this is where your creativity will flow!
Pulling the Clay: After opening, you’ll want to pull the walls of your pottery upward. This technique involves using both hands to gently squeeze and lift the clay. Start from the bottom and work your way up, applying even pressure. It’s like pulling taffy; the more consistent your motion, the smoother the result. Remember, practice makes perfect!
Throughout these stages, it’s essential to keep your hands moist to prevent the clay from sticking. Using a simple water bowl nearby can be a game-changer. Additionally, don’t hesitate to experiment with different speeds on your wheel; finding the right pace can make all the difference in your throwing technique.
Lastly, embrace the learning process! Every potter has faced challenges and made mistakes along the way. The key is to learn from them. If your piece collapses or doesn't turn out as expected, think of it as a stepping stone to improvement.
Glazing adds color and texture to your pottery. This section discusses various glazing techniques, types of glazes, and how to achieve the desired finish for your creations.
Firing is a critical step in pottery making. This subsection explains the firing process, types of kilns, and tips for achieving the best results with your pieces.
Even experienced potters make mistakes. Here, we highlight common pitfalls in pottery throwing and how to troubleshoot them to improve your skills and outcomes.
- How long does it take to learn pottery? - Learning pottery can vary greatly depending on the individual. However, with consistent practice, many beginners see significant improvement within a few months.
- What type of clay is best for beginners? - Earthenware is often recommended for beginners due to its forgiving nature and ease of use.
- Do I need a kiln to make pottery? - While a kiln is essential for firing pottery, there are alternative methods like air-dry clay for those who want to start without a kiln.

Glazing and Finishing Touches
When it comes to pottery, glazing is where the magic truly happens. It's not just about adding a splash of color; it’s about enhancing the beauty and functionality of your pieces. Think of glazing as the icing on a cake—it transforms the ordinary into the extraordinary! But before you dive into the world of glazes, it’s essential to understand the basics and how to achieve the perfect finish.
There are several types of glazes available, each offering unique properties and effects. For instance, glossy glazes provide a shiny finish that reflects light beautifully, while matte glazes give a more subdued, earthy feel. Additionally, transparent glazes allow the clay body to show through, highlighting the natural textures and colors of your pottery. On the other hand, opaque glazes completely cover the clay, making them ideal for bold, vibrant colors.
Before applying glaze, it's crucial to prepare your pottery correctly. Ensure that your pieces are clean and dry; any dust or oil can affect how the glaze adheres. You might want to consider a test piece to experiment with different glazes and application techniques. This way, you can see how the glaze reacts during firing and make adjustments as needed.
There are various glazing techniques you can explore, including:
- Dipping: This technique involves dipping your pottery into a bucket of glaze. It’s quick and can produce an even coat but requires practice to master.
- Brushing: Using a brush allows for more control and can add texture. This method is perfect for applying multiple layers or creating designs.
- Spraying: For a smooth finish, spraying glaze can be effective. However, it requires a spray gun and proper ventilation.
After glazing, the next step is firing your pottery. This process is crucial as it transforms the raw glaze into a durable, glass-like surface. Depending on the type of glaze and clay you are using, the firing temperature will vary. Always refer to the manufacturer's instructions for the best results. Remember, firing is like baking your pottery; it needs the right conditions to ensure everything comes out perfectly!
Once your pieces are fired, take a moment to admire your work. You might find that the glaze has transformed your pottery in unexpected ways. Some glazes react differently in the kiln, creating stunning effects that you might not have anticipated. This is part of the beauty of pottery-making—embracing the surprises that come with each creation!
Lastly, don’t forget about the finishing touches. After your pottery has cooled down, you might want to polish the edges or add additional decorative elements. A simple wax finish can enhance the appearance and provide a protective layer. Think of it as giving your pottery a little extra love!
Q: Can I glaze pottery that has not been fired before?
A: No, it's essential to bisque fire your pottery before glazing. This process strengthens the clay and allows the glaze to adhere properly.
Q: How do I choose the right glaze for my project?
A: Consider the type of clay you are using, the desired finish, and how the glaze reacts during firing. Testing different glazes on sample pieces is a great way to find what works best for you.
Q: Is it safe to use commercial glazes for food-safe pottery?
A: Always check if the glaze is labeled as food-safe. Some glazes contain toxic materials that should not come into contact with food or drink.
Q: What should I do if my glaze runs during firing?
A: Running can occur if the glaze is too thick or if the firing temperature is too high. To prevent this in the future, ensure you apply an even coat and follow the manufacturer's firing recommendations.
Firing Your Pottery
Firing your pottery is like sending your creations on a transformative journey. It’s the moment when your soft, malleable clay becomes a hard, durable piece of art. This crucial step not only solidifies your work but also enhances its beauty and functionality. Understanding the firing process is essential for any potter, whether you're a novice or a seasoned artist. In this section, we will delve into the intricacies of firing your pottery, including the types of kilns available, the firing methods you can choose from, and tips for achieving the best results.
First off, let's talk about the types of kilns. The kiln is the heart of your pottery studio during the firing process. There are several types of kilns you might consider:
| Type of Kiln | Description | Best For |
|---|---|---|
| Electric Kiln | Uses electric heating elements to achieve high temperatures. | Beginner potters and small studios. |
| Gas Kiln | Utilizes gas burners for heating, allowing for greater temperature control. | Intermediate to advanced potters. |
| Wood Kiln | Fires using wood as fuel, producing unique effects due to ash and flame interaction. | Artists seeking a rustic finish. |
| Raku Kiln | A special kiln for Raku firing, which is a quick process that creates stunning finishes. | Potters interested in experimental techniques. |
When it comes to the firing methods, there are generally two main types: bisque firing and glaze firing. Bisque firing is the first stage, where your pottery is fired at a lower temperature to remove moisture and make it more robust. This is crucial because it prepares your pieces for glazing. After bisque firing, you apply the glaze and fire the pottery again during the glaze firing. This stage is where the magic happens—the glaze melts and fuses to the clay, resulting in a beautiful finish. Each firing method has its own temperature range, so be sure to consult your clay and glaze manufacturers for the ideal firing schedule.
To achieve the best results in your firing process, here are some tips to keep in mind:
- Preheat your kiln: This helps to avoid thermal shock, which can crack your pieces.
- Load your kiln carefully: Ensure that pieces are spaced properly to allow heat to circulate.
- Monitor the temperature: Use a pyrometer or kiln sitter to keep an eye on the firing temperature.
- Allow for proper cooling: Don't open the kiln immediately after firing; let it cool down gradually to prevent cracking.
Finally, don't forget to keep a firing log. Documenting your firing schedules, temperatures, and outcomes will help you refine your technique over time and avoid repeating mistakes. Each firing is a learning experience, and maintaining a record will empower you to make informed decisions for future projects.
Q: What is the ideal temperature for bisque firing?
A: Typically, bisque firing occurs between 1730°F and 1830°F (about 950°C to 1000°C), depending on the type of clay.
Q: How long does a firing take?
A: The duration of a firing can vary significantly. A bisque firing might take anywhere from 8 to 12 hours, while glaze firing can take 10 to 14 hours, plus cooling time.
Q: Can I fire pottery in a regular oven?
A: No, regular ovens do not reach the necessary temperatures for firing clay. Always use a kiln designed for pottery.
Q: What should I do if my pottery cracks during firing?
A: Cracking can occur due to rapid temperature changes or improper loading. If it happens, analyze your process and consider adjusting your techniques for future firings.
Common Mistakes to Avoid
When you're diving into the world of pottery, it’s easy to get caught up in the excitement and overlook some essential practices that can make or break your creations. Even seasoned potters find themselves tripping over the same hurdles time and again. So, let’s explore some of the most common mistakes you should be wary of, ensuring your pottery journey is as smooth as freshly wedged clay.
One of the biggest blunders beginners often make is not preparing the clay properly. Imagine trying to bake a cake without mixing the ingredients well – it just won’t turn out right! Similarly, if your clay isn’t wedged and free of air bubbles, you risk cracking or collapsing your piece while throwing. Always take the time to knead your clay thoroughly; it’s the foundation of your work.
Another pitfall is overworking the clay. While it might feel satisfying to keep shaping and pulling, excessive handling can lead to fatigue in the clay, making it less responsive. Think of it like stretching a rubber band too much – it loses its elasticity. Instead, focus on short, deliberate movements and give yourself breaks to let the clay rest.
Next up, let’s talk about centering. This is often the most challenging step for beginners. If your clay isn’t centered correctly on the wheel, it won’t spin evenly, leading to uneven walls and shapes. A good tip is to take your time with this step. Use your hands to apply pressure evenly from all sides, and don’t rush through it. If you find yourself struggling, consider practicing with a small ball of clay until you get the hang of it.
Don’t forget about tool selection. Using the wrong tools can significantly affect your results. For instance, a rib tool can help smooth out your piece, but using it incorrectly can create unwanted marks or distortions. Make sure you invest in a few quality tools and learn how to use each one effectively. It’s like having the right paintbrush for the right stroke – it makes all the difference!
Lastly, let’s touch on the importance of patience. Pottery is an art that requires time and practice. Rushing through the process can lead to mistakes and frustration. Embrace the journey, and allow yourself to learn from each piece you create. Remember, every great potter started as a novice, and each mistake is just a stepping stone toward mastery.
By being aware of these common mistakes, you can enhance your pottery skills and create beautiful pieces that reflect your unique style. So, take a deep breath, roll up your sleeves, and let your creativity flow – just remember to avoid these pitfalls along the way!
- What type of clay is best for beginners?
Earthenware is often recommended for beginners due to its workability and forgiving nature. It’s easier to shape and fires at lower temperatures.
- How long does it take to learn pottery?
Learning pottery can vary greatly depending on your dedication and practice. Many find they can create basic forms within a few weeks, but mastering techniques can take months or even years.
- Can I use a regular oven to fire my pottery?
No, traditional pottery requires a kiln to reach the high temperatures needed for firing. A regular oven cannot achieve these temperatures safely.
- What should I do if my pottery cracks during drying?
If your pottery cracks, you can try to repair it with slip (a mixture of clay and water) or accept it as part of the learning process and start anew.
Frequently Asked Questions
- What type of clay is best for beginners?
For beginners, earthenware clay is often recommended because it’s easy to work with and forgiving. It fires at lower temperatures and is versatile for various projects. If you’re looking for something a bit sturdier, stoneware clay is also a great option as it’s durable and can handle more intricate designs.
- Do I need a pottery wheel to start making pottery?
No, you don’t necessarily need a pottery wheel to start. Many beginners begin with hand-building techniques, like pinch pots or coil pots. However, if you’re eager to try throwing, investing in a wheel can be an exciting next step!
- How do I choose between a manual and electric pottery wheel?
Choosing between a manual and electric pottery wheel comes down to your personal preference and budget. Manual wheels offer a traditional feel and can be more affordable, while electric wheels provide ease of use and speed. Think about how often you’ll use it and what style you prefer!
- What are some common mistakes to avoid when throwing pottery?
Some common mistakes include not centering the clay properly, using too much water, or pulling the clay too quickly. These can lead to uneven shapes and cracks. Take your time and practice each technique slowly to improve your skills!
- How do I properly maintain my pottery wheel?
Maintaining your pottery wheel is crucial for longevity. Make sure to clean it after each use, checking for any clay buildup. Lubricate moving parts as needed and store it in a dry place to prevent rust. Regular maintenance keeps your wheel in top shape!
- What glazing techniques should I try as a beginner?
As a beginner, you might want to start with dip glazing or brush glazing. These methods are straightforward and allow you to experiment with colors and textures easily. Once you’re comfortable, you can explore more advanced techniques like spraying or pouring glazes!
- What type of kiln do I need for firing my pottery?
The type of kiln you need depends on the clay and glaze you’re using. For most beginners, a cone 04 kiln is suitable for earthenware and low-fire glazes. If you plan to work with stoneware or high-fire glazes, consider a cone 6 or cone 10 kiln. Always check the specifications of your materials before firing!


