Easy Repurpose Projects for Chalk Paint
Are you ready to unleash your creativity and transform ordinary items into stunning decor? Chalk paint is the perfect medium for those looking to breathe new life into their surroundings with minimal effort. Whether you're a seasoned DIY enthusiast or just dipping your toes into the world of crafting, these easy repurpose projects will inspire you to grab a brush and get started. Imagine turning that old wooden chair into a chic accent piece or revamping a tired picture frame into a statement art display. The possibilities are endless!
Chalk paint is not only versatile but also user-friendly, making it an ideal choice for various projects. One of the best things about it is that it adheres well to most surfaces without extensive prep work, allowing you to dive right into your creative endeavors. Plus, it dries quickly, so you won't be left waiting around for hours. In this article, we will explore a range of exciting projects that will help you make the most of your chalk paint.
But before we get into the nitty-gritty of specific projects, let’s talk about some key benefits of using chalk paint:
- Easy Application: Chalk paint glides on smoothly, making it a breeze to work with.
- Minimal Prep Work: No need for priming or extensive sanding in most cases!
- Variety of Finishes: You can achieve a matte, rustic, or even a more polished look depending on your technique.
- Quick Drying: Most chalk paints dry within an hour, allowing you to layer and finish your projects faster.
Now, let’s dive into some fun and simple projects that you can tackle using chalk paint. From furniture makeovers to decorative accents, these ideas will not only spruce up your space but also give you a sense of accomplishment.
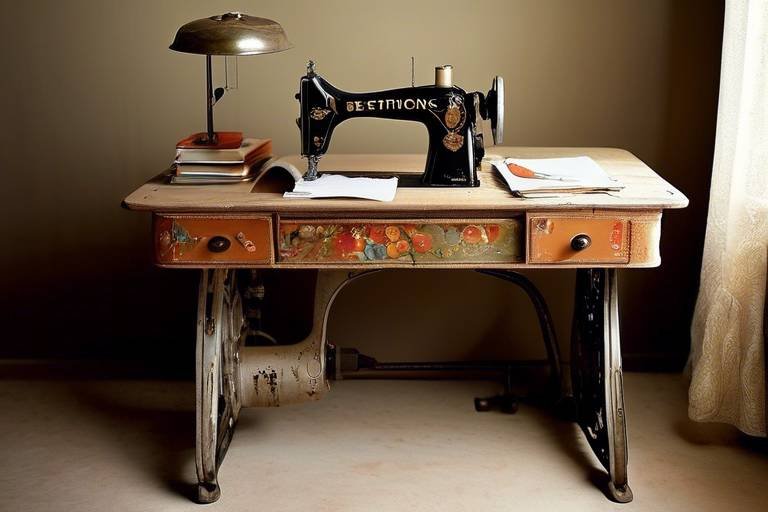
One of the most impactful ways to use chalk paint is by transforming furniture. Think about that old dresser sitting in your garage or the coffee table that has seen better days. With a little chalk paint, you can turn these pieces into beautiful focal points in your home. For instance, a simple coat of chalk paint can turn a drab, dark wood dresser into a bright, airy piece that fits perfectly in a modern bedroom.
Here are some quick tips for furniture makeovers:
- Choose a color that complements your existing decor.
- Consider distressing the edges for a vintage look.
- Seal the paint with a wax or clear coat for durability.
Chalk paint isn’t just for furniture; it can also work wonders on smaller decor items. Think about repurposing glass jars, picture frames, or even ceramic pots. A splash of chalk paint can turn a plain glass jar into a charming vase or a simple frame into a rustic masterpiece. The beauty of these projects is that they require minimal investment and can be completed in a short amount of time.
For example, a quick coat of chalk paint on a ceramic pot can give it a whole new life, making it a perfect home for your favorite plants. You can even use stencils to add designs and patterns for a personal touch. The key is to let your imagination run wild!
Q: Can I use chalk paint on any surface?
A: Yes, chalk paint adheres well to most surfaces, including wood, metal, and even some plastics. Just ensure the surface is clean and free from grease.
Q: Do I need to prime my items before painting?
A: In most cases, you do not need to prime your items before using chalk paint. However, if you're working with a glossy surface or a darker color, a light sanding may help the paint adhere better.
Q: How do I seal my chalk paint projects?
A: You can use a clear wax or a polyurethane sealant to protect your chalk-painted items. Wax gives a soft, matte finish, while polyurethane can provide a more durable, glossy finish.
Q: Is chalk paint easy to remove if I change my mind?
A: Chalk paint is water-based, so it can be removed with soap and water while it’s still wet. Once it’s dried and sealed, it will be more challenging to remove, but sanding can help.
With these easy repurpose projects and helpful tips, you’re well on your way to transforming your space with chalk paint. So grab your brushes and let the creativity flow!

Choosing the Right Chalk Paint
When it comes to transforming your everyday items into stunning decor, the choice of chalk paint can make all the difference. With so many brands, finishes, and colors available, it’s essential to understand what each offers to select the best option for your project. Imagine standing in a paint aisle, overwhelmed by choices—do you go for the vibrant hues or the muted tones? Do you need a matte finish or something with a bit of sheen? Let’s break it down.
First off, consider the brand. Some popular chalk paint brands like Annie Sloan, Rust-Oleum, and Dixie Belle have earned their reputations for a reason. They offer high-quality paints that adhere well and provide excellent coverage. For instance, Annie Sloan’s chalk paint is renowned for its versatility and ease of use, making it a favorite among DIY enthusiasts. On the other hand, Rust-Oleum is often praised for its affordability and availability in various retail stores, making it an accessible option for many.
Next, let's talk about finishes. Chalk paint typically comes in a matte finish, which is perfect for achieving that rustic, vintage look. However, if you’re aiming for a more modern aesthetic, you might want to explore options that offer a satin or semi-gloss finish. These finishes not only enhance the visual appeal but also provide added durability, especially in high-traffic areas. To illustrate this, here's a quick comparison:
| Finish Type | Best For | Durability |
|---|---|---|
| Matte | Rustic, vintage looks | Low |
| Satin | Modern aesthetics | Medium |
| Semi-Gloss | High-traffic areas | High |
Now, let’s not forget about color. The color palette of chalk paint is vast, ranging from soft pastels to bold, vibrant shades. When selecting a color, think about the overall vibe you want to create in your space. For instance, soft blues and greens can evoke a sense of tranquility, while bright yellows and reds can energize a room. It’s often helpful to test a few colors on a small section of your item before committing to a full paint job. This practice allows you to see how the color interacts with the light in your space and ensures you’re making the right choice.
In summary, choosing the right chalk paint involves considering the brand, finish, and color that best suit your project and personal style. Remember, the right paint can turn a simple piece into a showstopper, so take your time in making this decision. Happy painting!

Preparing Your Items for Painting
When it comes to using chalk paint, the magic truly begins with proper preparation. You might be wondering, why is preparation so important? Well, think of it like laying the foundation for a house: if the foundation is shaky, the entire structure is at risk. Similarly, if your items aren't adequately prepared, the paint won't adhere well, leading to a finish that chips and peels. So, let's dive into the essential steps that will set you up for success!
First off, cleaning your items is crucial. Dust, grease, and grime can create a barrier that prevents the paint from bonding. Imagine trying to paint a dirty canvas; the colors won't pop, and the paint won't stick. To ensure a clean surface, you can use a simple soap and water solution. Just grab a sponge, mix some dish soap with warm water, and scrub away any residues. Rinse thoroughly and let your item dry completely before moving on to the next step.
If you encounter stubborn dirt or grease that soap and water can't tackle, don't fret! There are other options available. For tougher grime, consider using degreasers or solvents. These powerful cleaners can break down oils and residues that cling stubbornly to surfaces. However, it's essential to use them safely: always work in a well-ventilated area and wear gloves to protect your skin. Here’s a quick comparison of cleaning methods:
| Cleaning Method | Best For | Notes |
|---|---|---|
| Soap and Water | General dirt and dust | Safe and easy to use |
| Degreasers | Greasy or oily surfaces | Use in a ventilated area |
| Solvents | Heavy-duty cleaning | Handle with care |
After cleaning, the next step is sanding. This process might seem tedious, but trust me, it's worth the effort. Sanding creates a rough surface that helps the paint adhere better—think of it as giving your item a little grip to hold onto the paint. You don’t need to go overboard; a light sanding with fine-grit sandpaper will do the trick. Once you’re done, make sure to wipe away any dust particles with a damp cloth.
Now, let’s talk about priming. While chalk paint often doesn’t require a primer, using one can significantly enhance coverage and durability, especially on darker or glossy surfaces. If you decide to prime, choose a quality primer that’s compatible with chalk paint. Apply it according to the manufacturer’s instructions and allow it to dry completely before you start painting.
In summary, preparing your items for painting involves a few simple yet crucial steps: cleaning, sanding, and priming. By taking the time to prepare properly, you’ll set the stage for a beautiful finish that lasts. So grab your cleaning supplies and get ready to transform your items into stunning chalk-painted pieces!
Q: Do I need to sand every surface before painting with chalk paint?
A: Not necessarily! While sanding helps with adhesion, it’s not always required. If the surface is already rough or porous, you may skip this step.
Q: Can I use chalk paint on any material?
A: Chalk paint adheres well to most surfaces, including wood, metal, and even glass. However, always check the manufacturer's guidelines for the best results.
Q: How long should I wait after cleaning before I start painting?
A: It's best to wait until your item is completely dry after cleaning. This usually takes about 1-2 hours, depending on the humidity and temperature.

Cleaning Techniques
When diving into the world of chalk paint, one of the most crucial steps is ensuring your surfaces are impeccably clean. Think of cleaning as the foundation of a house; without a solid base, everything else crumbles. Proper cleaning techniques not only prepare your items for painting but also enhance the overall finish and durability of your project. So, what are the best methods to get your surfaces ready? Let’s break it down!
First off, you’ll want to start with a simple yet effective cleaning solution: soap and water. This age-old method is surprisingly powerful. Just mix warm water with a few drops of mild dish soap, and you’re ready to go. Use a soft cloth or sponge to wipe down the surfaces, ensuring you remove any dust, dirt, or grease that might interfere with the paint adhering properly. Remember, the key here is to rinse thoroughly to avoid any soap residue that could affect the paint finish later on.
When using soap and water, it's essential to follow some best practices to maximize its efficacy:
- Use Warm Water: It helps to dissolve grime more effectively.
- Soft Cloth or Sponge: Avoid abrasive materials that could scratch the surface.
- Rinse Well: Ensure no soap is left behind, as this can cause paint adhesion issues.
However, sometimes soap and water just won’t cut it, especially if you're dealing with stubborn grime or greasy surfaces. In such cases, you might need to escalate your cleaning game with degreasers or solvents. These products are designed to tackle tougher residues that soap simply can't handle. But, a word of caution: always ensure you're working in a well-ventilated area and wearing protective gear, as some of these chemicals can be quite potent.
When choosing a degreaser or solvent, look for options that are safe for the material you're working with. Here’s a quick comparison of common cleaning agents:
| Cleaning Agent | Best For | Notes |
|---|---|---|
| Degreaser | Heavy grease and oil | Use in a well-ventilated area |
| Mineral Spirits | Paint and varnish residue | Test on a small area first |
| Rubbing Alcohol | General cleaning | Quick-drying and effective |
After you've successfully cleaned your items, you might want to consider sanding and priming them for that perfect finish. Sanding helps to create a better bond for the paint, while priming can enhance coverage and durability. So, don’t skip these steps if you want to achieve a professional look!
In summary, whether you’re using soap and water or a more aggressive cleaning solution, taking the time to clean your surfaces properly will set the stage for a successful chalk paint project. Think of it as giving your items a fresh start; it’s the first step in your creative journey!
Q1: Can I use vinegar as a cleaning agent?
A1: Yes! Vinegar is a natural cleaner that can help remove dirt and grime. Just mix it with water for an effective solution.
Q2: How do I know if my surface is clean enough?
A2: A clean surface will feel smooth to the touch and won't have any visible dirt or grease. You can also run a clean cloth over it; if it comes away dirty, you need to clean more!
Q3: Is it necessary to sand before painting?
A3: While it's not always necessary, sanding can significantly improve paint adhesion and result in a smoother finish.

Using Soap and Water
When it comes to prepping your items for a fresh coat of chalk paint, one of the simplest yet most effective methods is using a soap and water solution. This approach is not only easy on the wallet but also incredibly efficient at removing most residues that could interfere with your painting project. Imagine trying to paint a canvas that’s covered in dust and grime; it’s just not going to work, right? The same principle applies here. A clean surface is essential for achieving that flawless finish you’re aiming for.
To start, gather a few basic supplies: a bucket, warm water, dish soap, and a soft cloth or sponge. You don’t need anything fancy! Just a few drops of dish soap mixed with warm water will do the trick. Dip your cloth or sponge into the soapy water and wring it out so it’s damp but not dripping. Then, gently wipe down the surfaces of your item. This method is particularly effective for wooden furniture, metal accents, and even ceramic pieces.
Here’s a quick rundown of the steps you should follow:
- Step 1: Mix warm water with a few drops of dish soap in a bucket.
- Step 2: Soak your cloth or sponge in the solution, then wring it out.
- Step 3: Wipe down the item thoroughly, paying attention to corners and crevices.
- Step 4: Rinse the cloth or sponge with clean water and wipe the item again to remove any soap residue.
- Step 5: Allow the item to dry completely before moving on to sanding or painting.
By using this method, you ensure that your surfaces are not only clean but also ready to bond with the chalk paint. Think of it like preparing a canvas for a masterpiece; every little detail counts! Additionally, this technique is perfect for everyday items that may have collected dust over time. So, whether you're refreshing an old chair or preparing a decorative vase, soap and water should be your go-to cleaning solution.
Remember, while soap and water is effective for most cleaning tasks, it may not be sufficient for tougher grime or sticky residues. In such cases, you might want to explore other cleaning agents, but for general use, this method is a winner. It’s straightforward, eco-friendly, and gets the job done!
Q: Can I use any type of soap?
A: While any liquid dish soap will work, it's best to use a gentle formula to avoid damaging the surface of your item.
Q: How long should I let the item dry after cleaning?
A: It’s advisable to let the item dry for at least 30 minutes to ensure that no moisture interferes with the paint application.
Q: Is it necessary to rinse the item after cleaning?
A: Yes, rinsing helps remove any soap residue that can affect the adhesion of the chalk paint.

Degreasers and Solvents
When it comes to prepping your items for a fresh coat of chalk paint, sometimes a simple soap and water solution just won't cut it. That's where come into play. These powerful cleaning agents are designed to tackle tougher grime, grease, and stubborn residues that can hinder the adhesion of your paint. Think of them as the heavy artillery in your cleaning arsenal, ready to blast away any unwanted contaminants that might ruin your project.
Using degreasers and solvents can be a bit daunting, especially if you're not familiar with them. However, understanding how to use these products safely and effectively can make a significant difference in the outcome of your repurposing project. Before diving into the world of solvents, it's essential to know the different types available and how they can best serve your needs.
Here are a few common types of degreasers and solvents you might consider:
- All-Purpose Degreasers: These are versatile cleaners that can be used on various surfaces, making them a great option for general cleaning tasks.
- Citrus-Based Degreasers: Made from natural ingredients, these are effective and environmentally friendly, perfect for those who prefer a more natural approach.
- Solvents (like Acetone or Mineral Spirits): These are stronger options that can dissolve tough stains and residues but should be used with caution due to their potency.
When using degreasers and solvents, always remember to wear protective gear, such as gloves and a mask, to keep yourself safe from fumes and skin irritation. It's also a good idea to work in a well-ventilated area to minimize exposure to any harmful vapors. Now, let's dive into how to use these products effectively.
Start by applying the degreaser or solvent with a clean cloth or sponge, ensuring you cover the entire area that needs cleaning. For stubborn spots, allow the product to sit for a few minutes to penetrate the grime, then scrub gently with a brush or cloth. Rinse the surface thoroughly with water afterward to remove any residue from the cleaner. If you're using a solvent, be sure to follow the manufacturer's instructions for the best results.
In conclusion, degreasers and solvents are invaluable tools in your chalk paint preparation process. They ensure that your surfaces are pristine and ready for that beautiful finish you envision. Just remember to handle them with care, and you'll be well on your way to creating stunning repurposed items that shine with creativity!
Q: Can I use any degreaser for my chalk paint projects?
A: While many degreasers are suitable, it’s best to choose one that is safe for the material you’re cleaning. Always check the label for compatibility.
Q: Are there any natural alternatives to chemical degreasers?
A: Yes! You can use vinegar, baking soda, or citrus-based cleaners as natural alternatives that are effective at cutting through grease.
Q: How do I know if my surface is clean enough for painting?
A: After cleaning, the surface should feel free of any residue or grease. You can do a simple water test; if water beads up, it’s not clean enough.

Sanding and Priming
When it comes to transforming your old items with chalk paint, sanding and priming are two crucial steps that can make or break your project. Think of sanding as the warm-up before the big game; it prepares the surface for the paint, ensuring a smooth and even application. By removing any existing finishes, you create a better bond between the paint and the surface, which is essential for a long-lasting finish.
So, how do you know when to sand? If your item has a glossy finish or any imperfections like scratches or dents, grab your sandpaper! A medium-grit sandpaper (around 120-150 grit) is ideal for most surfaces. Just remember to sand in the direction of the grain to avoid creating scratches that might show through your paint. Once you’re done, give it a good wipe-down to remove any dust particles; a clean surface is key!
Now, let’s talk about priming. While chalk paint has excellent adhesion properties, applying a primer can significantly enhance coverage and durability, especially on porous surfaces like wood or when you’re working with darker colors. Priming is like putting on a base coat before applying your favorite nail polish; it helps the final color pop and ensures it lasts longer. Choose a primer that’s compatible with chalk paint, and use a brush or roller to apply it evenly. Allow it to dry completely before moving on to the fun part—painting!
In summary, here’s a quick rundown of the sanding and priming process:
| Step | Details |
|---|---|
| Sanding | Use medium-grit sandpaper to smooth the surface. Sand in the direction of the grain and clean off dust. |
| Priming | Apply a compatible primer to enhance adhesion and coverage. Allow to dry completely before painting. |
By taking the time to sand and prime your items properly, you’re setting yourself up for success. Not only will your chalk paint adhere better, but the end result will also be a beautiful, professional-looking finish that you can be proud of. So, roll up your sleeves and get ready to create something amazing!
- Do I always need to sand before painting with chalk paint? While it's not mandatory, sanding is highly recommended for glossy surfaces or when you want to ensure better adhesion.
- Can I skip priming if I'm using chalk paint? You can, but priming is beneficial for achieving better coverage and durability, especially on porous or darker surfaces.
- What grit sandpaper should I use? A medium-grit sandpaper (120-150 grit) is ideal for most surfaces when preparing for chalk paint.

Techniques for Applying Chalk Paint
When it comes to applying chalk paint, the technique you choose can make a world of difference in the final look of your project. Whether you're aiming for a smooth, polished finish or a more rustic, textured appearance, understanding the various application methods can help you achieve your desired results. Let's dive into the different techniques that you can use to apply chalk paint effectively, ensuring that your repurposing projects turn out just as you envision them.
One of the most common methods is brushing. This technique allows for precise control and can be particularly beneficial for intricate designs or detailed furniture pieces. When using a brush, opt for a high-quality synthetic bristle brush, as it can help minimize brush strokes and provide an even application. Start by loading your brush with a small amount of paint, and apply it in long, even strokes. Remember, less is more! Overloading the brush can lead to drips and an uneven finish.
On the other hand, rolling is a fantastic option for larger, flat surfaces. A foam roller can cover vast areas quickly and efficiently, making it ideal for tables or cabinets. Just like with brushing, you want to apply the paint in thin layers. This helps to avoid the dreaded roller marks and ensures a smooth finish. For the best results, use a roller with a short nap, which will help you apply the paint evenly without soaking the surface.
If you're looking for a quick and professional finish, using a sprayer might be the way to go. Sprayers can create a flawless, smooth coat that brushes and rollers often can't match. However, using a sprayer requires a bit of practice and preparation. Make sure to set up a well-ventilated area and protect surrounding surfaces from overspray. When using a sprayer, keep the nozzle moving at a consistent speed and distance from the surface to avoid drips and uneven coverage.
To help you choose the right application method for your project, consider the following comparison:
| Technique | Advantages | Best For |
|---|---|---|
| Brushing | Precise control, great for details | Intricate designs, furniture |
| Rolling | Covers large areas quickly | Flat surfaces like tables and cabinets |
| Spraying | Flawless, smooth finish | Large projects, professional look |
As you embark on your chalk paint journey, remember that practice makes perfect. Don't be afraid to experiment with different techniques to find what works best for you. Each method has its charm and can yield stunning results when done correctly. So, grab your chalk paint and let your creativity flow!
Q: Can I use chalk paint on any surface?
A: Yes, chalk paint adheres well to a variety of surfaces, including wood, metal, and even plastic. Just make sure to prepare the surface properly for the best results.
Q: Do I need to seal chalk paint?
A: While chalk paint is durable on its own, sealing it with a topcoat can enhance its longevity and protect against scratches and stains.
Q: How many coats of chalk paint should I apply?
A: Typically, two coats are recommended for optimal coverage, especially if you're working with a lighter color over a darker base.
Q: Can I mix different colors of chalk paint?
A: Absolutely! Mixing chalk paint colors can create unique shades and effects, allowing you to personalize your projects even further.

Brushing vs. Rolling
When it comes to applying chalk paint, two popular techniques stand out: brushing and rolling. Each method has its own set of advantages, and the choice between them can significantly impact the final look of your project. So, which one should you choose? Let's dive into the details!
Brushing is often favored for its precision. When you use a brush, you have the ability to reach into intricate details and corners that a roller might miss. This makes it an excellent choice for items with ornate designs or furniture with carved edges. Not to mention, brushes come in various shapes and sizes, allowing you to select the perfect tool for your specific project. A good quality brush can also create a lovely texture, enhancing the visual appeal of your piece.
On the flip side, rolling can be a real time-saver, especially for larger surfaces. If you're working on a big piece of furniture or a wall, a roller can cover more area in less time. The smooth finish that a roller provides is often less textured than that of a brush, which can be an advantage if you're aiming for a sleek, modern look. However, keep in mind that rolling might not be as effective in those hard-to-reach spots, so you might still need to use a brush for touch-ups.
To help you decide, here’s a quick comparison:
| Criteria | Brushing | Rolling |
|---|---|---|
| Precision | High | Medium |
| Speed | Medium | High |
| Finish Texture | Textured | Smooth |
| Best For | Intricate designs | Large flat surfaces |
Ultimately, the choice between brushing and rolling comes down to your specific project needs. If you enjoy the meticulous nature of brushing and want to highlight details, go for it! If you’re looking to speed up the process and achieve a clean finish on a large surface, rolling might be your best bet. You can even combine both methods! Start with a roller for the bulk of the area and finish off with a brush for those tricky spots. This approach can give you the best of both worlds!
- Can I use any brush for chalk paint? It's best to use a high-quality synthetic brush designed for water-based paints to avoid bristle shedding.
- Do I need to thin chalk paint before using a sprayer? It depends on the sprayer, but generally, thinning is recommended for a smoother application.
- How do I clean my brushes after using chalk paint? Clean your brushes with soap and water immediately after use to maintain their quality.
- Can I mix different brands of chalk paint? Mixing brands can yield unexpected results; it's best to stick with one brand for consistency.

Using a Sprayer
When it comes to applying chalk paint, using a sprayer can be a game changer. Imagine gliding through your painting project with ease, achieving a smooth, even finish that brushes and rollers sometimes struggle to deliver. But before you dive in, there are a few essential tips and tricks to keep in mind to ensure your experience is nothing short of spectacular.
First off, selecting the right sprayer is crucial. There are several types available, including airless sprayers, HVLP (High Volume Low Pressure) sprayers, and even handheld options. Each has its own advantages, but for chalk paint, many enthusiasts recommend HVLP sprayers due to their fine mist and reduced overspray. This means less paint waste and a more controlled application. Take a moment to consider your project size and the level of detail required when choosing your sprayer.
Next, preparing your chalk paint for spraying is key to achieving that flawless finish. Unlike traditional painting methods, sprayers require a specific consistency of paint. You may need to thin your chalk paint slightly with water or a paint thinner to ensure it flows smoothly through the nozzle. A good rule of thumb is to aim for a consistency similar to that of milk. Always check the manufacturer's recommendations for thinning ratios!
Once your paint is ready, it’s time to set up your workspace. Make sure to cover any nearby surfaces with drop cloths to protect them from overspray. Additionally, ensure you’re working in a well-ventilated area, as the fine mist can linger in the air longer than you might expect. Safety first! Wearing a mask and goggles is advisable to protect your lungs and eyes from paint particles.
Now, let’s talk about the application technique. Hold the sprayer about 12 to 18 inches away from the surface you’re painting. Start with a light coat, moving the sprayer in a steady, sweeping motion to avoid drips and uneven coverage. It’s better to apply multiple thin coats than one thick one. This approach not only enhances the finish but also helps the paint adhere better.
If you’re feeling adventurous, you can also experiment with different spraying patterns to achieve unique effects. For example, try angling the sprayer slightly to create a distressed look or layering colors for a more dynamic finish. The possibilities are endless! Just remember to practice on a scrap piece of wood or cardboard before tackling your main project.
Finally, don’t forget about cleaning your sprayer after use. Chalk paint can dry quickly, so it’s essential to clean the sprayer thoroughly to prevent clogging. Follow the manufacturer’s instructions for disassembly and cleaning, ensuring that all paint residues are removed. A well-maintained sprayer will serve you well for many projects to come!
In summary, using a sprayer for your chalk paint projects can elevate your results to a whole new level. With the right tools, preparation, and techniques, you’ll be able to transform your items effortlessly. So, roll up your sleeves, grab that sprayer, and let your creativity flow!
- Can I use any type of sprayer for chalk paint? While you can use different types of sprayers, HVLP sprayers are often recommended for their fine mist and precision.
- Do I need to thin chalk paint before using a sprayer? Yes, thinning your chalk paint to a milk-like consistency is usually necessary for optimal spraying.
- How do I clean my sprayer after using chalk paint? Follow the manufacturer's instructions to disassemble and clean the sprayer thoroughly to prevent clogging.

Finishing Touches and Sealing
After you've poured your heart and soul into your chalk paint project, the last steps can make all the difference in achieving a stunning finish. You might think of finishing touches as the cherry on top of your DIY sundae; they elevate your work from good to absolutely fantastic! So, how do you ensure your repurposed items not only look great but also stand the test of time? Let’s dive into some essential techniques for sealing and finishing your chalk-painted creations.
First things first, choosing the right sealant is crucial. There are various options available, and each has its unique benefits. For example, you can opt for wax, which gives a lovely matte finish and enhances the color depth, or you might prefer a polyurethane sealant for a more durable, glossy look. Here’s a quick comparison of different sealants:
| Sealant Type | Finish | Durability | Application Method |
|---|---|---|---|
| Wax | Matte | Moderate | Buffing with cloth |
| Polyurethane | Glossy | High | Brush or spray |
| Varnish | Satin | High | Brush |
Once you've selected the appropriate sealant, it’s time to apply it. If you’re using wax, make sure to apply it in thin layers using a soft cloth. Remember, less is more! After applying, allow it to dry, and then buff it to a beautiful sheen. For polyurethane or varnish, follow the instructions on the label, ensuring you apply even strokes to avoid streaks or bubbles. It’s often recommended to apply at least two coats, especially for items that will be used frequently.
Now, let’s talk about the importance of curing time. After sealing your project, don’t be too eager to use it right away. Allow it to cure for several days, if not a week, depending on the sealant used. This waiting period is crucial as it helps the finish to harden and adhere properly, ensuring longevity.
In addition to sealing, consider adding some decorative elements to your project. This could be anything from a stencil design to embellishments like knobs, handles, or even fabric accents. These finishing touches can transform a simple project into a statement piece that reflects your personal style.
Finally, always keep in mind that maintenance is key to preserving your chalk-painted items. Regularly dusting and cleaning with gentle solutions will help maintain the finish. If you notice any areas of wear, don’t fret! A quick touch-up with a little chalk paint and a sealant can keep your project looking fresh and vibrant.
- Can I use chalk paint outdoors? Yes, but make sure to seal it properly with a weather-resistant sealant.
- How long does chalk paint take to dry? Typically, it dries to the touch in about 30 minutes, but it’s best to wait a couple of hours before applying a second coat.
- Is it necessary to seal chalk paint? While chalk paint can be used without a sealant, sealing helps protect the finish and makes it more durable.

Creative Repurpose Ideas
When it comes to repurposing with chalk paint, the possibilities are truly endless! Whether you have an old piece of furniture gathering dust or some mundane decor items that lack personality, chalk paint can transform them into stunning focal points in your home. Imagine walking into your living room and seeing a beautifully painted coffee table that was once a boring, drab piece of wood. It’s like giving your items a second chance at life! Let’s dive into some exciting ideas that can spark your creativity and get those DIY juices flowing.
One of the most popular projects is furniture makeovers. Think about that tired old dresser in your bedroom. With a few coats of chalk paint, you can turn it into a chic, modern statement piece. Choose a bold color like deep navy or a soft pastel to match your decor. Not only does this breathe new life into your furniture, but it also adds a personal touch to your space. You can even get creative by mixing colors or adding stencils for a unique design. The key is to envision the potential of what you already have!
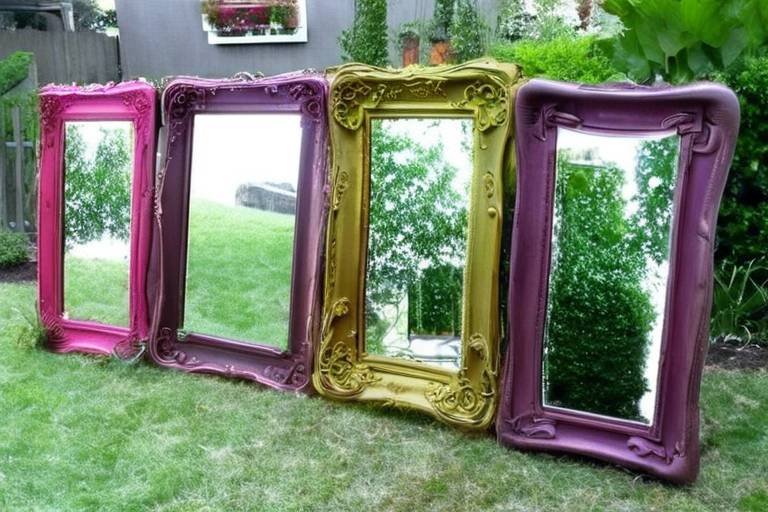
But it’s not just about furniture; home decor accents can also benefit from a little chalk paint magic! Consider repurposing glass jars, picture frames, or even old books. For instance, glass jars can become beautiful vases or storage containers. Simply paint them in a color that complements your room and add some twine or lace for an extra touch. Picture frames can be transformed into chalkboards or used to create a gallery wall that showcases your favorite memories. The beauty of chalk paint is its versatility; it can be applied to almost any surface, allowing you to get as creative as you want.
Moreover, if you have wooden crates lying around, don’t toss them out! With a little chalk paint, they can become stylish storage solutions or even unique side tables. Imagine a rustic crate painted in a soft white, topped with a cozy throw and some decorative pillows. It’s not just functional; it’s a conversation starter!
For those looking to add a touch of whimsy, consider repurposing old chairs. A mismatched set of chairs can be painted in coordinating colors to create a fun dining set that adds character to your kitchen or dining area. You can even paint the seat cushions with chalk paint for an unexpected twist!
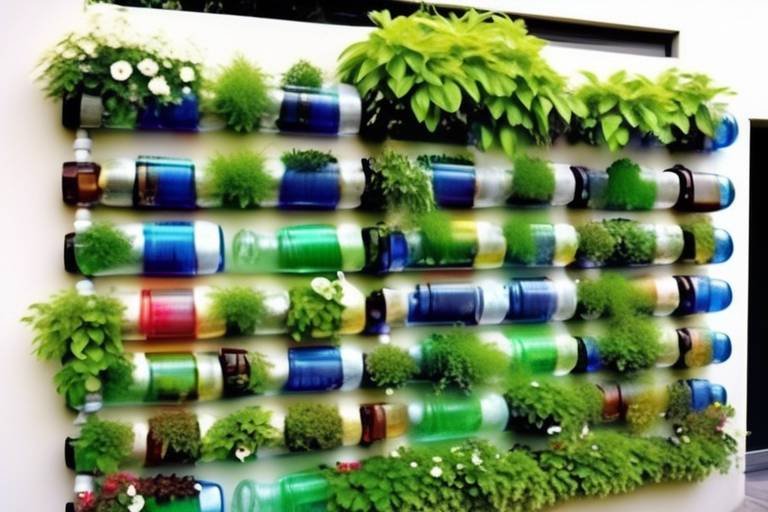
Lastly, don’t forget about outdoor items! Chalk paint can also be used on garden furniture or planters to create a cohesive look in your outdoor space. Imagine a vibrant yellow bench surrounded by colorful flowers, creating a cheerful atmosphere that invites relaxation and enjoyment. The transformation can be so dramatic that your outdoor area feels like a completely new space.
In conclusion, the world of chalk paint is filled with creative opportunities waiting to be explored. By thinking outside the box and viewing your items through a new lens, you can create beautiful decor that reflects your personality and style. So gather your supplies, unleash your creativity, and start your repurposing journey today!
Q: Can I use chalk paint on any surface?
A: Chalk paint is incredibly versatile and can be used on a variety of surfaces, including wood, metal, and even plastic. Just make sure to properly prepare the surface for the best results.
Q: Do I need to sand my items before painting?
A: While sanding isn’t always necessary, it can help create a better bond for the paint, especially on glossy surfaces. Lightly sanding can enhance the finish.
Q: How do I seal my chalk-painted items?
A: To protect your chalk paint, you can use a clear wax or a polyurethane sealant. This will help maintain the finish and durability of your projects.
Q: Can I mix chalk paint colors?
A: Absolutely! Mixing chalk paint colors can create unique shades and effects, allowing you to customize your projects even further.

Furniture Makeovers
Transforming old furniture into stunning pieces with chalk paint is not just a trend; it's a delightful journey into creativity! Imagine taking a tired, worn-out chair or a bland dresser and giving it a fresh lease on life. With chalk paint, the possibilities are endless! It’s like giving your furniture a new wardrobe—one that reflects your personality and style.
One of the most exciting aspects of furniture makeovers using chalk paint is the ability to customize colors and finishes. Whether you prefer a vintage charm or a modern aesthetic, chalk paint can help you achieve that look effortlessly. You can choose from a variety of colors, from soft pastels to bold, vibrant hues. Additionally, you can mix and match colors to create unique shades that suit your taste. It’s like being an artist, but instead of a canvas, you have furniture!
When embarking on a furniture makeover, consider the following popular ideas:
- Chalkboard Furniture: Turn an old side table into a chalkboard surface for notes or doodles, perfect for kids or as a creative workspace.
- Distressed Finishes: Achieve a rustic look by applying multiple layers of paint, then sanding down edges for that shabby chic vibe.
- Ombre Effects: Create a stunning gradient effect on dressers or cabinets for a modern twist that draws the eye.
Before diving into your project, it's essential to visualize the end result. You might want to sketch your ideas or even create a mood board. This preparation can help you stay focused and excited about the transformation ahead. Plus, it’s a great way to experiment with color combinations!
Once you’ve decided on your design, the actual process begins. Start by cleaning your furniture thoroughly to remove any dust or grease. Then, apply a coat of chalk paint. Depending on the look you want, you might need two or three coats. The beauty of chalk paint is that it dries quickly, allowing you to layer without much waiting time.
After painting, don’t forget to seal your masterpiece! A good sealer will protect your furniture from scratches and stains, ensuring that your hard work lasts. You can choose from waxes, polycrylics, or even oils, depending on the finish you desire. Each option has its own unique qualities, so consider what will work best for your specific project.
In conclusion, furniture makeovers with chalk paint are an enjoyable and fulfilling way to breathe new life into old items. Not only do you get to express your creativity, but you also contribute to a more sustainable lifestyle by repurposing rather than discarding. So grab your brushes, unleash your imagination, and let the transformation begin!
Q: Can I use chalk paint on any type of furniture?
A: Yes! Chalk paint works well on most surfaces, including wood, metal, and even plastic. Just ensure you prepare the surface appropriately for the best results.
Q: Do I need to sand my furniture before painting with chalk paint?
A: While it's not always necessary to sand, doing so can help create a better bond between the paint and the surface, especially for glossy finishes.
Q: How do I seal my chalk paint to make it durable?
A: You can use a variety of sealers such as wax, polycrylic, or varnish. Each has its own application method, so choose one that suits your project and desired finish.
Q: Can I mix different colors of chalk paint?
A: Absolutely! Mixing colors can help you create unique shades that fit your decor perfectly. Just make sure to test your mix on a small area first.

Home Decor Accents
When it comes to sprucing up your living space, can make a world of difference. Imagine walking into a room and being greeted by a vibrant, chalk-painted vase or a stunningly transformed picture frame. These small but impactful items can tie a room together, adding personality and flair without breaking the bank. The beauty of using chalk paint is that it allows you to get creative and express your style in ways you might not have thought possible.
One of the best parts about chalk paint is its versatility. You can use it on a variety of materials, including wood, metal, and even glass. For instance, an old glass jar can be transformed into a charming candle holder or a stylish storage container. Just picture it: a beautifully painted jar sitting on your kitchen counter, filled with fresh herbs or colorful utensils. It’s not just decor; it’s a statement piece!
Here are a few ideas to get your creative juices flowing:
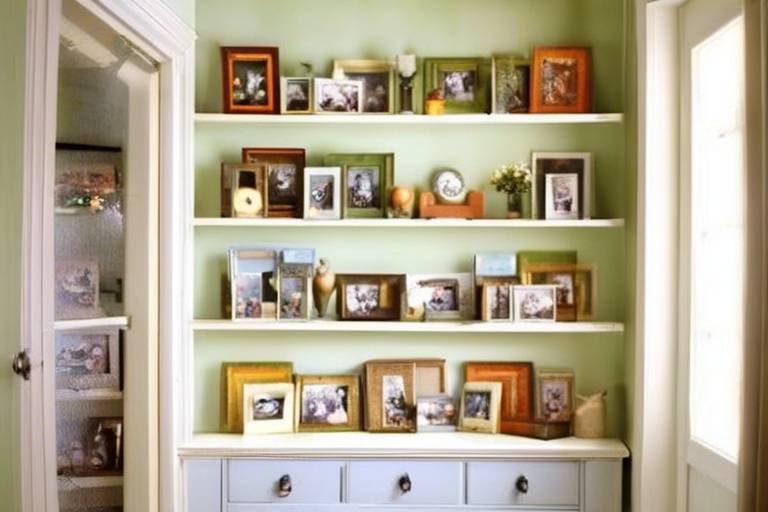
- Picture Frames: Update those outdated frames with a fresh coat of chalk paint. You can choose a color that complements your artwork or go bold with a contrasting shade.
- Vases: Transform plain vases into eye-catching centerpieces. You can even use stencils to add intricate designs for a more personalized touch.
- Wall Art: Consider painting small canvases or wooden boards with chalk paint. You can create abstract designs or inspirational quotes that add character to your walls.
Another exciting project is to repurpose old trays. With a little chalk paint and creativity, you can turn a mundane tray into a stunning serving piece or a decorative catch-all for your entryway. Just imagine guests being wowed by your unique style when they see a beautifully painted tray holding keys, mail, and other small items.
Don't forget about furniture accents! Small tables, stools, and even chairs can be revitalized with a splash of chalk paint. A once-dull side table can become the focal point of your living room, especially when paired with a trendy lamp or decorative books. The key is to choose colors that resonate with your overall decor theme, whether that’s a rustic farmhouse vibe or a sleek modern aesthetic.
As you embark on your chalk paint journey, remember that the process should be as enjoyable as the end result. Experiment with different techniques, such as distressing or layering colors, to achieve a unique look. The more you practice, the more comfortable you’ll become with this transformative medium.
In conclusion, chalk paint opens up a world of possibilities for creating stunning home decor accents. From picture frames to furniture, the only limit is your imagination. So gather your supplies, unleash your creativity, and watch as your home transforms into a beautiful reflection of your personal style!
Q: Can I use chalk paint on any surface?
A: Yes, chalk paint can be used on a variety of surfaces including wood, metal, and glass. However, it's essential to prepare the surface properly for the best results.
Q: Do I need to prime the surface before using chalk paint?
A: Priming is not always necessary, especially if you are painting over a light-colored surface. However, for dark or glossy surfaces, a primer can help improve adhesion and coverage.
Q: How do I seal my chalk paint projects?
A: To seal your chalk paint, you can use a clear wax or a polyurethane topcoat. Applying a sealant will enhance durability and protect your painted items from wear and tear.
Q: Can I mix different colors of chalk paint?
A: Absolutely! Mixing colors can lead to unique shades and tones, allowing you to customize your projects even further.

Maintaining Your Chalk Paint Projects
Once you've transformed your items with beautiful chalk paint, it's crucial to keep them looking fresh and vibrant. Just like a well-tended garden, your chalk-painted projects require a little care to thrive. Whether it's a chic coffee table or a charming picture frame, maintaining these pieces ensures they remain stunning and functional for years to come. The good news? With a few simple practices, you can keep your chalk-painted treasures in top shape!
First and foremost, cleaning your chalk paint projects is essential. Unlike traditional paint, chalk paint has a matte finish that can attract dust and dirt. To clean your items, use a soft, damp cloth and a mild soap solution. Avoid harsh chemicals that can strip the paint or alter its finish. A gentle touch goes a long way—think of it as giving your painted pieces a spa day! For more stubborn stains, you can opt for a specialized chalk paint cleaner, which is designed to be gentle yet effective.
Another important aspect of maintenance is touch-ups. Over time, even the most carefully maintained items can show signs of wear. If you notice scuffs or scratches, don't fret! Simply grab your chalk paint and a small brush to perform a quick touch-up. It's like giving your furniture a little facelift—quick, easy, and incredibly rewarding! Make sure to blend the new paint seamlessly into the existing finish for a flawless look.
To help you remember the best practices for maintaining your chalk paint projects, consider the following tips:
- Regular Cleaning: Wipe down surfaces weekly to prevent dust accumulation.
- Use Coasters: Protect surfaces from moisture and heat by using coasters under drinks.
- Avoid Direct Sunlight: Keep your painted items out of direct sunlight to prevent fading.
- Reapply Sealer: Depending on usage, consider reapplying a sealer every 1-2 years to enhance durability.
Lastly, remember that your chalk paint projects are more than just decorative items; they hold memories and add character to your space. By taking the time to maintain them, you're not only preserving their beauty but also the stories they carry. So, roll up your sleeves and give your chalk-painted treasures the love and care they deserve!
Q: How often should I clean my chalk-painted items?
A: It's best to clean your chalk-painted items weekly to prevent dust and dirt buildup. A soft, damp cloth with mild soap works wonders!
Q: Can I use any kind of cleaner on chalk paint?
A: No, avoid harsh chemicals and abrasive cleaners. Stick to gentle soap solutions or specialized chalk paint cleaners.
Q: What should I do if my chalk paint gets scratched?
A: Simply touch up the scratch with the same chalk paint and a small brush. Blend it in for a seamless finish!
Q: How can I protect my chalk-painted furniture from fading?
A: Keep your items out of direct sunlight and consider using a sealer to protect the finish.

Cleaning and Care Tips
Maintaining the beauty of your chalk-painted projects is essential to ensure they stand the test of time. After all, you’ve put in the effort to transform ordinary items into stunning pieces of decor, so why not keep them looking fresh? Cleaning your chalk-painted surfaces doesn’t have to be a chore; in fact, with the right techniques, it can be quite simple and effective. The first step in this journey is to understand that chalk paint is more porous than traditional paints, which means it can absorb dirt and grime more easily. Therefore, a gentle approach is key.
To start, always use a soft cloth or sponge when cleaning your chalk-painted items. Avoid abrasive materials that can scratch the surface, as this can lead to damage over time. For light cleaning, a mixture of warm water and a few drops of mild dish soap is often sufficient. Simply dampen your cloth in the solution and gently wipe the surface. Rinse with clean water and dry with a soft towel to prevent water spots. This method is particularly effective for surfaces that don’t see heavy use.
However, if your chalk-painted item has accumulated more stubborn dirt or stains, you may need to step up your cleaning game. In such cases, consider using a non-toxic degreaser or a gentle all-purpose cleaner. Just remember to test any cleaner on a small, inconspicuous area first to ensure it won't affect the paint. If you opt for commercial cleaners, look for those specifically labeled as safe for painted surfaces.
Another important aspect of care involves protecting your chalk paint from wear and tear. If your item is a high-traffic piece, such as a table or a chair, applying a protective sealant can make a world of difference. There are several options available, including wax, polyurethane, or even hemp oil, each offering varying degrees of durability and finish. For example, while wax gives a lovely matte finish, polyurethane provides a more robust shield against scratches and spills.
Lastly, it’s crucial to regularly inspect your chalk-painted items for signs of damage. If you notice any chips or scratches, don’t panic! A simple touch-up can work wonders. Just sand the affected area lightly, clean it, and apply a bit of the original chalk paint to restore its beauty. This proactive approach not only keeps your projects looking their best but also extends their lifespan.
Q: Can I use regular soap to clean my chalk-painted furniture?
A: Yes, a mild dish soap mixed with water is perfect for light cleaning. Just make sure to rinse and dry it afterward.
Q: How often should I clean my chalk-painted items?
A: It depends on usage, but a monthly clean is a good rule of thumb for items that see regular use.
Q: What should I do if my chalk paint gets scratched?
A: Simply sand the area lightly, clean it, and apply a touch of chalk paint to fix the scratch.

Touch-Up Techniques
Over time, even the most stunning chalk-painted projects may show signs of wear and tear. But don’t fret! Touching up your chalk paint creations is a simple process that can bring back their original charm and beauty. Think of it like giving your favorite pair of jeans a little TLC—sometimes, they just need a bit of refreshing to look great again!
To begin, you’ll want to assess the areas that need attention. Look for scratches, chips, or faded spots. It’s essential to be thorough in your inspection, as even the smallest imperfections can stand out against the matte finish of chalk paint. Once you've identified the areas that need a touch-up, gather your supplies. You’ll need some chalk paint in the same color you used for your project, a small brush, and a clean cloth.
Here’s a quick rundown of the steps to follow:
- Clean the Area: Use a damp cloth to wipe away any dust or debris around the area you’ll be touching up. This ensures that the paint adheres properly.
- Apply the Paint: Dip your brush into the chalk paint and carefully apply it to the damaged area. Use light strokes to blend the new paint with the existing paint. If you’re working on a larger area, you might want to use a small roller for a more uniform finish.
- Feather the Edges: To avoid noticeable lines where the new paint meets the old, feather the edges by lightly brushing over the transition area. This technique will help blend the touch-up seamlessly into the surrounding paint.
- Let It Dry: Allow the paint to dry completely before assessing if another coat is necessary. Sometimes, one coat is all it takes, but if the area still looks uneven, don’t hesitate to apply a second coat.
- Seal the Touch-Up: Once you’re satisfied with the coverage, consider applying a clear wax or sealer to protect the newly painted area. This will help maintain the durability of your touch-up and keep it looking fresh for longer.
Remember, touch-ups don’t have to be perfect! The beauty of chalk paint lies in its rustic charm, so embrace any slight variations in texture or color. They tell the story of your piece and add character. With these simple touch-up techniques, you can keep your chalk-painted items looking beautiful for years to come!
Q: How long does chalk paint last?
A: With proper care, chalk paint can last for many years. However, high-traffic areas may require more frequent touch-ups.
Q: Can I use chalk paint on outdoor furniture?
A: Yes, but make sure to use a sealer designed for outdoor use to protect against the elements.
Q: Do I need to sand before touching up?
A: It’s not always necessary, but lightly sanding the area can help the new paint adhere better, especially if the old paint has worn down.
Q: What if I can't find the same color chalk paint?
A: You can mix different colors to create a custom shade that matches closely, or consider repainting the entire piece for a fresh look.
Frequently Asked Questions
- What is chalk paint?
Chalk paint is a type of paint that is known for its matte finish and ability to adhere to various surfaces without extensive prep work. It's perfect for DIY projects because it can transform furniture and decor easily, giving them a vintage or distressed look.
- Do I need to sand my furniture before using chalk paint?
While chalk paint adheres well to many surfaces, sanding can help create an even better bond and a smoother finish. If your furniture has a glossy finish or is particularly worn, a light sanding can be beneficial.
- Can I use chalk paint on metal surfaces?
Absolutely! Chalk paint works well on metal surfaces as long as they are properly cleaned and prepared. Just make sure to remove any rust and clean off any grease or dirt before applying the paint.
- What are the best techniques for applying chalk paint?
You can apply chalk paint using various methods, including brushing, rolling, or spraying. Each technique offers different finishes, so it’s best to choose one based on the look you want to achieve. Brushing gives texture, while spraying provides a smooth finish.
- How do I seal my chalk paint projects?
To protect your chalk-painted items, sealing is essential. You can use wax, polyurethane, or a clear coat specifically designed for chalk paint. Each option varies in durability and finish, so choose one that suits your project and lifestyle.
- Can I mix different colors of chalk paint?
Yes! Mixing different colors of chalk paint can create unique shades and effects. It's a fun way to personalize your projects. Just make sure to test your mixture on a small area first to see how it looks once dry.
- How can I maintain my chalk-painted furniture?
To keep your chalk-painted furniture looking fresh, use a damp cloth for cleaning and avoid harsh chemicals. Regular touch-ups can help maintain its appearance, especially in high-traffic areas.
- Is chalk paint suitable for outdoor projects?
While some chalk paints are designed for outdoor use, many are not. If you plan to use chalk paint for outdoor items, look for products specifically labeled for outdoor use to ensure durability against the elements.
- How long does chalk paint take to dry?
Chalk paint typically dries quickly, usually within 30 minutes to an hour, depending on the thickness of the application and environmental conditions. However, it’s best to wait a few hours before applying a second coat or sealing.