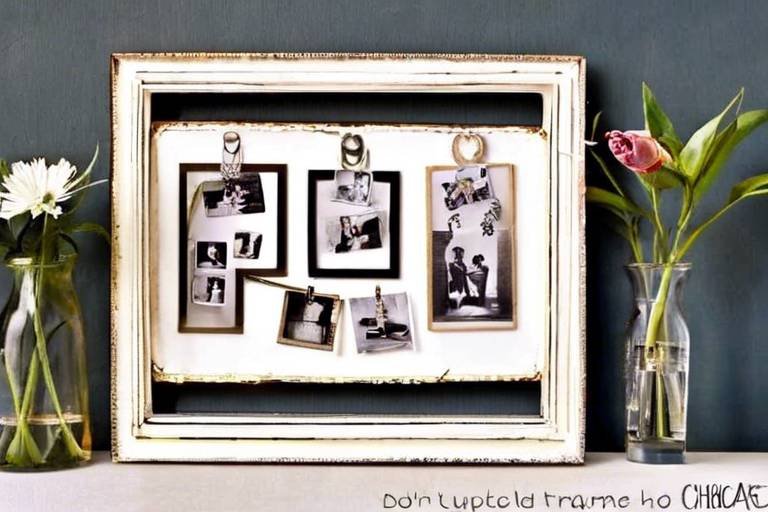
How to Repurpose Old Luggage into Funky Furniture
Are you tired of seeing your old luggage collecting dust in the attic or garage? Instead of tossing it out, why not transform it into something truly spectacular? Repurposing old luggage into funky furniture pieces is not only a sustainable way to give new life to forgotten items, but it also adds a touch of unique charm to your home. Imagine a coffee table made from a vintage suitcase or a quirky bookshelf that tells a story of travel and adventure. In this article, we’ll explore creative ways to turn your old luggage into stylish and functional furniture pieces that will wow your guests and spark conversations.
When it comes to repurposing old luggage, selecting the perfect piece is crucial. You want to ensure that your chosen luggage not only looks appealing but also serves its intended purpose effectively. Start by considering the size of the luggage; larger pieces can make great tables or benches, while smaller ones might be better suited as decorative accents. Next, assess the condition of the luggage. A piece with a sturdy frame and intact hinges will stand up better to the demands of furniture use. Finally, don’t overlook style—whether it’s a classic vintage look or a bold, colorful design, the right luggage can set the tone for your entire project.
Before diving into your exciting project, it's important to gather the necessary tools and materials. This preparation will ensure a smooth and enjoyable crafting experience. Here’s a quick overview of what you’ll need:
- Basic Tools: Saws, drills, screwdrivers, and adhesives are essential for transforming your luggage.
- Decorative Materials: Paint, fabric, and hardware can enhance the aesthetic appeal of your final piece.
Having the right tools can make all the difference in your repurposing project. Here’s a detailed list of essential tools you’ll want to have on hand:
| Tool | Purpose |
|---|---|
| Saw | To cut the luggage or create legs for tables. |
| Drill | For making holes and securing pieces together. |
| Adhesive | To bond surfaces securely. |
Safety should always come first when working on any DIY project. It’s essential to wear protective gear, such as goggles and gloves, to keep yourself safe while crafting. Remember, it’s better to be safe than sorry, especially when using tools that can cause injury.
Now that you have your tools ready, let’s talk about decorative materials. You can explore a variety of options, such as:
- Paint: A fresh coat can completely change the look of your luggage.
- Fabric: Upholstering with vibrant fabrics can add a cozy touch.
- Hardware: Unique knobs and handles can enhance functionality and style.
Unleash your creativity with innovative design ideas for transforming luggage into furniture. Here are a few inspirations to get you started:
- Coffee Tables: Stack two suitcases together and add legs for a unique coffee table.
- Storage Benches: Use a large suitcase as a bench seat with storage inside.
- Bookshelves: Attach luggage to the wall to create a quirky bookshelf that showcases your favorite reads.
Ready to get started? Follow this comprehensive guide to successfully repurpose your old luggage. Each step is broken down clearly, ensuring you can achieve professional-looking results regardless of your crafting skills.
Before you start the transformation process, it’s essential to properly prepare and clean your luggage. This step not only ensures the best results but also enhances the longevity of your newly created furniture. Begin by wiping down the exterior and interior with a damp cloth to remove dust and dirt. If your luggage has any lingering odors, consider using a mixture of vinegar and water to freshen it up. Once clean, let it dry completely before moving on to the next steps.
Discover various assembly techniques that will help you securely attach components and ensure stability in your furniture. Whether you’re adding legs to a suitcase coffee table or creating a multi-level bookshelf, proper assembly is key to creating functional and durable pieces. Use screws and brackets for a strong hold, and don’t be afraid to get creative with your designs!
Finishing touches can elevate your repurposed luggage furniture from good to great. This is the time to get artistic! Consider painting or staining your luggage to match your home decor. Adding hardware like handles or decorative knobs can also give your project a polished and professional look.
Applying protective coatings is essential for durability. Sealants and varnishes can help preserve your furniture and keep it looking fresh. Choose a finish that complements your design while providing the protection your furniture needs.
Finally, learn how to style your repurposed luggage furniture within your home. Consider color coordination, placement, and accessorizing to showcase your unique creations beautifully. A well-styled piece of furniture can become a focal point in your room, sparking conversations and admiration from guests.
1. Can any type of luggage be repurposed?
Yes! While vintage suitcases are popular, any sturdy luggage can be transformed into furniture. Just ensure it’s in good condition.
2. Is it difficult to repurpose luggage?
Not at all! With the right tools and a bit of creativity, anyone can tackle a repurposing project.
3. How do I maintain my repurposed luggage furniture?
Regular cleaning and applying a protective coating will help maintain its appearance and durability.
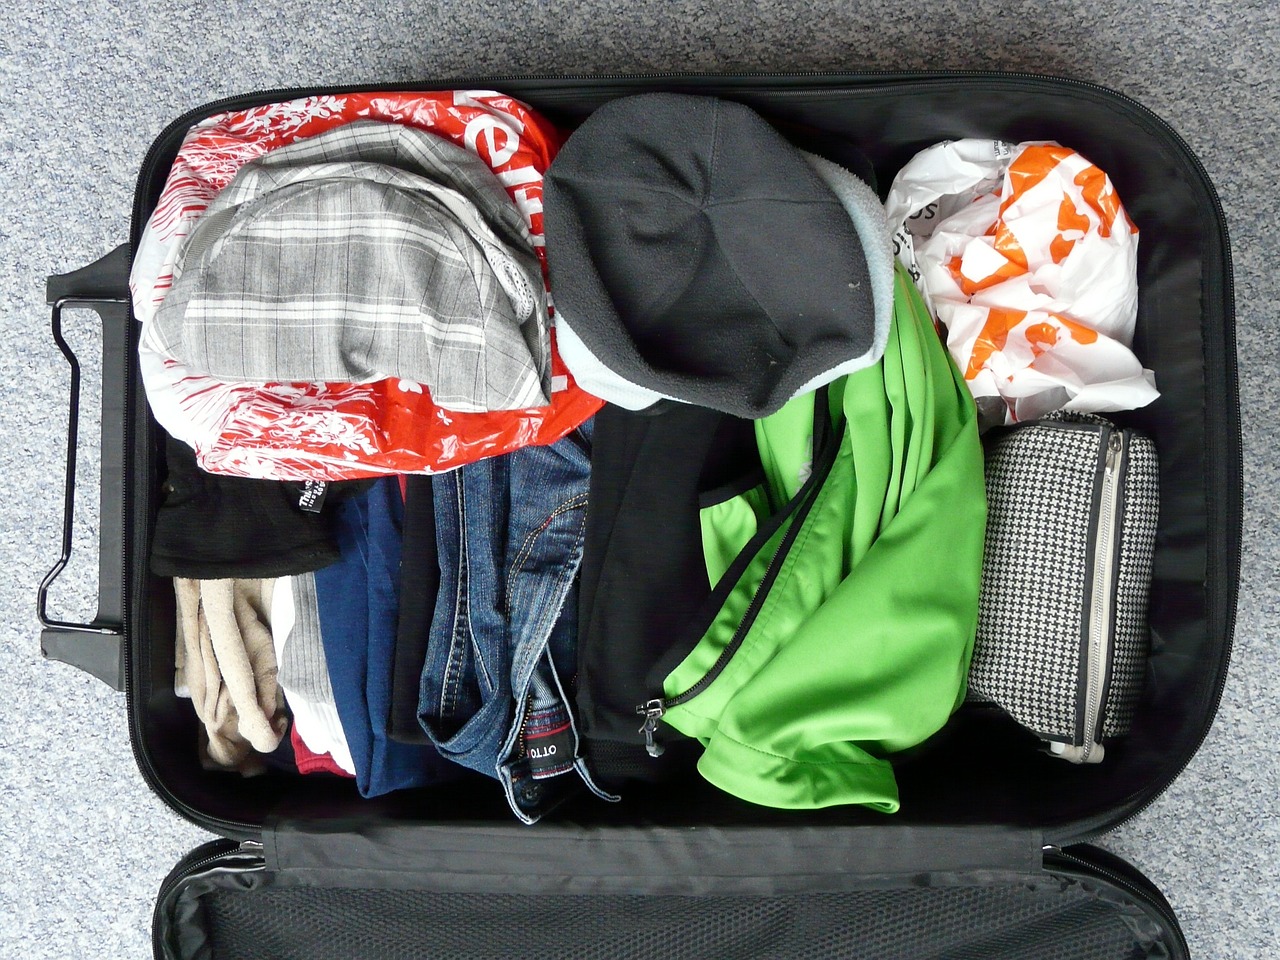
Choosing the Right Luggage
When it comes to transforming old luggage into funky furniture, the first step is all about choosing the right pieces. You might be wondering, "What makes a suitcase suitable for repurposing?" Well, it’s not just about picking any old bag off the shelf. You need to consider several factors to ensure your project turns out fabulous and functional.
First and foremost, think about the size of the luggage. Are you envisioning a stylish coffee table or a quirky nightstand? The size will dictate how you can use the luggage in your space. A larger suitcase might work wonders as a trunk-style coffee table, while a smaller one could be perfect for a bedside table. The key is to visualize how the luggage will fit into your existing décor.
Next up is the condition of the luggage. You want to look for pieces that have a sturdy structure. Check for any signs of damage, such as broken clasps, worn-out handles, or significant rust. A suitcase in good condition will be much easier to work with and will ensure your furniture piece is durable and reliable. However, don’t shy away from a little wear and tear; sometimes, those scuffs and scratches can add character, giving the piece a vintage vibe.
Now, let’s talk about style. Old luggage comes in a myriad of designs, from classic leather to funky patterned hard-shell cases. Choose a style that resonates with your personal taste and complements your home’s aesthetic. For instance, a chic, retro suitcase can become a standout piece in a modern living room, while a vintage trunk can add charm to a rustic or farmhouse setting. Remember, the luggage you select should not only serve a purpose but also reflect your unique style.
To help you in your quest for the perfect luggage, here are some tips to keep in mind:
- Research: Look for inspiration online or in thrift stores to see what others have done with their repurposed luggage.
- Visit local shops: Thrift stores, flea markets, and garage sales are treasure troves for finding unique pieces.
- Consider functionality: Think about how you plan to use the furniture. Will it be purely decorative, or do you need it to serve a specific function?
In summary, selecting the right luggage for your project is a crucial step that can make or break your furniture transformation. By considering size, condition, and style, you're setting yourself up for success. So, keep your eyes peeled for those hidden gems that just beg to be repurposed into something extraordinary!
Essential Tools and Materials
Before diving into the exciting world of repurposing old luggage into funky furniture, it's essential to gather all the tools and materials you'll need for a smooth crafting experience. Think of this phase as setting the stage for a fantastic performance; without the right props, your show might not go as planned! So, let's explore what you need to bring your creative vision to life.
First and foremost, you'll want to have a solid set of basic tools at your disposal. These are the unsung heroes of your project, enabling you to cut, drill, and assemble your luggage with ease. Here’s a quick rundown of some must-have tools:
- Hand Saw: Perfect for cutting through the sturdy material of your luggage.
- Drill: Essential for making holes for screws or securing pieces together.
- Adhesives: Strong glue or epoxy will help bond materials that screws can’t reach.
- Screwdriver: You’ll need this for attaching hardware and securing components.
But wait, safety first! Before you start wielding those tools, make sure you have the right safety equipment. Protective gear is not just a suggestion; it's a necessity. A pair of goggles will shield your eyes from dust and debris, while gloves will protect your hands from sharp edges and splinters. Remember, a little precaution goes a long way in ensuring a fun and accident-free crafting session!
Now that we’ve covered tools and safety, let’s talk about decorative materials. This is where your personality can shine through! Think of paint, fabric, and hardware as the icing on the cake. These elements not only enhance the aesthetic appeal of your repurposed luggage but also allow you to customize your furniture to fit your unique style. For instance, you could use vibrant colors to make a statement piece or opt for muted tones for a more classic look. Additionally, consider adding some funky hardware like vintage handles or decorative knobs to give your furniture that extra flair.
To help you visualize your project better, here’s a simple table summarizing the essential tools and materials:
| Tool/Material | Purpose |
|---|---|
| Hand Saw | Cutting through luggage material |
| Drill | Making holes for screws |
| Adhesives | Bonding materials together |
| Screwdriver | Attaching hardware |
| Goggles | Eye protection |
| Gloves | Hand protection |
| Paint/Fabric | Decoration and customization |
| Hardware | Adding unique touches |
In conclusion, gathering the right tools and materials is the first step towards transforming your old luggage into stunning furniture. Each item plays a vital role in your project, so take your time to select what resonates with your vision. With your toolkit ready and your creative juices flowing, you’re all set to embark on this exciting journey of repurposing!
Here are some common questions you might have as you begin your journey of repurposing luggage into furniture:
- What type of luggage is best for repurposing? Vintage suitcases often work best due to their sturdy construction and unique designs.
- Can I use damaged luggage? Yes! Damaged luggage can add character to your project, and you can often fix minor issues during the repurposing process.
- How do I ensure my furniture is stable? Proper assembly techniques and using strong adhesives or screws will help maintain stability.
- What finishes are best for protecting my project? Sealants and varnishes are excellent for preserving the look and durability of your repurposed furniture.
Basic Tools for Repurposing
When it comes to transforming your old luggage into funky furniture, having the right tools is crucial. Think of your tools as the magic wands that will help you bring your creative vision to life. You don’t need a full workshop to get started; a few basic tools will do the trick. First and foremost, a good handsaw or a jigsaw is essential for cutting through the hard shell of the suitcase. If you’re dealing with wooden components, a circular saw might also come in handy. Remember, the right saw can make your cuts clean and precise, which is vital for a polished finish.
Next up, you’ll need a drill. This tool is not only useful for creating holes but also for driving screws into place. A cordless drill can provide the flexibility you need to maneuver around your project easily. Don’t forget to stock up on various drill bits to tackle different materials, whether it’s metal, wood, or plastic.
Adhesives are another key player in your repurposing toolkit. A strong wood glue or epoxy can bond materials together securely, ensuring your furniture remains stable for years to come. For those smaller details, a hot glue gun can be a lifesaver, especially when attaching decorative elements.
Now, let’s talk about screwdrivers. Having both flathead and Phillips screwdrivers will allow you to tackle various screws you might encounter in your luggage. And while you’re at it, a measuring tape is indispensable for ensuring your dimensions are spot on. After all, there’s nothing worse than cutting a piece too short!
To keep your workspace safe and organized, invest in a good workbench or a sturdy table. This will provide a solid surface for your projects and help you avoid accidents. And speaking of safety, don’t skip on protective gear like goggles and gloves. These will protect you from dust and sharp edges, allowing you to focus on your creativity without worry.
Here’s a quick overview of the basic tools you’ll need for your repurposing adventure:
| Tool | Purpose |
|---|---|
| Handsaw/Jigsaw | Cutting through luggage material |
| Drill | Creating holes and driving screws |
| Adhesives | Bonding materials together |
| Screwdrivers | Fastening screws |
| Measuring Tape | Ensuring accurate dimensions |
| Workbench | Providing a stable working surface |
| Protective Gear | Safety while working |
With these tools at your disposal, you’ll be well-equipped to tackle any repurposing project that comes your way. Remember, the journey of transforming old luggage into stylish furniture is not just about the end product; it’s about enjoying the creative process. So, roll up your sleeves and get ready to unleash your inner designer!
- What type of luggage is best for repurposing? Vintage suitcases, especially those with unique designs or materials, tend to work best.
- Do I need advanced skills to repurpose luggage? Not at all! Basic crafting skills and a willingness to learn are all you need.
- Can I use any type of adhesive? It’s best to use adhesives designed for the materials you’re working with for a strong bond.
- How can I ensure my new furniture is durable? Proper assembly, finishing touches, and protective coatings will enhance durability.
Safety Equipment
When diving into the exciting world of repurposing old luggage into funky furniture, safety should always take center stage. Just like a superhero dons their cape, you too should gear up to protect yourself from potential hazards. Imagine wielding a saw or a drill without the right protective gear; it’s like going into battle without armor! So, let’s talk about the essential safety equipment you’ll need to ensure a smooth crafting experience.
First and foremost, a good pair of goggles is non-negotiable. Whether you’re sanding down rough edges or cutting through tough materials, goggles will shield your eyes from dust and debris. It’s all about keeping those peepers safe so you can see your masterpieces come to life without any interruptions. Alongside goggles, a sturdy pair of gloves is crucial. Not only do they protect your hands from sharp tools, but they also provide a better grip, allowing you to handle your materials with ease. Think of gloves as your trusty sidekick in this creative adventure!
Additionally, if you’re going to be working with paints or adhesives, a good quality mask is essential. Many of these substances release fumes that can be harmful if inhaled over time. Wearing a mask is akin to putting on a filter that helps you breathe easier while you work on your projects. And let’s not forget about ear protection! If you’re using power tools, those sounds can get pretty loud, and protecting your hearing is just as important as shielding your eyes and skin.
Here’s a quick rundown of the essential safety equipment you should consider:
- Safety Goggles - Protects your eyes from dust and debris.
- Work Gloves - Safeguards your hands and improves grip.
- Respirator Mask - Filters out harmful fumes from paints and adhesives.
- Ear Protection - Reduces noise exposure from power tools.
By equipping yourself with these safety essentials, you’re not just preparing for a project; you’re setting the stage for a successful and enjoyable crafting experience. Remember, the goal is to create without fear, so take the time to gear up properly. After all, a little preparation goes a long way in ensuring that your creative journey is both fun and safe!

Decorative Materials
When it comes to transforming old luggage into stunning furniture, the choice of can make all the difference. Think of these materials as the icing on the cake, adding flair and personality to your creations. First and foremost, paint is an essential tool in your arsenal. Whether you opt for a vibrant hue or a muted tone, paint can breathe new life into worn luggage, allowing you to customize it to match your home’s aesthetic. Consider using chalk paint for a matte finish that evokes a vintage feel or spray paint for a sleek, modern look.
Next up is fabric. Upholstering parts of your luggage can create a cozy and inviting appearance. Imagine adding a plush cushion to the top of a suitcase to create a chic ottoman or lining the interior with colorful fabric to serve as a stylish storage solution. You can choose from a variety of materials such as cotton, velvet, or even faux leather, depending on the vibe you want to achieve. To help you visualize your options, here’s a quick table of popular fabric choices:
| Fabric Type | Best For |
|---|---|
| Cotton | Easy to clean and versatile for various designs |
| Velvet | Adds a touch of luxury and softness |
| Faux Leather | Durable and stylish, great for a modern look |
Don’t forget about hardware! Adding unique knobs, handles, or hinges can elevate your piece from ordinary to extraordinary. Look for vintage or eclectic hardware at thrift stores or online marketplaces to give your luggage a distinctive flair. The right hardware not only enhances functionality but also adds character, making your furniture truly one-of-a-kind.
Finally, consider using accessories to complete your design. Items like stencils for artistic designs or decoupage materials can introduce an unexpected twist. You might even want to add some decorative legs to your suitcase table for added height and style. The key is to let your imagination run wild—after all, this is your chance to create something uniquely yours!
In conclusion, the decorative materials you choose are crucial in defining the final look of your repurposed luggage furniture. By experimenting with paint, fabric, hardware, and accessories, you can craft pieces that are not only functional but also serve as conversation starters in your home.
- What type of luggage is best for repurposing? Look for sturdy pieces that are in good condition, preferably vintage styles that have character.
- Can I use any paint on luggage? It's best to use paint designed for the material of your luggage, such as acrylic or chalk paint for fabric and metal.
- How do I ensure my repurposed furniture is durable? Use protective coatings like sealants and varnishes to enhance durability and longevity.
- What tools do I need for repurposing luggage? Essential tools include saws, drills, adhesives, and safety equipment like goggles and gloves.

Creative Design Ideas
When it comes to transforming old luggage into stunning furniture pieces, the only limit is your imagination! Think of your vintage suitcases as a blank canvas, just waiting for your creative touch. One of the most popular ideas is to turn an old suitcase into a coffee table. By stacking two or three suitcases of varying sizes, you can create a unique and eye-catching focal point in your living room. Simply secure them together with sturdy brackets and add a piece of glass on top for a smooth surface. This not only gives you a stylish table but also provides hidden storage for magazines or remote controls.
Another fantastic option is to create a bench or seating area. By using a larger suitcase, you can add a comfortable cushion on top and use it as a quirky bench in your hallway or at the foot of your bed. Imagine the surprise on your guests' faces when they see a beautifully upholstered suitcase as a seating option! You can even paint or decoupage the exterior for added flair, making it truly one-of-a-kind.
If you're looking for something more functional, consider turning your luggage into a storage unit. By securing a suitcase to the wall, you can create a floating shelf that's perfect for displaying books, plants, or decorative items. This approach not only saves space but also adds a vintage charm to your home decor. You can match the suitcase color with your existing decor or go bold with bright hues to make a statement.
For those who love the outdoors, why not transform an old suitcase into a planter? Cut out the bottom of the suitcase, fill it with soil, and plant your favorite flowers or herbs. This quirky garden feature will undoubtedly be a conversation starter at your next barbecue! Just make sure to line the inside with plastic to prevent water damage.
Finally, consider creating a nightstand by stacking a few smaller suitcases beside your bed. This not only adds a vintage touch to your bedroom but also provides ample storage for books, glasses, or personal items. You can even attach legs to the bottom suitcase for added height and stability, making it a functional piece that complements your decor.
With these creative design ideas, the possibilities are endless! Whether you’re crafting a conversation piece or a practical storage solution, repurposing old luggage allows you to express your creativity while being eco-friendly. So gather your tools and let your imagination soar!
- Can I use any type of luggage for these projects? Absolutely! While vintage suitcases add charm, any sturdy luggage can be repurposed.
- How do I clean my old luggage before starting? Use a damp cloth to wipe down the exterior, and for stubborn stains, a gentle cleaner may be used. Ensure it’s completely dry before proceeding.
- What if my suitcase has a strong odor? You can deodorize it by placing baking soda inside and letting it sit for a few days, or using activated charcoal.
- Do I need to seal my finished furniture? Yes, applying a protective coating will enhance durability and keep your project looking fresh for years to come.
Step-by-Step Repurposing Guide
Transforming your old luggage into stylish furniture can be an exciting journey, and with the right guidance, you can achieve stunning results. This step-by-step guide will walk you through the entire process, ensuring you feel confident and inspired at each stage. Let's dive into the details!
First and foremost, it’s essential to start with a solid plan. Before you even pick up your tools, take a moment to envision what you want to create. Are you dreaming of a chic coffee table that doubles as storage? Or perhaps a quirky nightstand that tells a story? Having a clear vision will guide your decisions throughout the project.
Once you have your idea, it's time to gather your materials. Ensure you have all the necessary tools and decorative elements ready to go. Here’s a quick overview of what you might need:
| Tools | Purpose |
|---|---|
| Saw | To cut the luggage into desired shapes. |
| Drill | For creating holes for screws or attaching hardware. |
| Adhesive | To bond various materials together securely. |
Now that you have your tools and materials, the first practical step is preparation and cleaning. Dust off your luggage and give it a thorough clean. You want to remove any lingering odors or stains that could affect your finished piece. A mixture of warm water and mild soap usually does the trick. Make sure to dry it completely before proceeding, as moisture can lead to mold or deterioration.
Next, it’s time for the fun part: assembly. Depending on your design, you might need to cut the luggage or attach legs for stability. If you're creating a coffee table, for instance, you might want to cut the suitcase in half and attach a sturdy base. Use your drill to secure everything in place, ensuring that each component is stable and ready for use. Remember, a well-assembled piece not only looks good but also lasts longer!
After your assembly is complete, it's time to focus on the finishing touches. This is where you can really let your creativity shine! Consider painting the luggage in a color that complements your home decor or adding some vintage hardware for an extra flair. Don’t forget to apply a protective coating, such as varnish or sealant, to keep your furniture looking fresh and new. This step is crucial for durability, especially if your piece will be used frequently.
Finally, once everything is set and dry, it’s time to style your new furniture. Place it in your desired location and accessorize it with items that match your home’s aesthetic. A few decorative books, a plant, or a quirky lamp can really bring your repurposed luggage to life. Remember, the goal is to create a piece that not only serves a function but also adds character to your space!
With these steps, you’re well on your way to transforming your old luggage into a unique furniture piece that will surely impress your friends and family. So, roll up your sleeves, unleash your creativity, and enjoy the process of upcycling!
Q: Can any type of luggage be repurposed?
A: While most luggage can be repurposed, hard-shell suitcases tend to work best for furniture projects due to their sturdiness. Soft-sided luggage may not hold up as well.
Q: What if my luggage has a lot of wear and tear?
A: Don’t worry! Wear and tear can add character to your piece. If you prefer a cleaner look, consider using paint or fabric to cover up any imperfections.
Q: How do I ensure my repurposed furniture is stable?
A: Proper assembly is key. Make sure to use strong adhesives and screws, and test the stability of your piece before using it.
Q: Can I use my repurposed luggage outdoors?
A: If you plan to use your furniture outdoors, be sure to apply a weather-resistant sealant and choose materials that can withstand the elements.

Preparation and Cleaning
Before diving into your exciting journey of transforming old luggage into funky furniture, it’s essential to start with a solid foundation. The preparation and cleaning process is crucial for ensuring that your creative project not only looks fabulous but also stands the test of time. First, take a good look at your chosen pieces of luggage. Are they dusty, stained, or perhaps showing signs of wear? Don’t worry! With a little bit of elbow grease, you can restore them to their former glory.
Begin by emptying the luggage completely. It’s tempting to leave a few trinkets inside, but trust me, you’ll want a clean slate to work with. Once emptied, give the exterior a thorough wipe down with a damp cloth to remove any dust or dirt. For tougher stains, a mixture of mild soap and warm water can work wonders. Just be sure to avoid soaking the luggage, especially if it’s made of leather, as excess moisture can cause damage.
Next, let’s tackle the interior. Depending on how long the luggage has been sitting around, you may encounter some unpleasant odors or remnants of its past travels. To freshen things up, sprinkle some baking soda inside and let it sit for a few hours before vacuuming it out. This little trick is like giving your luggage a spa day! If you encounter any stubborn stains, consider using a fabric cleaner specifically designed for the material of your luggage.
After cleaning, inspect the luggage for any necessary repairs. Look for broken clasps, torn fabric, or worn-out zippers. If you find any issues, don’t fret! A little creativity can go a long way. For example, if a zipper is broken, you might consider replacing it with a decorative latch or turning it into a unique storage piece that doesn’t require a zipper at all. Remember, imperfections can add character to your creation!
Once everything is clean and in good condition, it’s time to let your luggage dry completely. This step is vital! If you skip it, you risk trapping moisture inside, which can lead to unpleasant smells or mold growth later on. Place the luggage in a well-ventilated area, preferably outdoors, but out of direct sunlight to avoid fading its colors.
In summary, proper of your old luggage sets the stage for a successful repurposing project. By taking the time to clean, inspect, and repair, you’ll ensure that your furniture not only looks good but also functions well. So, roll up your sleeves and get ready to transform those vintage suitcases into stunning pieces of furniture that tell a story!
- How do I choose the right luggage for repurposing? Look for luggage that is sturdy, has a unique design, and is in good condition. Vintage suitcases often have character and charm, making them perfect for repurposing.
- Can I use damaged luggage? Absolutely! Damaged luggage can often be repaired or creatively transformed into something entirely new. Embrace the imperfections!
- What are some easy projects for beginners? Start with simple projects like a coffee table or a storage ottoman. These are great ways to dip your toes into the world of furniture repurposing.
Assembly Techniques
When it comes to transforming old luggage into stunning furniture, mastering the right assembly techniques is crucial. You want your creations not only to look fabulous but also to be sturdy and functional. Think of assembly as the backbone of your project; without it, your beautiful design could easily fall apart. So, let’s dive into some essential techniques that will help you assemble your luggage furniture like a pro.
First and foremost, you'll want to ensure that your luggage is in good condition. Check for any weak seams or damaged areas that may require reinforcement. Once you’ve prepped your luggage, consider how you plan to use it. Are you turning it into a coffee table, a bench, or perhaps a unique storage solution? The intended use will dictate the assembly method you choose.
One popular technique for securing luggage pieces is using brackets and screws. These provide a strong hold, especially if you are combining multiple suitcases into one piece. For instance, if you’re stacking suitcases to create a side table, placing metal brackets at the corners will not only stabilize the structure but also add a touch of industrial flair. Make sure to use screws that are appropriate for the material of your luggage—too long, and they might poke through the other side!
Another effective method is using wooden dowels or pegs. This technique is particularly useful for creating a seamless look. You can drill holes into the luggage where you want to attach additional pieces, insert the dowels, and secure them with glue. This not only provides a strong connection but also allows for a cleaner aesthetic. Just remember to measure twice and cut once—precision is key!
For those looking for a more temporary solution, consider using heavy-duty adhesive. This is especially handy when you're working with lighter pieces or if you want to avoid drilling holes in your vintage luggage. However, keep in mind that while adhesives can provide a quick fix, they may not hold up as well under heavy use. Always check the manufacturer's instructions for drying times and weight limits.
Lastly, don’t forget about the finishing touches! Adding decorative hardware, such as handles or locks, can not only enhance the visual appeal of your furniture but also serve as functional elements. For example, if you’re creating a bench, consider using old suitcase handles as part of the design. Not only does it give a nod to the original piece, but it also adds character.
In summary, the assembly techniques you choose will significantly impact the durability and style of your repurposed luggage furniture. Whether you opt for screws, dowels, or adhesives, remember that each method has its strengths. So grab your tools, unleash your creativity, and start building something fabulous!
- Can I use any type of luggage for furniture projects?
While you can technically use any type of luggage, vintage suitcases with sturdy frames and unique designs tend to work best for furniture projects. - What tools do I need for assembly?
A basic toolkit including a drill, screws, brackets, and wood glue will usually suffice for most assembly tasks. - How can I ensure my furniture is stable?
Make sure to reinforce joints with brackets or screws and consider the weight distribution of your furniture piece. - What type of finish should I use on my furniture?
Using a protective coating like varnish or sealant can help preserve the appearance and durability of your repurposed luggage.
Finishing Touches
Once you've transformed your old luggage into a stunning piece of furniture, it's time to focus on the that will truly make your creation shine. Think of this stage as the cherry on top of your sundae; it’s what elevates your piece from good to extraordinary. Whether you're looking to add a splash of color or a touch of elegance, the right finishing techniques can enhance the overall aesthetic and functionality of your repurposed luggage.
First up, painting or staining your furniture can dramatically change its appearance. If you want to keep the vintage vibe, consider using a transparent stain that highlights the natural wood grain. On the other hand, if you're feeling bold, a bright color can turn your luggage into a statement piece. Make sure to choose paints that are suitable for the material of your luggage; acrylics work well for fabric, while spray paints can be great for hard surfaces.
Next, let’s talk about hardware. Adding new knobs, handles, or hinges can not only improve functionality but also add a unique flair to your furniture. You can find a variety of decorative hardware at local craft stores or online. Mix and match styles to create an eclectic look that reflects your personality. For example, pairing vintage suitcase latches with modern drawer pulls can create a fascinating contrast that draws the eye.
After you’ve painted and added hardware, it’s essential to give your piece a protective coating. This step is crucial for ensuring your furniture withstands the test of time. Options like sealants and varnishes not only protect against scratches and stains but also provide a beautiful finish. When applying these coatings, make sure to follow the manufacturer’s instructions carefully to achieve the best results. A well-applied coat can turn your luggage into a durable piece that remains stunning for years to come.
Finally, styling your newly created furniture is where the real fun begins! Consider how your piece will fit into your existing decor. Will it serve as a bold centerpiece in your living room, or perhaps as a charming side table in your bedroom? Use accessories like books, plants, or decorative items to enhance its look. Color coordination is key here; try to match or complement the colors of the rest of the room. For instance, if your luggage is painted a vibrant teal, consider adding some cushions or throws that incorporate similar shades.
In conclusion, the finishing touches you apply to your repurposed luggage can transform it into a functional work of art. By focusing on painting, hardware, protective coatings, and styling, your old luggage can become a standout piece in your home. So, unleash your creativity and let your personality shine through, because these final details are what will make your furniture truly unique!
- What type of paint should I use on my luggage? It's best to use acrylic paint for fabric and spray paint for hard surfaces. Make sure the paint is suitable for the material you're working with.
- How do I ensure my furniture is durable? Applying a protective coating like sealant or varnish will help preserve your furniture and protect it from scratches and stains.
- Can I mix different styles of hardware? Absolutely! Mixing different styles can create a unique and eclectic look that adds character to your piece.
- What accessories work well with repurposed luggage furniture? Consider using plants, books, or decorative items that complement the colors and style of your luggage to enhance its appearance.
Protective Coatings
When it comes to transforming your old luggage into stunning furniture pieces, one of the most crucial steps is applying . Think of these coatings as the armor that shields your creations from the wear and tear of everyday life. Just like a knight wouldn’t head into battle without their armor, you shouldn’t finish your project without ensuring it’s protected. Not only do these coatings enhance the durability of your furniture, but they also add an appealing finish that can make your piece stand out.
There are several types of protective coatings available, each with its unique benefits. For instance, sealants are fantastic for providing a waterproof barrier, making them ideal for pieces that might encounter spills or humidity. On the other hand, varnishes offer a glossy finish that can enhance the natural beauty of the materials used. When choosing a coating, consider the environment where your furniture will reside. Will it be a coffee table in a busy living room, or a decorative piece in a quiet study? This decision will guide you in selecting the right protective finish.
Here’s a quick comparison of some popular protective coatings:
| Coating Type | Best For | Finish | Drying Time |
|---|---|---|---|
| Sealant | Waterproofing | Matte | 1-2 hours |
| Varnish | Durability | Glossy | 2-4 hours |
| Polyurethane | High Traffic Areas | Semi-gloss to Glossy | 4-6 hours |
| Wax | Natural Look | Satin | 30 minutes |
Before applying any coating, ensure your furniture piece is clean and dry. Dust and grime can hinder adhesion and lead to unsatisfactory results. If you’re working with painted surfaces, it’s wise to allow the paint to cure fully before sealing it. This curing process can take several days, but it’s worth the wait for a flawless finish.
Once you’ve selected your coating, follow the manufacturer’s instructions for application. Most coatings can be applied with a brush, roller, or spray, depending on the desired finish and the intricacy of your luggage design. Remember to work in a well-ventilated area to avoid inhaling fumes, and always wear a mask if recommended.
After applying your protective coating, allow it to cure completely before using your new furniture. Patience is key here; while it might be tempting to show off your creation right away, giving it the time it needs will ensure longevity and beauty. So go ahead, take a step back, and admire your handiwork as it dries!
- What type of protective coating is best for vintage luggage?
It depends on the intended use. For decorative pieces, varnish might be ideal, while sealants are better for functional furniture. - How long do protective coatings last?
With proper application and care, most coatings can last several years, but it's good to check for wear and reapply as needed. - Can I use regular paint as a protective coating?
While regular paint can provide some protection, it’s not as durable as specialized coatings. Always opt for a product designed for protection.
Styling Your New Furniture
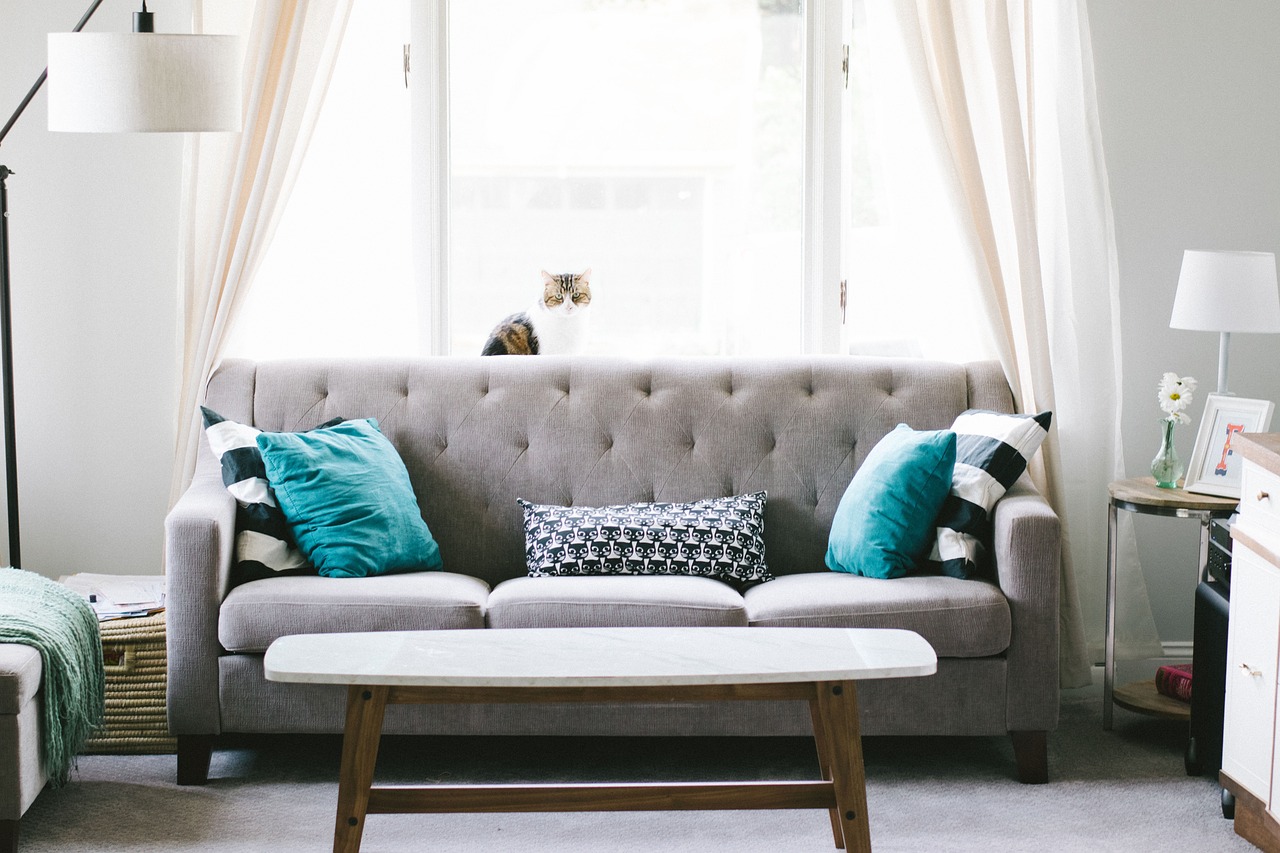
Once you've successfully transformed your old luggage into stunning furniture pieces, the next exciting step is styling them to fit seamlessly into your home. Think of your luggage furniture as a blank canvas, waiting for your personal touch to make it truly shine. Start by considering the overall theme of your space. Is your home more modern, with sleek lines and minimalistic decor, or does it lean towards a vintage charm, filled with eclectic pieces? Understanding your style will guide you in making choices that enhance your new furniture.
One of the most effective ways to style your repurposed luggage is by coordinating colors. If your luggage has a bold exterior, you might want to keep the surrounding decor more muted to let it stand out. Conversely, if your luggage features soft, pastel colors, consider adding vibrant accessories to create a lively contrast. Don't shy away from using textiles to add warmth and texture. A cozy throw blanket draped over a luggage chair or a chic table runner on a luggage coffee table can make a world of difference.
Placement is another crucial aspect of styling. Think about the flow of your space. For instance, if you've created a coffee table from an old suitcase, place it in a central location where it can serve as a functional conversation starter. You might want to arrange seating around it to encourage interaction. If you’ve made a bedside table, consider adding a stylish lamp or a few books on top to create an inviting atmosphere. Remember, the goal is to make your furniture not just functional, but also a conversation piece that reflects your personality.
Accessorizing your repurposed luggage is where your creativity can really shine. Consider adding decorative elements like vintage books, unique knick-knacks, or even a small plant to bring life to your furniture. A suitcase turned into a bench can be adorned with colorful cushions that invite guests to sit down and enjoy. Don't forget about lighting; a well-placed lamp can create a cozy ambiance, making your space feel warm and inviting.
Lastly, don't underestimate the power of seasonal decor. Changing accessories according to the season can keep your space feeling fresh and exciting. Think about adding autumn leaves in a vase during fall or bright flowers in the summer. This simple change can breathe new life into your repurposed luggage furniture and keep your home feeling dynamic.
- Can any type of luggage be repurposed? Yes, almost any type of luggage can be repurposed, but it's best to choose pieces that are sturdy and in good condition.
- How do I clean the luggage before repurposing? Use a gentle cleaner and a soft cloth to wipe down the exterior and interior of the luggage. Make sure to remove any old stickers or labels.
- What tools do I need for basic repurposing? Essential tools include a saw, drill, screws, and adhesives. Safety gear like gloves and goggles is also important.
- Can I paint my luggage furniture? Absolutely! Painting can enhance the look of your furniture. Just make sure to use the right type of paint for the material of your luggage.
Frequently Asked Questions
- What types of luggage are best for repurposing?
When choosing luggage for your project, look for pieces that are sturdy and in good condition. Vintage suitcases, hard-shell cases, and even soft-sided bags can be transformed into unique furniture. Just make sure they have enough space and structural integrity to hold their new purpose!
- Do I need special tools to repurpose luggage?
While you don't need a full workshop, having a few basic tools will make your project smoother. Essential tools include a saw, drill, and some strong adhesives. If you're planning to add decorative elements, you might also want paint brushes, fabric scissors, and a staple gun!
- How do I clean old luggage before repurposing?
Cleaning is a crucial step! Start by emptying the luggage and wiping down the interior and exterior with a damp cloth. For tougher stains, use a mild detergent. Don't forget to let it dry completely before starting your transformation!
- What are some creative ideas for repurposing luggage?
The possibilities are endless! You can turn an old suitcase into a chic coffee table, a stylish pet bed, or even a unique storage solution. Just let your imagination run wild—your old luggage can become a conversation starter in your home!
- How can I ensure my repurposed furniture is stable?
Stability is key! Use strong adhesives and secure assembly techniques to attach components. If you're stacking luggage or using it as a base, make sure everything is well-balanced and reinforced. Testing it out before use is always a good idea!
- What finishing touches can I add to my repurposed luggage furniture?
Finishing touches can really make your project pop! Consider painting or staining the exterior, adding new hardware like handles or legs, and applying a protective coating to preserve the look. These details can take your piece from good to gorgeous!
- How do I style my new luggage furniture in my home?
Styling is all about placement and accessorizing! Think about the colors in your room and how your new furniture can complement them. Use it as a focal point or blend it with other vintage pieces. Don't forget to accessorize with plants, books, or art to create a cohesive look!


