
Making vintage-looking ceramics: A complete guide
This guide explores techniques, materials, and tips for creating beautiful vintage-style ceramics, from understanding historical influences to mastering glazing and finishing methods for an authentic appearance. If you've ever wandered through a quaint antique shop, you know the charm that vintage ceramics can bring to a space. The soft colors, the unique shapes, and the stories they tell are simply enchanting. But what if you could create your own pieces that evoke that same sense of nostalgia? Well, you can! This guide will take you through everything you need to know, from the basics of vintage aesthetics to the nitty-gritty of crafting your own ceramics.
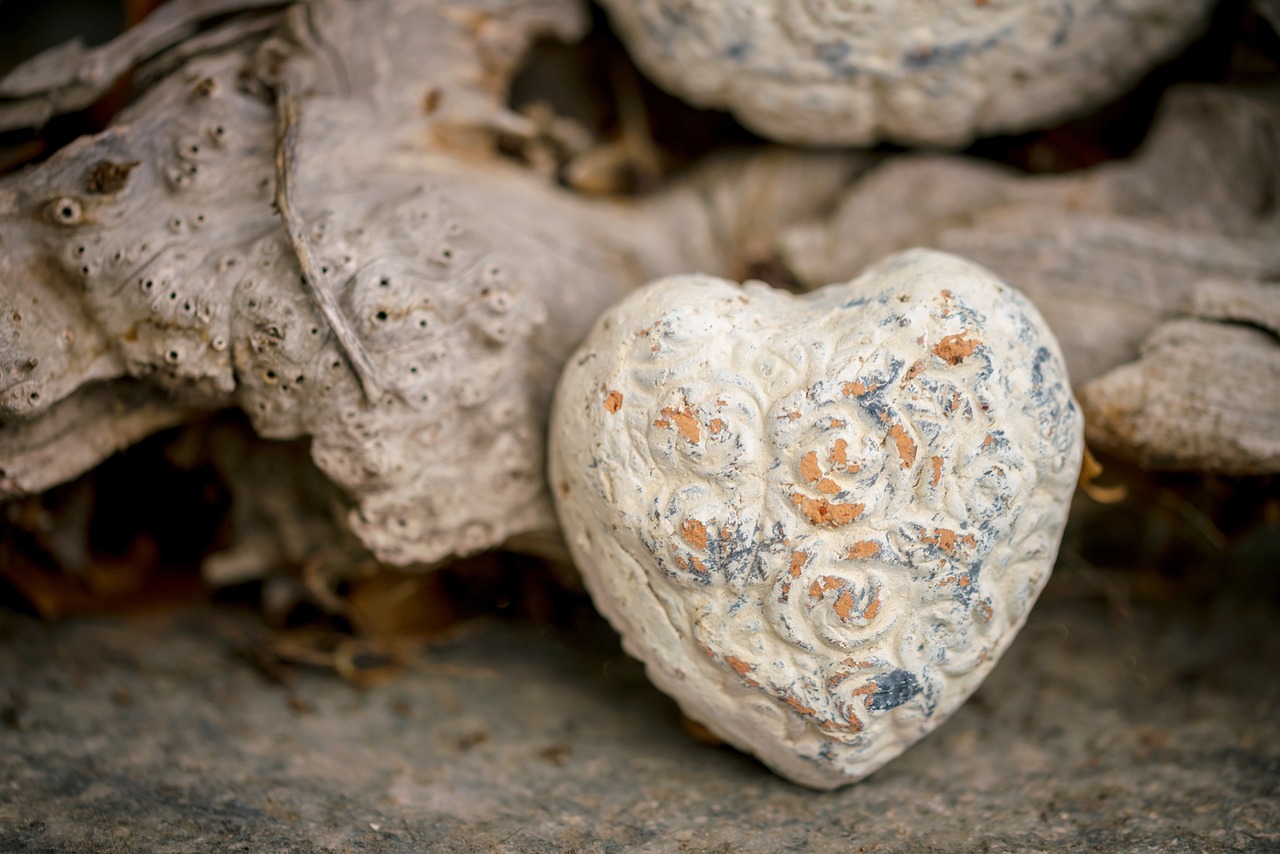
To successfully create vintage ceramics, it's essential to grasp the characteristics that define this unique style. Vintage ceramics often feature muted color palettes, intricate textures, and organic shapes that seem to have a story of their own. Think about the soft greens, faded blues, and warm earth tones that transport you to a simpler time. These colors not only add a layer of warmth but also evoke feelings of nostalgia. The textures can range from smooth and glossy to rough and rustic, creating a tactile experience that invites touch. Shapes are often asymmetrical or have a handmade quality, enhancing the charm of the piece. By understanding these elements, you can create ceramics that not only look vintage but also feel authentic.
Creating vintage ceramics starts with choosing the right materials. The foundation of your piece lies in the type of clay, the glazes you select, and the tools you use. Different clays offer various characteristics that can significantly impact the final product. For instance, earthenware is porous and often has a rustic finish, while stoneware is more durable and can withstand higher temperatures. It's essential to pick materials that align with the vintage look you're aiming for. Additionally, the glazes you choose can enhance the vintage aesthetic. They can create an aged look or a vibrant pop of color, depending on your vision. Finally, having the right tools is crucial for bringing your ideas to life.
When it comes to crafting vintage ceramics, the type of clay you choose can make a world of difference. There are several options, each with unique properties:
- Earthenware: This clay is easy to work with and often results in a rustic, handmade appearance. It's typically fired at lower temperatures, making it more porous.
- Stoneware: Known for its durability, stoneware can withstand higher temperatures and is less porous than earthenware. It often has a smoother finish, which can be ideal for certain vintage styles.
Understanding these differences will help you decide which clay is best suited for your artistic goals.
Let's dive deeper into the comparison between earthenware and stoneware. While both types have their advantages, they cater to different aesthetics and functional needs:
| Property | Earthenware | Stoneware |
|---|---|---|
| Firing Temperature | Low (around 1,000°C) | High (around 1,200-1,300°C) |
| Porosity | High | Low |
| Finish | Rustic | Smooth and durable |
This comparison can help you decide which clay aligns with your vision. If you're looking for a softer, more rustic feel, earthenware might be the way to go. On the other hand, if durability is key, stoneware could be your best bet.
Don't forget about specialty clays! Options like porcelain and raku can bring unique characteristics to your vintage ceramics. Porcelain, with its fine texture and translucent quality, can create elegant pieces that still feel vintage. Raku, known for its unpredictable and often dramatic finishes, can give your work an authentic, aged appearance that stands out in any collection. These specialty clays can add an extra layer of uniqueness to your creations, making them truly one-of-a-kind.
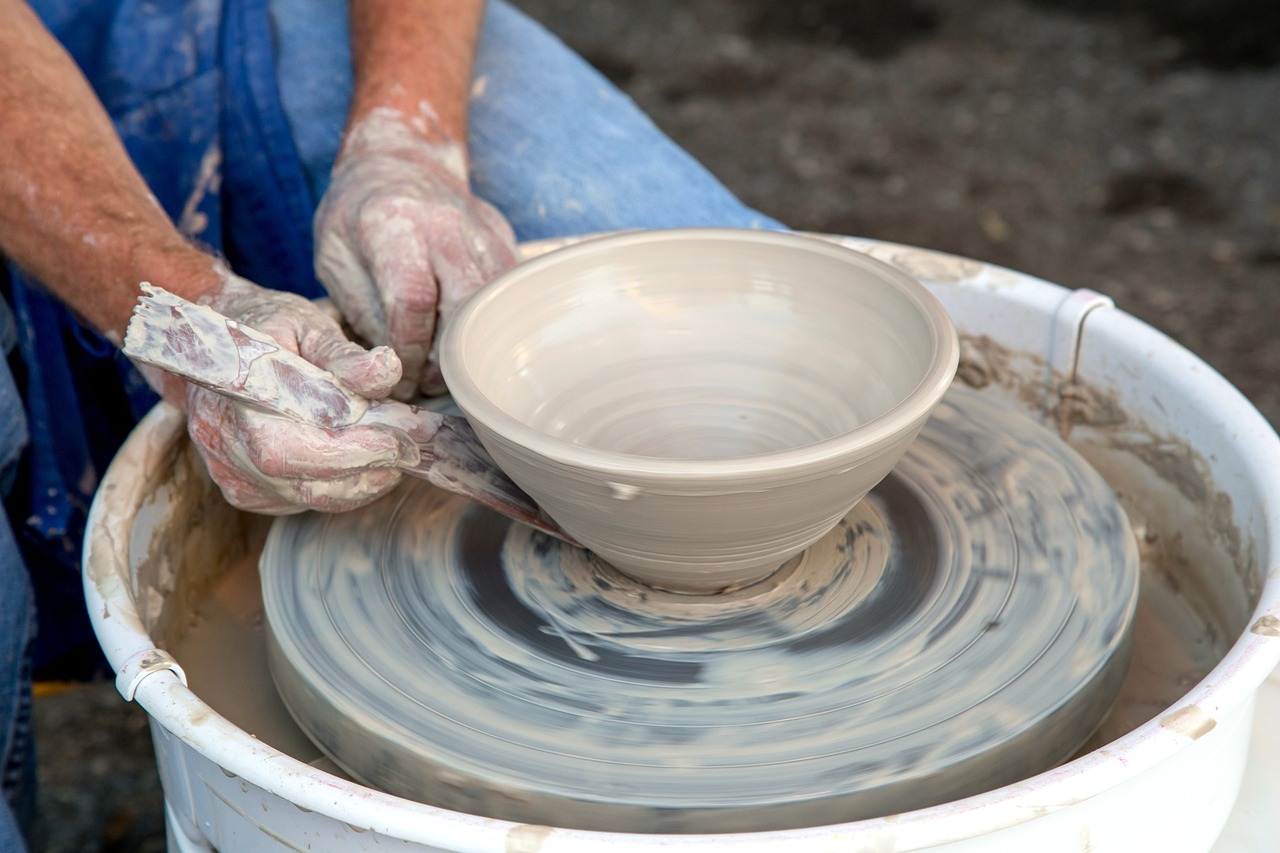
As you embark on your ceramic journey, having the right tools and equipment is essential. A pottery wheel can help you shape your pieces, while a kiln is necessary for firing your creations. Other essential tools include:
- Clay cutters
- Rolling pins
- Sponges for smoothing
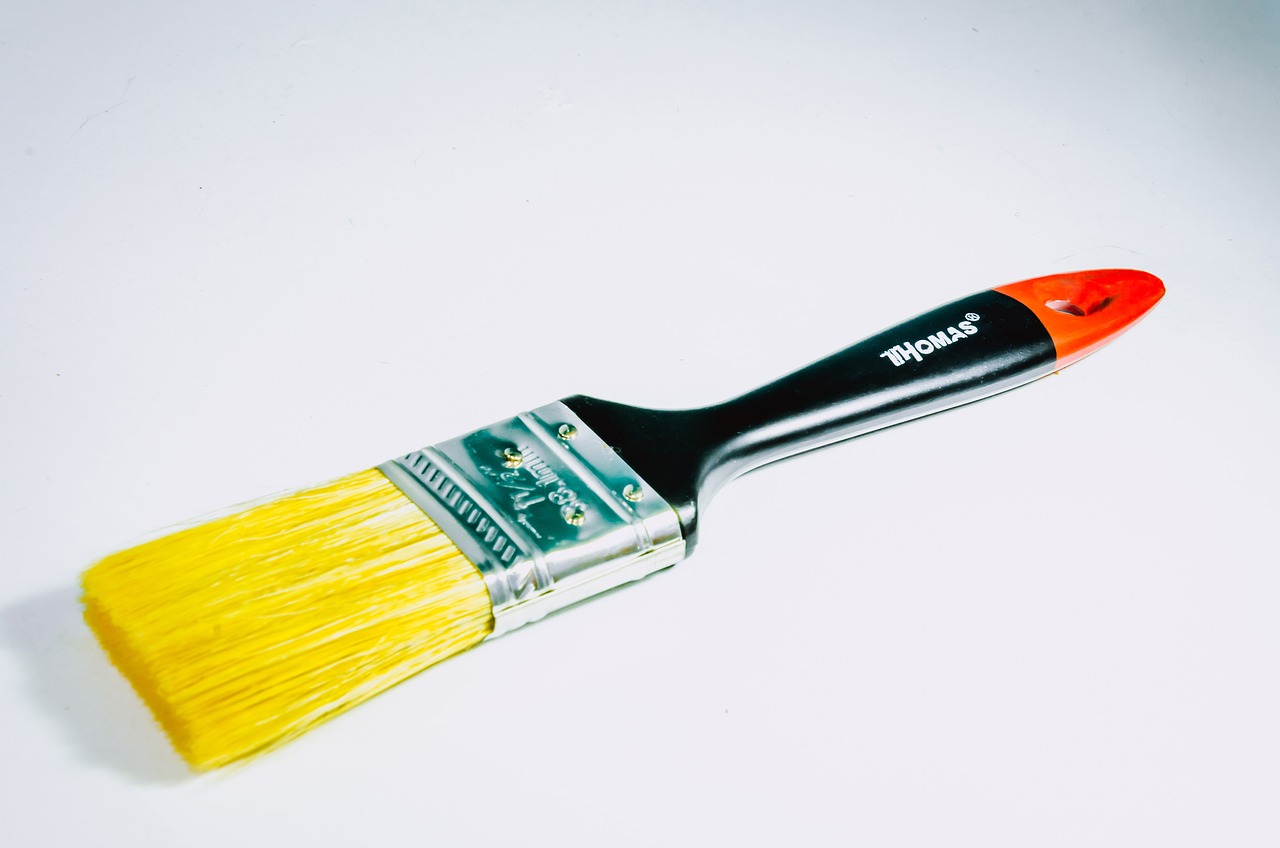
- Glazing brushes
Equipping yourself with these tools will make your crafting process smoother and more enjoyable, allowing you to focus on the artistic side of creating vintage ceramics.
Now that you have a grasp on materials and tools, let's talk about techniques. Achieving that authentic vintage look requires a few tricks up your sleeve. Techniques like distressing and layering glazes can give your ceramics the well-loved appearance that vintage pieces are known for. Distressing can be done through methods such as sanding or applying washes to create an aged effect. Layering glazes allows for depth and complexity, reminiscent of antique ceramics with their unique color variations.
Applying distressing techniques is an art form in itself. By sanding the edges of your pieces or using washes to create a faded look, you can achieve that well-loved, vintage finish. Imagine holding a piece that feels like it has been cherished for generations—this is the magic of distressing!
Layering glazes is another technique that can elevate your ceramics. By applying multiple layers of different glazes, you can create stunning depth and complexity. This method allows for unique color variations that can mimic the look of antique pieces, giving your work a truly authentic feel.
Once your pieces are crafted and glazed, it's time for the finishing touches. Applying a clear coat can protect the surface of your ceramics while enhancing their vintage look. This step is crucial for ensuring durability without sacrificing aesthetic appeal. You’ll want your creations to stand the test of time, just like the vintage pieces that inspire you.
By applying a clear coat, you not only protect your ceramics from wear and tear but also enhance their visual appeal. A clear coat can add a beautiful sheen that makes colors pop, giving your vintage ceramics a polished finish.
When it comes to sealers, you have options. Natural sealers, often made from wax or oils, can provide a lovely finish that feels authentic. However, synthetic sealers may offer more durability and protection. Consider the appearance, safety, and longevity of each option to determine what’s best for your vintage ceramics.
Q: Can I use any type of clay for vintage ceramics?
A: While you can use various types of clay, earthenware and stoneware are popular choices for achieving vintage aesthetics.
Q: How do I achieve a distressed look?
A: Techniques such as sanding edges and applying washes can create a well-loved, vintage appearance.
Q: What is the best sealer for vintage ceramics?
A: It depends on your preference; natural sealers offer an authentic feel, while synthetic ones provide more durability.

Understanding Vintage Aesthetics
This guide explores techniques, materials, and tips for creating beautiful vintage-style ceramics, from understanding historical influences to mastering glazing and finishing methods for an authentic appearance.
When we talk about vintage ceramics, we're diving into a world where every piece tells a story. The charm of vintage ceramics lies in their unique characteristics that evoke nostalgia and warmth. But what exactly defines a vintage aesthetic? It’s all about the color palettes, textures, and shapes that transport us back in time. Think of the soft, muted tones of a rustic farmhouse or the intricate patterns reminiscent of a grandmother's china. These elements are not just random choices; they reflect a rich history and a deep appreciation for craftsmanship.
One of the most striking features of vintage ceramics is their color palette. Often, you’ll find a blend of earthy tones—think warm browns, soft greens, and faded blues—that create a sense of harmony and comfort. These colors are reminiscent of natural materials, which is why they resonate so well with the vintage aesthetic. In contrast, modern ceramics often lean towards bright, bold colors that can feel jarring. So, if you're aiming for that vintage look, stick to muted shades that whisper tales of yesteryears.
Next up is texture. Vintage ceramics often showcase a variety of textures that add depth and interest to the pieces. Whether it’s the smooth surface of a well-finished plate or the rough, handcrafted feel of a rustic bowl, texture plays a crucial role in conveying a vintage vibe. You can achieve these textures through various techniques, such as hand-building or using molds. The goal is to create pieces that feel authentic and well-loved, as if they’ve been passed down through generations.
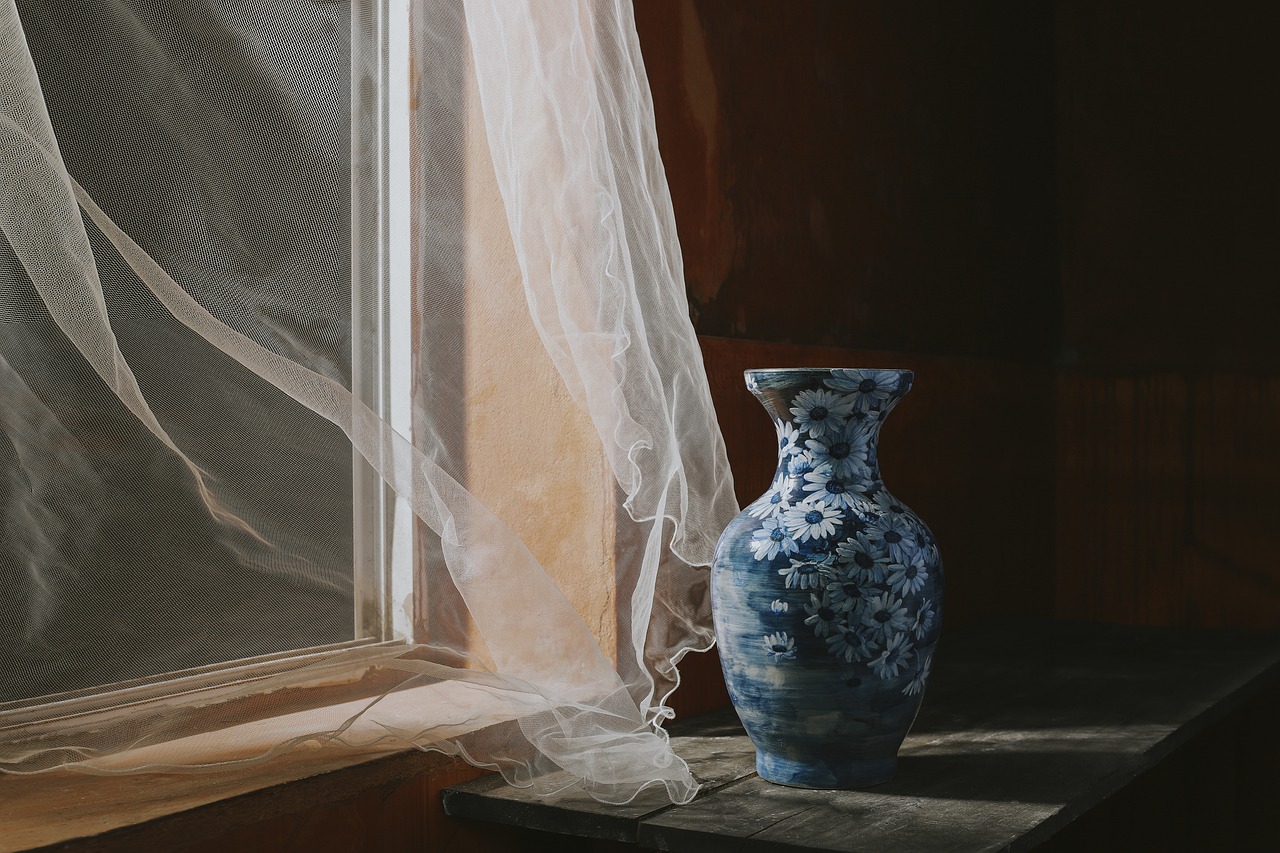
Shapes also contribute significantly to the vintage aesthetic. Many vintage ceramics feature organic, flowing lines rather than sharp, angular designs. This softness is inviting and creates a sense of nostalgia. For instance, a gently curved vase or a rounded bowl can evoke memories of family gatherings or cozy dinners. When designing your ceramics, consider how the shape can enhance the overall vintage feel. It’s all about creating pieces that feel like they belong in a cherished collection.
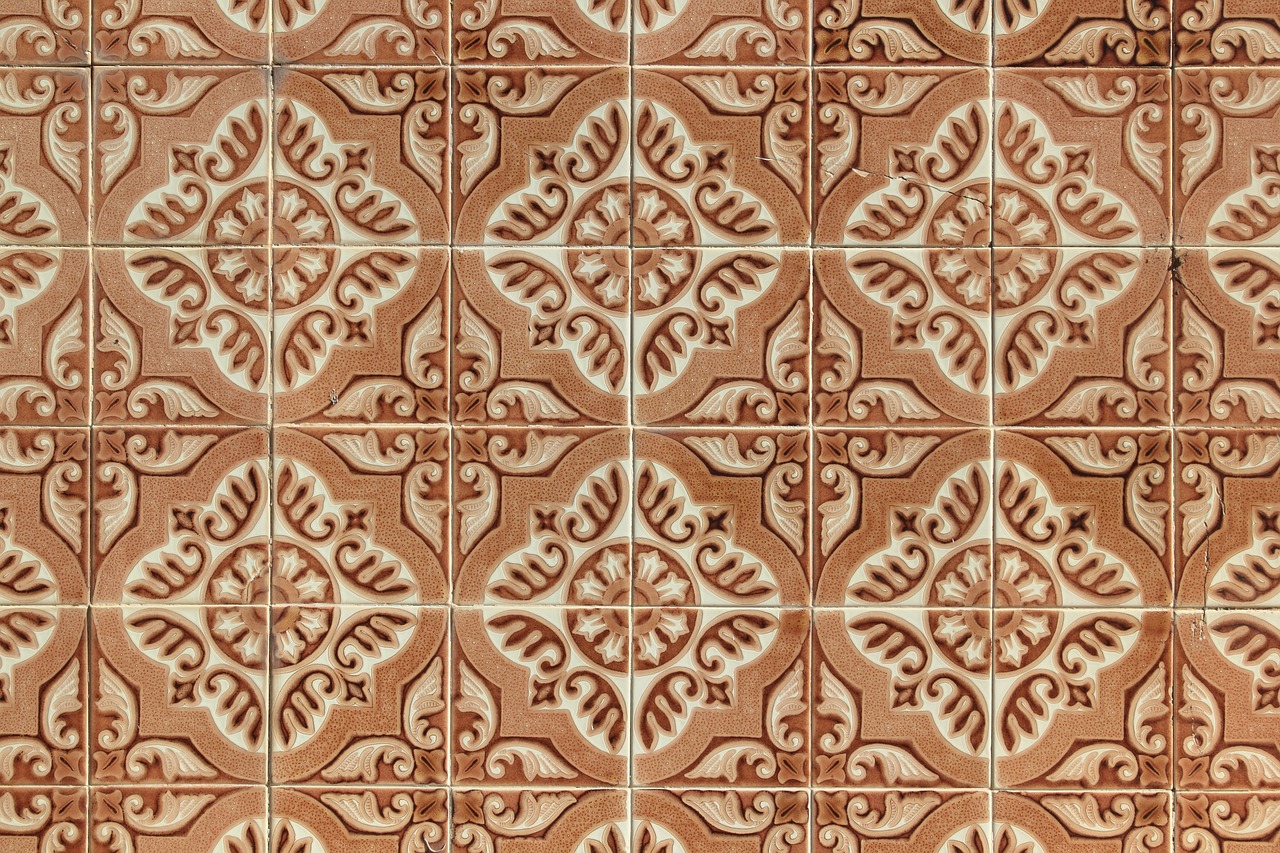
Let’s not forget about the patterns that often adorn vintage ceramics. Floral motifs, intricate lace designs, and even whimsical illustrations can transform a simple piece into a stunning work of art. These patterns can be applied using various techniques, such as transfer printing or hand painting. The key is to choose designs that resonate with the vintage aesthetic you’re aiming for. Remember, the right pattern can elevate your ceramics from ordinary to extraordinary.
In summary, understanding vintage aesthetics is about appreciating the nuances that make these ceramics special. By focusing on muted color palettes, rich textures, inviting shapes, and charming patterns, you can create pieces that not only look beautiful but also tell a story. So, the next time you sit down to craft your vintage ceramics, keep these elements in mind. They are the building blocks of nostalgia and charm, and they will help you create pieces that are truly timeless.
- What is the best clay for vintage ceramics? Earthenware and stoneware are popular choices, each offering unique characteristics that contribute to the vintage look.
- How can I achieve a distressed look on my ceramics? Techniques like sanding and applying washes can help create a well-loved, vintage finish.
- What types of glazes work best for vintage ceramics? Layering glazes can create depth and complexity, enhancing the antique appearance of your pieces.
- Should I use natural or synthetic sealers? It depends on your preference for appearance and safety; both have their benefits.
Materials for Vintage Ceramics
When it comes to crafting vintage ceramics, the choice of materials is paramount. The right materials not only influence the aesthetics but also the durability and functionality of your creations. Understanding the various types of clays, glazes, and essential tools will empower you to create pieces that resonate with the charm of bygone eras.
First off, let's talk about clay. The type of clay you choose can dramatically affect the final look and feel of your vintage ceramics. There are several types of clay to consider:
| Type of Clay | Characteristics | Best For |
|---|---|---|
| Earthenware | Low firing temperature, porous, often has a rustic finish. | Creating decorative pieces with a vintage feel. |
| Stoneware | Durable and non-porous, fired at higher temperatures, often has a smooth finish. | Functional items like dinnerware that require durability. |
| Porcelain | High firing temperature, very fine and translucent. | High-end decorative pieces that showcase intricate designs. |
| Raku | Unique firing process that creates unpredictable and vibrant finishes. | Artistic pieces that stand out due to their one-of-a-kind appearance. |
Choosing the right clay is just the beginning. Next up, we have glazes. The glaze you select can create a variety of effects, from shiny and reflective to matte and textured. Vintage ceramics often feature specific color palettes that evoke nostalgia. Think soft pastels, muted earth tones, or even vibrant jewel tones, depending on the era you're inspired by. Layering glazes can also add depth and complexity to your pieces, making them visually rich and appealing.
Now, let’s not forget about the tools you’ll need. Having the right tools can make your ceramic journey smoother. Here’s a quick rundown of essential tools:
- Pottery Wheel: Great for shaping your pieces.
- Kiln: Necessary for firing your ceramics to achieve the desired hardness.
- Clay Tools: Including rib tools, trimming tools, and sponges for finishing touches.
- Glazing Brushes: For applying glazes evenly and artistically.
Incorporating these materials and tools into your ceramic practice will not only enhance your craftsmanship but also bring you closer to achieving that authentic vintage aesthetic. Remember, the beauty of vintage ceramics lies in their imperfections and unique characteristics, so don’t shy away from experimenting!
Q: What is the best clay for beginners?
A: Earthenware is often recommended for beginners due to its forgiving nature and lower firing temperature.
Q: Can I use modern glazes for vintage ceramics?
A: Yes, modern glazes can be used to achieve vintage looks, especially if you layer them or use techniques like distressing.
Q: How do I know if my ceramics are food safe?
A: Always check the label on your glazes and clays. Look for those marked as food safe, and ensure they are properly fired to the recommended temperature.
Q: What tools are essential for glazing?
A: Glazing brushes, sponges, and spray bottles are essential for applying glazes evenly and effectively.
Choosing the Right Clay
When it comes to creating vintage ceramics, the choice of clay is absolutely crucial. The type of clay you select will not only influence the final appearance of your pieces but also their durability and functionality. There are several types of clay that can be used for vintage ceramics, each with its unique characteristics and properties. Understanding these differences will help you make an informed decision that aligns with your artistic vision.
One of the most popular options for vintage ceramics is earthenware. This type of clay is known for its porosity and soft texture, making it easy to work with. Earthenware is typically fired at lower temperatures, which gives it a more rustic look that is often associated with vintage pottery. Its natural, earthy tones can evoke a sense of nostalgia, making it ideal for creating pieces that feel authentic and charming. However, because of its porous nature, earthenware is not always suitable for functional items like dishware unless properly glazed.
On the other hand, we have stoneware, which is fired at higher temperatures, resulting in a denser and more durable product. Stoneware is less porous than earthenware, making it a better choice for functional ceramics that need to withstand everyday use. Its ability to hold vibrant glazes allows for a wide range of creative possibilities. The finish of stoneware can mimic the look of antique pieces, especially when combined with the right glazing techniques. If you’re aiming for a vintage aesthetic with durability, stoneware might be your best bet.
To help you visualize the differences, here’s a quick comparison:
| Type of Clay | Firing Temperature | Porosity | Typical Uses |
|---|---|---|---|
| Earthenware | Low (1,830°F - 2,100°F) | Highly porous | Decorative items, non-functional pottery |
| Stoneware | High (2,190°F - 2,400°F) | Less porous | Functional dishware, durable pottery |
Additionally, if you’re feeling adventurous, consider exploring specialty clays like porcelain and raku. Porcelain is renowned for its fine, delicate quality and can be used to create stunning vintage pieces that sparkle with elegance. Raku, on the other hand, offers an entirely different aesthetic with its unpredictable glazes and unique firing process, resulting in vibrant colors and textures that can truly stand out. Each of these specialty clays can add a unique touch to your vintage ceramics, enhancing their overall appeal.
Ultimately, the choice of clay will depend on the look and functionality you desire for your vintage ceramics. Whether you prefer the rustic charm of earthenware or the durability of stoneware, understanding the properties of each type will empower you to create pieces that are not only beautiful but also meaningful. So, take your time to experiment with different clays and discover which one resonates with your creative spirit!
Earthenware vs. Stoneware
When diving into the world of ceramics, one of the first decisions you'll face is choosing between earthenware and stoneware. Each type of clay brings its own unique qualities to the table, affecting not only the final look of your vintage ceramics but also their durability and functionality. Understanding these differences can help you make an informed choice that aligns with your artistic vision.
Earthenware is typically fired at lower temperatures, usually between 1,830°F and 2,100°F (1,000°C to 1,150°C). This results in a porous and relatively soft material that is ideal for creating rustic, vintage-style pieces. One of the defining features of earthenware is its ability to showcase vibrant colors, especially when glazed. However, it is important to note that earthenware is not as strong as stoneware, making it less suitable for functional items that will see heavy use.
On the other hand, stoneware is fired at higher temperatures, typically ranging from 2,190°F to 2,600°F (1,200°C to 1,400°C). This results in a denser, more durable material that can withstand the rigors of everyday use. Stoneware's non-porous nature also makes it less likely to absorb moisture, which is a significant advantage for functional pieces like dinnerware or bakeware. The finish of stoneware can be quite varied, often featuring earthy tones and textures that can evoke a vintage feel.
To help you further understand the differences between earthenware and stoneware, here’s a quick comparison:
| Characteristic | Earthenware | Stoneware |
|---|---|---|
| Firing Temperature | 1,830°F - 2,100°F (1,000°C - 1,150°C) | 2,190°F - 2,600°F (1,200°C - 1,400°C) |
| Durability | Less durable, more fragile | Highly durable, chip-resistant |
| Porosity | Porous, may absorb moisture | Non-porous, moisture-resistant |
| Color Range | Bright and vibrant colors | Earthy tones, varied textures |
| Best Uses | Decorative pieces, planters | Functional items like dinnerware, bakeware |
Ultimately, the choice between earthenware and stoneware boils down to the specific needs of your project. If you're looking to create decorative pieces that capture a vintage aesthetic, earthenware might be your best bet with its rich colors and charming imperfections. However, if you want something that can withstand daily use while still maintaining a vintage vibe, stoneware is the way to go. Each type of clay has its own charm and character, so embrace the one that speaks to your creative spirit!
- Can I use earthenware for functional items?
While earthenware can be used for functional items, it is less durable than stoneware and may not hold up well under heavy use. - Is stoneware safe for food use?
Yes, stoneware is generally safe for food use and is often preferred for dinnerware and bakeware due to its non-porous nature. - Can I glaze earthenware and stoneware differently?
Yes, both types of clay can be glazed in a variety of ways to achieve different finishes and effects. Experimenting with glazes can enhance the vintage look of your ceramics.
Specialty Clays
When it comes to creating vintage ceramics, the choice of clay can significantly impact the final look and feel of your pieces. Among the various types of clay available, stand out for their unique properties and the distinct character they can bring to your work. Two of the most notable specialty clays are porcelain and raku, each offering a different aesthetic and experience in the crafting process.
Porcelain is renowned for its delicate, translucent quality and smooth texture. This clay is often fired at higher temperatures, resulting in a very durable product that can withstand wear and tear. The fine grain of porcelain allows for intricate detailing, making it ideal for vintage pieces that require a touch of elegance. When glazed, porcelain can achieve a glossy finish that enhances its classic appeal, reminiscent of antique china. However, working with porcelain can be challenging due to its sensitivity and the need for precise handling during the firing process.
On the other hand, raku offers a completely different experience. This clay type is associated with a unique firing technique that creates stunning, unpredictable results. Raku pottery is typically removed from the kiln while still glowing hot and then placed in combustible materials, which creates dramatic color variations and crackled surfaces. The result is a rustic charm that perfectly complements the vintage aesthetic. Raku pieces often have a more organic feel, with textures and colors that evoke a sense of history and storytelling.
Choosing between these specialty clays depends largely on the desired outcome for your vintage ceramics. If you're aiming for a refined, polished look, porcelain might be your best bet. However, if you're drawn to the unexpected beauty and character of aged pottery, raku could be the way to go. Both clays allow for creativity and experimentation, ensuring that each piece you create is truly one-of-a-kind.
In summary, specialty clays like porcelain and raku not only enhance the aesthetic appeal of your vintage ceramics but also provide opportunities for artistic expression. By understanding the unique properties of these clays, you can make informed decisions that will elevate your ceramic creations and bring a touch of nostalgia to your work.
- What is the best clay for beginners interested in vintage ceramics?
Earthenware is often recommended for beginners due to its ease of use and forgiving nature. - Can I mix different types of clay?
Mixing clays is possible, but it's important to ensure compatibility in firing temperatures and shrinkage rates. - How do I know if my clay is suitable for vintage ceramics?
Look for clays that can be fired at lower temperatures and have a texture that can hold glazes well, such as earthenware or stoneware. - What are the advantages of using specialty clays?
Specialty clays can provide unique textures, colors, and finishes that enhance the vintage look of your ceramics.
Essential Tools and Equipment
When it comes to creating vintage-looking ceramics, having the right tools and equipment is absolutely essential. Think of your workspace as a painter's studio; without the right brushes and colors, the masterpiece remains a mere idea. The world of ceramics is no different! From shaping your clay to firing your masterpieces, each tool plays a pivotal role in achieving that charming, nostalgic aesthetic.
First and foremost, you'll need a good quality pottery wheel. This is your best friend when it comes to shaping the clay into various forms. The wheel allows for smooth, even shaping, which is crucial for creating pieces that look like they’ve been around for decades. If you’re just starting out, consider investing in an electric wheel, as it provides consistency and ease of use. However, if you're feeling adventurous, a kick wheel can give your work a more traditional touch, adding to that vintage vibe.
Next up on your shopping list is a reliable kiln. This is where the magic happens—firing your clay to transform it into durable ceramics. There are various types of kilns available, ranging from electric to gas, and even wood-fired options. Each type offers a unique aesthetic and can influence the final look of your ceramics. For vintage styles, you might want to explore a gas kiln, as it can produce beautiful, unpredictable effects that mimic the look of aged ceramics.
In addition to a wheel and kiln, you'll need an array of hand tools. These include wooden ribs for smoothing, trimming tools for detailing, and sponges for adding texture. Each of these tools helps in refining your pieces, ensuring they not only look vintage but also feel authentic. Don't forget about your glazing brushes and spray bottles for applying glazes evenly—these are crucial for achieving that layered, aged look.
Now, let’s not overlook the importance of workspace essentials. A sturdy workbench is a must, along with protective gear like aprons and gloves. Keeping your workspace organized will allow you to focus on your creativity without the distraction of clutter. A good setup can make all the difference, ensuring that your artistic flow remains uninterrupted.
Finally, consider investing in some storage solutions for your raw materials and finished pieces. Clay, glazes, and tools can quickly accumulate, so having designated spaces for each will help you stay organized. Use labeled bins for your clays and glazes, and consider shelving units for your completed works. This not only keeps your workspace tidy but also allows you to showcase your beautiful vintage ceramics.
To summarize, the essential tools and equipment for crafting vintage ceramics include:
- Pottery Wheel
- Kiln
- Hand Tools (trimming, smoothing, detailing)
- Glazing Brushes and Spray Bottles
- Sturdy Workbench
- Protective Gear (aprons, gloves)
- Storage Solutions
With the right tools at your disposal, you’re well on your way to creating stunning vintage ceramics that tell a story. Each piece you create will not only reflect your artistic vision but also evoke a sense of nostalgia, transporting you and your audience back in time.
Q: What type of clay is best for vintage ceramics?
A: Both earthenware and stoneware are excellent choices. Earthenware is more porous and can give a rustic look, while stoneware is more durable and suitable for functional pieces.
Q: Do I need a kiln to make ceramics?
A: Yes, a kiln is essential for firing your clay. It transforms raw clay into durable ceramic by reaching high temperatures.
Q: Can I achieve a vintage look with modern glazes?
A: Absolutely! Layering modern glazes and using techniques like distressing can create that authentic vintage feel.
Q: How can I protect my vintage ceramics after they are finished?
A: Applying a clear coat or using natural sealers can help protect your ceramics while maintaining their vintage aesthetic.
Techniques for Achieving Vintage Effects
Creating vintage-looking ceramics is not just about the materials you use; it's also about the techniques you apply. To truly capture that nostalgic feel, you need to master a few key methods that can transform your pieces from ordinary to extraordinary. Think of your ceramics as a canvas where every stroke, every technique adds a layer of history and charm. It’s like telling a story through your art, where each crack and glaze tells a tale of its own.
One of the most effective techniques for achieving that coveted vintage look is distressing. This process involves deliberately aging your ceramics to give them a well-loved appearance. Imagine walking into a quaint antique shop and finding a piece that’s been cherished for decades. You can replicate this by using tools like sandpaper to gently wear down edges or by applying washes of diluted paint that settle into the crevices, mimicking the natural wear and tear of time. The beauty of distressing is that it allows you to express your creativity while adding character to your ceramics.
Another essential technique is layering glazes. This method involves applying multiple layers of glaze to create depth and complexity in your ceramic pieces. Picture the way light dances on the surface of an antique vase, revealing subtle variations in color and texture. To achieve this effect, start with a base layer of glaze, then add additional colors on top, allowing each layer to dry before applying the next. This not only enhances the visual appeal but also creates a unique finish that is reminiscent of vintage ceramics.
Additionally, don’t underestimate the power of texture. Incorporating different textures into your ceramics can evoke a sense of history and authenticity. You might experiment with tools like sponges, brushes, or even natural materials like leaves to imprint patterns onto your clay. These textures can mimic the look of age-old pottery that has been shaped by hands over generations. The tactile nature of your ceramics will invite people to touch and explore, creating a deeper connection with your work.
To summarize, mastering these techniques is crucial for anyone looking to create vintage-style ceramics. Whether it’s through distressing, layering glazes, or adding texture, each method plays a vital role in achieving that authentic, timeworn appearance. Remember, the goal is to evoke feelings of nostalgia and charm in your audience, making them feel as though they’ve stumbled upon a hidden gem from the past. So grab your tools, unleash your creativity, and let your ceramics tell their own story!
- What is the best clay to use for vintage ceramics?
Earthenware and stoneware are both excellent choices, depending on the desired finish and durability.
- Can I use modern glazes to achieve a vintage look?
Yes, modern glazes can be layered and manipulated to create vintage effects, especially when combined with distressing techniques.
- How do I know if my ceramics are truly vintage?
Look for signs of wear, unique glazes, and craftsmanship that reflect historical techniques.
Distressing Techniques
When it comes to creating vintage-looking ceramics, mastering is essential for achieving that authentic, well-loved appearance. Think about it: have you ever come across an old piece of pottery that just exudes character? That’s the magic of distressing! This process mimics the natural wear and tear that occurs over time, adding a layer of history to your pieces. From sanding to washes, there are several methods you can employ to give your ceramics that charming, aged look.
One popular technique is sanding. This involves lightly sanding the surface of your finished piece to create a worn effect. You can use fine-grit sandpaper to gently buff away some of the glaze, exposing the clay underneath. This not only gives the piece a tactile quality but also adds visual interest by revealing different layers of color. Imagine the subtle variations you can achieve! Just be cautious not to overdo it; you want to enhance, not destroy, your work.
Another effective method is the use of washes. A wash is essentially a diluted paint or stain that you apply to your ceramics. This technique can help to highlight texture and create a sense of depth. For instance, if you have a piece with intricate carvings, a wash can settle into those grooves, making them pop. You can create washes using acrylic paints or even natural dyes. Experimenting with different colors can yield stunning results, reminiscent of antique ceramics that have aged beautifully over time.
Additionally, consider using crackle glazes. These glazes, when applied correctly, can create a network of fine cracks on the surface of your pottery, simulating the look of truly vintage pieces that have seen better days. To achieve this effect, you’ll need to apply a specific crackle glaze and follow the manufacturer's instructions carefully. The result? A stunningly aged appearance that will make your ceramics look like treasured heirlooms.
Lastly, don't overlook the power of layering. By applying multiple layers of glaze and distressing each layer, you can create a rich, complex finish that tells a story. Think of it as building a narrative with your ceramics—each layer adds depth, much like the layers of history in an old building. The key is to let each layer dry before applying the next, ensuring that you achieve the best possible results.
In summary, distressing techniques are crucial for anyone looking to create vintage-inspired ceramics. Whether you choose to sand, wash, apply crackle glazes, or layer, each method offers a unique pathway to achieving that perfect aged aesthetic. So grab your tools, get creative, and let your ceramics tell their own story!
- What is the best clay for distressing techniques? Earthenware is often preferred due to its porous nature, which allows for better absorption of washes and glazes.
- Can I distress ceramics that are already glazed? Yes, but be cautious. Light sanding can be done, but it may compromise the integrity of the glaze if overdone.
- How do I know when to stop distressing? Trust your instincts! Step back and assess your piece; it should look naturally worn, not overly damaged.
Layering Glazes
Layering glazes is akin to painting a masterpiece on a canvas, where each stroke adds depth and richness to the overall composition. When it comes to ceramics, this technique allows you to achieve stunning visual effects that can transform a simple piece into a work of art. Imagine creating a vintage bowl that not only catches the eye but also tells a story through its intricate colors and textures. By skillfully layering glazes, you can mimic the appearance of antique ceramics, evoking nostalgia and charm.
To get started with layering glazes, it’s essential to understand the properties of the glazes you’re working with. Different glazes can react in unique ways when combined, leading to unexpected and delightful results. For instance, a transparent glaze layered over an opaque one can create a beautiful depth, where the underlying color peeks through, much like sunlight filtering through leaves. This layering technique is particularly effective when aiming for a vintage look, as it can replicate the subtle variations often found in aged ceramics.
One of the best practices when layering glazes is to apply them in multiple thin coats rather than one thick layer. This method not only prevents drips and runs but also allows for better control over the final appearance. You might start with a base layer of a solid color, followed by a translucent glaze that adds a soft sheen. For example, a deep cobalt blue base can be beautifully complemented by a soft, milky white glaze that adds an ethereal quality to the piece. The interplay of colors can create a stunning visual effect that feels both modern and timeless.
It’s also crucial to experiment with different application techniques. You can use brushes, sponges, or even spray bottles to apply your glazes. Each method will yield different results, so don’t be afraid to play around! You might find that a sponge creates a lovely mottled effect, while a brush allows for more precise application. Additionally, consider using tools like stencils or stamps to create patterns or textures that can further enhance the vintage feel of your ceramics.
Moreover, keeping a glaze journal can be incredibly beneficial. Document your experiments, noting the glaze combinations, application methods, and firing temperatures. This practice not only helps you remember what worked well but also encourages you to push the boundaries of your creativity. Over time, you’ll develop a repertoire of techniques that will elevate your ceramic pieces to new heights.
Remember, patience is key in the layering process. Allow each layer to dry completely before applying the next one. This step is vital to achieving a smooth finish and preventing any unwanted blending of colors. Once you’ve reached your desired look, firing your ceramics in the kiln will bring everything together, sealing in the beauty of your layered glazes.
In conclusion, layering glazes is a powerful technique that can breathe life into your vintage ceramics. By experimenting with colors, application methods, and documenting your findings, you can create pieces that are not only visually stunning but also rich in character and history. So, grab your glazes and let your creativity flow; the world of vintage ceramics awaits!
- What types of glazes are best for layering? Transparent and semi-transparent glazes work best for layering, as they allow the underlying colors to show through.
- How many layers should I apply? Generally, 2 to 4 layers are ideal, but you can experiment based on the desired effect.
- Can I layer different types of glazes? Yes, but be cautious as some glazes may react unfavorably with others. Always test on a small piece first.
- Do I need to fire the piece after each layer? No, you can apply multiple layers and fire once at the end for a smoother finish.
Finishing and Sealing Your Work
When it comes to creating vintage ceramics, the final touches can make all the difference. Finishing and sealing your work not only enhances its aesthetic appeal but also ensures durability, allowing your beautiful creations to stand the test of time. Think of the finishing process as the cherry on top of a sundae; it’s the element that elevates your work from good to truly exceptional. So, what should you consider when finishing your ceramics?
First off, applying a clear coat is a popular choice among ceramic artists. This protective layer not only safeguards your pieces from scratches and stains but also amplifies the vintage look you’re aiming for. A well-applied clear coat can bring out the richness of colors and textures, making your ceramics look like they’ve been lovingly preserved for generations. Imagine how a glossy finish can transform a dull surface into something that catches the light just right, evoking a sense of nostalgia.
However, choosing the right type of clear coat is crucial. There are various options available, including water-based and solvent-based sealers. Water-based sealers are often favored for their ease of use and low odor, making them an ideal choice for indoor projects. On the other hand, solvent-based sealers tend to offer more durability and a more robust finish, which might be preferable for pieces that will see heavy use. Here’s a quick comparison:
| Type of Clear Coat | Advantages | Disadvantages |
|---|---|---|
| Water-Based | Low odor, easy cleanup, quick drying | Less durable than solvent-based |
| Solvent-Based | Highly durable, rich finish | Stronger odor, longer drying time |
Next, let’s talk about sealing your ceramics. This step is essential, especially if your pieces will be used for food or drink. You have the option of natural or synthetic sealers, each with its own set of characteristics. Natural sealers, such as beeswax or olive oil, can impart a warm, organic feel to your ceramics, which aligns beautifully with the vintage aesthetic. However, they may require more frequent reapplication and might not provide the same level of durability as synthetic options.
On the flip side, synthetic sealers offer a more robust protection and can withstand the rigors of daily use. They come in various finishes, from matte to glossy, allowing you to choose one that best suits your style. When considering which route to take, think about the intended use of your ceramics. If they are purely decorative, a natural sealer might suffice. But for functional pieces, a synthetic sealer may be the better choice.
In conclusion, the finishing and sealing process is where your vintage ceramics truly come to life. By carefully selecting the right clear coat and sealer, you’ll not only enhance the beauty of your pieces but also ensure they remain cherished heirlooms for years to come. Remember, every brush stroke and layer of finish tells a story, and your ceramics will carry that narrative forward, inviting others to share in the charm of vintage artistry.
- What is the best type of clear coat for vintage ceramics? The best type often depends on the intended use of your ceramics. Water-based sealers are great for indoor, decorative pieces, while solvent-based options provide more durability for functional items.
- Can I use natural sealers on food-safe ceramics? While natural sealers like beeswax can be used, they may not provide the same level of durability or safety as synthetic sealers, which are specifically designed for food-safe applications.
- How often should I reapply sealers? This varies based on use and environmental factors. Generally, natural sealers may need more frequent reapplication, while synthetic sealers can last longer, especially with proper care.
Applying a Clear Coat
When it comes to giving your vintage ceramics that final touch of elegance, applying a clear coat can be a game-changer. Not only does it enhance the overall aesthetic, but it also provides essential protection for your beautiful creations. Imagine your vintage piece sitting on a shelf, catching the light just right, with a glossy finish that highlights every intricate detail. That’s the magic of a clear coat!
But why exactly should you consider applying a clear coat? Well, for starters, it acts as a barrier against moisture, dirt, and other environmental factors that could potentially damage your ceramics over time. This is especially important for pieces that are meant to be functional, like plates or mugs, as they are more susceptible to wear and tear. Additionally, a clear coat can help to preserve the colors of your glazes, ensuring that the vibrant hues remain intact for years to come.
There are several types of clear coats available, each with its own unique properties. Here’s a quick overview:
| Type of Clear Coat | Benefits | Considerations |
|---|---|---|
| Water-Based Sealers | Low odor, quick drying, easy to clean up | May require multiple coats for durability |
| Oil-Based Sealers | Durable and long-lasting finish | Longer drying time, stronger odor |
| Spray Sealers | Even application, great for intricate details | Requires careful technique to avoid overspray |
When choosing a clear coat, consider the look you want to achieve and the level of protection you need. For example, if you’re working on a decorative piece that won’t see much use, a simple water-based sealer might suffice. However, for items that will be used regularly, an oil-based sealer might be the better choice due to its superior durability.
Before applying the clear coat, ensure that your ceramics are completely dry and free of dust or debris. A clean surface will allow for better adhesion and a smoother finish. You can use a soft cloth to wipe down your pieces, making sure to remove any particles that might interfere with the application.
Application techniques can vary depending on the type of clear coat you choose. For water-based sealers, using a brush or sponge can work well, while spray sealers often require a steady hand and a well-ventilated area. Regardless of the method, aim for thin, even coats to avoid drips and uneven surfaces. It’s often recommended to apply at least two coats, allowing adequate drying time between each layer to achieve the best results.
Finally, once your clear coat is applied and dried, it’s crucial to let your ceramics cure for a few days before using them. This will ensure that the finish has fully set and provides the maximum level of protection. Trust me, your vintage ceramics will thank you for it!
- Can I use a clear coat on food-safe ceramics? Yes, but make sure to choose a clear coat that is specifically labeled as food-safe.
- How long does a clear coat take to dry? Drying times can vary based on the type of clear coat used; typically, water-based sealers dry within a couple of hours, while oil-based ones may take longer.
- Can I reapply a clear coat if it wears off? Absolutely! Just make sure to clean the surface before reapplying to ensure proper adhesion.

Natural vs. Synthetic Sealers
When it comes to finishing your vintage ceramics, choosing the right sealer can make all the difference. Both natural and synthetic sealers have their own unique benefits and drawbacks, and understanding these can help you make an informed decision that aligns with your artistic vision and practical needs.
Natural sealers, often derived from materials like beeswax, linseed oil, or other plant-based substances, offer an eco-friendly option that appeals to many artisans. These sealers can enhance the natural beauty of the clay while providing a warm, organic finish. However, they may require more frequent reapplication and can be less resistant to water and stains compared to their synthetic counterparts. This means that while they contribute to a charming, rustic aesthetic, they might not be the best choice for functional pieces that will see regular use.
On the other hand, synthetic sealers, such as polyurethane or acrylic-based products, provide a robust protective layer that can withstand wear and tear. These sealers are often more durable and water-resistant, making them suitable for functional ceramics. However, they can sometimes create a glossy finish that may not align with the vintage look you're aiming for. The choice between natural and synthetic sealers often boils down to what you prioritize: the authenticity and charm of natural materials or the durability and ease of maintenance offered by synthetic options.
To help you decide, here’s a quick comparison:
| Feature | Natural Sealers | Synthetic Sealers |
|---|---|---|
| Eco-Friendliness | High | Lower |
| Durability | Moderate | High |
| Water Resistance | Low | High |
| Finish Appearance | Matte/Warm | Glossy/Varied |
| Maintenance | High (frequent reapplication) | Low (long-lasting) |
Ultimately, your choice of sealer should reflect your personal style and the intended use of your ceramics. If you're crafting decorative pieces that will grace a shelf rather than a dining table, a natural sealer might be just the ticket. Conversely, if you're creating functional items that need to stand up to daily use, a synthetic sealer could be the way to go. Remember, the beauty of ceramics lies in their versatility, so don’t hesitate to experiment with both types to find what works best for you!
Q: Can I use natural sealers on functional ceramics?
A: While it's possible, natural sealers may not provide the durability needed for functional pieces. If you choose to use them, consider limiting their use to decorative items.
Q: How often do I need to reapply natural sealers?
A: The frequency of reapplication depends on usage and exposure to elements. Generally, you might need to reapply every few months for items that see regular handling.
Q: Are synthetic sealers safe for food contact?
A: Many synthetic sealers are not food-safe. Always check the manufacturer's guidelines to ensure that your chosen product is suitable for use on food-related items.
Frequently Asked Questions
- What are the key characteristics of vintage ceramics?
Vintage ceramics are often defined by their unique color palettes, textures, and shapes. Think of muted tones, intricate patterns, and a slightly worn look that tells a story. These elements combine to create pieces that evoke nostalgia, charm, and a sense of history.
- Which types of clay are best for creating vintage ceramics?
When it comes to vintage ceramics, earthenware and stoneware are popular choices. Earthenware is great for its earthy tones and porous nature, while stoneware offers durability and a more refined finish. Each type of clay will affect the final product's appearance, so choose based on the look you're aiming for!
- How can I achieve a distressed look on my ceramics?
To create that well-loved, vintage finish, try using techniques like sanding or applying washes. These methods can help you mimic the natural wear and tear that comes with age, giving your ceramics a charming character. It's like giving your pieces a little history of their own!
- What are the benefits of layering glazes?
Layering glazes can add depth and complexity to your ceramics, allowing for unique color variations that resemble antique pieces. This technique can create stunning visual effects, making each piece truly one-of-a-kind. It's like painting a picture, where each layer contributes to the overall masterpiece!
- Should I apply a clear coat to my finished ceramics?
Applying a clear coat can be beneficial as it protects the surface of your ceramics while enhancing their vintage look. It acts as a barrier against scratches and stains, ensuring your beautiful creations last longer. Think of it as giving your ceramics a shiny armor that also showcases their beauty!
- What is the difference between natural and synthetic sealers?
Natural sealers are often made from organic materials and can provide a more authentic finish, while synthetic sealers may offer higher durability and a wider range of finishes. When choosing between the two, consider factors like appearance, safety, and how you want your ceramics to look and feel over time.


