Inspiring Pottery Projects: An Ultimate Guide
This guide explores various pottery projects that inspire creativity and skill development. From beginner to advanced techniques, discover ideas that will ignite your passion for pottery and enhance your artistic journey. Whether you're a complete novice or someone looking to refine your skills, this guide will provide you with a treasure trove of ideas and techniques that can elevate your pottery game to new heights.
Starting with simple projects can build confidence and skills. If you're new to pottery, it's essential to engage in easy pottery ideas that allow you to grasp fundamental techniques while creating beautiful pieces. Think of your first piece as a stepping stone—a way to dip your toes into the vast ocean of pottery. For instance, you might start with a basic pinch pot, which is not only straightforward but also incredibly rewarding. The satisfaction of holding a piece you've created with your own hands is unparalleled!
Once you've mastered the basics, it's time to dive into intermediate techniques that challenge your skills. This section covers projects that introduce new methods and designs to elevate your pottery work. Imagine transitioning from a simple bowl to crafting intricate designs that reflect your personal style. It's like moving from a black-and-white sketch to a vibrant painting; the possibilities are endless!
Handbuilding offers creative freedom and unique designs. There are several methods you can explore, such as pinch pots, coil building, and slab construction. Each technique allows you to express your creativity in different ways. For instance, pinch pots enable you to shape clay freely, while coil building lets you stack and build larger pieces. The beauty of handbuilding is that you can create stunning pottery pieces that are personal and distinctive.
Pinch pots are a classic beginner project that allows for creativity. They start with a simple ball of clay, which you can mold and shape using just your fingers. This method not only teaches the fundamentals of clay manipulation but also gives you the freedom to personalize your vessel. Think of it as crafting a small, unique sculpture that serves a practical purpose. You can create pinch pots for various uses, from small bowls for snacks to decorative pieces for your home.
Coil building is a versatile technique that enables you to create larger pieces. By stacking coils of clay, you can form intricate designs that are both functional and artistic. This method is like building a tower, where each coil adds height and dimension. It requires a bit more patience and skill, but the results can be breathtaking. Imagine crafting a beautiful vase or a large planter that showcases your creativity and craftsmanship!
Wheel throwing is an essential pottery skill that every potter should learn. This section introduces the basics of using a potter's wheel, including centering clay, shaping, and trimming techniques. Think of the wheel as your dance partner; it requires practice and rhythm to master. As you learn to control the clay's movement, you'll find yourself creating perfectly symmetrical bowls, mugs, and even intricate decorative pieces. The thrill of watching your creation take shape is an experience like no other!
Glazing adds color and texture to your pottery, transforming simple clay into vibrant works of art. Explore different glazing methods, including dipping, brushing, and spraying, to enhance the beauty of your finished pieces. Glazing is where your creativity can truly shine, as you can experiment with colors and finishes. It's like adding the final touches to a masterpiece, turning an ordinary piece into something extraordinary!
Under glazes provide a vibrant way to decorate pottery before the final glaze. Applying under glazes effectively can yield striking results, allowing you to create intricate patterns and designs. Think of under glazes as the foundation of your artwork; they set the stage for the final glaze, bringing depth and richness to your pieces.
Layering glazes can create depth and complexity in your pottery. By combining different glazes, you can achieve unique visual effects that make your pieces stand out. This technique is akin to mixing colors on a palette; the more you experiment, the more unique your creations will become. Imagine how exciting it is to unveil a piece that has a rich, layered finish, showcasing your artistic flair!
Creating functional pottery adds purpose to your art. Explore projects that result in practical items, combining aesthetics with usability for everyday life. Think about how rewarding it is to use something you’ve made with your own hands. It’s not just about art; it’s about bringing beauty into your daily routine.
Crafting dishware and utensils allows you to create beautiful, functional pieces. Learn about the materials and techniques needed to make your own plates, bowls, and cutlery. Imagine serving dinner on a set of dishes you've crafted—it's a conversation starter and a point of pride!
Designing planters and vases merges art with nature. Creating stunning pieces that enhance your home and garden showcases your pottery skills beautifully. Think of it as bringing life into your art; each planter or vase can tell a story, reflecting your style and personality.
Q: What materials do I need to start pottery?
A: To start pottery, you'll need clay, a work surface, basic tools (like a needle tool and a rib), and a kiln for firing your pieces.
Q: Is pottery difficult to learn?
A: Like any art form, pottery has its challenges, but with practice and patience, anyone can learn it. Start with simple projects and gradually work your way up.
Q: How long does it take to make a piece of pottery?
A: The time varies depending on the complexity of the piece. Simple projects can take a few hours, while more intricate designs may take several days from start to finish.

Beginner-Friendly Pottery Projects
Starting your journey in pottery can feel like stepping into a new world, filled with endless possibilities and creative outlets. are the perfect way to ease into this fascinating craft, allowing you to build confidence while honing your skills. These projects are designed not only to teach you the fundamentals but also to ignite your passion for creating beautiful pieces that reflect your unique style.
One of the most rewarding aspects of pottery is that it can be as simple or as complex as you want it to be. For beginners, the key is to start with projects that are manageable yet satisfying. Think of your first pottery piece as a blank canvas; it’s an opportunity to express yourself without the pressure of perfection. From simple pinch pots to basic slab constructions, each project can help you develop essential techniques while having fun!
Let’s explore some beginner-friendly projects that are perfect for newcomers:
- Pinch Pots: These are perhaps the easiest and most enjoyable projects for beginners. All you need is a ball of clay and your hands. By pinching and shaping the clay, you can create small bowls or decorative pieces that can be personalized with textures or colors.
- Coil Pots: This technique involves rolling out long coils of clay and stacking them to form a pot. It’s a fantastic way to learn about structure and form, and you can create larger pieces as you become more confident.
- Slab Construction: Using flat slabs of clay, you can create various shapes and forms. This method allows for creativity in design, and you can make anything from plates to boxes.
As you embark on these projects, remember that the process is just as important as the final product. Embrace the messiness of clay and the joy of creation. Each piece you make is a step forward in your pottery journey, and with every project, you’ll find yourself becoming more skilled and confident.
Now, you might be wondering, “What tools do I need to get started?” Fortunately, you don’t need a lot of fancy equipment. Here’s a quick table to help you out:
| Tool | Purpose |
|---|---|
| Clay | Your primary material, choose a type suitable for beginners. |
| Potter's Knife | For cutting and shaping clay. |
| Sponge | For smoothing surfaces and adding moisture. |
| Rolling Pin | To flatten clay for slab construction. |
| Texturing Tools | To add unique designs and patterns. |
With these tools and some basic projects, you’re well on your way to creating stunning pottery pieces. Remember, the best part of pottery is the opportunity to experiment; don’t be afraid to try new techniques or combine methods. Each piece you create will not only reflect your growing skills but also tell a story of your artistic journey.
So, roll up your sleeves, get your hands dirty, and let your creativity flow! Pottery is not just about making objects; it's about discovering yourself and enjoying the process. Who knows? You might just find a new passion that will last a lifetime!
Intermediate Pottery Techniques
Once you've mastered the basics of pottery, it's time to elevate your skills and explore intermediate techniques that will challenge your creativity and expand your repertoire. This stage of your pottery journey is where the real magic happens! You'll delve into various projects that not only test your abilities but also introduce you to innovative methods and designs. Whether you're looking to create intricate pieces or enhance your existing skills, this section is packed with ideas that will inspire you to push your limits.
One of the most exciting aspects of intermediate pottery is the opportunity to experiment with handbuilding techniques. Unlike wheel throwing, handbuilding allows for a greater degree of artistic freedom, enabling you to craft unique, one-of-a-kind pieces. There are several handbuilding methods to explore:
- Pinch Pots: These are simple yet versatile vessels that you can shape with your hands. They’re perfect for beginners who want to explore their creativity.
- Coil Building: This method involves rolling out coils of clay and stacking them to create larger and more complex forms. It’s a fantastic way to create intricate designs.
- Slab Construction: Using flat pieces of clay, you can create geometric shapes and structures, allowing for a wide range of artistic expressions.
Each of these techniques offers a unique way to express your artistic vision. For instance, when working with pinch pots, you can personalize them with textures and patterns that reflect your style. On the other hand, coil building allows you to create larger sculptures or functional items, expanding your creative possibilities.
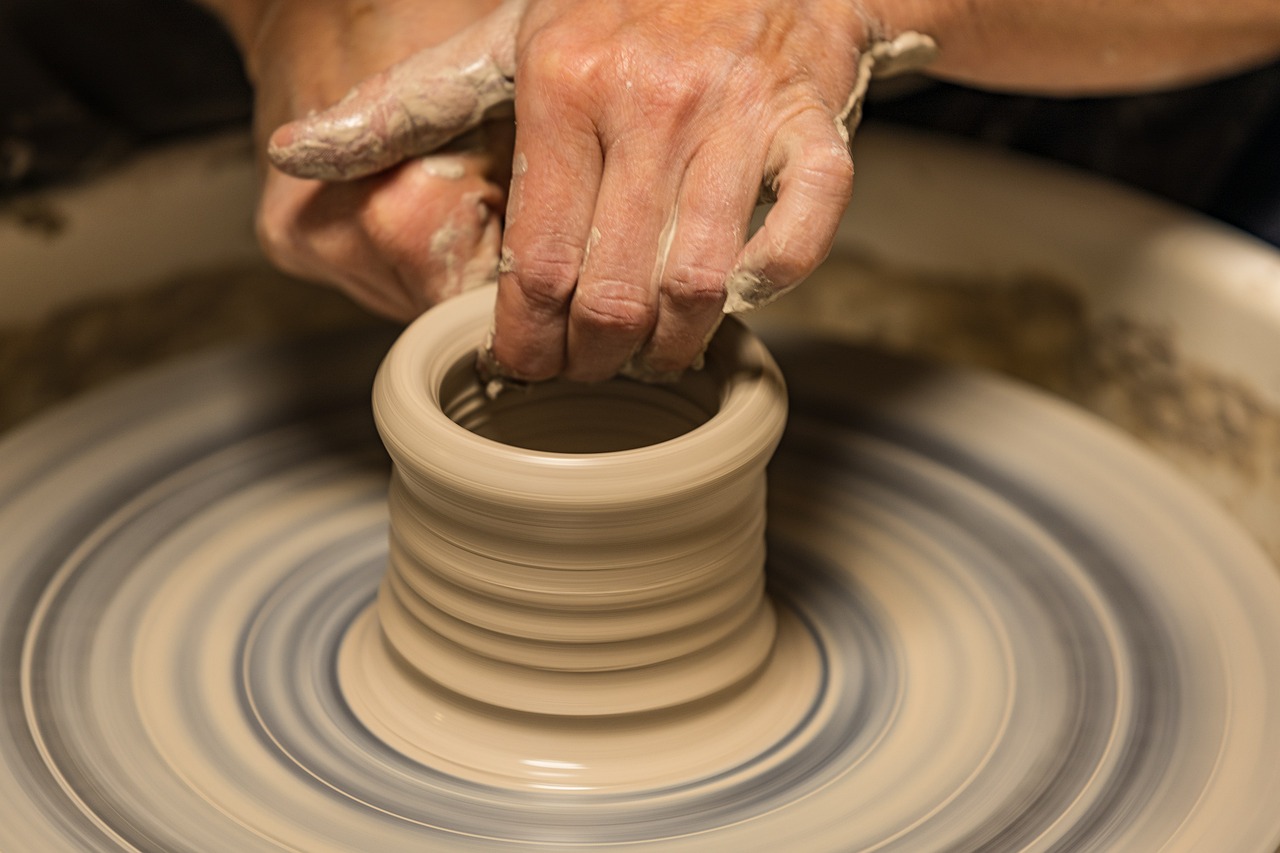
Another essential component of intermediate pottery is mastering the wheel throwing basics. This skill is crucial for producing symmetrical and refined pieces. Understanding how to center the clay on the wheel is foundational; once you achieve this, you can shape and trim your creations with confidence. Here’s a quick overview of the steps involved in wheel throwing:
| Step | Description |
|---|---|
| 1. Centering | Place your clay on the wheel and use your hands to center it, creating a balanced base. |
| 2. Opening | Use your fingers to create an opening in the center of the clay, forming the base of your piece. |
| 3. Pulling Up | Gradually pull the clay upwards to form the walls of your pottery, adjusting the thickness as needed. |
| 4. Trimming | Once your piece is leather-hard, use trimming tools to refine its shape and add decorative elements. |
As you advance in your pottery skills, remember that practice is key. Don’t be afraid to make mistakes; each piece you create is a stepping stone toward mastery. Embrace the journey, and let your imagination guide you through the world of . The satisfaction of creating something beautiful from raw clay is unmatched and will undoubtedly ignite your passion for this timeless art form.
Q: What materials do I need for intermediate pottery projects?
A: You'll need clay, tools for handbuilding or wheel throwing, a pottery wheel (if you're throwing), and glazes for finishing your pieces. Don't forget safety gear like a dust mask when working with dry clay!
Q: How long does it take to master wheel throwing?
A: Mastery varies by individual, but with consistent practice, you can expect to see significant improvement within a few months. Remember, patience is key!
Q: Can I combine handbuilding and wheel throwing techniques?
A: Absolutely! Many potters incorporate both methods to create unique pieces. For example, you might throw a bowl on the wheel and then add handbuilt details.
Handbuilding Techniques
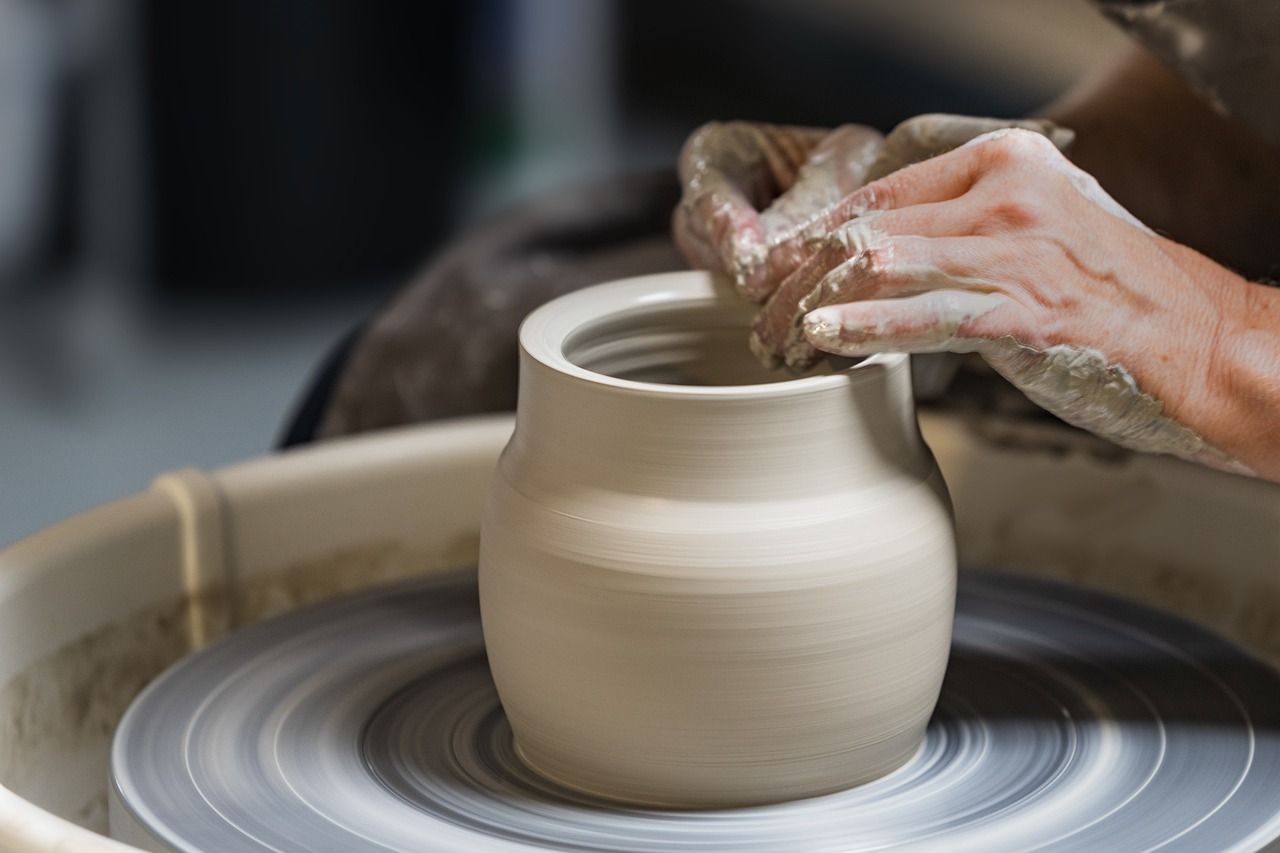
Handbuilding is one of the most rewarding aspects of pottery, providing you with the creative freedom to mold and shape your pieces without the constraints of a potter's wheel. Whether you're a beginner or an experienced potter, mastering handbuilding techniques can significantly enhance your pottery skills and allow you to express your individuality through your work. In this section, we will explore several popular handbuilding methods that can help you create stunning and unique pottery pieces that reflect your personal style.
One of the simplest and most popular handbuilding techniques is the pinch pot method. This technique involves taking a ball of clay and using your fingers to pinch and shape it into a vessel. Pinch pots are not only easy to make but also offer a fantastic opportunity to personalize your creations. You can experiment with different shapes, sizes, and textures, making each pot a one-of-a-kind masterpiece. Imagine crafting a small pinch pot that serves as a cozy holder for your favorite succulent or a decorative item on your coffee table.
Another exciting handbuilding technique is coil building. This method allows you to create larger and more intricate pieces by stacking coils of clay on top of each other. The beauty of coil building lies in its versatility; you can create anything from simple bowls to complex sculptures. To get started, roll out long, thin coils of clay and gradually stack them, smoothing the seams as you go. This technique not only enhances your ability to create larger forms but also encourages you to experiment with different designs and patterns. Picture a stunning, spiraled vase that adds an artistic touch to your living space!
Finally, we have the slab construction technique, which involves rolling out flat pieces of clay (slabs) and joining them together to form various shapes. Slab construction is perfect for creating functional items like plates and tiles, as well as artistic sculptures. The key to successful slab building is ensuring that your slabs are of even thickness, which can be achieved using a rolling pin and guides. Once you have your slabs ready, you can cut them into desired shapes and assemble them using scoring and slipping techniques. Imagine crafting a set of beautifully designed dinner plates that not only serve food but also tell a story!
In summary, handbuilding techniques open up a world of possibilities for potters of all skill levels. By exploring methods like pinch pots, coil building, and slab construction, you can create unique and meaningful pieces that showcase your creativity. Remember, the journey of pottery is all about experimentation and self-expression, so don’t be afraid to try new things and let your imagination run wild!
Q: What is the best clay for handbuilding?
A: The best clay for handbuilding is typically a stoneware or earthenware clay. These types of clay are forgiving and easy to work with, making them ideal for beginners.
Q: How do I keep my clay from drying out while I work?
A: To prevent your clay from drying out, keep it covered with a damp cloth or plastic wrap when you’re not actively working on it. This will help maintain moisture and keep the clay pliable.
Q: Can I combine different handbuilding techniques?
A: Absolutely! Many potters combine various handbuilding techniques to create unique pieces. For example, you can start with a pinch pot base and then add coil elements for decoration.
Pinch Pots
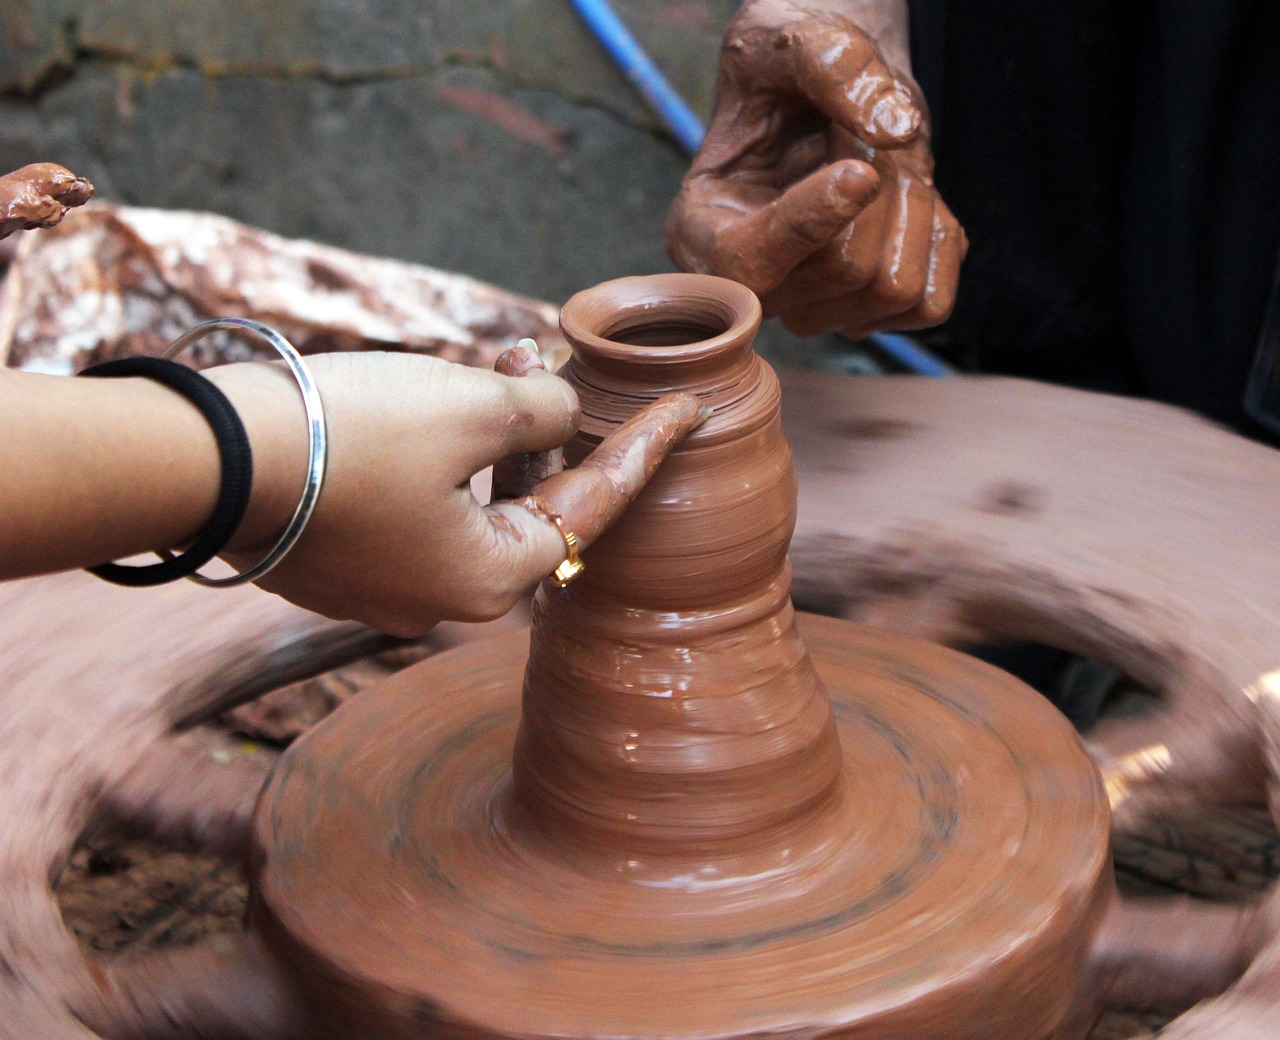
Pinch pots are not just a classic beginner project; they are a delightful way to express your creativity while mastering the fundamentals of pottery. Imagine this: you start with a simple ball of clay, and through the magic of your hands, it transforms into a unique, personalized vessel. The beauty of pinch pots lies in their simplicity and versatility. They can be used as decorative items, small planters, or even functional bowls for snacks!
To create a pinch pot, the process is straightforward yet rewarding. First, take a ball of clay—about the size of a golf ball is perfect. Begin by pressing your thumb into the center of the clay ball, creating a small indentation. As you pinch the clay between your thumb and fingers, rotate the pot to maintain an even thickness. This technique not only shapes the pot but also allows you to infuse it with your own style. You can create a smooth finish or add texture by using various tools or even your fingers.
As you become more comfortable with this technique, consider incorporating some personal touches. Here are a few ideas to enhance your pinch pots:
- Texturing: Use tools like forks, stamps, or even natural items like leaves to create interesting patterns on the surface.
- Color: Once your pinch pot is bisque fired, you can paint it with underglazes or glazes to add vibrant colors.
- Functionality: Think about how you want to use your pinch pot. If it’s for plants, ensure the base is wide enough for drainage holes.
Moreover, pinch pots are a fantastic way to practice your pottery skills without the pressure of perfection. They can be made in various sizes, from tiny pots for air plants to larger bowls for serving snacks. The process is forgiving, allowing you to experiment with different shapes and sizes. And if you make a mistake? Just reshape the clay and start again! This freedom is what makes pinch pots an ideal project for both beginners and seasoned potters alike.
In essence, pinch pots are not merely vessels; they are a canvas for your imagination. They invite you to play, explore, and create without boundaries. So, grab some clay, and let your fingers do the talking—each pinch is a step towards discovering your unique artistic voice!
Q: What type of clay is best for pinch pots?
A: Earthenware clay is a great option for beginners due to its pliability and ease of use. However, stoneware can also be used for more durable pieces.
Q: Can I glaze my pinch pots?
A: Absolutely! Once your pinch pots are bisque fired, you can apply glazes or underglazes to add color and finish.
Q: How do I prevent my pinch pots from cracking?
A: Make sure to keep your clay moist while working, and allow your pots to dry slowly. Cover them with plastic if necessary to prevent rapid drying.
Q: What are some creative uses for pinch pots?
A: Pinch pots can be used for a variety of purposes, including as small planters, jewelry holders, or even as unique gift items!
Coil Building
Coil building is a fascinating pottery technique that offers both versatility and creative freedom. Imagine stacking soft coils of clay, each one building upon the last, to create a unique masterpiece that reflects your personal style. This method is not just about forming shapes; it’s about expressing your artistic vision through the tactile experience of clay. Whether you’re crafting a simple bowl or an intricate sculpture, coil building allows you to explore your creativity in ways you might not have thought possible.
To get started with coil building, you’ll need a few essential tools and materials. Gather your clay, a rolling pin, a knife or wire cutter, and some water for smoothing. The process begins with rolling out long, thin coils of clay. The thickness of these coils can vary depending on your desired outcome; thicker coils can create sturdy structures, while thinner ones are perfect for delicate designs. As you roll, think about how each coil will contribute to the overall form of your piece.
Once you have your coils ready, it’s time to start stacking! Here’s a basic overview of the coil building process:
- Base Layer: Start by forming a circular base with your first coil. This will serve as the foundation for your piece.
- Adding Coils: Begin adding additional coils on top of the base, gently pressing them together to ensure they adhere. Use your fingers to blend the seams, creating a smooth transition between each layer.
- Shaping: As you build upwards, you can shape the coils to create curves or angles. This is where your creativity shines—experiment with different forms!
- Smoothing: After reaching your desired height, use a damp sponge or your fingers to smooth out any rough edges and refine the shape.
One of the most exciting aspects of coil building is the ability to create intricate designs. You can incorporate patterns or textures into your work by using various tools, such as stamps or carving tools. Additionally, consider mixing different types of clay to achieve contrasting colors and textures, which can add depth to your creations.
Coil building is not just a technique; it’s a journey of exploration and discovery. Each piece you create tells a story—your story. So, gather your materials, let your imagination run wild, and start stacking those coils!
Q: What type of clay is best for coil building?
A: Any type of clay can be used for coil building, but earthenware or stoneware is often preferred for its workability and durability.
Q: Can I use coil building for functional pottery?
A: Absolutely! Many potters create functional items like bowls and vases using coil building techniques.
Q: How do I ensure my coils stick together?
A: Make sure to score the edges of the coils and apply a bit of water before pressing them together. This helps to create a strong bond.
Q: What if my coils crack while drying?
A: Cracking can occur if the coils are too thick or dry out too quickly. To prevent this, keep your piece covered with plastic while it dries and ensure even thickness in your coils.

Wheel Throwing Basics
Wheel throwing is an essential skill for any potter looking to create beautifully shaped vessels. Imagine the thrill of spinning clay on a potter's wheel, transforming a lump of earth into a functional work of art! But before you dive headfirst into this exciting world, it's crucial to understand the foundational techniques that will set you up for success.
First and foremost, centering the clay is the most critical step in wheel throwing. This process involves placing your clay on the wheel and using your hands to manipulate it until it is perfectly balanced and symmetrical. If the clay is not centered, you’ll find it nearly impossible to shape it into the desired form. Picture this: if you were trying to spin a top that was lopsided, it wouldn’t spin well, would it? The same principle applies here.
Once you’ve centered the clay, the next step is to open the clay. This means using your fingers to create a hollow in the center of your centered lump. This stage is where your vessel truly begins to take shape. As you open the clay, be mindful of the thickness of the walls; they should be even to ensure your pottery is both aesthetically pleasing and functional.
After opening the clay, you’ll want to pull up the walls. This technique involves using your hands to gently squeeze and lift the clay upwards, creating the walls of your pot. It’s a delicate dance between pressure and control, and it might take some practice to get it just right. Think of it as a gentle hug; too tight, and you’ll crush the clay, too loose, and it won’t take shape.
Finally, once you’ve achieved the desired height and shape, it’s time to trim your piece. Trimming is where you refine the form, removing excess clay and creating a smooth base. It’s akin to giving your pottery a haircut—making it neat, tidy, and ready for the finishing touches. Remember, practice makes perfect, so don’t be discouraged if your first few attempts don’t turn out exactly as you envisioned.
To help you visualize the wheel throwing process, here’s a simple table summarizing the key steps:
| Step | Description |
|---|---|
| Centering | Balancing the clay on the wheel to ensure even shaping. |
| Opening | Creating a hollow in the center of the clay. |
| Pulling Up | Lifting the walls of the pot to the desired height. |
| Trimming | Refining the shape and removing excess clay. |
In conclusion, wheel throwing is not just about technique; it’s about embracing the journey of creation. Each piece you make tells a story, reflecting your growth as an artist. So grab that clay, spin that wheel, and let your imagination run wild!
Q: Do I need any special tools for wheel throwing?
A: While a potter's wheel is essential, you'll also benefit from tools like a rib, sponge, and trimming knife to help you shape and refine your pieces.
Q: How long does it take to learn wheel throwing?
A: Learning the basics can take a few weeks of practice, but mastering the art can take months or even years. Enjoy the process and be patient with yourself!
Q: Can I use any type of clay for wheel throwing?
A: Not all clays are suitable for wheel throwing. Look for stoneware or earthenware clays that have good plasticity and can withstand the shaping process.
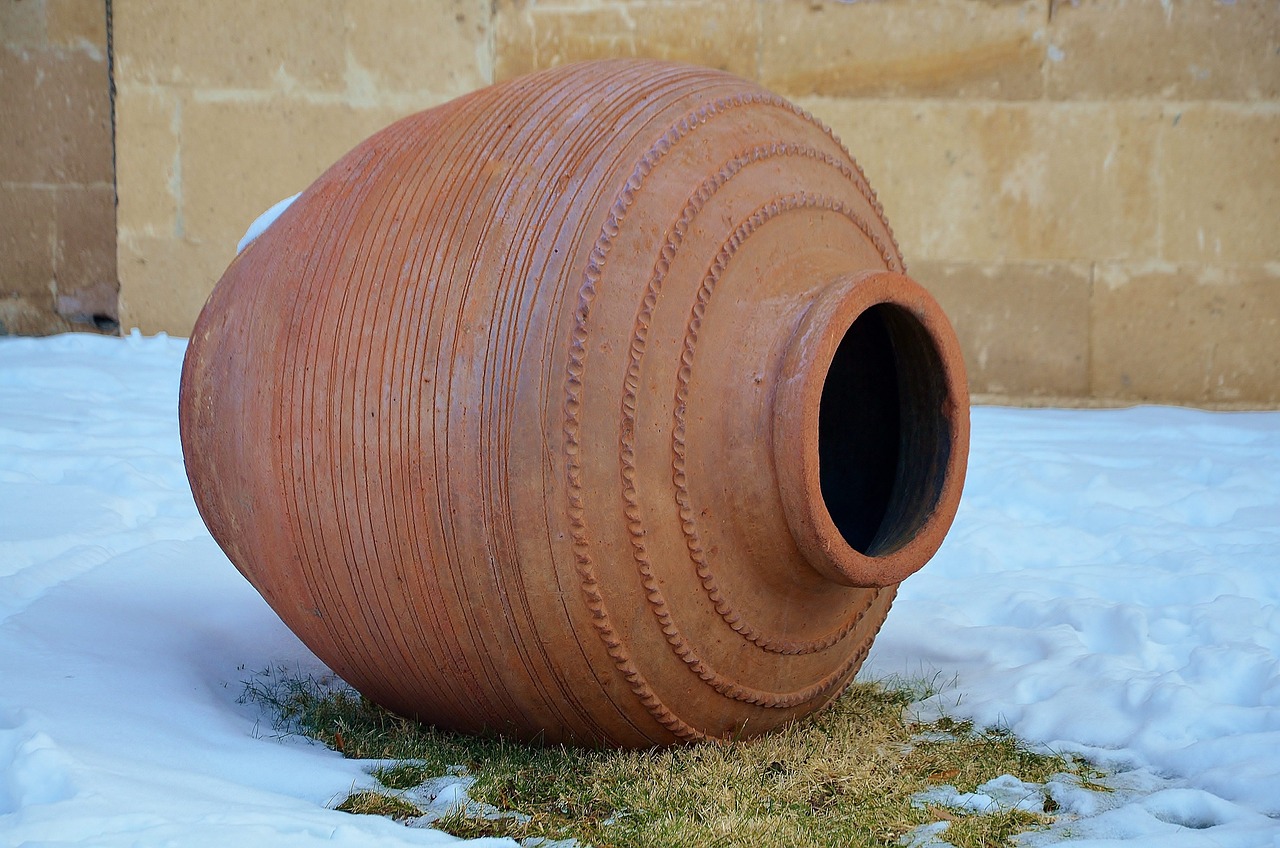
Creative Glazing Techniques
Glazing is where the magic truly happens in pottery, transforming your pieces from simple clay forms into vibrant works of art. It's like painting on a canvas, but instead, you're using a glass-like finish that not only enhances aesthetics but also provides a durable surface. Whether you're looking to add a splash of color, create intricate designs, or experiment with textures, glazing techniques can elevate your pottery to new heights. In this section, we will explore various glazing methods that can help you achieve stunning results.
One of the most popular glazing methods is dipping. This technique involves immersing your pottery piece into a container filled with glaze. It's a quick way to achieve an even coat, and the results are often stunningly smooth. However, it's essential to ensure that the piece is clean and dry before dipping to avoid any unwanted blemishes. Imagine dipping a perfectly shaped bowl into a vibrant turquoise glaze, watching it emerge with a glossy finish that catches the light beautifully.
Another technique to consider is brushing. This method allows for more control over the application of glaze, making it perfect for detailed work. You can create patterns, textures, or even write words on your pottery. Think of it as using a paintbrush to create a masterpiece; with each stroke, you add your unique touch. This technique is particularly effective for adding underglazes, which can provide a vibrant base layer before applying a final glaze.
For those who want to take a more modern approach, spraying is an exciting option. Using a spray gun, you can achieve an even, fine mist of glaze over your pottery. This method is especially useful for larger pieces where dipping might not be feasible. The beauty of spraying is that it can create a soft gradient effect, allowing colors to blend seamlessly. Imagine a large planter that transitions from a deep blue at the bottom to a soft sky blue at the top, creating a stunning visual effect.
To enhance your glazing game, consider experimenting with under glazes. These are applied before the final glaze and can add a pop of color or intricate designs to your pottery. Under glazes are typically matte, which means they can create a lovely contrast when topped with a glossy final glaze. You can use under glazes to paint detailed designs, patterns, or even images, allowing for a personal touch that makes your pottery truly unique.
Additionally, layering glazes can create depth and complexity in your pieces. By applying multiple layers of different glazes, you can achieve unique visual effects that are both surprising and beautiful. For example, a base layer of a solid color can be topped with a transparent glaze that has flecks of metallic elements, giving your pottery a shimmering quality. The possibilities are endless, and experimentation is key!
In summary, glazing is not just a finishing touch; it's an integral part of the pottery-making process that can dramatically alter the appearance of your work. By exploring various techniques such as dipping, brushing, spraying, and layering, you can find the perfect method that resonates with your artistic vision. So grab your glazes and let your creativity flow!
- What is the best glaze for beginners? For beginners, it's often recommended to start with a clear or transparent glaze, as it allows the natural clay color to shine through while providing a protective finish.
- Can I mix different glazes? Yes, mixing glazes can lead to unique results, but it's crucial to test your combinations on a small piece first to see how they interact during firing.
- How do I prevent glaze from running? To prevent glaze from running, ensure that you apply the glaze evenly and avoid overloading the piece, especially on the bottom where it can drip during firing.

Under Glazes
are an exciting way to bring life and vibrancy to your pottery pieces before they are glazed. Unlike traditional glazes, which can be applied as a final layer, under glazes are designed to be used on greenware or bisque-fired pottery, allowing for intricate designs and colors that will remain visible after the final glaze is applied. This technique opens up a world of possibilities for artists looking to express their creativity in unique ways.
One of the most appealing aspects of under glazes is their versatility. You can use them to create detailed patterns, intricate images, or simply to add a splash of color to your work. The application methods can vary, but here are a few popular techniques:
- Brushing: This method allows for precision and control, making it perfect for detailed designs.
- Sponging: A more abstract approach, sponging can create beautiful textures and blends.
- Stenciling: For those who want to achieve specific shapes or patterns, stencils can be a fantastic tool.
When applying under glazes, it's essential to keep a few key tips in mind to ensure the best results:
- Surface Preparation: Make sure your pottery surface is clean and dry before application to help the under glaze adhere properly.
- Layering: You can layer different colors of under glazes to create depth. Just remember to let each layer dry before adding the next!
- Test Swatches: Always test your under glazes on a small piece of clay before applying them to your main project. This helps you see how the colors will look after firing.
Once you’ve applied your under glazes, the next step is to apply a clear glaze over the top. This final layer not only enhances the colors but also protects your artwork. The combination of under glazes and a clear glaze results in a stunning finish that showcases your creativity and skill.
In summary, under glazes are an essential tool for any pottery artist looking to add a personal touch to their work. By experimenting with different techniques and colors, you can create pieces that are not only functional but also works of art. So grab your brushes, unleash your imagination, and let your pottery journey take flight!
Q: What is the difference between under glazes and regular glazes?
A: Under glazes are applied before the final glaze and are meant to provide color and detail that will show through after firing. Regular glazes are typically applied as a final layer and can completely cover the underlying design.
Q: Can I mix under glazes?
A: Yes! Mixing under glazes can create unique colors and effects. Just be sure to test your mixes on a small piece first to see how they turn out after firing.
Q: Do I need to seal under glazes?
A: Yes, it is essential to apply a clear glaze over under glazes to protect them and enhance their appearance. The clear glaze will also provide a glossy finish.
Q: How do I clean my brushes after using under glazes?
A: Clean your brushes with water immediately after use to prevent the under glaze from drying on the bristles. If the under glaze has dried, you may need to soak the brushes in water to soften the residue.
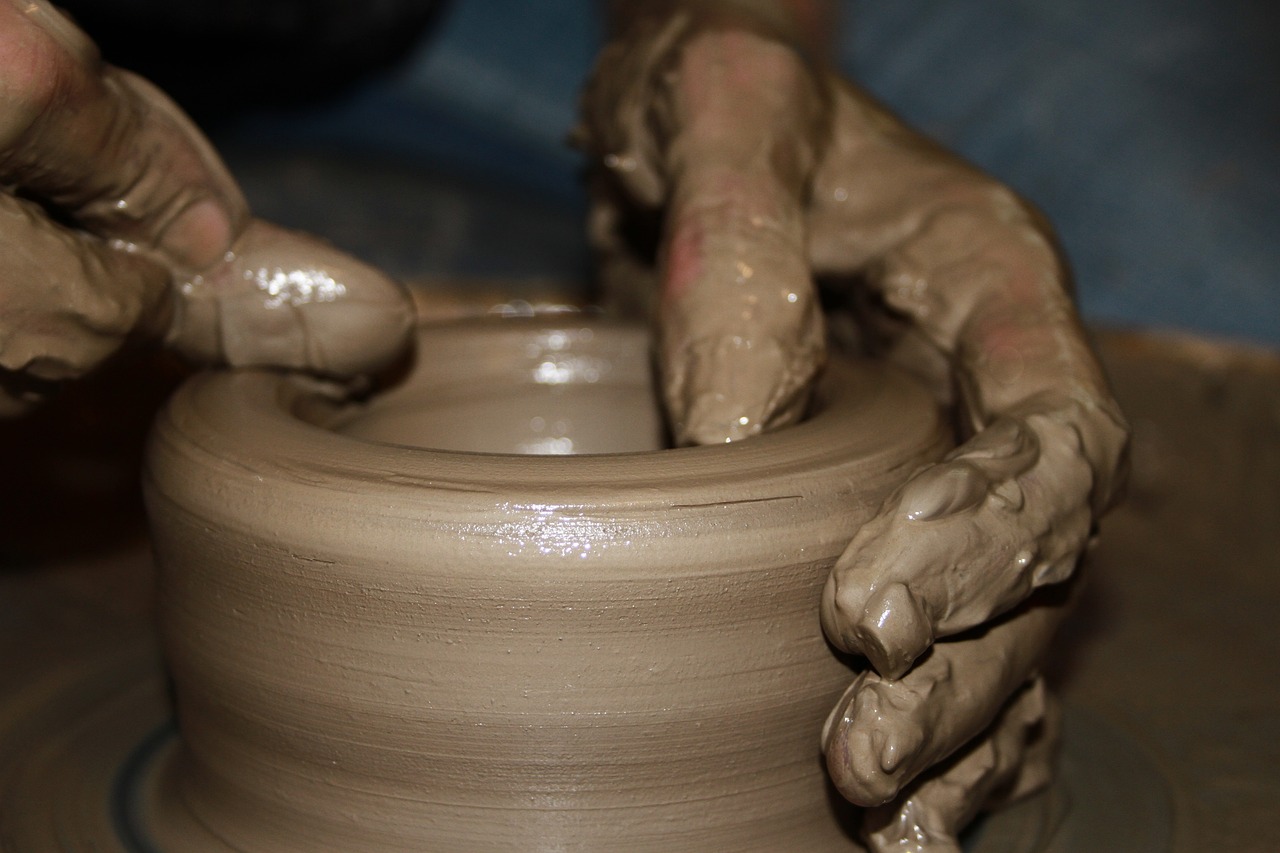
Layering Glazes
Layering glazes is like painting a masterpiece on a canvas; it allows you to blend colors, create depth, and achieve stunning visual effects that can transform your pottery into a true work of art. By applying multiple layers of glaze, you can experiment with color combinations and textures, resulting in pieces that are not only functional but also captivating. Imagine your pottery as a blank slate, waiting for the magic of glaze to bring it to life!
To successfully layer glazes, there are a few essential techniques and tips to keep in mind. First, it's important to choose compatible glazes, as some may react negatively with others during the firing process. Here’s a simple guideline to help you pick the right glazes:
| Glaze Type | Compatibility |
|---|---|
| Glossy Glazes | Generally compatible with matte glazes, but test before use. |
| Matte Glazes | Can be layered with other matte glazes for a soft finish. |
| Transparent Glazes | Works well over colored underglazes to enhance their vibrancy. |
| Opaque Glazes | May obscure underlying colors; use with caution. |
Once you have your glazes selected, the application process begins! Start by applying a base layer of your chosen glaze, allowing it to dry completely before adding additional layers. This is crucial because applying wet glaze over another wet layer can lead to unpredictable results, such as running or mixing of colors.
After your base layer is dry, you can begin layering additional glazes. Here are some methods to consider:
- Dipping: Dip your piece into a second glaze for an even coat.
- Brushing: Use a brush to apply glazes in specific areas for more control.
- Spraying: For a more uniform look, use a spray gun to apply layers evenly.
Don’t be afraid to experiment! Layering glazes can lead to unexpected and beautiful results. For instance, you might find that a transparent glaze over a vibrant underglaze creates a depth of color that is simply breathtaking. Remember, the key to mastering this technique lies in patience and practice. Keep a record of your glaze combinations and firing temperatures, as this will help you replicate successful results in the future.
As you explore the world of layering glazes, you'll discover that it's not just about the final product; it's about the journey of creativity and self-expression. Each piece you create is a reflection of your artistic vision, and layering glazes is a powerful tool that can help you convey that vision in unique and exciting ways.
Q: Can I layer any type of glaze?
A: Not all glazes are compatible. Always check the manufacturer's guidelines for compatibility.
Q: How many layers should I apply?
A: Typically, 2-3 layers work well, but you can experiment with more to see what effects you achieve.
Q: What if my glazes run during firing?
A: This can happen if the glaze is too thick or if the glazes are incompatible. Adjust your application technique and try again!
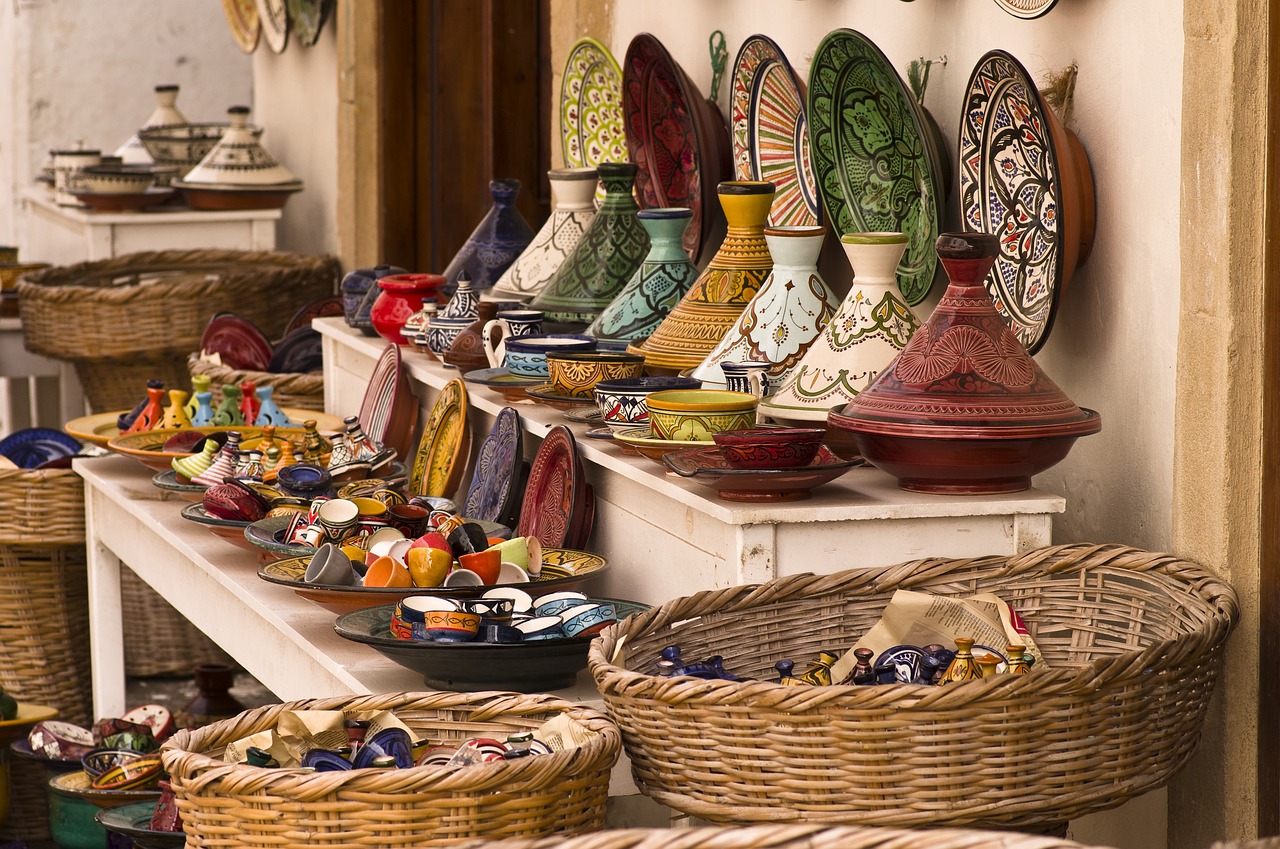
Functional Pottery Projects
Creating functional pottery is not just about aesthetics; it’s about merging art with everyday utility. Imagine sipping your morning coffee from a mug you crafted yourself, or serving dinner on plates that you designed and made. These pieces not only serve a purpose but also tell a story, embodying the creativity and effort you invested in their creation. Whether you're a novice potter or someone with a bit more experience, there are countless projects that allow you to explore the practical side of pottery while honing your skills.
One of the most rewarding aspects of functional pottery is the variety of items you can create. From dishware to planters, the possibilities are endless. Let’s delve deeper into some exciting projects that will inspire you to create beautiful, usable pieces that can enhance your home and lifestyle.
Crafting dishware and utensils is a fantastic way to combine functionality with creativity. Think about the joy of hosting a dinner party and serving your guests on plates that you made. Not only does it add a personal touch, but it also showcases your artistic flair. When creating dishware, you'll need to consider the materials and techniques that will ensure durability and usability. Stoneware and earthenware are popular choices for their strength and ability to withstand everyday use.
Here are some essential considerations when making dishware:
- Clay Selection: Choose a clay body that is food safe and suitable for the type of dishware you want to create.
- Glazing: Use glazes that are non-toxic and safe for food contact. Consider how the glaze will affect the final look of your pieces.
- Size and Shape: Design your pieces with practicality in mind. For example, bowls should be deep enough for soups, and plates should have a slight lip to prevent spills.
Once you’ve mastered the basics, you can experiment with different shapes and sizes, perhaps creating a matching set of plates, bowls, and cups that complement each other beautifully.
Designing planters and vases is another exciting avenue for functional pottery. These pieces not only serve as stunning decor but also provide a home for your favorite plants. Imagine a beautifully crafted vase on your dining table, bursting with fresh flowers, or a unique planter that adds character to your garden. When creating these pieces, consider the drainage needs of plants to ensure they thrive in their new homes.
Here are some tips for creating functional planters and vases:
- Drainage Holes: Always include drainage holes in your planters to prevent overwatering.
- Size: Think about the size of the plants you want to pot. Larger plants will need bigger pots to accommodate their growth.
- Style: Get creative with shapes and designs! From traditional round vases to whimsical animal-shaped planters, the sky's the limit.
By incorporating these elements into your pottery projects, you can create pieces that are not only visually appealing but also serve a practical purpose in your home. Functional pottery projects allow you to express your creativity while also producing items that enhance your everyday life.
Q: What type of clay should I use for functional pottery?
A: For functional pottery, it's best to use stoneware or earthenware clay, as these types are durable and suitable for everyday use.
Q: Can I use any glaze on functional pottery?
A: No, you should always use food-safe glazes for any pottery that will come into contact with food or drink.
Q: How do I ensure my pottery is waterproof?
A: To make your pottery waterproof, you need to properly fire it in a kiln and apply a suitable glaze. Ensure that the glaze covers all surfaces, especially the inside of planters.
Q: Are there any specific techniques for creating dishware?
A: Yes! Techniques such as slab construction, wheel throwing, and handbuilding can be used to create various dishware items. Each method offers unique possibilities for shapes and designs.
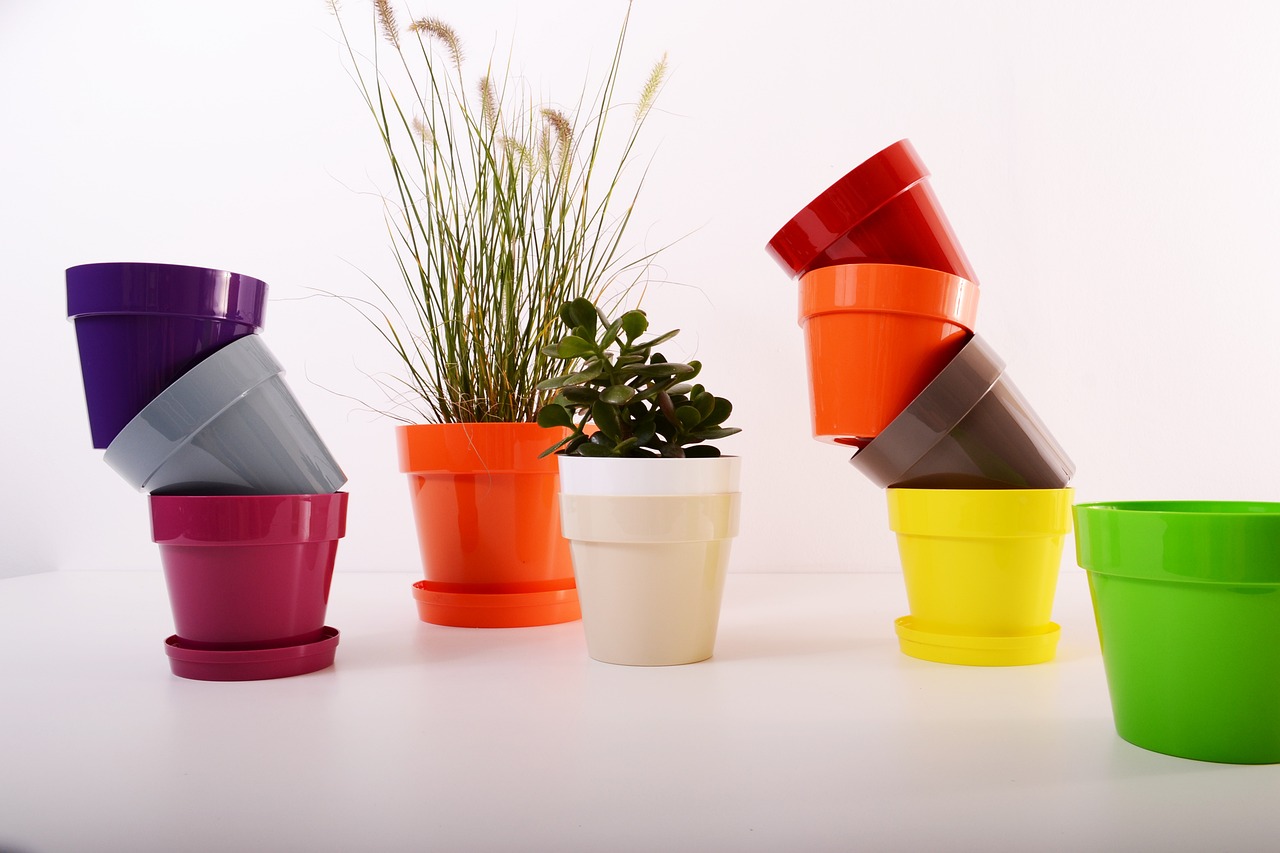
Dishware and Utensils
Creating your own dishware and utensils is a rewarding journey that combines artistry with functionality. Imagine serving your favorite meals on plates that you've crafted with your own hands, or using a set of utensils that reflect your personal style. Not only does this process allow you to express your creativity, but it also infuses your dining experience with a touch of uniqueness that store-bought items simply can't match.
To embark on this exciting adventure, you'll need to consider several key materials and techniques. The most common clay types for dishware include stoneware and earthenware, both of which are durable and suitable for everyday use. Stoneware is particularly popular due to its ability to withstand high temperatures, making it ideal for oven-safe dishes. On the other hand, earthenware is perfect for decorative pieces, as it often has a more rustic charm.
When it comes to the actual crafting process, you can choose between handbuilding and wheel throwing. Handbuilding allows for a more organic feel, enabling you to create unique shapes and sizes. You might start with simple forms like bowls and plates, gradually experimenting with more complex designs as you gain confidence. For those who prefer a more traditional approach, wheel throwing offers precision and the ability to create perfectly symmetrical pieces. Mastering the potter's wheel can seem daunting at first, but with practice, you'll be amazed at what you can achieve.
Once you've shaped your dishware, the next step is glazing. This is where the magic happens! Glazing not only adds color but also creates a waterproof surface, making your pieces functional. You can experiment with different glazing techniques, such as dipping, brushing, or spraying, to achieve various effects. Don’t be afraid to mix and match glazes; layering them can produce stunning results that elevate your dishware to a whole new level.
For those interested in creating utensils, the process is quite similar. Whether you're crafting spoons, forks, or serving tools, the same principles apply. It's essential to consider ergonomics: your utensils should not only look good but also feel comfortable in the hand. Many potters find joy in designing utensils that are both practical and artistic, allowing them to showcase their skills while creating items that people will use daily.
In conclusion, creating dishware and utensils is not just about making functional items; it's about infusing your personality and creativity into everyday life. Every piece tells a story, and every meal becomes a celebration of your artistic journey. So gather your materials, unleash your creativity, and start crafting beautiful pieces that will not only serve a purpose but also bring joy to your dining experience.
- What type of clay is best for dishware? Stoneware is often recommended for its durability and ability to withstand high temperatures.
- Can I use my pottery in the oven? Yes, if you use stoneware, it is generally safe for oven use; however, always check your specific clay's properties.
- How do I care for my handmade dishware? Handmade dishware should be treated with care. Avoid sudden temperature changes and hand wash when possible to preserve the glaze.
- What glazing techniques should I try? Experiment with dipping, brushing, and layering glazes to find the style that suits you best!
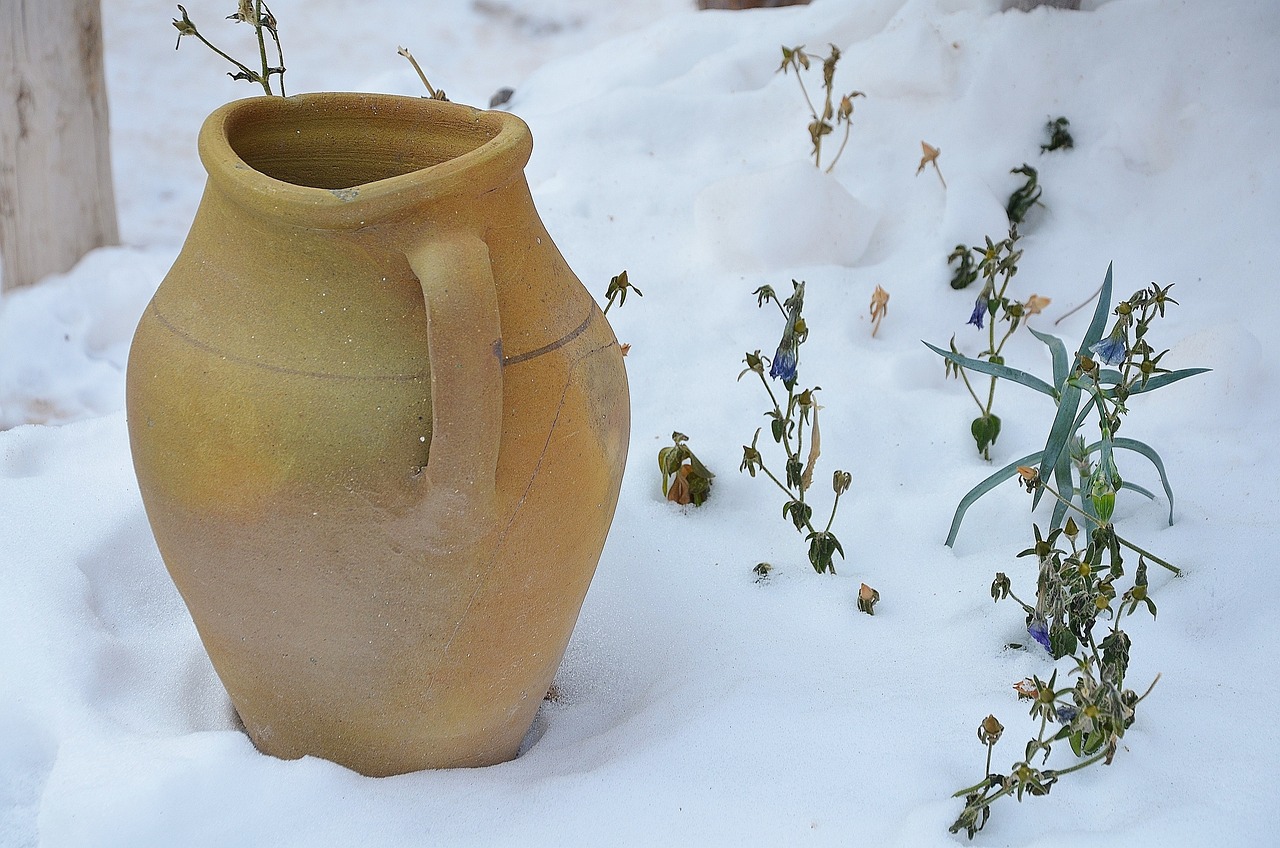
Planters and Vases
Creating planters and vases is a fantastic way to combine your pottery skills with a touch of nature. Not only do these pieces serve a functional purpose, but they also allow you to express your creativity and style. Imagine crafting a beautiful vase that showcases your favorite flowers or a unique planter that brings life to your indoor space. The possibilities are endless!
When diving into the world of planters and vases, it's essential to consider the materials and techniques that will best suit your vision. For instance, you can use stoneware or earthenware clay, both of which offer different textures and finishes. Stoneware is durable and great for outdoor use, while earthenware is more porous and can be perfect for indoor plants. Choosing the right clay is the first step in ensuring your creation not only looks good but also meets the needs of the plants it will house.
One of the most exciting aspects of making planters and vases is the ability to personalize them. You can incorporate various decorative elements such as textures, colors, and shapes. For example, you might choose to create a rustic, textured surface using a sponge technique or add intricate carvings for a more elegant look. The choice is yours! Below are some popular techniques that can enhance your pottery projects:
- Texturing: Use tools like stamps, combs, or even natural materials like leaves to create unique patterns.
- Adding Handles: Consider adding handles to your vases for a more functional and stylistic touch.
- Glazing: Experiment with different glazes to create vibrant colors or subtle earth tones that complement your home decor.
Another crucial aspect of crafting planters is ensuring they have proper drainage. Without it, plants can suffer from overwatering, leading to root rot. When designing your planter, make sure to include drainage holes at the bottom. You can achieve this by simply poking holes in the base of your piece before it dries completely. This small step can make a significant difference in the health of your plants!
Once you’ve shaped and dried your planters or vases, it’s time to think about the finishing touches. Glazing not only protects your pottery but also adds a layer of beauty. You might want to explore under glazes for vibrant colors or experiment with layering glazes to achieve a unique finish. The application of glazes can be done through various methods, including dipping, brushing, or spraying, each offering a different visual effect.
In summary, creating planters and vases is a rewarding pottery project that enhances your skills while allowing you to bring beauty into your home. Whether you’re a beginner or an experienced potter, the joy of crafting functional art is something that can inspire anyone. So gather your materials, unleash your creativity, and watch as your artistic vision blossoms into beautiful, living decor!
Q: What type of clay is best for planters?
A: Stoneware is generally the best choice for outdoor planters due to its durability, while earthenware is suitable for indoor use.
Q: How do I ensure my planter has proper drainage?
A: Make sure to poke holes in the bottom of your planter before it dries to allow excess water to escape.
Q: Can I use any glaze on my planters?
A: Yes, but ensure the glaze is non-toxic and safe for plants, especially if you plan to use it for edible plants.
Q: What techniques can I use to decorate my vases?
A: You can use texturing techniques, carving, and various glazing methods to personalize your vases.
Frequently Asked Questions
- What are some beginner-friendly pottery projects?
Starting your pottery journey can be both exciting and a bit daunting. Some great beginner-friendly projects include pinch pots, which are simple and allow for personal creativity, and coil pots, where you can stack coils to build larger pieces. These projects are perfect for learning the basics while having fun!
- How can I improve my wheel throwing skills?
Improving your wheel throwing skills takes practice and patience. Focus on centering the clay properly, as this is crucial for shaping. Also, try to keep your hands steady and apply even pressure while shaping the clay. Watching tutorials or joining a pottery class can really help you refine your technique!
- What glazing techniques should I try?
There are many exciting glazing techniques to explore! You might want to start with dipping, which is straightforward and gives a nice even coat. Layering glazes can also create beautiful depth and visual interest in your pieces. Experimenting with under glazes allows you to add vibrant colors before applying the final glaze.
- Can I make functional pottery?
Absolutely! Creating functional pottery is a fantastic way to combine art with practicality. You can craft items like plates, bowls, and utensils that are not only beautiful but also useful in your daily life. Your creations can be both aesthetically pleasing and serve a purpose!
- What materials do I need for pottery?
To get started with pottery, you'll need some basic materials like clay, which comes in various types depending on your project. You’ll also require a potter's wheel if you're wheel throwing, and tools like sponges, scoring tools, and glazes for finishing your pieces. Don't forget a kiln for firing your creations!
- How do I care for my finished pottery?
Caring for your finished pottery is essential to ensure its longevity. Always hand wash your pieces with mild soap and avoid putting them in the dishwasher. If your pottery is functional, make sure to check if it’s food safe before using it for food items!


