
Creating Ceramics with Molds: An In-Depth Guide
Creating ceramics with molds is a captivating journey that combines artistry with science. Whether you’re a novice eager to explore this craft or a seasoned artisan looking to refine your techniques, understanding the intricacies of ceramic molding can significantly enhance your creative process. This guide aims to illuminate the fascinating world of ceramic molding, providing you with insights into techniques, materials, and invaluable tips that will help you master this art form.
Understanding the fundamental principles of ceramic molding is essential to your success as a ceramic artist. At its core, ceramic molding involves shaping clay into desired forms using various types of molds. These molds can be made from different materials, each offering unique benefits. For instance, plaster molds are popular for their ability to absorb moisture, which helps speed up the drying process. On the other hand, silicone molds provide flexibility and ease of demolding, making them ideal for intricate designs.
The overall process of creating ceramic pieces typically involves several key steps. First, you'll need to prepare your clay, ensuring it has the right consistency for molding. Next, you'll pour or press the clay into your chosen mold, allowing it to set and take shape. Once the clay has dried sufficiently, you can demold your piece and move on to finishing touches. But before diving into this exciting process, let’s explore the materials you’ll need.
Selecting appropriate materials is crucial for successful ceramic molding. The type of clay you choose can significantly impact the final product. For example, earthenware is known for its versatility and ease of use, while stoneware offers durability and a more refined finish. Additionally, incorporating additives like grog can improve the clay's strength and reduce shrinkage during drying.
When it comes to mold materials, you have several options. Plaster molds are often favored for their affordability and ease of use, but silicone molds are gaining popularity due to their flexibility and reusability. Each type of mold can affect the texture and finish of your ceramic piece, so it’s essential to choose wisely based on your artistic vision.
There are several types of molds used in ceramics, each serving a specific purpose. Let's delve into the differences between the most common types:
| Mold Type | Advantages | Disadvantages |
|---|---|---|
| Plaster Molds | Cost-effective, easy to make | Less durable, can absorb moisture |
| Silicone Molds | Flexible, reusable, great for intricate designs | More expensive, requires careful maintenance |
| Wooden Molds | Sturdy, good for larger pieces | Heavy, not suitable for fine details |
A well-organized workspace is vital for efficient ceramic molding. Before you start, ensure you have the necessary tools and equipment at hand. This includes clay, molds, sculpting tools, and a clean surface to work on. Additionally, consider setting up a drying area with proper ventilation to prevent your pieces from cracking as they dry. A clutter-free environment not only enhances productivity but also ensures safety while working with potentially hazardous materials.
The molding process can be broken down into several key steps that will guide you through creating your ceramic piece:
- Prepare the Clay: Knead your clay until it reaches a smooth, pliable consistency.
- Fill the Mold: Carefully pour or press the clay into your mold, ensuring there are no air bubbles.
- Set and Dry: Allow the clay to set in the mold for the recommended time, then remove it to dry completely.
- Finishing Touches: Once dry, you can trim, sand, or add decorative elements to your piece.
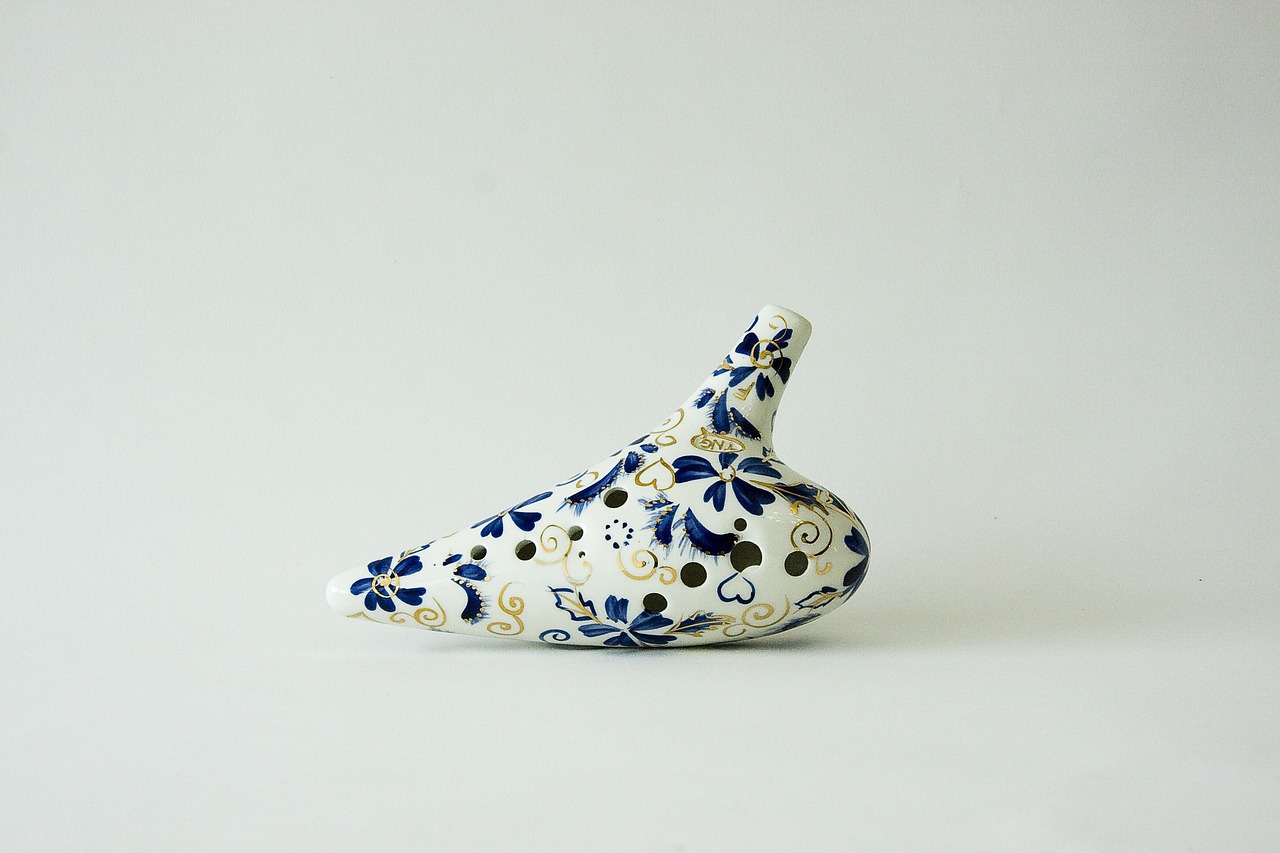
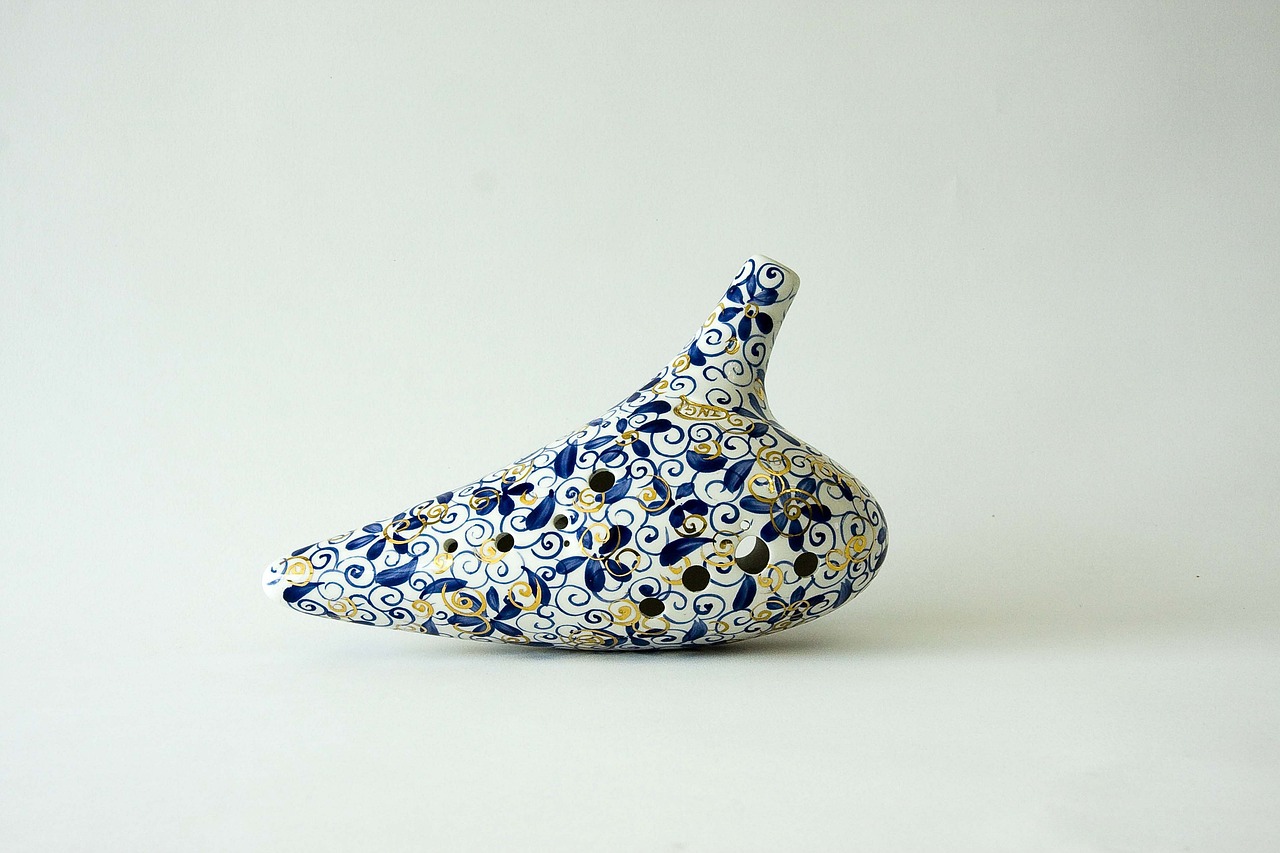
Once your ceramic piece is molded, finishing techniques can enhance its appearance and functionality. Glazing is a popular method that not only adds color but also provides a protective layer to your piece. You can experiment with different glazing techniques, such as dipping, brushing, or spraying, to achieve various effects. Additionally, painting and surface treatments can elevate your creations, allowing your personality and style to shine through.
Even experienced artists can encounter challenges when molding ceramics. Some common pitfalls include overworking the clay, which can lead to cracks, or not allowing sufficient drying time, resulting in warping. By being mindful of these mistakes and learning from them, you can refine your skills and produce high-quality work.
For those looking to expand their skills, consider exploring advanced techniques in ceramic molding. Multi-part molds can allow for intricate designs and complex shapes, pushing the boundaries of traditional ceramics. Additionally, experimenting with texture and layering can create stunning visual effects that set your work apart.
Q: What type of clay is best for beginners?
A: Earthenware is often recommended for beginners due to its workability and forgiving nature.
Q: How do I prevent my molded pieces from cracking?
A: Ensure your clay is well-kneaded and avoid rapid drying by covering your pieces with plastic as they set.
Q: Can I use regular household items as molds?
A: Absolutely! Many household items can serve as makeshift molds, just be mindful of their material and shape.

The Basics of Ceramic Molding
Understanding the fundamental principles of ceramic molding is essential for anyone looking to dive into this captivating art form. At its core, ceramic molding involves shaping clay into desired forms using molds, which can be made from various materials. This process not only allows for the creation of intricate designs but also helps achieve consistency in the final product. Whether you're a beginner or an experienced artisan, grasping these basics will set the foundation for your ceramic journey.
First off, let's talk about the types of molds you might encounter. There are primarily three types: plaster molds, silicone molds, and polyurethane molds. Each type serves a unique purpose and has its own set of advantages and disadvantages. For instance, plaster molds are great for their ability to absorb moisture from the clay, which helps in faster drying times. On the other hand, silicone molds offer flexibility and are perfect for more intricate designs since they can easily release the finished piece without damaging it.
Next, we need to consider the materials used in the molding process. The most common material is, of course, clay. However, not all clays are created equal. There are various types, such as earthenware, stoneware, and porcelain, each with its unique characteristics and firing temperatures. For example, porcelain is known for its strength and translucence, making it ideal for fine ceramics, while earthenware is more porous and easier to work with for beginners.
Another crucial aspect is the additives that can enhance the quality and durability of your ceramic pieces. These can include colorants, fluxes, and binders, which help improve the workability of the clay and the final finish. Understanding these materials and how they interact will empower you to create more refined and professional-looking ceramics.
The overall process of ceramic molding typically involves several steps: preparing the clay, forming it in the mold, allowing it to set, and finally demolding the piece. Each of these steps requires careful attention to detail. For instance, when preparing the clay, it’s essential to wedge it properly to eliminate air bubbles, which can cause cracks during firing. This part of the process is akin to kneading dough; it helps achieve a uniform consistency that is vital for successful molding.
In summary, mastering the basics of ceramic molding involves understanding the types of molds available, selecting the right materials, and following a structured process to create beautiful ceramic pieces. With practice and patience, you’ll find this art form not only rewarding but also a fantastic outlet for your creativity.
- What type of clay is best for beginners? Earthenware is often recommended for beginners due to its workability and lower firing temperature.
- Can I use any mold for ceramics? No, it's essential to use molds specifically designed for ceramic work to avoid damaging your pieces.
- How do I care for my molds? Clean them gently after use and store them in a dry place to prevent damage.
Choosing the Right Materials
When it comes to ceramic molding, selecting the right materials is crucial for achieving stunning results. Think of it like cooking; the quality of your ingredients can make or break the final dish. In the world of ceramics, the primary materials you'll need to consider include various types of clay, mold materials, and optional additives that can enhance the durability and aesthetics of your creations.
First up is clay. The type of clay you choose can significantly influence the outcome of your project. There are several options available, each with its own unique properties:
- Earthenware: This clay is easy to work with and fires at low temperatures, making it ideal for beginners. It’s perfect for decorative pieces but may not be the best choice for functional items due to its porous nature.
- Stoneware: Known for its strength and durability, stoneware is fired at higher temperatures, resulting in a non-porous finish. This makes it suitable for both functional and decorative items.
- Porcelain: Often regarded as the ‘queen’ of clays, porcelain is refined and can achieve a delicate finish. It requires a high firing temperature and is best suited for experienced artisans.
Next, let’s talk about mold materials. The choice of mold can affect the intricacy and detail of your ceramic piece. Here are some common materials used for molds:
- Plaster: This is a traditional mold material that is easy to work with and provides excellent detail. Plaster molds are great for slip casting and can be used multiple times.
- Silicone: Silicone molds are flexible and allow for easy demolding, making them perfect for intricate designs. They are also durable and can withstand multiple uses without losing their shape.
- Plastic: While not as common, plastic molds can be useful for simple shapes and are generally more affordable. However, they may not provide the same level of detail as plaster or silicone.
In addition to clay and mold materials, you might want to consider additives that can enhance your ceramic pieces. These can include:
- Colorants: These can be added to the clay or glaze to achieve vibrant colors and unique effects.
- Frits: These are pre-melted glass particles that can be mixed into glazes to create interesting textures and finishes.
- Grog: This is ground-up fired clay that can be added to your clay body to improve strength and reduce shrinkage.
Ultimately, the materials you choose will depend on your specific project and the results you want to achieve. Don’t be afraid to experiment; sometimes the best creations come from unexpected combinations! Remember, the right materials can elevate your work from ordinary to extraordinary, so take the time to choose wisely.
Types of Molds
When it comes to creating ceramics, the type of mold you choose can significantly influence the outcome of your work. Each mold type has its own unique characteristics, advantages, and applications, making it essential to understand the differences before diving into your ceramic projects. Let's explore the primary types of molds used in ceramics, which include plaster molds, silicone molds, and others.
Plaster Molds are perhaps the most traditional and widely used type of mold in the ceramics world. Made from gypsum plaster, these molds are known for their ability to absorb moisture from the clay, which helps in the drying process. They are particularly effective for creating detailed designs and are commonly used for slip casting. The downside of plaster molds is that they can be heavy and prone to breaking if not handled carefully. However, their durability and ability to produce high-quality pieces make them a favorite among many ceramic artists.
Silicone Molds, on the other hand, have gained popularity in recent years due to their flexibility and ease of use. Unlike plaster molds, silicone molds do not absorb moisture, which means they can be used for a variety of materials, including resin and other casting compounds. They are incredibly versatile, allowing for intricate designs without the risk of damaging the mold during demolding. However, silicone molds can be more expensive than plaster molds and may require special care to maintain their longevity.
Additionally, there are Metal Molds which are often used for industrial applications. These molds are durable and can withstand high temperatures, making them suitable for firing ceramics. However, they are typically not used by individual artists due to their cost and complexity. For those looking for a more unique approach, 3D-printed molds are also becoming a trend. They allow for customization and can produce intricate designs that would be challenging to create with traditional methods.
| Type of Mold | Material | Advantages | Disadvantages |
|---|---|---|---|
| Plaster Molds | Gypsum Plaster | Good moisture absorption, detailed designs | Heavy, prone to breaking |
| Silicone Molds | Silicone Rubber | Flexible, easy to demold, versatile | More expensive, requires care |
| Metal Molds | Metal | Durable, high-temperature resistance | Costly, complex |
| 3D-Printed Molds | Plastic or Resin | Customizable, intricate designs | May require specific printing capabilities |
In summary, the type of mold you choose can greatly impact your ceramic creations. Whether you opt for the traditional plaster mold, the modern silicone mold, or even venture into the realm of 3D printing, each option has its own set of benefits and challenges. Understanding these differences will help you select the right mold for your specific project, ensuring that your artistic vision comes to life with precision and beauty.
- What is the best type of mold for beginners?
For beginners, plaster molds are often recommended due to their affordability and ease of use.
- Can I use silicone molds for firing in a kiln?
No, silicone molds are not suitable for kiln firing as they cannot withstand high temperatures.
- How do I care for my molds?
Always clean your molds after use, and store them in a cool, dry place to prevent damage.

Preparing Your Workspace
Creating stunning ceramics requires more than just skill and creativity; it also demands a well-organized and efficient workspace. Imagine trying to cook a gourmet meal in a cluttered kitchen—chaos ensues! The same principle applies to ceramics. A tidy and functional workspace not only enhances your productivity but also ensures safety during the molding process. So, let’s dive into what you need to set up the perfect ceramic studio.
First and foremost, you’ll want to choose a dedicated area for your ceramic projects. Ideally, this space should be well-ventilated to help dissipate any dust or fumes from materials you might be using. If possible, select a room with natural light to boost your mood and inspire creativity. Now, let’s talk about the essential tools and equipment you’ll need to have on hand:
- Work Surface: A sturdy, flat table is crucial. It should be large enough to accommodate your molds and tools without feeling cramped.
- Tools: Basic tools include a wire cutter, rib tools, carving tools, and sponges. Each tool plays a unique role in shaping your clay and refining your pieces.
- Molds: Depending on your project, you’ll need various molds. Ensure they are clean and ready for use to avoid any contamination in your clay.
- Storage Solutions: Organize your materials with shelves, bins, or drawers. Keeping your clay, glazes, and tools neatly stored will save you time and frustration.
Next, let’s not forget about safety. Working with clay and other materials can be messy, so wearing an apron or old clothes is a wise choice. Additionally, consider using gloves when handling glazes or chemicals to protect your skin. A first-aid kit should also be within reach—better safe than sorry!
Another important aspect of your workspace is the setup of your tools. Group similar items together to avoid wasting time searching for what you need. For example, keep all your cutting tools in one area and your glazing supplies in another. This organization will help you transition smoothly from one step of the process to another without unnecessary interruptions.
Finally, think about incorporating some personal touches into your workspace. Adding plants, artwork, or even a vision board can create an inspiring environment that fuels your creativity. After all, a space that feels good to work in can make all the difference in your artistic journey.
In summary, preparing your workspace is a vital step in the ceramic molding process. By ensuring you have the right tools, a safe environment, and a touch of personal flair, you’ll be setting yourself up for success. So roll up your sleeves, get organized, and let your creativity flow!
| Question | Answer |
|---|---|
| What materials do I need to start ceramics? | You’ll need clay, tools for shaping, molds, and potentially glazes for finishing. |
| How do I ensure my workspace is safe? | Keep your area clean, use protective gear, and have a first-aid kit nearby. |
| Can I use my kitchen for ceramic work? | While possible, it’s best to have a dedicated space to avoid cross-contamination with food. |
The Molding Process
Creating ceramics with molds is an exciting journey that combines artistry and technique. The molding process can seem daunting at first, but once you break it down into manageable steps, it becomes much more approachable. Let’s dive into the nitty-gritty of this fascinating craft!
First things first, you need to prepare your clay. The type of clay you choose can greatly affect your final piece, so make sure to select one that suits your project. Once you've chosen your clay, it’s time to knead it. Kneading is essential as it removes air bubbles and ensures a consistent texture. Think of it as giving your clay a warm-up before the big game. A well-kneaded clay will yield better results in the molding process.
After kneading, roll your clay into a ball and then flatten it out to the desired thickness. This is where the fun begins! You’ll want to make sure your mold is clean and free of any debris. If you're using a plaster mold, a light dusting of talcum powder can help prevent the clay from sticking. For silicone molds, you might not need any release agent, but it's always best to check the manufacturer's recommendations.
Now, it’s time to pour your clay into the mold. Depending on the type of mold you’re using, you may need to follow specific pouring techniques. For example, with a plaster mold, you can fill it up to the rim and then let it sit for a few minutes to allow the moisture to absorb into the plaster. This will create a solid outer layer while the inside remains soft. If you’re using a silicone mold, you can simply pour the clay in and let it settle.
Once you've poured the clay, patience is key. Allow it to set for the recommended time. This can vary based on the type of clay and mold used. After the clay has set, it’s time to demold! Gently remove the mold, taking care not to apply too much pressure, as this can distort your piece. If you’re using a multi-part mold, follow the same procedure for each part.
After demolding, you may notice some rough edges or imperfections. Don’t worry! This is completely normal. Use a damp sponge or a soft cloth to smooth out these areas. You can also trim excess clay with a sharp tool if necessary. At this stage, you might want to consider adding any decorative elements or textures to your piece. This is where your creativity can shine!
Finally, let your piece dry completely before firing it in the kiln. This is a crucial step, as any remaining moisture can cause your piece to crack or explode during the firing process. Once it’s dry, you can fire it according to the clay’s specifications, and then it’s ready for glazing or any finishing touches you’d like to add.
In summary, the molding process involves several key steps: preparing your clay, pouring it into a mold, allowing it to set, demolding, smoothing imperfections, and finally drying it properly. Each step is crucial for achieving a successful ceramic piece. Remember, practice makes perfect, so don't be discouraged if your first few attempts don’t turn out exactly as planned. Keep experimenting, and soon enough, you’ll be creating stunning ceramics that showcase your unique style!
- What type of clay is best for beginners? Earthenware is often recommended for beginners due to its forgiving nature and ease of use.
- How long should I let my piece dry before firing? Generally, it’s best to let your piece dry for at least 24 hours, but this can vary based on size and thickness.
- Can I use regular molds for ceramics? It's best to use molds specifically designed for ceramics, as they can withstand the firing process and provide better results.
Finishing Techniques
Once your ceramic piece is molded and has been properly demolded, the fun really begins! are essential to enhance both the aesthetic appeal and functionality of your creations. Think of this stage as the final brush strokes on a masterpiece; it’s where your work truly comes to life. There are several methods you can use to finish your ceramics, each offering unique textures, colors, and effects.
One of the most popular finishing techniques is glazing. Glazing not only adds color but also creates a protective layer over your ceramic piece. This is particularly important if your item will be used for food or drink. When selecting a glaze, consider the following:
- Type of glaze: Matte, glossy, or satin finishes can dramatically change the look of your piece.
- Color: Choose colors that complement your design and the intended use of the ceramic.
- Firing temperature: Ensure the glaze is compatible with the clay body and can withstand the firing temperature.
Once you've selected your glaze, application can be done through dipping, brushing, or spraying. Each method has its own charm and can yield different results. For instance, dipping can produce a uniform coat, while brushing allows for more control and detail.
Another technique to consider is painting. This can be done with underglazes or specialty ceramic paints. Painting allows for intricate designs and patterns, giving you the freedom to express your creativity. Remember, if you choose to paint, it's often best to apply a clear glaze over the top to seal your artwork and protect it from wear.
Surface treatments can also elevate your ceramic pieces. Techniques such as burnishing, where you polish the surface with a smooth tool, can create a lovely sheen and highlight the clay's natural color. Alternatively, you might explore textures by adding slips or using carving tools before the final firing. This adds depth and interest, making your piece stand out.
Finally, don’t forget about the importance of safety during the finishing process. Always work in a well-ventilated area, especially when using sprays or glazes that contain chemicals. Wearing a mask and gloves can also protect you from dust and fumes, ensuring a safe and enjoyable crafting experience.
Q: Can I use regular paint on ceramics?
A: It's best to use paints specifically designed for ceramics, as they can withstand high temperatures and adhere properly. Regular paint may not hold up during firing.
Q: How do I know which glaze to choose?
A: Consider the type of clay you're using, the desired finish, and the intended use of the piece. Always test glazes on a small sample first!
Q: What if my glaze comes out uneven?
A: Uneven glazing can happen for several reasons, including inconsistent application or incompatible materials. If this occurs, don’t be afraid to experiment with touch-ups or even re-glazing.
Common Mistakes to Avoid
Creating ceramics with molds can be an incredibly rewarding experience, but it’s not without its challenges. Even the most seasoned artisans can stumble upon pitfalls that can derail their projects. One of the most common mistakes is not preparing the mold properly. If the mold isn't clean or if it hasn't been treated with a release agent, the clay can stick, leading to frustration and ruined pieces. Always remember that a clean mold is a happy mold!
Another frequent error is using the wrong type of clay. Different clays have different properties, and using a clay that’s not suited for molding can result in cracks or weak structures. For instance, earthenware is great for hand-building but may not hold up well in a mold. It’s essential to choose a clay that complements your molding technique. When in doubt, consult with your local pottery supplier for recommendations.
Moreover, overworking the clay can lead to a myriad of issues. Clay that is kneaded excessively can lose its plasticity, making it difficult to work with. This can result in air bubbles or uneven textures in your final product. Always handle the clay gently, and if you find that it’s becoming too dry, consider adding a bit of water to restore its flexibility.
Another common mistake is not allowing sufficient drying time before demolding. Patience is key! If you rush this process, your piece can warp or crack. A good rule of thumb is to let the piece dry in the mold for at least 24 hours, depending on the thickness of the clay. Remember, the slower you dry, the better your piece will turn out.
Finally, neglecting to test your glazes is a mistake that can lead to disappointment. Different glazes react differently on various clay bodies, and what looks good in the jar may not translate well to your piece. Always test your glazes on a small sample piece before applying them to your final work. This simple step can save you from heartache later on.
In summary, avoiding these common mistakes can significantly enhance your ceramic molding experience. By paying attention to mold preparation, selecting the right clay, handling it properly, allowing adequate drying time, and testing glazes, you'll be on your way to creating stunning ceramic pieces that you'll be proud to show off!
Q: What should I do if my clay keeps cracking?
A: Cracking can be caused by a few factors, including too much moisture loss during drying. Make sure to cover your clay with plastic to retain moisture and avoid drafts. If the clay is too dry, you can mist it with water to help it regain some flexibility.
Q: How do I know when my piece is ready to be demolded?
A: A good indicator is when the piece feels firm to the touch and has lost its sheen. It should be dry enough to hold its shape but not so dry that it becomes brittle. Typically, waiting at least 24 hours is a safe bet.
Q: Can I reuse my mold?
A: Yes, molds can be reused multiple times. However, it's important to clean them thoroughly after each use to prevent residue buildup, which can affect the quality of future pieces.
Q: What’s the best way to clean my molds?
A: Use a soft brush or sponge to remove any clay residue. For stubborn bits, a gentle scrub with warm water can help. Avoid using abrasive materials that might scratch the surface of the mold.

Tips for Advanced Techniques
Once you've mastered the basics of ceramic molding, you're ready to elevate your craft to new heights! Advanced techniques can transform your creations from simple pieces to stunning works of art. One of the most exciting avenues to explore is the use of multi-part molds. These molds allow you to create complex shapes that would be impossible with a single mold. Imagine crafting a beautifully detailed sculpture or an intricate vase that has multiple sections fitting together perfectly. To achieve this, it’s vital to ensure that each part of the mold aligns seamlessly, which might require some trial and error. But don't worry; the satisfaction of seeing your vision come to life is worth the effort!
Another technique that can really push your artistic boundaries is working with intricate designs. This involves not just the mold itself but also how you manipulate the clay. For instance, you can incorporate undercuts in your designs, which adds depth and character to your pieces. However, be cautious with undercuts, as they can complicate the demolding process. To help with this, consider using a release agent, like petroleum jelly or a specialized mold release spray, to facilitate easier removal without damaging your creation.
Moreover, when diving into advanced techniques, the choice of clay becomes even more critical. Different types of clay respond uniquely to molding and firing. For example, stoneware is durable and versatile, making it a favorite for functional pottery, while earthenware is softer and easier to work with, perfect for decorative pieces. Experimenting with various clays can lead to surprising results, so don’t hesitate to try out new materials!
Additionally, consider incorporating additives into your clay mix. Materials like grog can enhance the texture and strength of your pieces, especially when creating larger items. Similarly, using colorants can add vibrancy and uniqueness to your designs. Just remember to test these additives in small batches first to see how they affect your clay’s workability and final appearance.
Finally, don’t underestimate the power of glazing and surface treatments. These finishing touches can completely transform the look of your ceramics. Advanced glazing techniques, such as layering different glazes or experimenting with raku firing, can yield stunning visual effects. Keep in mind that the firing process can alter colors and textures, so always test your glazes before committing to a large piece.
In conclusion, advancing your ceramic molding skills involves a mix of creativity, experimentation, and technical knowledge. Embrace the challenges that come with complex designs and multi-part molds, and don’t shy away from trying new materials and techniques. Remember, every artist has their unique journey, and the more you practice, the more you'll discover your own style and preferences. So, roll up your sleeves and let your imagination run wild!
Q: What is the best clay for advanced ceramic molding?
A: The best clay often depends on the intended use of your final piece. Stoneware is great for durability, while earthenware is excellent for decorative items. Experiment to find what suits your style!
Q: How do I prevent my mold from sticking to the clay?
A: Using a release agent like petroleum jelly or a specialized mold release spray can help ensure easy removal of your clay from the mold.
Q: Can I use multiple glazes on one piece?
A: Yes! Layering different glazes can create beautiful effects, but always test them first to see how they interact during firing.
Frequently Asked Questions
- What types of molds are best for beginners in ceramics?
For beginners, plaster molds are often recommended due to their affordability and ease of use. They allow for better detail and are forgiving for those just starting out. Silicone molds are also a great option as they are flexible and can be reused multiple times, making them a practical choice for novices.
- How do I choose the right clay for my ceramic projects?
Choosing the right clay depends on your project's needs. Earthenware is perfect for beginners because it's easy to work with and fires at low temperatures. If you're looking for durability, stoneware is a fantastic option, while porcelain is ideal for intricate designs but requires more skill and higher firing temperatures.
- What are some common mistakes to avoid when using molds?
Common mistakes include not properly preparing the mold, which can lead to sticking, and using the wrong clay type, which may not adhere well. Additionally, rushing the drying process can result in cracks. It's crucial to take your time and follow the instructions carefully to avoid these pitfalls.
- Can I use homemade molds for ceramics?
Absolutely! Homemade molds can be a fun and creative way to personalize your projects. Just ensure you use materials that can withstand the molding process, like plaster for solid molds or silicone for flexible ones. Experimenting with different materials can lead to unique and exciting results!
- What finishing techniques can enhance my ceramic pieces?
Finishing techniques like glazing, painting, and applying surface treatments can significantly enhance your ceramic pieces. Glazing not only adds color but also provides a protective layer. Experimenting with different finishes can elevate your work and make it stand out!
- How do I properly clean and maintain my molds?
Cleaning your molds is essential for longevity. After each use, gently wash them with warm, soapy water and a soft brush to remove any clay residue. Make sure to dry them completely to prevent moisture buildup, which can damage the molds over time.
- What advanced techniques can I explore in ceramic molding?
If you're looking to push your skills further, consider exploring multi-part molds and creating intricate designs. These techniques allow for more complex shapes and details, giving you the opportunity to create stunning, one-of-a-kind pieces that showcase your artistry.


