
Exploring Pottery Techniques: A Guide for Enthusiasts
Welcome to the fascinating world of pottery! Whether you're a budding artist or a seasoned potter, this guide is designed to take you on an exciting journey through various pottery techniques. Pottery isn't just about molding clay; it’s an art form that combines creativity, skill, and a touch of magic. Imagine the feeling of transforming a lump of clay into a beautiful, functional piece of art with your own hands. Sounds thrilling, right?
In this article, we will explore the essential techniques that every pottery enthusiast should know. From hand-building methods that allow for complete artistic freedom to the precision of wheel-throwing, each technique has its own charm and intricacies. You’ll also learn about surface decoration techniques that can elevate your pottery from ordinary to extraordinary, as well as the critical firing processes that make your creations durable and beautiful.
But wait, there’s more! We’ll dive into the tools and equipment you’ll need to get started, troubleshoot common issues that might arise during your pottery journey, and even explore the therapeutic benefits of working with clay. Are you ready to unleash your creativity and discover the endless possibilities that pottery offers? Let’s get started!
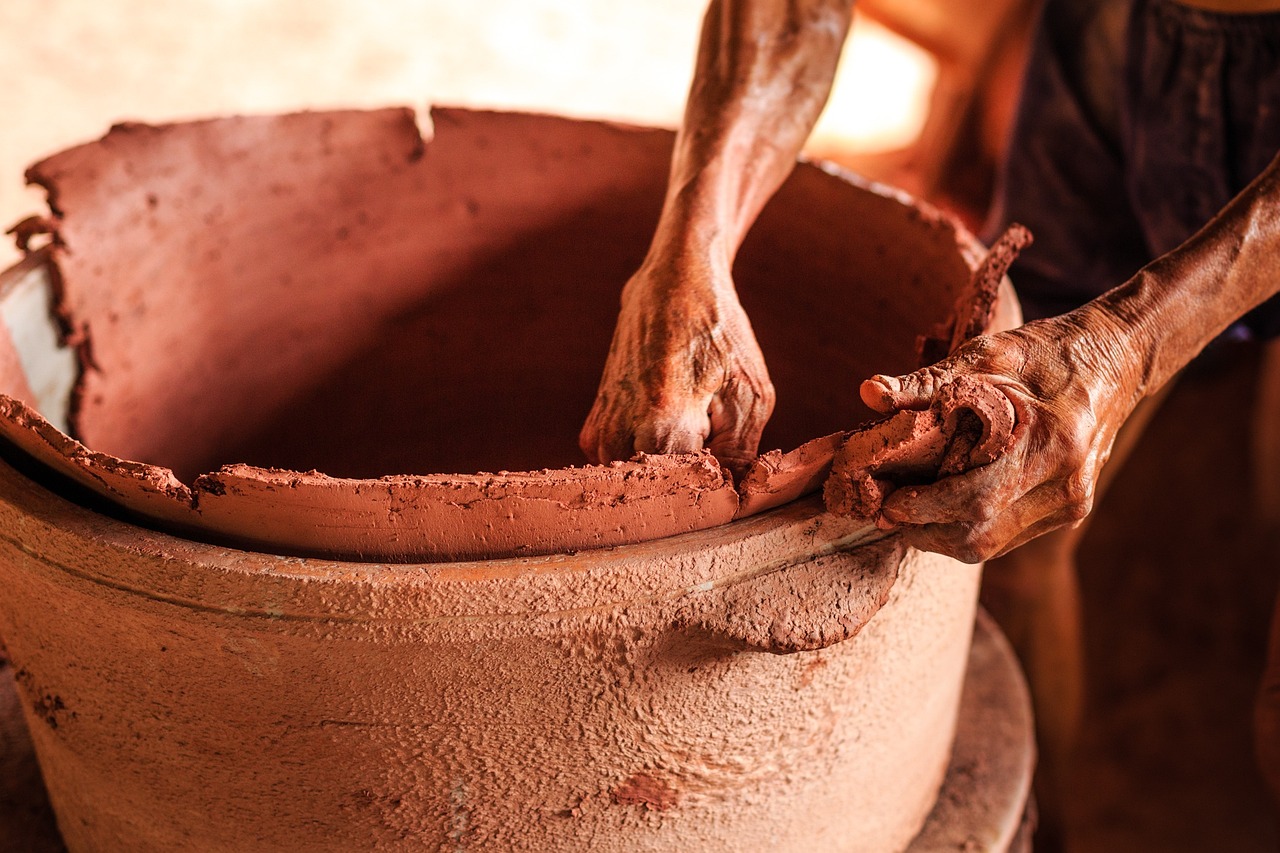
Hand-building is a fundamental pottery technique that allows artists to create unique forms using only their hands and basic tools. This method is perfect for those who prefer a more tactile approach to pottery. There are three primary hand-building techniques: pinch, coil, and slab methods.
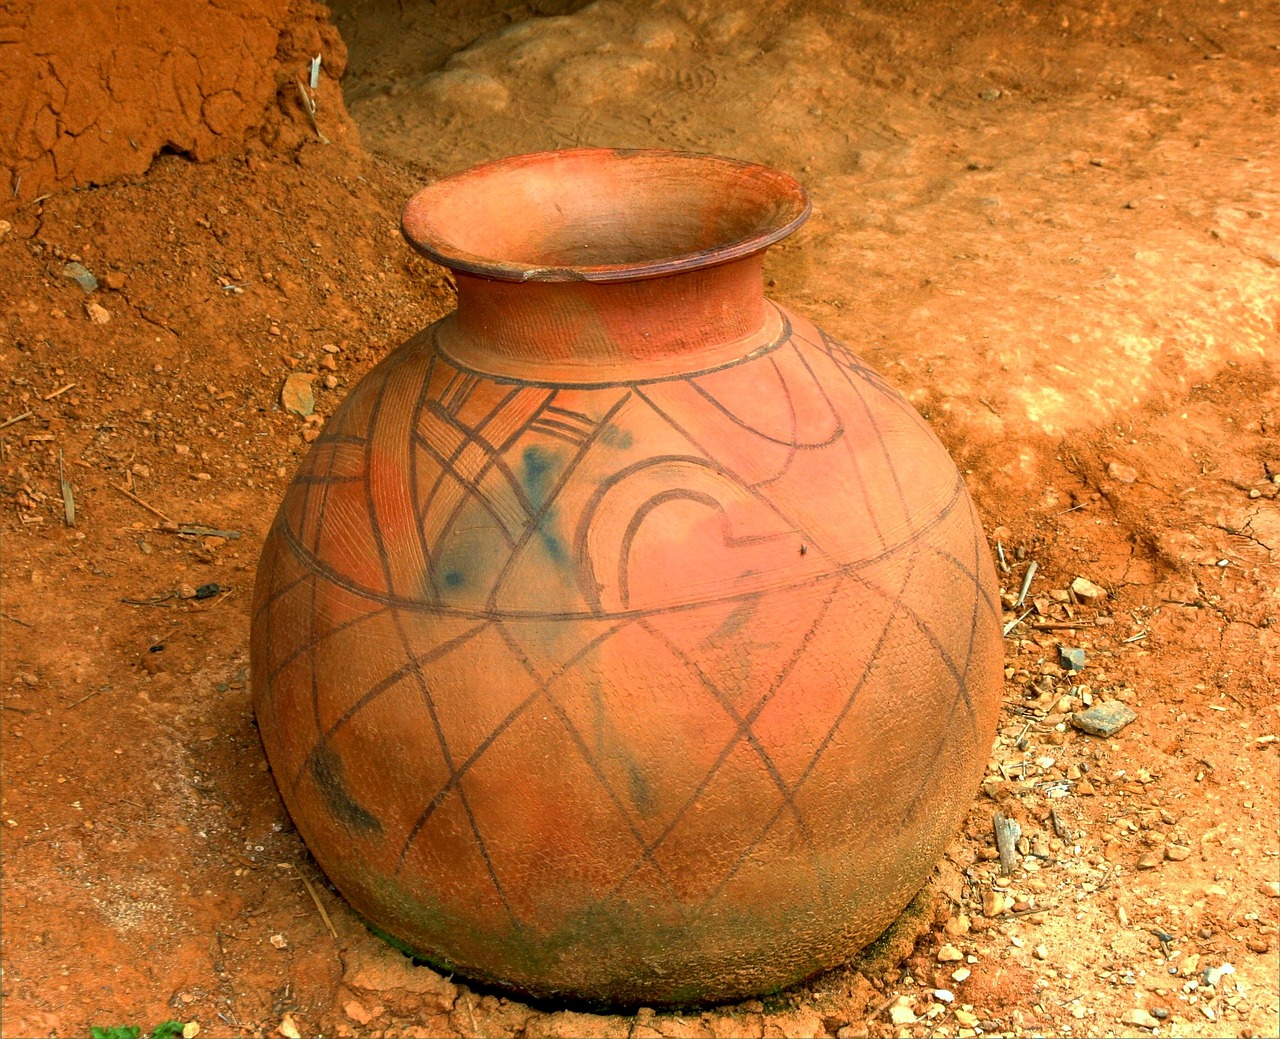
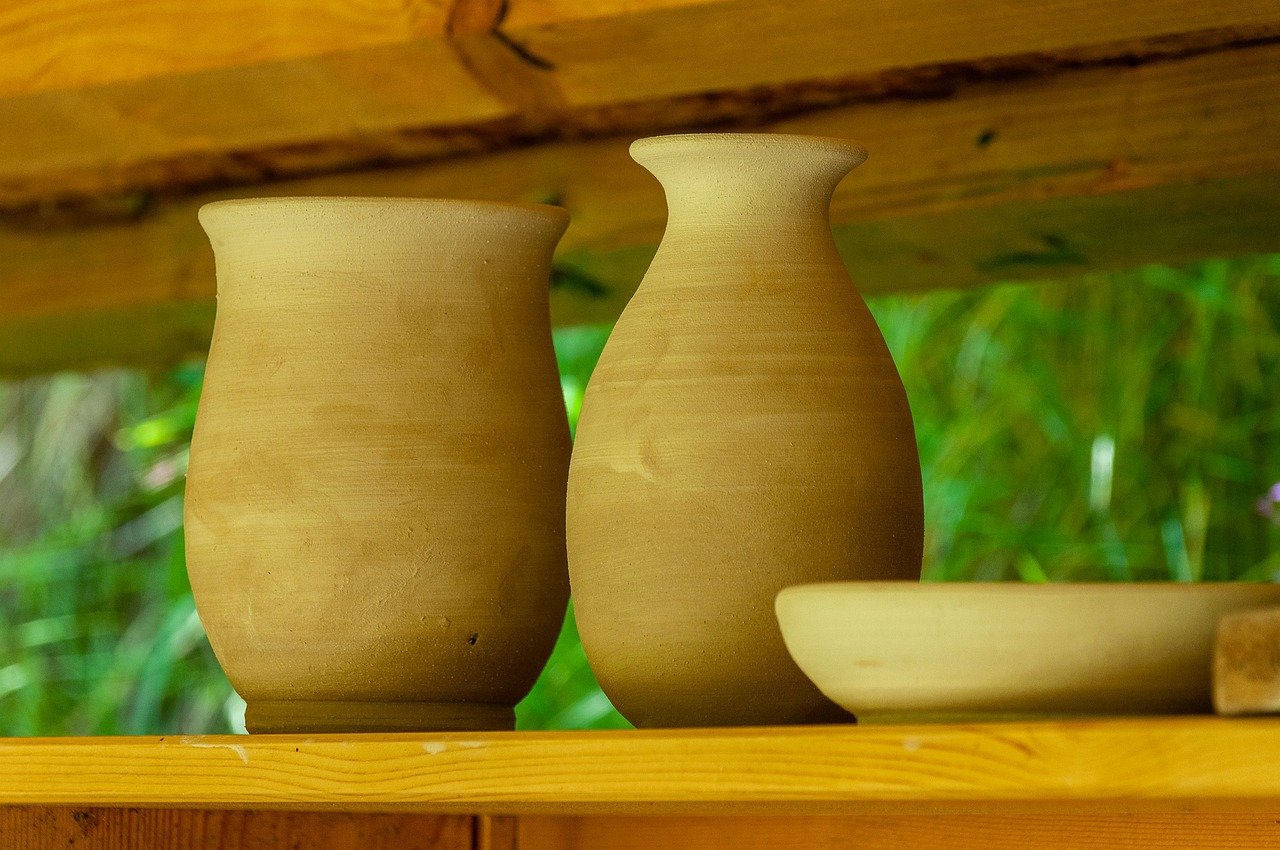
The pinch method involves squeezing and shaping the clay with your fingers, allowing for organic forms and intricate designs. The coil method uses rolled strips of clay stacked and blended together to create larger pieces, perfect for vases and bowls. Finally, the slab method involves rolling out flat pieces of clay and assembling them into shapes, ideal for creating boxes or tiles. Each technique opens a world of creativity, so don't hesitate to experiment!
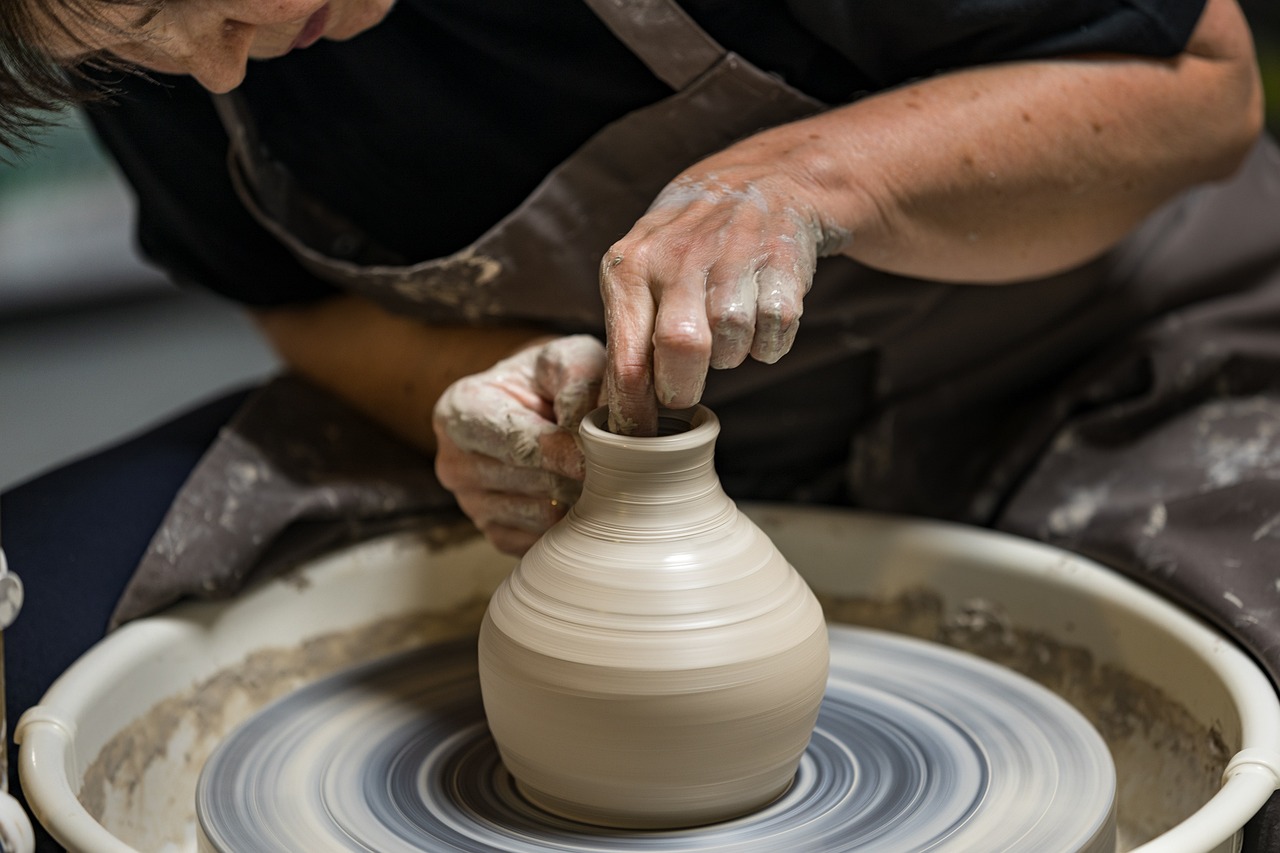
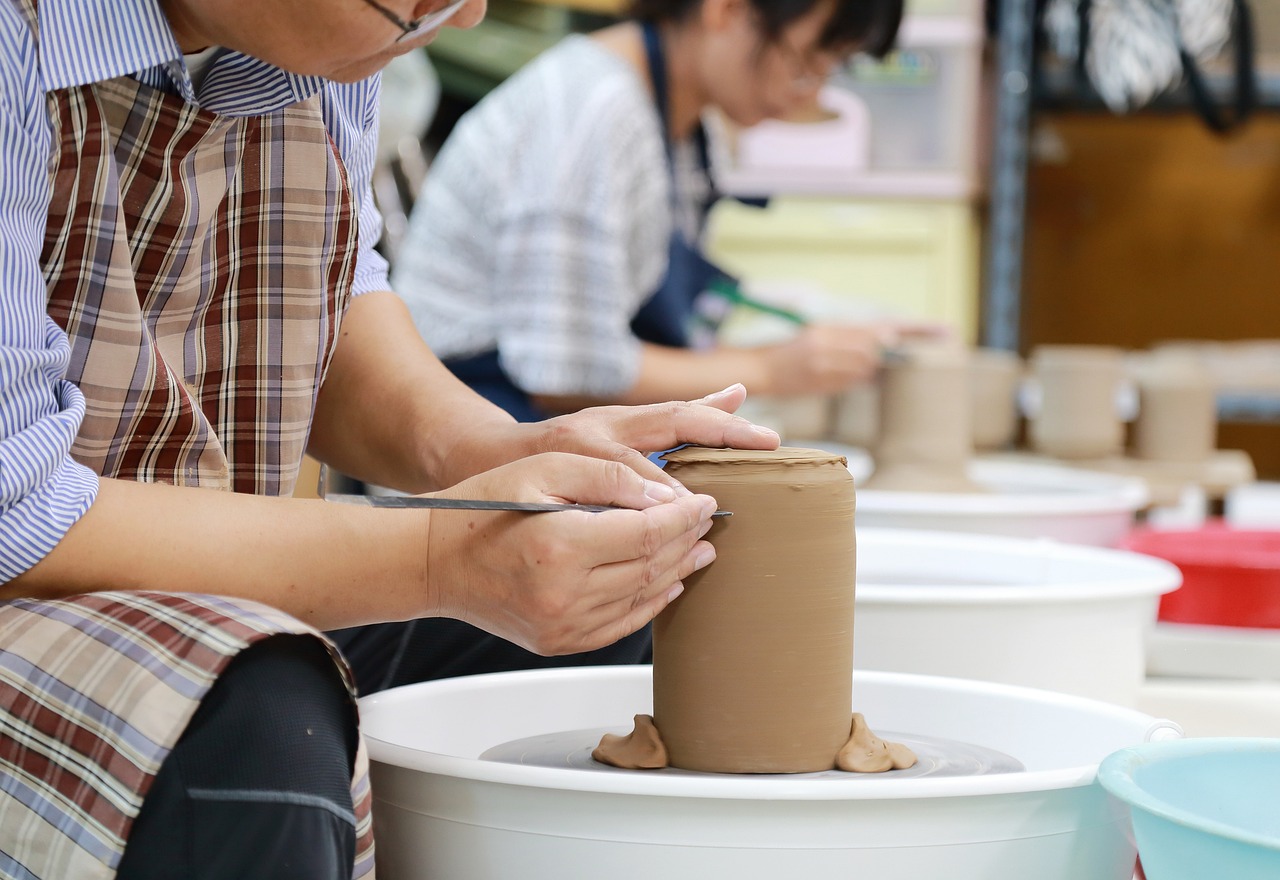
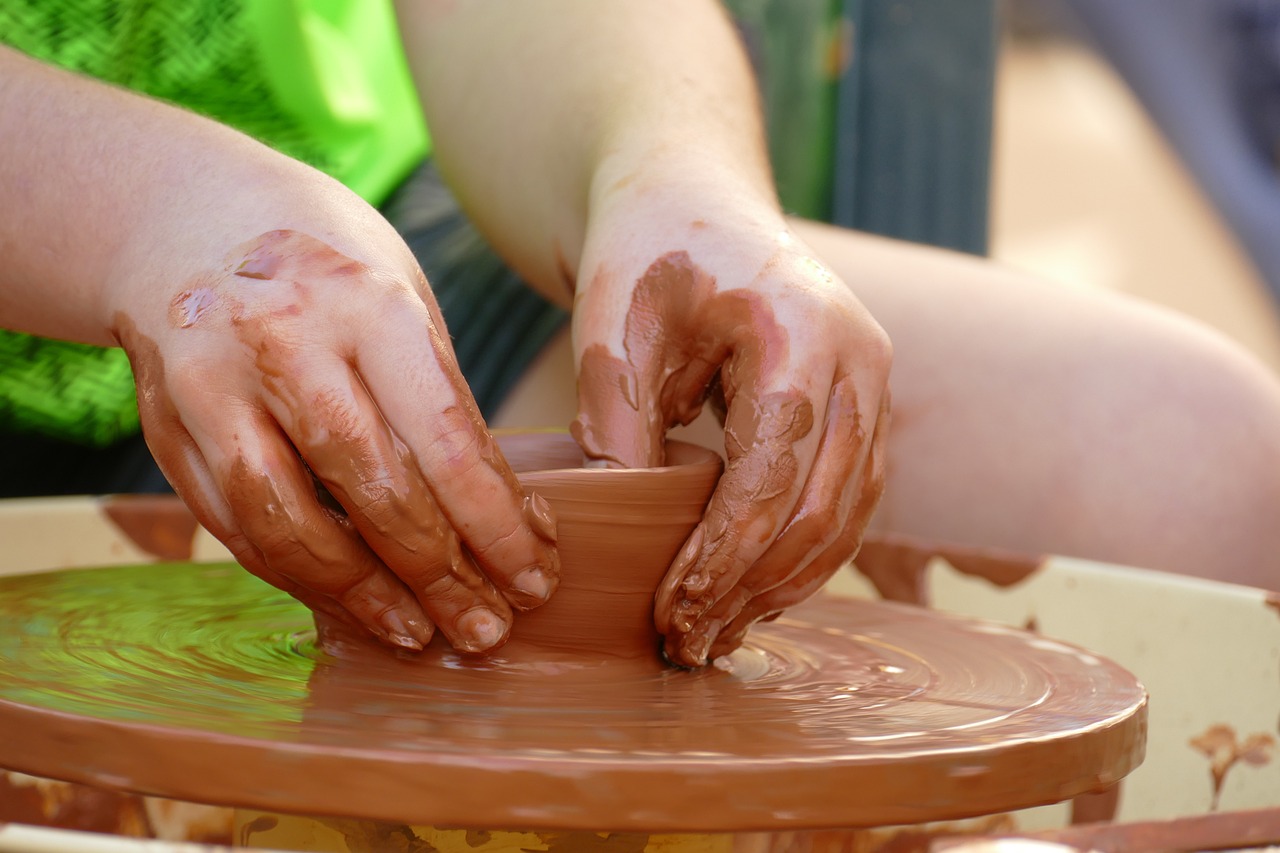
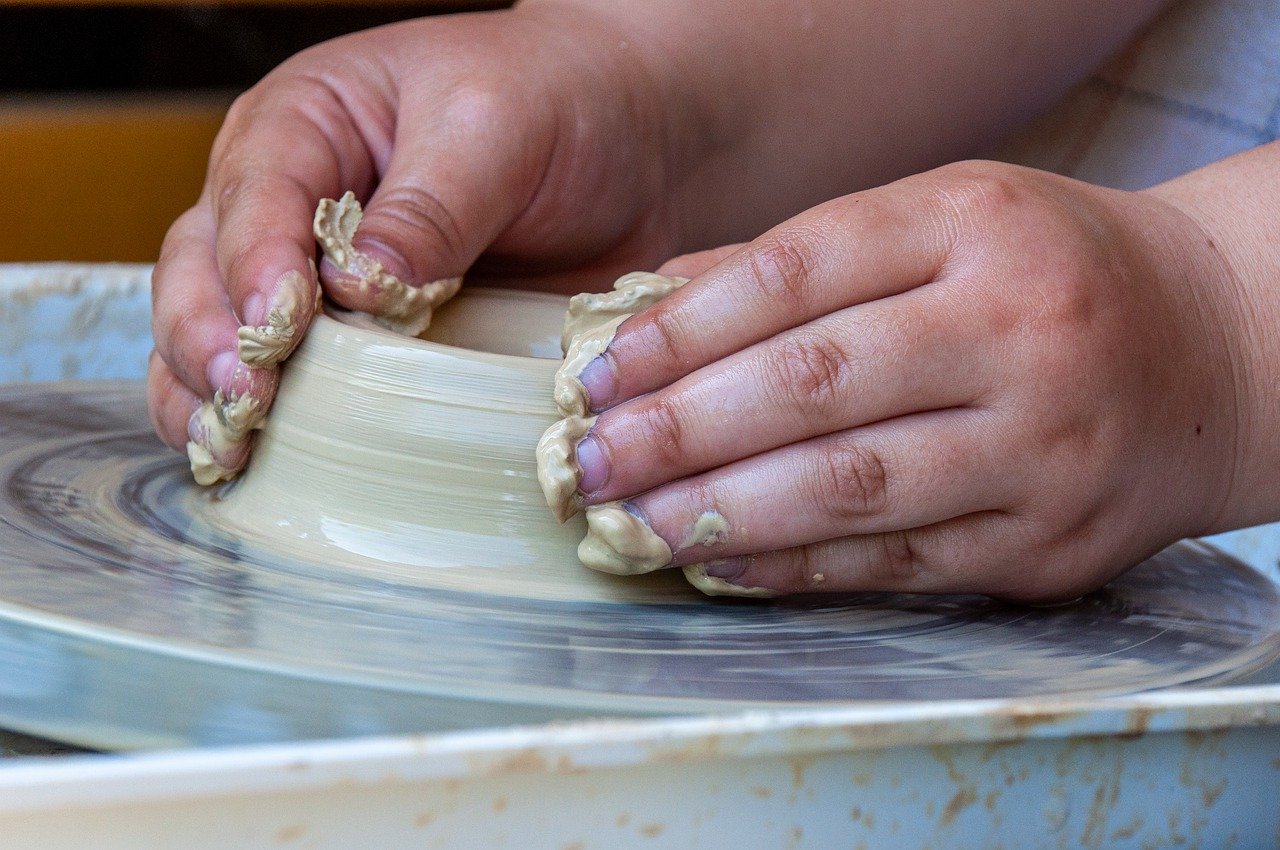
Wheel-throwing is a popular pottery technique that involves shaping clay on a potter's wheel. If you’ve ever watched a potter at work, you know how mesmerizing it can be. The wheel spins, the clay moves, and before you know it, a beautiful piece begins to take shape. Mastering this technique can take time, but the results are well worth the effort.
Properly preparing clay is crucial for successful wheel-throwing. Before you even sit down at the wheel, you need to ensure that your clay is ready for shaping. This involves a few key steps: wedging, kneading, and centering.
Wedging helps eliminate air bubbles and creates a uniform texture in the clay. Think of it like kneading dough; it’s essential for achieving a consistent texture. There are various wedging techniques, including the ram’s head and spiral methods, each offering a unique approach to preparing your clay.
Centering clay on the wheel is a vital skill for potters. It’s all about achieving balance and control while throwing. A well-centered piece of clay allows for smoother shaping and reduces the chances of warping. Practice makes perfect, so don’t get discouraged if it takes a few tries to get it just right!
Once your clay is centered, it’s time to shape your pottery. There are numerous techniques for shaping your piece on the wheel, from creating bowls and vases to more intricate forms. The key is to maintain a steady hand and a clear vision of what you want to create. As you gain confidence, you’ll find that the possibilities are endless!
Surface decoration enhances the aesthetic appeal of pottery. It’s where your personality and creativity can truly shine! Techniques such as glazing, slip trailing, and sgraffito allow you to add color, texture, and intricate designs to your pieces.
Understanding glazing is essential for achieving beautiful finishes. There are various types of glazes, each offering different effects and finishes. Application methods can range from dipping and brushing to spraying. The firing process is also crucial, as it determines how the glaze interacts with the clay body. Don’t be afraid to experiment with different glazes to find your signature style!
Explore alternative decoration methods like underglazing and using natural materials. These techniques encourage experimentation and innovation in surface design. Imagine using leaves or flowers to create stunning imprints on your pottery—nature can be your best canvas!
Firing is a critical step in pottery that transforms raw clay into durable ceramics. There are different firing methods, including bisque and glaze firing, each serving its purpose in the pottery-making process. Understanding these methods is essential for achieving the desired results and ensuring your pieces stand the test of time.
Various kiln types offer unique firing experiences. Electric kilns are popular for their ease of use, while gas kilns provide more control over the atmosphere during firing. Wood-fired kilns, on the other hand, create distinctive finishes that can’t be replicated. Each type has its benefits and limitations, so choose one that aligns with your pottery goals.
Raku firing is a distinctive method that results in unique finishes. This process involves removing pieces from the kiln while they are still glowing hot and placing them in combustible materials. The reaction creates stunning effects, but safety measures are essential, as the process can be unpredictable. The creative possibilities with raku are endless, making it a favorite among many potters.
Having the right tools is essential for successful pottery making. Whether you’re hand-building or wheel-throwing, the right equipment can make all the difference. Essential tools include rib tools, knives, rolling pins for hand-building, and trimming tools, calipers, and sponges for wheel-throwing. Investing in quality tools will enhance your creative process and improve your results.
Even experienced potters face challenges during the pottery-making process. Common issues like cracking, warping, and glazing problems can be frustrating, but fear not! Understanding the causes and solutions can help you overcome these hurdles.
Cracking can occur during drying or firing. Factors such as uneven thickness, rapid drying, or even temperature fluctuations can contribute to this issue. To avoid cracking, ensure your pieces are evenly thick and dry them slowly. A little patience goes a long way in pottery!
Glazing can be tricky, with common problems such as runs and uneven application. To achieve flawless finishes, practice your glazing techniques and consider testing your glazes on small pieces before applying them to larger works. Remember, pottery is a learning process, and every mistake is an opportunity to grow!
Finding inspiration is key to developing your pottery skills. Explore a wealth of resources, including books, online courses, and community groups, to support your artistic journey. Engaging with fellow potters can spark new ideas and techniques, so don’t hesitate to reach out!
Explore a curated list of essential pottery books that provide insights, techniques, and inspiration for potters of all levels. These resources can guide you through various techniques and help you find your unique voice in pottery.
Engaging with online pottery communities can enhance your learning experience. Discover platforms where you can share your work, seek advice, and connect with fellow enthusiasts. The pottery community is vast and welcoming, so dive in!
Pottery can be a therapeutic outlet for many individuals. Working with clay promotes mindfulness and creativity, allowing you to express your emotions and thoughts through your art. The process of shaping and molding clay can be incredibly soothing, providing a much-needed break from the hustle and bustle of everyday life.
Engaging in pottery encourages mindfulness and relaxation. Focusing on the creative process can help reduce stress and promote mental well-being. Think of it as a form of meditation where each movement and touch brings you closer to a peaceful state of mind.
Joining pottery classes or groups fosters community and connection. The social benefits of pottery include friendship and collaboration, creating a supportive environment where you can share your passion and learn from others. Remember, you’re never alone in your artistic journey!
Pottery continues to evolve with new techniques and technologies. Emerging trends in sustainable practices and innovations are shaping the future of pottery making. As artists, it’s essential to stay informed and adaptable to these changes.
Sustainability is becoming increasingly important in pottery. Discover eco-friendly materials and practices that potters can adopt to reduce their environmental impact. By making conscious choices, you can create beautiful art while caring for our planet.
Explore how technology is influencing pottery, from 3D printing to digital design tools. These innovations are changing traditional practices and opening new avenues for creativity. Embrace the future of pottery and see where your imagination can take you!
Q: What is the best clay for beginners?
A: Earthenware clay is often recommended for beginners due to its workability and low firing temperature.
Q: How do I prevent my pottery from cracking?
A: Ensure even thickness in your pieces and allow for slow drying to minimize cracking.
Q: Can I use regular paint on pottery?
A: No, regular paint will not adhere properly. Use specific pottery glazes for best results.
Q: What is raku firing?
A: Raku firing is a unique process that involves removing hot pottery from the kiln and placing it in combustible materials for dramatic effects.
1. Hand-Building Techniques
Hand-building is one of the most fundamental pottery techniques that allows artists to create unique forms using only their hands and basic tools. This method is not just about crafting; it’s about expressing creativity in the most tactile way possible. Whether you're a beginner or a seasoned potter, mastering hand-building can open up a world of possibilities. It’s like painting with clay instead of colors, giving you the freedom to mold and shape your ideas into tangible forms.
There are three primary hand-building techniques that every potter should explore: pinch, coil, and slab methods. Each technique has its own unique characteristics and applications, making them suitable for different projects. For instance, the pinch technique is perfect for creating small bowls or sculptures, while the coil method is ideal for larger, more intricate pieces.
Let’s dive deeper into these techniques:
- Pinch Method: This technique involves pinching the clay between your fingers to form shapes. It’s incredibly intuitive and allows for a lot of personal expression. You can create anything from small decorative items to larger functional pieces. The beauty of the pinch method lies in its simplicity; it’s like molding dough with your hands!
- Coil Method: The coil technique involves rolling out long strips of clay and stacking them to build up the walls of your piece. This method is fantastic for creating larger vessels and can be combined with other techniques for added complexity. Imagine building a clay tower, layer by layer—this is what the coil method allows you to do!
- Slab Method: The slab technique consists of rolling out flat pieces of clay and assembling them into shapes. This method is perfect for creating geometric forms, tiles, and even boxes. It’s like constructing with bricks, but instead, you’re using clay slabs that can be cut and shaped to your liking.
Each of these techniques can be combined to create stunning results. For example, you might use the pinch method for the base of a bowl and then add coils for height and texture. The possibilities are endless! Experimenting with these methods not only enhances your skills but also allows for a deeper connection with the material.
Moreover, hand-building is a great way to develop your artistic voice. It encourages you to think outside the box and push the boundaries of traditional pottery. So, whether you’re creating a simple pinch pot or a complex coil vase, remember that the process is just as important as the final piece. Embrace the messiness, the imperfections, and let your creativity flow!
In conclusion, hand-building techniques are not just about forming clay; they’re about discovering your style and expressing your individuality. So, grab some clay, roll up your sleeves, and start experimenting. You might just surprise yourself with what you can create!
2. Wheel-Throwing Basics
Wheel-throwing is not just a technique; it’s a dance between the potter and the clay, a mesmerizing process that transforms a lump of earth into functional art. If you’re new to pottery, the potter's wheel might seem intimidating, but fear not! With practice and patience, you’ll find yourself creating beautiful pieces that reflect your personal style. In this section, we’ll cover the essential steps to get you started on your wheel-throwing journey, ensuring you have a solid foundation to build upon.
First off, let’s talk about the potter's wheel. It’s the heart of the wheel-throwing process. Imagine it as a stage where your creativity takes center stage. The wheel spins, and as it does, you’ll learn to manipulate the clay into various forms. But before you can start shaping, you need to prepare your clay properly. This involves a few key techniques that ensure your clay is ready for the magic to happen.
Properly preparing your clay is crucial for successful wheel-throwing. If you skip this step, you may end up with a lumpy, uneven piece that doesn’t meet your expectations. The preparation process generally includes wedging, kneading, and centering the clay. Each of these steps is vital, so let’s break them down.
Wedging is like giving your clay a warm-up before it hits the wheel. It helps eliminate air bubbles and creates a uniform texture, making it easier to work with. There are several wedging techniques you can try, including:
- Ram's Head Wedging: This technique involves pressing the clay down and pushing it forward, creating a spiral effect.
- Spiral Wedging: Here, you roll the clay into a spiral, which helps mix the particles evenly.
- Cut and Fold: Simply cut the clay into pieces and fold them over each other, ensuring a consistent texture.
Experiment with these methods to find out which one feels most comfortable for you. Remember, the goal is to achieve a smooth, pliable consistency that will respond well to your shaping efforts.
Once your clay is wedged, it’s time to center it on the wheel. Centering is arguably one of the most important skills you’ll need to master as a potter. If your clay isn’t centered, your piece will wobble and distort, leading to frustration. To center your clay, follow these steps:
- Place your wedged clay ball in the middle of the wheel head.
- Start the wheel spinning at a moderate speed.
- Use your hands to apply pressure to the clay, pushing down and inward simultaneously.
- Keep your hands steady and maintain consistent pressure until the clay feels balanced.
It may take time to get the hang of centering, so don’t get discouraged! Practice makes perfect, and soon you’ll be able to achieve that sweet spot where your clay is perfectly balanced and ready for shaping.
Now that your clay is prepped and centered, it’s time to unleash your creativity! Shaping your pottery is where the real fun begins. Whether you’re aiming to create a bowl, vase, or any other form, the key is to use your hands and tools to guide the clay into the desired shape. Start by gently applying pressure from the inside and outside as the wheel spins, allowing the clay to rise and expand. Remember, it’s all about feeling the clay and understanding its movement. Don’t be afraid to experiment with different shapes and sizes!
In summary, wheel-throwing is an art form that requires patience, practice, and a willingness to learn. As you embark on this journey, keep in mind that every piece you create is a step towards mastering the craft. So, roll up your sleeves, get your hands dirty, and enjoy the beautiful process of creating pottery!
Q1: How long does it take to learn wheel-throwing?
A1: The time it takes to learn wheel-throwing varies for each individual. Some may grasp the basics in a few classes, while others may take several months to feel comfortable. Consistent practice is key!
Q2: What type of clay is best for beginners?
A2: Stoneware clay is often recommended for beginners due to its versatility and durability. It can withstand higher temperatures and is less prone to cracking.
Q3: Can I make functional pieces right away?
A3: Yes! While it may take some practice to perfect your technique, many beginners are able to create functional pieces like bowls or mugs within their first few classes.

2.1 Preparing the Clay
When it comes to wheel-throwing, the first step to success lies in properly preparing your clay. Imagine trying to build a house on a shaky foundation; it just won’t hold up! The same principle applies to pottery. The process of preparing clay involves several key techniques that ensure your material is uniform, workable, and ready for shaping. Let's dive into these essential steps that can make or break your pottery experience.
First and foremost, we have wedging. This technique is crucial as it helps to eliminate air bubbles that can cause your piece to crack during firing. Additionally, wedging helps to create a consistent texture throughout the clay, which is vital for achieving even results. There are various wedging methods, including the ram’s head and the spiral techniques. Each method has its own benefits, but the goal remains the same: to create a homogenous mass of clay that is free from imperfections.
Once your clay is wedged, the next step is kneading. While wedging focuses on removing air bubbles, kneading ensures that the clay is pliable and ready for the wheel. Think of kneading like working dough for bread; it’s all about achieving that perfect consistency. You want your clay to be soft enough to mold but firm enough to hold its shape. As you knead, pay attention to the texture and moisture level, making adjustments as necessary.
Now, let’s talk about the heart of wheel-throwing: centering. Centering your clay on the wheel is perhaps one of the most challenging yet rewarding skills to master. When your clay is centered, it allows for better control and balance, making it easier to shape your piece. To center your clay, start by forming it into a ball and placing it on the wheel head. As the wheel spins, use your hands to apply pressure from both sides, gradually pushing the clay into a symmetrical shape. It may take some practice, but once you get the hang of it, you’ll feel like a true pottery pro!
To summarize, proper clay preparation is the backbone of successful pottery making. The process involves:
- Wedging: Removing air bubbles and creating a uniform texture.
- Kneading: Ensuring the clay is pliable and ready for use.
- Centering: Achieving balance and control on the potter's wheel.
By mastering these techniques, you set yourself up for a smoother and more enjoyable pottery experience. Remember, every great potter started with a lump of clay just like yours, so embrace the journey and enjoy the process of creating!
Q1: How do I know if my clay is properly wedged?
A1: Properly wedged clay should feel smooth and uniform without any air bubbles. You can test it by squeezing a small piece; it should hold its shape without cracking.
Q2: What should I do if my clay is too dry?
A2: If your clay feels too dry, you can mist it lightly with water and knead it until it reaches the desired consistency. Just be careful not to add too much moisture!
Q3: Can I reuse clay that has dried out?
A3: Yes, you can reclaim dried-out clay by soaking it in water and then kneading it back to a workable state. This process can take some time, but it’s worth it to reduce waste.
2.1.1 Wedging Techniques
Wedging is an essential step in pottery that prepares your clay for shaping, ensuring that it has a uniform texture and is free from air bubbles. Think of wedging as giving your clay a good workout—it's all about kneading and compressing the material to make it pliable and ready for the potter's wheel or hand-building techniques. There are several methods to achieve effective wedging, and each has its unique benefits.
One popular technique is the spiral wedging method. This involves rolling and pushing the clay into a spiral shape, which helps to stretch and compress the clay evenly. By doing this, you are not only removing air pockets but also aligning the clay particles, making it easier to shape your piece later on. Another method is the ram's head wedging, where you knead the clay like dough, pushing it down and folding it over itself. This technique is especially useful for larger amounts of clay.
Here’s a quick overview of different wedging techniques:
| Wedging Technique | Description | Best For |
|---|---|---|
| Spiral Wedging | Rolling clay into a spiral to remove air and align particles. | All types of clay |
| Ram's Head Wedging | Kneading clay by pushing down and folding. | Larger clay batches |
| Slap Wedging | Slapping the clay against a surface to compress it. | Quick preparation |
Regardless of the technique you choose, the key is to ensure that your clay is well-wedged before moving on to shaping. A well-wedged piece of clay is more forgiving and easier to manipulate, which can save you a lot of frustration down the line. Remember, the goal is to create a consistent texture that will hold up during the drying and firing processes.
As you practice wedging, you'll develop a feel for the clay and understand how much pressure to apply. Don't hesitate to experiment with different techniques to find what works best for you. Just like any other skill in pottery, mastering wedging takes time and practice, but the rewards are well worth the effort!
- What is the purpose of wedging in pottery? Wedging is crucial for removing air bubbles and ensuring a consistent texture in the clay, which helps in achieving better results during shaping and firing.
- How long should I wedge my clay? It's generally recommended to wedge your clay for about 5-10 minutes, but the time may vary based on the clay type and your technique.
- Can I skip wedging if I'm in a hurry? Skipping wedging is not advisable, as it can lead to cracks and other issues during the drying and firing stages.
2.1.2 Centering on the Wheel
Centering on the wheel is one of the most crucial skills a potter must master. Imagine trying to build a tower of blocks on a wobbly base; it's simply not going to work! The same principle applies to pottery. If your clay isn't centered properly, your creation will likely end up uneven or misshapen. To get started, you’ll want to ensure your wheel is set up correctly, and that your clay is prepared and wedged. Once you’ve got that down, the real fun begins!
To center your clay, follow these essential steps:
- Start with a firm foundation: Place your wedged clay in the center of the wheel head. It should be a mound, roughly the size of a grapefruit, to give you enough material to work with.
- Wet your hands: Keeping your hands moist will help you grip the clay better and prevent it from sticking.
- Apply pressure: As the wheel spins, use your palms to gently push down and inward. This motion helps to compress the clay and gradually brings it to the center.
- Check your progress: As you apply pressure, keep an eye on the shape. You should see the clay begin to rise and form a symmetrical shape. If it wobbles, don’t panic! Just adjust your hands and continue to apply even pressure until it stabilizes.
It’s important to remember that centering takes practice. You may not get it right the first time, and that’s completely normal! Think of it as learning to ride a bike; it may feel awkward at first, but with persistence, you’ll find your balance. As you become more comfortable with centering, you’ll notice that your ability to create more complex forms will improve significantly.
Moreover, don’t hesitate to experiment with different techniques. Some potters prefer to use their elbows for additional stability, while others find that using their fingertips gives them better control. The key is to find what works best for you. And always remember, patience is your best friend in pottery. So, take a deep breath, enjoy the process, and let the clay guide you!
Q: Why is centering important in pottery?
A: Centering is crucial because it ensures that your clay is balanced, which is essential for creating symmetrical and functional pieces. Without proper centering, your pottery can become warped or uneven.
Q: How can I tell if my clay is centered?
A: You can tell if your clay is centered when it spins smoothly without wobbling. If you notice any irregular movements, it likely means the clay is off-center.
Q: What should I do if my clay keeps falling off the wheel?
A: If your clay is falling off, check to ensure that you have enough moisture on the wheel and your hands. Additionally, make sure that the clay is firmly pressed onto the wheel head before you start spinning.
Q: How long does it take to master centering?
A: Mastering centering can vary from person to person. Some may feel comfortable within a few sessions, while others might take weeks or even months. The key is to practice regularly and remain patient with yourself.
2.2 Shaping Your Piece
Shaping your pottery piece on the wheel is where the magic truly happens. Imagine the clay spinning beneath your hands, transforming from a simple lump into a beautiful vessel. It's a dance between you and the clay, requiring not just skill but also a bit of intuition. The first step in this process is to establish a solid foundation. Make sure your clay is centered; if it isn’t, your piece will end up lopsided, and nobody wants a wonky bowl!
Once your clay is centered, you can start to pull it up and shape it. The key here is to use your hands effectively. Your fingers will guide the shape, while your palms will help to smooth and refine it. Here are a few techniques to consider:
- Creating Bowls: To form a bowl, start by gently pushing down in the center of the clay, allowing the walls to rise as you pull outward. Keep your hands steady, and don’t rush the process.
- Shaping Vases: For vases, you can lift the walls higher while gently pinching the top to create a narrower opening. This technique can create stunning silhouettes that are both functional and artistic.
- Making Plates: When shaping plates, flatten the clay while keeping the edges slightly raised. This can be achieved by using a rib tool to smooth the surface while you turn the wheel.
As you shape your piece, remember that practice makes perfect. Don’t be discouraged if your first few attempts don’t turn out as expected. Each spin on the wheel teaches you something new. You can also experiment with different shapes and sizes, pushing the boundaries of your creativity. Think of it like sculpting a cloud; it can take any form you envision, and the only limit is your imagination.
Once you’ve shaped your piece, take a moment to admire your creation. Feel the texture, appreciate the curves, and visualize how it will look when finished. This is your moment of connection with the clay, a time to reflect on the journey from raw material to art. Remember, every piece you create is a step towards mastering the craft of pottery.
Q: How do I know if my clay is centered?
A: A centered piece will spin evenly without wobbling. You can check by watching the clay as it spins; it should look like a smooth, symmetrical shape.
Q: What if my piece collapses while shaping?
A: Don’t panic! This happens to everyone. Simply reclaim the clay, re-wedge it, and try again. It’s all part of the learning process.
Q: Can I shape the clay without a wheel?
A: Absolutely! You can use hand-building techniques like pinch pots or coils to shape your pottery. The wheel is just one of many tools at your disposal.
Shaping your piece is not just about creating pottery; it's about expressing yourself and enjoying the process. So, roll up your sleeves, get your hands dirty, and let your creativity flow!
3. Surface Decoration Techniques
When it comes to pottery, the surface decoration is where your creativity truly shines! It’s like the icing on a cake, transforming a simple piece of clay into a stunning work of art. This section dives into various techniques that can enhance the aesthetic appeal of your pottery, allowing you to express your unique style and personality. From glazing to intricate designs, the possibilities are endless, and each method offers its own charm and character.
Glazing is perhaps the most popular surface decoration technique. It not only adds color and texture but also serves a functional purpose by making your pottery food-safe and waterproof. Understanding the fundamentals of glazing is essential for achieving beautiful finishes. There are several types of glazes, each with its own unique properties. For instance, matte glazes offer a soft, understated finish, while glossy glazes can create a vibrant, reflective surface that catches the eye. The application method is equally important; you can dip, brush, or spray glazes onto your piece, and each method yields different results.
Another fascinating technique is slip trailing, where a liquid clay mixture, known as slip, is applied to the surface of your pottery using a squeeze bottle or piping bag. This method allows for intricate designs and patterns, adding depth and dimension to your work. You can create everything from delicate floral motifs to bold geometric shapes, making slip trailing a versatile option for potters looking to add a personal touch.
Then there's sgraffito, a technique that involves scratching through a layer of slip or glaze to reveal the clay body underneath. This method can create stunning contrast and intricate designs, perfect for those who enjoy a more detailed approach to decoration. Imagine creating a beautiful landscape scene or intricate patterns that tell a story with just a few careful scratches. The beauty of sgraffito lies in its ability to combine simplicity with complexity, making it a favorite among many potters.
For those who love to experiment, consider exploring alternative decoration methods. Techniques such as underglazing allow you to paint designs onto your pottery before applying a clear glaze, which can result in vibrant colors that pop after firing. Additionally, using natural materials like leaves, flowers, or even fabric can create unique textures and impressions on your pieces. The key is to embrace experimentation; don’t be afraid to mix and match techniques or come up with your own unique methods!
In summary, surface decoration techniques are a fantastic way to elevate your pottery from ordinary to extraordinary. Whether you prefer the glossy finish of glazing, the intricate designs of slip trailing, or the detailed artistry of sgraffito, there’s a technique out there for everyone. So grab your tools, unleash your creativity, and let your pottery reflect your personal style!
Q: What is the best surface decoration technique for beginners?
A: Glazing is often recommended for beginners as it is straightforward and can dramatically change the appearance of your pottery. As you gain confidence, you can explore more intricate techniques like slip trailing and sgraffito.
Q: Can I mix different glazing techniques?
A: Absolutely! Many potters enjoy experimenting with different glazing techniques to create unique effects. Just be sure to test your combinations on small pieces first to see how they interact during firing.
Q: How do I prevent my glaze from running?
A: To prevent running, ensure you apply the glaze evenly and don’t overload the piece. Additionally, consider the firing temperature and the type of glaze you’re using, as some are more prone to running than others.
3.1 Glazing Fundamentals
Glazing is one of the most exciting and transformative aspects of pottery, offering potters the opportunity to add color, texture, and a protective layer to their creations. Understanding the fundamentals of glazing is essential for achieving those stunning finishes that can elevate your work from ordinary to extraordinary. The glazing process involves several key components, including the types of glazes available, application methods, and firing processes. Each of these elements plays a crucial role in the final appearance of your pottery.
First, let's dive into the types of glazes. There are two primary categories: glossy and matte. Glossy glazes provide a shiny, reflective surface that enhances colors and patterns, while matte glazes offer a more subdued, velvety finish. Additionally, there are specialized glazes such as crystalline, which create beautiful patterns during the firing process, and transparent glazes that allow the clay body or underglaze designs to show through. The choice of glaze can dramatically change the character of your piece, so experimenting with different types can lead to delightful surprises.
Next, the application method is equally important. There are several ways to apply glaze, including dipping, brushing, and spraying. Each method has its advantages and can yield different results:
- Dipping: This method involves immersing the piece into a bucket of glaze. It's quick and can provide an even coating, but it may require practice to avoid drips.
- Brushing: Brushing allows for more control and can create interesting textures, but it may require multiple coats to achieve full coverage.
- Spraying: Spraying is great for achieving a smooth finish and can be used for intricate designs, but it requires specialized equipment and safety precautions.
Once you've applied your glaze, the next step is firing. The firing process is what truly brings your glaze to life. During this stage, the glaze melts and forms a glassy surface, bonding with the clay body. It's essential to follow the recommended firing temperature for your specific glaze, as each type has its own requirements. For instance, low-fire glazes typically fire at around 1830°F (999°C), while high-fire glazes can reach temperatures of 2340°F (1280°C) or more. Understanding these firing ranges is crucial for achieving the desired results.
In summary, mastering the fundamentals of glazing involves a blend of knowledge, technique, and a bit of creativity. By exploring different types of glazes, honing your application methods, and understanding the firing process, you can unlock a world of possibilities for your pottery. So, don’t be afraid to experiment and let your imagination run wild—after all, the beauty of pottery lies in its endless potential for creativity!
- What is the difference between low-fire and high-fire glazes? Low-fire glazes are typically more vibrant and are fired at lower temperatures, while high-fire glazes are more durable and often have a more subdued color palette.
- Can I mix different glazes? Yes, mixing glazes can create unique colors and effects, but it's essential to test the mixture on a small scale first to see how they react together.
- How do I avoid common glazing issues? To avoid problems like runs or uneven application, ensure your piece is clean, apply the glaze evenly, and follow the firing instructions closely.
3.2 Alternative Decoration Methods
When it comes to pottery, the surface decoration can truly make or break your piece. While glazing is often the go-to method for finishing pottery, there are alternative decoration methods that can add unique flair and personality to your creations. These techniques allow potters to express their artistic vision in exciting ways, making each piece a true work of art.
One fascinating technique is underglazing. This method involves applying colored slips or glazes to the surface of the pottery before the final glaze is applied. The beauty of underglazing lies in its versatility; you can create intricate designs, patterns, or even detailed images that will remain visible after firing. Imagine painting a vibrant landscape on your vase that pops through the glossy finish of the glaze! This technique not only enhances aesthetic appeal but also allows for a greater range of colors and textures.
Another method worth exploring is using natural materials for decoration. Potters have been experimenting with items like leaves, flowers, and even fabric to create imprints and textures on their clay. For instance, pressing a fern leaf into the soft clay can leave a beautiful, organic pattern that adds depth and character to your piece. This approach not only connects you with nature but also inspires creativity in unexpected ways. You might even find that the imperfections of natural materials add a certain charm to your work.
Furthermore, sgraffito is a technique that involves scratching through a layer of slip or glaze to reveal the clay body underneath. This method is particularly effective for creating detailed designs or patterns. Imagine applying a dark slip to your pot and then carefully carving out a delicate floral pattern that contrasts beautifully with the clay's natural color. The result? A stunning visual effect that draws the eye and invites closer inspection.
It's essential to remember that experimentation is key in pottery. Don't hesitate to mix and match these alternative decoration methods to discover what resonates with your artistic style. For example, you could combine underglazing with sgraffito to create a layered effect that showcases both techniques. The possibilities are endless, and every experiment is an opportunity to learn and grow as a potter.
In conclusion, alternative decoration methods in pottery not only enhance the visual appeal of your work but also encourage personal expression and creativity. Whether you choose to underglaze, imprint with natural materials, or explore sgraffito, each technique offers a new avenue for artistic exploration. So grab your tools, unleash your imagination, and let your pottery tell your unique story!
Q: What is underglazing, and how is it different from glazing?
A: Underglazing involves applying colored slips or glazes to your pottery before the final glaze is added. It allows for more intricate designs and colors that will show through the clear glaze, while glazing is typically the final layer applied to enhance the finish.
Q: Can I use any natural materials for decoration?
A: Yes! You can experiment with various natural materials like leaves, flowers, and fabrics. Just ensure they are clean and free from chemicals to avoid any unwanted reactions during firing.
Q: What is sgraffito, and how do I do it?
A: Sgraffito is a technique where you scratch through a layer of slip or glaze to reveal the clay underneath. To do this, apply a layer of slip to your piece, let it dry slightly, and then use a sharp tool to carve your design.
4. Firing Techniques
Firing techniques are the backbone of pottery, transforming raw clay into durable ceramics that can withstand the test of time. The firing process not only solidifies the clay but also enhances its aesthetic qualities, making it an essential step for any potter. Understanding the different firing methods can help you achieve the desired results for your creations, whether you're aiming for functional ware or artistic pieces. In this section, we'll explore various firing methods, including bisque and glaze firing, and discuss their significance in the pottery-making journey.
First, let's break down the two primary firing stages: bisque firing and glaze firing. Each stage serves a unique purpose and requires careful consideration:
| Firing Stage | Purpose | Temperature Range |
|---|---|---|
| Bisque Firing | Transforms clay into a porous, hardened state, making it easier to handle and prepare for glazing. | Typically between 1,830°F and 1,940°F (1,000°C - 1,060°C) |
| Glaze Firing | Melts the glaze to form a glass-like surface, enhancing color and durability. | Ranges from 1,830°F to over 2,380°F (1,000°C - 1,300°C) |
During the bisque firing, the clay undergoes a transformation. The heat removes moisture and organic materials, resulting in a sturdy, porous structure that can absorb glaze. This stage is crucial because it sets the foundation for the subsequent glazing process. If you've ever felt a bisque-fired piece, you might notice its lightweight and somewhat chalky texture—this is a sign that it's ready for glazing!
Once your piece has been bisque fired, it’s time for the glaze firing. This is where the magic truly happens! The glaze, which can come in various colors and finishes, is applied to the bisque piece, and the kiln is heated again. The heat causes the glaze to melt and fuse to the clay, resulting in a beautiful, often glossy surface. The temperature and duration of the glaze firing can significantly affect the final appearance of your piece, so it’s essential to monitor these closely.
Now, let’s dive into the different kiln types available for firing your pottery. Each type has its unique characteristics and can influence the final outcome:
- Electric Kilns: These are popular for their ease of use and consistent firing results. They are ideal for beginners and can accommodate a range of firing temperatures.
- Gas Kilns: These kilns provide a different atmosphere during firing, which can lead to unique results. They require more skill to operate but are favored for their ability to produce rich, varied finishes.
- Wood-Fired Kilns: This traditional method involves firing pottery using wood as fuel, resulting in distinctive ash glazes and surfaces. It’s a labor-intensive process but can yield stunning, one-of-a-kind pieces.
Among these, wood-fired kilns are particularly exciting. They create a dynamic environment where the flames and ash interact with the clay, resulting in unpredictable yet beautiful finishes. However, they require a good understanding of kiln operation and safety measures due to the high temperatures involved.
Speaking of safety, it’s essential to prioritize safety during the firing process, especially with methods like Raku firing. This unique technique involves removing pottery from the kiln while it’s still hot and placing it in combustible materials, creating dramatic effects. However, it also poses risks, so protective gear and proper ventilation are a must!
In summary, mastering firing techniques is crucial for any pottery enthusiast. From understanding the purpose of bisque and glaze firing to exploring various kiln types, each aspect plays a vital role in the final outcome of your creations. As you experiment with different methods, you'll discover how firing can elevate your pottery to new levels of artistry.
Q: What is the difference between bisque and glaze firing?
A: Bisque firing transforms raw clay into a durable, porous state, while glaze firing melts the glaze to create a glass-like surface.
Q: Can I use any kiln for firing pottery?
A: Not all kilns are suitable for every type of pottery. Electric kilns are great for beginners, while gas and wood-fired kilns offer unique results but require more experience.
Q: What safety precautions should I take when firing pottery?
A: Always wear protective gear, ensure proper ventilation, and follow safety guidelines specific to the firing method you are using.
4.1 Kiln Types
When it comes to firing pottery, the type of kiln you choose can significantly impact the final outcome of your pieces. Each kiln type offers unique advantages and challenges, making it essential for potters to understand their options. Whether you are a novice or a seasoned potter, knowing the differences can help you make informed decisions about your pottery journey.
One of the most common kiln types is the electric kiln. These kilns are user-friendly and ideal for beginners due to their consistent heating and ease of use. They allow potters to control the temperature precisely, making them perfect for both bisque and glaze firing. However, electric kilns can be limited in terms of the types of clay and glazes they can effectively fire, as they typically reach lower temperatures compared to other kiln types.
On the other hand, gas kilns offer a different firing experience. They provide a unique atmosphere that can enhance the colors and textures of your pottery. Gas kilns can reach higher temperatures and allow for reduction firing, which can produce stunning effects not achievable in electric kilns. However, they require more skill and knowledge to operate safely, making them less suitable for beginners.
For those looking for a traditional firing method, wood-fired kilns present an exciting challenge. These kilns rely on wood as fuel, creating a dynamic atmosphere that can produce unique surface effects. Each wood-fired piece can have its own distinct character due to the ash and flame interaction. However, wood firing requires significant preparation and can be time-consuming, making it a labor of love for potters who appreciate the artistry involved.
To summarize, here’s a quick comparison of the kiln types:
| Kiln Type | Advantages | Disadvantages |
|---|---|---|
| Electric Kiln | Consistent temperature control, easy to use | Limited firing temperature, less versatility |
| Gas Kiln | Higher temperatures, reduction firing capabilities | Requires more skill and knowledge |
| Wood-Fired Kiln | Unique surface effects, traditional firing method | Time-consuming, requires significant preparation |
Ultimately, the choice of kiln will depend on your specific needs and artistic goals. Each type offers a different journey in pottery making, and experimenting with various kilns can lead to exciting discoveries in your craft. So, whether you’re drawn to the precision of electric kilns, the creative possibilities of gas kilns, or the rustic charm of wood-fired pieces, there’s a kiln out there that can help you bring your artistic vision to life.
- What is the best kiln for beginners? Electric kilns are generally recommended for beginners due to their ease of use and consistent temperature control.
- Can I fire stoneware in an electric kiln? Yes, most electric kilns can fire stoneware, but be sure to check the kiln's specifications for maximum temperature.
- What safety precautions should I take when using a gas kiln? Always ensure proper ventilation, use safety gear, and follow manufacturer guidelines to prevent accidents.

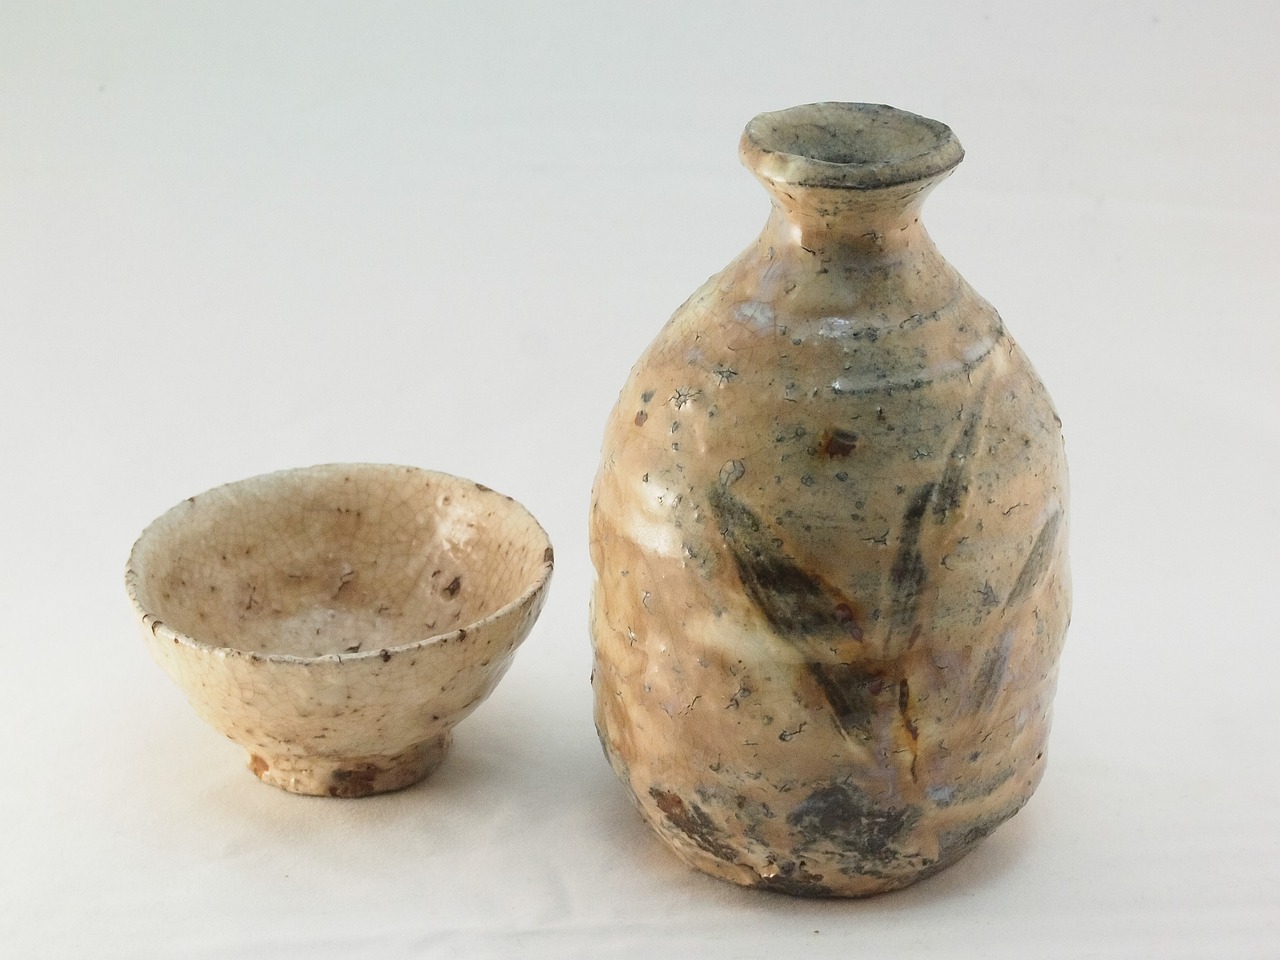
4.2 Raku Firing Process
The Raku firing process is a fascinating and distinctive method of firing pottery that results in unique and unpredictable finishes. Originating from Japan, Raku has evolved over time, attracting potters around the world who are eager to experiment with its vibrant colors and textures. Unlike traditional firing methods, Raku is characterized by its low-temperature firing and the post-firing reduction process, which gives pieces their signature look. But what exactly does this entail?
To begin with, the Raku process typically involves the following steps:
- Preparation: Start with well-prepared clay and create your pottery pieces. It’s crucial to ensure that they are completely dry before firing.
- Firing: Place your pottery in a Raku kiln and heat it to around 1,800°F (982°C). This rapid firing is essential for achieving the desired effects.
- Reduction: After reaching the peak temperature, the hot pottery is removed from the kiln and placed into combustible materials like sawdust or newspaper. This creates a smoky environment that reduces the oxygen available to the glaze, resulting in dramatic color changes.
- Cooling: Once the piece has cooled slightly, it is removed from the combustibles and quenched in water or allowed to cool in the open air, which can create additional surface effects.
One of the most exciting aspects of Raku firing is the element of surprise. Each piece can turn out differently, making it a thrilling experience for potters. The glazes used in Raku are often metallic and can develop stunning iridescent qualities. However, this unpredictability also means that potters must approach the process with a sense of adventure and curiosity.
Safety is a paramount concern during Raku firing. The high temperatures and combustible materials can pose risks, so it's crucial to wear protective gear, including gloves and goggles. Additionally, working in a well-ventilated area can help mitigate the risks associated with smoke and fumes.
In summary, the Raku firing process is not just a technique; it's an experience that combines art, science, and a bit of magic. By embracing the unexpected outcomes and focusing on the creative possibilities, potters can truly elevate their craft and create pieces that tell a story through their unique finishes.
- What types of clay are suitable for Raku firing? Generally, clay that can withstand thermal shock is preferred, such as stoneware or Raku clay specifically designed for this firing method.
- Can I use any glaze for Raku? Not all glazes are suitable for Raku. It's essential to use glazes specifically formulated for Raku firing to achieve the desired effects.
- Is Raku firing safe? While Raku firing can be safe, it requires proper precautions, including protective gear and adequate ventilation.
- How does Raku firing differ from traditional firing? Raku firing is done at lower temperatures and involves a reduction phase, which creates unique surface effects not typically found in traditional kiln firings.
5. Tools and Equipment
When it comes to pottery, having the right tools and equipment can make all the difference in your creative journey. Whether you’re just starting out or you’re a seasoned potter, understanding the essentials will help you bring your ideas to life more effectively. Think of your tools as the brush to a painter; without them, your vision remains just that—a vision. In this section, we’ll dive into the must-have tools for both hand-building and wheel-throwing techniques, ensuring you’re well-equipped to tackle any project.
For hand-building, the following tools are indispensable:
- Rib Tools: These come in various shapes and sizes and are perfect for smoothing and shaping your clay.
- Knives: A good craft knife can help you cut and trim your clay precisely.
- Rolling Pins: Essential for flattening your clay into slabs, rolling pins are a must-have for any hand-builder.
Moving on to wheel-throwing, you’ll need a different set of tools designed to enhance your experience on the potter's wheel. Here are some key items:
- Trimming Tools: These are crucial for refining the shape of your piece after it has been thrown.
- Calipers: Useful for measuring the dimensions of your pottery, calipers help ensure consistency.
- Sponges: Sponges are vital for keeping your clay moist while you work, which aids in achieving the perfect texture.
In addition to these tools, investing in a quality potter's wheel and kiln will open up a world of possibilities for your pottery. The right wheel allows for smooth and controlled throwing, while a kiln is essential for firing your creations to perfection.
To help you understand the differences in kiln types, here’s a brief comparison:
| Kiln Type | Benefits | Limitations |
|---|---|---|
| Electric Kiln | Easy to use, precise temperature control | Can be expensive, limited to lower temperature firings |
| Gas Kiln | Good for high-temperature firings, versatile | Requires more setup, can be more challenging to control |
| Wood-Fired Kiln | Unique finishes, great for large batches | Time-consuming, requires significant experience |
Ultimately, the tools you choose should resonate with your style and the techniques you wish to explore. Don’t hesitate to try out different tools until you find the ones that feel just right in your hands. Remember, the journey of pottery is as much about the process as it is about the final product!
Q: What tools do I need to start pottery?
A: As a beginner, you should invest in basic tools like a rib tool, a knife, a rolling pin for hand-building, and a trimming tool and sponge for wheel-throwing.
Q: Can I use regular kitchen tools for pottery?
A: While some kitchen tools can be adapted for pottery, it's best to use tools specifically designed for clay to achieve better results.
Q: How much should I spend on pottery tools?
A: Start with a modest budget and gradually invest in higher-quality tools as you develop your skills. Quality tools can enhance your experience significantly.
Q: Do I need a kiln to make pottery?
A: Yes, a kiln is essential for firing your pottery to make it durable. However, some community studios offer kiln access if you don’t have one at home.
5.1 Essential Hand-Building Tools
When it comes to hand-building pottery, having the right tools can make all the difference between a frustrating experience and a creative triumph. Imagine trying to sculpt a masterpiece with nothing but your bare hands; while it’s certainly possible, the process becomes much more enjoyable and efficient with a few essential tools by your side. These tools not only enhance your ability to shape and mold clay but also allow for greater precision and creativity in your work.
First on the list is the **rib tool**, which is a versatile instrument that can be made from wood, metal, or plastic. This tool is perfect for smoothing surfaces, shaping forms, and creating intricate details. Whether you’re refining the edges of a bowl or adding texture to a vase, a rib tool is indispensable. Additionally, having a variety of rib tools in different shapes and materials can provide you with a broad range of effects.
Another key player in your hand-building toolkit is the **pottery knife**. This isn’t just any knife; it’s designed specifically for cutting and trimming clay. A good pottery knife allows you to make clean cuts and can also be used for carving designs into your pieces. Think of it as your artistic scalpel, enabling you to bring your visions to life with precision.
Don’t forget about the **rolling pin**! This tool is essential for creating slabs of clay. By rolling out your clay evenly, you can ensure that your pieces have a consistent thickness, which is crucial for even drying and firing. You might think of a rolling pin as the unsung hero of pottery; it’s simple, yet it plays a vital role in the hand-building process.
In addition to these main tools, there are a few others that can significantly enhance your hand-building experience:
- Wire cutter: This tool helps you slice through clay with ease, making it perfect for cutting off chunks or removing pieces from your work surface.
- Sponges: Sponges are fantastic for smoothing out surfaces and adding moisture to your clay, which can be especially helpful during the construction phase.
- Wooden modeling tools: These come in various shapes and sizes, allowing for detailed work on your pottery. They can be used for carving, smoothing, and even adding decorative elements.
As you gather these tools, remember that the best artisans often develop their own preferences over time. What works for one potter might not work for another, so don’t hesitate to experiment with different tools and techniques. The journey of hand-building pottery is as much about exploration and personal expression as it is about the final product.
In conclusion, investing in essential hand-building tools not only enhances your pottery-making process but also opens up new avenues for creativity. With the right tools in hand, you can transform a lump of clay into a stunning work of art, each piece telling its own unique story. So, gear up and get ready to dive into the world of hand-building with confidence!
Q: What is the most important tool for hand-building pottery?
A: While all tools have their significance, many potters consider the rib tool to be one of the most essential as it allows for smoothing and shaping the clay effectively.
Q: Can I use regular kitchen tools for pottery?
A: Yes, you can! Many potters use kitchen tools like rolling pins and knives, but investing in specialized pottery tools can enhance your experience and results.
Q: How do I maintain my hand-building tools?
A: Keep your tools clean and dry after each use. For wooden tools, occasionally apply mineral oil to prevent drying out. Metal tools should be wiped down to avoid rust.
5.2 Wheel-Throwing Tools
When it comes to mastering the art of wheel-throwing, having the right tools at your fingertips is essential. A potter's toolkit can make all the difference in achieving precision and efficiency while working with clay. Just like a chef needs the right knives to create a culinary masterpiece, a potter needs specific tools to shape and refine their creations on the wheel. Here’s a closer look at some of the must-have tools that can elevate your pottery game.
First and foremost, the potter's wheel itself is the cornerstone of this technique. Whether you opt for an electric or kick wheel, it’s the platform where your creativity comes to life. Alongside the wheel, trimming tools are indispensable for refining the shape of your pottery once it has been thrown. These tools help you remove excess clay and achieve that perfect finish. Trimming tools typically come in various shapes and sizes, allowing for different cutting angles and effects.
Another essential tool is the caliper, which is used to measure the diameter of your pieces accurately. This tool ensures that your pottery maintains consistency in size, especially when creating sets of bowls or plates. Additionally, sponges are vital for keeping your hands and the clay moist during the throwing process. A well-moistened surface is crucial for smooth shaping and helps prevent cracks from forming as the clay dries.
Beyond these basics, potters often rely on a variety of rib tools made from wood, metal, or plastic. These tools are perfect for smoothing, shaping, and creating texture on your pottery. Each material offers different benefits; for instance, wooden ribs provide a gentle touch, while metal ribs can create sharper lines. In addition, a needle tool is handy for making precise cuts or checking the thickness of your pottery walls.
Lastly, don’t underestimate the power of a good bat. A bat is a flat disc that attaches to the wheel, allowing you to easily lift your work off the wheel without disturbing its shape. This tool is particularly useful for larger pieces that require a bit more care when handling.
In summary, investing in the right wheel-throwing tools can significantly enhance your pottery-making experience. Whether you are a beginner or a seasoned potter, having these tools will not only improve your efficiency but also help you achieve the stunning results you envision. Remember, the journey of pottery is as much about the tools you use as it is about the techniques you master!
- What is the best type of potter's wheel for beginners? Electric wheels are often recommended for beginners due to their ease of use and consistent speed.
- How do I maintain my wheel-throwing tools? Regular cleaning and proper storage are essential for maintaining the longevity of your tools. Always keep them dry and free from clay residue.
- Can I make pottery without a potter's wheel? Yes! Hand-building techniques such as pinch, coil, and slab methods allow you to create beautiful pottery without a wheel.
6. Troubleshooting Common Issues
Even the most seasoned potters encounter challenges while crafting their masterpieces. Pottery is as much about creativity as it is about understanding the material and the processes involved. Whether you're a novice or a veteran, knowing how to troubleshoot common issues can save you time, effort, and a lot of frustration. In this section, we'll dive into two of the most prevalent problems potters face: cracking and glazing issues.
Cracking is a common concern that can arise at various stages of the pottery-making process. It often occurs during the drying phase or even during firing. Understanding the causes of cracking is crucial for prevention. Factors like uneven drying, excessive moisture, and rapid temperature changes can lead to cracks that mar your work. To avoid these issues, consider the following:
- Even Drying: Ensure that your pieces dry evenly. Cover them with plastic to slow down the drying process and prevent rapid moisture loss.
- Proper Thickness: Maintain consistent thickness throughout your piece. Thicker areas will dry more slowly than thinner ones, leading to cracking.
- Controlled Firing: Gradually increase the temperature during firing to prevent thermal shock, which can cause cracks.
By implementing these strategies, you can significantly reduce the likelihood of cracking and enjoy a smoother pottery-making experience.
Glazing can be a tricky aspect of pottery, with several potential pitfalls that can lead to disappointing results. Common problems include runs, uneven application, and crazing. Each of these issues can detract from the beauty of your work, but fear not! Here are some tips to achieve flawless finishes:
- Runny Glaze: If your glaze runs during firing, it may be too thin or applied too liberally. Always test your glazes on sample pieces before committing to your final work.
- Uneven Application: To avoid uneven glazing, use a consistent technique, whether dipping, brushing, or spraying. Practice makes perfect!
- Crazing: This occurs when the glaze shrinks more than the clay body during cooling. To combat this, ensure your glaze and clay are compatible and adjust the glaze formulation if necessary.
By being mindful of these common glazing issues, you can enhance your pottery's aesthetic appeal and ensure your work stands out.
Q: What should I do if my pottery cracks during drying?
A: If your piece cracks while drying, assess the thickness and drying conditions. You might need to adjust how you cover the piece or ensure it dries more evenly.
Q: How can I fix glazing runs?
A: If you notice runs after firing, you can sand down the excess glaze and reapply a thinner layer before firing again. Always test glazes beforehand to avoid this issue.
Q: What is crazing, and how can I prevent it?
A: Crazing is the fine cracks that appear on the surface of your glaze. To prevent it, ensure your glaze and clay body are compatible and avoid overly thick applications of glaze.
6.1 Cracking and Drying Issues
Cracking in pottery can be a potter's worst nightmare, often appearing unexpectedly and ruining hours of hard work. Understanding the causes of these cracks is crucial for both novice and experienced potters. Generally, cracks can occur during the drying phase or firing process, and they can be attributed to several factors. One common culprit is uneven drying, which can lead to stresses in the clay body. If one part of your piece dries faster than another, it can result in cracks as the clay shrinks unevenly. Thus, maintaining a consistent drying environment is essential.
Another significant factor contributing to cracking is the moisture content of the clay. If your clay is too wet when you begin shaping it, or if it dries too quickly post-shaping, you may encounter issues. It’s vital to find the right balance. A good practice is to cover your pieces with plastic to slow down the drying process, especially during the initial stages. This way, you can prevent the outer layer from drying too quickly while the inner part remains moist.
Additionally, the method of construction plays a role in cracking. For instance, if you are using hand-building techniques like coiling or pinching, ensure that the coils are well blended and that there are no air pockets trapped within. Air pockets can expand during firing, leading to cracks or even explosions in your kiln. To avoid this, always roll your coils or slabs evenly and compress them thoroughly.
Here are some tips to help mitigate cracking:
- Ensure even thickness throughout your piece.
- Control the drying environment by working in a humid space or using damp cloths.
- Regularly check your piece during the drying process for signs of stress.
- Use a slow and steady firing schedule to minimize thermal shock.
By being aware of these factors and implementing preventive measures, you can significantly reduce the likelihood of cracking in your pottery. Remember, patience is key in pottery-making—allow your creations to dry slowly and evenly, and they will reward you with stunning results. If you do encounter cracks, don’t despair; sometimes, they can be incorporated into your design, adding character and uniqueness to your work.
Q: What are the main causes of cracking in pottery?
A: Cracking can be caused by uneven drying, excessive moisture content, and air pockets in the clay. It's essential to ensure even thickness and control the drying environment to prevent cracks.
Q: How can I prevent my pottery from cracking during the drying process?
A: To prevent cracking, cover your pieces with plastic to slow down the drying process, ensure even thickness, and regularly check for signs of stress during drying.
Q: Is it possible to fix cracks after they occur?
A: While minor cracks can sometimes be repaired with slip or clay, significant cracks may compromise the integrity of your piece. It's best to focus on prevention to avoid this issue altogether.
6.2 Glazing Problems and Solutions
Glazing can be one of the most exciting yet frustrating aspects of pottery. While a well-applied glaze can elevate your piece to a masterpiece, a poorly executed glaze can lead to disappointment and frustration. One common problem potters face is glaze runs, where the glaze drips down the sides of the piece during firing. This often occurs when too much glaze is applied or when the piece is not properly positioned in the kiln. To prevent this, it’s essential to follow the manufacturer's guidelines on glaze application and to practice applying a thin, even coat.
Another frequent issue is uneven glazing, which can result from several factors, including inconsistent application techniques or variations in kiln temperature. To achieve a more uniform finish, consider using a spray or dipping method instead of brushing, as these techniques often yield more consistent results. Additionally, ensuring that your kiln is properly calibrated can help mitigate temperature fluctuations that may affect the glaze's performance.
Sometimes, potters encounter glaze crazing, which appears as fine cracks in the surface of the glaze. This can be caused by a mismatch between the clay body and the glaze’s thermal expansion. To avoid crazing, it’s crucial to test your glazes on the same clay body you plan to use for your final piece. Conducting small test tiles can help you identify any potential issues before committing to a larger project.
Here’s a quick rundown of common glazing problems and their solutions:
| Problem | Possible Causes | Solutions |
|---|---|---|
| Glaze Runs | Too much glaze applied, improper kiln positioning | Apply a thinner coat, position correctly in the kiln |
| Uneven Glazing | Inconsistent application, kiln temperature variations | Use spray or dipping methods, calibrate kiln |
| Glaze Crazing | Mismatched thermal expansion of clay and glaze | Test glazes on the same clay body |
In addition to these common issues, potters may also face challenges such as bubbles or blisters in the glaze. These can occur if the glaze is mixed improperly or if air is trapped in the glaze layer. To minimize these issues, ensure that your glaze is thoroughly mixed and free of lumps before application. Allowing your piece to dry completely before firing can also help reduce the likelihood of bubbles forming.
Ultimately, the key to mastering glazing lies in experimentation and practice. Don’t be afraid to try new techniques or materials, and keep detailed notes on your processes and results. This way, you can learn from your experiences and refine your skills over time. Remember, every mistake is an opportunity to grow as an artist!
- What is the best way to apply glaze? - The best methods are spraying, dipping, or brushing, depending on the desired effect.
- How can I prevent glaze runs? - Ensure an even application and correct positioning in the kiln.
- What causes crazing in glaze? - Crazing is typically caused by a mismatch between the glaze and the clay body’s thermal expansion.
- Can I fix glazing mistakes? - Some mistakes can be fixed by re-glazing or adjusting firing temperatures, but others may require starting over.
7. Inspiration and Resources
Finding inspiration is crucial for any pottery enthusiast, whether you're just starting out or have been shaping clay for years. Inspiration can come from various sources, and tapping into these can fuel your creativity and enhance your skills. One of the best ways to find inspiration is by exploring the works of other artists. Visit local galleries or online platforms to see what's trending in the pottery world. You might be surprised at how a simple piece can spark a whole new idea in your mind!
In addition to viewing other artists' work, consider immersing yourself in nature. The textures, colors, and forms found in the natural world can provide endless ideas for your pottery projects. Imagine crafting a bowl inspired by the swirling patterns of a river or a vase that mimics the shape of a blooming flower. Nature is an artist’s best friend!
Books and online courses are also fantastic resources for learning new techniques and gathering inspiration. Here’s a brief overview of some recommended resources:
| Resource Type | Examples |
|---|---|
| Books |
|
| Online Courses |
|
| Community Groups |
|
Engaging with these resources not only enhances your technical skills but also connects you with a community of like-minded individuals. Sharing your work and receiving feedback can be incredibly motivating. Plus, you’ll find that many potters are more than willing to share their tips and tricks, creating a supportive environment for everyone.
Lastly, remember that inspiration can also come from within. Keep a journal of your ideas, sketches, and reflections on your pottery journey. Over time, you might discover patterns in your thinking or themes that resonate with you. This personal insight can lead to unique creations that truly reflect your artistic voice.
Q1: Where can I find local pottery classes?
A1: Check community centers, art schools, or local pottery studios. Many offer classes for all skill levels.
Q2: How can I connect with other potters online?
A2: Social media platforms like Instagram and Facebook have numerous pottery communities. Joining these groups can help you share your work and learn from others.
Q3: What are some good books for beginners in pottery?
A3: "The Complete Potter" and "Handbuilding for Everyone" are excellent starting points for new potters.
Q4: Can pottery be therapeutic?
A4: Absolutely! Many find that working with clay promotes mindfulness and relaxation, making it a great therapeutic practice.
7.1 Recommended Books
When it comes to enhancing your pottery skills, there’s no substitute for a good book. Whether you're a novice eager to learn the basics or a seasoned potter looking to refine your techniques, the right literature can provide invaluable insights and inspiration. Here are some highly recommended titles that every pottery enthusiast should consider adding to their collection:
- The Complete Potter: A Comprehensive Guide to Pottery Techniques - This book covers everything from hand-building to wheel-throwing, making it a fantastic resource for potters at any level. With detailed illustrations and step-by-step instructions, it demystifies complex techniques.
- Mastering the Potter's Wheel - If you're looking to dive deep into wheel-throwing, this book is a must. It offers expert tips and tricks, helping you to achieve that perfect shape and finish.
- Pottery for Beginners: A Step-by-Step Guide - Perfect for those just starting out, this book breaks down the pottery-making process into manageable steps, making it easy to follow along and practice.
- Glazing Techniques: A Guide to Surface Decoration - Glazing can be a complex part of pottery, but this book simplifies the process. It covers various glazing methods and provides troubleshooting tips for common issues.
In addition to these titles, many potters find inspiration in books that explore the artistic side of pottery. For instance, “The Art of Pottery: A Visual Guide” showcases stunning works from various artists, offering a glimpse into the creative possibilities that clay presents. Furthermore, don’t overlook the power of community resources, such as local libraries or pottery studios, where you can often find books that are not only educational but also deeply inspiring.
Reading about pottery can ignite your creativity and motivate you to experiment with new techniques. So, whether you’re curled up on the couch or sitting at your potter's wheel, these recommended books will surely enhance your journey in the world of pottery.
Q: What is the best book for beginners in pottery?
A: "Pottery for Beginners: A Step-by-Step Guide" is highly recommended for newcomers. It breaks down the basics and provides clear instructions to help you get started.
Q: Are there books that focus specifically on glazing techniques?
A: Yes! "Glazing Techniques: A Guide to Surface Decoration" is a great resource that covers various methods and troubleshooting tips for glazing.
Q: Can I find pottery books at my local library?
A: Absolutely! Many libraries have a selection of pottery books, and you can often request titles that are not currently available.
Q: How can I stay updated on new pottery techniques and trends?
A: Following pottery blogs, subscribing to pottery magazines, and joining online communities can help you stay informed about the latest trends and techniques in pottery.

7.2 Online Communities
In today's digital age, online communities have become invaluable resources for pottery enthusiasts. Whether you're a beginner or a seasoned pro, these platforms offer a wealth of knowledge, support, and inspiration. Imagine being able to connect with fellow potters from around the globe, sharing your creations, and receiving constructive feedback—all from the comfort of your home. Sounds amazing, right?
One of the great things about online pottery communities is their diversity. From Facebook groups to dedicated forums, there are numerous platforms where potters can gather. For instance, Facebook hosts various groups like "Pottery Heads" or "Ceramic Arts Daily," where members post their work, ask questions, and share techniques. These groups often have a vibrant atmosphere, encouraging members to engage actively and support one another. The sense of camaraderie can be incredibly uplifting, especially when you're facing challenges in your pottery journey.
Another fantastic option is Reddit, where you can find subreddits like r/Pottery. Here, users discuss everything from basic techniques to advanced firing methods. The platform allows for easy interaction, making it simple to ask questions and get advice from experienced potters. The anonymity of Reddit can also make it easier for some to share their struggles and seek help without feeling judged.
Moreover, many pottery enthusiasts turn to Instagram to showcase their work and follow others for inspiration. The visual nature of Instagram allows potters to post stunning images of their pieces, share behind-the-scenes processes, and connect with artists worldwide. Hashtags like #potterycommunity or #ceramics can lead you to countless accounts filled with creativity and innovation.
In addition to social media platforms, there are also specialized websites and forums dedicated to pottery. Websites like Pottery Heads and Ceramic Arts Network offer articles, tutorials, and forums where potters can discuss techniques and share their experiences. These platforms often host challenges or contests, providing an excellent opportunity to push your creative boundaries and gain recognition.
Joining these online communities not only enhances your skills but also fosters a sense of belonging. You can learn from others' experiences, share your own, and even collaborate on projects. The feedback you receive can be incredibly valuable, helping you refine your techniques and explore new ideas. So, if you haven't already, dive into the world of online pottery communities. You might just find your next big inspiration or a new friend who shares your passion for clay!
1. What are the best online communities for pottery enthusiasts?
There are many great options, including Facebook groups like "Pottery Heads," Reddit's r/Pottery, and Instagram accounts dedicated to pottery. Each platform offers unique ways to connect and share.
2. How can I benefit from joining an online pottery community?
Joining an online community can provide you with support, inspiration, and feedback on your work. It's a great way to learn new techniques and connect with fellow potters.
3. Are there any costs associated with joining these communities?
Most online communities are free to join. However, some specialized forums might offer premium memberships for additional resources or content.
4. Can I share my work in these communities?
Absolutely! Sharing your work is encouraged in most online pottery communities. It's a great way to receive feedback and inspire others.
8. Pottery as a Therapeutic Practice
Pottery is not just about creating beautiful objects; it can also serve as a powerful therapeutic practice. Many individuals find that working with clay provides a unique outlet for self-expression and emotional release. The tactile nature of clay encourages a deep connection between the artist and their material, allowing for a meditative experience that can soothe the mind and promote mindfulness.
As you mold and shape the clay, you may find yourself entering a state of flow, where worries and distractions fade away. This process can be incredibly calming, similar to how some people feel when they engage in activities like gardening or painting. The act of creating something with your hands can lead to a sense of accomplishment and satisfaction, which is vital for mental well-being.
Moreover, pottery can foster a sense of community and connection. Joining a pottery class or group provides opportunities to meet like-minded individuals who share a passion for this craft. These social interactions can lead to friendships and collaborations, enhancing the overall therapeutic experience. Engaging in group projects or simply sharing your work with others can boost your confidence and inspire creativity.
Here are some of the key mental health benefits associated with pottery:
- Mindfulness: Focusing on the process of shaping clay encourages mindfulness, helping to reduce anxiety and stress.
- Self-Expression: Pottery allows for personal expression, enabling individuals to convey emotions and thoughts through their art.
- Community Building: Connecting with others in a pottery setting fosters a sense of belonging and support.
- Skill Development: Learning and mastering pottery techniques can boost self-esteem and provide a sense of achievement.
In addition to the emotional benefits, engaging in pottery can also improve fine motor skills and hand-eye coordination. As you practice various techniques, you develop a greater awareness of your body and movements, which can be particularly beneficial for individuals recovering from injuries or those with disabilities.
In conclusion, pottery is more than just a hobby; it can be a transformative practice that nurtures the mind and spirit. Whether you're a seasoned potter or a complete beginner, the therapeutic benefits of working with clay can greatly enhance your overall well-being. So, why not grab some clay and start your journey into the world of pottery? You might just find that it becomes a cherished part of your self-care routine.
- What are the mental health benefits of pottery? Pottery can promote mindfulness, self-expression, and community connection, all of which contribute to improved mental health.
- Do I need prior experience to benefit from pottery? No, pottery is accessible to everyone, and beginners can find therapeutic value in the creative process.
- Can pottery help with stress relief? Absolutely! The repetitive motions and focus required in pottery can help alleviate stress and anxiety.
- Is pottery a solitary or social activity? Pottery can be both! You can enjoy it alone for personal reflection or join classes and groups for social interaction.
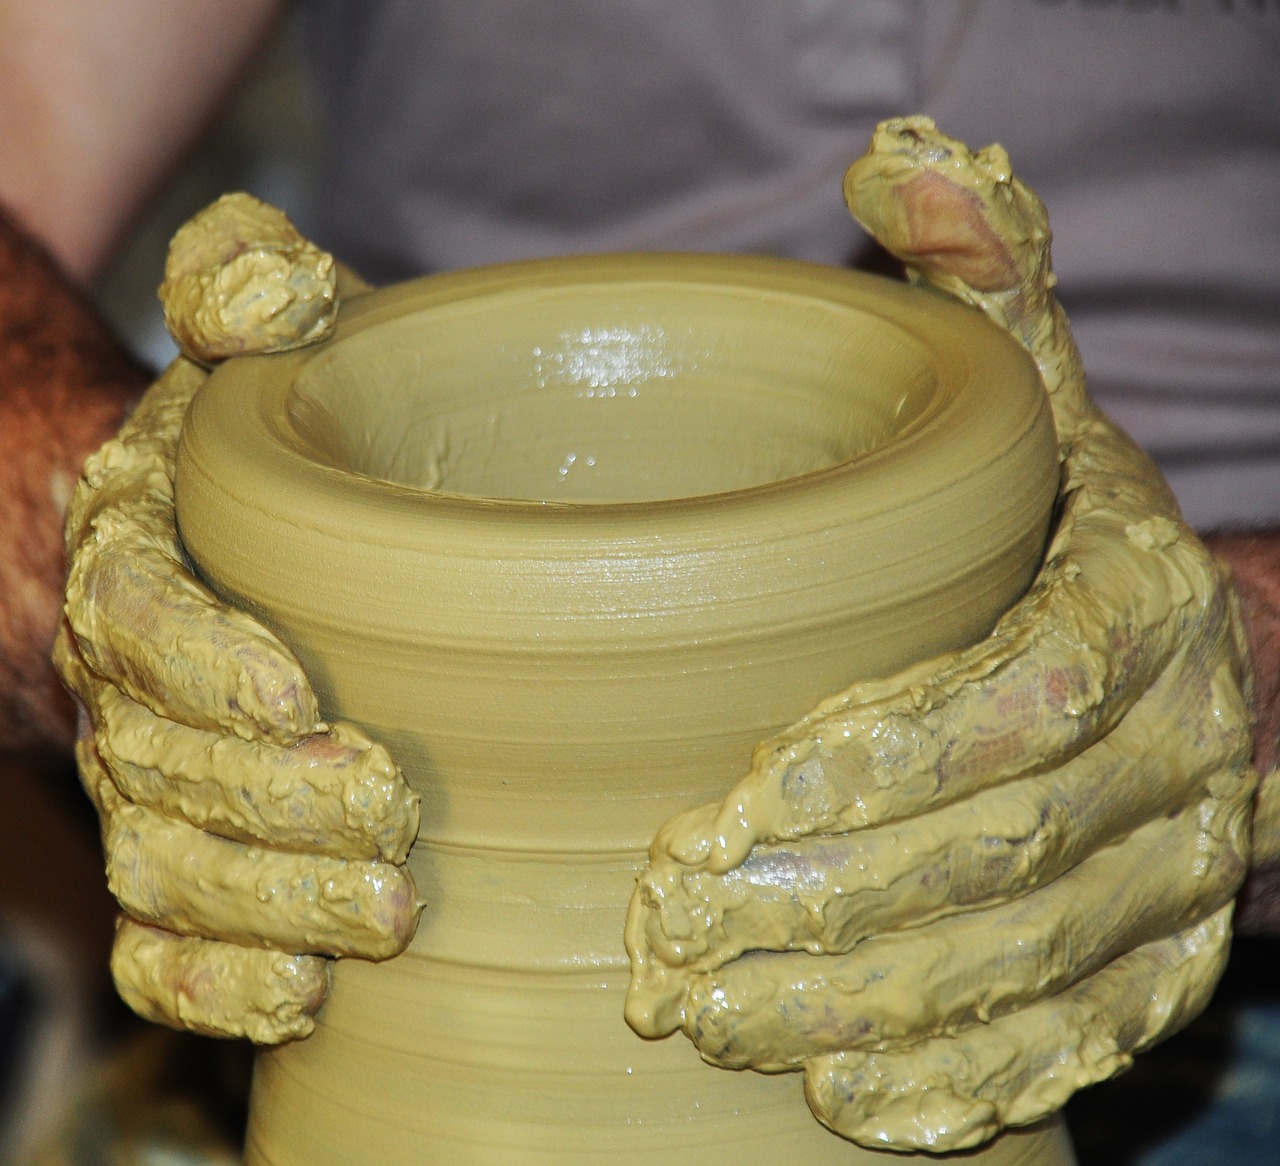
8.1 Mindfulness Through Pottery
Engaging in pottery is more than just a creative outlet; it's a pathway to mindfulness that can significantly enhance your mental well-being. When you sit at the pottery wheel or work with clay in your hands, you're not just shaping mud into beautiful forms—you're also immersing yourself in the present moment. This practice encourages you to focus on the tactile sensations of the clay, the rhythm of your movements, and the transformation occurring right before your eyes. It's almost like meditation, where your mind can quiet down and your worries can fade away, allowing you to connect with yourself on a deeper level.
As you mold and shape the clay, you might notice how the act of creation can be quite therapeutic. Pottery requires concentration, which helps to divert your attention from stressors and anxieties. When you concentrate on the feel of the clay, the pressure of your hands, and the sound of the wheel, you create a mindful experience that can lead to a state of flow. This flow state is characterized by a sense of timelessness and deep engagement, where you lose track of everything else and are fully present in the moment.
Moreover, pottery can serve as a form of self-expression. Each piece you create is a reflection of your thoughts and emotions at that moment. This connection between your inner self and your art can be incredibly rewarding. You might find that certain shapes or colors resonate with your current state of mind, allowing you to explore your feelings more openly. Here are some ways pottery fosters mindfulness:
- Focus on the Process: Instead of fixating on the end product, pottery encourages you to appreciate the journey of creation.
- Tactile Engagement: The physical connection with clay can ground you, making you more aware of your body and senses.
- Breath and Rhythm: The repetitive motions involved in shaping clay can help you find a calming rhythm, akin to breathing exercises.
- Creative Freedom: Pottery allows for personal expression, which can lead to emotional release and clarity.
Incorporating pottery into your routine can be a wonderful way to cultivate mindfulness and enhance your overall mental health. Whether you're a seasoned potter or just starting out, the act of working with clay can provide a sanctuary from the chaos of daily life. So, the next time you find yourself feeling overwhelmed, consider reaching for that lump of clay and let your hands guide you into a state of calm and creativity.
Here are some common questions related to mindfulness through pottery:
- How does pottery help with stress relief?
Pottery requires focus and creativity, which can distract you from daily stressors and promote relaxation. - Can anyone practice pottery for mindfulness?
Absolutely! Pottery is accessible to all skill levels, and the act of creating can be beneficial regardless of experience. - What materials do I need to start pottery?
Basic materials include clay, a potter's wheel (if wheel-throwing), and simple tools like rib tools and knives. - How often should I practice pottery for mindfulness?
Regular practice, even in short sessions, can enhance the benefits. Find a schedule that works for you!

8.2 Community and Connection
Pottery isn't just about shaping clay; it's about forging connections and building a community around a shared passion. When you step into a pottery studio, you enter a space filled with creativity, laughter, and the clinking of tools against clay. This vibrant atmosphere fosters friendships that often last a lifetime. But why is community so crucial in the world of pottery?
For many, joining a pottery class or group is a gateway to not just learning techniques but also to meeting like-minded individuals who share your enthusiasm. The camaraderie that develops in these settings can be incredibly uplifting. Imagine sitting at a potter's wheel, surrounded by others who are just as excited to create. You can exchange tips, share stories, and even collaborate on projects. This exchange of ideas can spark new inspirations and help you grow as an artist.
Moreover, being part of a pottery community can enhance your overall experience. Many studios and groups organize events such as workshops, exhibitions, and pottery fairs. These gatherings not only showcase your work but also allow you to appreciate the artistry of others. You might discover different styles and techniques that you never considered before, enriching your own practice.
Additionally, the social aspect of pottery can serve as a therapeutic outlet. Engaging with others while working with clay can relieve stress and promote mental well-being. It’s a chance to step away from the hustle and bustle of daily life and immerse yourself in a creative environment. The act of creating alongside others can foster a sense of belonging, making you feel more connected to your community and the world around you.
In the digital age, online pottery communities have also emerged, providing a platform for artists to connect globally. Social media groups and forums allow potters to share their work, seek advice, and celebrate each other's successes. Whether you're a beginner or a seasoned potter, these online spaces can offer invaluable support and inspiration.
Ultimately, the connections you make through pottery can lead to lifelong friendships and a deeper appreciation for the art form. So, if you haven’t already, consider joining a pottery class or an online community. You never know where your journey with clay might take you!
- How can I find a pottery class near me?
Check local community centers, art schools, or online platforms like Meetup to find classes in your area. - What are the benefits of joining a pottery community?
Joining a community can enhance your skills, provide emotional support, and foster lasting friendships. - Can I participate in pottery events without being an expert?
Absolutely! Many events welcome potters of all skill levels, and they can be a great way to learn and connect.
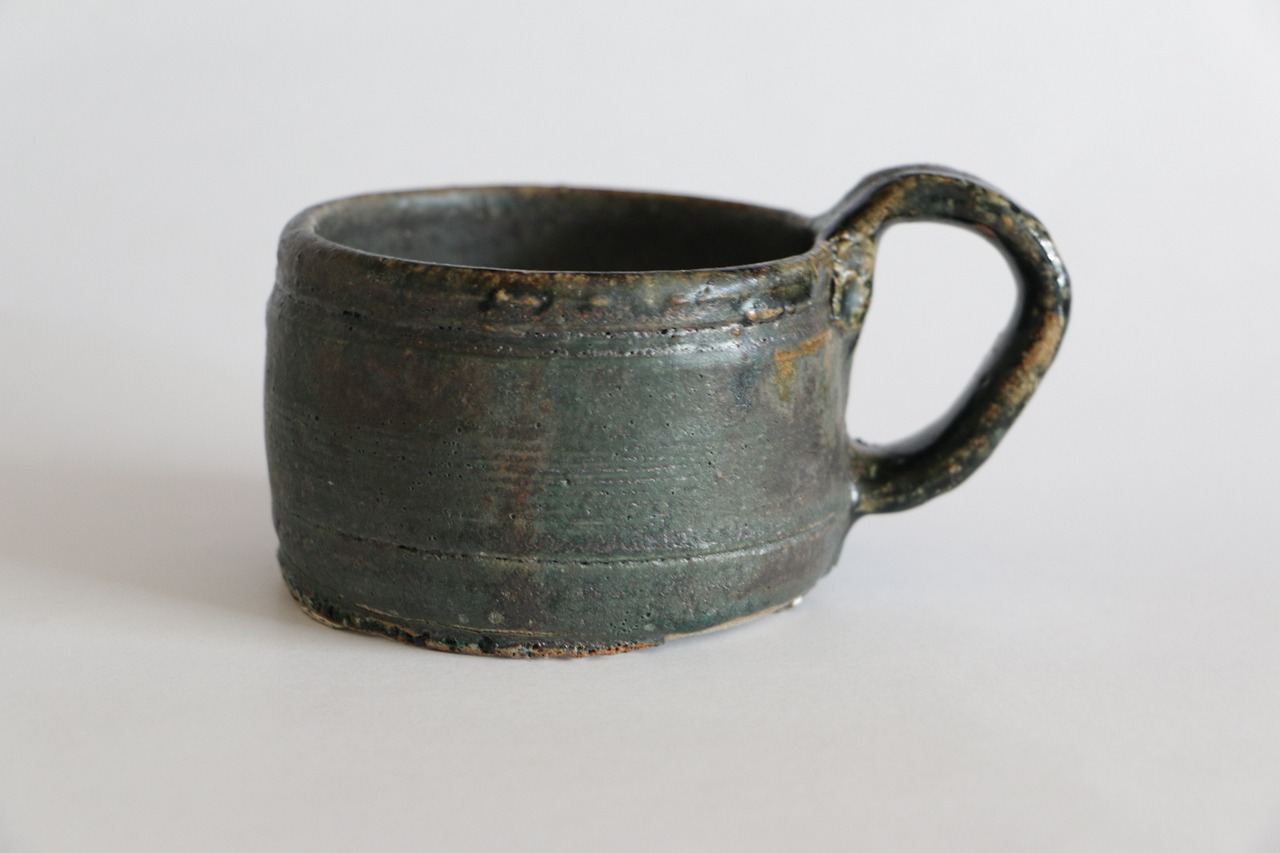
9. Future Trends in Pottery
As we look ahead, the world of pottery is undergoing a fascinating transformation, influenced by both technological advancements and a growing awareness of sustainability. Potters today are not just artists; they are innovators, blending traditional techniques with modern practices to create stunning works of art. One of the most exciting trends is the increasing use of **sustainable materials**. Many potters are now sourcing clay and glazes that are eco-friendly, reducing their environmental impact while still producing beautiful pieces. This shift is not just a trend; it represents a profound change in how artists view their role in the environment.
In addition to sustainability, technology is playing a pivotal role in shaping the future of pottery. The rise of **3D printing** technology is revolutionizing the way potters design and create their work. Imagine being able to print intricate designs that would be nearly impossible to achieve by hand! This fusion of art and technology is opening new doors for creativity, allowing potters to experiment with forms and structures that challenge traditional boundaries.
Furthermore, digital design tools are becoming increasingly accessible, enabling artists to visualize their creations before they even touch the clay. This not only streamlines the creative process but also helps in planning complex pieces with precision. As potters embrace these innovations, they are also finding new ways to connect with their audience. Online platforms and social media are fostering a community where potters can share their work, receive feedback, and collaborate with fellow artists around the globe.
Another trend worth noting is the rise of **interactive pottery workshops**. These classes are not just about learning techniques; they focus on building a community. Participants often come together to share their experiences, challenges, and successes, creating a supportive environment that encourages creativity. This sense of community is crucial, especially as more people turn to pottery as a therapeutic practice. Engaging in hands-on activities helps individuals unwind and connect with their inner selves, making pottery not just a craft but a pathway to mental well-being.
As we delve deeper into the future of pottery, the blending of tradition and innovation will undoubtedly continue to flourish. Potters are embracing change while honoring age-old techniques, ensuring that the art of pottery remains vibrant and relevant. The future is not just about what we create, but how we create it and the impact it has on our world. So, whether you're a seasoned potter or just starting out, keep an eye on these trends; they could inspire your next masterpiece!
- What are sustainable materials in pottery? Sustainable materials refer to eco-friendly clays and glazes that minimize environmental impact while maintaining quality and aesthetics.
- How is technology influencing pottery? Technology, particularly 3D printing and digital design tools, is allowing potters to create intricate designs and streamline their creative processes.
- What are interactive pottery workshops? These workshops focus on community-building and collaboration, allowing participants to share experiences and support each other's creative journeys.
- Can pottery be therapeutic? Yes! Many individuals find that engaging in pottery helps reduce stress and promotes mindfulness, making it a beneficial practice for mental health.
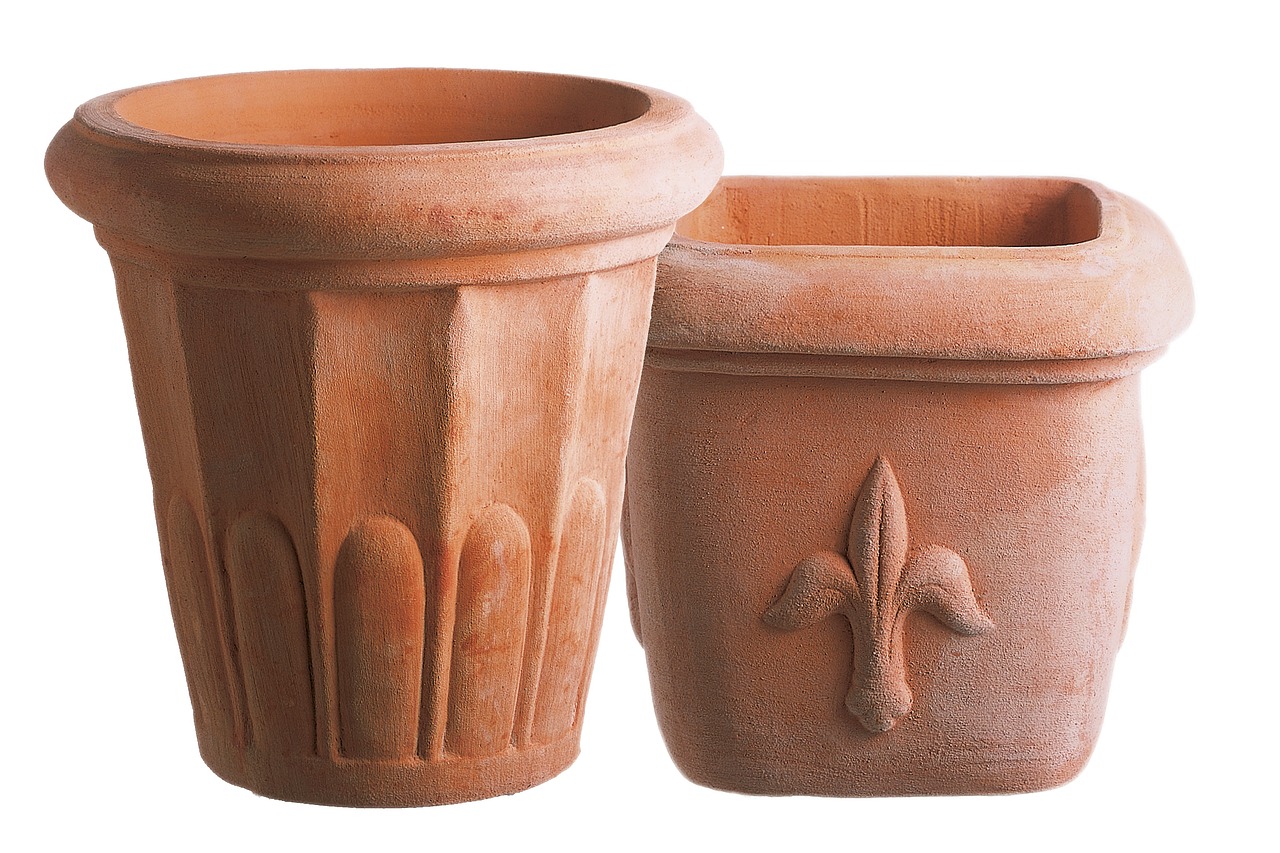
9.1 Sustainable Pottery Practices
Sustainable pottery practices are becoming a vital aspect of the ceramics community, as artists and enthusiasts alike recognize the importance of reducing their environmental footprint. Embracing sustainability not only benefits the planet but also enhances the creative process, allowing potters to explore new materials and techniques that align with eco-friendly principles. By integrating sustainable practices into pottery, we can create beautiful works of art while being mindful of our resources.
One of the most effective ways to adopt sustainable practices is through the use of eco-friendly materials. Many potters are now seeking natural clays, which are sourced sustainably and free from harmful additives. Additionally, using non-toxic glazes and natural pigments can greatly reduce the environmental impact of our work. For instance, instead of traditional commercial glazes, potters can experiment with homemade glazes made from locally sourced ingredients, which not only minimizes waste but also adds a unique touch to their creations.
Another essential aspect of sustainable pottery is energy efficiency during the firing process. Traditional kilns can consume a significant amount of energy, but potters are increasingly turning to alternative firing methods that use less energy and produce unique results. For example, wood-fired kilns not only create stunning finishes but also utilize renewable resources. Similarly, solar kilns harness the power of the sun, providing an innovative solution for eco-conscious potters.
Moreover, potters can implement recycling practices within their studios. By reclaiming and reusing clay scraps, artists can minimize waste and reduce the need for new materials. This practice not only conserves resources but also encourages creativity, as potters can experiment with different clay bodies and textures. Additionally, incorporating recycled materials into glazes or decorative elements can further enhance the sustainability of the pottery.
To summarize, sustainable pottery practices involve:
- Using eco-friendly materials such as natural clays and non-toxic glazes.
- Exploring alternative firing methods like wood-fired and solar kilns.
- Implementing recycling practices to minimize waste and encourage creativity.
By adopting these sustainable practices, potters can contribute to a healthier planet while developing their skills and artistry. It's not just about creating beautiful pottery; it's about making a positive impact on the world around us. As the pottery community continues to evolve, embracing sustainability will undoubtedly play a crucial role in shaping the future of this timeless craft.
Q1: What materials are considered eco-friendly for pottery?
A1: Eco-friendly materials for pottery include natural clays, non-toxic glazes, and locally sourced ingredients for homemade glazes. These materials minimize environmental impact and promote sustainability.
Q2: How can I reduce energy consumption when firing pottery?
A2: You can reduce energy consumption by using alternative firing methods such as wood-fired or solar kilns, which are more energy-efficient than traditional electric kilns.
Q3: What are some ways to recycle clay in pottery?
A3: Recycling clay can be done by collecting scraps and leftover pieces, reworking them into new clay bodies, or creating new projects. This practice helps minimize waste and encourages creativity.

9.2 Technological Innovations
In the ever-evolving world of pottery, technological innovations are reshaping how artists create and experience their craft. From 3D printing to digital design tools, the integration of technology is not merely a trend; it's a revolution that opens up new avenues for creativity and efficiency. Imagine being able to design intricate patterns or forms on a computer and then bring them to life with a 3D printer! This fusion of technology and traditional methods is making pottery more accessible and exciting for both beginners and seasoned potters.
One of the most remarkable advancements is the use of 3D printing. This technique allows potters to create complex shapes that would be nearly impossible to achieve by hand. With a 3D printer, you can experiment with forms and designs without the constraints of manual labor. Not only does this save time, but it also encourages potters to push the boundaries of their creativity. Moreover, the ability to print with various materials means that artists can explore different textures and finishes, adding a new dimension to their work.
Additionally, digital design software plays a crucial role in modern pottery. Programs like Rhino and Fusion 360 enable potters to visualize their creations in a virtual space before committing to the clay. This means that you can adjust proportions, experiment with colors, and even simulate how the piece will look once fired. The ability to plan meticulously can lead to fewer mistakes and more successful outcomes. Plus, these tools can help in creating detailed templates for hand-building or wheel-throwing, ensuring precision in every piece.
Another exciting innovation is the development of smart kilns. These kilns come equipped with advanced technology that allows potters to monitor and control the firing process remotely. Imagine being able to adjust temperatures or firing schedules from your smartphone! This level of control not only improves the quality of the finished product but also enhances safety in the studio. Smart kilns can alert you to any issues during firing, ensuring that your creations are not only beautiful but also durable.
As we embrace these technological advancements, it's essential to consider their impact on the pottery community. While some purists may argue that technology detracts from the traditional aspects of pottery, many believe it complements and enhances the art form. The key is finding a balance between innovation and tradition, allowing potters to express their individuality while benefiting from modern tools.
In conclusion, the integration of technology in pottery is a thrilling development that offers endless possibilities. Whether it's through 3D printing, digital design, or smart kilns, these innovations are transforming the way we approach this ancient craft. As we look to the future, it will be fascinating to see how these technologies continue to evolve and inspire the next generation of potters.
- What is 3D printing in pottery?
3D printing in pottery involves using a printer to create ceramic objects layer by layer, allowing for complex designs that are difficult to achieve by hand.
- How does digital design software help potters?
Digital design software enables potters to visualize and modify their designs before creating them in clay, reducing errors and enhancing creativity.
- What are smart kilns?
Smart kilns are advanced kilns that allow potters to monitor and control the firing process remotely, ensuring better quality and safety during firing.
- Can technology replace traditional pottery techniques?
While technology offers new tools and methods, it is meant to complement rather than replace traditional techniques, allowing for greater creativity and efficiency.
Frequently Asked Questions
- What are the basic pottery techniques for beginners?
For beginners, hand-building techniques like pinch, coil, and slab methods are great starting points. These methods allow you to create unique pieces without the need for a potter's wheel. Wheel-throwing is also popular, where you shape clay on a spinning wheel, but it requires more practice to master.
- How do I prepare clay for wheel-throwing?
Preparing clay involves wedging, kneading, and centering. Wedging helps remove air bubbles and creates a uniform texture, while centering is crucial for achieving balance on the wheel. Properly prepared clay will make the throwing process much smoother and more enjoyable.
- What is the importance of glazing in pottery?
Glazing not only adds color and shine to your pottery but also provides a protective layer. Understanding different types of glazes and application methods is essential for achieving beautiful finishes. The firing process also plays a significant role in how the glaze appears on your final piece.
- What are some common issues faced during pottery making?
Common issues include cracking during drying or firing and glazing problems like runs or uneven application. It's important to understand the causes of these issues and learn preventive measures to avoid frustration in your pottery journey.
- How can pottery be therapeutic?
Pottery offers a creative outlet that promotes mindfulness and relaxation. Engaging in the tactile process of working with clay can help reduce stress and improve mental well-being. Additionally, joining pottery classes fosters a sense of community and connection with others.
- What are some resources for learning pottery?
There are numerous resources available, including books, online courses, and community groups. These resources can provide valuable insights, techniques, and inspiration for potters at all levels, helping you to enhance your skills and creativity.
- What are the future trends in pottery?
Future trends in pottery include a focus on sustainable practices and technological innovations. Potters are increasingly adopting eco-friendly materials and methods, while advancements like 3D printing and digital design tools are changing how pottery is created.


