How to Grow a Pumpkin Patch in Your Backyard
Are you ready to embark on an exciting journey of growing your very own pumpkin patch? Imagine the thrill of watching vibrant green vines stretch across your backyard, adorned with plump, orange pumpkins just waiting to be picked! This article provides a comprehensive guide on how to successfully cultivate a pumpkin patch, covering everything from soil preparation to harvesting your pumpkins. So, roll up your sleeves, grab your gardening gloves, and let’s dig into the world of pumpkin patch cultivation!
Choosing the right location for your pumpkin patch is crucial. Think of it as picking the perfect stage for a grand performance; the right setting can make all the difference! Look for a spot that receives at least 6 to 8 hours of sunlight daily. Pumpkins are sun-worshippers, and sunlight is their best friend. Additionally, consider the drainage of the area. Pumpkins thrive in well-drained soil, so avoid low spots where water tends to collect. A location near a water source is also ideal, as pumpkins require consistent moisture throughout their growing season.
Soil preparation is essential for healthy pumpkin growth. Think of your soil as the foundation of a house; without a solid base, everything else will crumble. Start by testing the soil pH, aiming for a range of 6.0 to 6.8. You can purchase a soil testing kit at your local garden center or send a sample to a lab. If your soil is too acidic, you can add lime; if it’s too alkaline, sulfur can help. Next, enrich the soil with organic matter, such as compost or well-rotted manure, to boost nutrient levels. Ensure proper drainage by mixing in sand or perlite if your soil is heavy and clay-like. This will create a suitable environment for your pumpkins to flourish.
Now that your soil is prepped and ready to go, it’s time to plant those seeds! Seed selection is key; choose varieties that suit your climate and desired pumpkin size. For example, ‘Jack-o’-Lantern’ pumpkins are perfect for carving, while ‘Sugar Pie’ pumpkins are great for pies. Plant seeds about 1 inch deep and space them approximately 2 to 3 feet apart to allow for sprawling vines. If you're planting in rows, ensure that the rows are at least 4 to 6 feet apart to provide ample room for growth. Remember, patience is a virtue; seeds typically take about 7 to 14 days to germinate, depending on the temperature.
Proper watering is vital for pumpkin plants. Think of watering like a balancing act; too much or too little can spell disaster. Water your pumpkins deeply, ensuring the soil is moist but not soggy. A good rule of thumb is to provide about 1 inch of water per week, adjusting based on rainfall. Early morning is the best time to water, as it allows the plants to absorb moisture before the heat of the day. If you notice the leaves wilting or turning yellow, it might be a sign of overwatering, while dry, cracked soil indicates underwatering. Keep an eye on your plants, and they will reward you with vibrant growth!
Keeping your pumpkin patch healthy requires vigilance against pests and diseases. Common threats include aphids, squash bugs, and powdery mildew. To combat these nuisances, consider using organic solutions like neem oil or insecticidal soap. Regularly inspect your plants for signs of trouble; early detection is key! If you prefer chemical solutions, always follow the manufacturer’s instructions to avoid harming your plants. Additionally, practicing crop rotation and maintaining good air circulation around your plants can help prevent diseases from taking hold.
Fertilizing your pumpkin plants can significantly boost growth and yield. Think of fertilizer as a multivitamin for your plants; it provides essential nutrients they need to thrive. Use a balanced fertilizer with a ratio of 5-10-10 (N-P-K) to promote strong root and fruit development. Apply fertilizer at planting time and again when the plants begin to flower. However, be cautious not to over-fertilize, as this can lead to lush foliage at the expense of fruit. Always follow the recommended application rates on the fertilizer package.
As pumpkins grow, they may require support to prevent damage. Imagine your pumpkins as delicate treasures; they need protection to flourish. Use stakes or trellises to support climbing varieties, and consider placing straw or wood chips under the pumpkins to keep them off the ground, preventing rot. This not only helps keep them clean but also allows for better air circulation around the fruit. Regularly check your plants and adjust supports as needed to ensure they grow strong and healthy.
Knowing when and how to harvest pumpkins is crucial for the best flavor and longevity. The signs of ripeness are clear: the skin should be hard, and the color should be vibrant. Typically, pumpkins are ready to harvest in late summer to early fall, depending on the variety. To harvest, use a sharp knife or pruning shears to cut the stem, leaving about 3 to 4 inches attached to the pumpkin. This helps prolong storage life. Handle your pumpkins gently to avoid bruising, and enjoy the fruits of your labor!
Proper storage techniques can prolong the life of your harvested pumpkins. Store them in a cool, dry place away from direct sunlight. Ideal storage conditions are around 50 to 55°F with good ventilation. Avoid stacking pumpkins on top of each other, as this can lead to bruising. Instead, place them on a shelf or in a single layer on the ground. With the right care, your pumpkins can last for several months, allowing you to enjoy them well into the winter!
- When is the best time to plant pumpkin seeds? The best time to plant pumpkin seeds is after the last frost date in your area, typically in late spring.
- How much sunlight do pumpkins need? Pumpkins require at least 6 to 8 hours of direct sunlight each day for optimal growth.
- Can I grow pumpkins in containers? Yes! Smaller pumpkin varieties can be grown in large containers, but ensure they have enough space to spread out.
- How do I know when my pumpkins are ripe? Pumpkins are ripe when their skin is hard, the color is vibrant, and the stem is dry and brown.
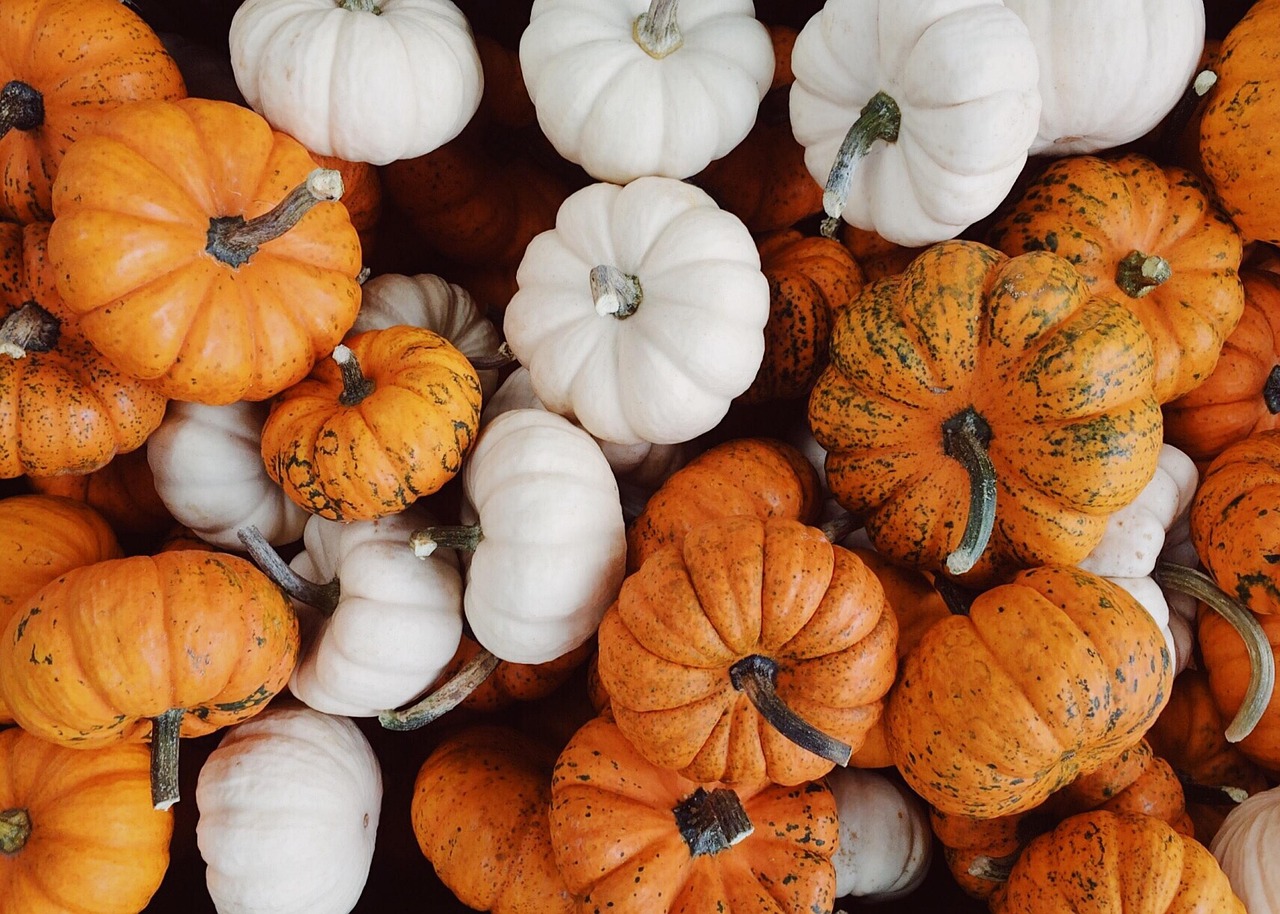
Choosing the Right Location
When it comes to growing a thriving pumpkin patch, choosing the right location is absolutely crucial. Imagine trying to grow a beautiful flower in the shade; it just wouldn't work, right? Similarly, pumpkins need the right environment to flourish. First and foremost, look for a spot that receives at least 6 to 8 hours of direct sunlight each day. Pumpkins are sun-loving plants, and the more sunlight they get, the bigger and healthier they will grow.
Next, consider the drainage of the soil. Pumpkins do not like to sit in waterlogged soil, which can lead to root rot and other diseases. If your chosen area tends to hold water, you might want to think about building raised beds or mounding the soil to improve drainage. A simple test is to dig a hole about a foot deep and fill it with water. If the water drains away within a few hours, you’re in good shape!
Another factor to keep in mind is the proximity to water sources. Pumpkins require a lot of water, especially during their growing season. Having a water source nearby can save you time and effort, especially on those hot summer days when your plants are thirsty. You don’t want to be lugging heavy buckets of water across your yard when you could have a hose right at your fingertips!
Lastly, think about the protection from wind. Strong winds can damage delicate pumpkin vines and knock over young plants. If possible, choose a location that is sheltered from harsh winds, perhaps near a fence or a row of taller plants that can act as a windbreak. This small detail can make a significant difference in the overall health and productivity of your pumpkin patch.
In summary, when selecting the perfect spot for your pumpkin patch, keep these key factors in mind:
- Sunlight: Ensure 6-8 hours of direct sunlight daily.
- Drainage: Test soil drainage and consider raised beds if necessary.
- Water Access: Proximity to a water source for easy irrigation.
- Wind Protection: Choose a sheltered location to protect your plants.
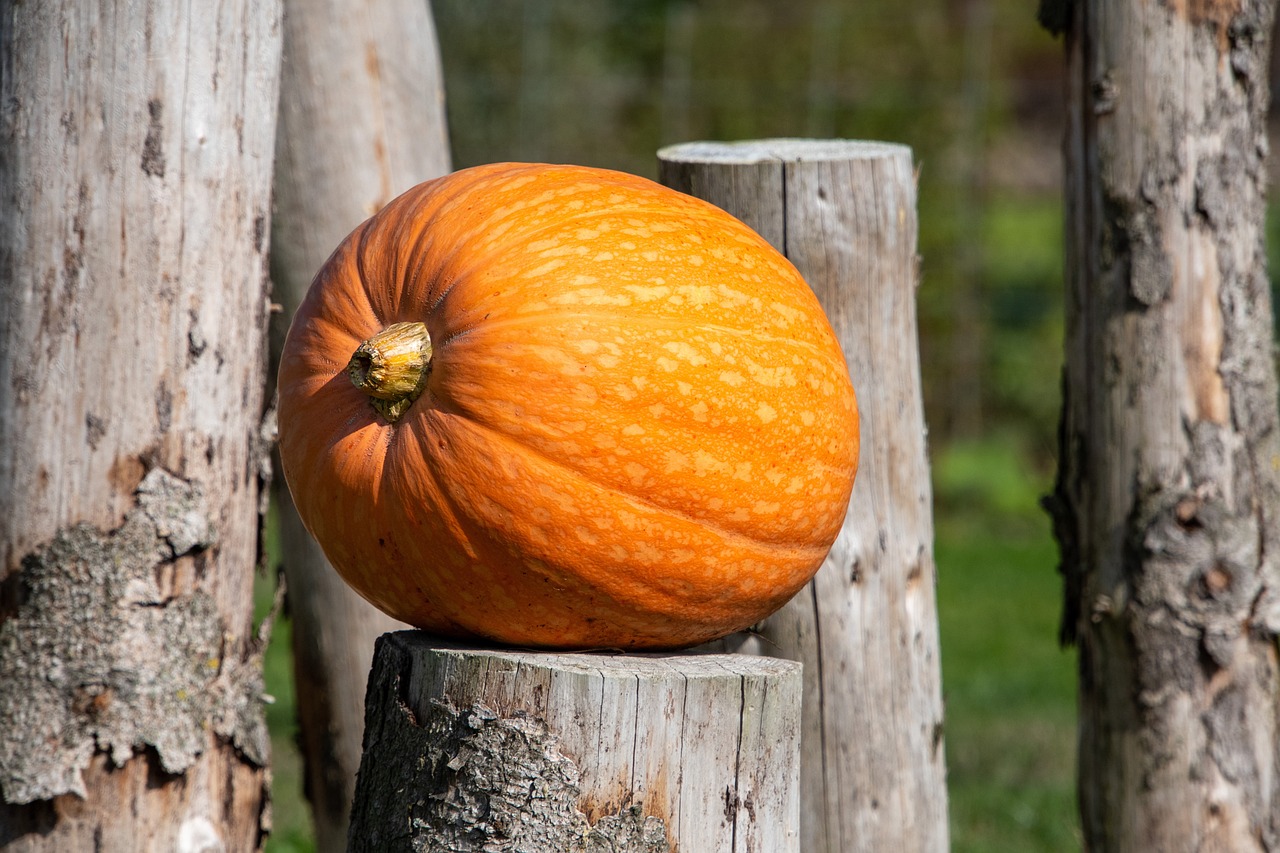
Preparing the Soil
Soil preparation is the backbone of a successful pumpkin patch. Think of your soil as the foundation of a house; without a solid base, everything else can crumble. Before you even think about planting those adorable little seeds, you need to ensure that your soil is in tip-top shape. This involves testing the soil pH, amending it with organic matter, and ensuring proper drainage. Let's break it down step by step.
First off, you should test your soil. Soil testing kits are widely available and can help you understand the pH level and nutrient content of your soil. Pumpkins thrive in slightly acidic to neutral soil with a pH between 6.0 and 7.0. If your soil is too acidic or alkaline, you might need to amend it. For example:
| Soil pH Level | Amendment Needed |
|---|---|
| Below 6.0 | Add lime |
| Above 7.0 | Add sulfur |
Once you’ve got your pH in check, the next step is to amend your soil with organic matter. This is like giving your soil a nutritious meal! Compost, well-rotted manure, or peat moss can work wonders. Not only do these amendments improve soil structure, but they also enhance nutrient content and moisture retention. Just imagine your pumpkins growing in a rich, nutrient-packed environment; they’ll be thriving in no time!
Now, let’s talk about drainage. Pumpkins love moisture, but they hate sitting in water. Poor drainage can lead to root rot, which is a surefire way to end your pumpkin dreams. To improve drainage, consider the following:
- Mix in sand or perlite to sandy soils.
- In clay soils, add organic matter to break up the compacted soil.
- Create raised beds to allow excess water to drain away.
After you’ve amended your soil and ensured proper drainage, it’s time to till the soil. This process aerates the soil and allows the amendments to mix thoroughly. Use a garden fork or a rototiller to break up the soil to a depth of about 12 inches. This is like fluffing up a pillow; it makes everything more comfortable for your pumpkin seeds to grow!
Lastly, consider testing for pests and diseases while preparing your soil. Healthy soil means healthy plants, but sometimes, lurking pests can hitch a ride in the soil. Look for signs of pests like grubs or diseases, and consider using beneficial nematodes or other organic pest controls to keep your soil and future pumpkin patch healthy.
In summary, preparing your soil is not just a chore; it’s an essential part of your pumpkin-growing adventure. By testing your soil, amending it with organic matter, ensuring proper drainage, and tilling it well, you create a thriving environment for your pumpkins to flourish. So roll up your sleeves and get ready to dig in!
Planting Seeds
When it comes to planting pumpkin seeds, setting the right foundation is key to ensuring a bountiful harvest. First off, you’ll want to choose high-quality seeds that are suited for your climate. There are various pumpkin varieties, each with its unique flavor and size, so think about what you want to grow. Are you looking for the classic orange pumpkins for Halloween, or perhaps some unique varieties for cooking? The choice is yours!
Next, timing is everything. Pumpkins thrive in warm soil, so aim to plant your seeds after the last frost date in your area. Typically, this means waiting until the soil temperature is consistently above 70°F (21°C). This warmth will give your seeds the best chance to germinate and sprout quickly. You can check soil temperature with a simple garden thermometer or by feeling the soil with your hand. If it feels warm to the touch, you’re likely good to go!
Now, let’s talk about planting depth and spacing. Pumpkin seeds should be planted about 1 to 2 inches deep. If you plant them too shallow, they might dry out; too deep, and they may struggle to break through the soil. When it comes to spacing, give each seed plenty of room to grow. A good rule of thumb is to plant seeds about 3 to 5 feet apart. This spacing allows the vines to spread without crowding each other, which can lead to poor air circulation and increased disease risk.
Here’s a quick overview of the planting process:
- Step 1: Prepare your garden bed by loosening the soil.
- Step 2: Create small hills or mounds to improve drainage.
- Step 3: Plant 2 to 3 seeds per hill, about 1 to 2 inches deep.
- Step 4: Water the area gently, ensuring the soil is moist but not soggy.
After planting, it’s crucial to keep an eye on the moisture levels. Water your seeds regularly, especially during dry spells, but be careful not to overwater, as pumpkins dislike sitting in waterlogged soil. A good practice is to check the soil moisture by sticking your finger about an inch deep into the soil; if it feels dry, it’s time to water.
As your seeds germinate and tiny green shoots start to appear, you’ll want to thin them out. Once the seedlings have a couple of true leaves, choose the strongest one in each mound and snip the others at the base. This way, you’re giving the healthiest plant the best chance to thrive. Remember, it’s all about nurturing that one strong plant!
In summary, planting pumpkin seeds is an exciting step in your gardening journey. With the right seeds, timing, depth, spacing, and care, you’ll be well on your way to growing a thriving pumpkin patch. So grab your seeds, get your hands dirty, and watch as your garden transforms into a vibrant sea of green!
Q: When is the best time to plant pumpkin seeds?
A: The best time to plant pumpkin seeds is after the last frost date in your area, when the soil temperature is consistently above 70°F (21°C).
Q: How deep should I plant pumpkin seeds?
A: Pumpkin seeds should be planted about 1 to 2 inches deep in the soil.
Q: How far apart should I space my pumpkin seeds?
A: Space pumpkin seeds about 3 to 5 feet apart to allow for proper growth and air circulation.
Q: How often should I water my pumpkin seeds?
A: Water your pumpkin seeds regularly, keeping the soil moist but not soggy. Check the moisture by feeling the soil with your finger.
Watering Techniques
When it comes to growing a successful pumpkin patch, proper watering is absolutely essential. Think of your pumpkins as thirsty little sponges that need just the right amount of moisture to thrive. Too little water, and they'll shrivel up like a raisin; too much, and they'll drown! So, how do you strike that perfect balance? Let’s dive into some effective watering strategies to keep your pumpkin plants happy and healthy.
First off, timing is everything. Pumpkins thrive in warm weather, and their watering needs can vary significantly throughout the growing season. During the first few weeks after planting, your young seedlings will need consistent moisture to establish their root systems. Aim to water them deeply but infrequently—this encourages roots to grow deep into the soil, making them more resilient to drought. A good rule of thumb is to water your pumpkins about 1 inch per week, either through rainfall or irrigation.
As your pumpkins grow, their water requirements will increase. During the flowering and fruiting stages, they may need up to 2 inches of water per week. If you notice the leaves wilting or the fruits starting to shrivel, it’s a clear sign they need more hydration. However, keep an eye out for signs of overwatering, such as yellowing leaves or mushy stems, which can indicate root rot.
Now, let’s talk about the best ways to deliver that precious water. Here are a few techniques:
- Drip Irrigation: This method delivers water directly to the soil at the base of the plants, reducing evaporation and ensuring that the roots get the moisture they need.
- Soaker Hoses: Similar to drip irrigation, soaker hoses allow water to seep out slowly along their length, providing a steady supply of moisture to the soil.
- Hand Watering: If you prefer a more personal touch, using a hose or watering can can be effective. Just be sure to water at the base of the plants to avoid wetting the leaves, which can lead to fungal diseases.
When watering, it’s best to do so in the early morning or late afternoon. This helps reduce evaporation and allows the plants to absorb moisture before the heat of the day kicks in. Additionally, watering in the morning can help prevent fungal diseases that thrive in moist conditions.
To help you visualize the watering schedule, here's a simple table summarizing the watering needs throughout the pumpkin growth stages:
| Growth Stage | Watering Frequency | Water Amount |
|---|---|---|
| Seedling Stage | Every 2-3 days | 1 inch per week |
| Vegetative Stage | 2-3 times per week | 1-2 inches per week |
| Flowering/Fruiting Stage | Every other day | 2 inches per week |
In conclusion, watering your pumpkin patch is not just a routine chore; it’s a vital practice that can make or break your harvest. By understanding your plants’ needs and employing the right techniques, you’ll set the stage for a bountiful pumpkin patch that’s the envy of your neighborhood. Just remember, the key is consistency and observation. Keep an eye on your plants, and they’ll reward you with plump, vibrant pumpkins!
Pest and Disease Management
Pest and disease management in your pumpkin patch is akin to being a vigilant guardian of your garden. Just as a knight protects their castle, you must defend your pumpkins from the myriad of threats that can hinder their growth and reduce your yield. The first step in this protective journey is to regularly inspect your plants for any signs of distress. Do you notice yellowing leaves or holes in your foliage? These could be telltale signs of pest infestations or diseases creeping in.
Common pests that may invade your pumpkin patch include aphids, cucumber beetles, and spider mites. Each of these critters has its own unique way of wreaking havoc. For instance, cucumber beetles not only munch on the leaves but can also transmit diseases like bacterial wilt. To combat these pests effectively, consider implementing a combination of organic and chemical solutions. Organic methods such as introducing beneficial insects like ladybugs or using insecticidal soap can help keep pest populations in check without harming the environment.
In addition to pests, diseases such as powdery mildew and downy mildew can pose significant threats to your pumpkins. These fungal infections thrive in warm, humid conditions, making them a common problem in many gardens. To prevent the onset of these diseases, ensure you practice good air circulation around your plants. This can be achieved by spacing your plants adequately and avoiding overhead watering, which can promote humidity. If you do spot signs of mildew, act quickly by applying a fungicide or removing affected leaves to prevent further spread.
Another effective strategy is to rotate your crops each season. Growing pumpkins in the same spot year after year can lead to a buildup of pests and diseases in the soil. Instead, try to rotate your pumpkin patch with other crops like beans or corn, which can help disrupt the life cycles of harmful organisms.
For those who prefer a more visual approach, here’s a quick reference table outlining common pests and diseases, along with their symptoms and recommended management strategies:
| Threat | Symptoms | Management Strategies |
|---|---|---|
| Aphids | Sticky residue, curled leaves | Introduce ladybugs, use insecticidal soap |
| Cucumber Beetles | Chewed leaves, wilting plants | Row covers, neem oil |
| Powdery Mildew | White powdery spots on leaves | Improve air circulation, apply fungicide |
| Downy Mildew | Yellowing leaves, grayish mold | Water early in the day, remove affected leaves |
In summary, being proactive in your pest and disease management can make all the difference in the health of your pumpkin patch. Regular monitoring, employing organic solutions, and maintaining good cultural practices will not only protect your pumpkins but also yield a bountiful harvest. Remember, a healthy pumpkin patch is a happy pumpkin patch!
Q: How often should I check my pumpkin plants for pests?
A: It's best to check your plants at least once a week, especially during the growing season when pests are most active.
Q: Are there any natural remedies for pests?
A: Yes! You can use neem oil, insecticidal soap, or even homemade garlic spray as natural pest repellents.
Q: What should I do if I find a diseased plant?
A: Remove the affected plant immediately to prevent the disease from spreading to healthy plants.
Q: Can I use chemical pesticides on my pumpkin patch?
A: While chemical pesticides are effective, it's recommended to use them as a last resort and to follow the instructions carefully to minimize harm to beneficial insects.

Fertilization Methods
Fertilizing your pumpkin plants is like giving them a nutritious meal; it’s essential for their growth and the overall yield of your pumpkin patch. Just like us, pumpkins thrive on a balanced diet, which means understanding what they need at different stages of their growth is key. Let’s dive into the different types of fertilizers you can use, how to apply them, and the timing for optimal results.
First off, it’s important to recognize that there are two main types of fertilizers: organic and synthetic. Organic fertilizers, such as compost, aged manure, and bone meal, not only provide essential nutrients but also improve soil structure and promote beneficial microbial activity. On the other hand, synthetic fertilizers offer a quick nutrient boost but can lead to soil degradation if overused. Choosing between these options often depends on your gardening philosophy and the specific needs of your soil.
When it comes to application, timing is everything. Generally, you’ll want to fertilize your pumpkins at least twice during the growing season. The first application should occur at planting time, using a balanced fertilizer that has equal parts nitrogen, phosphorus, and potassium (N-P-K). This initial boost helps establish a strong root system. After the plants have started to vine out, a second application of a fertilizer higher in phosphorus and potassium can encourage flowering and fruit development. Here’s a quick look at how to apply fertilizers:
| Stage of Growth | Type of Fertilizer | Application Method |
|---|---|---|
| At Planting | Balanced Fertilizer (N-P-K) | Mix into soil before planting seeds |
| Vining Stage | High Phosphorus & Potassium | Side-dress around the base of plants |
It’s also crucial to monitor your plants closely after fertilizing. Over-fertilization can be just as harmful as under-fertilization, leading to excessive leaf growth at the expense of fruit production. A good rule of thumb is to follow the instructions on the fertilizer package and conduct regular soil tests to adjust your fertilization strategy accordingly.
One of the most significant aspects of fertilization is understanding the specific nutrient needs of your pumpkins. For example, nitrogen is vital for leafy growth, while phosphorus supports root and flower development, and potassium enhances fruit quality. If you notice your plants are growing tall and leafy but not producing many pumpkins, it might be time to reevaluate your nitrogen levels. Conversely, if your pumpkins are small or misshapen, a boost of potassium could be the answer.
In conclusion, fertilization is a critical component of a successful pumpkin patch. By choosing the right type of fertilizer, applying it at the right time, and paying attention to your plants’ responses, you can ensure your pumpkins grow healthy and plentiful. Remember, gardening is a continual learning process, so don’t hesitate to adjust your methods as you gain more experience!
- How often should I fertilize my pumpkin plants? It's generally recommended to fertilize twice during the growing season: once at planting and once when the plants begin to vine out.
- Can I use compost as a fertilizer? Absolutely! Compost is an excellent organic fertilizer that enriches the soil and provides essential nutrients.
- What should I do if my pumpkins aren't growing well? Check your fertilization routine, as well as soil health and moisture levels. Adjust your fertilizer type or application frequency as needed.
Supporting Your Plants
As your pumpkin plants grow, they can become quite hefty, and this is where comes into play. Just like a toddler learning to walk, your pumpkins need a little help to stand tall and thrive! Without proper support, the vines may break under the weight of the pumpkins, leading to damage and affecting your overall yield. So, what are the best ways to ensure your pumpkins are well-supported?
First off, consider using trellises or cages. These structures can be incredibly beneficial, especially if you’re short on space. By training your vines to climb, you not only save ground space but also improve air circulation around the plants, which can help reduce the risk of disease. It’s like giving your pumpkins a VIP seat at the garden party!
When setting up your supports, make sure they are sturdy enough to handle the weight of the pumpkins as they grow. You wouldn’t want your carefully nurtured pumpkins to tumble down like a game of Jenga, right? Using materials like wooden stakes, metal fencing, or even old tomato cages can provide the necessary support. Just ensure that whatever you choose is securely anchored into the ground, as a strong wind can easily knock over an unsupported plant.
Another technique involves using slings to cradle the pumpkins. This method is particularly useful for larger varieties. You can create slings from old t-shirts, pantyhose, or even fabric scraps. Just gently lift the pumpkin and support it with the sling, tying it to the trellis or stake. Think of it as giving your pumpkins a cozy hammock to lounge in while they grow!
| Support Method | Description | Best For |
|---|---|---|
| Trellises | Vertical structures that allow vines to climb | Space-saving and improved air circulation |
| Cages | Enclosures that hold plants upright | General support for smaller pumpkins |
| Slings | Fabric support for larger fruits | Heavy pumpkins that need extra care |
As you care for your pumpkin patch, remember that patience is key. Supporting your plants is not a one-time task; it requires regular checks and adjustments as the pumpkins grow. Keep an eye on the weight distribution and make sure your supports are still doing their job. If you notice any signs of stress or sagging, don’t hesitate to reinforce your supports. After all, you want your pumpkins to reach their full potential and impress everyone come harvest time!
- How do I know if my pumpkins need support? If the vines are sagging or the pumpkins are touching the ground, it's time to provide some support.
- Can I use any material for slings? Yes, as long as it’s strong enough to hold the weight and won’t damage the pumpkin’s skin.
- How often should I check the supports? Regularly check them, especially as the pumpkins grow. A weekly inspection is a good rule of thumb.

Harvesting Your Pumpkins
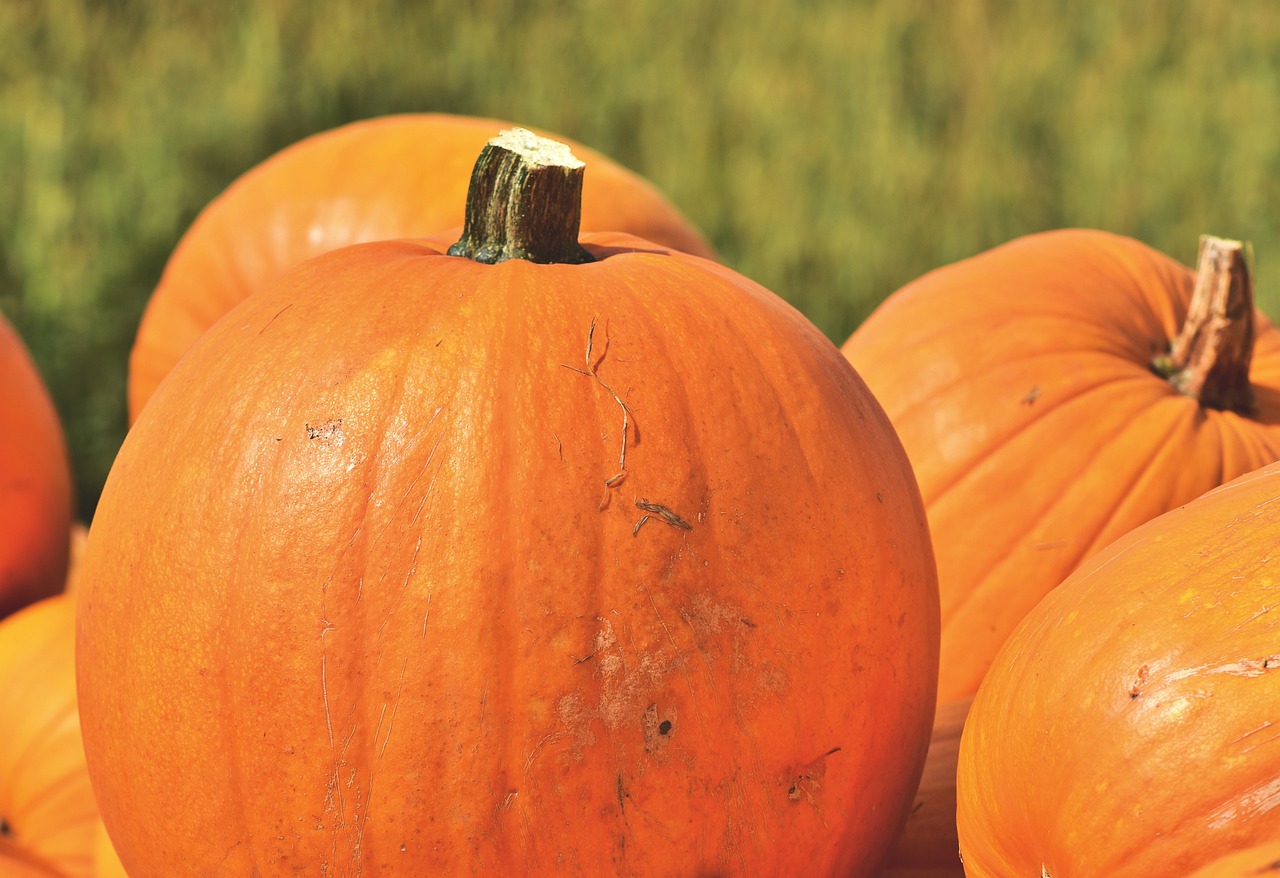
Harvesting your pumpkins is like the grand finale of a spectacular show; it’s the moment you’ve been waiting for after all the hard work and dedication you've put into your pumpkin patch. But how do you know when it’s time to pick those orange beauties? Timing is everything! Pumpkins are typically ready for harvest in late summer to early fall, depending on the variety and your local climate. The general rule of thumb is to look for the color change; when your pumpkins have turned a deep, vibrant orange, it’s a good indication that they are ready to be harvested.
Another telltale sign is the skin's hardness. Give your pumpkin a gentle poke—if it feels firm and resists your touch, you’re in the clear! On the flip side, if the skin feels soft, it’s best to leave it on the vine a little longer. Additionally, check the stem; it should be dry and brown. If it’s still green and pliable, your pumpkin needs more time to mature. Harvesting too early can lead to bland flavor and a shorter shelf life, which is the last thing you want after all your efforts!
When it’s time to harvest, use a sharp knife or garden shears to cut the pumpkin from the vine, leaving about 3 to 4 inches of stem attached. This little piece of stem is crucial—it helps to seal the pumpkin and prevents rot. Handle the pumpkins gently; they are heavier than they look and can bruise easily. If you’re planning to carve your pumpkins for Halloween, aim to harvest them about a week before the big day to allow them to acclimate and stay fresh.
After harvesting, it’s important to clean your pumpkins. Wipe them down with a damp cloth to remove dirt and debris, which can harbor mold and bacteria. If you notice any blemishes or soft spots, those pumpkins should be used first, as they won’t store as well. For your perfectly ripe pumpkins, consider curing them in a warm, dry place for about a week. This process helps to harden the skin and prolong their storage life.
And speaking of storage, here are some tips to keep your pumpkins in prime condition:
- Store them in a cool, dark place, ideally between 50°F to 60°F (10°C to 15°C).
- Avoid stacking them, as this can lead to bruising.
- Check regularly for any signs of spoilage and remove any affected pumpkins to prevent spreading.
By following these simple guidelines, you can enjoy your pumpkins for weeks to come, whether you plan to decorate, carve, or use them in delicious recipes. Remember, the joy of growing your own pumpkins is not just in the harvest; it’s in the journey of nurturing them from seed to fruit. So, grab your tools, prepare for that glorious harvest, and relish in the fruits of your labor!
Q: When is the best time to harvest pumpkins?
A: The best time to harvest pumpkins is when they have turned a deep orange color, the skin is hard, and the stem is dry and brown. This usually occurs in late summer to early fall.
Q: How should I store my pumpkins after harvesting?
A: Store pumpkins in a cool, dark place, ideally at temperatures between 50°F to 60°F. Avoid stacking them to prevent bruising, and check regularly for any signs of spoilage.
Q: Can I harvest pumpkins too early?
A: Yes, harvesting too early can result in bland flavor and a shorter shelf life. Make sure to check for color, firmness, and stem condition before harvesting.
Storing Pumpkins After Harvest
After all the hard work you’ve put into growing your pumpkin patch, it’s time to think about how to store your prized pumpkins to keep them fresh and flavorful. Proper storage is essential because, let’s face it, no one wants to see their hard-earned harvest go to waste! The key to successful pumpkin storage lies in understanding the right conditions and techniques. So, let’s dive into the nitty-gritty of how to store your pumpkins like a pro.
First things first, you need to choose the right location for storage. Ideally, pumpkins should be kept in a cool, dry place with good ventilation. A temperature range of 50°F to 60°F is optimal. Too cold, and they can develop frost damage; too warm, and they may rot. A basement or a garage can be a great option, provided it's not too damp. If you don't have access to those, a shaded area outdoors can work as long as the weather is mild.
Next, let’s talk about the importance of inspecting your pumpkins before storage. Before you even think about putting them away, check each pumpkin for any signs of damage or blemishes. A small bruise can lead to a big problem if left unchecked. If you find any imperfections, it’s best to use those pumpkins right away in your favorite recipes or as decorations that won't be stored for long. Remember, one bad pumpkin can ruin the bunch!
When it comes to storing your pumpkins, you want to avoid stacking them directly on top of each other. Instead, place them on a shelf or in a single layer on a table. This will help prevent bruising and allow air to circulate around each pumpkin, reducing the risk of rot. If you have a lot of pumpkins, consider using straw or cardboard as a barrier to separate them. This not only cushions them but also promotes airflow.
Another important aspect of storage is humidity. Pumpkins prefer a low-humidity environment. High humidity can lead to mold growth, which can spoil your pumpkins faster than you can say “jack-o'-lantern.” If you live in a particularly humid area, consider using a dehumidifier in your storage space. Alternatively, placing a few silica gel packets around can help absorb excess moisture.
Now, you might be wondering how long your pumpkins will last once stored. Generally, when stored properly, pumpkins can last anywhere from two to three months. However, keep an eye on them regularly. If you notice any soft spots or changes in color, it’s best to use those pumpkins sooner rather than later.
In summary, storing your pumpkins properly is crucial for maintaining their quality and extending their shelf life. Here are the key takeaways:
- Store in a cool, dry place with good ventilation.
- Inspect pumpkins for damage before storage.
- Avoid stacking; use barriers for separation.
- Maintain low humidity to prevent mold.
- Check regularly for any signs of spoilage.
By following these tips, you can enjoy your pumpkins throughout the season, whether you’re using them for cooking, decoration, or simply admiring their beauty. Happy storing!
Q: How can I tell if my pumpkin is ripe?
A: A ripe pumpkin will have a hard, thick skin and a deep, rich color. The stem should also be dry and brown.
Q: Can I store my pumpkins outside?
A: Yes, but only if the weather is mild. Make sure they are in a shaded area to protect them from direct sunlight and moisture.
Q: What should I do if I notice mold on my pumpkins?
A: If the mold is minimal, you can try to cut it off carefully. However, if the pumpkin is soft or has extensive mold, it’s best to discard it to avoid spoiling other pumpkins.
Q: How can I use pumpkins that are starting to go bad?
A: Pumpkins that are starting to spoil can be cooked and pureed for soups, pies, or even pumpkin bread. Just make sure to remove any bad spots before using.
Frequently Asked Questions
- What is the best location for a pumpkin patch?
Choosing the right location is crucial for your pumpkin patch's success. Look for a spot that receives at least 6 to 8 hours of direct sunlight daily. Good drainage is also essential, so avoid areas where water tends to pool. Proximity to a water source is a bonus, making it easier to keep your pumpkins hydrated.
- How should I prepare the soil for planting pumpkins?
Soil preparation is key to healthy pumpkin growth. Start by testing your soil's pH level; pumpkins thrive in slightly acidic to neutral soil (pH 6.0 to 7.0). Amend your soil with organic matter like compost to enhance fertility and drainage. Turn the soil to a depth of at least 12 inches to create a suitable environment for root development.
- When is the best time to plant pumpkin seeds?
The ideal time to plant pumpkin seeds is after the last frost date in your area, typically in late spring. Soil temperatures should be around 70°F (21°C) for optimal germination. Plant seeds about 1 inch deep and 2 to 3 feet apart to allow for ample growth and airflow.
- How often should I water my pumpkin plants?
Watering is crucial for pumpkin plants, especially during dry spells. Aim to water your pumpkins deeply once a week, ensuring that the soil is moist but not waterlogged. If you notice the leaves wilting, it may be a sign that they need more water. Consistency is key, so try to keep a regular watering schedule.
- What are some common pests and diseases that affect pumpkins?
Pumpkins can be susceptible to various pests like aphids, squash bugs, and cucumber beetles, as well as diseases such as powdery mildew and root rot. Regularly inspect your plants for signs of trouble. Organic solutions like neem oil can help manage pests, while good cultural practices can prevent disease.
- How do I fertilize my pumpkin plants?
Fertilization can significantly boost your pumpkin growth. Use a balanced fertilizer with a higher phosphorus content to promote flowering and fruiting. Apply fertilizer when planting and again when the plants start to vine. Be cautious not to over-fertilize, as this can lead to excessive foliage growth at the expense of fruit.
- Do I need to support my pumpkin plants?
As pumpkins grow, they may need support, especially larger varieties. You can use trellises or stakes to help support the vines and fruits. This not only prevents damage but also makes harvesting easier. Just be sure to choose strong supports that can handle the weight of the pumpkins as they mature.
- How do I know when my pumpkins are ready to harvest?
Knowing when to harvest is crucial for flavor and longevity. Look for signs of ripeness: the skin should be hard, and the color should be vibrant. Additionally, the stem will start to turn brown and dry out. Generally, pumpkins are ready to harvest about 90 to 120 days after planting.
- What is the best way to store harvested pumpkins?
To prolong the life of your harvested pumpkins, store them in a cool, dry place with good ventilation. Ideally, keep them at temperatures between 50°F to 60°F (10°C to 15°C). Avoid stacking them to prevent bruising, and check regularly for signs of spoilage to ensure they stay fresh throughout the season.


