
Top 10 Tips for Machine Quilting at Home
Machine quilting at home can be an incredibly rewarding experience, allowing you to express your creativity while crafting beautiful quilts. Whether you’re a seasoned quilter or just starting, having the right knowledge and tools can make all the difference in your quilting journey. In this article, we’ll explore essential tips that will not only enhance your skills but also help you create stunning quilts with ease. From choosing the right machine to mastering various quilting techniques, you’ll discover everything you need to elevate your quilting experience. So, grab your fabric and let’s dive into the world of machine quilting!
Selecting the appropriate machine is crucial for successful quilting. There are various types of machines available on the market, each with its unique features. For instance, some machines are designed specifically for quilting, while others may offer a combination of sewing and quilting capabilities. When choosing your machine, consider factors such as the size of the throat, the type of stitches it offers, and whether it has a walking foot or free motion capabilities. Investing in a good quality machine that fits your quilting style and needs can save you time and frustration in the long run.
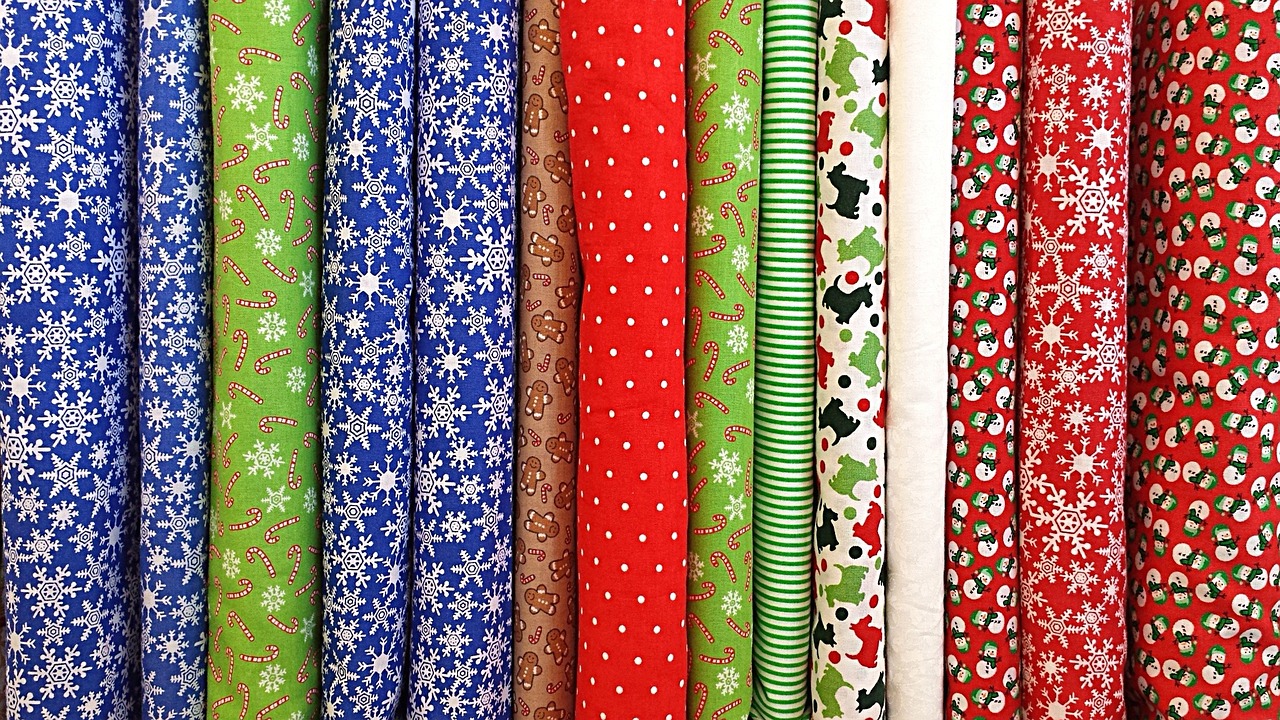
Knowledge of fabric types and their properties can significantly impact your quilting results. Different fabrics behave differently when quilted, and understanding these nuances can help you make informed choices. For instance, cotton is a popular choice for quilting due to its durability and ease of handling, while fabrics like silk or rayon may require more delicate handling. When selecting fabric for your projects, consider not only the aesthetic appeal but also the fabric's weight, stretch, and how it will hold up over time.
Pre-washing fabrics is essential to prevent shrinkage and color bleeding. Before you start quilting, it’s a good idea to wash and dry your fabrics to ensure they are clean and pre-shrunk. This step can save you from surprises later on, like your beautiful quilt shrinking after the first wash. The best practices for washing and preparing your fabrics include:
- Use cold water to wash your fabrics to minimize color bleeding.
- Dry fabrics on a low heat setting to avoid damage.
- Iron your fabrics before cutting to ensure they are smooth and flat.
Proper fabric care is vital for maintaining quality. Here are some tips on how to wash, dry, and store your fabrics to keep them in excellent condition for quilting:
- Store fabrics in a cool, dry place away from direct sunlight.
- Use fabric-friendly detergents to prevent fading.
- Keep fabrics folded neatly to avoid creases and wrinkles.
Selecting the right batting is important for your quilt's warmth and texture. Batting comes in various materials, such as cotton, polyester, or wool, each offering different qualities. For instance, cotton batting gives a soft, breathable finish, while polyester provides durability and loft. When choosing batting, consider the intended use of your quilt and how warm or lightweight you want it to be. Understanding these differences can help you create quilts that are not only beautiful but also functional.
Accurate fabric cutting is key to achieving precise quilt pieces. Whether you’re using rotary cutters, scissors, or specialized cutting machines, mastering your cutting techniques can significantly improve your quilting accuracy and efficiency. Here are a few techniques to enhance your cutting skills:
- Use a rotary cutter and mat for clean, straight cuts.
- Invest in a good ruler to help with measurements.
- Practice cutting fabric in layers to save time.
Understanding essential quilting techniques can elevate your projects to new heights. From straight line quilting to free motion quilting, each method offers unique opportunities for creativity. By exploring various methods, you can enhance your skills and express your artistic vision through your quilts. For beginners, starting with straight line quilting is a great way to build confidence and develop your skills.
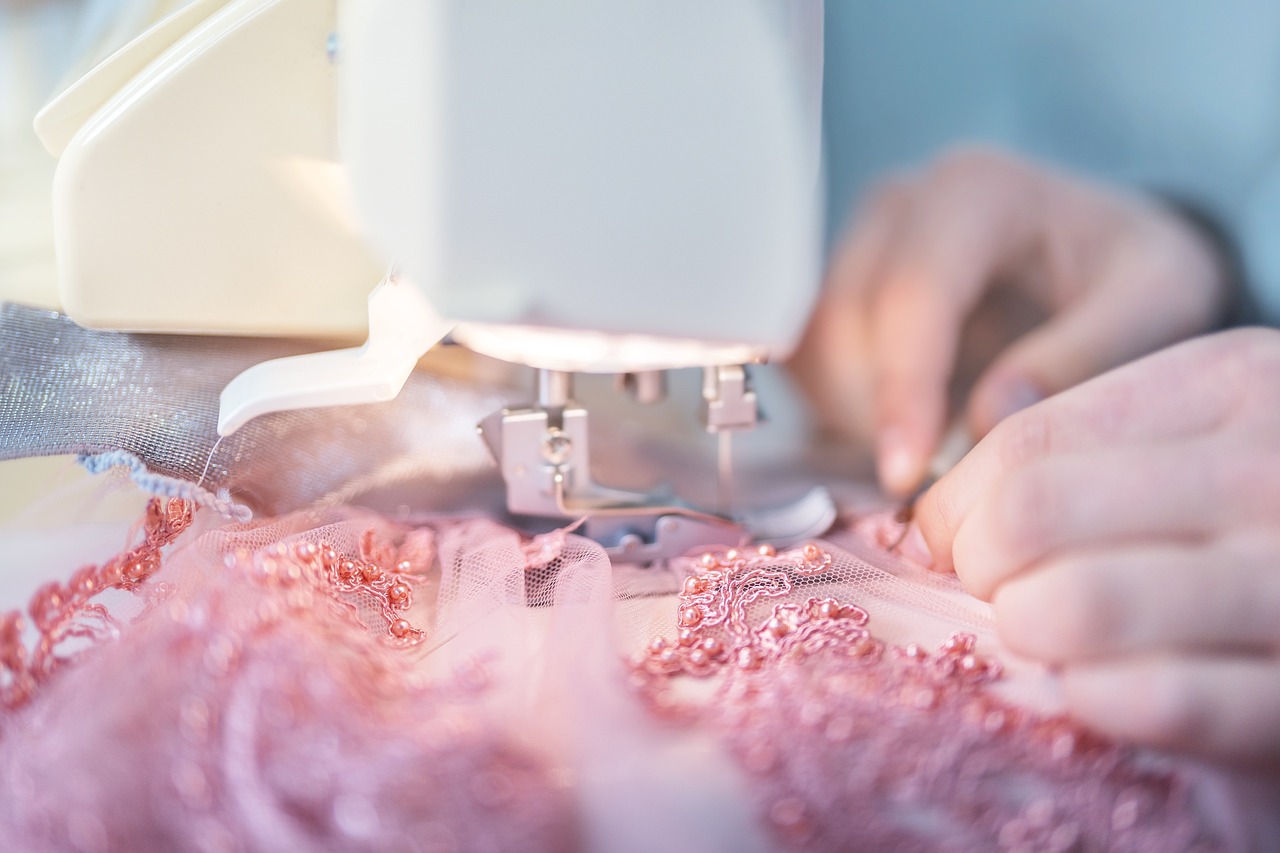
Straight line quilting is a foundational technique for beginners. It involves sewing straight lines across the quilt’s surface, which can create a beautiful, clean look. To execute this technique effectively, ensure your fabric is well-pressed and use a walking foot to help guide the fabric evenly through the machine. This technique not only helps in securing the layers of your quilt but also adds texture and design to your finished piece.
Free motion quilting allows for creativity and unique designs. This technique involves lowering the feed dogs on your sewing machine and using a special foot to guide the fabric freely. It’s like drawing with your sewing machine! To master this technique, practice on scrap fabric to build your confidence. Tips for success include:
- Start with simple shapes and gradually move to more complex designs.
- Maintain a steady speed and consistent pressure on the fabric.
- Experiment with different thread colors and types for added flair.
Q: What type of sewing machine is best for quilting?
A: A sewing machine with a larger throat space, walking foot, and free motion capabilities is ideal for quilting.
Q: Do I need to pre-wash my fabrics?
A: Yes, pre-washing your fabrics helps prevent shrinkage and color bleeding.
Q: What batting should I use for my quilt?
A: Choose batting based on the desired warmth and texture; cotton is great for softness, while polyester offers durability.
1. Choose the Right Machine
This article provides essential tips for machine quilting at home, helping you enhance your skills and create beautiful quilts with ease. Discover techniques, tools, and best practices to elevate your quilting experience.
Choosing the right quilting machine can feel like trying to find a needle in a haystack—there are so many options out there! The machine you select will play a pivotal role in your quilting journey, influencing everything from the ease of stitching to the final look of your quilt. So, how do you know which machine is right for you? First, consider your quilting style and the types of projects you want to tackle. Are you a beginner looking to make simple quilts, or are you a seasoned pro ready to explore intricate designs? Here are some factors to keep in mind:
- Type of Machine: There are generally two types of machines used for quilting—mechanical and computerized. Mechanical machines are great for beginners and straightforward projects, while computerized machines offer advanced features like programmable patterns and automated stitching.
- Throat Space: The throat space is the area to the right of the needle. A larger throat space allows you to handle bigger quilts more comfortably, making it easier to maneuver your fabric as you sew.
- Stitch Options: Look for a machine that offers a variety of stitch options. This flexibility can help you experiment with different techniques and styles, allowing your creativity to shine.
- Ease of Use: Features like automatic tension adjustment, needle up/down function, and easy threading can make a world of difference, especially for beginners.
Once you have a clear idea of your needs, it’s time to hit the stores or browse online. Don’t hesitate to test out machines in person if you can; feeling the machine in action can help you gauge its comfort and functionality. Additionally, consider reading reviews and watching tutorials to get a sense of how different models perform in real-world quilting scenarios.
Another important aspect is the accessories and attachments that come with the machine. Some machines might include walking feet, quilting feet, or even extension tables, which can enhance your quilting experience significantly. Make sure to check what’s included and think about any additional accessories you might need down the line.
In conclusion, investing time in choosing the right quilting machine is crucial for your success and enjoyment in quilting. By understanding your quilting style, evaluating machine features, and considering the accessories, you’ll be well on your way to creating stunning quilts that you can be proud of.
Q: What is the best machine for beginners?
A: A mechanical sewing machine with basic features and a good reputation for reliability is often best for beginners. Look for models that have a simple interface and come with a walking foot for quilting.
Q: Do I need a special machine for quilting?
A: While you can quilt on a regular sewing machine, a dedicated quilting machine offers features that make the process easier, such as a larger throat space and specialized quilting feet.
Q: How much should I spend on a quilting machine?
A: Prices can vary widely, from a few hundred to several thousand dollars. It’s best to set a budget that aligns with your quilting goals and to explore options within that range.
2. Understand Your Fabric
Understanding your fabric is like knowing the secret ingredient in a recipe; it can make or break your quilting project. Each fabric type comes with its own unique properties, which can significantly influence the final outcome of your quilt. For instance, cotton is a popular choice due to its durability and ease of use, while silk offers a luxurious finish but can be tricky to work with. It’s essential to consider the weight, texture, and stretch of the fabric you choose, as these factors will affect how well your quilt holds together and how it drapes.
When selecting fabrics, always think about the project at hand. Are you making a cozy quilt for winter or a lightweight throw for summer? The answer will guide your fabric choice. For example, if you're creating a quilt for a child, you might want to opt for fabrics that are not only durable but also easy to wash. Fabrics like flannel or cotton blends can be perfect for such projects.
One of the most crucial steps in preparing your fabric is pre-washing. This process helps to eliminate any potential shrinkage and color bleeding that could ruin your meticulously crafted quilt. Imagine spending hours piecing together your quilt only to have it shrink in the wash! To pre-wash your fabrics effectively, consider the following tips:
- Use cold water: This helps to preserve the colors and prevent fading.
- Dry naturally: Air drying is gentler on your fabric compared to machine drying.
- Iron after washing: This will help to smooth out any wrinkles and prepare the fabric for cutting.
Proper fabric care is essential to maintain the quality of your materials. After pre-washing, store your fabrics in a cool, dry place away from direct sunlight to prevent fading. Consider using fabric bins or shelves to keep them organized and accessible. Here are some additional tips for keeping your fabrics in top condition:
- Avoid storing in damp areas: Moisture can lead to mold and mildew.
- Use fabric protectors: These can help to keep pests away from your precious materials.
Selecting the right batting is just as important as choosing your fabric. Batting provides warmth and gives your quilt its body. There are various types available, such as cotton, polyester, and wool, each offering different benefits. For instance, cotton batting is breathable and great for all-season quilts, while polyester is more durable and resistant to creasing. To choose the best batting for your project, consider factors like the desired warmth, loft, and how you plan to quilt it. Below is a simple comparison table:
| Type of Batting | Warmth | Loft | Best For |
|---|---|---|---|
| Cotton | Medium | Low to Medium | All-season quilts |
| Polyester | Medium to High | High | Durable quilts |
| Wool | High | Medium to High | Warm quilts for winter |
Accurate cutting is the foundation of successful quilting. If your pieces aren’t cut precisely, your quilt won’t fit together correctly, and that can be incredibly frustrating! Investing in a quality rotary cutter, cutting mat, and ruler can make a world of difference. Remember, measure twice, cut once! This old adage holds true in quilting as well. Techniques such as using a straight edge and ensuring your fabric is flat can help you achieve cleaner cuts.
In conclusion, understanding your fabric is essential for creating stunning quilts. By knowing the properties of different fabrics, pre-washing, and selecting the right batting, you set yourself up for success. So, the next time you’re ready to quilt, take a moment to consider your fabric choices—your future self will thank you!
Q: Why is it important to pre-wash fabrics?
A: Pre-washing helps to prevent shrinkage and color bleeding, ensuring your quilt maintains its beauty after washing.
Q: How do I choose the right batting for my quilt?
A: Consider the warmth, loft, and how you plan to quilt. Different types of batting offer various benefits for different projects.
Q: What are some tips for cutting fabric accurately?
A: Use a rotary cutter and mat, measure carefully, and ensure your fabric is flat before cutting to achieve the best results.
2.1. Pre-Washing Fabrics
When it comes to machine quilting, one of the most crucial yet often overlooked steps is pre-washing your fabrics. Imagine putting in hours of effort into a beautiful quilt, only to have it shrink or bleed colors when washed! By pre-washing your fabrics, you can significantly reduce the risk of these issues. This simple step ensures that your fabric is not only clean but also ready to behave as expected during the quilting process.
Before diving into the washing process, it's essential to understand the types of fabrics you’re working with. Different fabrics react differently to water and heat. For example, cotton fabrics tend to shrink more than synthetic ones. So, how do you go about pre-washing? Here are some best practices:
- Check Fabric Labels: Always read the care instructions on your fabric. Some may require special handling.
- Use Cold Water: Wash your fabrics in cold water to minimize shrinkage.
- Gentle Cycle: Opt for a gentle cycle to prevent any damage to the fabric.
After washing, it's equally important to dry your fabrics properly. You can either hang them to dry or tumble dry on a low setting. Just remember, if you choose to tumble dry, keep an eye on them to prevent excessive shrinkage. Once dried, give your fabrics a good press to remove any wrinkles, making them easier to cut and sew.
Now let’s talk about color bleeding. This is a common concern when working with vibrant fabrics. To avoid this, you might want to use a color catcher in your wash. These handy sheets absorb excess dye, ensuring that your other fabrics remain pristine. It’s a small investment for peace of mind!
In summary, pre-washing your fabrics is not just a suggestion; it’s a crucial step in the quilting process. By taking the time to prepare your fabrics properly, you’ll save yourself a lot of headaches later on. So, before you start cutting and piecing, make sure to give your fabrics the care they deserve!
- Do I need to pre-wash all types of fabrics? - While it’s recommended for most fabrics, some pre-treated fabrics may not require it. Always check the label!
- What if my fabric shrinks after washing? - This is why pre-washing is essential. If it does shrink, you’ll know how to account for it in your cutting.
- Can I pre-wash batting? - Generally, it’s not necessary to pre-wash batting, but always refer to the manufacturer's instructions.

2.1.1. Fabric Care Tips
When it comes to fabric care, the way you treat your materials can make a world of difference in the final outcome of your quilting projects. Think of your fabric as the canvas for your masterpiece; if the canvas isn’t prepared properly, the painting won’t shine. Here are some essential tips to ensure your fabrics remain in top-notch condition:
First and foremost, always pre-wash your fabrics. This step is crucial because it helps to remove any chemicals or sizing that might be present from the manufacturing process. Not only does pre-washing prevent future shrinkage, but it also reduces the risk of color bleeding when your quilt is washed. You wouldn’t want your vibrant reds to bleed into your whites, right? So, grab your washing machine and set it to a gentle cycle with cold water. Add a mild detergent, and voilà! Your fabrics are ready for action.
Next, let’s talk about drying. It’s tempting to toss your freshly washed fabrics into the dryer, but this can lead to unexpected shrinkage. Instead, consider air drying your fabrics. Lay them flat on a clean surface or hang them up to dry. This method not only helps maintain the fabric's integrity but also allows you to inspect for any imperfections or wrinkles that may need attention before you start cutting.
Once your fabrics are dry, proper storage is key. Store them in a cool, dry place away from direct sunlight to prevent fading. You might want to use acid-free storage boxes or breathable fabric bags to keep them safe from dust and pests. Remember, your fabrics are an investment, so treat them like one!
Here’s a quick rundown of essential fabric care tips:
- Pre-wash: Always pre-wash to avoid shrinkage and color bleeding.
- Air dry: Instead of using a dryer, air dry your fabrics to maintain their quality.
- Store properly: Use acid-free containers and keep them out of sunlight.
Lastly, don’t forget about ironing. A good iron can be your best friend in quilting. Iron your fabrics before cutting to ensure they are smooth and free of wrinkles. This will help you achieve accurate cuts and a more polished final product. Just make sure to use the appropriate heat setting for your fabric type to avoid any damage.
By following these fabric care tips, you’ll not only enhance the beauty of your quilts but also ensure their longevity. Remember, a little care goes a long way in the world of quilting!
Q: Why is pre-washing fabric important?
A: Pre-washing fabric helps to remove chemicals and sizing, prevents shrinkage, and reduces the risk of color bleeding after your quilt is washed.
Q: Can I dry my fabrics in the dryer?
A: It’s best to air dry your fabrics to prevent shrinkage. If you must use a dryer, set it to a low heat setting and monitor closely.
Q: How should I store my fabric?
A: Store fabrics in a cool, dry place away from direct sunlight. Using acid-free storage solutions can help maintain their quality.
Q: What’s the best way to iron fabric?
A: Iron fabrics on the appropriate heat setting for the fabric type to avoid damage. Always iron before cutting for better accuracy.
2.1.2. Choosing Batting
When it comes to quilting, choosing the right batting is just as important as selecting the perfect fabric. Batting serves as the insulating layer between the quilt top and backing, impacting not only the warmth of your quilt but also its texture and overall appearance. With various types available, knowing what to look for can make a world of difference in your finished project.
There are three main types of batting to consider: cotton, polyester, and wool. Each type has its unique properties that can influence your quilting experience:
| Type of Batting | Characteristics | Best For |
|---|---|---|
| Cotton | Soft, breathable, and has a natural look. It shrinks slightly when washed, giving a lovely crinkled effect. | Traditional quilts and projects where a natural fiber is preferred. |
| Polyester | Durable, lightweight, and resistant to moisture. It holds its shape well and is easy to care for. | Quilts that need to withstand wear and tear or for those who want a more resilient option. |
| Wool | Warm, lofty, and provides excellent insulation. It can be a bit heavier but gives a luxurious feel. | Cold-weather quilts or projects where warmth is a priority. |
When selecting batting, consider the weight and loft as well. Loft refers to the thickness of the batting, which can affect the drape and texture of your quilt. A higher loft can create a more puffy appearance, while low loft batting offers a flatter finish, which might be preferable for certain designs.
Additionally, think about the quilt design and techniques you plan to use. For example, if you're going for intricate free motion quilting, a thinner batting might be easier to work with, allowing for more detailed stitching. Conversely, if you’re creating a simple, cozy quilt, a thicker batting could give you that snuggly feel that everyone loves.
Lastly, always check the care instructions for the batting you choose. Some batts can be washed, while others may require special care to maintain their integrity. This will ensure your quilt remains beautiful and functional for years to come.
- What is the best batting for beginners? Cotton batting is often recommended for beginners due to its ease of use and natural properties.
- Can I mix different types of batting in one quilt? It’s generally not advisable to mix batts, as they have different properties that can affect the quilt's performance.
- How do I determine the right amount of batting needed? Measure your quilt top and add a few extra inches on all sides for trimming.
2.2. Fabric Cutting Techniques
When it comes to quilting, the way you cut your fabric can make or break your project. Precision is key, and mastering the art of cutting can elevate your quilting game significantly. Imagine trying to assemble a puzzle with pieces that don’t quite fit—frustrating, right? The same goes for quilting! If your fabric pieces are uneven or inaccurately cut, your quilt will not only look off but can also lead to difficulties when piecing everything together.
There are several techniques and tools that can help you achieve that perfect cut. First off, investing in a quality rotary cutter is a game-changer. Unlike traditional scissors, a rotary cutter allows for quick and precise cuts, especially when working with multiple layers of fabric. Pair it with a self-healing cutting mat and a clear acrylic ruler for the best results. These tools work together like a well-oiled machine, ensuring that your cuts are straight and true.
Now, let’s talk about some effective cutting techniques:
- Use a Straight Edge: Always align your fabric with a straight edge when cutting. This helps ensure that your cuts are even and accurate.
- Cutting Multiple Layers: If you’re making a quilt with identical pieces, consider cutting multiple layers of fabric at once. Just be sure to use a sharp rotary cutter and a stable surface.
- Mark Your Fabric: Before cutting, use fabric chalk or a marking pen to outline your cutting lines. This provides a clear guide, reducing the chance of mistakes.
Another essential aspect to consider is the grain of the fabric. Cutting against the grain can lead to distortion, which can ruin the overall look of your quilt. Always cut with the grain for the best results. If you’re unsure, a quick test is to pull a thread from the fabric; this will show you the direction of the grain.
Additionally, practicing your cutting technique can make a world of difference. Set aside some time to practice cutting scraps before diving into your main project. This not only builds your confidence but also helps you get a feel for the tools you’re using.
Finally, let’s not forget the importance of keeping your tools in top condition. Regularly replace the blades of your rotary cutter to ensure clean cuts, and keep your rulers and mats clean and free of fabric dust. A little maintenance goes a long way in keeping your cutting game sharp!
Q: What tools do I need for fabric cutting?
A: Essential tools include a rotary cutter, cutting mat, clear acrylic ruler, and fabric chalk or marking pen.
Q: How do I know if my fabric is cut correctly?
A: Ensure that your cuts are straight and follow the grain of the fabric. You can check by aligning the edges and seeing if they match up perfectly.
Q: Can I cut multiple layers of fabric at once?
A: Yes, you can cut multiple layers, but make sure to use a sharp rotary cutter and a stable surface for the best results.
Q: What should I do if my fabric is distorted after cutting?
A: This often happens when cutting against the grain. Always cut with the grain and make sure your fabric is properly aligned before cutting.
3. Mastering Quilting Techniques
Mastering quilting techniques is like learning to dance; it requires practice, patience, and a bit of flair. Whether you’re a seasoned pro or just starting out, understanding different quilting methods can significantly enhance your projects. Each technique offers a unique way to express your creativity and can transform a simple quilt into a stunning masterpiece. Let’s dive into some essential techniques that every quilter should know.
One of the most fundamental techniques is Straight Line Quilting. This method involves sewing straight lines across your quilt layers, creating a clean and polished look. It’s a fantastic starting point for beginners because it builds confidence and helps you get comfortable with your machine. To execute this technique effectively, you can use a walking foot, which feeds the layers of fabric evenly, preventing any shifting. As you practice, try varying the spacing between your lines to add visual interest. You’ll be amazed at how this simple technique can elevate your quilt!
Next up is Free Motion Quilting, which is where the magic happens. Imagine gliding your sewing machine over the fabric like a painter with a brush, creating intricate designs and patterns. This technique allows for complete creative freedom, enabling you to express your artistic vision. However, it can be a bit daunting at first. To master free motion quilting, start with a practice sandwich of fabric and batting. Set your machine to a lower speed, and don’t forget to drop the feed dogs! As you get the hang of it, experiment with different designs—swirls, flowers, or even geometric shapes. The possibilities are endless!
To help you understand these techniques better, here’s a quick comparison:
| Technique | Description | Best For |
|---|---|---|
| Straight Line Quilting | Sewing straight lines across the quilt layers | Beginners, clean and modern designs |
| Free Motion Quilting | Freehand sewing with intricate designs and patterns | Creative expression, advanced quilters |
In addition to these techniques, don’t underestimate the power of decorative quilting. This method can add texture and dimension to your quilts. Think of it as adding the final touches to an outfit—a little embellishment can go a long way! You can incorporate decorative stitches available on your sewing machine or even hand-stitched elements to personalize your quilts. The key is to let your creativity shine through, so don’t be afraid to experiment!
Finally, remember that mastering these techniques takes time. Just like any skill, you’ll get better with practice. So, grab your fabric, set up your machine, and let’s get quilting! The journey of mastering quilting techniques is not just about creating beautiful quilts; it’s about enjoying the process and expressing yourself along the way.
Q: What is the best machine for quilting?
A: The best machine depends on your quilting style and budget. Look for machines with a larger throat space and a walking foot feature for quilting.
Q: How do I prevent fabric from shifting while quilting?
A: Use a walking foot, pin your layers together, and consider using a spray adhesive to keep everything in place.
Q: Can I use any fabric for quilting?
A: While you can use various fabrics, cotton is the most popular choice due to its durability and ease of handling.
Q: How often should I clean my sewing machine?
A: It's a good practice to clean your machine after every few projects to ensure it runs smoothly and lasts longer.
3.1. Straight Line Quilting
Straight line quilting is often viewed as the unsung hero of the quilting world. It's a foundational technique that not only provides structure to your quilt but also offers a clean, professional finish that can elevate your work to new heights. Imagine the satisfaction of seeing those perfectly aligned stitches running through your quilt, creating a stunning visual effect that draws the eye and showcases your fabric choices. But how do you achieve that level of precision? Let’s dive into some essential tips and techniques to master straight line quilting.
First and foremost, choosing the right tools is crucial. A quality walking foot is your best friend when it comes to straight line quilting. This handy attachment helps feed the fabric evenly, preventing any puckering or shifting as you sew. Additionally, using a rotary cutter and cutting mat can enhance your cutting accuracy, ensuring that your fabric pieces are perfectly sized for your quilt. Remember, a well-prepared fabric will lead to a well-executed quilt!
Before you start quilting, it’s a good idea to plan your design. Visualizing where you want your lines can help you maintain consistency throughout your project. Consider using a fabric marker or chalk to lightly mark your lines before you begin sewing. This will serve as a guide and help you stay on track. Plus, if you make a mistake, it’s much easier to correct a mark than to unpick stitches!
When you finally sit down to quilt, take your time. Rushing through the process can lead to uneven stitches and mistakes. Instead, focus on maintaining a steady speed and keeping your hands steady. If you find yourself getting tense, take a break! Quilting should be a relaxing and enjoyable experience, not a race.
Practice makes perfect, so don’t be afraid to experiment. Try out different spacing between your lines, or even mix in some curves for a unique twist. You might be surprised at how such simple adjustments can transform the look of your quilt. And if you’re feeling adventurous, consider combining straight line quilting with other techniques, like free motion quilting, to create a dynamic and interesting design.
To help you visualize the process, here’s a quick overview of the steps involved in straight line quilting:
| Step | Description |
|---|---|
| 1 | Prepare your quilt sandwich (top, batting, backing). |
| 2 | Attach the walking foot to your sewing machine. |
| 3 | Mark your quilting lines on the fabric. |
| 4 | Begin sewing, following your marked lines. |
| 5 | Trim any excess batting and backing after quilting. |
In conclusion, straight line quilting is not just about sewing in a straight line; it’s about embracing the process and enjoying the journey of creating something beautiful. With practice and the right techniques, you’ll find that this method can be both rewarding and fun. So grab your machine, choose your favorite fabrics, and get started on your next quilting adventure!
- What is the best machine for straight line quilting? A machine with a walking foot and a good feed system will help you achieve the best results.
- Can I use straight line quilting on any quilt design? Yes! Straight line quilting can complement various designs, adding structure and visual interest.
- How do I avoid puckering when quilting? Ensure your fabric is properly prepared and use a walking foot to help manage layers as you sew.
3.2. Free Motion Quilting
Free motion quilting is like dancing with your sewing machine. It allows you to unleash your creativity and create stunning, one-of-a-kind designs that can transform a simple quilt into a masterpiece. Unlike traditional quilting, where the machine moves in a straight line, free motion quilting gives you the freedom to move the fabric in any direction you choose. This technique can be a bit intimidating at first, but with practice, you’ll find it’s an incredibly rewarding way to express your artistic vision.
To get started with free motion quilting, there are a few essential steps you should follow. First, ensure your machine is equipped with a darning foot or a . This special foot allows you to move the fabric freely while keeping the needle in place. Next, you’ll want to lower your feed dogs, which are the little teeth that pull the fabric through the machine. By lowering them, you gain complete control over the fabric’s movement, allowing you to create intricate patterns.
Before diving into your quilt, it’s a good idea to practice on a scrap piece of fabric. You can use this time to experiment with different designs. Here are some popular free motion quilting patterns you might want to try:
- Loops: Simple and fun, loops can add a playful touch to your quilt.
- Waves: Create a soothing, flowing effect that resembles gentle ocean waves.
- Feathers: A classic design that adds elegance and sophistication to any quilt.
- Stippling: This technique involves creating a meandering pattern that fills space beautifully.
As you practice, try to maintain a steady speed and keep your hands relaxed. Tension is the enemy of free motion quilting! If you find yourself gripping the fabric too tightly, it can lead to uneven stitches and frustration. Instead, think of your hands as guides, gently steering the fabric as you sew. The more you practice, the more comfortable you’ll become with the rhythm of free motion quilting.
Another crucial aspect of free motion quilting is thread tension. You want to ensure that your top and bottom threads are balanced. If you notice that one thread is pulling more than the other, it can create unsightly puckering or loose stitches. Adjust your tension settings as needed and test on a scrap piece until you achieve that perfect balance.
Finally, don’t forget to have fun! Free motion quilting is all about creativity and self-expression. There are no strict rules, so feel free to experiment with different designs and techniques. You might even find that some of your best ideas come when you’re just playing around with the fabric and thread.
Q: Do I need a special machine for free motion quilting?
A: While a sewing machine with a darning foot is ideal, many modern machines are equipped to handle free motion quilting. Just make sure to check your machine's manual for settings and accessories.
Q: How can I improve my free motion quilting skills?
A: Practice is key! Spend time on scrap fabric experimenting with different designs and techniques. Additionally, consider taking a class or watching online tutorials for tips and inspiration.
Q: What type of thread should I use for free motion quilting?
A: It’s best to use high-quality cotton thread for free motion quilting. This type of thread tends to provide better tension and stitch quality.
Frequently Asked Questions
- What type of sewing machine is best for machine quilting at home?
The best sewing machine for machine quilting at home typically features a strong motor, a wide throat space, and adjustable stitch settings. Look for machines specifically designed for quilting, as they often include additional features like walking feet and quilting stitches that can make your quilting experience smoother and more enjoyable.
- Should I pre-wash my fabrics before quilting?
Absolutely! Pre-washing your fabrics is essential to prevent any shrinkage or color bleeding after your quilt is completed. By washing your fabric beforehand, you ensure that your quilt maintains its shape and color, keeping it looking beautiful for years to come.
- What are the best fabric types for quilting?
Cotton is the most popular choice for quilting due to its durability, ease of handling, and wide range of colors and patterns. However, you can also experiment with blends, flannels, and even batiks to add texture and variety to your quilts. Just make sure to consider the properties of each fabric type when planning your project.
- How do I choose the right batting for my quilt?
Selecting the right batting depends on the desired warmth, weight, and texture of your quilt. Cotton batting is breathable and gives a lovely drape, while polyester batting is lighter and provides more loft. If you're looking for something eco-friendly, consider bamboo or wool batting. Each type has its unique qualities, so choose one that aligns with your quilt's purpose.
- Can I use any type of thread for machine quilting?
While you can technically use any thread, it's best to stick with high-quality cotton or polyester thread designed for quilting. These threads are less likely to break and can withstand the stress of quilting. Additionally, using a thread that matches or contrasts well with your fabric can enhance the overall look of your quilt.
- What are some tips for mastering free motion quilting?
To master free motion quilting, start by practicing on scrap fabric to get comfortable with the motion of the machine. Use a darning foot, lower the feed dogs, and move your fabric steadily and evenly. Don't forget to experiment with different designs and speeds to find what works best for you. The more you practice, the more confident you'll become!
- How can I improve my fabric cutting accuracy?
Improving your fabric cutting accuracy can be achieved by using a rotary cutter, a cutting mat, and a clear acrylic ruler. Always make sure your fabric is pressed flat and aligned properly before cutting. Taking your time and measuring twice can help ensure that your pieces are cut accurately, leading to a more professional-looking quilt.


