Drying Herbs from Your Garden 101
Have you ever wondered how to preserve the vibrant flavors and aromas of the herbs you grow in your garden? Drying herbs is not just a practical way to extend their shelf life; it’s also a rewarding process that allows you to enjoy your garden's bounty all year round. Imagine being able to sprinkle fresh-tasting basil or rosemary into your dishes, even in the dead of winter! In this comprehensive guide, we will explore the techniques, benefits, and tips for drying herbs effectively, ensuring you capture their essence for use in your culinary adventures.
When it comes to drying herbs, not all plants are created equal. Some herbs dry beautifully and retain their robust flavors, while others may lose their potency and aroma. It's essential to make informed choices for your garden. Popular herbs that dry well include thyme, oregano, sage, and mint. These herbs not only hold their flavor but can also enhance your dishes significantly. On the other hand, delicate herbs like basil and cilantro may not fare as well when dried, often losing their unique characteristics. So, as you plan your herb garden, consider which varieties will serve you best in their dried form.
Harvesting herbs at the right time is crucial for achieving the best flavor and aroma in your dried herbs. The process begins with understanding when to pick your herbs for optimal quality. Generally, herbs are best harvested just before they flower, as this is when their essential oils are at their peak. This leads us to the importance of timing your harvest. Early morning, after the dew has dried but before the sun is too hot, is often the ideal time to gather herbs. This ensures they are fresh and full of moisture, which is essential for a successful drying process.
Timing is everything in the world of herb harvesting. Different herbs have different growing seasons, and knowing when to harvest can make all the difference. For instance, rosemary and thyme thrive in the warmer months, while parsley can be harvested in cooler temperatures. Always check your herbs regularly and look for signs of maturity, such as a robust color and a strong fragrance. These indicators are your best friends when it comes to harvesting herbs at their peak.
When you're out in the garden, keep an eye out for specific signs that indicate your herbs are ready for harvest. Look for vibrant, healthy leaves that are rich in color and have a strong aroma. For example, mature basil leaves should be deep green and fragrant, while oregano should feel slightly fuzzy to the touch. By recognizing these signs, you can ensure that your harvested herbs will have the best flavor and aroma when dried.
Having the right tools can make your herb harvesting experience much more enjoyable and efficient. A pair of sharp garden scissors or shears will allow you to make clean cuts without damaging the plant. Additionally, a basket or a cloth bag is handy for collecting your herbs without bruising them. Remember, the key to a successful harvest is to be gentle and precise, ensuring that the herbs remain intact for the drying process.
Once you've harvested your herbs, the next step is preparation. This involves cleaning, sorting, and bundling your herbs before the drying process begins. Start by rinsing your herbs gently under cool water to remove any dirt or insects. After washing, pat them dry with a clean towel or let them air dry for a bit. Once dried, sort your herbs by type and bundle them together using twine or rubber bands. This organization will make the drying process smoother and more efficient.
There are several methods for drying herbs, each with its unique advantages. You can choose from air drying, oven drying, or using a dehydrator, depending on your preferences and the equipment you have at hand. Air drying is a traditional method that requires no special tools, while a dehydrator can speed up the process significantly, preserving the flavor and nutrients in your herbs.
Air drying is one of the simplest and most effective methods for drying herbs. To do this, simply hang your herb bundles upside down in a cool, dark, and well-ventilated area. The key to successful air drying is ensuring good air circulation to prevent mold growth. You can also place a paper bag over the herbs to catch any falling leaves. This method may take a few days, but the results are well worth the wait!
If you’re looking for a faster method, using a dehydrator can be a game-changer. These machines provide controlled heat and airflow, which can dry your herbs in a matter of hours. Just spread your herbs evenly on the dehydrator trays, set the temperature (usually around 95°F to 115°F), and let it do the work. This method not only saves time but also helps retain more of the herbs' flavor and nutrients compared to other drying methods.
Once your herbs are dried to perfection, proper storage is crucial to ensure they maintain their flavor, aroma, and potency over time. Store dried herbs in airtight containers, preferably in a cool, dark place. Glass jars, metal tins, or vacuum-sealed bags are excellent options for keeping your herbs fresh. Remember, light and moisture can degrade the quality of dried herbs, so choose your storage method wisely.
Choosing the right containers is essential for preserving your dried herbs. Here are a few options:
- Glass Jars: Ideal for long-term storage; they are airtight and prevent moisture.
- Metal Tins: Great for keeping light out and maintaining freshness.
- Vacuum-Sealed Bags: Perfect for maximizing shelf life by removing air.
Keeping your dried herbs organized is essential for easy access during cooking. Label each container with the herb name and the date of drying. This practice not only helps you keep track of freshness but also makes it easier to find what you need when whipping up your favorite dishes. Consider creating a dedicated herb drawer or shelf in your kitchen to streamline your collection.
Dried herbs can transform your cooking, adding depth and flavor to a variety of dishes. Whether you're making a hearty stew or a light salad, incorporating dried herbs can elevate your meals. However, it’s essential to know how to use them effectively to get the most out of their flavor. One tip is to add dried herbs earlier in the cooking process, allowing them to rehydrate and infuse their flavors into the dish.
Understanding flavor profiles can take your cooking to the next level. For instance, oregano pairs beautifully with tomatoes, making it a staple in Italian cuisine, while thyme complements roasted meats and vegetables. Experiment with different combinations to discover which dried herbs work best with your favorite ingredients.
Rehydrating dried herbs before use can enhance their flavor significantly. Soaking them in warm water for about 15-30 minutes prior to cooking can help revive their taste and aroma, making them more vibrant in your dishes. This simple step can make a world of difference in your culinary creations.
Aside from adding flavor, dried herbs also offer numerous health benefits. Many herbs are packed with antioxidants and essential nutrients that can contribute to overall wellness. Incorporating dried herbs into your diet can provide a natural way to boost your health while enhancing your meals.
Many dried herbs are rich in antioxidants, which can help combat oxidative stress in the body. For example, oregano and thyme are known for their high antioxidant content. Including these herbs in your cooking can be a delicious way to support your health and well-being.
Some dried herbs have been used for centuries in traditional medicine for their healing properties. For instance, ginger is often used to alleviate nausea, while peppermint can aid digestion. Exploring the medicinal uses of dried herbs can open up a world of natural remedies and holistic health practices.
While drying herbs can be a straightforward process, there are common pitfalls that can lead to disappointing results. Being aware of these mistakes can help ensure your herbs are preserved properly and maintain their quality.
One of the most significant mistakes is over-drying herbs, which can diminish their flavor and aroma. Signs of over-drying include a brittle texture and a loss of vibrant color. To avoid this, keep a close eye on your herbs during the drying process and test them for doneness regularly.
Maintaining cleanliness during the drying process is essential to avoid contamination. Always wash your hands and tools before handling herbs, and ensure that your drying area is clean. This attention to hygiene will help preserve the quality of your dried herbs and keep them safe for consumption.
In summary, drying herbs from your garden is a rewarding process that enhances your culinary experiences. By following the outlined techniques and tips, you can enjoy flavorful herbs year-round. Not only will you save money and reduce waste, but you'll also gain the satisfaction of knowing you’ve preserved the essence of your garden. So go ahead, start your herb-drying adventure, and savor the delightful flavors of your homegrown herbs in every dish!
Here are some common questions about drying herbs:
- Can I dry herbs in the sun? Yes, but be cautious as too much direct sunlight can diminish flavor.
- How long do dried herbs last? When stored properly, dried herbs can last up to 1-3 years.
- Do I need to wash herbs before drying? Yes, washing helps remove dirt and pests, but ensure they are thoroughly dried afterward.

Choosing the Right Herbs
When it comes to drying herbs from your garden, the first step is to choose the right herbs. Not all herbs dry well, and some may lose their flavor and aroma during the drying process. Therefore, understanding which herbs retain their qualities after being dried is crucial for your culinary adventures. Herbs like thyme, rosemary, oregano, and sage are excellent choices as they maintain their robust flavors even after drying. On the other hand, delicate herbs such as basil and parsley can sometimes lose their potency, so it's essential to handle them with care.
To make the selection process easier, consider the following factors when choosing herbs:
- Flavor Profile: Think about the flavors you enjoy and use most in your cooking. Selecting herbs that complement your favorite dishes will enhance your culinary experience.
- Growing Conditions: Some herbs thrive in specific conditions. Ensure that the herbs you choose are suitable for your garden's climate and soil.
- Usage Frequency: Opt for herbs that you frequently use in your kitchen. This way, you can ensure that your dried herbs are not just stored away but actively utilized in your recipes.
Additionally, it’s helpful to consider the herb’s growth cycle. Some herbs, like chives and mint, grow rapidly and can be harvested multiple times throughout the season, while others, like lavender, may require a bit more patience. By planning your herb garden with a mix of fast-growing and slower-growing varieties, you can ensure a steady supply of fresh herbs for drying.
In summary, choosing the right herbs for drying is not just about picking any plant from your garden; it’s about understanding the characteristics of each herb and how they will perform post-harvest. By selecting herbs that retain their flavor and aroma, you can create a stockpile of dried herbs that will elevate your cooking throughout the year. So, take a moment to reflect on your culinary preferences and garden conditions, and you’ll be well on your way to a successful herb-drying experience!
- What are the best herbs to dry? Some of the best herbs for drying include thyme, rosemary, oregano, and sage.
- How do I know when to harvest my herbs? Harvest herbs when they are in full bloom and at their peak flavor, usually in the morning after the dew has dried.
- Can I dry delicate herbs like basil? Yes, but handle them gently and consider using methods like air drying for the best results.
Harvesting Techniques
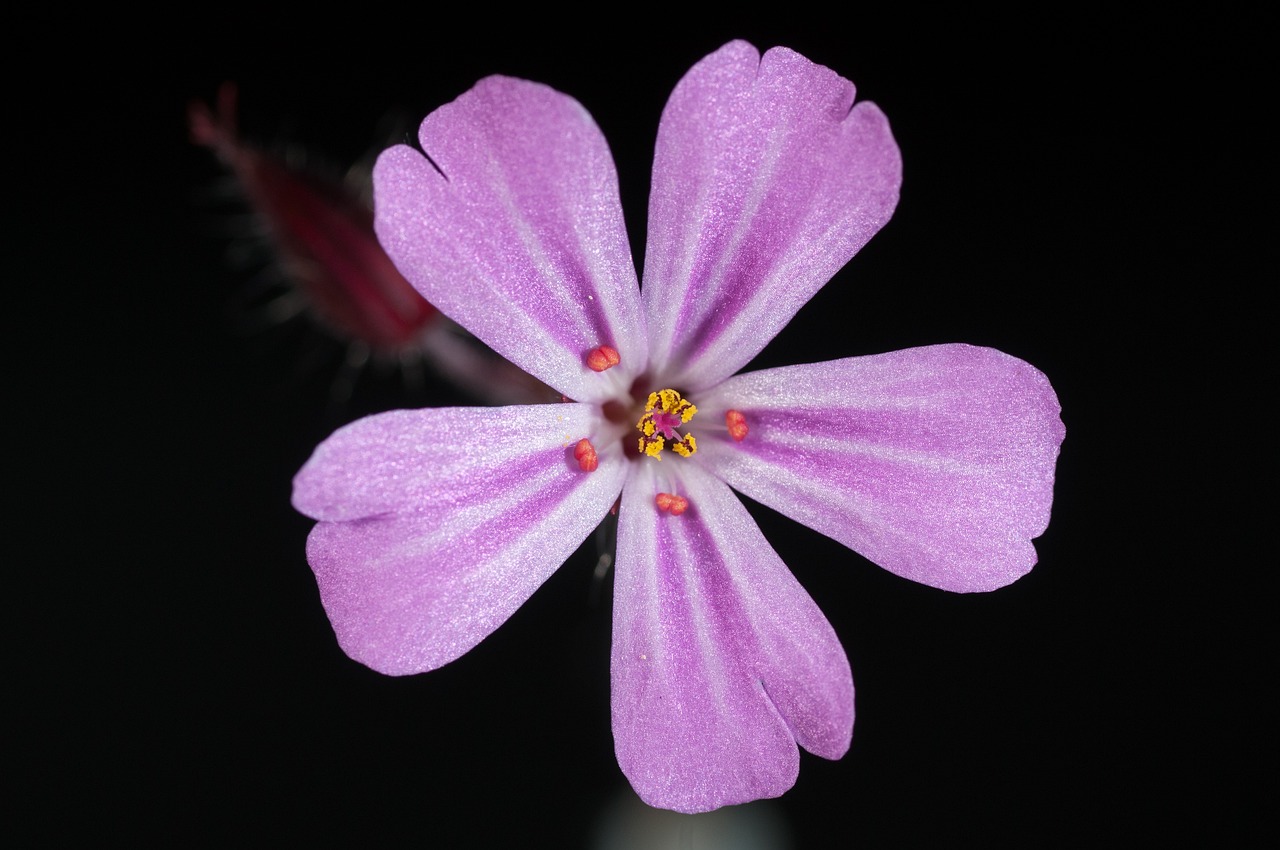
When it comes to harvesting herbs, the right techniques can make all the difference in the quality and flavor of the dried product. First and foremost, timing is everything! You want to ensure that you're picking your herbs at their peak, which means knowing when they are most flavorful and aromatic. This will not only enhance your culinary creations but also ensure that the herbs retain their health benefits. So, how do you know when to harvest? It's all about paying attention to the signs of maturity, which we'll discuss shortly.
Another essential aspect of harvesting is the method you use. Gently snipping or cutting the herbs rather than pulling them from the ground can prevent damage to the plant. Using clean, sharp scissors or garden shears is crucial to avoid crushing the stems, which can lead to a loss of essential oils. If you're harvesting a large quantity, consider doing so in the early morning after the dew has dried. This is when the oils are most concentrated, giving your herbs a robust flavor.
Here are some tips to keep in mind while harvesting:
- Use the Right Tools: A good pair of garden scissors can make the process smoother and more efficient.
- Harvest in Batches: Instead of taking all the herbs at once, consider harvesting in smaller batches to maintain freshness.
- Leave Some Behind: Always leave enough herbs on the plant to ensure it can continue to grow and thrive.
Now, let's talk about the signs of maturity for various herbs. Each herb has its own indicators, but generally, you should look for the following:
| Herb | Signs of Maturity |
|---|---|
| Basil | Leaves are fully developed and fragrant, typically just before flowering. |
| Thyme | Stems are woody, and the leaves are aromatic, usually just before flowering. |
| Oregano | Leaves are vibrant and aromatic, harvested before the plant flowers. |
| Mint | Leaves are lush and fragrant, best harvested before flowering. |
Lastly, don’t underestimate the importance of cleanliness during the harvesting process. Always wash your hands before handling herbs and ensure your tools are sanitized. This helps prevent contamination and preserves the integrity of your herbs. By following these harvesting techniques, you’ll be well on your way to enjoying the rich flavors and aromas of your homegrown herbs all year long!
Q: When is the best time to harvest herbs?
A: The best time to harvest herbs is typically in the morning after the dew has dried, but before the sun is too hot. This is when the essential oils are most concentrated.
Q: How can I tell if my herbs are mature enough to harvest?
A: Look for fully developed leaves and a strong aroma. Each herb has specific signs, such as flowering or the color of the leaves, which indicate readiness.
Q: What tools do I need for harvesting herbs?
A: A pair of clean, sharp scissors or garden shears is ideal. Having a small basket or container for collecting the herbs can also be helpful.
Q: How should I store my harvested herbs before drying them?
A: Keep them in a cool, dry place and avoid washing them until you are ready to dry them to prevent mold.
Timing Your Harvest
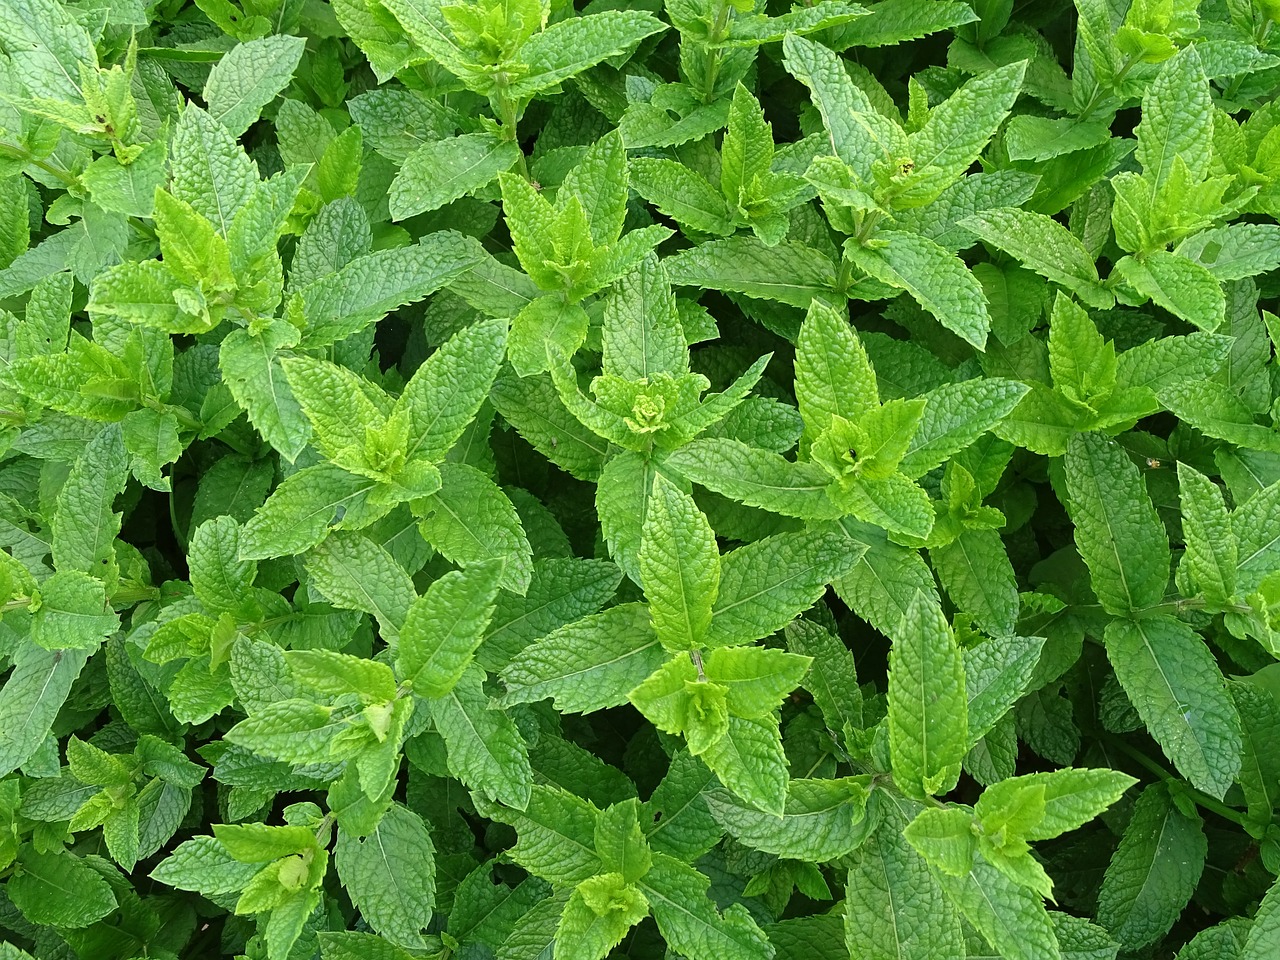
Timing your herb harvest is crucial for capturing the **maximum flavor and aroma** of your plants. Imagine biting into a juicy tomato or a fragrant basil leaf; the burst of flavor you experience is often a result of harvesting at just the right moment. So, how do you determine when that moment is? It involves a bit of knowledge about the specific herbs you’re growing, as well as an understanding of the seasons and daily cycles.
Generally, the best time to harvest herbs is in the **morning** after the dew has dried but before the sun becomes too hot. This is when the essential oils are at their peak, offering the most potent flavor. For instance, herbs like basil, mint, and thyme thrive when harvested in the cool of the morning. Conversely, harvesting in the afternoon can lead to diminished oil content, resulting in a less flavorful herb.
Additionally, the **season** plays a significant role in your harvesting schedule. Most herbs are best harvested in the **late spring to early summer** when they are actively growing. However, some herbs, like sage and rosemary, can be harvested throughout the growing season. Understanding the growth patterns of your herbs can help you decide the best times to snip those fragrant leaves. Here’s a quick breakdown of ideal harvesting times for common herbs:
| Herb | Best Harvest Time | Notes |
|---|---|---|
| Basil | Morning, mid-summer | Harvest regularly to encourage growth |
| Oregano | Morning, late spring | Best flavor just before flowering |
| Thyme | Morning, mid-summer | Can be harvested throughout the season |
| Mint | Morning, late spring | Harvest before flowering for best flavor |
Another essential factor is to look for **signs of maturity**. Each herb has its indicators that signal it's ready for harvesting. For example, basil leaves should be vibrant green and fully formed, while rosemary should have a robust, woody stem. Additionally, checking the flowers can also indicate maturity, as many herbs should be harvested before they bloom to maintain their flavor.
In summary, timing your herb harvest involves a blend of understanding the **environment**, recognizing the **season**, and observing the **growth stage** of your plants. By honing in on these factors, you can ensure that your herbs are bursting with flavor, ready to enhance your culinary creations throughout the year.
- When is the best time to harvest herbs? The best time is typically in the morning after the dew has dried but before the sun gets too hot.
- How do I know if my herbs are mature enough to harvest? Look for vibrant color, fully formed leaves, and avoid harvesting once they start to flower.
- Can I harvest herbs throughout the growing season? Yes, many herbs can be harvested multiple times during the season, especially if you prune them regularly.
Signs of Maturity
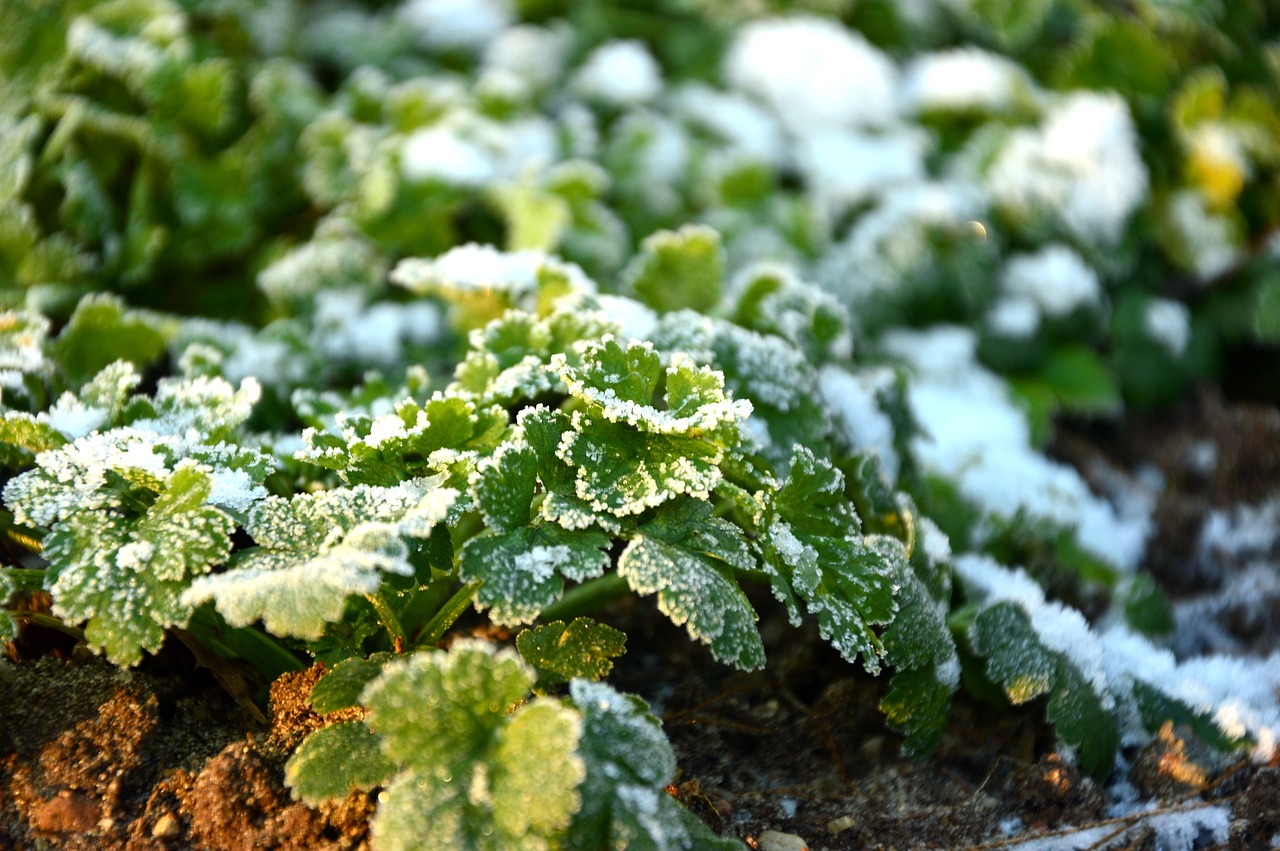
When it comes to harvesting herbs, recognizing the is crucial for ensuring that you gather them at their peak flavor and potency. Each herb has its unique characteristics, but there are some universal indicators that can guide you in determining when your plants are ready to be harvested. One of the first signs to look for is the overall size and vigor of the plant; mature herbs often exhibit robust growth and a lush appearance. Additionally, the leaves will typically be vibrant in color, indicating that they have reached their full potential.
Another key factor to consider is the aroma. As herbs mature, they develop their distinct scents, which can be a delightful indicator of readiness. For instance, when you gently rub the leaves between your fingers, the fragrance should be strong and aromatic. If the aroma is weak or barely noticeable, it might be a sign that the herb is not yet fully mature.
Furthermore, the timing of your harvest can vary depending on the type of herb. For example, herbs like basil and oregano should be harvested just before they flower, as this is when their essential oils are most concentrated. On the other hand, herbs such as thyme and rosemary can be harvested at various stages, but the best flavor is achieved when the leaves are fully developed and the plant is in bloom.
To help you identify these signs more effectively, here’s a quick reference table that outlines some common herbs and their signs of maturity:
| Herb | Signs of Maturity |
|---|---|
| Basil | Leaves are large, vibrant green, and before flowering. |
| Oregano | Strong aroma, leaves are fully developed and before flowering. |
| Thyme | Leaves are small but plentiful, plant is in bloom. |
| Rosemary | Sturdy stems, aromatic leaves, and blooming flowers. |
In conclusion, observing these signs of maturity is essential for harvesting herbs that will provide the most flavor and aroma in your culinary creations. By paying close attention to the growth, color, aroma, and timing, you can ensure that your herbs are harvested at their best, allowing you to enjoy their benefits throughout the year.
- How can I tell if my herbs are overripe? Look for signs such as yellowing leaves, a decrease in aroma, or the presence of flowers, which can indicate that the herb is past its prime.
- Is it better to harvest herbs in the morning or evening? Morning is generally the best time to harvest herbs, as they are at their most aromatic and have higher moisture content before the heat of the day.
- Can I harvest herbs year-round? Many herbs can be harvested year-round, but their growth may slow in colder months. Indoor herb gardening can help maintain a fresh supply.
Tools for Harvesting
When it comes to harvesting herbs from your garden, having the right tools can make all the difference in ensuring a smooth and efficient process. Imagine trying to cut through a thick vine with a dull knife; frustrating, right? The same principle applies to harvesting herbs. Using appropriate tools not only saves time but also helps maintain the quality of the herbs you’re collecting. Here are some essential tools that every herb gardener should consider:
- Herb Scissors: These specially designed scissors often have multiple blades, allowing you to chop herbs quickly and efficiently. They’re perfect for snipping delicate herbs like chives or parsley without bruising them.
- Garden Shears: For larger herbs or those with tougher stems, a good pair of garden shears is invaluable. They offer the leverage needed to make clean cuts, ensuring the plant continues to thrive.
- Gloves: While not a cutting tool, gloves protect your hands from thorns, sap, or any potential irritants. They also provide a better grip on wet stems.
- Baskets or Buckets: As you harvest, you’ll need a way to collect your herbs. A breathable basket allows for air circulation, which helps prevent moisture buildup and keeps your herbs fresh until you’re ready to dry them.
Beyond these tools, having a good sense of timing is equally important. For instance, using your shears early in the morning when the dew is still on the leaves can help preserve the essential oils that contribute to the flavor and aroma of your herbs. Additionally, consider investing in a good quality magnifying glass to check for pests or diseases on your herbs before harvesting. This proactive approach ensures that you only collect the healthiest plants, maximizing the quality of your dried herbs.
In conclusion, the right tools for harvesting not only enhance your efficiency but also contribute to the preservation of the herbs' quality. Investing in a few key items can elevate your herb-gathering experience, making it more enjoyable and productive. Remember, a well-prepared gardener is a successful gardener!
Q: What is the best time to harvest herbs?
A: The best time to harvest herbs is usually in the morning after the dew has dried but before the sun is too hot. This timing helps to preserve the essential oils and flavors.
Q: Can I use regular kitchen scissors for harvesting herbs?
A: While you can use kitchen scissors, it's better to use specialized herb scissors or garden shears designed for cutting plants. They provide a cleaner cut and reduce the risk of damaging the plant.
Q: How do I know when my herbs are ready to be harvested?
A: Herbs are typically ready to be harvested when they are lush and full, and before they start to flower. Look for vibrant color and robust leaves as signs of maturity.
Q: Is it necessary to wash herbs before drying them?
A: Yes, it's important to wash herbs to remove dirt and potential pests. However, make sure to dry them thoroughly before the drying process to avoid mold growth.

Preparing Herbs for Drying
Preparing your herbs for drying is a crucial step that can make all the difference in the flavor and quality of the final product. First, you want to ensure that your herbs are fresh and free from any dirt or pests. Start by gently rinsing them under cool water to remove any impurities. After washing, lay them out on a clean towel or paper towel to dry. This step is essential because excess moisture can lead to mold during the drying process, ruining your hard work.
Next, it's time to sort your herbs. You’ll want to remove any damaged or wilted leaves, as these can affect the overall quality of your dried herbs. Only select the best parts for drying; this means using the vibrant, healthy leaves and stems. For herbs like basil or mint, you can remove the leaves from the stems, while for others, such as rosemary or thyme, you can dry them whole.
Once you have sorted your herbs, it’s beneficial to bundle them for drying. This not only helps with organization but also improves air circulation, which is vital for even drying. To bundle, simply gather a handful of stems and secure them with a piece of string or a rubber band. Keep in mind that the bundles should not be too thick; otherwise, the herbs may not dry properly. Ideally, you want to have small bundles that allow air to flow freely around each herb.
After bundling, you can choose your preferred drying method. Whether you decide to air dry, use a dehydrator, or an oven, having your herbs prepped and ready will streamline the process. Remember, the goal here is to retain as much of the herb's natural flavor and aroma as possible, so take your time with the preparation. A little attention to detail now will pay off later when you’re adding these herbs to your favorite dishes.
To summarize, the preparation stage involves:
- Washing and drying the herbs to remove moisture
- Sorting through the herbs to eliminate any damaged parts
- Bundling the herbs for better air circulation
By following these steps, you’ll set yourself up for success in the herb drying process, ensuring that your culinary creations are bursting with flavor all year round!
Q1: Can I dry any herb from my garden?
A1: While many herbs can be dried, some retain their flavor better than others. Herbs like thyme, rosemary, and oregano are excellent choices for drying, while delicate herbs like basil may lose some flavor.
Q2: How long can I store dried herbs?
A2: Dried herbs can last for up to a year if stored properly in a cool, dark place in airtight containers. However, for the best flavor, it’s recommended to use them within six months.
Q3: Should I use fresh or dried herbs in recipes?
A3: Both fresh and dried herbs have their place in cooking. Dried herbs are more concentrated, so you typically need less of them compared to fresh. A good rule of thumb is to use one-third the amount of dried herbs as you would fresh.
Q4: What’s the best way to rehydrate dried herbs?
A4: To rehydrate dried herbs, simply soak them in warm water for about 10-15 minutes before adding them to your dishes. This can help to restore some of their original flavor and aroma.
Drying Methods
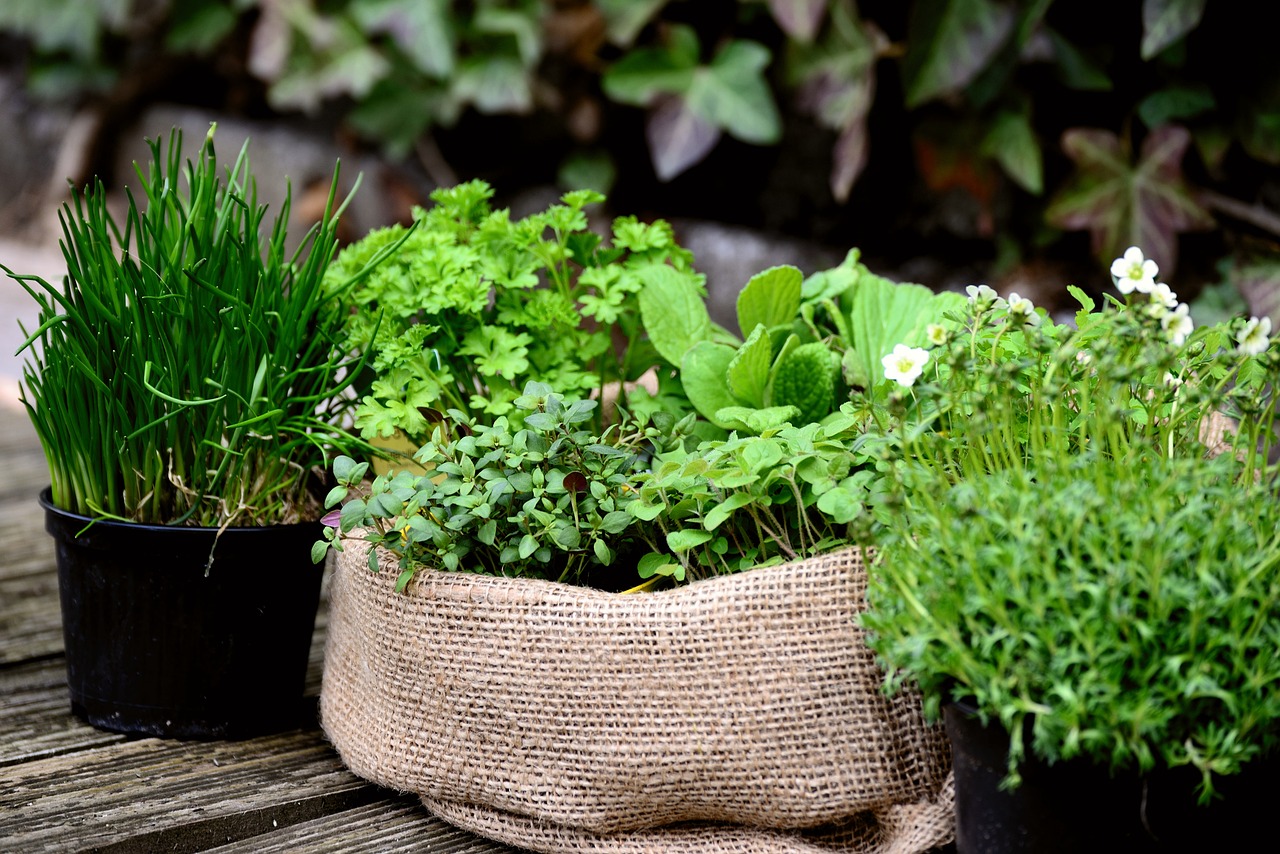
When it comes to preserving the vibrant flavors and aromas of your garden herbs, choosing the right drying method is crucial. There are several techniques available, each with its own set of advantages and ideal uses. Whether you're looking for a traditional approach or a modern solution, understanding these methods will help you make the best choice for your herbs.
First up is air drying, a classic method that requires no special equipment. This technique is as simple as it sounds: you hang your herbs in bunches in a warm, dry place with good air circulation. It's like nature's way of drying, allowing the herbs to retain their essential oils and flavors. However, air drying works best for herbs with low moisture content, such as thyme, rosemary, and oregano. Just make sure to avoid direct sunlight, as it can degrade the herbs' color and potency.
Next, we have oven drying, which is perfect for those who want to speed up the process without sacrificing quality. Preheat your oven to the lowest setting, usually around 170°F (77°C). Spread the herbs in a single layer on a baking sheet and place them in the oven. Keep a close eye on them, as they can dry out quickly. This method is particularly effective for herbs like basil and parsley, which can lose their flavor if left to air dry for too long.
Another popular option is using a dehydrator. This device is designed specifically for drying foods and can significantly reduce the time needed to dry herbs. Dehydrators work by circulating warm air around the herbs, ensuring even drying. This method is especially beneficial for those who wish to preserve the maximum amount of flavor and nutrients. Just set the dehydrator to the appropriate temperature (usually around 95°F to 115°F or 35°C to 46°C for herbs) and let it do the work for you.
Here’s a quick comparison of these methods:
| Method | Pros | Cons |
|---|---|---|
| Air Drying | No equipment needed; retains flavor | Slow; requires a suitable environment |
| Oven Drying | Faster than air drying; easy to control | Can over-dry if not monitored; may lose some flavor |
| Dehydrator | Efficient; preserves nutrients | Requires investment; can be noisy |
Lastly, microwave drying is a quick and unconventional method. Although it may not be the best for preserving flavor, it’s useful in a pinch. Place the herbs between two paper towels and microwave them in short bursts, checking frequently. This method is best for small batches and should be used with caution to avoid burning the herbs.
In conclusion, the method you choose for drying your herbs can significantly affect the final product. Whether you prefer the simplicity of air drying or the efficiency of a dehydrator, each technique has its unique benefits. Experiment with different methods to find what works best for your herbs and enjoy the rich flavors of your garden all year round!
- What is the best time to dry herbs? The best time to dry herbs is when they are at their peak flavor, typically just before they flower. Harvesting in the morning after the dew has dried is ideal.
- Can I dry herbs in direct sunlight? It's best to avoid direct sunlight when drying herbs, as it can degrade their color and flavor. A dark, well-ventilated area is preferable.
- How long do dried herbs last? When stored properly in airtight containers, dried herbs can last for up to a year, though they are best used within six months for optimal flavor.
Air Drying
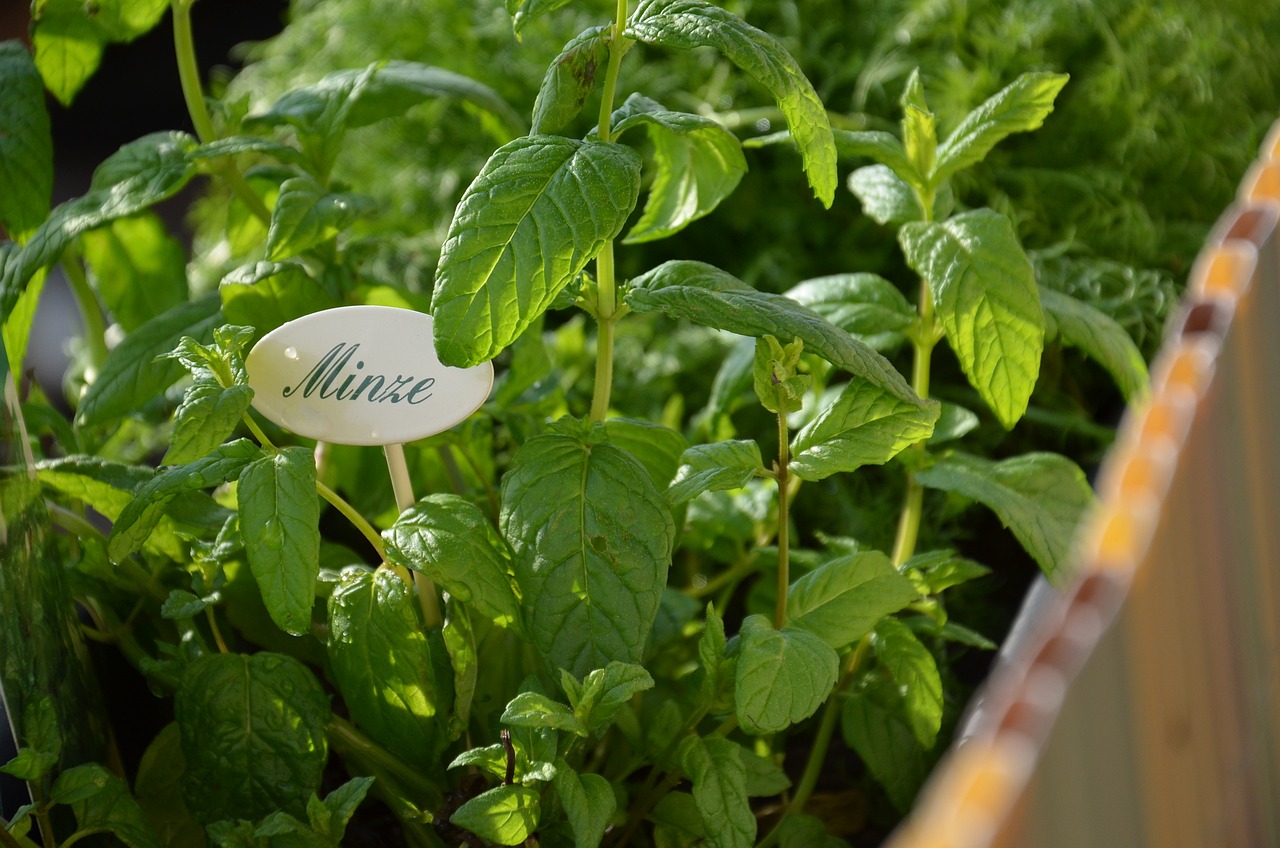
Air drying is perhaps the most traditional and straightforward method for preserving herbs, and it's a fantastic way to maintain their flavor and aroma without the need for any fancy equipment. Imagine walking through your garden, scissors in hand, and snipping off a fresh bundle of basil or thyme, ready to be dried and stored for later use. The beauty of air drying lies in its simplicity; all you need is a well-ventilated space, some twine, and a little patience.
To start the air drying process, you'll want to harvest your herbs at their peak freshness. This means picking them in the morning after the dew has evaporated but before the sun is too hot. Why? Because during this time, the essential oils that give herbs their unique flavors are at their highest concentration. Once you've gathered your herbs, it's important to clean them gently to remove any dirt or insects. You can rinse them under cool water, but make sure to dry them thoroughly with a clean towel to avoid excess moisture, which can lead to mold during the drying process.
Next, you'll want to bundle your herbs. Gather a small handful of stems (about 5-10) and tie them together at the base with twine or string. Make sure the bundles are not too thick; this allows for better air circulation, which is crucial for effective drying. If you're drying larger leaves like sage or mint, you may want to spread them out on a clean, dry surface instead of bundling them. Once your herbs are bundled, hang them upside down in a warm, dry, and dark place. A kitchen or pantry works well, as long as there’s good airflow. Avoid direct sunlight, as it can degrade the color and flavor of your herbs.
Typically, herbs can take anywhere from a few days to a couple of weeks to fully dry, depending on the humidity and the type of herb. You'll know they are ready when the leaves feel crisp and crumble easily when you touch them. It's essential to check on your herbs regularly to ensure they are drying properly and to prevent any mold from forming.
Once dried, remove the leaves from the stems and store them in airtight containers, away from light and heat. This will help to preserve their flavor for months to come. Air drying not only enhances the taste of your culinary creations but also brings a touch of homemade charm to your kitchen.
- How long does it take to air dry herbs? The drying time varies by herb but generally takes between 3 days to 2 weeks.
- Can I air dry herbs in direct sunlight? It's best to avoid direct sunlight, as it can diminish the herbs' flavor and color.
- What types of herbs are best for air drying? Herbs like rosemary, thyme, oregano, and sage are excellent choices for air drying.
Using a Dehydrator
Using a dehydrator is one of the most efficient ways to dry herbs, allowing you to preserve their flavor and nutrients while significantly speeding up the drying process. Unlike traditional air drying, which can take days or even weeks, a dehydrator can dry herbs in just a few hours, making it an ideal choice for those who want to enjoy their homegrown herbs year-round.
When using a dehydrator, it's essential to prepare your herbs properly. Start by washing them gently to remove any dirt or pests. After washing, pat them dry with a clean towel to avoid excess moisture, which can hinder the drying process. Next, remove any tough stems and leaves that don't look fresh. You want to ensure that only the best parts of your herbs make it into the dehydrator.
Once your herbs are prepped, it's time to load the dehydrator. Arrange the herbs in a single layer on the dehydrator trays, making sure not to overcrowd them. This allows for optimal air circulation, which is crucial for effective drying. The ideal temperature for drying herbs typically ranges from 95°F to 115°F (35°C to 46°C). Most dehydrators have adjustable settings, so you can easily find the right temperature for your herbs.
As your herbs dry, keep an eye on them. The time it takes can vary depending on the type of herb and the humidity level in your home. For example, delicate herbs like basil or parsley may take about 1 to 4 hours, while sturdier herbs like rosemary or thyme might require up to 6 hours. It's a good idea to check on them periodically to prevent over-drying, which can lead to a loss of flavor and aroma.
Once the herbs are completely dry, they should be crisp and crumble easily when you touch them. To test for doneness, take a few leaves and try to bend them; they should snap rather than bend. If they still feel pliable, give them more time in the dehydrator. After achieving the perfect dryness, allow the herbs to cool before storing them to avoid condensation in your storage containers.
In conclusion, using a dehydrator not only saves time but also helps maintain the quality of your dried herbs. With a little preparation and attention to detail, you can enjoy the vibrant flavors and aromas of your garden herbs long after the growing season has ended. Embrace this method, and you’ll find it a game-changer in your herb preservation journey!
- How do I know when my herbs are fully dried? - Dried herbs should be crisp and crumble easily. If they bend without snapping, they need more time in the dehydrator.
- Can I dry all types of herbs in a dehydrator? - Most herbs can be dried using a dehydrator, but delicate herbs like basil and cilantro may dry quicker than tougher herbs like rosemary and sage.
- What temperature should I set my dehydrator for herbs? - The ideal temperature for drying herbs is between 95°F and 115°F (35°C to 46°C).
- How should I store my dried herbs? - Store dried herbs in airtight containers, away from light and heat, to preserve their flavor and potency.
Storing Dried Herbs
Once you've successfully dried your herbs, the next crucial step is ensuring they are stored properly. Proper storage can significantly affect the longevity and quality of your dried herbs. If stored incorrectly, herbs can lose their flavor, aroma, and potency over time. So, let’s dive into the best practices for storing your precious dried herbs.
First and foremost, choose the right containers. Glass jars are often the best option for storing dried herbs because they provide an airtight seal, keeping moisture and air out. You can also use plastic containers, but ensure they are opaque to protect the herbs from light exposure. Light is a major enemy of dried herbs, as it can degrade their quality. Here’s a quick breakdown of some ideal container options:
| Container Type | Benefits |
|---|---|
| Glass Jars | Airtight, non-reactive, and protects against light |
| Plastic Containers | Lightweight and less fragile, but should be opaque |
| Vacuum-Sealed Bags | Excellent for long-term storage, minimizes air exposure |
Next, it’s essential to label and organize your herbs effectively. This not only helps you quickly find what you need but also ensures you use the oldest herbs first, preventing waste. You can use simple labels with the herb name and the date of drying. For example, if you dried basil in July, label it as "Basil - July 2023." This practice helps you keep track of freshness.
When it comes to location, store your dried herbs in a cool, dark, and dry place. A pantry or a cabinet away from heat sources is ideal. Avoid storing them above the stove or in direct sunlight, as heat and light can cause herbs to lose their flavor and aroma much faster. Additionally, be mindful of humidity; moisture can lead to mold growth, ruining your hard work. If you live in a particularly humid area, consider using silica gel packets in your containers to absorb excess moisture.
Lastly, remember that different herbs have varying shelf lives. While some herbs can last up to two years if stored correctly, others may only maintain their quality for several months. Here’s a quick reference for the shelf life of common dried herbs:
| Herb | Shelf Life |
|---|---|
| Basil | 6 months to 1 year |
| Oregano | 1 to 3 years |
| Thyme | 1 to 3 years |
| Rosemary | 1 to 3 years |
By following these storage tips, you’ll ensure that your dried herbs remain flavorful and aromatic for many months to come. Remember, the care you take in storing them will pay off in the kitchen, where you can enjoy the fruits of your labor all year round!
Q: How long do dried herbs last?
A: Dried herbs can last anywhere from 6 months to 3 years, depending on the type of herb and how well they are stored.
Q: Can I store dried herbs in the refrigerator?
A: While you can store herbs in the refrigerator, it's typically not necessary. A cool, dark pantry is usually sufficient. Refrigeration may introduce moisture, which can lead to mold.
Q: Is it necessary to remove the leaves from the stems before storing?
A: It’s not necessary, but removing the leaves can save space and make it easier to use the herbs later. Just ensure that the leaves are fully dried before storing.
Q: How can I tell if my dried herbs have gone bad?
A: If your dried herbs have lost their color, have a musty smell, or show signs of mold, it’s time to discard them. Fresh herbs should have a strong aroma and vibrant color.
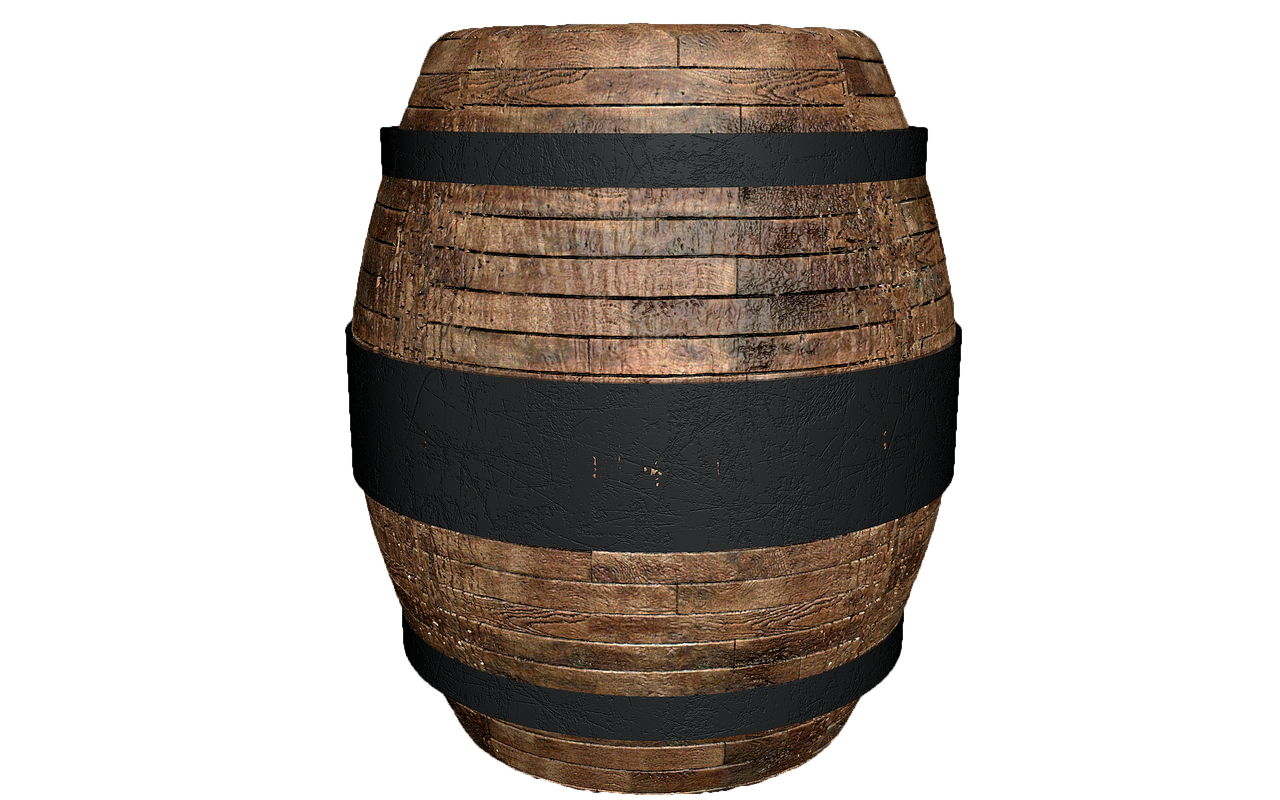
Containers for Storage
When it comes to preserving the flavor and aroma of your dried herbs, choosing the right containers is crucial. Not all containers are created equal, and the materials you select can significantly impact the longevity and quality of your herbs. For instance, glass jars are often the go-to choice for many herb enthusiasts. They are non-reactive, airtight, and allow you to see the contents, making it easy to identify your herbs at a glance. However, it's essential to ensure that these jars are kept in a cool, dark place, as exposure to light can degrade the quality of the herbs over time.
Another popular option is metal tins. These containers are durable and typically provide excellent protection against light and air, but be cautious—make sure that the tins are lined with a non-reactive material. Plastic containers can also be used, but they should be made from high-quality, food-grade materials. It's advisable to avoid using containers that have previously housed strong-smelling substances, as they can impart unwanted flavors to your herbs.
To help you decide on the best container for your dried herbs, here's a quick comparison of the different types:
| Container Type | Advantages | Disadvantages |
|---|---|---|
| Glass Jars | Non-reactive, airtight, visually appealing | Can break easily, heavier than other options |
| Metal Tins | Durable, excellent light protection | May react with certain herbs if not lined properly |
| Plastic Containers | Lightweight, often cheaper | Can absorb odors, may not be as airtight |
In addition to the type of container, consider the size as well. Smaller containers are better for frequently used herbs, while larger ones can store bulk quantities. Always remember to keep your herbs labeled with the name and date of drying, as this will help you keep track of freshness and potency. The goal is to ensure that your herbs retain their flavor, aroma, and potency for as long as possible, allowing you to enjoy the fruits of your gardening labor throughout the year.
- How long can dried herbs be stored? Dried herbs can typically be stored for 1 to 3 years if kept in proper conditions.
- Can I reuse containers for dried herbs? Yes, but ensure they are thoroughly cleaned and dried to prevent contamination.
- What is the best temperature for storing dried herbs? Ideally, keep them in a cool, dark place, away from heat and moisture.
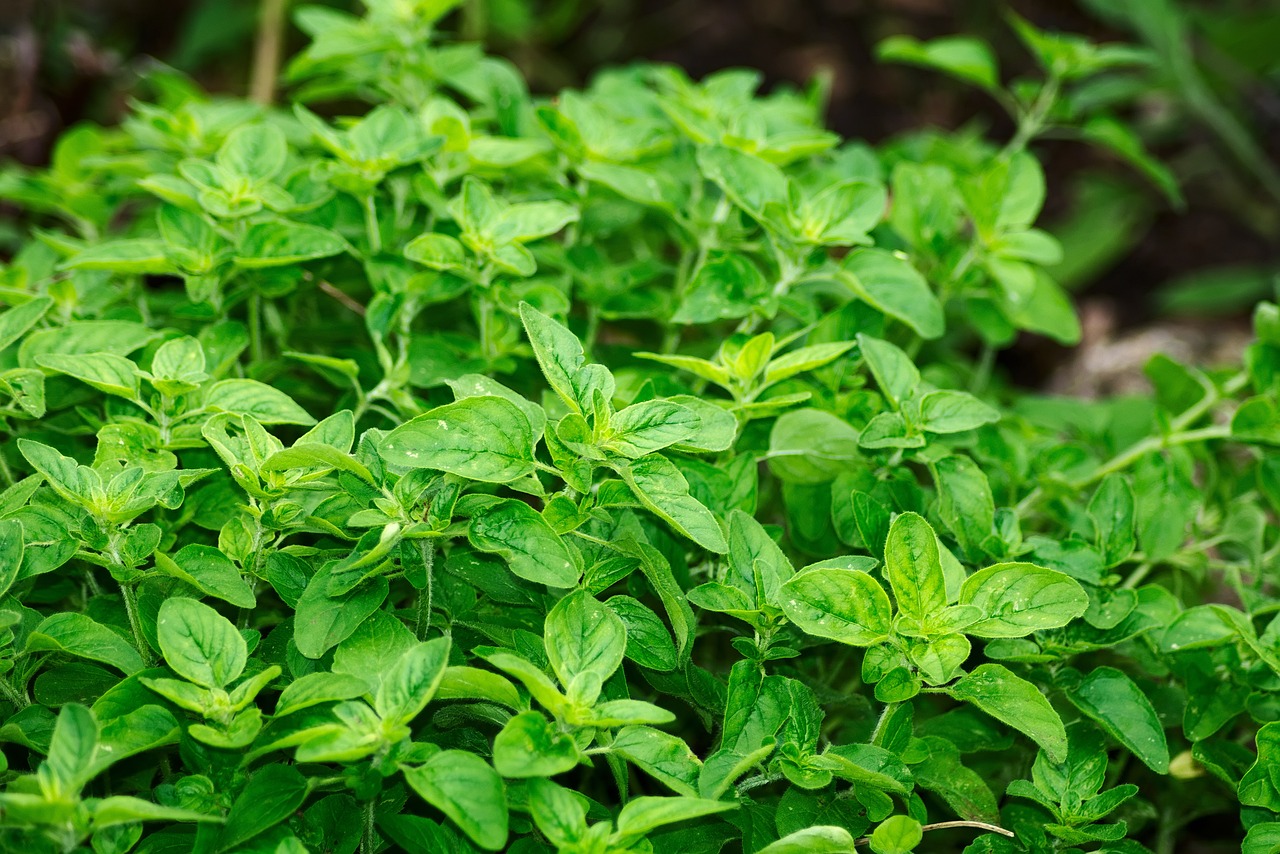
Labeling and Organizing
When it comes to storing dried herbs, effective labeling and organizing can make all the difference. Imagine opening your pantry and being greeted by a chaotic collection of herbs, where you can't tell thyme from tarragon. Not only does this create unnecessary frustration, but it can also lead to using the wrong herbs in your culinary creations. To avoid this, it's essential to establish a system that works for you, ensuring that your dried herbs are not only easy to find but also retain their freshness and flavor.
Start with clear labeling. Use labels that are easy to read and include the name of the herb and the date it was dried. This helps you keep track of the freshness of your herbs, as dried herbs can lose potency over time. You might consider using a label maker for a professional look, or simply write on masking tape for a quick and easy solution. Additionally, you could use color-coded labels for different herb categories, such as culinary herbs, medicinal herbs, or even herbs used for teas. This visual cue can save you time and enhance your cooking experience.
Next, think about organization. Group your herbs in a way that makes sense to you. Some people prefer to organize them alphabetically, while others might want to group them by flavor profiles or usage. For instance, you could have a section for herbs that pair well with meats, another for those that enhance vegetables, and a separate area for herbs used in baking. This customized approach not only makes it easier to locate the herbs you need but also inspires creativity in your cooking.
Consider using transparent containers for storage. Glass jars or clear plastic containers allow you to see the contents at a glance, reducing the chances of forgetting what you have on hand. Ensure that the containers are airtight to protect the herbs from moisture and light, which can degrade their quality. You might also want to include a small desiccant packet in the container to absorb any excess moisture, especially if you live in a humid climate.
Finally, don’t forget about regularly reviewing and rotating your stock. Just like any pantry item, dried herbs have a shelf life. Make it a habit to check your herb collection every few months, discarding any that have lost their flavor or aroma. This not only keeps your collection fresh but also gives you the opportunity to replenish your stock with new herbs from your garden.
By implementing these labeling and organizing strategies, you'll ensure that your dried herbs remain a delightful addition to your cooking repertoire. You'll not only save time while cooking but also enhance the flavors of your dishes, making every meal an opportunity to showcase the bounty of your garden.
- How long can dried herbs be stored? Dried herbs can generally last for 1 to 3 years if stored properly in a cool, dark place.
- What is the best way to label dried herbs? Use clear, waterproof labels that include the herb name and the date it was dried for easy identification.
- Can I use regular kitchen jars for storing dried herbs? Yes, but ensure they are airtight and preferably made of glass for optimal preservation.
- How can I tell if dried herbs have gone bad? If the herbs have lost their color, aroma, or flavor, it's time to replace them.
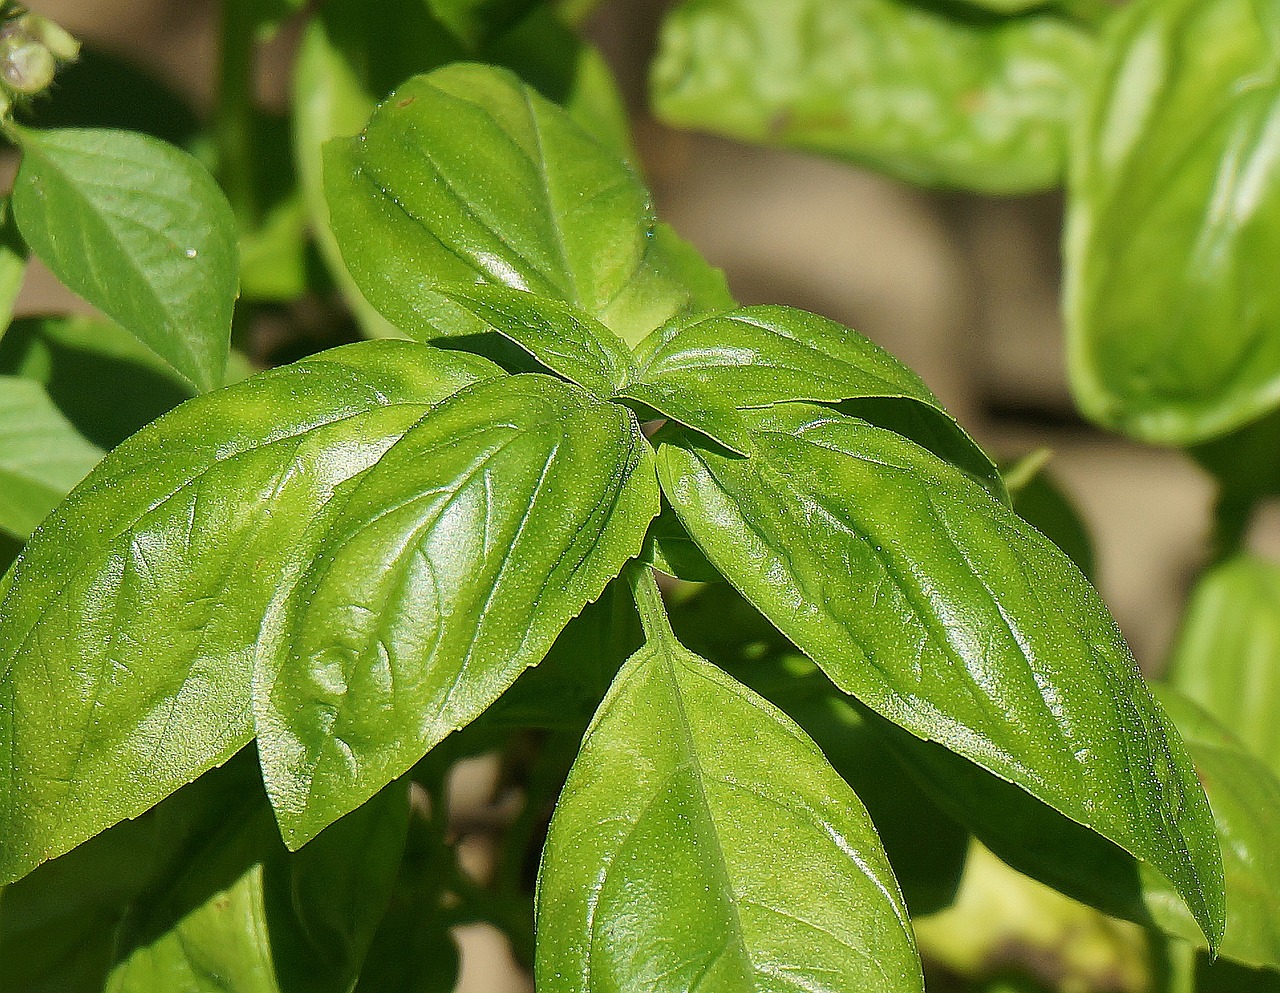
Using Dried Herbs in Cooking
Using dried herbs in your cooking can transform a simple meal into a culinary masterpiece. Imagine tossing a handful of dried basil into your marinara sauce or sprinkling some oregano over a freshly baked pizza. The beauty of dried herbs lies not only in their convenience but also in their ability to enhance flavors and aromas, making your dishes more vibrant and exciting. But how do you ensure you're getting the most out of these dried treasures? Let's dive into some practical tips and tricks!
First, it's essential to understand that dried herbs are more concentrated in flavor than their fresh counterparts. This means you typically need less of them. A good rule of thumb is to use one-third of the amount of dried herbs compared to fresh herbs. For example, if a recipe calls for 1 tablespoon of fresh thyme, you would use about 1 teaspoon of dried thyme. This conversion helps maintain the balance of flavors in your dish without overwhelming it.
When incorporating dried herbs into your cooking, consider the timing of when you add them. Dried herbs benefit from a bit of cooking time to release their essential oils and flavors. For dishes that simmer, like soups or stews, add dried herbs early in the cooking process. This allows their flavors to meld beautifully with the other ingredients. On the other hand, for quick-cooking dishes, such as stir-fries or salads, sprinkle dried herbs towards the end to preserve their aromatic qualities.
Another fantastic way to elevate your cooking with dried herbs is by experimenting with flavor pairings. Certain herbs complement specific ingredients exceptionally well. For instance, rosemary pairs beautifully with roasted meats, while thyme is a fantastic match for poultry and vegetables. Below is a table highlighting some classic herb pairings:
| Herb | Best Pairings |
|---|---|
| Basil | Tomatoes, mozzarella, and chicken |
| Oregano | Pasta, pizza, and grilled vegetables |
| Thyme | Poultry, potatoes, and soups |
| Rosemary | Lamb, potatoes, and bread |
| Sage | Pork, butternut squash, and beans |
Don't forget that rehydrating dried herbs can also enhance their flavor before use. To do this, simply soak them in a small amount of warm water or broth for about 10-15 minutes. This process can help revive some of their original flavors, making them even more effective in your dishes. It's a simple step that can make a noticeable difference, especially in recipes that require a fresh herb taste.
Lastly, remember that dried herbs can also be used in marinades, dressings, and sauces. Incorporating them into these mixtures allows their flavors to infuse over time, resulting in a more robust taste. So whether you're making a homemade vinaigrette or a savory marinade for your grilled veggies, don't hesitate to sprinkle in those dried herbs!
In summary, using dried herbs in cooking is a fantastic way to enhance your meals. By understanding their concentrated flavors, timing your additions, experimenting with pairings, and considering rehydration techniques, you can elevate your dishes to new heights. So, the next time you reach for that jar of dried herbs, remember the magic they can bring to your culinary creations!
- Can I use dried herbs instead of fresh herbs? Yes, you can! Just remember to use less dried herbs since they are more concentrated in flavor.
- How should I store dried herbs? Keep them in a cool, dark place in airtight containers to maintain their flavor and potency.
- How long do dried herbs last? Dried herbs can last up to 1-3 years, but their flavor may diminish over time, so it's best to use them within a year for optimal taste.

Flavor Pairing
When it comes to cooking, is an art that can elevate your dishes from mundane to extraordinary. Understanding how to combine dried herbs with different ingredients can transform a simple meal into a culinary masterpiece. Imagine biting into a savory dish where the flavors dance on your palate, each herb enhancing the other. This synergy is what makes cooking with dried herbs so exciting!
First off, let’s talk about some classic combinations that will never steer you wrong. For instance, basil and tomato are a match made in heaven. This duo is perfect for sauces, salads, and even pizzas. The sweetness of tomatoes complements the aromatic notes of basil, creating a flavor explosion that is hard to resist. Similarly, oregano pairs beautifully with garlic and olive oil, making it an ideal choice for Mediterranean dishes.
But don’t stop there! Experimentation is key in the kitchen. Here are a few more herb pairings to inspire your culinary creativity:
- Thyme with chicken or potatoes - the earthy notes of thyme enhance the savory flavors of these proteins.
- Rosemary with lamb or bread - its robust flavor can stand up to hearty meats and even add a delightful twist to baked goods.
- Parsley with fish or citrus - the freshness of parsley brightens up dishes, making it a great garnish as well.
When you’re cooking, consider the overall flavor profile of your dish. Are you going for something rich and hearty, or light and refreshing? This will guide your herb choices. For instance, if you’re preparing a hearty stew, you might want to lean towards robust herbs like bay leaves and sage. On the other hand, if you’re making a light salad, fresh herbs like cilantro or mint can add a refreshing burst.
Another thing to keep in mind is the potency of dried herbs compared to fresh ones. Dried herbs are often more concentrated, so you’ll need less. A good rule of thumb is to use one-third of the amount of dried herbs as you would fresh. This ensures that your dish remains balanced and doesn’t become overpowered by herbaceous flavors.
In summary, mastering the art of flavor pairing with dried herbs can take your cooking to the next level. With a little practice and a willingness to experiment, you’ll find combinations that not only complement each other but also delight your taste buds. So, grab those dried herbs from your pantry and start creating delicious flavor profiles that will impress your family and friends!
Q: Can I use dried herbs in place of fresh herbs in any recipe?
A: While you can substitute dried herbs for fresh, remember that dried herbs are more concentrated. Use about one-third of the amount specified for fresh herbs to avoid overpowering your dish.
Q: How should I store my dried herbs to maintain their flavor?
A: Store dried herbs in a cool, dark place in airtight containers. This will help preserve their flavor and potency for longer periods.
Q: Are there any herbs that don’t dry well?
A: Yes, some herbs like chives and parsley tend to lose their flavor when dried. It's often better to use them fresh.

Rehydrating Dried Herbs
Rehydrating dried herbs is an essential step to unlock their full flavor potential before adding them to your dishes. While dried herbs can maintain their flavor for an extended period, they often benefit from a little moisture to revive their aromatic qualities. So, how do you go about rehydrating these little flavor powerhouses? It’s simpler than you might think!
One of the most effective methods is to soak the dried herbs in warm water. Start by placing the desired amount of dried herbs in a bowl and cover them with warm water. Allow them to soak for about 15 to 30 minutes. This process not only rehydrates the herbs but also helps to soften them, making them easier to incorporate into your recipes. For herbs like oregano or thyme, this method works wonders, bringing back their vibrant flavors.
Another technique involves using the herbs directly in your cooking. When you add dried herbs to a dish, try to incorporate them early in the cooking process. This allows them to absorb moisture from the other ingredients, gradually rehydrating them as the dish simmers. For example, if you’re making a soup or a sauce, toss in your dried herbs at the beginning so they have time to soak up all those delicious flavors.
Here’s a quick comparison of the two methods:
| Method | Time Required | Best For |
|---|---|---|
| Soaking in Warm Water | 15-30 minutes | Salads, Dressings, and Light Dishes |
| Cooking with Dishes | Varies | Soups, Stews, and Sauces |
Additionally, you can also use a bit of oil to rehydrate dried herbs. By mixing them with olive oil or another type of oil, you create a flavorful herb-infused oil that can be used in dressings or marinades. This method not only rehydrates the herbs but also enhances their flavor profile, making your dishes even more delicious.
In summary, rehydrating dried herbs is a simple yet effective way to enhance your culinary creations. Whether you choose to soak them in warm water, incorporate them into your cooking, or create an infused oil, each method has its unique advantages. So, the next time you reach for those dried herbs, remember these techniques to bring them back to life!
- How long can I store dried herbs? Dried herbs can typically be stored for 1 to 3 years, depending on the type of herb and storage conditions. Keep them in a cool, dark place for optimal freshness.
- Can I rehydrate herbs in cold water? While it’s possible, warm water is more effective for rehydrating dried herbs as it helps to soften them more quickly.
- Are there herbs that should not be rehydrated? Some herbs, like bay leaves, are often added directly to dishes without rehydration, as they impart flavor during cooking but are typically removed before serving.
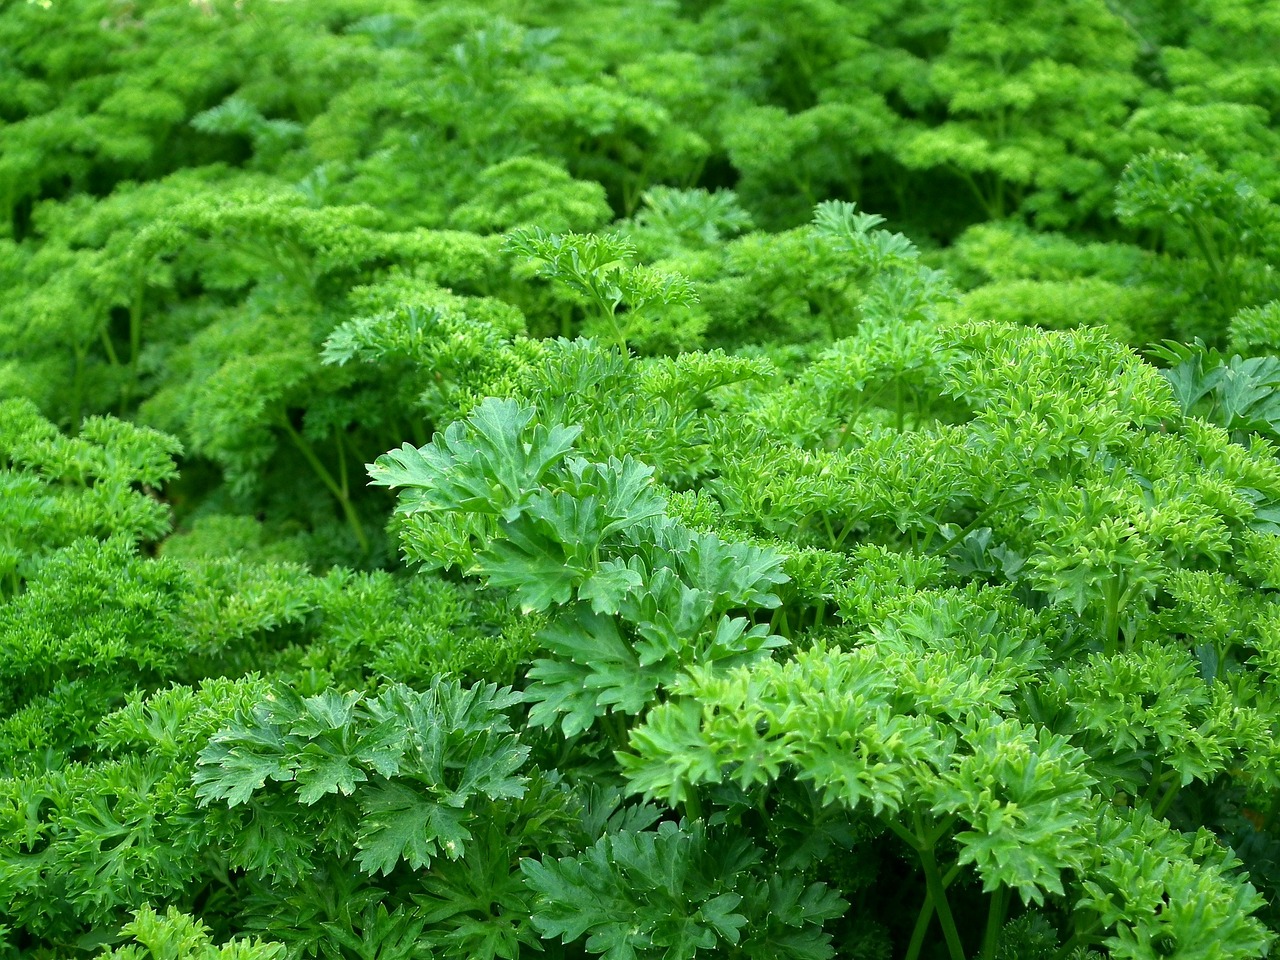
Health Benefits of Dried Herbs
Dried herbs are not just a flavorful addition to your meals; they also pack a powerful punch when it comes to health benefits. Incorporating dried herbs into your diet can enhance your overall well-being in several ways. For instance, many dried herbs are rich in essential vitamins and minerals, which are crucial for maintaining a healthy body. Imagine adding a sprinkle of dried basil to your pasta sauce, not only enhancing the flavor but also boosting your intake of vitamin K, iron, and antioxidants!
One of the standout benefits of dried herbs is their antioxidant properties. Antioxidants are compounds that help combat oxidative stress in the body, which can lead to chronic diseases. Herbs like oregano, thyme, and rosemary are particularly high in antioxidants. In fact, a study published in the Journal of Agricultural and Food Chemistry found that oregano had one of the highest antioxidant levels among common herbs. This means that incorporating these herbs into your diet can help protect your cells from damage and promote better health.
Moreover, certain dried herbs have medicinal properties that have been recognized for centuries. For example, dried ginger is known for its ability to alleviate nausea and improve digestion, while dried chamomile can be used to promote relaxation and improve sleep quality. These herbs have been utilized in traditional medicine practices, and their benefits are supported by modern research. Imagine sipping on a warm cup of chamomile tea made with dried flowers after a long day; it’s not just comforting but also beneficial for your mental health.
To give you a clearer picture of some popular dried herbs and their associated health benefits, here’s a quick reference table:
| Herb | Health Benefits |
|---|---|
| Oregano | Rich in antioxidants, supports immune health. |
| Thyme | Antimicrobial properties, aids in respiratory health. |
| Ginger | Reduces nausea, aids digestion. |
| Chamomile | Promotes relaxation, improves sleep quality. |
| Rosemary | Enhances memory and concentration, rich in antioxidants. |
In addition to their individual benefits, dried herbs can also contribute to a balanced diet. They are low in calories and can add flavor without the need for excess salt or sugar, making them a fantastic choice for those looking to maintain or lose weight. Plus, the variety of flavors they bring to meals can make healthy eating more enjoyable. So, next time you're seasoning your dish, remember that you're not just adding taste; you're also adding a splash of health!
- Can dried herbs lose their potency over time? Yes, dried herbs can lose their flavor and aroma over time. It's best to store them in a cool, dark place and use them within a year for optimal freshness.
- Are there any herbs I should avoid drying? While most herbs dry well, delicate herbs like basil and parsley can lose their flavor. It's best to use these fresh or consider freezing them instead.
- How can I incorporate dried herbs into my diet? You can add dried herbs to soups, stews, marinades, and salad dressings. They can also be used in baking, such as in bread or savory pastries.
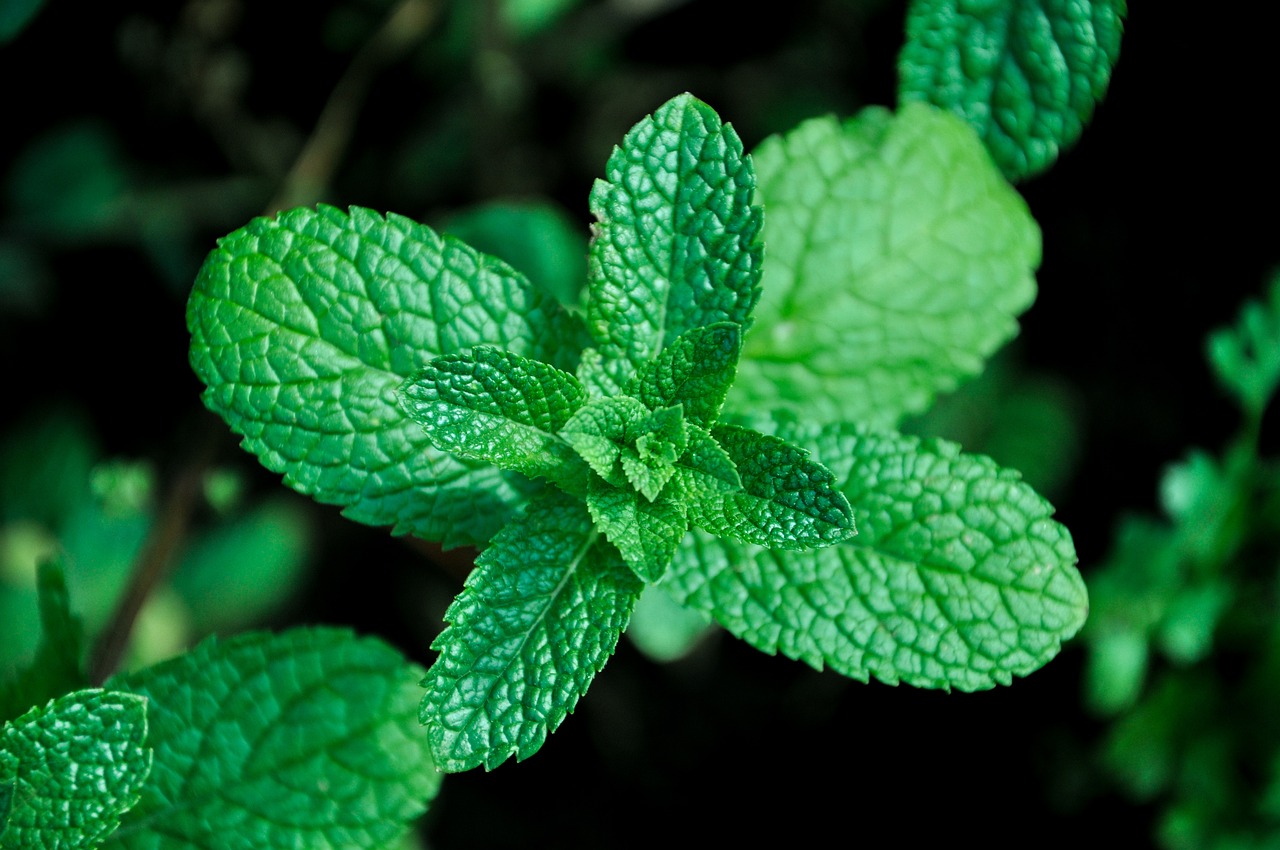
Antioxidant Properties
When it comes to health benefits, the of dried herbs are nothing short of remarkable. Antioxidants are compounds that help combat oxidative stress in the body, which is linked to various chronic diseases, including heart disease and cancer. By incorporating dried herbs into your diet, you're not just enhancing flavors—you're also giving your body a fighting chance against free radicals.
Many common herbs pack a powerful antioxidant punch. For instance, oregano and thyme are not only staples in the kitchen but also rich in flavonoids and phenolic acids, which are known for their protective effects on the body. Here’s a quick overview of some popular herbs and their antioxidant content:
| Herb | Key Antioxidants | Health Benefits |
|---|---|---|
| Oregano | Carvacrol, Thymol | Supports immune health, anti-inflammatory properties |
| Thyme | Thymol, Rosmarinic Acid | Antimicrobial, promotes respiratory health |
| Rosemary | Rosmarinic Acid, Carnosic Acid | Enhances memory, protects brain health |
| Basil | Apigenin, Eugenol | Anti-inflammatory, supports digestive health |
Incorporating these herbs into your meals can be both delicious and beneficial. Imagine sprinkling a bit of dried oregano on your pizza or adding thyme to your roasted vegetables. Not only do these herbs elevate your dishes, but they also contribute to your overall health by providing essential antioxidants.
However, it’s important to note that the antioxidant levels can vary based on factors such as the herb's growing conditions, the drying process, and how they are stored. To maximize these benefits, ensure you’re using high-quality dried herbs, preferably those that you’ve harvested and dried yourself. This way, you can be sure they retain their nutritional value and potent antioxidant properties.
- What are antioxidants, and why are they important?
Antioxidants are compounds that help neutralize free radicals in the body, reducing oxidative stress and lowering the risk of chronic diseases. - Which dried herbs are the highest in antioxidants?
Oregano, thyme, rosemary, and basil are among the herbs known for their high antioxidant content. - How can I incorporate dried herbs into my diet?
You can add dried herbs to soups, stews, marinades, and sauces, or use them as seasoning for meats and vegetables. - Do dried herbs lose their antioxidant properties over time?
While dried herbs can lose potency over time, proper storage in a cool, dark place can help maintain their antioxidant levels.
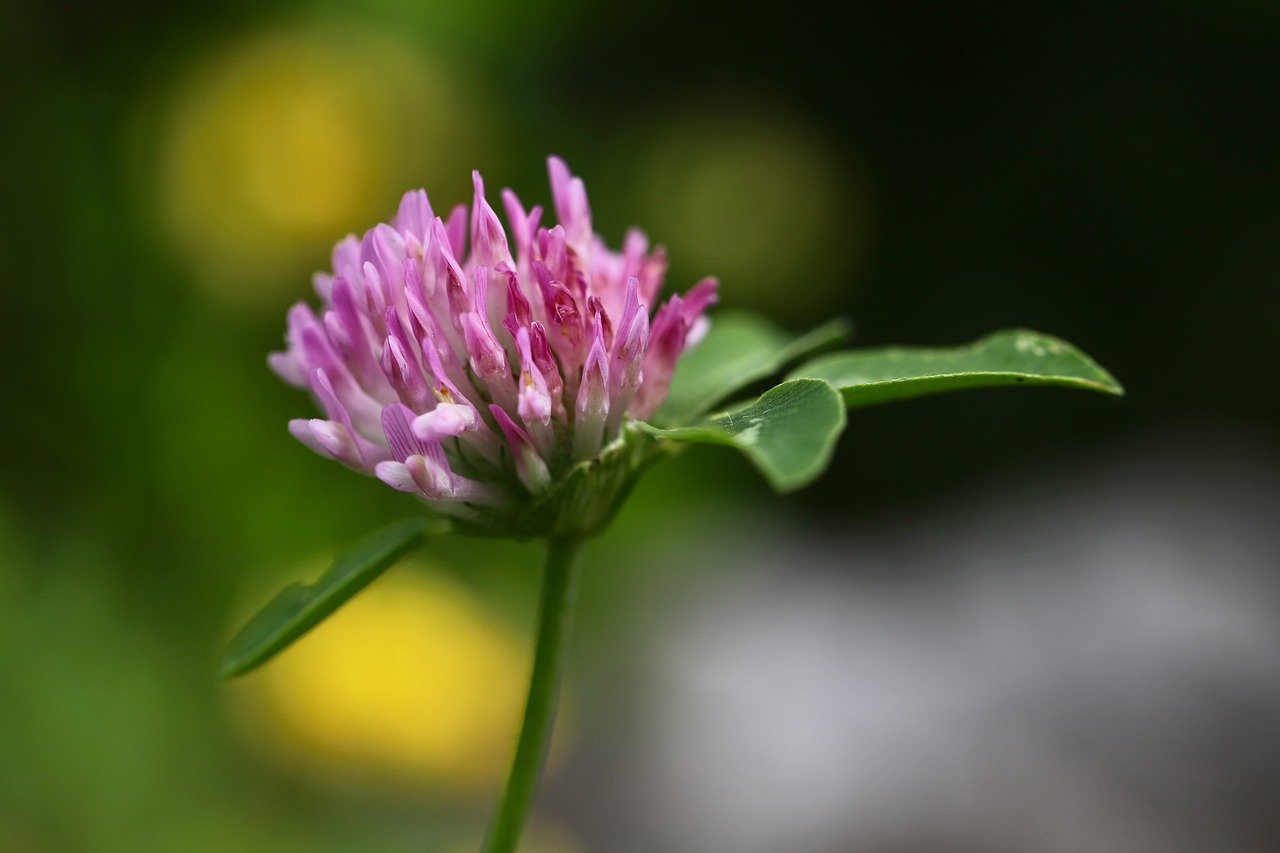
Medicinal Uses
When it comes to the world of herbs, their medicinal properties are often just as compelling as their culinary uses. For centuries, various cultures have harnessed the power of dried herbs for their health benefits, making them an essential part of natural remedies. From soothing digestive issues to enhancing immune function, the right herbs can be a game changer in your wellness routine.
Take peppermint, for example. Known for its refreshing taste, peppermint is also a powerhouse when it comes to aiding digestion. Many people brew peppermint tea after meals to help alleviate bloating and discomfort. Similarly, ginger is renowned for its anti-inflammatory properties and is often used to combat nausea and digestive issues. These herbs not only add flavor to your dishes but also offer significant health benefits that can improve your overall well-being.
Another herb worth noting is chamomile. This gentle flower is celebrated for its calming effects, making it a popular choice for those seeking relief from anxiety or insomnia. A warm cup of chamomile tea before bed can help you unwind and prepare for a restful night’s sleep. Meanwhile, turmeric, with its vibrant yellow hue, is packed with antioxidants and has been used in traditional medicine for its anti-inflammatory effects. It’s often incorporated into meals or taken as a supplement to support joint health.
It's important to understand that while herbs can offer health benefits, they should not replace conventional medicine. Always consult with a healthcare provider before starting any new herbal regimen, especially if you are pregnant, nursing, or taking medications. Here’s a quick overview of some common dried herbs and their medicinal uses:
| Herb | Medicinal Use |
|---|---|
| Peppermint | Aids digestion and alleviates bloating |
| Ginger | Helps with nausea and reduces inflammation |
| Chamomile | Promotes relaxation and aids sleep |
| Turmeric | Supports joint health and has antioxidant properties |
Incorporating these herbs into your daily routine can be as simple as brewing a tea or adding them to your meals. With their rich histories and proven benefits, dried herbs are more than just a flavor enhancer; they are a vital part of holistic health that can support your body in numerous ways.
- Can I use dried herbs for medicinal purposes? Yes, many dried herbs have medicinal properties, but it's important to consult with a healthcare provider before use.
- How should I store dried herbs to maintain their medicinal properties? Store dried herbs in airtight containers, away from light and moisture to preserve their potency.
- Are there any side effects to using dried herbs? While many herbs are safe, some can interact with medications or cause allergic reactions. Always research and consult a professional.
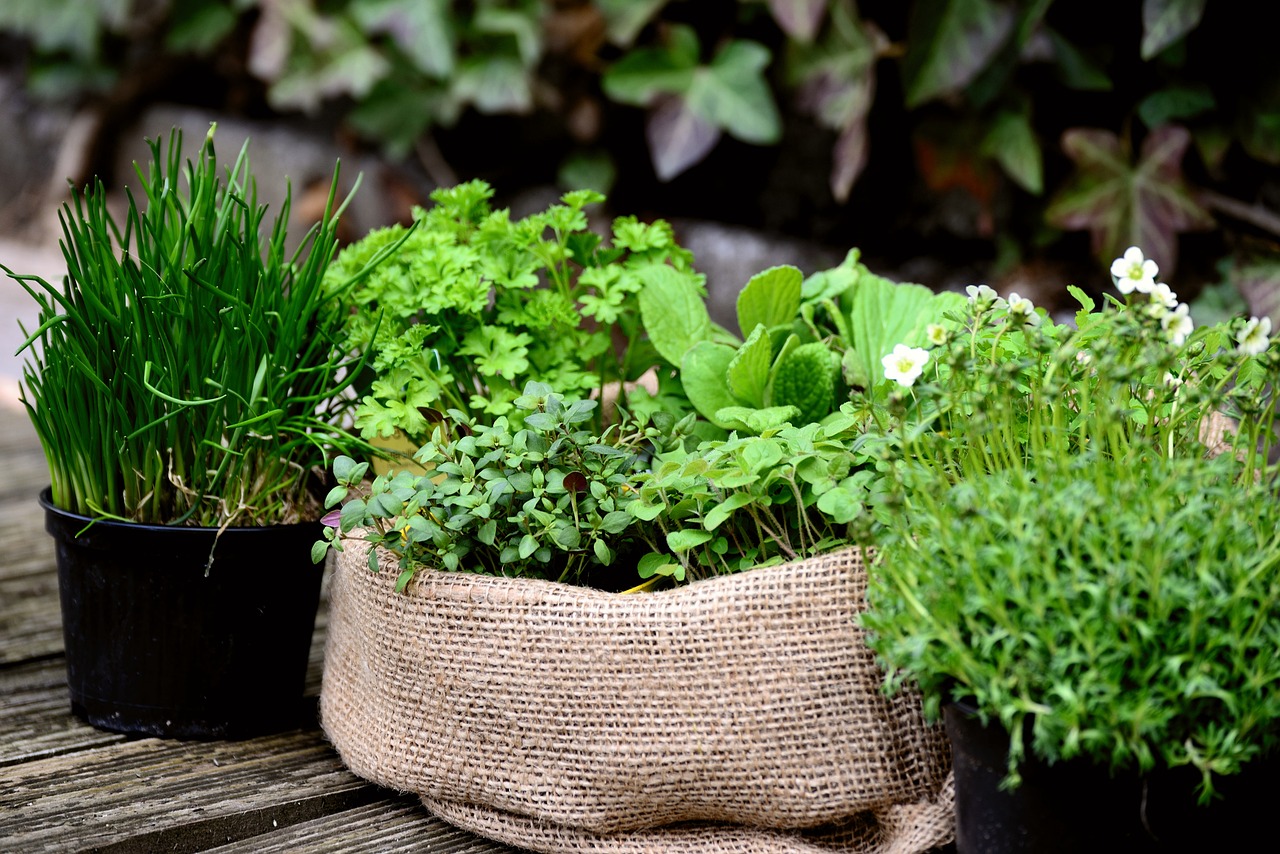
Common Mistakes to Avoid
When it comes to drying herbs, even the most seasoned gardeners can fall into traps that undermine their hard work and the quality of their herbs. One of the most common mistakes is over-drying. This occurs when herbs are left to dry for too long, resulting in a loss of flavor and aroma that can leave your culinary creations lacking. To avoid this, keep a close eye on your herbs as they dry. They should feel crisp but still retain some color and fragrance. If they crumble easily into dust, you've likely dried them too much. A good rule of thumb is to check them regularly and remove them from the drying process as soon as they reach the right texture.
Another frequent pitfall is ignoring cleanliness during the drying process. Herbs can pick up dirt, insects, and other contaminants if not handled properly. Before harvesting, ensure your hands and tools are clean. After harvesting, rinse your herbs gently under cool water to remove any debris, and pat them dry with a clean cloth. This simple step can prevent unwanted flavors and potential health hazards in your dried herbs.
Additionally, not timing your harvest correctly can lead to disappointing results. Herbs should be harvested at their peak—typically just before they flower. If you wait too long, they may lose their potency and flavor. Pay attention to the signs of maturity for each herb variety. For example, basil is best picked in the morning after the dew has dried but before the afternoon sun hits it. This timing helps preserve the essential oils that give herbs their rich flavors.
Moreover, some gardeners make the mistake of using improper storage containers. Storing dried herbs in clear glass jars may look appealing, but exposure to light can degrade their quality over time. Instead, opt for dark-colored glass or opaque containers that block out light. Airtight containers are also essential to keep moisture at bay, which can lead to mold growth. Remember, the goal is to keep your herbs fresh and flavorful for as long as possible.
Lastly, neglecting to label your herbs can create chaos in your kitchen. Imagine trying to find that perfect basil for your pasta sauce only to be met with a jumble of unlabeled jars! Take the time to label your containers with the herb name and the date of drying. This not only helps you keep track of freshness but also makes it easier to find what you need when you’re in the middle of cooking.
Here are some common questions that arise when drying herbs:
- How long do dried herbs last? Dried herbs can last anywhere from 1 to 3 years if stored properly in a cool, dark place.
- Can I dry herbs in the oven? Yes, you can dry herbs in the oven at a low temperature (around 180°F or 82°C), but keep a close watch to prevent burning.
- What herbs are best for drying? Herbs like thyme, oregano, rosemary, and sage are excellent choices for drying as they retain their flavor well.
- Is it necessary to wash herbs before drying? Yes, washing herbs before drying is important to remove dirt and insects, but make sure to dry them thoroughly afterwards.
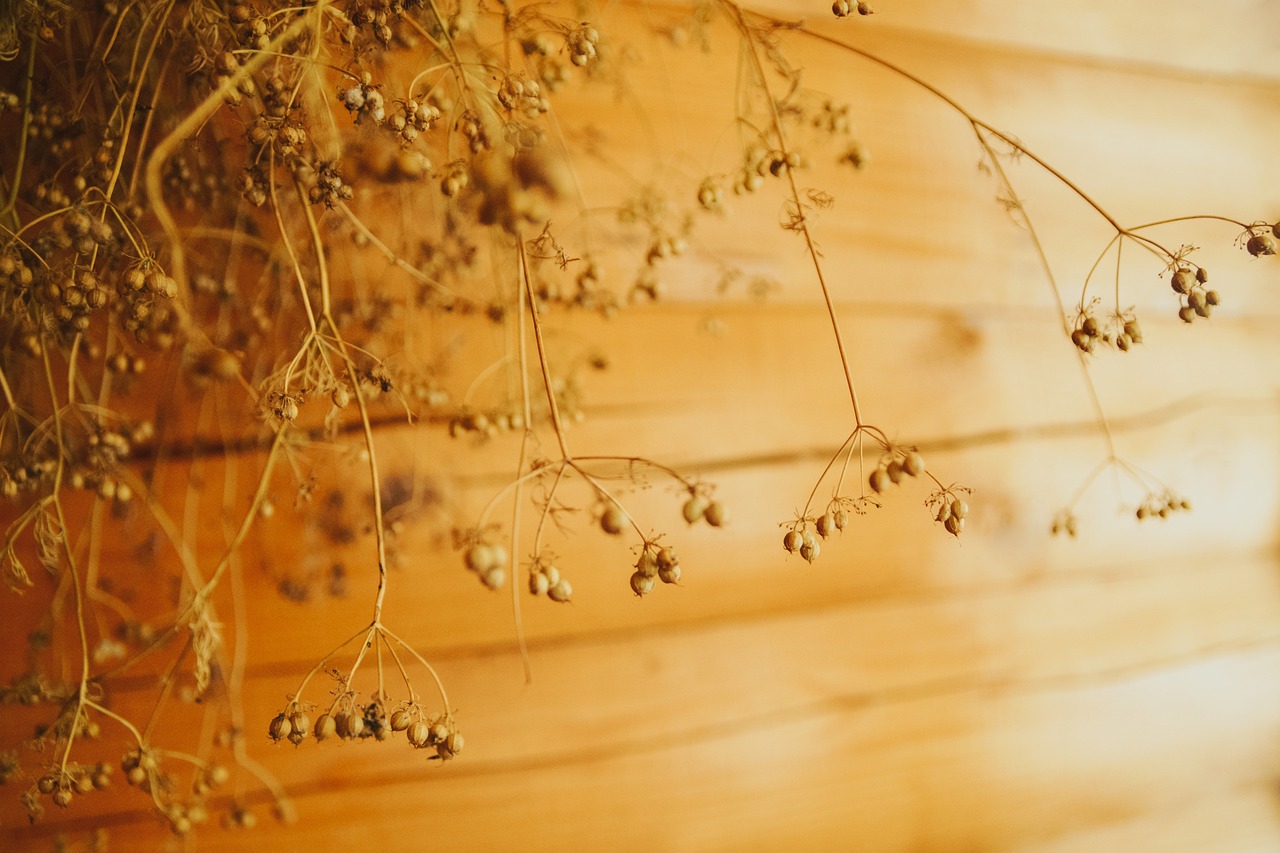
Over-Drying Issues
When it comes to drying herbs, one of the most common pitfalls is over-drying. This occurs when herbs are left in the drying process for too long, leading to a significant loss of flavor and aroma. Imagine biting into a dried herb that should burst with flavor, only to find it has turned into a mere shadow of its former self. Over-drying not only diminishes the taste but can also affect the color and nutritional value of your herbs.
So, how can you tell if your herbs are over-dried? Here are some signs to watch out for:
- Color Change: Fresh herbs have vibrant colors. If they appear dull or faded, they may have been over-dried.
- Texture: Over-dried herbs can become brittle and crumbly. You want them to be dry but still somewhat pliable.
- Aroma: If the herb has lost its characteristic scent, it's a clear indication that it has lost its essential oils.
To prevent over-drying, it’s essential to monitor the drying process closely. Here are a few tips to help you maintain the right moisture level:
- Check Regularly: Whether you’re air drying or using a dehydrator, make it a habit to check your herbs frequently. A good rule of thumb is to check them every few hours.
- Use a Timer: If you’re using a dehydrator, set a timer to remind you to check the herbs. This can help you avoid leaving them in for too long.
- Store Properly: Once dried, store your herbs in airtight containers. This will help retain their moisture content and prevent them from becoming too dry.
In conclusion, while drying herbs is an excellent way to preserve their flavor and aroma, it's crucial to avoid the common mistake of over-drying. By keeping a close eye on your herbs during the drying process and following the tips mentioned above, you can ensure that your dried herbs remain flavorful and ready to enhance your culinary creations.
Q: How can I tell if my herbs are dried properly?
A: Properly dried herbs should be crisp but not crumbly. They should retain their color and aroma.
Q: What are the best herbs to dry?
A: Some of the best herbs for drying include basil, oregano, thyme, and rosemary, as they retain their flavors well.
Q: Can I rehydrate over-dried herbs?
A: Unfortunately, once herbs are over-dried, they lose much of their flavor and aroma, and rehydrating them may not restore their original quality.
Q: How should I store my dried herbs?
A: Store your dried herbs in a cool, dark place in airtight containers to maintain their flavor and potency.
Ignoring Cleanliness
When it comes to drying herbs, cleanliness is non-negotiable. Many gardeners underestimate the importance of hygiene during the drying process, which can lead to contamination and spoilage. Imagine spending hours nurturing your herbs, only to ruin them with a lack of proper sanitation! It's crucial to ensure that both your hands and the tools you use are clean. This simple practice not only protects your herbs but also preserves their natural flavors and aromas.
Before you start harvesting or preparing your herbs for drying, take a moment to wash your hands thoroughly. Additionally, make sure that any tools you use—like scissors, knives, or drying racks—are sanitized. A quick rinse with hot, soapy water followed by a thorough drying can make a world of difference. You might think, "Isn't that a bit excessive?" But consider this: even the tiniest speck of dirt or bacteria can lead to mold growth, ruining all your hard work.
Furthermore, the environment where you dry your herbs plays a significant role in maintaining cleanliness. Ensure that the area is free from dust, pet hair, and other contaminants. If you're air drying herbs, choose a spot that is well-ventilated and away from any sources of potential contamination. A clean drying area can significantly reduce the risk of spoilage and ensure that your herbs remain flavorful and aromatic.
In summary, don't overlook the importance of cleanliness in the herb drying process. By taking a few simple steps to maintain hygiene, you can protect your precious herbs and enjoy their rich flavors long after the growing season has ended. Remember, a little effort goes a long way in preserving the quality of your dried herbs!
- How do I know if my herbs are contaminated? Look for signs of mold, unusual odors, or discoloration. If you notice any of these, it's best to discard the herbs.
- Can I use bleach to clean my tools? While bleach can sanitize, it's important to rinse thoroughly afterward to avoid chemical residues. Hot, soapy water is often sufficient.
- What is the best way to store dried herbs to keep them clean? Store dried herbs in airtight containers in a cool, dark place to prevent contamination and preserve flavor.
Conclusion
In summary, drying herbs from your garden is not just a practical way to preserve your harvest; it's an enriching experience that opens up a world of flavor and aroma right in your kitchen. By mastering the techniques outlined in this article, you can ensure that your dried herbs maintain their potency and freshness, allowing you to enjoy the fruits of your labor throughout the year. Imagine the satisfaction of adding a sprinkle of your home-dried basil to a pasta dish or a dash of your own oregano to a homemade pizza, knowing that you cultivated and preserved those flavors yourself.
Moreover, the benefits of dried herbs extend beyond taste. They offer numerous health advantages, from antioxidant properties to potential medicinal uses. As you incorporate these herbs into your meals, you’re not just enhancing flavors; you’re also nourishing your body. The beauty of this process lies in its simplicity and the rewarding nature of nurturing your garden and transforming its bounty into something lasting.
As you embark on your herb-drying journey, remember that practice makes perfect. Don’t be discouraged by initial missteps; instead, view them as learning opportunities. Over time, you’ll develop your own methods and preferences, tailoring the drying and storing processes to suit your style. So roll up your sleeves, gather those herbs, and let the magic of drying transform your culinary creations. Enjoy the journey, and may your kitchen always be fragrant with the essence of your garden!
- What herbs dry best? Herbs like thyme, rosemary, and sage are excellent for drying, as they retain their flavor well.
- Can I dry herbs in the oven? Yes, using the oven is a quick method for drying herbs, but be sure to use low heat to preserve their essential oils.
- How do I know when my herbs are fully dried? Dried herbs should feel crispy and crumble easily when you touch them. If they are still pliable, they need more drying time.
- What’s the best way to store dried herbs? Store dried herbs in airtight containers in a cool, dark place to maintain their flavor and potency.
Frequently Asked Questions
- What herbs are best for drying?
When it comes to drying herbs, some of the best options include thyme, oregano, rosemary, and sage. These herbs retain their flavor and aroma exceptionally well, making them perfect for your culinary needs throughout the year.
- How do I know when to harvest my herbs?
The best time to harvest herbs is typically in the morning after the dew has dried but before the sun is too hot. Look for signs of maturity such as vibrant color and strong scent. This ensures you’re picking them at their peak for the best flavor.
- What is the best method for drying herbs?
There are several methods for drying herbs, but air drying and using a dehydrator are among the most popular. Air drying is simple and requires no special equipment, while a dehydrator can speed up the process and preserve more nutrients.
- How should I store dried herbs?
To keep your dried herbs fresh, store them in airtight containers away from light and heat. Glass jars or dark-colored containers work well, as they help maintain the herbs' potency and flavor over time.
- Can I use dried herbs in cooking without rehydrating them?
Absolutely! Dried herbs can be added directly to your dishes, but for a more intense flavor, consider rehydrating them in a bit of water or oil before use. This helps to release their essential oils and enhances their taste.
- What are the health benefits of dried herbs?
Dried herbs are not just flavor enhancers; they are packed with antioxidants and have various medicinal properties. Incorporating them into your diet can contribute to overall wellness and may help boost your immune system.
- What common mistakes should I avoid when drying herbs?
One common mistake is over-drying, which can lead to a loss of flavor and aroma. Additionally, neglecting cleanliness can result in contamination, so always ensure your herbs are clean and handled properly during the drying process.


