
How to Turn Old Clothing Into Quilt Material
Have you ever looked at your closet and thought, "What on earth am I going to do with all these old clothes?" Instead of letting them gather dust or tossing them into the landfill, why not transform them into something beautiful and functional? Turning old clothing into quilt material is not only a fantastic way to recycle textiles but also an opportunity to create a unique piece of art that tells your story. In this article, we'll explore creative methods for this transformation, providing you with step-by-step guidance and tips to make your quilting journey enjoyable and sustainable.
When it comes to quilt-making, selecting the right garments is crucial. You want to ensure that the fabrics you choose are not only aesthetically pleasing but also durable enough to withstand the test of time. Look for clothing made from materials like cotton, denim, or linen, as these fabrics tend to hold up well when quilted. Colors and patterns play a significant role, too. Aim for a mix of vibrant hues and interesting prints that complement each other. Think of your quilt as a canvas; the clothing pieces you choose will be the colors that bring your masterpiece to life!
Before you dive into sewing your quilt, it's essential to properly prepare your fabric. This means washing, drying, and cutting your old clothing into usable quilt squares. Start by giving your garments a good wash to remove any dirt or odors. It’s important to preserve the integrity of the fabric during this process.
Understanding the best washing methods for different fabrics helps maintain their quality. For example, cotton can usually handle a warm wash, while delicate materials like silk require a gentle cycle with cold water. Use a mild detergent to avoid damaging the fibers. If you're unsure, always check the care labels on your clothing. Here’s a quick reference table for washing various fabrics:
| Fabric Type | Washing Temperature | Detergent Type |
|---|---|---|
| Cotton | Warm | Mild |
| Denim | Cold | Regular |
| Silk | Cold | Gentle |
| Linen | Warm | Mild |
Choosing the right drying method can prevent shrinkage and wear. You have two main options here: air drying or machine drying. Air drying is the gentler method, allowing your fabric to maintain its shape and size. On the other hand, if you’re short on time, machine drying on a low setting can work, but be cautious as it may lead to some shrinkage. Think of it as choosing between a slow simmer or a quick boil when cooking; the outcome can vary significantly!
Now that your fabric is clean and dry, it's time to cut it into quilt squares. Accurate cutting is key to achieving a polished final product. Use a rotary cutter and a cutting mat for precision. Measure your squares carefully, and don’t rush this step; it’s the foundation of your quilt. Remember, a well-prepared quilt top will make the sewing process much more enjoyable!
A well-thought-out design enhances the visual appeal of your quilt. Take the time to lay out your fabric pieces before sewing them together. Consider color balance and how the patterns interact. You might find it helpful to take a step back every now and then to see how everything looks from a distance. Think of the layout as composing a song; each piece of fabric adds a note to the overall melody of your quilt.
Mastering sewing techniques is key to assembling your quilt. Whether you prefer hand stitching or machine sewing, knowing the ins and outs of each method will help you achieve a sturdy and attractive finish. Hand sewing can be a meditative process, allowing you to connect with your quilt on a personal level, while machine sewing can speed things up significantly.
Explore the pros and cons of hand sewing versus machine sewing. Hand sewing gives you complete control over your stitches and allows for intricate designs, but it can be time-consuming. Machine sewing, on the other hand, is faster and often results in stronger seams. Consider your skill level and desired outcome when choosing between the two. It’s like deciding whether to paint a picture with a brush or a roller; each has its unique advantages!
Completing your quilt involves adding borders, batting, and backing. These finishing touches not only enhance the quilt's appearance but also provide warmth and durability. Take your time in this final step, as it’s the cherry on top of your quilt-making journey. Your quilt is now ready to be used, displayed, or gifted!
- What types of clothing are best for quilting? Look for durable fabrics like cotton, denim, and linen.
- Can I use clothing with stains or holes? Yes, but consider how these imperfections will affect the overall design.
- How do I prevent my quilt from shrinking? Proper washing and drying techniques are key to maintaining size.
- Is it necessary to pre-wash my fabric? Yes, pre-washing helps to remove any residual chemicals and prevents future shrinkage.
Choosing the Right Clothing
When it comes to transforming your old clothing into quilt material, choosing the right garments is absolutely crucial. Not only do you want your quilt to be visually appealing, but you also need to ensure that the fabrics you select are durable and suitable for quilting. So, how do you go about making these selections? Let's dive in!
First, consider the fabric types. Natural fibers like cotton and linen are ideal for quilting because they are breathable and easy to work with. On the other hand, synthetic fabrics such as polyester can add durability but may not provide the cozy feel you'd expect from a quilt. It's essential to strike a balance between comfort and longevity. For instance, a quilt made entirely from cotton will be soft and warm, perfect for snuggling under during chilly nights.
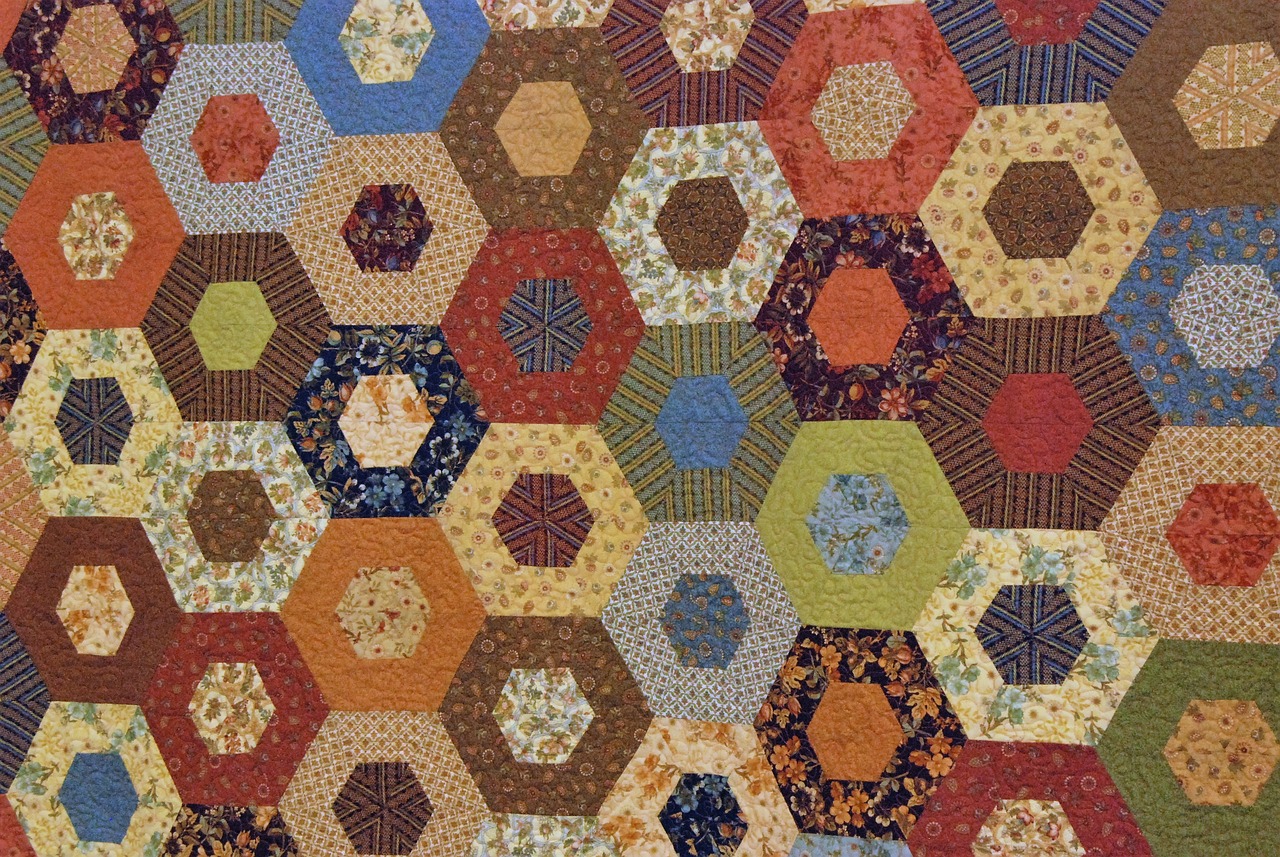
Next, think about the colors and patterns of the clothing you plan to use. A quilt is like a canvas, and the pieces you choose will dictate the overall aesthetic. Do you prefer a monochromatic scheme for a modern look, or are you drawn to vibrant, eclectic patterns that tell a story? Mixing and matching different colors can create a stunning visual effect, but be cautious not to overwhelm the senses. A good rule of thumb is to limit your palette to three or four complementary colors. This approach not only simplifies the process but also results in a cohesive design.
Additionally, consider the condition of the garments. While it might be tempting to use that old shirt with sentimental value, it’s vital to inspect the fabric for any signs of wear and tear. Look for holes, fraying edges, or stains that can't be removed. If a piece is too damaged, it might not hold up well in a quilt, and you don’t want your hard work to unravel over time. Instead, focus on pieces that are in good shape and have a story to tell.
Lastly, think about the themes you want to convey through your quilt. Are you aiming for a nostalgic vibe with vintage clothing, or do you want to create something modern and sleek? Perhaps you’re interested in a memory quilt that showcases clothing from significant moments in your life, like a favorite concert tee or a dress from a memorable event. Whatever your vision, let it guide your choices as you sift through your wardrobe.
In summary, choosing the right clothing for your quilt is an art in itself. By focusing on fabric types, colors, patterns, condition, and your overall theme, you can create a beautiful quilt that not only serves a practical purpose but also holds sentimental value. So, as you embark on this creative journey, remember to let your personality shine through!
Preparing the Fabric
Before diving into the exciting world of quilt-making, it’s essential to prepare your fabric properly. Think of this step as the foundation of a house; without a solid base, everything else can crumble. When you’re working with old clothing, you want to ensure that the fabric is not only clean but also in good condition for sewing. Start by gathering your old garments—this could be anything from worn-out jeans to soft cotton shirts. Each piece has its own story, and now it’s time to give them a new life!
First things first, let’s talk about washing your fabric. You might be wondering, “Can I just toss everything into the washing machine?” Well, not so fast! Different fabrics require different care. For instance, delicate silks and heavy denims can’t be treated the same way. Here’s a quick guide:
| Fabric Type | Recommended Wash Temperature | Detergent Type |
|---|---|---|
| Cotton | Warm | Regular detergent |
| Denim | Cold | Regular detergent |
| Silk | Cold | Gentle detergent |
| Wool | Cold | Wool-specific detergent |
After washing, it’s crucial to dry your fabric correctly. You may be tempted to throw everything in the dryer for convenience, but this can lead to shrinkage or even damage. Instead, consider air drying your pieces. Lay them flat or hang them up to dry naturally. It’s like letting your fabric breathe and regain its original shape! If you must use a dryer, opt for a low heat setting and remove the fabric while it’s still slightly damp to prevent excessive shrinkage.
Once your fabric is clean and dry, it’s time to cut it into quilt squares. This is where precision becomes key. A well-cut square not only makes sewing easier but also results in a more aesthetically pleasing quilt. Use a rotary cutter or sharp fabric scissors for clean edges. Remember, measure twice, cut once! You can create uniform squares of various sizes, depending on your quilt design. For example, 5-inch squares are a popular choice for beginners, as they’re manageable and versatile.
As you prepare your fabric, take a moment to appreciate the patterns and colors of each piece. You’ll want to envision how these different fabrics will come together in your quilt. Mixing and matching can be a fun way to express your creativity. Just remember to keep a balance; too many clashing colors can make your quilt look chaotic rather than harmonious. Aim for a cohesive look that tells a story, blending textures and hues that resonate with you.
In summary, preparing your fabric is a vital step in quilt-making. By washing, drying, and cutting your clothing properly, you set the stage for a successful quilting experience. So grab those old garments, and let’s turn them into something beautiful!
- Can I use any type of fabric for quilting? While you can use various fabrics, it’s best to stick to cotton or cotton blends for durability and ease of sewing.
- How do I prevent my quilt from fraying? Use a zigzag stitch or serger on the edges of your fabric pieces to secure them and prevent fraying.
- Is it necessary to pre-wash my fabric? Yes, pre-washing helps remove any chemicals and ensures that your fabric won’t shrink after your quilt is finished.

Washing Techniques
When it comes to transforming your old clothing into quilt material, washing is a critical first step that should not be overlooked. The way you wash your fabrics can significantly impact their quality and longevity. Each fabric type has its own set of requirements, and knowing how to treat them properly will ensure that your quilt remains beautiful and durable for years to come. So, what are the best practices for washing your old clothes before cutting them into quilt squares?
First off, temperature settings play a vital role. Most cotton fabrics can withstand hot water, which helps remove dirt and any lingering odors. However, for delicate materials such as silk or wool, cold water is your best friend. Using cold water not only prevents shrinking but also protects the fabric's integrity. Always check the care labels on your clothing to avoid any mishaps!
Next, let’s talk about detergents. Not all detergents are created equal, and some can be harsher on fabrics than others. For your quilt materials, it's advisable to use a gentle detergent that is free from harsh chemicals. If you’re dealing with vintage or sentimental pieces, consider using a specialized fabric wash designed for delicate items. This will help maintain the colors and textures that make your quilt unique.
Another important aspect is the washing technique. If you're washing multiple pieces together, make sure to separate fabrics by color to prevent bleeding. You wouldn’t want your vibrant reds to turn your whites into a dull pink, right? Additionally, consider using a gentle cycle on your washing machine to minimize agitation, which can cause wear and tear.
For those particularly delicate fabrics, hand washing is often the safest bet. Fill a basin with cold water, add your gentle detergent, and gently agitate the water. Submerge your clothing and let it soak for about 10-15 minutes before rinsing thoroughly with cool water. This method is not only effective but also gives you peace of mind knowing that your cherished clothing is being treated with care.
Lastly, don’t forget about spot cleaning. If you notice any stains on your clothing, it’s best to treat them before washing. Use a small amount of detergent or a stain remover on the affected area and gently rub it in. Allow it to sit for a few minutes before rinsing. This pre-treatment can save your fabrics from permanent damage and keep your quilt looking its best.
In summary, washing your old clothing properly is the foundation of a successful quilting project. By paying attention to temperature, detergent choice, washing techniques, and spot cleaning, you can ensure that your quilt materials are clean, vibrant, and ready for the next steps in your quilting journey.
- Can I wash all fabrics together? It's best to separate fabrics by color and type to avoid damage and bleeding.
- What if my fabric shrinks after washing? To prevent shrinkage, always follow the care label instructions and avoid hot water for delicate fabrics.
- Is it necessary to wash fabric before quilting? Yes, washing helps remove any dirt, odors, or chemicals, ensuring a clean start for your quilt.
Drying Options
When it comes to drying your quilt materials, the method you choose can significantly impact the quality and longevity of your fabric. After washing your old clothing, you have two primary options: air drying and machine drying. Each method has its own set of advantages and potential drawbacks that you should consider carefully.
Air drying is often the gentlest way to dry your fabric. By hanging your clothes on a line or laying them flat on a clean surface, you allow the fabric to dry naturally. This method is particularly beneficial for delicate materials that may shrink or become misshapen in a dryer. Additionally, air drying can help preserve the colors and textures of your fabric, making it a fantastic option for quilt-making. However, it does require more time and space, and you may need to plan for the weather if you’re drying outdoors.
On the other hand, machine drying offers the convenience of speed. If you’re in a hurry to get started on your quilt, tossing your fabric in the dryer can save you valuable time. However, it’s essential to be cautious with this method. Different fabrics react differently to heat, and using the wrong settings can lead to unwanted shrinkage or damage. For example, cotton can typically handle higher temperatures, while synthetic fabrics may require a lower setting. Always check the care labels on your clothing before deciding on a drying method.
Here’s a quick comparison of both drying options to help you decide:
| Drying Method | Pros | Cons |
|---|---|---|
| Air Drying |
|
|
| Machine Drying |
|
|
Ultimately, the choice between air drying and machine drying will depend on your specific fabrics and personal preferences. If you’re working with a variety of materials, you may find it beneficial to use a combination of both methods. For instance, consider air drying your more delicate fabrics and machine drying thicker pieces that can handle the heat. Remember, taking the time to dry your quilt materials properly will pay off in the long run, ensuring that your finished quilt is as beautiful and durable as possible.
Here are some common questions related to drying options for quilt materials:
- Can I dry all types of fabric in the dryer? - Not all fabrics are dryer-safe. Always check the care label for specific instructions.
- Does air drying really make a difference? - Yes, air drying is gentler on fabrics and can help maintain their original quality.
- How can I speed up air drying? - Use a fan or place the fabric in a well-ventilated area to help it dry faster.

Cutting Methods
When it comes to transforming your old clothing into quilt material, the you choose can significantly impact the final product. Precision is key; after all, a quilt is only as good as the pieces that make it up. So, how do you ensure that your fabric squares are cut perfectly? First, gather your tools. A sharp rotary cutter, a cutting mat, and a ruler are your best friends in this endeavor. These tools not only enhance accuracy but also speed up the process, allowing you to cut multiple layers of fabric at once.
Before you dive into cutting, it's essential to prepare your fabric. Start by laying your clothing flat on a clean surface. If the fabric is wrinkled, give it a quick press with an iron to achieve a smooth cutting surface. This step is crucial because any folds or creases can lead to uneven squares, which will affect the overall look of your quilt. Once your fabric is smooth, use your ruler to measure out the desired square size, typically ranging from 5 to 10 inches, depending on your design preference.
Now, let’s talk about the actual cutting technique. If you're using a rotary cutter, position your ruler along the edge of your fabric and slice through the layers with a steady hand. For those who prefer traditional scissors, make sure to cut slowly and carefully, following the lines you've marked. Remember, accuracy is vital; even a slight deviation can lead to mismatched pieces later on. As you cut, keep an eye out for any embellishments or seams in the fabric that might affect your squares. You might find it helpful to create a cutting guide for different fabric types:
| Fabric Type | Recommended Square Size | Cutting Tips |
|---|---|---|
| Cotton | 5-10 inches | Use a rotary cutter for clean edges. |
| Denim | 6-10 inches | Consider using heavy-duty scissors. |
| Knits | 5-8 inches | Cut slowly to avoid stretching. |
After cutting your fabric pieces, it’s a good idea to organize them by color or pattern. This way, you can easily visualize your quilt layout and make adjustments as necessary. Additionally, if you have any leftover scraps, don’t toss them out! You can use them for smaller projects or even as stuffing for pillows. In essence, the cutting phase is not just about the act of slicing fabric; it's about setting the stage for your quilt's design and ensuring that each piece fits together harmoniously.
In conclusion, mastering cutting techniques is a blend of skill and creativity. By taking the time to prepare your fabric and using the right tools, you’ll be well on your way to creating quilt squares that are not only beautiful but also uniform and ready for sewing. As you embark on this quilting journey, remember that each cut brings you closer to a unique, handcrafted piece that tells a story of its own.

Designing Your Quilt Layout
Designing your quilt layout is like painting on a blank canvas; it’s where your creativity truly shines! The way you arrange your fabric pieces can make all the difference between a quilt that’s just functional and one that’s a stunning piece of art. First and foremost, think about the color scheme. Do you want to go for a monochromatic look with varying shades of the same color, or are you feeling adventurous with a bold, multicolored pattern? The choice is yours! Remember, colors can evoke emotions, so consider what you want your quilt to express.
Next up, let’s talk about patterns. Mixing patterns can add visual interest, but it’s important to strike the right balance. You don’t want your quilt to look chaotic! A good rule of thumb is to choose a few patterns that complement each other. For instance, if you have a floral print, consider pairing it with a solid color or a subtle geometric pattern. This creates a sense of harmony while keeping things exciting. You might even want to sketch out a few layouts on paper before diving into the fabric.
When arranging your fabric pieces, think about the size and scale of the prints. Larger prints can dominate a quilt, so placing them strategically can help balance the overall look. You might want to create a focal point in the center of your quilt and build outwards with smaller pieces. This technique draws the eye to a specific area, making your quilt not only functional but also a conversation starter!
Another tip is to consider the direction of the fabric. If you’re using clothing with patterns that have a specific orientation, like stripes or checks, pay attention to how they align. You want to ensure that the patterns flow seamlessly across the quilt, creating a cohesive look. It might take a bit of time to arrange everything just right, but trust me, it’s worth the effort!
As you finalize your design, don’t forget about negative space. This refers to the areas of your quilt that don’t have any fabric. It’s just as important as the fabric pieces themselves! Negative space can provide a visual break and allow the eye to rest, enhancing the overall aesthetic of the quilt. Play around with leaving some areas open to create a more modern feel.
Finally, once you’ve settled on a layout, take a moment to step back and review your work. Sometimes, viewing it from a distance can help you see things you might have missed up close. Don’t be afraid to make adjustments! After all, this quilt is a reflection of your personal style and creativity. So grab those old clothes, let your imagination run wild, and create something beautiful!
- What types of fabric work best for quilting? Natural fibers like cotton are ideal due to their durability and ease of handling.
- Can I mix different fabric types? Yes, but be cautious as different fabrics may behave differently when washed or sewn.
- How do I choose a color scheme? Consider using a color wheel for guidance or pick colors that resonate with you personally.
- Is there a specific size for quilt squares? Common sizes are 6x6 inches or 12x12 inches, but you can customize based on your design.
Sewing Techniques
When it comes to assembling your quilt, mastering various is absolutely essential. Whether you're a seasoned quilter or just starting out, understanding the different methods can significantly impact the quality and appearance of your final product. Let’s dive into the world of quilting stitches and discover how you can elevate your quilt-making game!
One of the first decisions you'll face is whether to use hand sewing or machine sewing. Each method has its own unique advantages and challenges. Hand sewing allows for a more personal touch, giving you the flexibility to work at your own pace and make adjustments easily. However, it can be time-consuming, especially for larger quilts. On the other hand, machine sewing can speed up the process dramatically, making it ideal for those who want to finish their projects in a shorter amount of time.
To help you weigh your options, here’s a quick comparison:
| Method | Pros | Cons |
|---|---|---|
| Hand Sewing |
|
|
| Machine Sewing |
|
|
Regardless of the method you choose, there are some essential techniques to keep in mind. For instance, if you decide to go with machine sewing, ensure that your machine is properly threaded and that you’re using the correct needle type for the fabric you’re working with. A universal needle is a good starting point, but specialty fabrics may require different needles. Always test your stitches on a scrap piece of fabric first to avoid any surprises!
As you start sewing your quilt pieces together, remember to maintain a consistent seam allowance. This is typically around ¼ inch, but you can adjust it based on your design preferences. Keeping your seams uniform will not only enhance the quilt's appearance but also ensure that all pieces fit together seamlessly.
After joining your quilt top, you’ll need to consider the finishing touches. This includes adding borders, batting, and backing. When sewing these layers together, it’s crucial to pin or baste them securely to prevent any shifting during the sewing process. A well-prepared quilt sandwich will make the final stitching much easier and yield a more polished result.
In summary, whether you opt for hand or machine sewing, the key is to practice and find what works best for you. Quilting is not just about creating a beautiful piece; it’s about enjoying the process and expressing your creativity. So grab your fabric, thread, and sewing tools, and let your imagination run wild!
Q: Can I mix different fabric types in my quilt?
A: Absolutely! Just be mindful of how they behave together, especially regarding washing and durability.
Q: How do I know if my quilt is ready for the final touches?
A: Your quilt is ready when all pieces are securely sewn together, and you’re satisfied with the layout and design.
Q: What should I do if I encounter puckering in my quilt?
A: Puckering can often be fixed by adjusting your tension settings on the sewing machine or by using a walking foot for even feeding of layers.

Hand vs. Machine Sewing
When it comes to sewing your quilt, one of the most significant decisions you'll face is whether to go for hand sewing or to embrace the speed and efficiency of machine sewing. Each method has its own set of advantages and challenges, and understanding these can help you make the best choice for your project. Let's dive into the details!
Hand sewing is often viewed as a traditional craft, bringing a personal touch to your quilt. There's something truly special about stitching each piece together by hand, allowing for a level of detail and care that can be hard to replicate with a machine. Plus, it's a fantastic way to unwind and connect with your project. You can easily control the tightness of your stitches, which is especially beneficial for intricate designs. However, hand sewing can be time-consuming and may lead to fatigue, especially if you're working on a larger quilt.
On the other hand, machine sewing offers speed and efficiency that hand sewing simply can't match. If you're looking to complete your quilt in a shorter time frame, a sewing machine is your best friend. Modern machines come equipped with various settings and features that allow for different stitch types, making it easier to achieve a professional finish. However, machine sewing can sometimes lead to less control over the stitching, particularly for beginners who may struggle with maintaining even tension. Additionally, the noise of the machine can be distracting, taking away from the meditative quality of sewing.
To give you a clearer picture, here’s a quick comparison:
| Aspect | Hand Sewing | Machine Sewing |
|---|---|---|
| Speed | Slow | Fast |
| Control | High | Moderate |
| Complexity | Ideal for intricate designs | Good for straight lines and simple patterns |
| Fatigue | Low | High (if not careful) |
| Tools Needed | Needles, thread, scissors | Sewing machine, thread, scissors |
Ultimately, the choice between hand and machine sewing comes down to your personal preference and the specific needs of your quilt project. If you enjoy the tactile experience and have the time to dedicate, hand sewing can be a rewarding endeavor. However, if you’re pressed for time or looking for a more straightforward approach, machine sewing will get the job done efficiently. Some quilters even choose to combine both methods, using machine sewing for the bulk of the quilt and hand sewing for finishing touches or decorative elements. This hybrid approach allows you to enjoy the best of both worlds!
Q: Can I use both hand and machine sewing in the same quilt?
A: Absolutely! Many quilters find that using both methods can enhance their projects. You might use a sewing machine for the main seams and then hand sew decorative stitches or binding.
Q: Which method is better for beginners?
A: If you're new to quilting, starting with machine sewing might be easier as it allows for quicker results. However, hand sewing can be a great way to practice and improve your skills without the pressure of a machine.
Q: What if I don’t have a sewing machine?
A: No worries! Hand sewing can be just as effective, especially for smaller projects. You can create beautiful quilts using just a needle and thread.
Finishing Touches
Completing your quilt is like putting the cherry on top of a delicious cake; it’s all about those final touches that make your creation truly shine. Once you’ve sewn together your quilt top, it’s time to consider a few essential elements that will enhance both the beauty and functionality of your quilt. First up is the border. Adding a border not only frames your quilt but also offers an opportunity to introduce new colors and patterns that can complement the existing fabric. Think of it as a picture frame around a stunning piece of art!
Next, let’s talk about batting. This is the layer that provides warmth and texture to your quilt. Choosing the right batting can make a world of difference. Cotton batting is great for breathability, while polyester offers durability and loft. If you're aiming for a cozy feel, consider a blend that combines the best of both worlds. When layering your quilt, ensure that the batting is slightly larger than the quilt top to prevent any awkward edges from showing.
After you’ve laid out your quilt top and batting, it’s time to add the backing. This is where you can get really creative! You can use a single piece of fabric or piece together smaller scraps to create a unique backing that reflects your style. Just remember, the backing should be at least a few inches larger than the quilt top to allow for seams and quilting. Once everything is layered, it’s essential to pin or baste the layers together to prevent shifting during the quilting process.
Now, let’s get to the fun part—quilting! Whether you're opting for a simple straight stitch or a more intricate free-motion design, this step is where your quilt truly comes to life. Take your time and enjoy the process; it’s all about expressing your creativity. Once you’ve finished quilting, trim any excess batting and backing to match the edges of your quilt top.
Lastly, don’t forget to add your personal touch with a label. This could be a simple piece of fabric with your name, the date, and the occasion for which the quilt was made. It’s a lovely way to commemorate your hard work and creativity. Plus, it adds a sentimental value that can be cherished for generations.
In summary, the finishing touches of your quilt are not just about aesthetics; they are about bringing your vision to life. From choosing the right border and batting to adding a unique backing and personal label, each step is vital in creating a quilt that is not only beautiful but also functional and meaningful.
- What type of fabric is best for quilt backing? Cotton fabric is often recommended due to its durability and ease of handling. However, you can also use flannel for a softer feel.
- How do I prevent my quilt from bunching during quilting? Use plenty of pins or basting stitches to secure the layers together before you start quilting.
- Can I use old clothing for quilt backing? Absolutely! Just make sure to wash and prepare the fabric properly, as discussed earlier in the article.
- What is the best way to care for my quilt after it's finished? It's best to wash your quilt on a gentle cycle with cold water and tumble dry on low heat to maintain its quality.
Frequently Asked Questions
- What types of clothing are best for making quilts?
When it comes to quilt-making, you want to choose clothing made from durable fabrics like cotton, flannel, or denim. These materials not only hold up well over time but also provide a lovely texture and warmth to your quilt. Avoid stretchy fabrics, like knits, as they can be tricky to work with and may not hold their shape.
- How should I wash old clothing before using it for a quilt?
Washing your old clothing is crucial to remove any dirt, odors, or residues. For most fabrics, a gentle cycle in cold or warm water with a mild detergent works best. Always check the care labels first! For delicate materials, consider hand washing to preserve their quality. It's like giving your fabric a refreshing spa day!
- Can I mix different fabric types in my quilt?
Absolutely! Mixing different fabrics can add depth and interest to your quilt. Just keep in mind how each fabric behaves; for example, heavier fabrics like denim might require more effort to sew alongside lighter fabrics like cotton. Think of it as creating a harmonious orchestra, where each fabric plays its own unique part!
- What is the best way to cut fabric for quilting?
For precision, use a rotary cutter and a cutting mat. This ensures clean edges and uniform squares or shapes. If you're cutting by hand, sharp fabric scissors will do the trick. Remember, accuracy is key—imagine trying to fit puzzle pieces together; they need to be just right!
- Should I hand sew or machine sew my quilt?
It really depends on your personal preference and skill level! Hand sewing gives you more control and can be a relaxing activity, while machine sewing is faster and can handle thicker layers. Think of it as choosing between a leisurely stroll or a speedy bike ride—you'll get to the finish line either way!
- How do I add the finishing touches to my quilt?
Finishing touches can include adding borders, batting for warmth, and a backing fabric. Start by sewing the borders around your quilt top, then layer the batting and backing before quilting everything together. It’s like wrapping a present; you want it to look beautiful and ready to be enjoyed!


